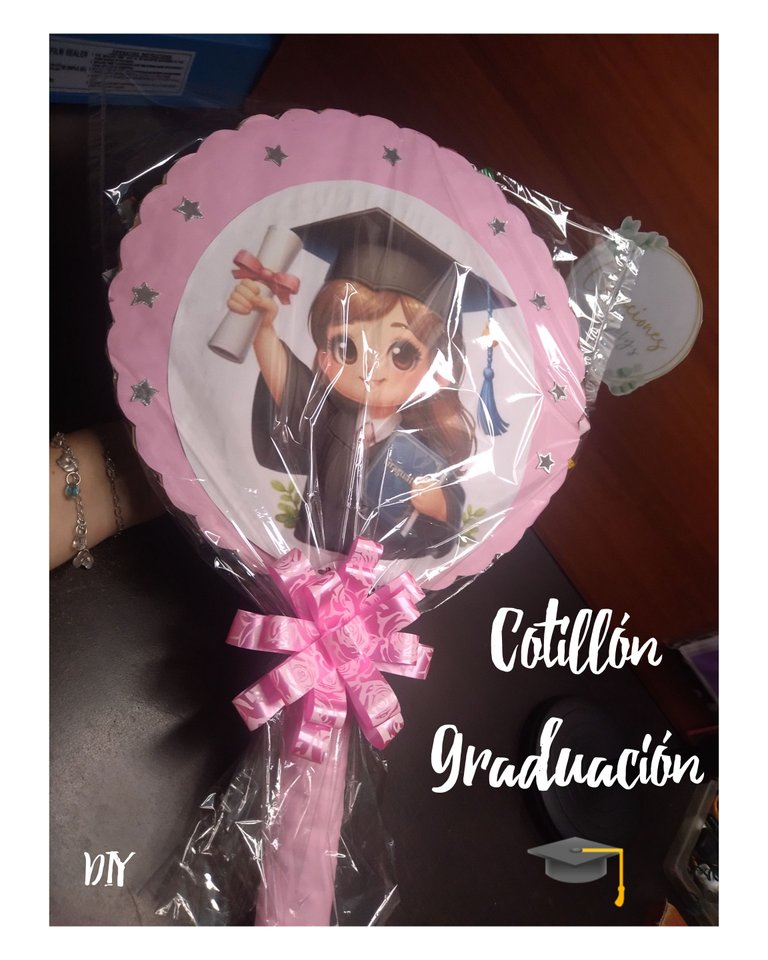
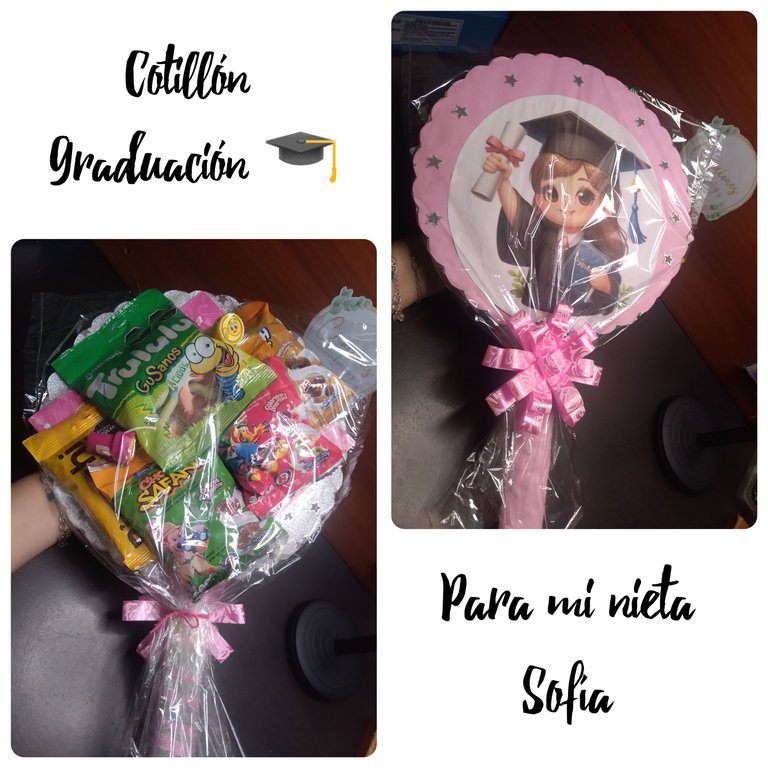
Cotillón de graduación 🎓 para Sofía.
Graduation party 🎓 for Sofia.
Hola amigos creativos, espero que estén muy bien. Ya estamos en los días previos a los actos de grado en la mayoría de las instituciones educativas de Venezuela. Desde los primeros niveles y hasta el último año de bachillerato los muchachos están en el cierre de sus actividades escolares del año escolar 2023-2024. Pronto todos estaremos de vacaciones hasta los primeros días de septiembre. Sí, aquí en mi país las vacaciones son de más de 30 días.
Esa es la razón por la que en este momento estoy dedicando parte de mi tiempo a la elaboración de pequeños presentes para algunos colegas, estudiantes y muy especialmente para mi linda nieta Sofía quien pasará de grado y de nivel. Cómo ella misma lo dice irá para la escuela grande. Es la primera vez que elaboro este modelo de cotillón. Lo ví por las redes sociales y de inmediato lo memoricé, claro que yo soy amateur en estas cosas, pero le puse todo mi cariño. Trabajé con materiales que tenía a la mano, fueron pocos los que compré. Te cuento cómo lo hice.
Hello creative friends, I hope you are very well. We are already in the days before the graduation ceremonies in most of the educational institutions in Venezuela. From the first levels and up to the last year of high school the kids are in the closing of their school activities for the 2023-2024 school year. Soon we will all be on vacation until the first days of September. Yes, here in my country vacations are longer than 30 days.
That is the reason why at this moment I am dedicating part of my time to the elaboration of small presents for some colleagues, students and very specially for my beautiful granddaughter Sofia who will pass to the next grade and level. As she herself says, she will go to the big school. It is the first time that I make this model of cotillion. I saw it on social networks and immediately memorized it, of course I am an amateur in these things, but I put all my love. I worked with materials that I had at hand, I only bought a few. I'll tell you how I did it.
MATERIALES:
Como verán en las imágenes usé materiales que tenía a la mano.
- Cartón reciclado de una caja de pizza. Limpio y seco.
- Cartulina metalizada estampada.
- Papel Bond rosado.
- Cinta de papel.
- Cinta adhesiva doble cara.
- Cinta adhesiva de papel.
- Papel celofán transparente. Un pliego.
- Maquina selladora.
- Tijeras.
- Lazo de papel previamente elaborado.
- Chucherías.
- Dos sellos de caritas felices.
- Trozo de hilo pabilo.
- Página impresa de la muñeca graduando.
- Pegamento.
MATERIALS:
As you will see in the pictures I used materials I had on hand.
- Recycled cardboard from a pizza box. Clean and dry.
- Stamped metallic cardboard.
- Pink Bond paper.
- Paper tape.
- Double-sided adhesive tape.
- Paper adhesive tape.
- Transparent cellophane paper. One sheet.
- Sealing machine.
- Scissors.
- Paper ribbon previously elaborated.
- Sweets.
- Two smiley face stamps.
- Piece of wicker thread.
- Printed page of the graduating doll.
- Glue.
PROCEDIMIENTO PARA LA ELABORACIÓN.
PREPARATION PROCEDURE.
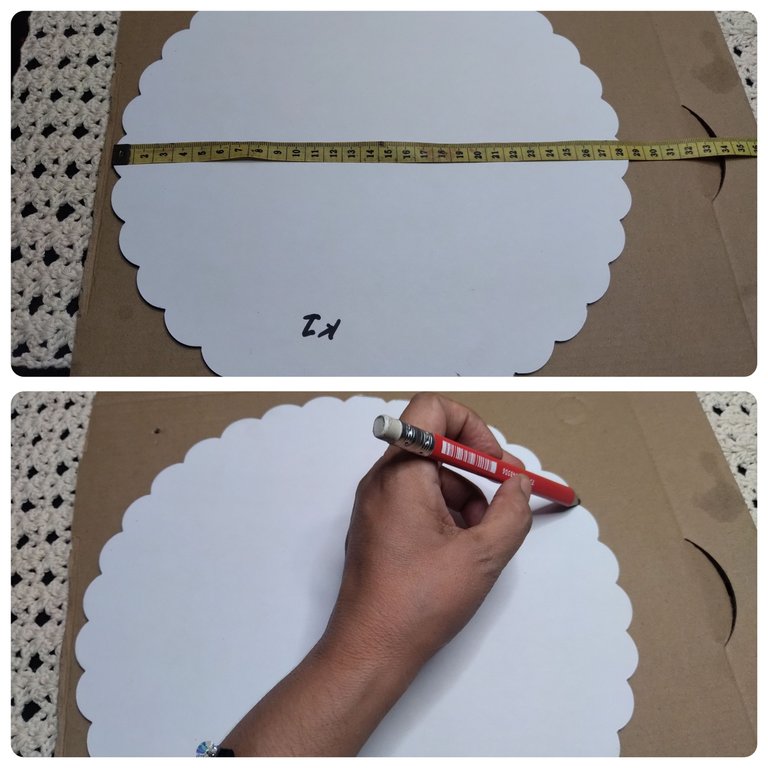
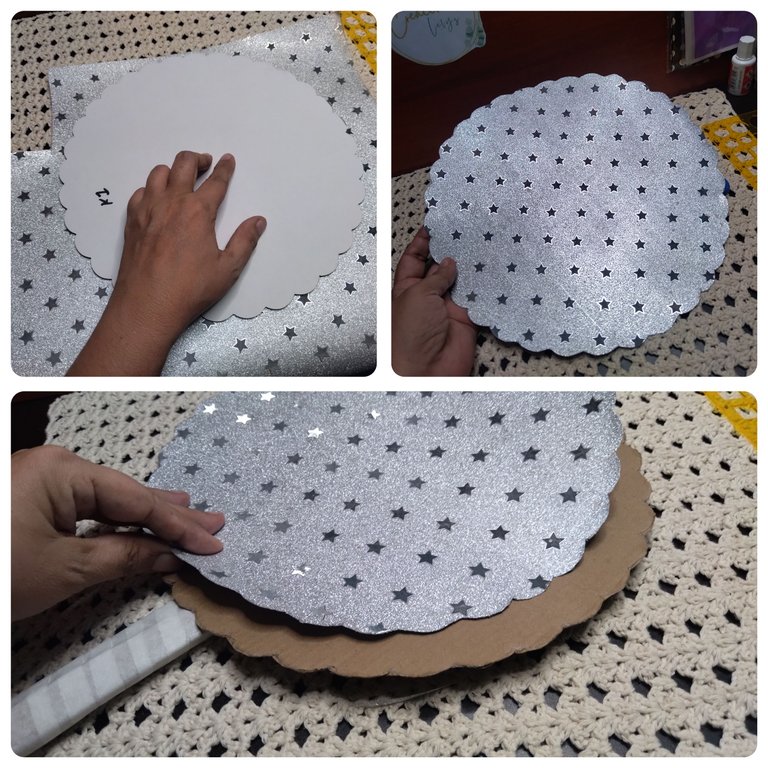
- Empecé marcando sobre el cartón reciclado un círculo con ondulaciones, me ayudé con una base de cartón que se usan para las tortas. Después de marcar corté y reservé.
- I began by marking on the recycled cardboard a circle with undulations, I helped myself with a cardboard base that is used for cakes. After marking, I cut and set aside.
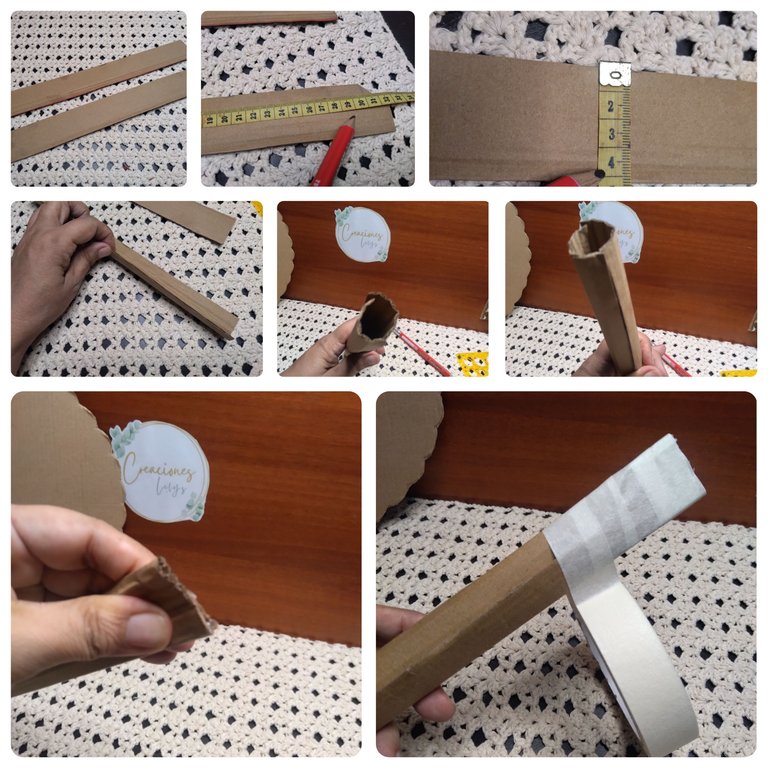
- Con el resto de cartón reciclado elaboré un palito más o menos grueso, le dí primero una forma tubular, lo pegué y lo forré con cinta adhesiva de papel. Quedó bastante firme y fuerte.
- With the rest of the recycled cardboard I made a more or less thick stick, I first gave it a tubular shape, glued it and lined it with paper tape. It was quite firm and strong.
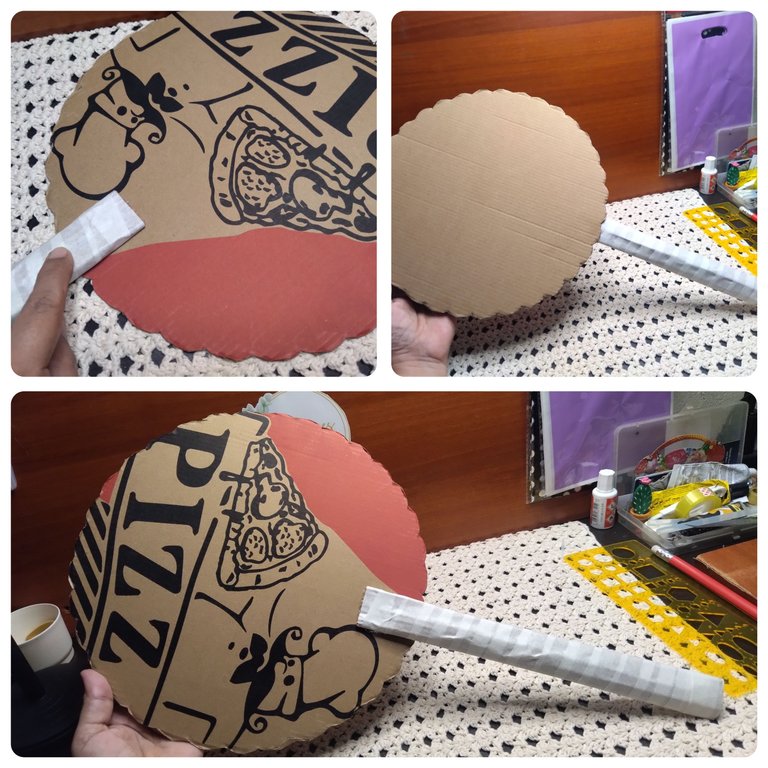
- Como pensé que lo iba a pintar lo pegué de una vez en el círculo de cartón. Este palito debe ser fuerte y se debe pegar a una altura justa para que logre sostener el círculo y el peso que llevará encima (chucherías)
- Since I thought I was going to paint it, I glued it all at once to the cardboard circle. This stick should be strong and should be glued at the right height to hold the circle and the weight it will carry on it (knick-knacks).
- Usando de nuevo el molde de cartón para torta dibujé sobre la cartulina metalizada para sacar otro circulo igual al anterior. Corté y pegué sobre el primero. Está cartulina la coloqué por el lado donde NO pegué el el palito.
- Using the cardboard cake mold again, I drew on the metallic cardboard to make another circle like the previous one. I cut and glued over the first one. I placed this cardboard on the side where I did NOT glue the stick.
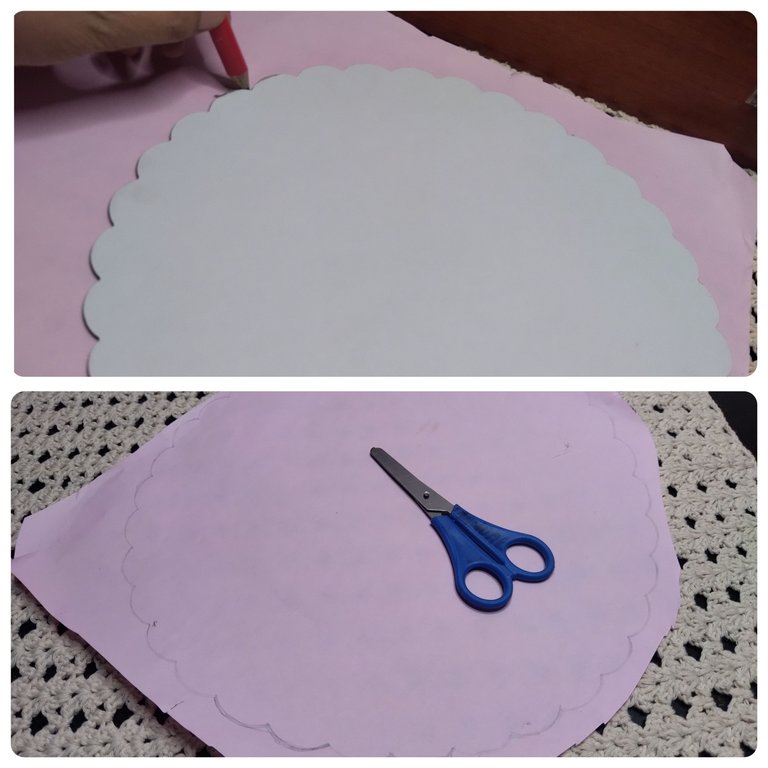
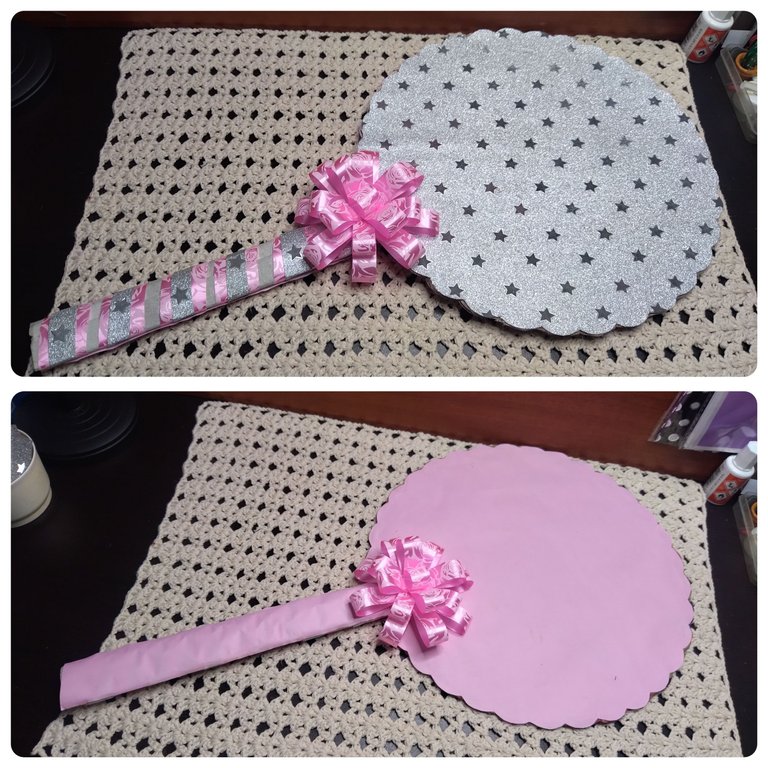
- Repetí el proceso ahora sobre el papel Bond rosado. Este círculo lo pegué al otro lado del primero. De esta manera ya tengo cubierto ambos lados del círculo el cual llamaremos paleta 😜
- I repeated the process now on the pink Bond paper. This circle I glued it to the other side of the first one. This way I already have covered both sides of the circle which we will call palette 😜.
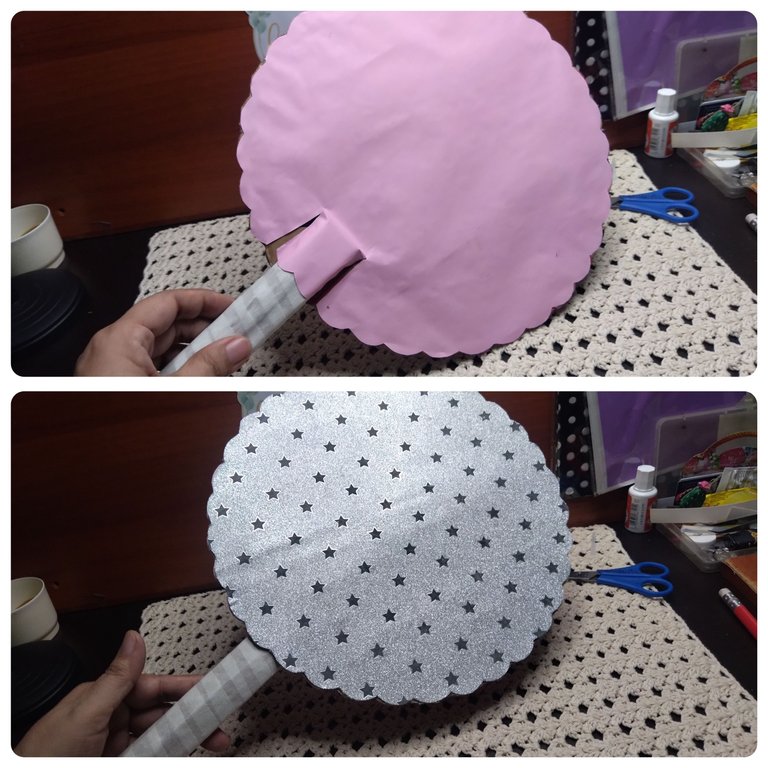
- Así se ve.
- This is what it looks like.
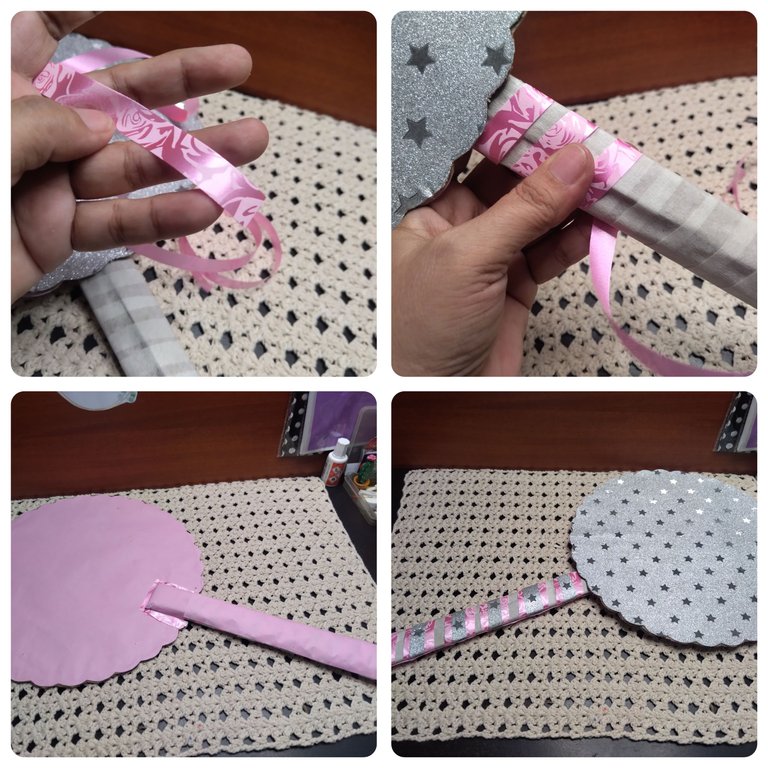
- Ahora me dediqué a forrar y decorar el palito. Lo cubrí con papel Bond primero de un lado. Del otro lado lo decoré con cinta de papel y estrellas metalizadas. Recorté varias tiritas de cartulina metalizada de 2 cm de ancho cada una y las fui pegando separadas de 1,5cm aproximadamente hasta cubrir el largo del palito.
- Now I lined and decorated the stick. I covered it with Bond paper on one side first. On the other side I decorated it with paper ribbon and metallic stars. I cut several strips of metallic cardboard 2 cm wide each and glued them about 1.5 cm apart to cover the length of the stick.
- Ya tenía el lazo elaborado y lo coloque sin pegar entre la paleta y el palo, solo para visualizar su ubicación. ¿Cómo se ve?
- I already had the loop made and placed it without gluing it between the pallet and the stick, just to visualize its location. How does it look?
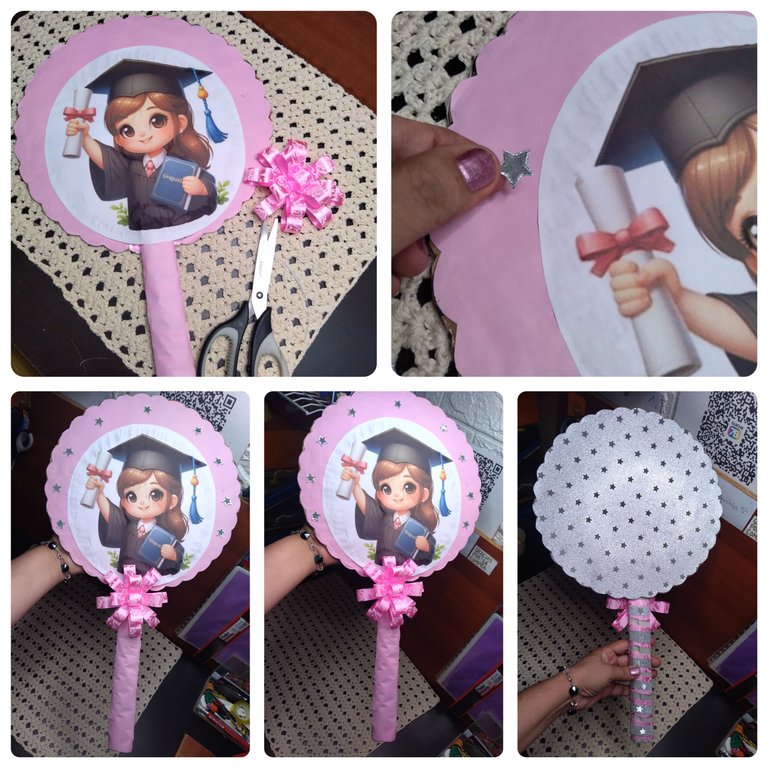
- Por el lado forrado con papel Bond pegué, casi centrada, la imagen de la niña graduada. Añadí unas estrellas metalizadas por encima y a los lados.
- On the side lined with Bond paper I glued, almost centered, the image of the graduated girl. I added some metallic stars on top and on the sides.
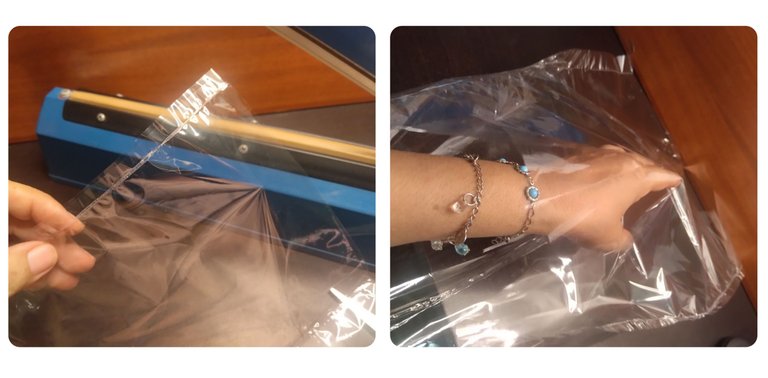
- Tomé el pliego de papel celofán, tomé la medida de la paleta ya con las chucherías encimas. Corté y pegué los bordes con la selladora de bolsa en el nivel 3 de temperatura. El resultado fue una bolsa de celofán grande para meter allí la paleta.
- I took the sheet of cellophane paper and measured the pallet with the sweets on top. I cut and glued the edges with the bag sealer at temperature level 3. The result was a large cellophane bag to put the lollipop in.
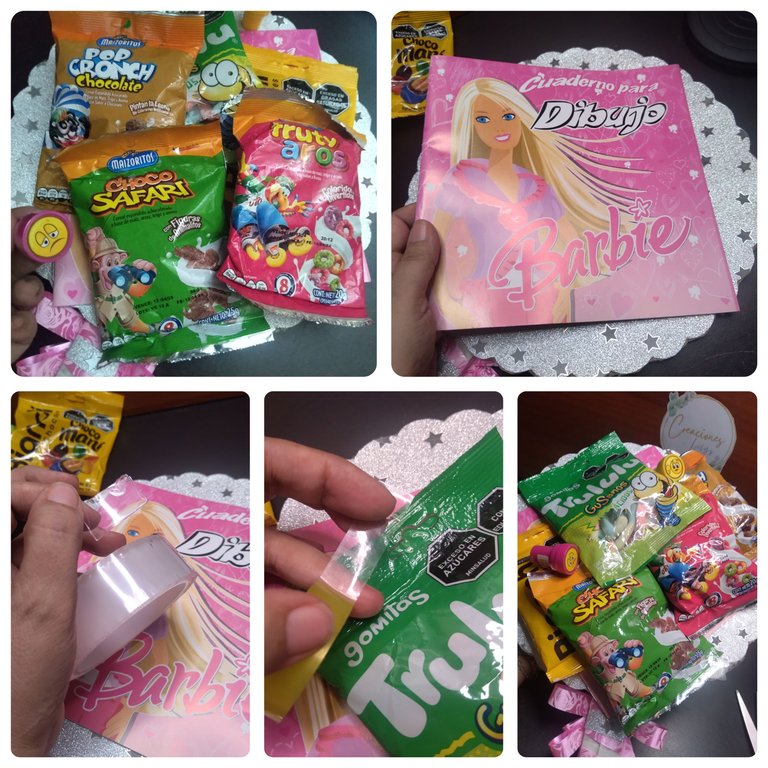
- Ya casi para finalizar coloqué toda la chuchería más un cuaderno de dibujo y dos sellos de caritas felices en el lado contrario de la paleta, no donde coloqué la impresión, sino del otro lado donde pegué la cartulina metalizada. Para fijarlas bien usé la cinta adhesiva doble cara y la cinta adhesiva normal.
- Al finalizar metí la paleta en la bolsa de papel celofán, amarré con un trozo de hilo pabilo y coloqué el lazo. ¡Se ve genial!
- Almost at the end I placed all the knick-knacks plus a sketchbook and two smiley face stamps on the opposite side of the palette, not where I placed the print, but on the other side where I glued the metallic cardboard. To fix them well I used the double-sided tape and the normal adhesive tape.
- At the end I put the palette in the cellophane bag, tied with a piece of wicker twine and put the ribbon. It looks great!
🙋🏽♀️ Me encantó el resultado. Espero que a mi nieta le guste su cotillón. El acto de grado será el día 18 de julio si Dios quiere. Muchas gracias por el apoyo. Todas las fotos son de mi propiedad. Edité con Polish. Usé el traductor de Deelp. Hasta pronto.
🙋🏽♀️ I loved the result. I hope my granddaughter likes her cotillion. The graduation ceremony will be on July 18, God willing. Thank you so much for the support. All photos are my property. I edited with Polish. I used Deelp translator. See you soon.
aha that looks amazing you are great thanks a lot for sharing keep up the good work.
Thanks You 👋🏽
Quedó demás hermoso ! No había visto ese modelo ! Seguro que a tu nieta le encantará porque además de lindo y original el detalle,se lo hizo su abuela especialmente para ella 🩷
Hola. Muchas gracias. Espero que si le guste. 🙋🏽♀️
Que hermoso y delicado trabajo Lelys, está impecable y además es adorable. Es un gran trabajo! Que tengas un hermoso día!💗
Hola amiga. Que bueno que te gustó. Muchas gracias.
¡Feliz tarde! ☺️
¡Qué ricura! 😋 Gracias.
Vos te lo mereces!!! Abrazo!
Congratulations, your post has been curated by @dsc-r2cornell. You can use the tag #R2cornell. Also, find us on Discord
Felicitaciones, su publicación ha sido votada por @ dsc-r2cornell. Puedes usar el tag #R2cornell. También, nos puedes encontrar en Discord
Gracias por valorar mi contenido. Su apoyo es realmente importante para mi. \ Thank you for appreciating my content. Your support is really important to me. 🫂
Que lindo, felicitaciones para todos los niños que ahora iran para la escuela grande jeje sobre todo tu linda nieta que de seguro le fascinara este presente 😊
Hola. Siiii. Muchísimas gracias. Ella está muy contenta 🙋🏽♀️🎓☺️✔️🫂
Muchas gracias 🫂
Que cotillón tan creativo nos has compartido querida, creacioneslelys, tu proceso de elaboración es muy sorprendente, muchas gracias por compartirnos tus trabajos.
Escrito por lionsaturbix / Written by lionsaturbix
¡¡¡Buen trabajo!!! Gracias por publicar tu excelente contenido en Hive Diy.
Muchísimas gracias por apreciarlo. ¡Bendiciones!
Aaww que bonito, a Sofía le va a encantar 😍
Hola. Me alegra que te guste. Seguro que le gustará, le encanta comer dulces ☺️ pero no se los damos todo el tiempo. 😜 Muchas gracias
Hola amiga que hermoso cotillón, seguro tu nieta estará muy feliz al recibirlo, me encantó la combinación de colores.
Saludos!
Hola. Que bueno que te guste. Espero que si esté feliz al recibirlo 🎁😊👋🏽