
English

Hiii, friends of the HiveDiy community, how are you today? I hope you're doing great!
As I promised you last week, the next post I'll write will be about how to make this pencil holder made with magazines, even though I was supposed to upload it last week, better late than never; promise is a promise.
This craft reminds me a lot of high school, because I told you that's where I learned to make the canutoes (paper sticks). I remembered one of the crafts that didn't work out at the time, so this time I came for revenge! hehehe.
Well, in this craft we will use the same recycled material as last time: magazines. So join me to knit with paper, here we go!

Materials

- Magazines (at least two).
- White glue.
- Silicone gun.
- Scissors.
- Cardboard.
- Bamboo skewer.
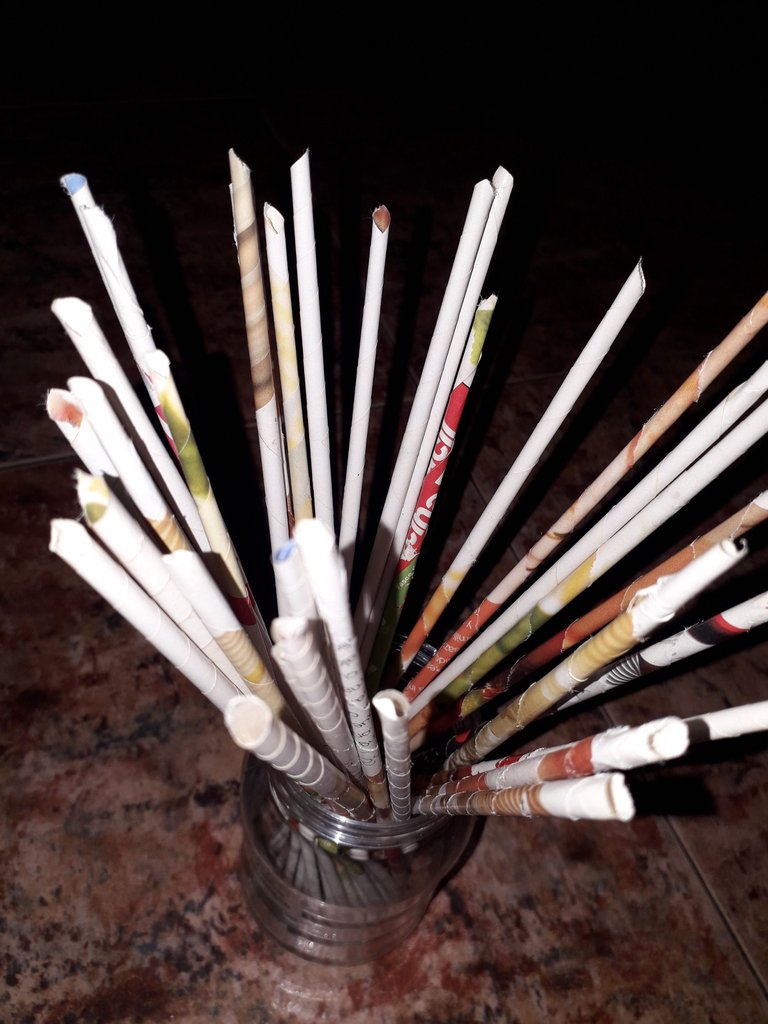
Here I had already made about 30 canutoes to have them ready to make the pencil holder, but if you don't remember how to make it, don't worry, I'll remind you right below.
 |  |
|---|
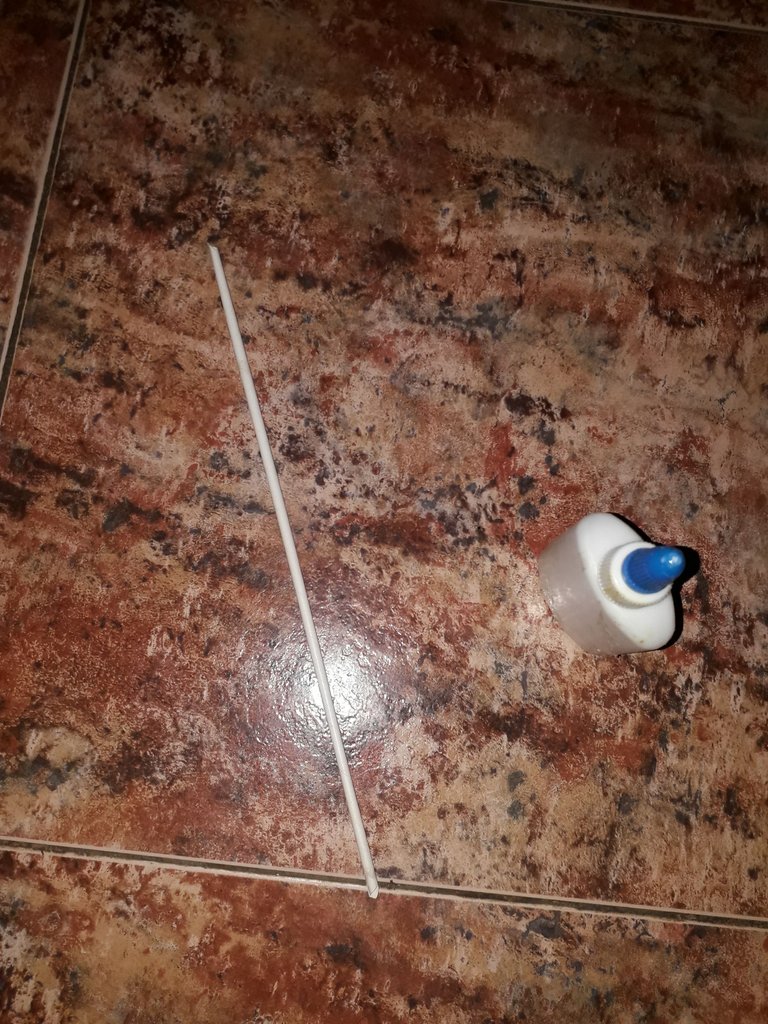
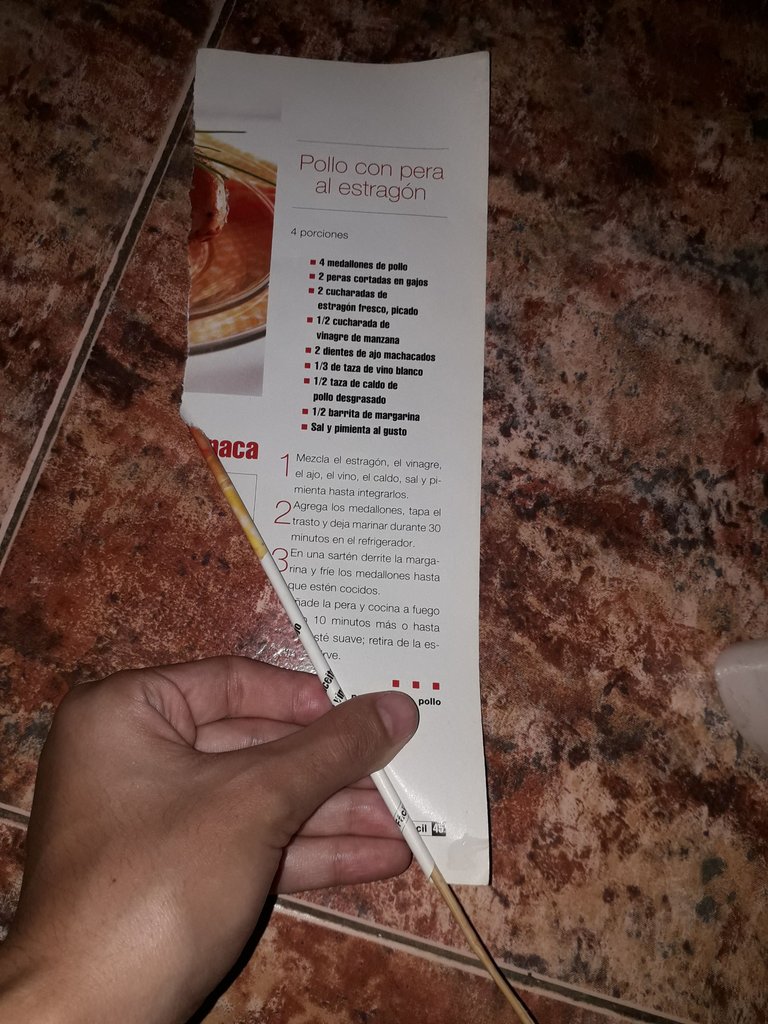
As I told you in my last post:
We are going to take a magazine sheet and cut it in half.
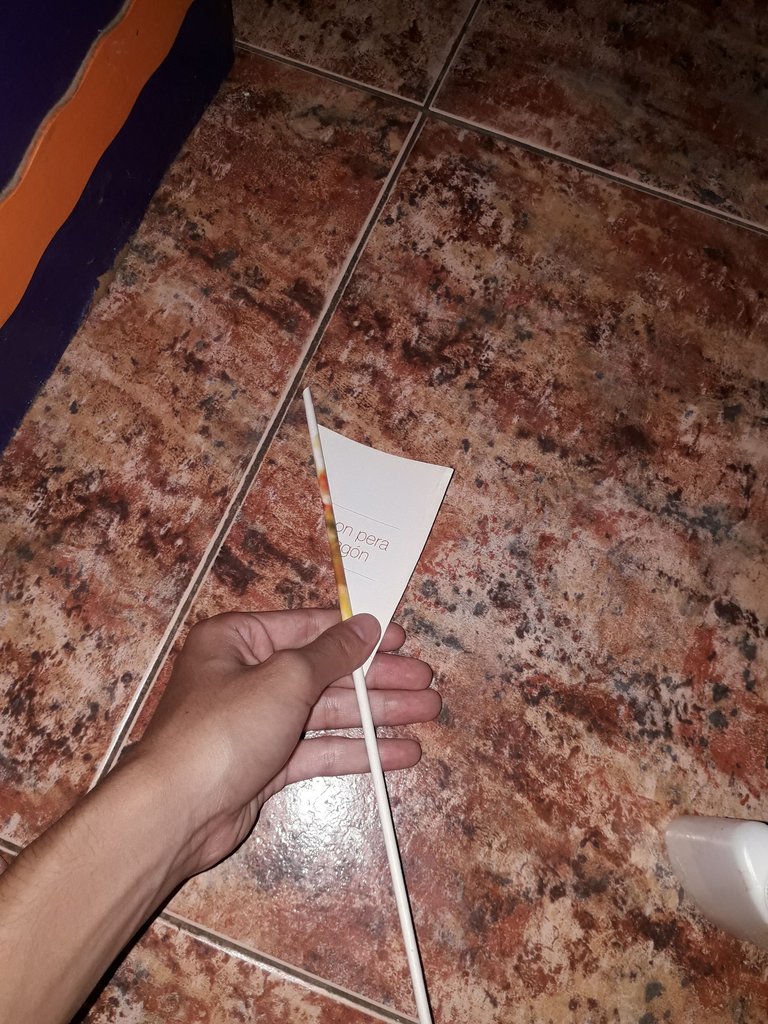
Then, we take the bamboo skewer and put it diagonally on top of the paper, in the lower left corner, and start rolling the paper upwards, always following the diagonal path, up to the upper right corner.
When we have a triangular piece left, we put a bit of white glue and finish rolling, pressing a little with our fingers so that the paper tube is well fixed.
And we would already have a canute.
 |  |
|---|
 |  |
|---|
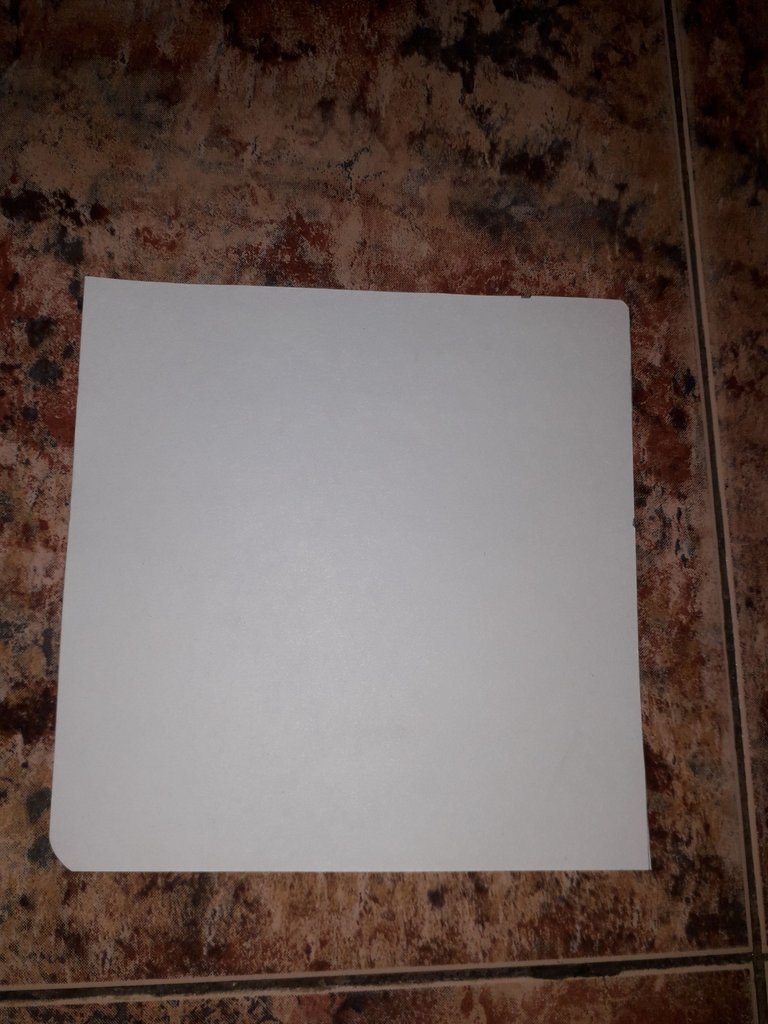
Now, for the base, we are going to take our cardstock and cut a 15×15 cm square.
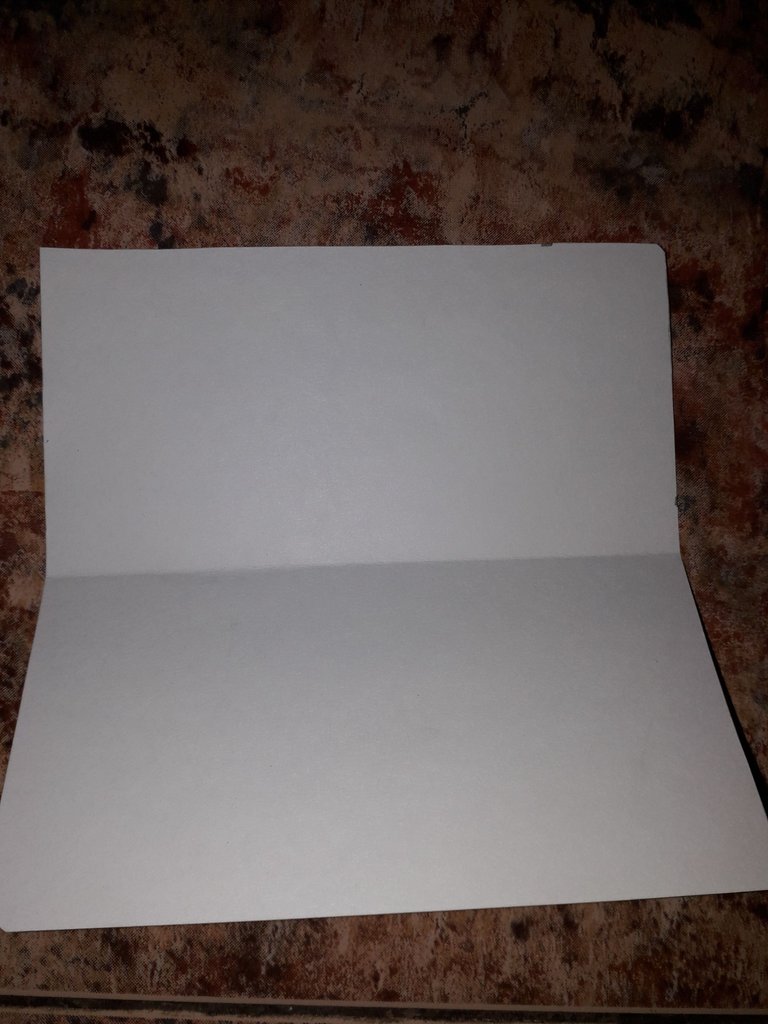
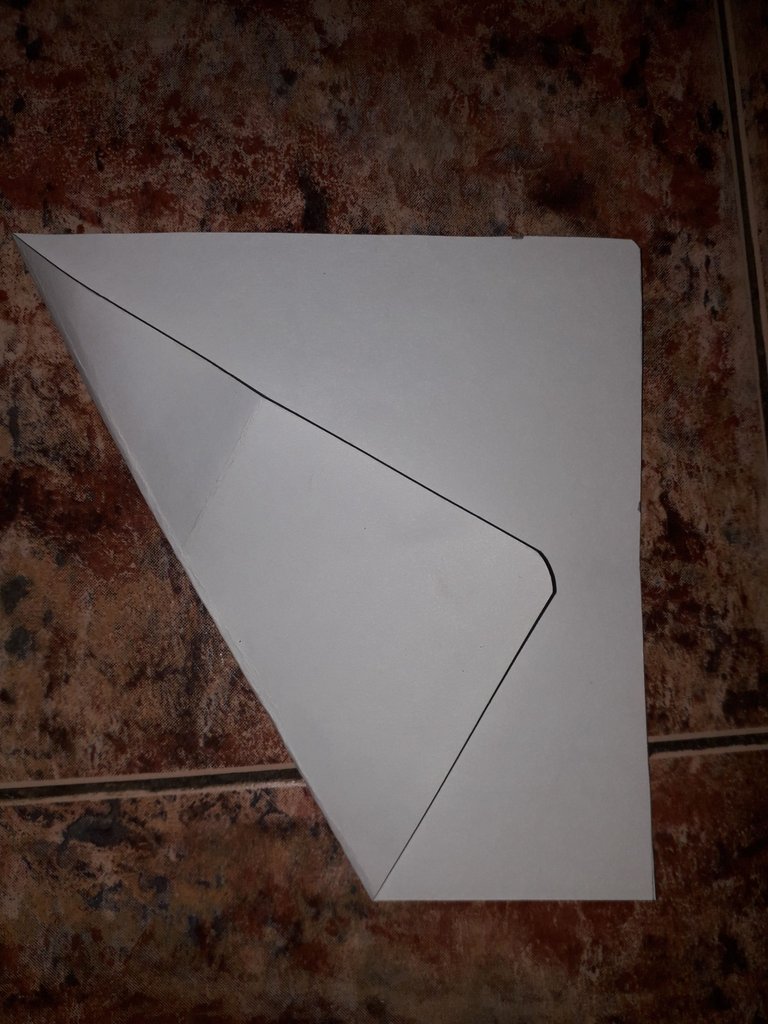
And now I'll try to explain as best I can the folds we're going to do to the paper.
First, we fold the cardboard in half, horizontally, and unfold it, the idea is to leave the mark on the paper to serve as a guide.
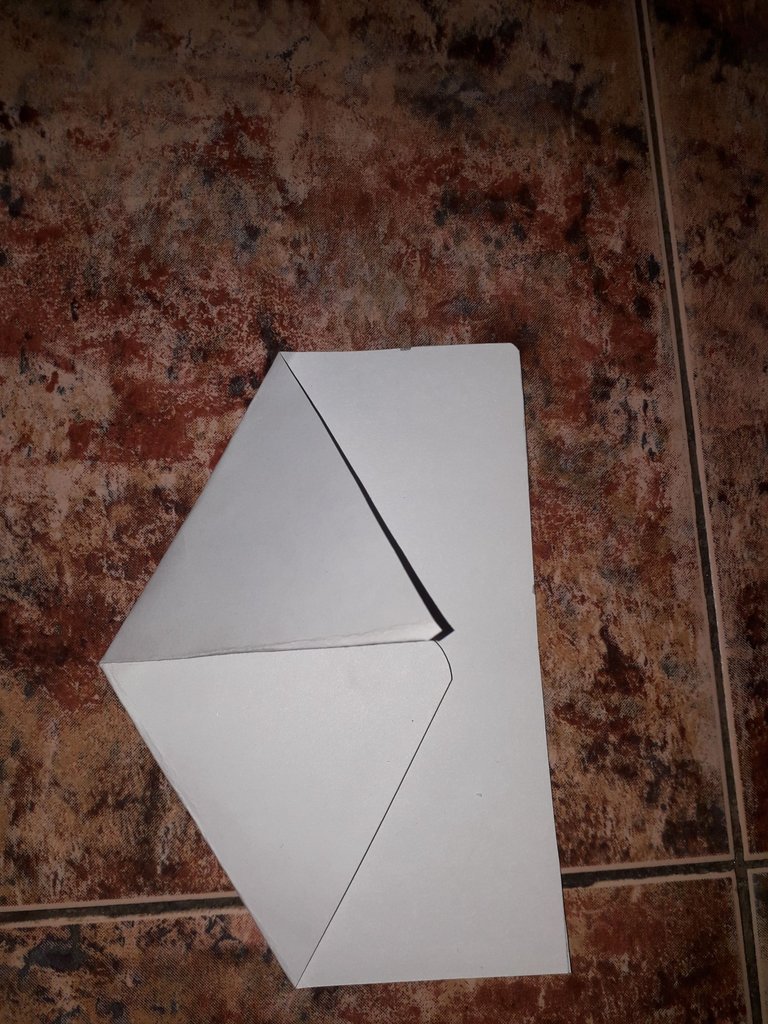
Then, we take the lower left corner and fold it upwards, so that the tip coincides with the horizontal line that divides the sheet in the center. Then, repeat this process with the upper left corner.
 |  |
|---|
 |  |
|---|
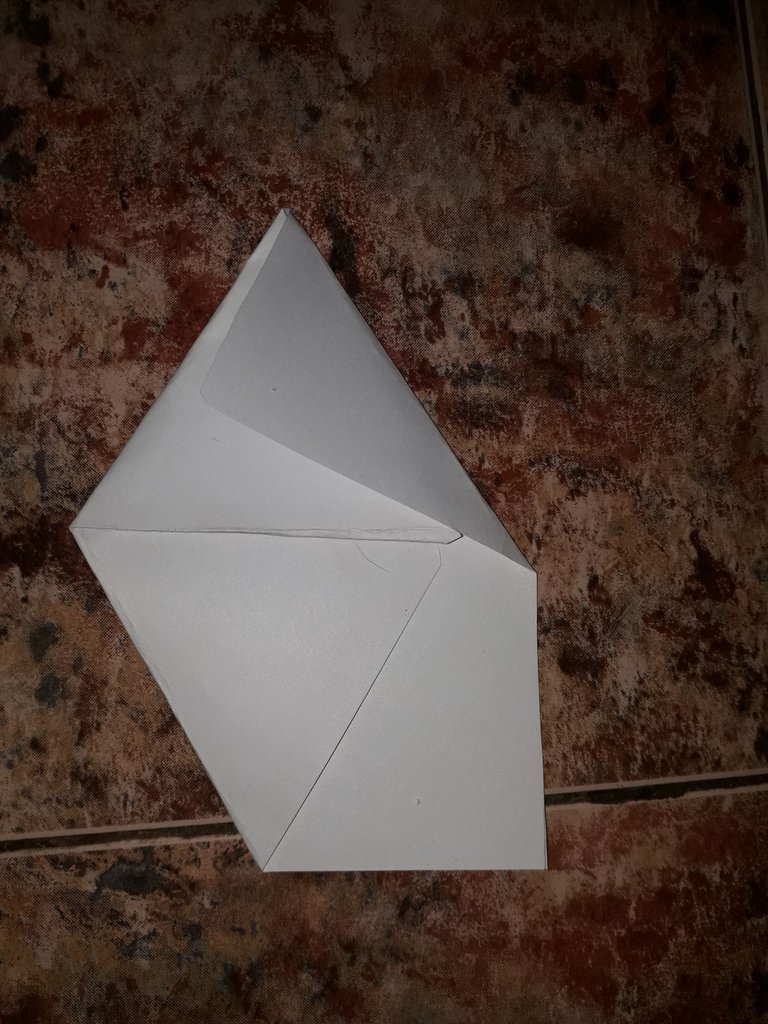
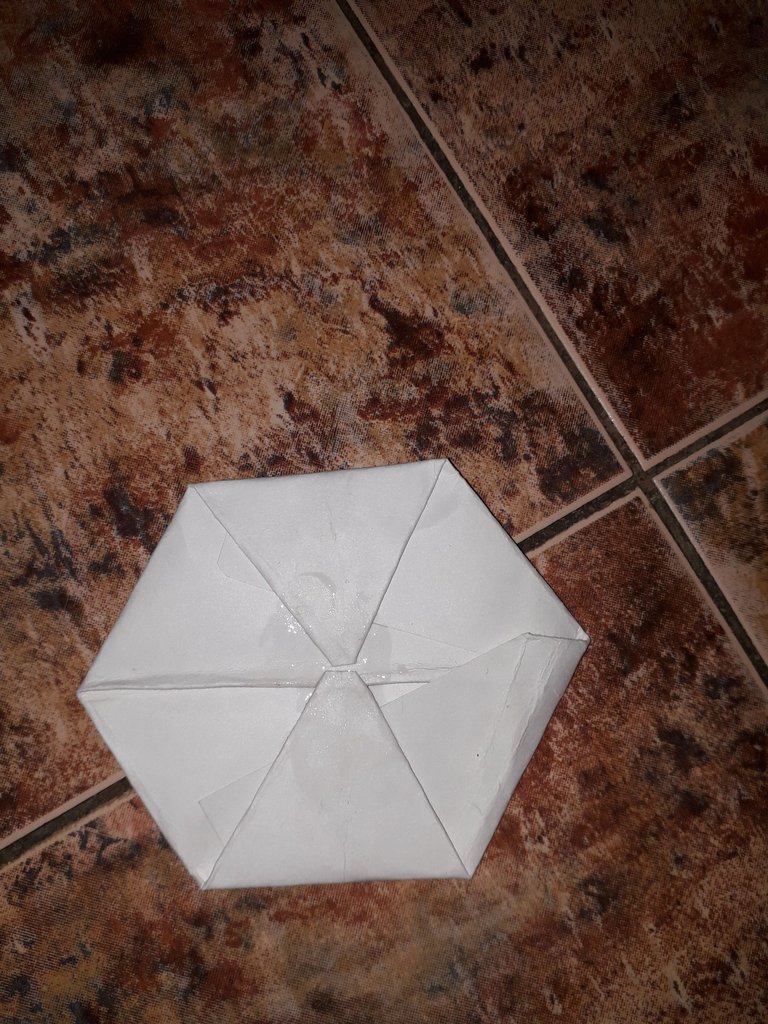
The next thing we will do is take the upper right corner and fold it down the way you see in the first image, making a triangle at the top after the fold. Am I making myself clear?
Let's repeat the procedure with the bottom right corner.
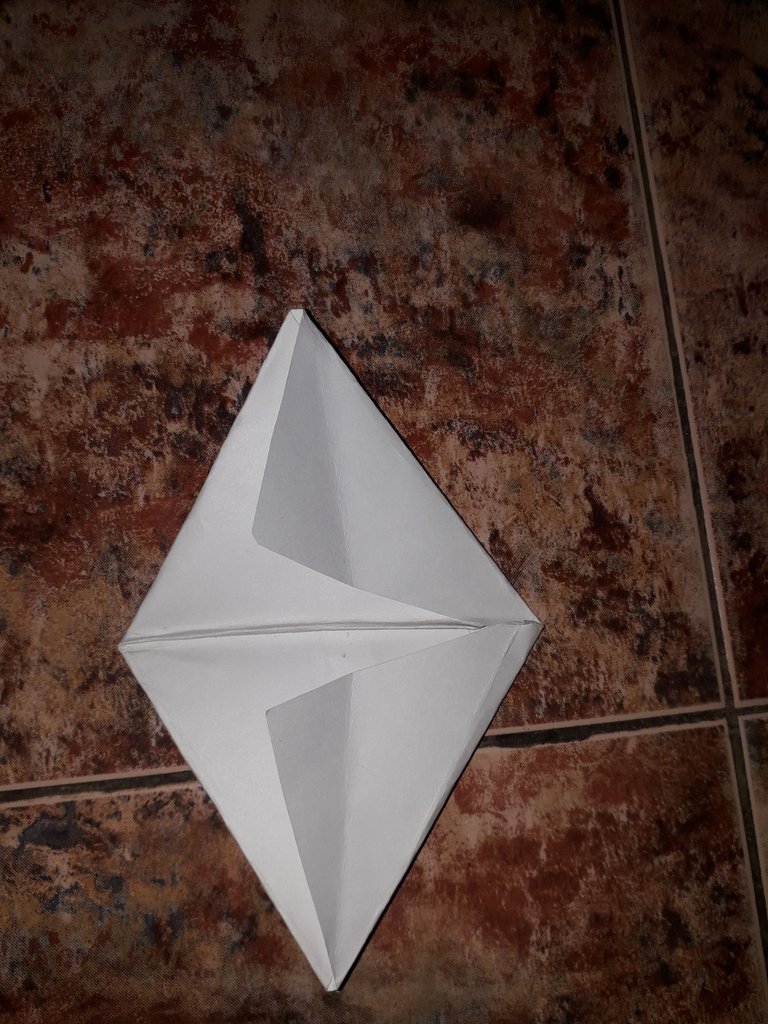
Then, we will take the top corner and the bottom corner, and we will fold them inwards, so that both corners touch each other flush with each other.
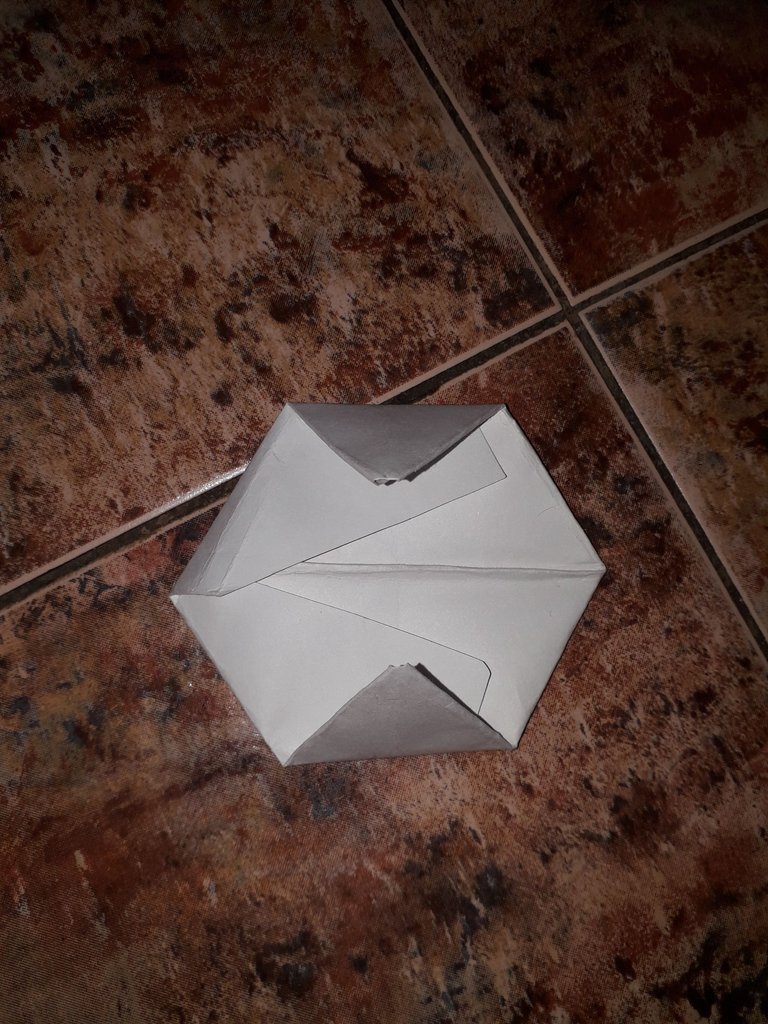
Finally, we will use white glue to fix the tips down. Finally, forming a paper hexagon.
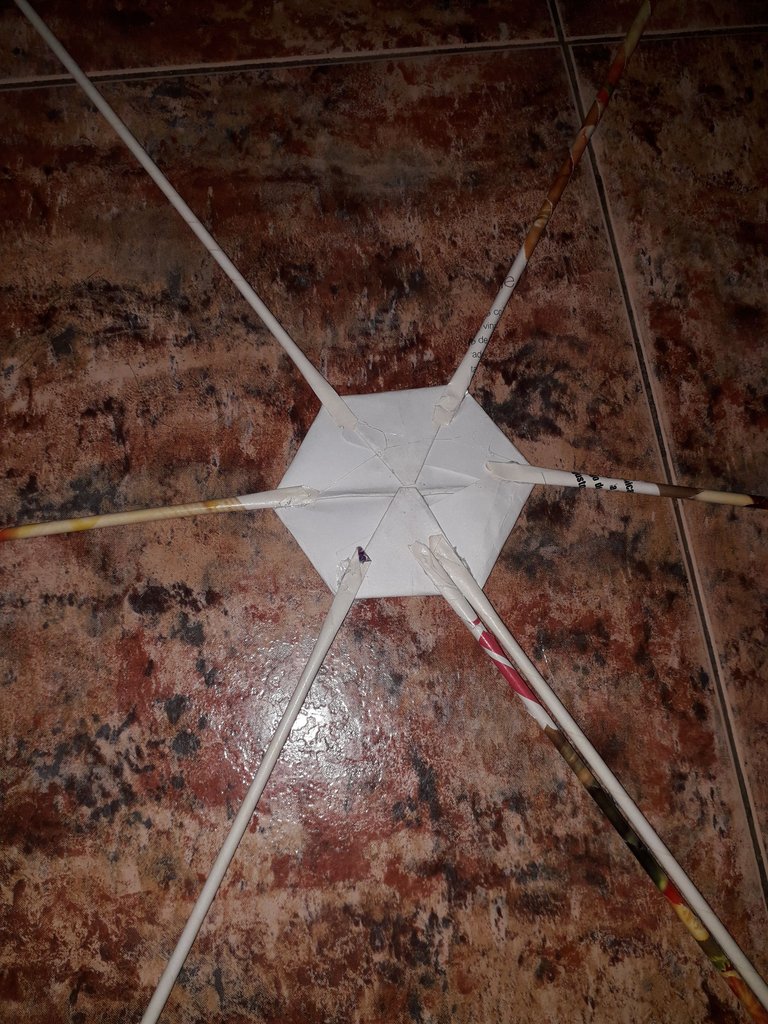
Now we are going to take seven marbles and glue them to the paper hexagon as follows: we are going to glue one marble on each end of the hexagon, and then one marble right next to any of the ends.
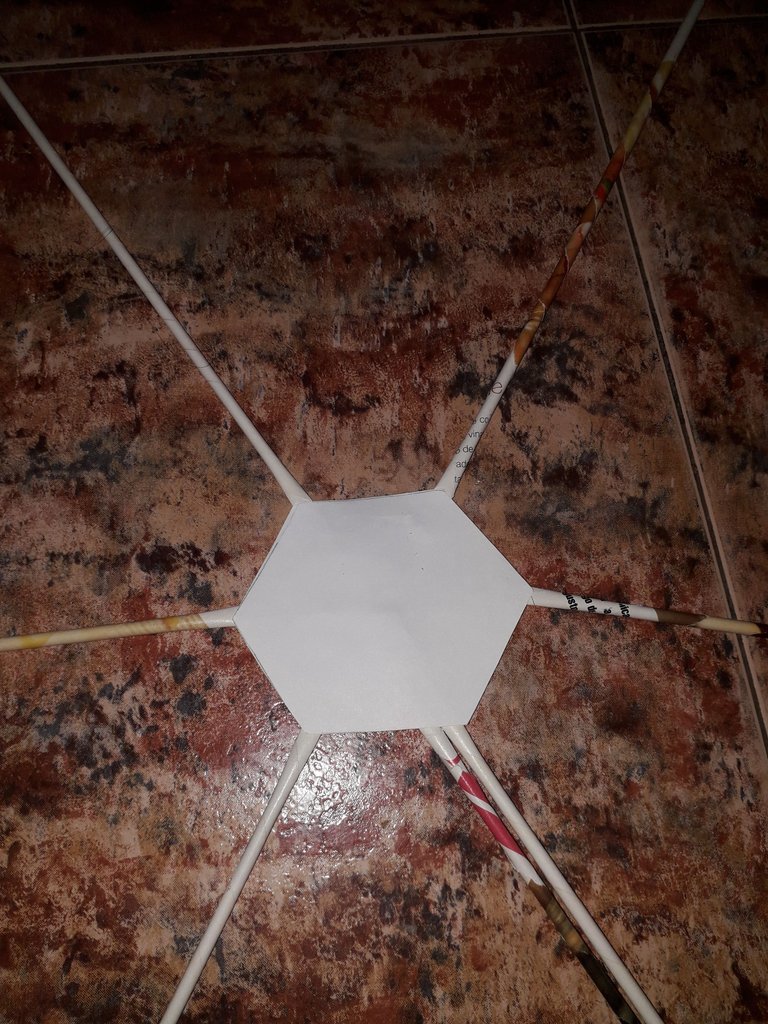
Here you will need to make another paper hexagon, cutting another 15x15 cm square and following the above steps again. Then, we will take that hexagon and glue it with hot silicon on top of the hexagon with the marbles, just like this, finishing with this the base of our pencil holder, at last. Now it's time to knit.
 |  |
|---|
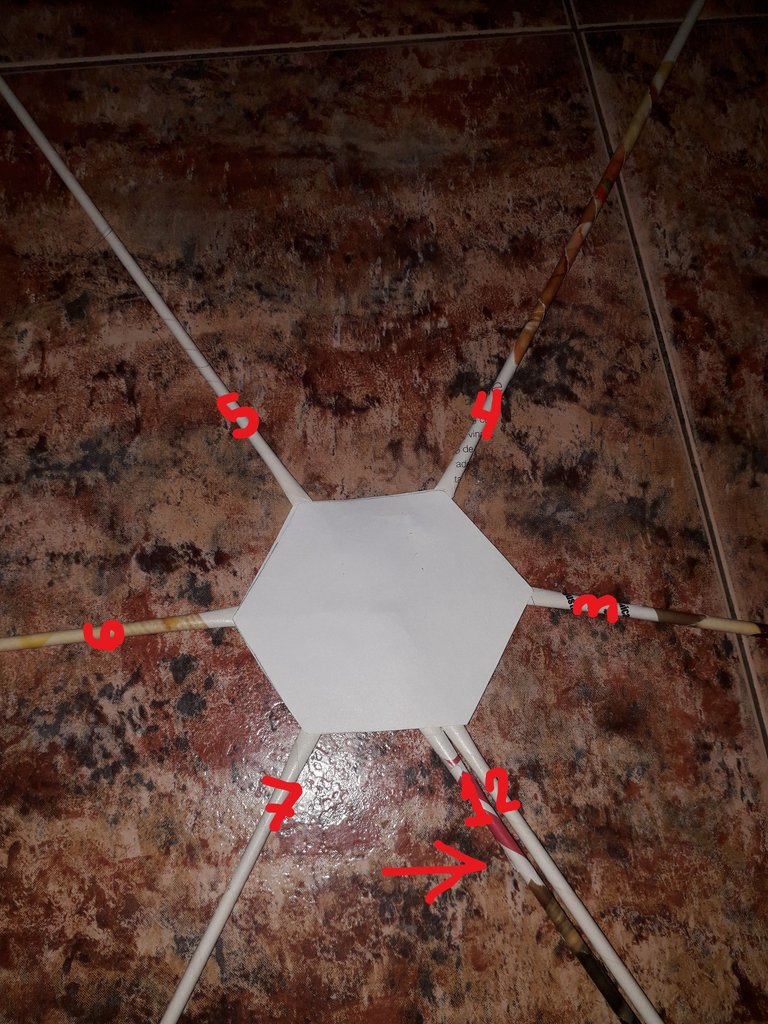
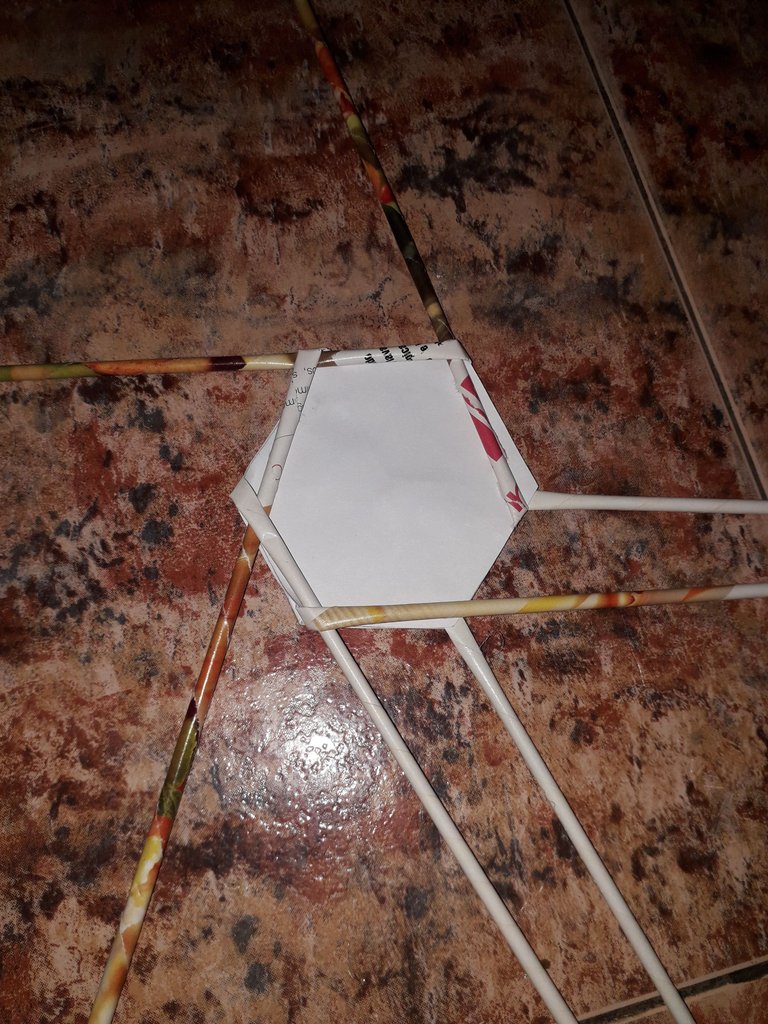
To start knitting, I want to make something clear in the first image, with some numbers to be able to explain the procedure more clearly.
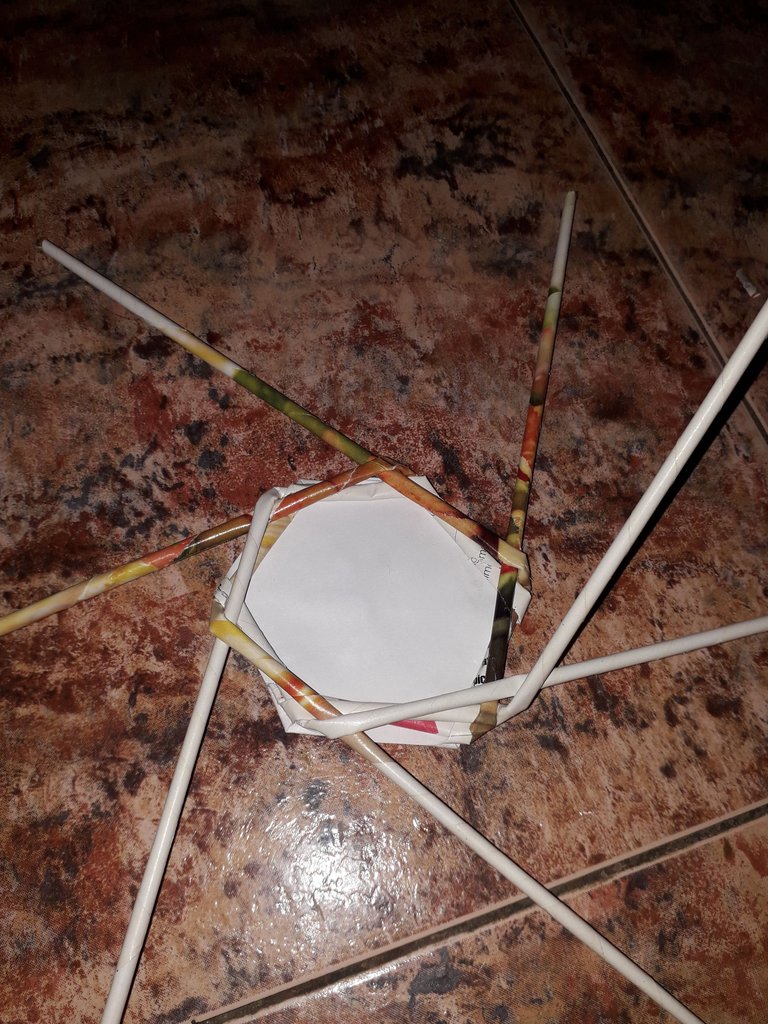
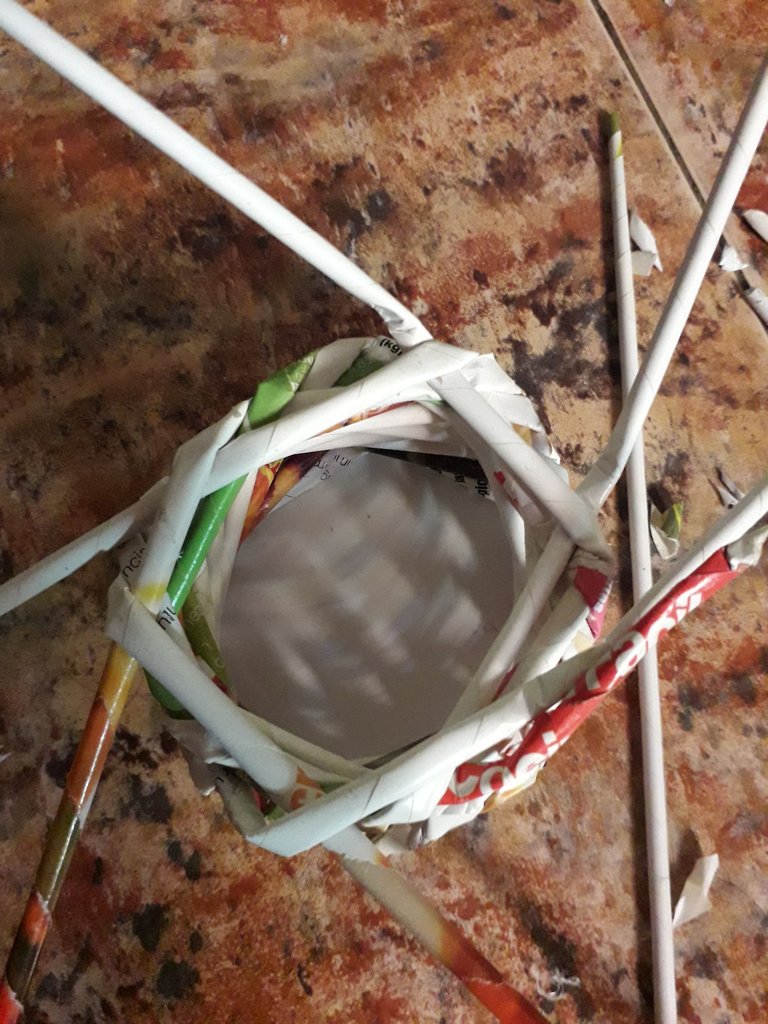
We start by taking the canute number 1, and we are going to fold it to the right, so that it passes over the canute number 2. Then we will take the number 2, and we will bend it to the right, so that it passes over the canutoes number 1 and 3. Then we will take the number 3, and we will pass it over the number 2 and 4. And so on….
Basically in such a way that they go over the previous one, and the next one wraps it underneath.
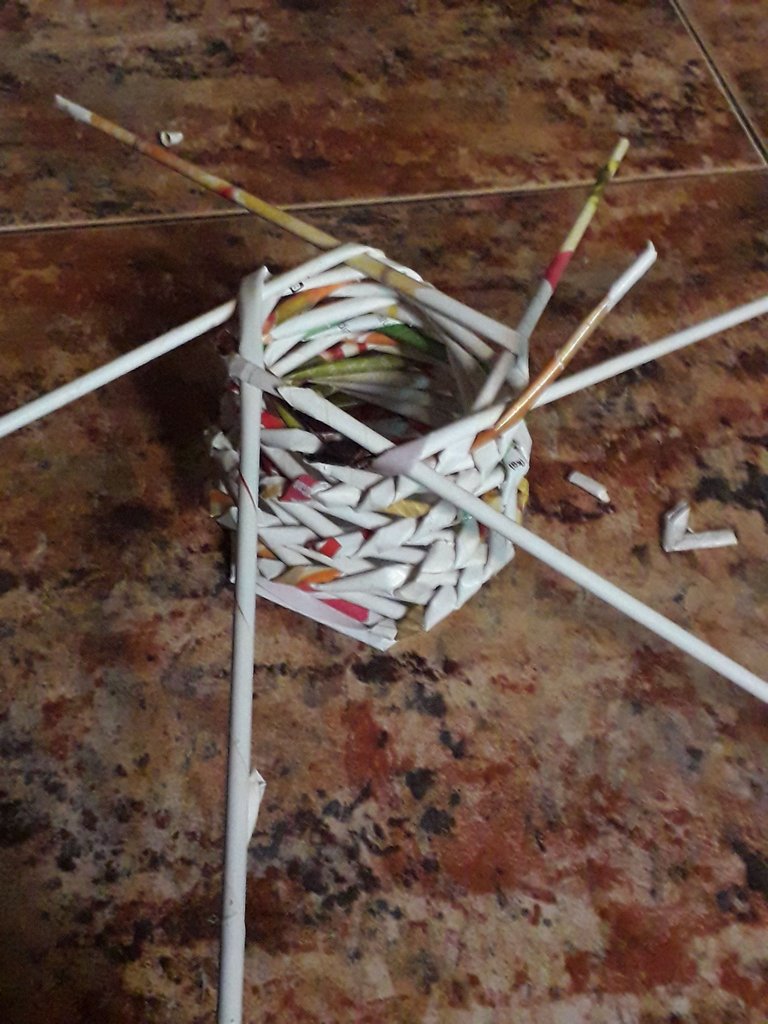
I know it is very difficult to understand, because I do not know how to explain myself well, but I hope that the image above on the left serves as an illustration. If I explained myself well, then it should start to look like the second image.
Something very funny is that as you get used to the process, you even start spinning the base while you are knitting, it's funny, it reminds me of people who make clay vases... It must be fun to learn how to make clay vases. Well, let's continue.
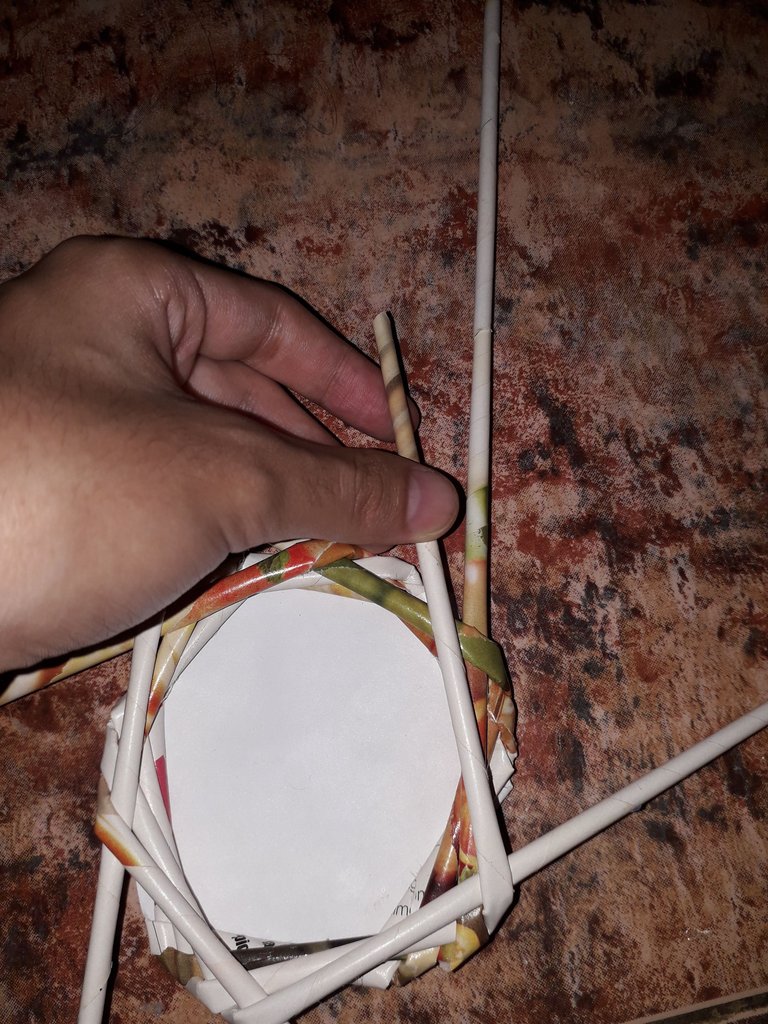
One important thing I wanted to mention is that when you run short on a canute, you should take another one and insert it into the one that is too short. I do not recommend gluing them, because it softens the paper and when you try to weave it, it can break. The significant thing is to insert the canute well so that it does not come out. Do not allow the canute to be too short, either, because it is more difficult to insert another canute to tie them together.
 |  |
|---|
 |  |
|---|
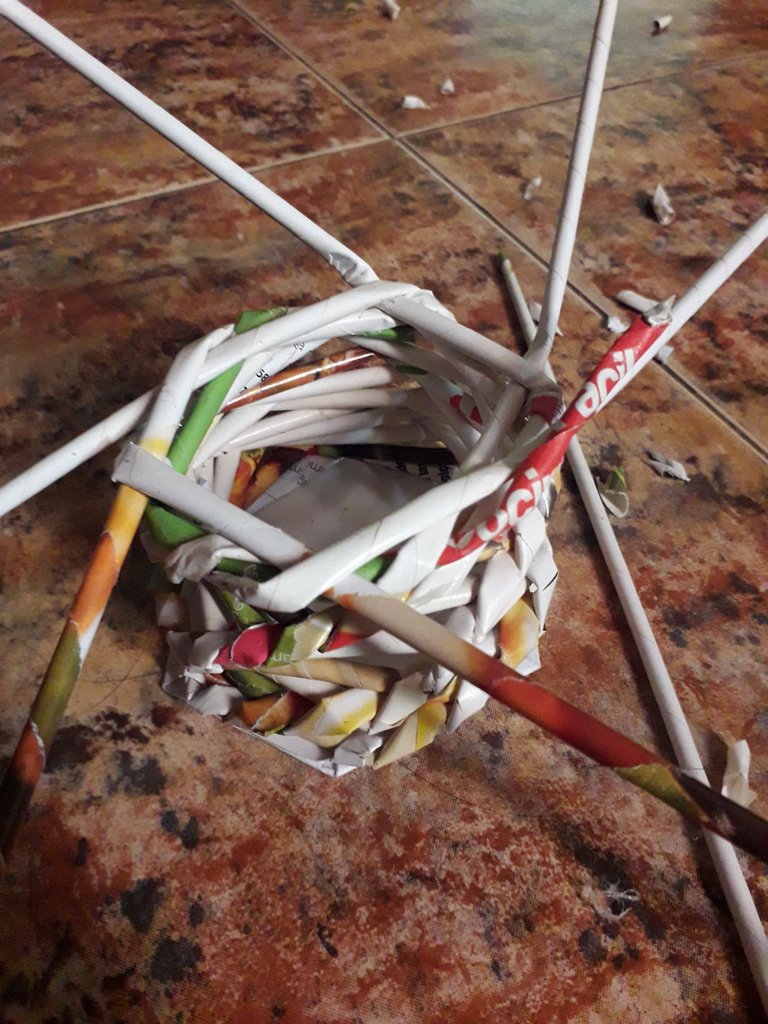
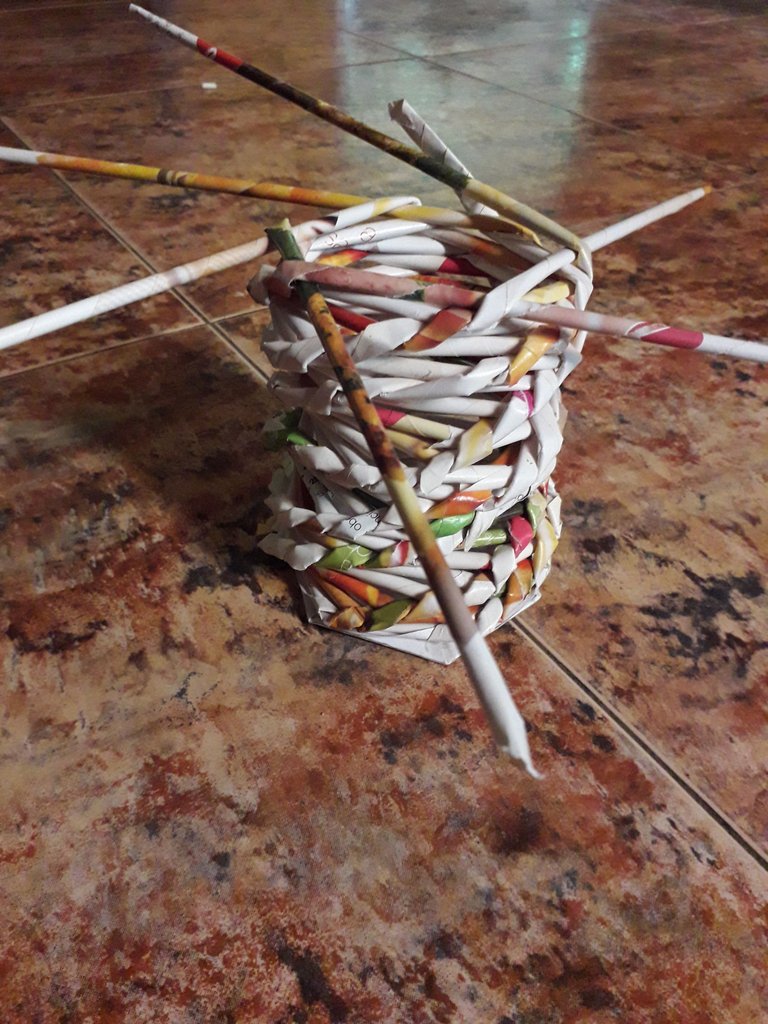
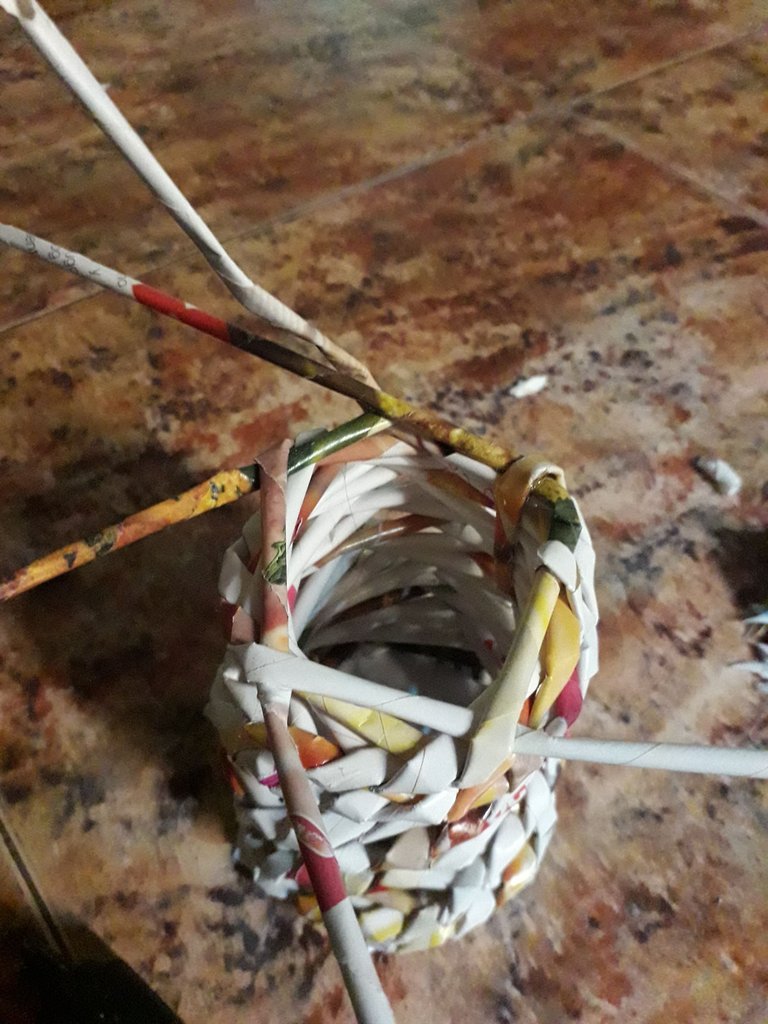
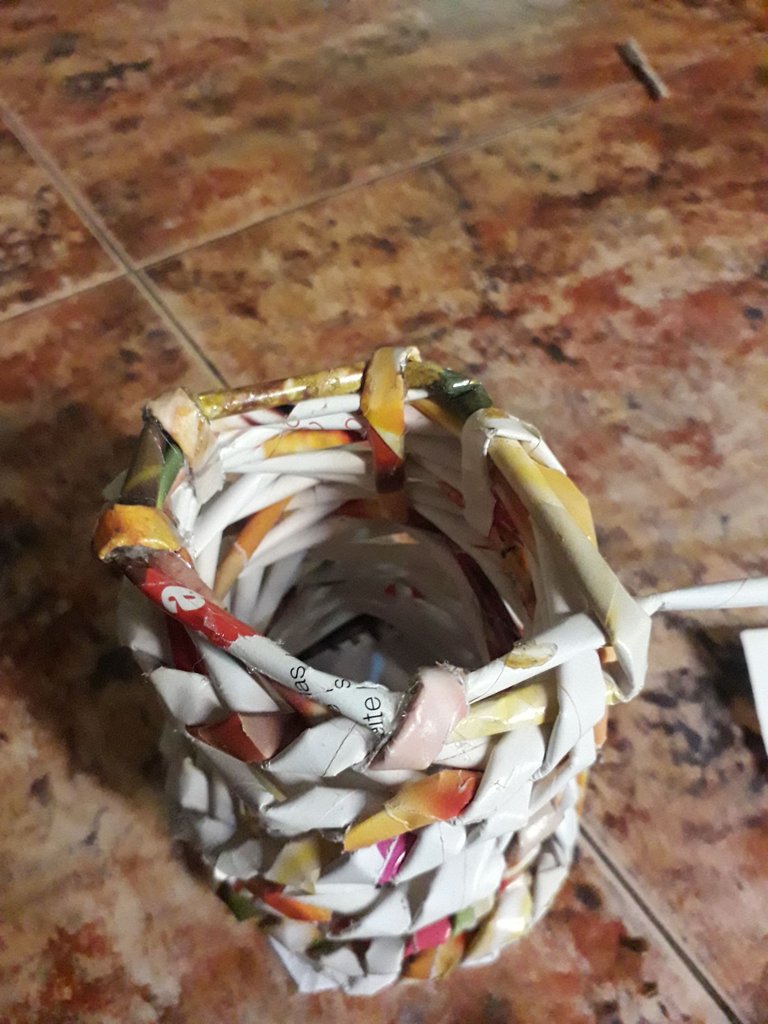
After all this, the process doesn't vary much. We continue to weave and tie cannons as needed. Here are some progressive photos.
We knit until we have a “cylinder” of the height you want. For example, in the last picture, I've decided that it was the right height.
A trick that people use so that the “cylinder” is not crooked, is that they put inside the base some container that has similar dimensions to what we want to achieve. Here I could have put a small bottle, but can you imagine that it would have gotten stuck? I better do it without a support and trusting the process hahaha.
 |  |
|---|
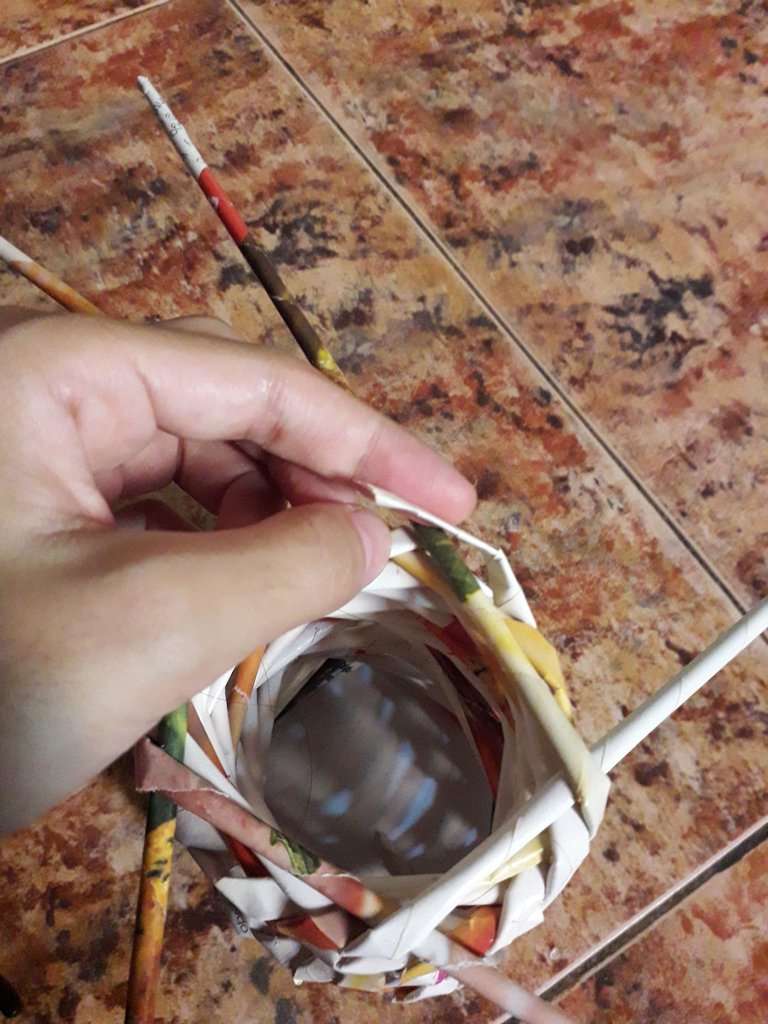
Finally, to close the edge of this pencil holder, we will do the following:
I took the last canute I was using for weaving, and cut it, as in the first image. Then, I applied hot silicon to the edge and folded the canute down to glue it to the inside of the pencil holder.
In the two images below, I show how I cut out each cannula and repeated the process described above. I put hot silicon on the edge of the marble, and folded it down, gluing it to the “inside” of the pencil holder.
And when I finished cutting and gluing each pencil, our pencil holder would be ready.

 |  |
|---|

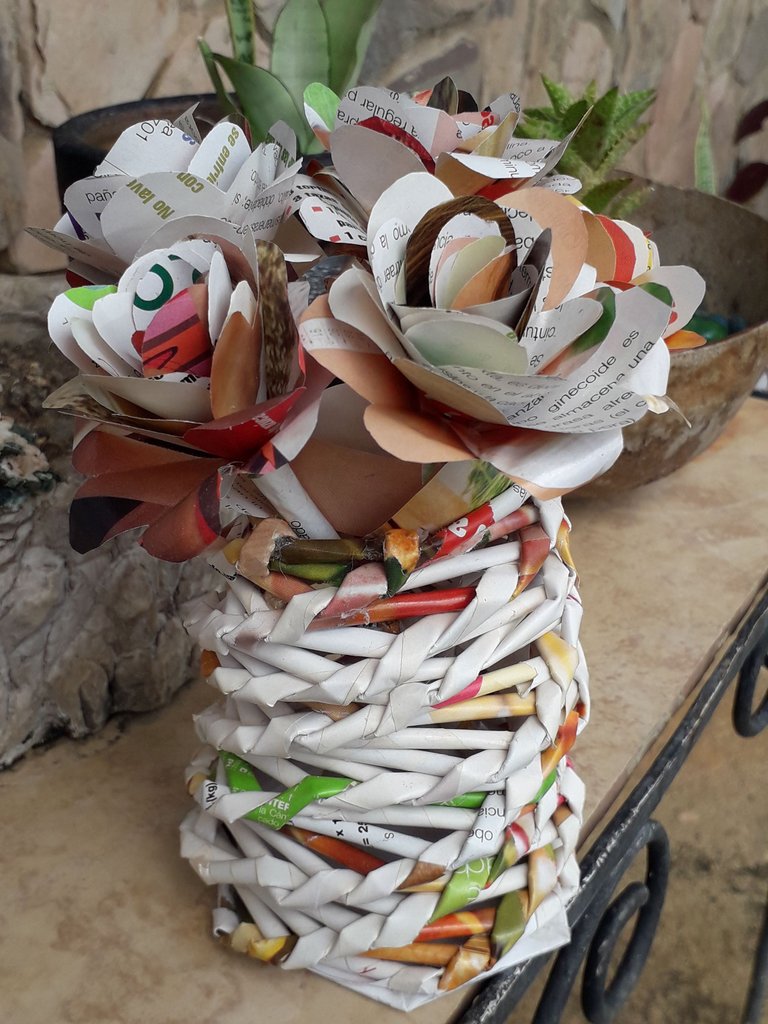
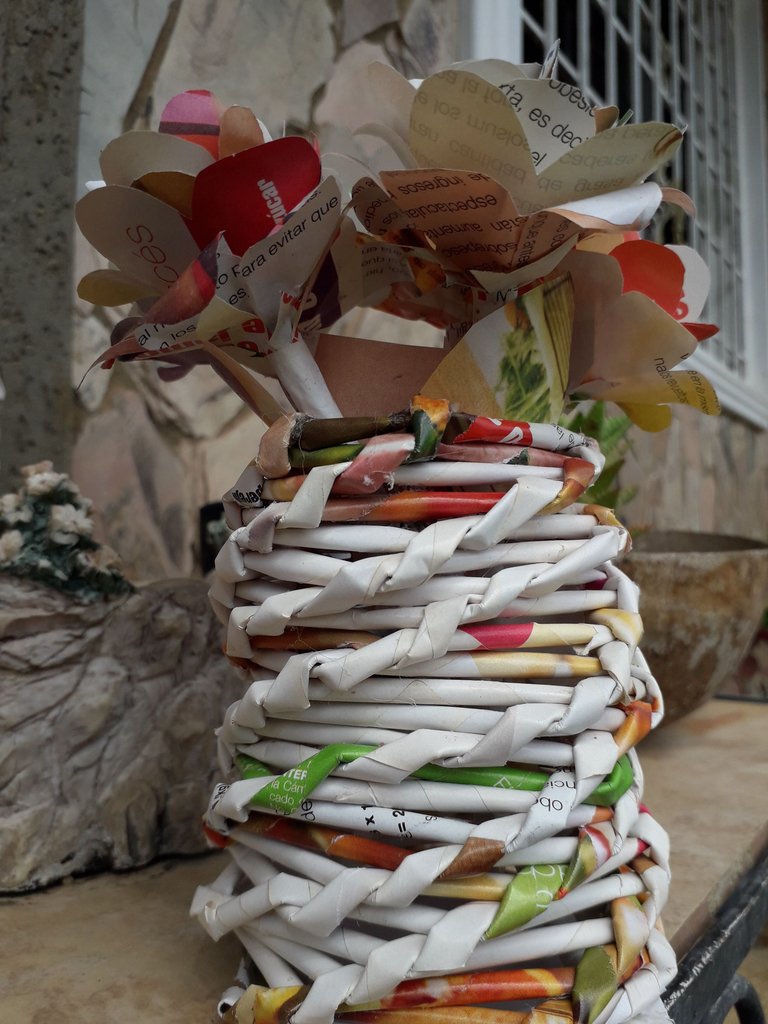
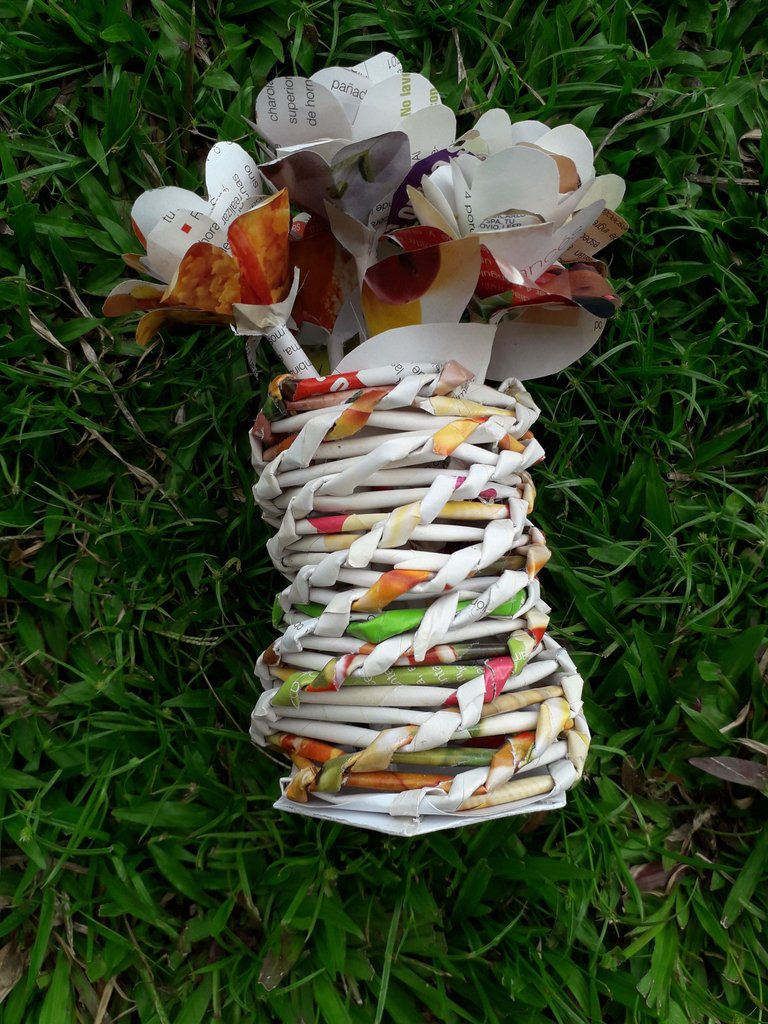
Now, here are some pictures of this pencil holder, which is also a vase! It looks very pretty when you complement it with the paper flowers, but I'm sure it would also look beautiful with colored pencils inside, or whatever you want to keep inside. The important thing is that thanks to this post, you now know another way to recycle magazines!
And before I finish, I wanted to share with you my idea of bringing my drawings to this beautiful community, as tutorials, of course. What do you think? Lately, I have not been so active in my art, but I would like to improve and expand my horizons, hehehe.

Now, with nothing more to add…. Take care, drink water, and don't forget to smile, I love you, see you in the next post, bye!


Español

Holiii, amigos de la comunidad de HiveDiy, ¿cómo se encuentran el día de hoy?, ¡espero que muy bien!
Como les prometí la semana antepasada, el próximo post que escribiría sería sobre como hacer este portalápiz tejido con revistas, aunque se supone que era la semana pasada que debía subirlo, mejor tarde que nunca; lo prometido es deuda.
Esta manualidad me recuerda muchísimo al liceo, pues les conté que ahí fue donde aprendí a hacer los canutos (palitos de papel), y recordé una de las manualidades que no me salieron en su momento, ¡así que esta vez vine por la revancha! jijiji.
Pues bien, en esta manualidad utilizaremos el mismo material reciclado de la vez anterior: revistas. Así que acompáñenme a tejer con papel, ¡vamos allá!

Materiales

- Revistas (al menos dos).
- Pega blanca.
- Pistola de silicón.
- Tijeras.
- Cartulina.
- Palito de altura.

Aquí yo ya había hecho aproximadamente 30 canutos para tenerlos ya listos para hacer el portalápiz, pero si ustedes no recuerdan como hacerlos, tranqui, yo se los recordaré justo debajo.
 |  |
|---|

Como les dije en mi post pasado:
Vamos a tomar una hoja de revista y la vamos a cortar a la mitad.
Luego, tomamos el palito de altura y lo ponemos de manera diagonal encima del papel, en la esquina inferior izquierda, y comenzamos a enrollar el papel hacia arriba, siempre siguiendo el camino diagonal, hasta la esquina superior derecha.
Cuando nos queda ya un pedacito triangular, ponemos un poquito de pega blanca y terminamos de enrollar, apretando un poco con los dedos para que quede bien fijado el tubito de papel.
Y ya tendríamos un canuto.
 |  |
|---|
 |  |
|---|
Ahora, para la base, vamos a tomar nuestra cartulina y cortaremos un cuadrado de 15x15 cm.
Y ahora intentaré explicar lo mejor que pueda los dobleces que le vamos a hacer al papel.
Primero, doblamos por la mitad la cartulina, de manera horizontal, y la desdoblamos, la idea es dejar la marca en el papel para que sirva de guía.
Luego, tomamos la esquina inferior izquierda y la doblaremos hacia arriba, de manera que la punta coincida con la línea horizontal que divide la hoja por el centro. Después, repetiremos este proceso con la esquina superior izquierda.
 |  |
|---|
 |  |
|---|
Lo siguiente que haremos es tomar la esquina superior derecha y la doblaremos hacia abajo de la manera en que se ve en la primera imagen, haciendo que se forme un triángulo en la parte de arriba después del doblez. ¿Sí me explico?
Vamos a repetir el procedimiento con la esquina inferior derecha.
Luego, tomaremos la punta de arriba, y la de abajo, y las doblaremos hacia adentro, de manera que ambas puntas se toquen entre sí ras con ras.
Por último, usaremos pega blanca para fijar las puntas hacia abajo. Finalmente, formando un hexágono de papel.

Ahora vamos a tomar siete canutos y los pegaremos al hexágono de papel de la siguiente forma: vamos a pegar un canuto en cada punta del hexágono, y luego un canuto justo al lado de cualquiera de las puntas.

Aquí deberán hacer otro hexágono de papel, cortando otro cuadrado de 15x15 cm y siguiendo los pasos anteriores nuevamente. Luego, tomaremos ese hexágono y lo pegaremos con silicon caliente encima del hexágono con canutos, justo así, terminando con esto la base de nuestro portalápiz, por fin. Ahora viene el momento de tejer.

 |  |
|---|
Para comenzar a tejer, quiero dejar en claro algo en la primera imagen, con algunos números para poder explicar el procedimiento de manera más clara.
Comenzamos por tomar el canuto número 1, y lo vamos a doblar hacia la derecha, de manera que pase por encima del canuto número 2. Luego tomaremos el canuto número 2, y lo doblamos hacia la derecha, de manera que pase encima del canuto número 1 y 3. Luego tomamos el canuto número 3 y lo pasamos por encima del canuto número 2 y 4. Y así sucesivamente...
Básicamente de manera que vayan pasando encima del anterior, y de que el que le sigue lo envuelva debajo.
Sé que es muy difícil de comprender, porque no me sé explicar bien, pero espero que en la imagen de arriba a la izquierda sirva como ilustración. Si me expliqué bien, entonces debería comenzar a quedarles como se ve en la segunda imagen.
Algo muy divertido es que a medida que te acostumbras al proceso, incluso comienzas a darle vueltas a la base mientras vas tejiendo, es gracioso, me recuerda a las personas que hacen jarrones de arcilla… Debe ser divertido aprender a hacer jarrones de arcilla. Bueno, continuamos.

Algo importante que quería mencionar es que cuando se les quede corto un canuto, deben tomar otro e insertarlo en el que está demasiado corto. No recomiendo ponerles pega, porque se ablanda el papel y cuando lo intenten tejer, se puede romper. Lo relevante es que inserten bien el canuto para que no se salga. Tampoco dejen que el canuto se les quede muy corto, porque es más difícil al momento de insertarle otro para empatarlos.
 |  |
|---|
 |  |
|---|
Después de todo esto, el proceso no varía mucho. Seguimos tejiendo y empatando canutos cuando haga falta. Aquí le dejo algunas fotos progresivas.
Tejemos hasta que quede un “cilindro” de la altura que ustedes quieran. Por ejemplo, en la última imagen, yo ya decidí que estaba bien de alto.
Un truco que suele usar la gente para que el “cilindro” no nos quede chueco, es que meten dentro de la base algún envase que tenga unas dimensiones similares a lo que queremos lograr. Aquí yo podría haberle puesto un frasquito, ¿pero se imaginan que se me hubiera quedado atorado? Mejor lo hago sin un apoyo y confiando en el proceso jajaja.

 |  |
|---|
Finalmente, para cerrar el borde de este portalápiz, haremos lo siguiente:
Tomé el último canuto que estaba usando para tejer, y lo corté como en la primera imagen. Luego, le apliqué silicon caliente en el borde y doblé el canuto hacia abajo para pegarlo hacia adentro del portalápiz.
En las dos imágenes de abajo, muestro como fui cortando cada canuto y repitiendo el proceso descrito anteriormente. Puse silicon caliente en el borde del canuto, y lo doblaba hacia abajo, pegándolo de la “parte interna” del portalápiz.
Y al terminar de cortar y pegar cada canuto, ya estaría listo nuestro portalápiz.


 |  |
|---|

Ahora les dejo unas fotitos de este portalápiz, ¡que también es un jarrón! Se ve muy bonito cuando lo complementas con las flores de papel, pero seguro que también se vería hermoso con lápices de colores dentro, o cualquier cosa que ustedes quieran guardar dentro. Lo importante es que gracias a este post, ¡ahora sabes otra manera de reciclar revistas!
Y antes de terminar, quería compartir con ustedes mi idea de traer mis dibujos a esta hermosa comunidad, a manera de tutoriales, claro. ¿Qué opinan? Últimamente, no he estado tan activa en mi arte, pero quisiera mejorar y expandir mis horizontes jijiji.

Ahora sí, sin nada más que añadir... Cuídense, tomen agua, y no se olviden de sonreír. ¡Se les quiere, nos vemos en el próximo post, chau!


Credits | Créditos
- English translation DeepL (sorry for any mistakes, I don't know much English)
- Traducción al inglés DeepL (lo siento por cualquier error, no sé mucho inglés.)
- Cover, dividers, and banners made in Canva
- Portada, separadores y banners hechos en Canva
- Photos used in the post were taken by me, using a Samsung Galaxy J6
- Las fotos usadas en el post fueron tomadas por mí, usando un Samsung Galaxy J6
Posted Using INLEO
¡Está hermoso, Celely! ¡Y muy práctico! !PIZZA !BBH !HUESO !DIY
¡Muchas gracias por el apoyo! Me alegra que te haya gustado 💙
Precioso 😍
Recordé aquellos tiempos en los que también hacía cestas con palitos de papel. Son muy versátiles. Te quedó lindo el jarrón 😃
Gracias por compartir 😊
¡Gracias!
Owww, yo quisiera, intente hacer una cesta, pero salió mal, jijiji.
Me alegra que le haya gustado. ✨
$PIZZA slices delivered:
@cpol(4/15) tipped @celely
You can query your personal balance by
!DIYSTATSQue bonito te quedo tu portalápices, lo genial es que usaste materiales de provecho. Saludos y bendiciones
Muchas gracias, me alegro de que te haya gustado. 💙 Saludos y bendiciones igualmente. ✨
Te quedó hermoso ! , me gusta esta idea porque es una forma de reciclar esas revistas viejas ,( yo aún tengo un montón de revistas tú guardadas) y ayuda también a ordenar las cosas funcionando de porta lápiz, jejej no se cómo te había quedado las primeras veces en el colegio, pero este quedó muy bonito así que es buena la revancha jaja😸