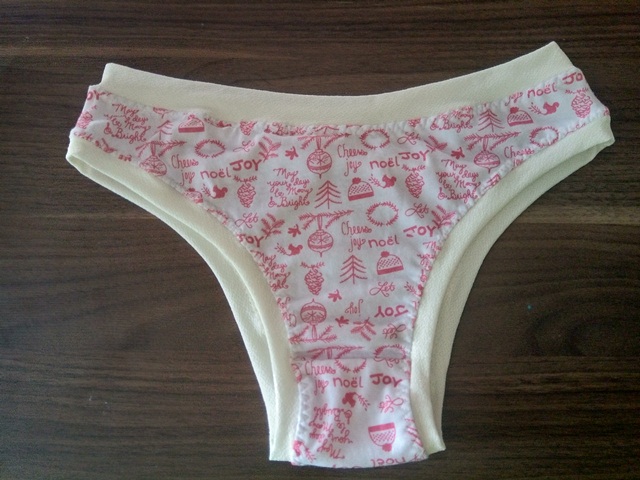
¡Hola a todos mis amigos de Hive.Blog!. Desde la distancia les envío un cordial saludo, deseando que la paz de Dios les acompañe durante todo este 2022. La panty es una prenda infaltable en el guardarropa de toda mujer, es recomendable que sea confeccionada en tejido algodón ya que las telas sintéticas pueden ocasionar lesión en pieles sensibles.
Hello to all my friends at Hive.Blog! From a distance I send you a cordial greeting, hoping that the peace of God accompanies you throughout this 2022. The panty is an essential garment in every woman's wardrobe, it is recommended that it be made of cotton fabric since synthetic fabrics can cause injury to sensitive skin.
Teniendo en cuenta la importancia de esta prenda, hoy les traigo un paso a paso para su confección, con la variante de que el encauchado de los escotes de pierna y cintura se los realicé con una tira al sesgo, la cual puede ser cortada del mismo tejido utilizado para hacer la panty o de otro tono a combinación, lo indispensable es que sea un género que “estire” o tenga elongación.
Taking into account the importance of this garment, today I bring you a step by step for its preparation, with the variant that the rubberized leg and waist necklines were made with a slanting strip, which can be cut from the same The fabric used to make the pantyhose or another color to match, the essential thing is that it be a fabric that "stretches" or has elongation.
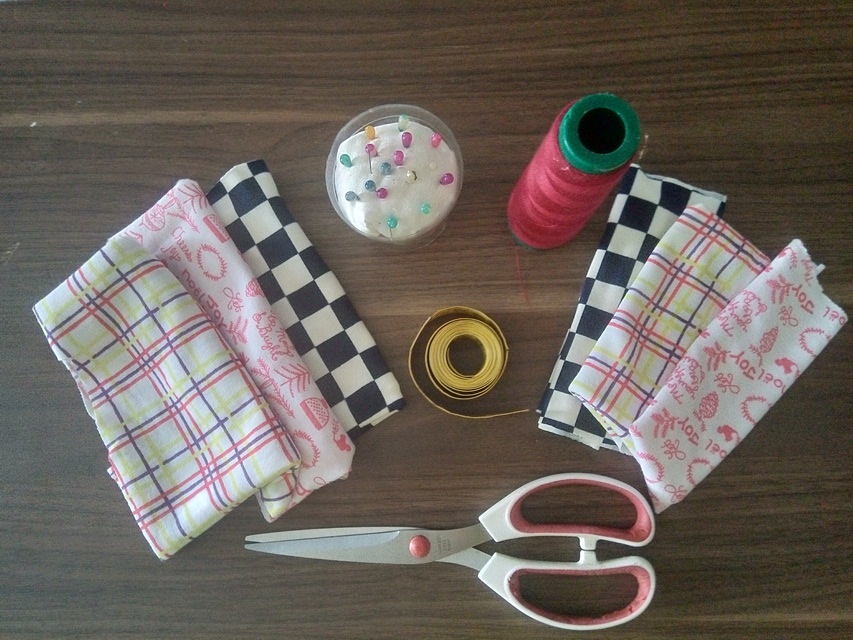
MATERIALS
- Franela algodón
- Tijera
- Hilo de coser
- Agujas, Alfileres
- Cinta métrica
- Lápiz, tiza o marcador
- Papel para los patrones
- Cotton flannel
- Scissor
- Sewing thread
- Needles, Pins
- Measuring tape
- Pencil, chalk or marker
- Paper for patterns
ELABORACION
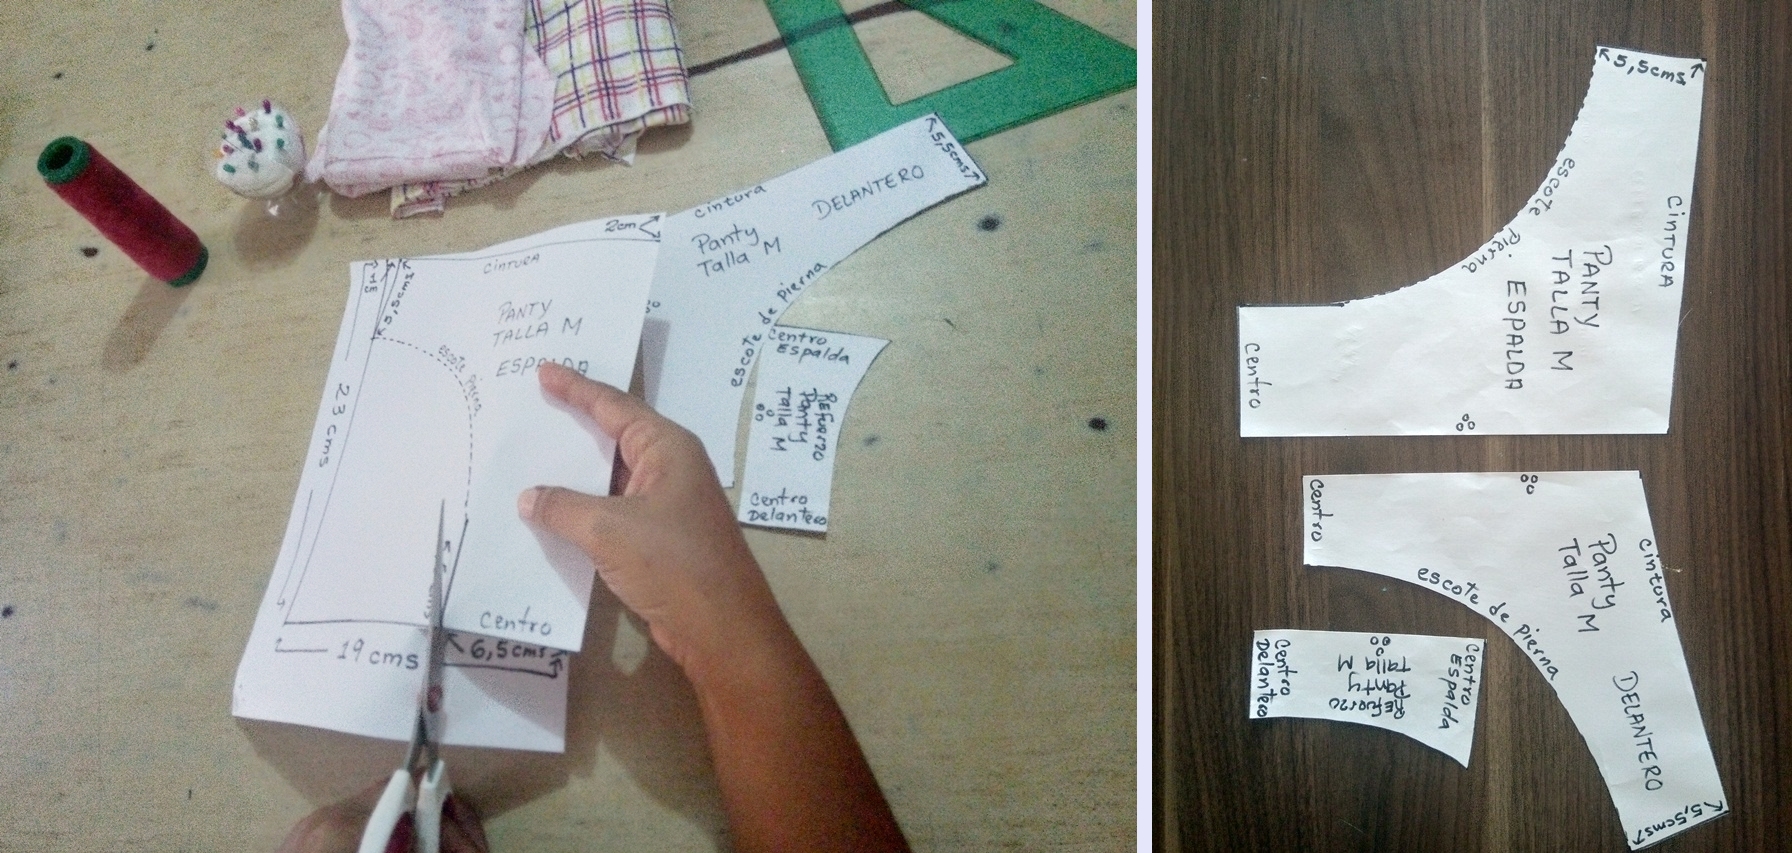
1.- Generalmente las pantis constan de tres piezas: delantero, trasero y entrepierna. Realicé el patrón en papel bond, en esta oportunidad trabajé con un talla “M”. Observa la secuencia fotográfica para su elaboración.
1.- Generally the pantyhose consist of three pieces: front, back and crotch. I made the pattern on bond paper, this time I worked with a size "M". Observe the photographic sequence for its elaboration.
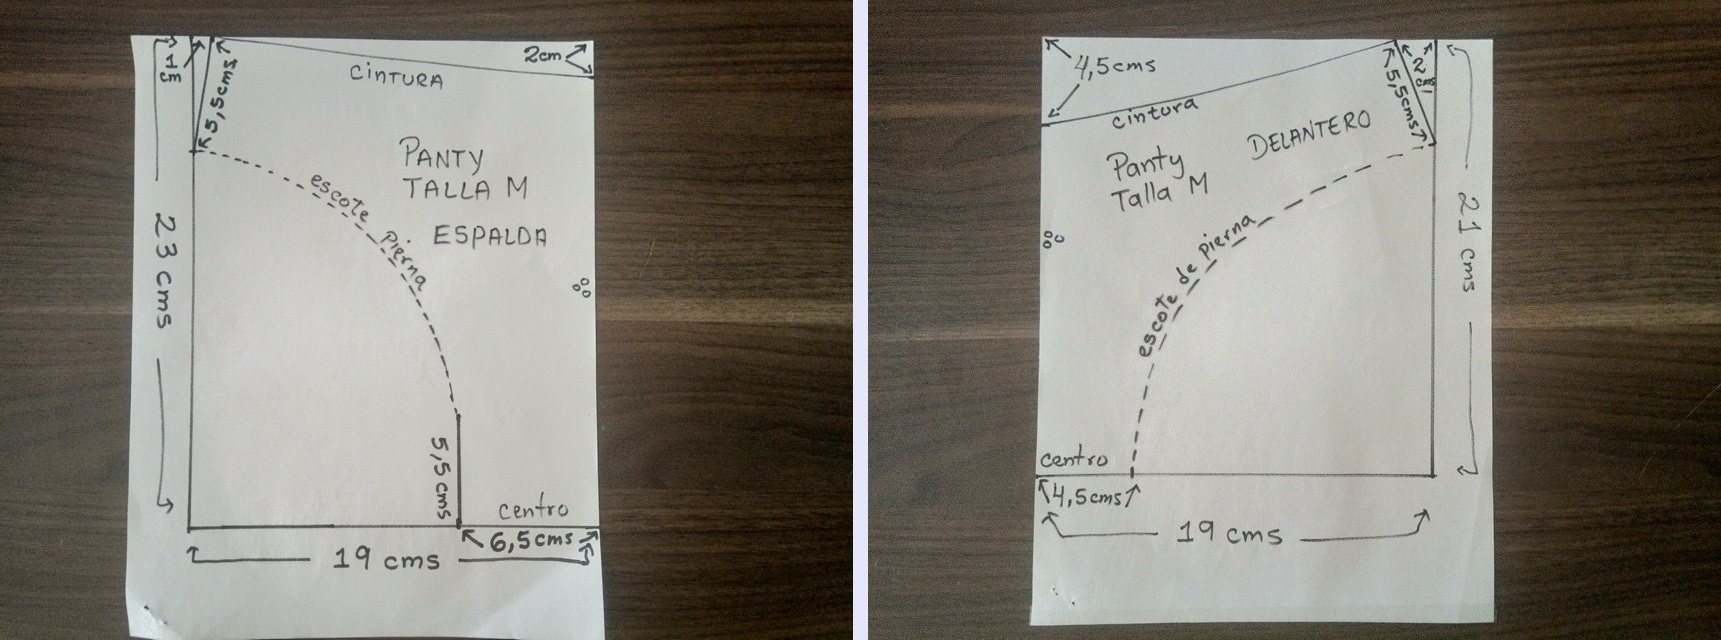
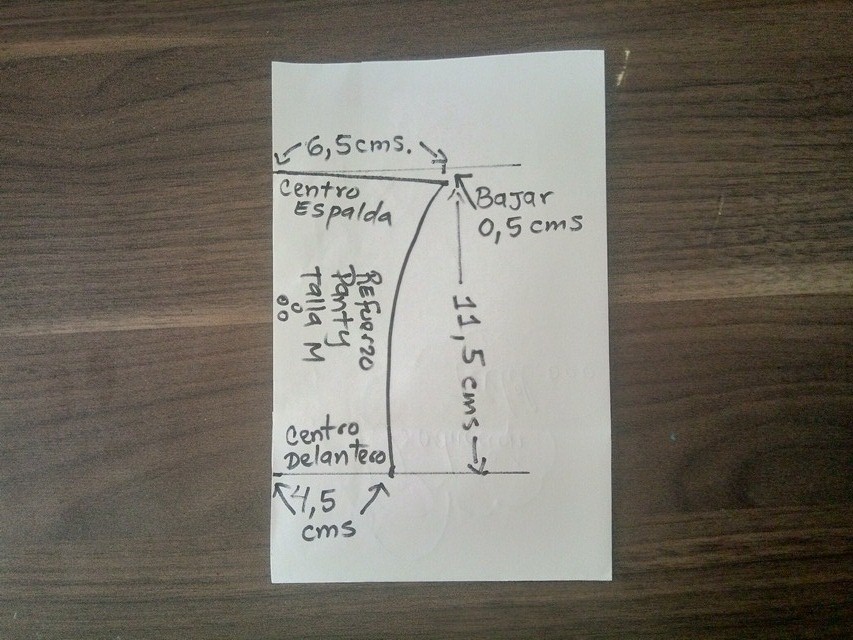
2.- Una vez realizados los patrones en papel, procedí a cortarlos por todo su contorno.
Once the patterns were made on paper, I proceeded to cut them all around their contour
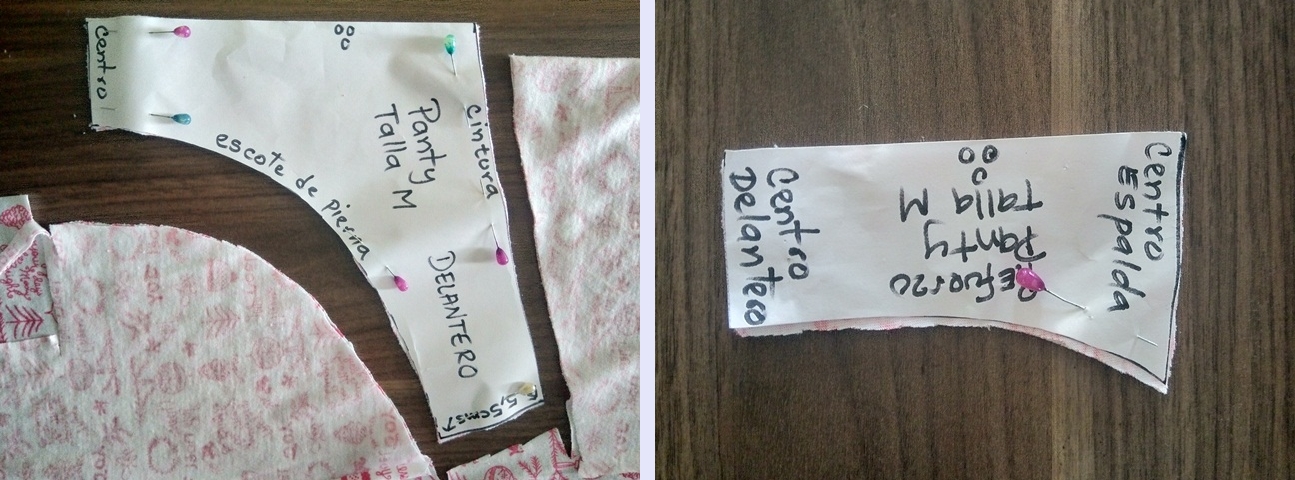
3.- Luego corté en la tela los patrones de la siguiente manera: Las piezas delantera y trasera, 1 vez cada una; la pieza de la entrepierna, 2 veces.
Then I cut the patterns on the fabric as follows: The front and back pieces, 1 time each; the crotch piece, 2 times.
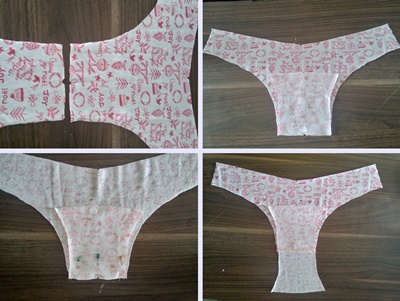
4.- Procedí a confeccionar la panty, para ello señalé el punto medio de cada pieza con un piquete o muesca, presenté las piezas del delantero y la entrepierna y luego cosí de manera simultánea los dos refuerzos con el delantero. Observa la secuencia fotográfica de su montaje.
4.- I proceeded to make the panty, for this I marked the midpoint of each piece with a notch or notch, I presented the pieces of the front and the crotch and then simultaneously sewed the two reinforcements with the front. Observe the photographic sequence of his montage.
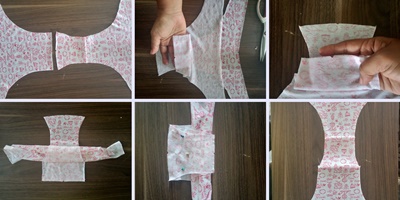
5.- Seguidamente, presenté la pieza trasera a la delantera encarando sus derechos, luego centralicé la pieza trasera a uno de los refuerzo. Enrollé la prenda y coloqué el derecho de la entrepierna sobre el revés del trasero y cosí con costura recta (ver imágenes)
Next, I presented the rear piece to the front facing its rights, then I centralized the rear piece to one of the reinforcements. I rolled the garment and placed the right crotch on the wrong side of the butt and sewed with a straight seam (see images)
6.- Para cerrar la prenda, cosí los costados de la panty con costura francesa. Luego señalé los puntos medios del escote de pierna y calculé su tamaño con la ayuda de la cinta métrica. A la medida obtenida le resté 6 cms. y corté de este tamaño las tiras para los sesgos.
6.- To close the garment, I sewed the sides of the panty with French seams. Then I marked the midpoints of the leg neckline and calculated its size with the help of the measuring tape. To the obtained measurement I subtracted 6 cms. and cut the strips for the biases to this size.

7.- Los sesgos para el escote de pierna tienen un ancho de 4 cms., se cierran con costura recta antes de montar en la panty. Acoplé los sesgos en la prenda haciendo coincidir sus puntos medios. Cosí aplicando el punto francés invertido al tiempo que lo estiraba ajustándola a la prenda. De la misma manera monté el sesgo de la cintura.
7.- The biases for the leg neckline are 4 cm wide, they are closed with a straight seam before mounting on the panty. I matched the biases in the garment by matching their midpoints. I sewed applying the inverted French stitch while stretching it adjusting it to the garment. In the same way I mounted the waist bias.
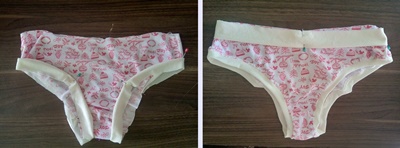
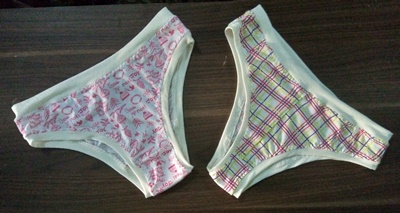
This is the final result. Thank you very much for taking the time to see my publication, until a new opportunity !!

Congratulations @carmenserrano! You have completed the following achievement on the Hive blockchain and have been rewarded with new badge(s):
Your next target is to reach 1750 upvotes.
You can view your badges on your board and compare yourself to others in the Ranking
If you no longer want to receive notifications, reply to this comment with the word
STOPCheck out the last post from @hivebuzz:
Support the HiveBuzz project. Vote for our proposal!