Hello my creative hive Diy people!
Estamos en los primeros meses mas calurosos del año, es evidente que el calor y el sol es insesante y sofocante. Es preocupante exponer nuestros niños al sol, pero igual debemos sacarlos a la calle y llevarlos a sus actividades escolares y recreativas. Los expertos recomiendan usar protector solar, ya que la exposicion directa al sol puede ocacionar grandes consecuencias como irritación, alegrías y quemaduras. Es por eso que hay que proteger a nuestros niños no solo con cremas corporales, sino que también podemos colocarles gorras las cuales resguardan un poco el rostro de los rayos solares. Hoy les traigo esta hermosa estrategia, para proteger nuestros niños del sol, ademas llamará la atención de muchos. Estas gorras son muy cómodas y fácil de hacer por que seguro en casa debes tener estos materiales que necesitarás para elaborarla. Hay muchos modelos y de difetentes materiales en que se pueden hacer gorras, como por ejemplo: tejidas con hilo, de tela, de plástico y de otros materiales. En este posh quiero presentarles un tutorial para elaborar una linda gorra de foami para las niñas. A continuación sigue mi procedimiento.
Welcome to my blog!
We are in the first hottest months of the year, it is evident that the heat and the sun are incessant and suffocating. It is worrying to expose our children to the sun, but we must still take them out into the street and take them to their school and recreational activities. Experts recommend using sunscreen, since direct exposure to the sun can cause great consequences such as irritation, joys and burns. That is why we must protect our children not only with body creams, but we can also put caps on them which protect their faces a little from the sun's rays. Today I bring you this beautiful strategy, to protect our children from the sun, it will also attract the attention of many. These caps are very comfortable and easy to make because at home you must have these materials that you will need to make it. There are many models and different materials in which caps can be made, such as: woven with thread, cloth, plastic and other materials. In this posh I want to present a tutorial to make a cute foami cap for girls. Below is my procedure.
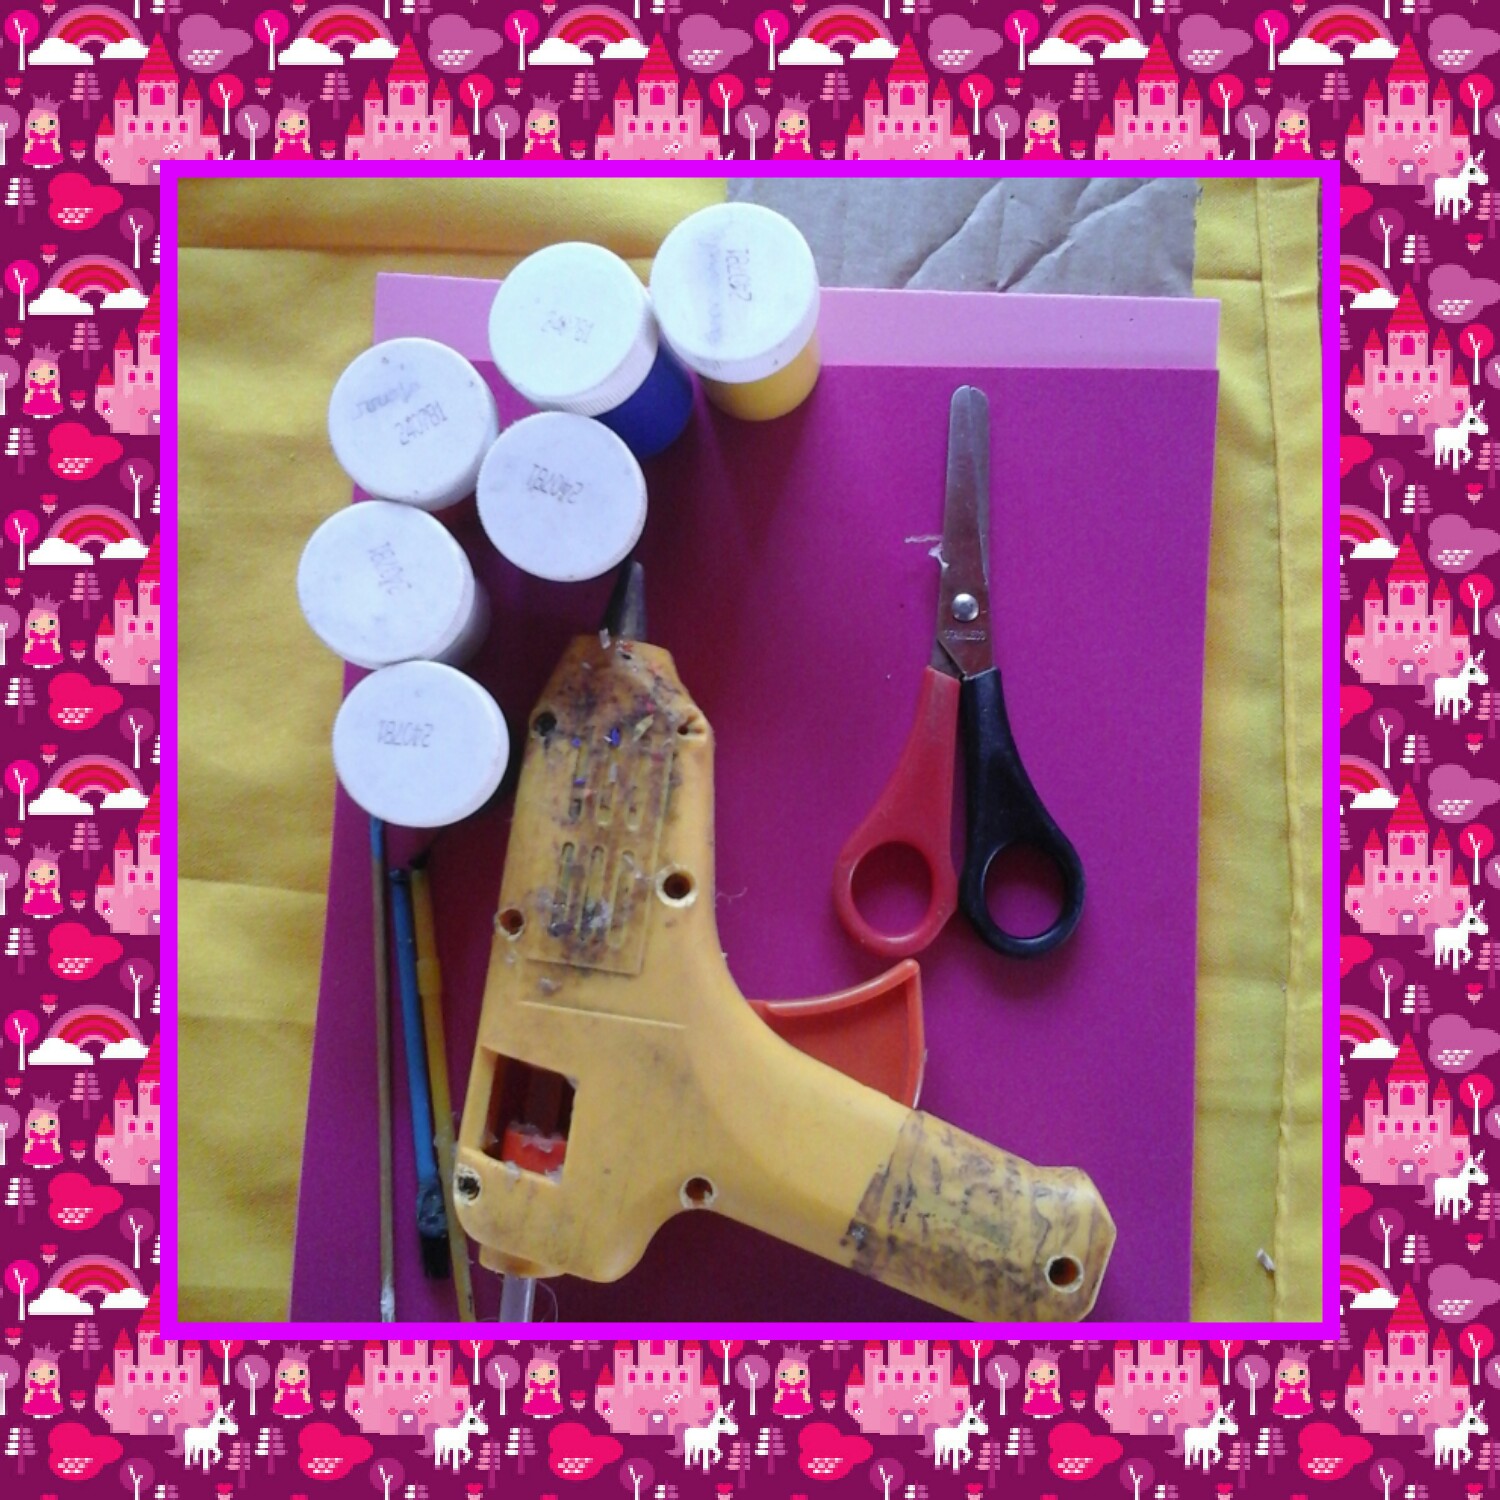
Para elaborar esta hermosa gorra para niñas necesitaremos los siguientes materiales:
- 2 Foami color rosado, uno piel, fucsia, negro y blanco).
- Pistola y barra de silicon.
- Tijera.
- Pintura y pinceles.
- Una hojilla.
To make this beautiful cap for girls we will need the following materials:
- 2 foami pink, one skin, fuchsia, black and white).
- Gun and silicone bar.
- Scissors.
- Paint and brushes.
- One blade.
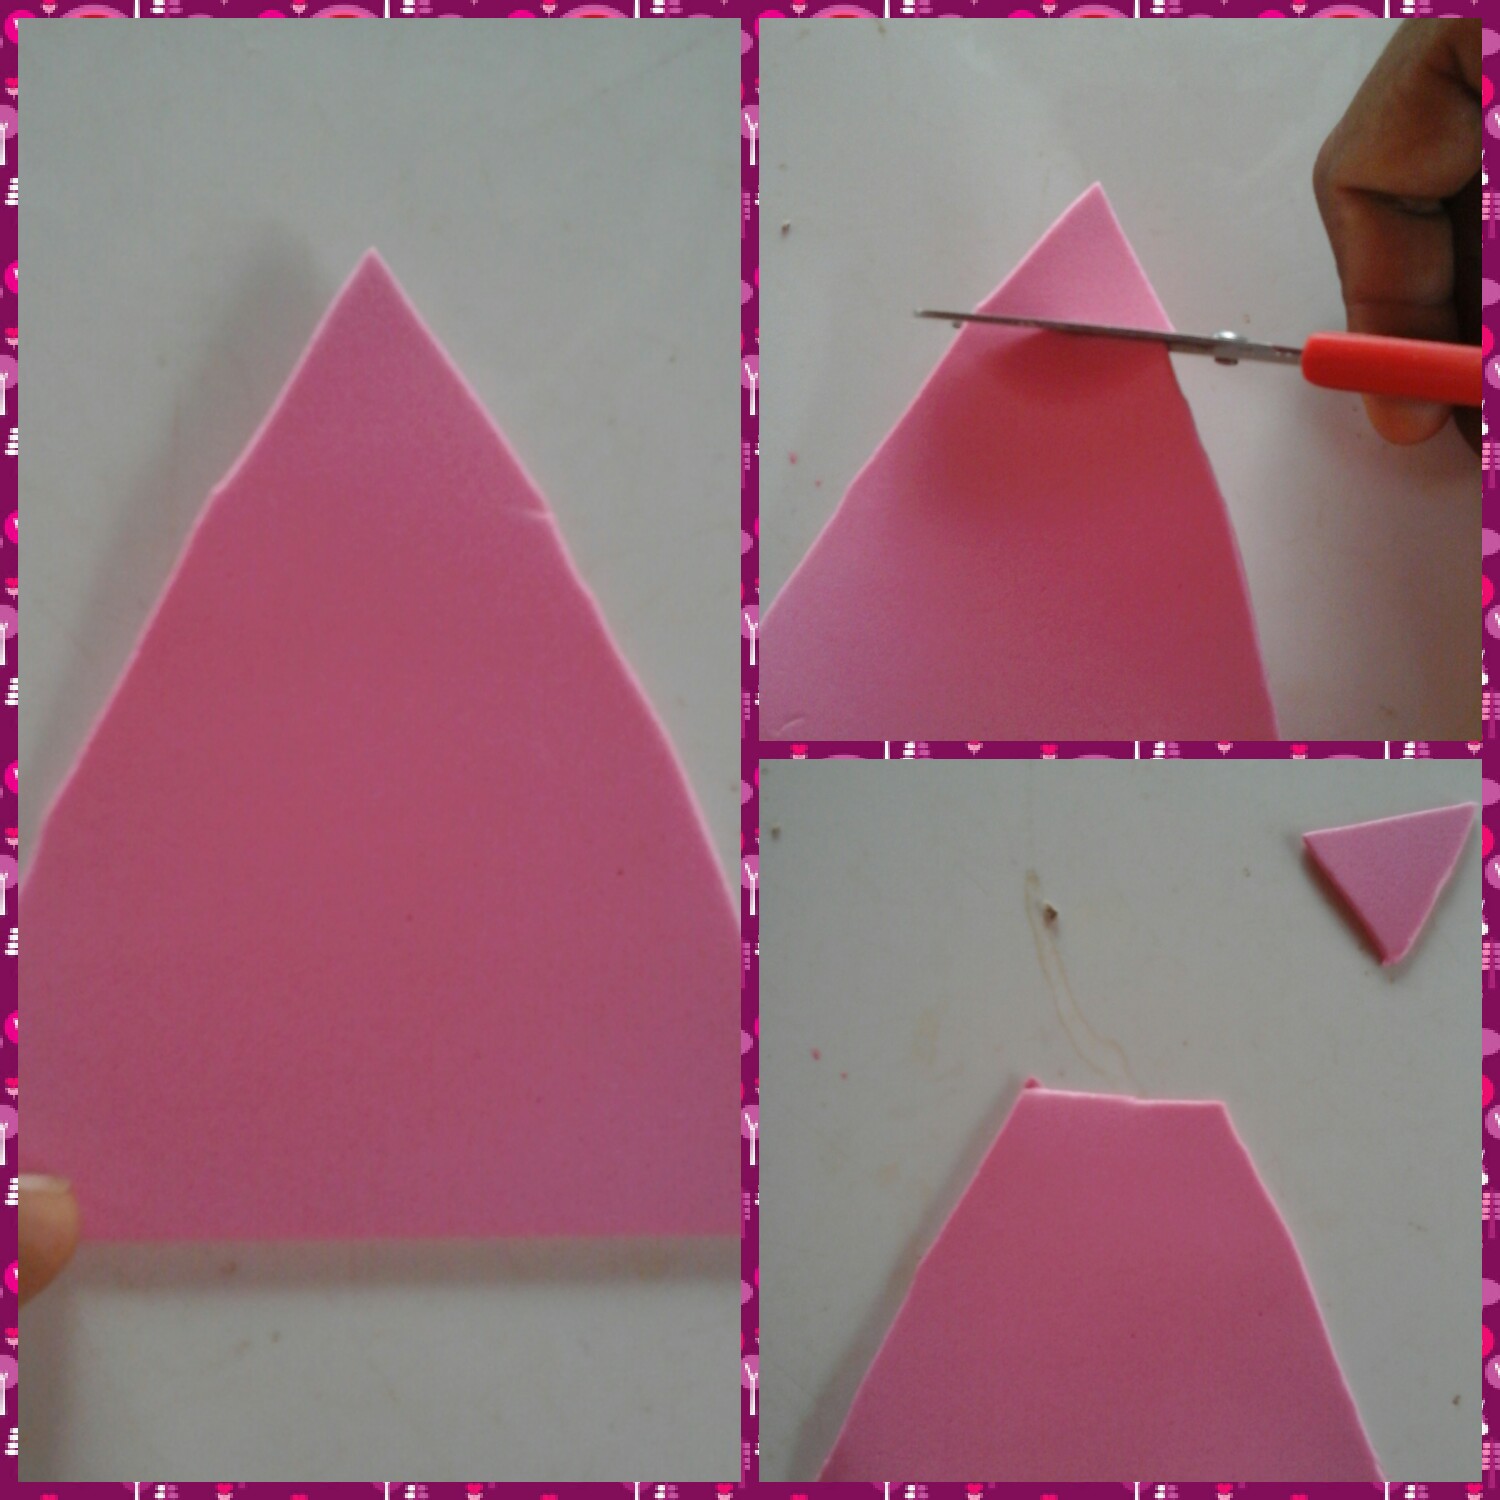
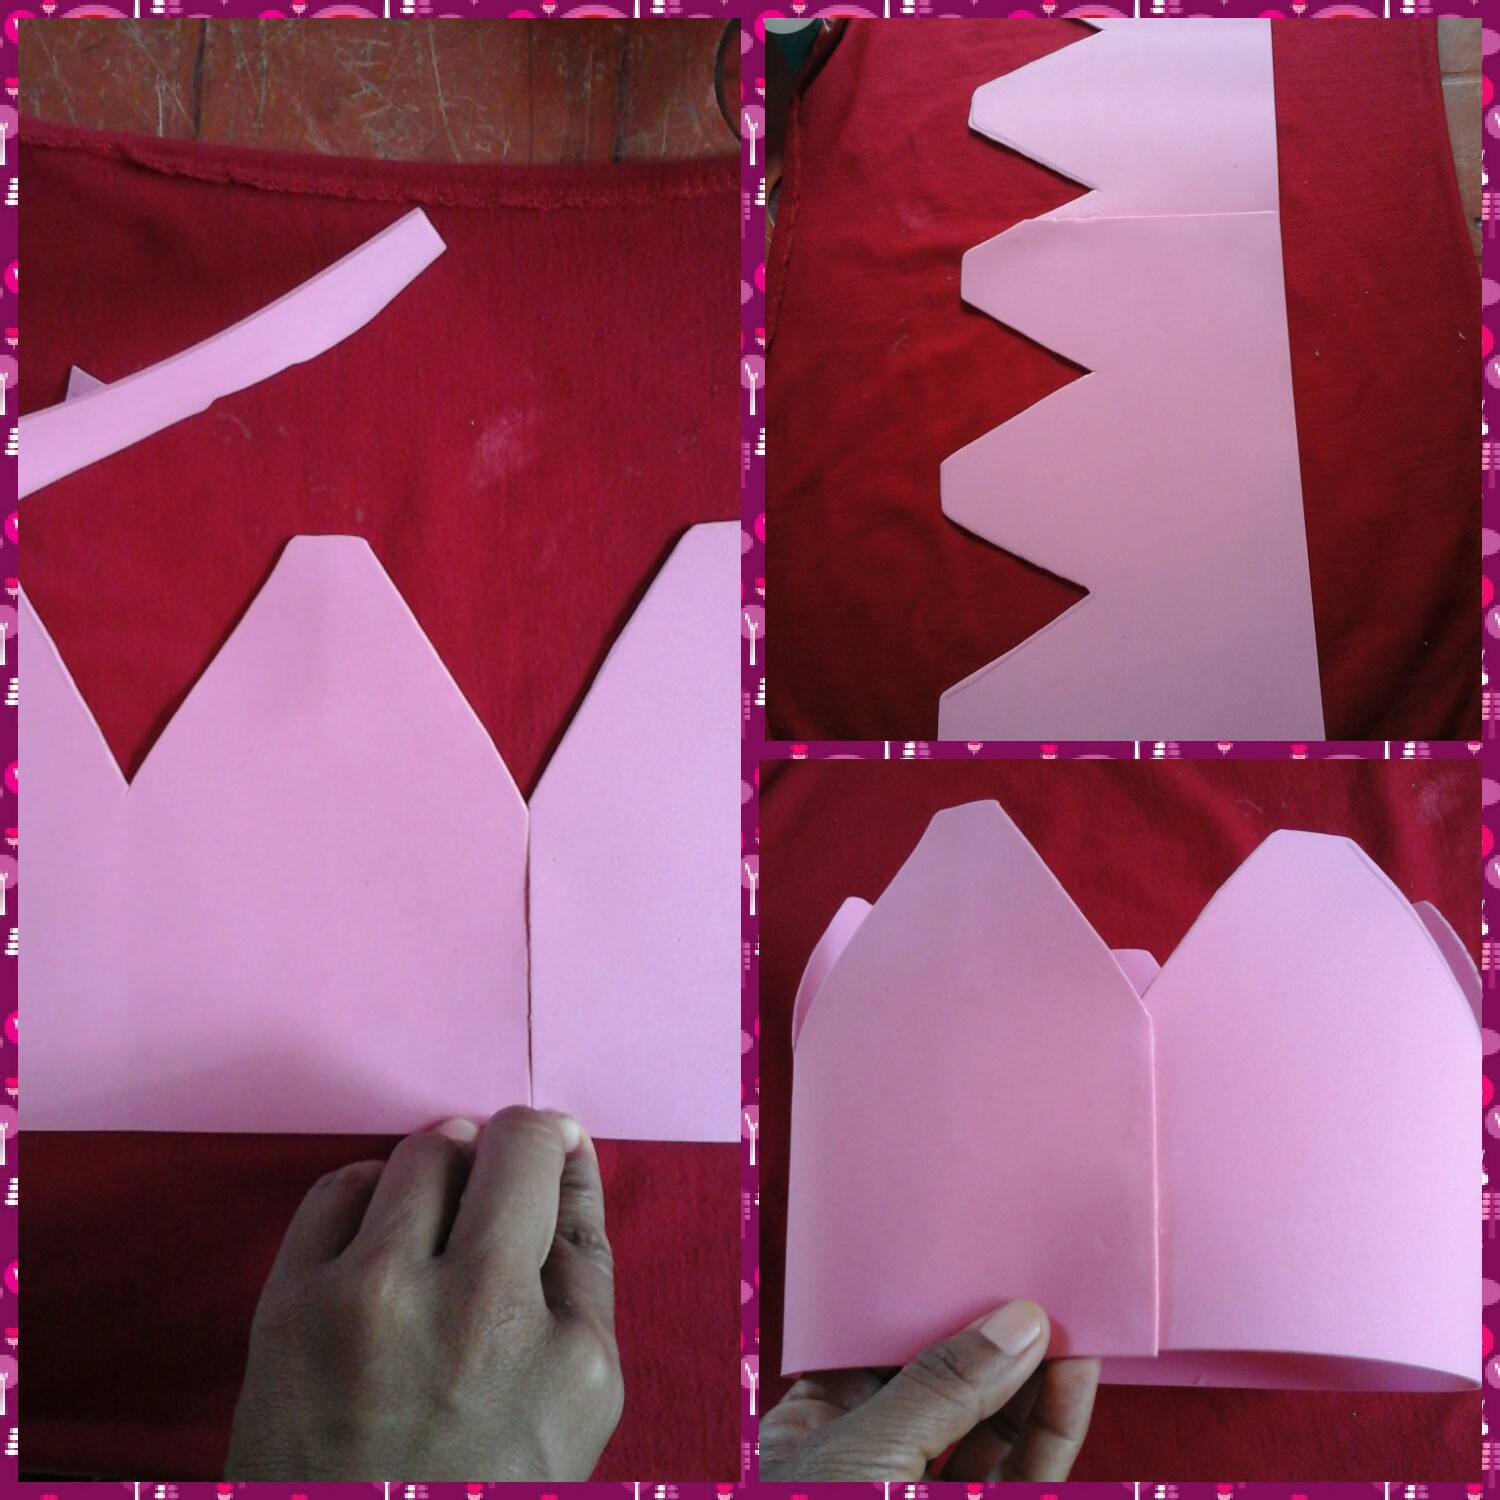
Para comenzar tomamos un pedazo de foami y recortamos en foma de triángulo, nuevamente recortamos pero solo la punta del mismo triángulo para que quede en forma de pirámide, éste nos servirá como patrón. Seguidamente colocamos la figura de pirámide sobre una lámina de foami rosado marca y recorta solo hasta donde termina la figura. Así comenzaremos la elaboración de esta gorra.
To start we take a piece of foami and cut it in the shape of a triangle, we cut it again but only the tip of the same triangle so that it is in the shape of a pyramid, this will serve as a pattern. Then we place the figure of the pyramid on a sheet of pink foami, we mark and cut only up to where the figure ends. This is how we will begin the elaboration of this hat.
Una vez que hayamos marcado y recortado en nuestra lámina de foami como vemos en la imagen. Volvemos a doblar para marcar y recortar. Repite este procedimiento cinco veces.
Once we have marked and cut out our foam sheet as we see in the image. We fold again to mark and cut. Repeat this procedure five times.
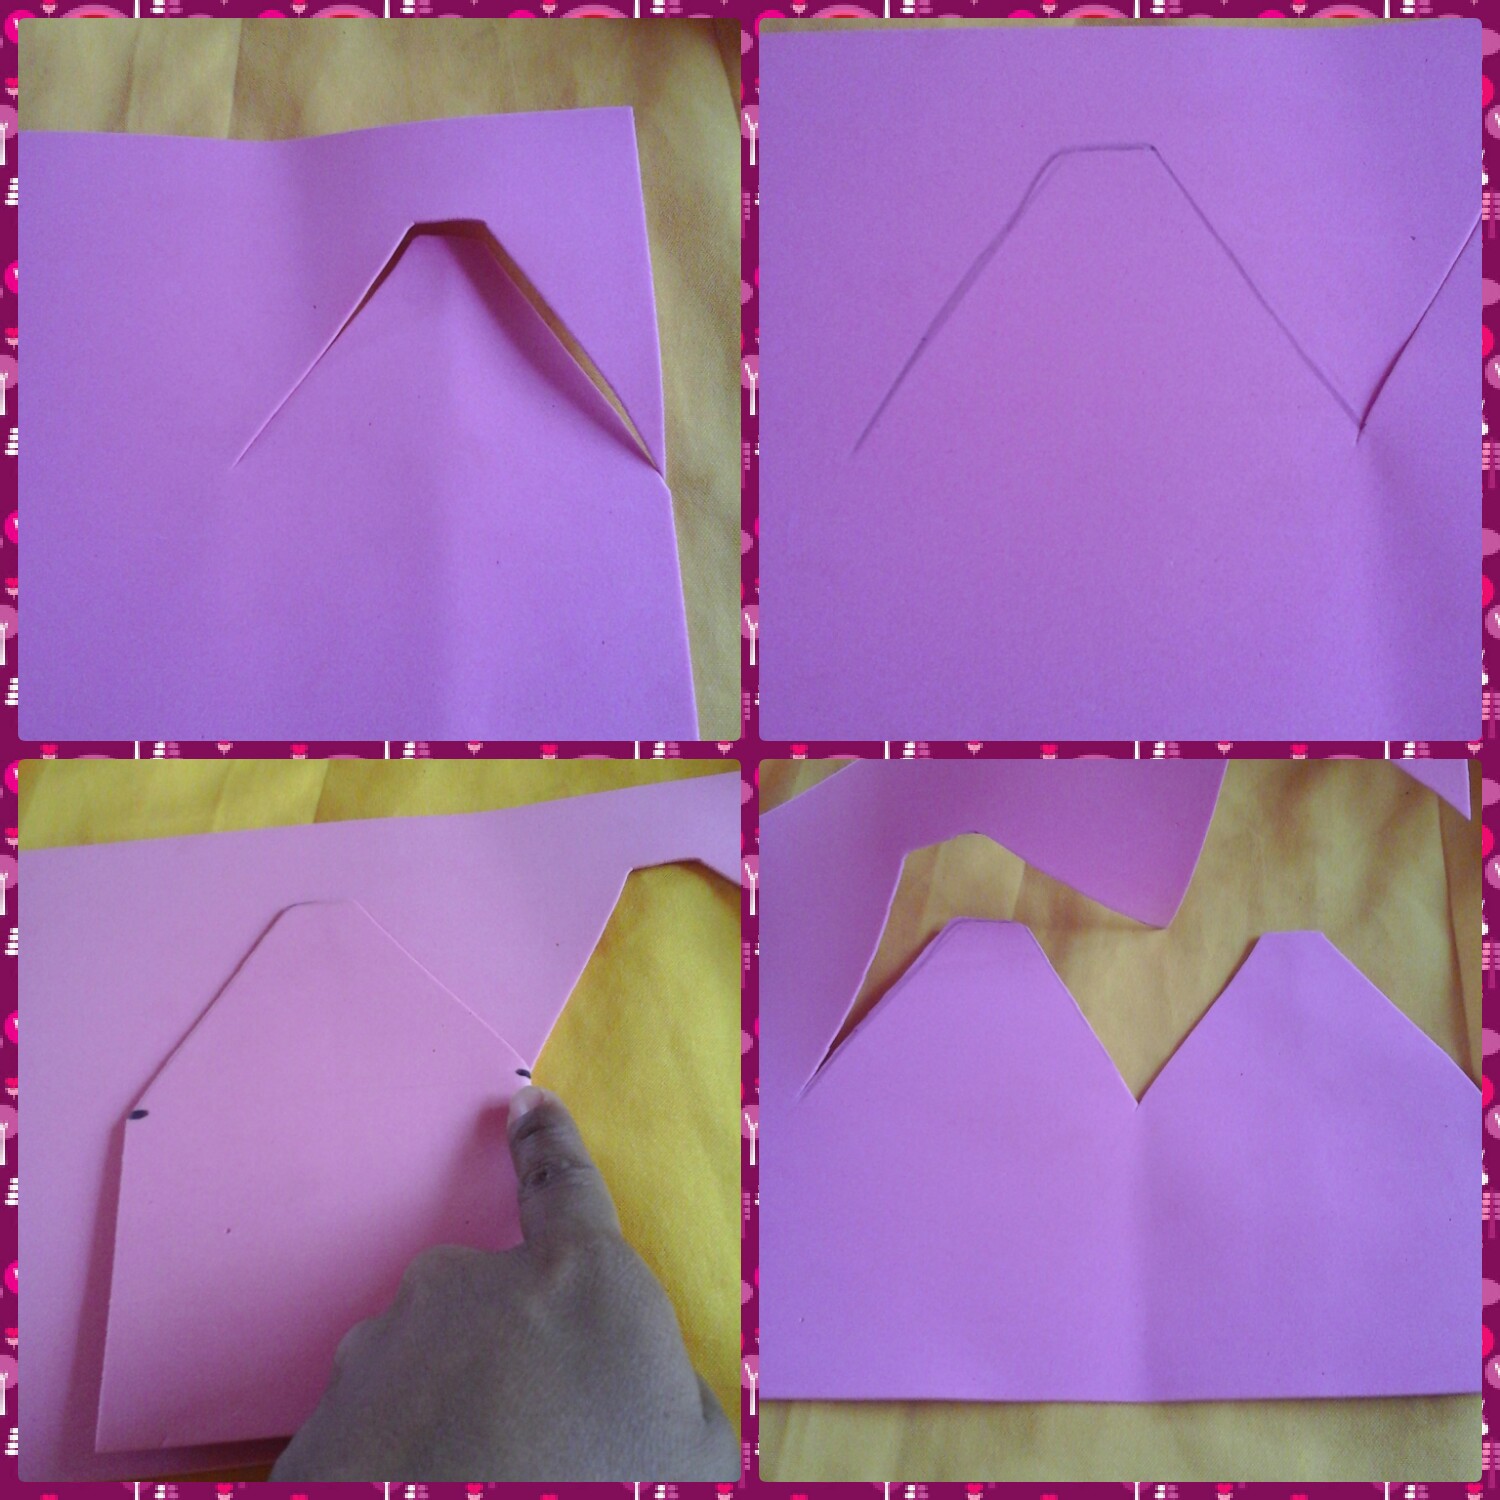
Si tu foami es tipo carta como el mio, entonces recortale tres puntas a una de las láminas y a la otra solo dos. Una vez que tengas el foami con bordes en forma de zigzags, une las láminas y pegalas para conseguir una sola pieza o lámina, si tienes en casa una lámina comlpeta de foami se te hará más cómodo elaborarla. Una vez que hayamos unido las dos lámina, pegamos los extremos y así ya nuestra gorra tomará forma.
If your foami is letter type like mine, then cut three points to one of the sheets and only two to the other. Once you have the foami with zigzag edges, join the sheets and glue them to get a single piece or sheet, if you have a complete sheet of foami at home it will be more comfortable for you to make it. Once we have joined the two sheets, we glue the ends and thus our cap will take shape.
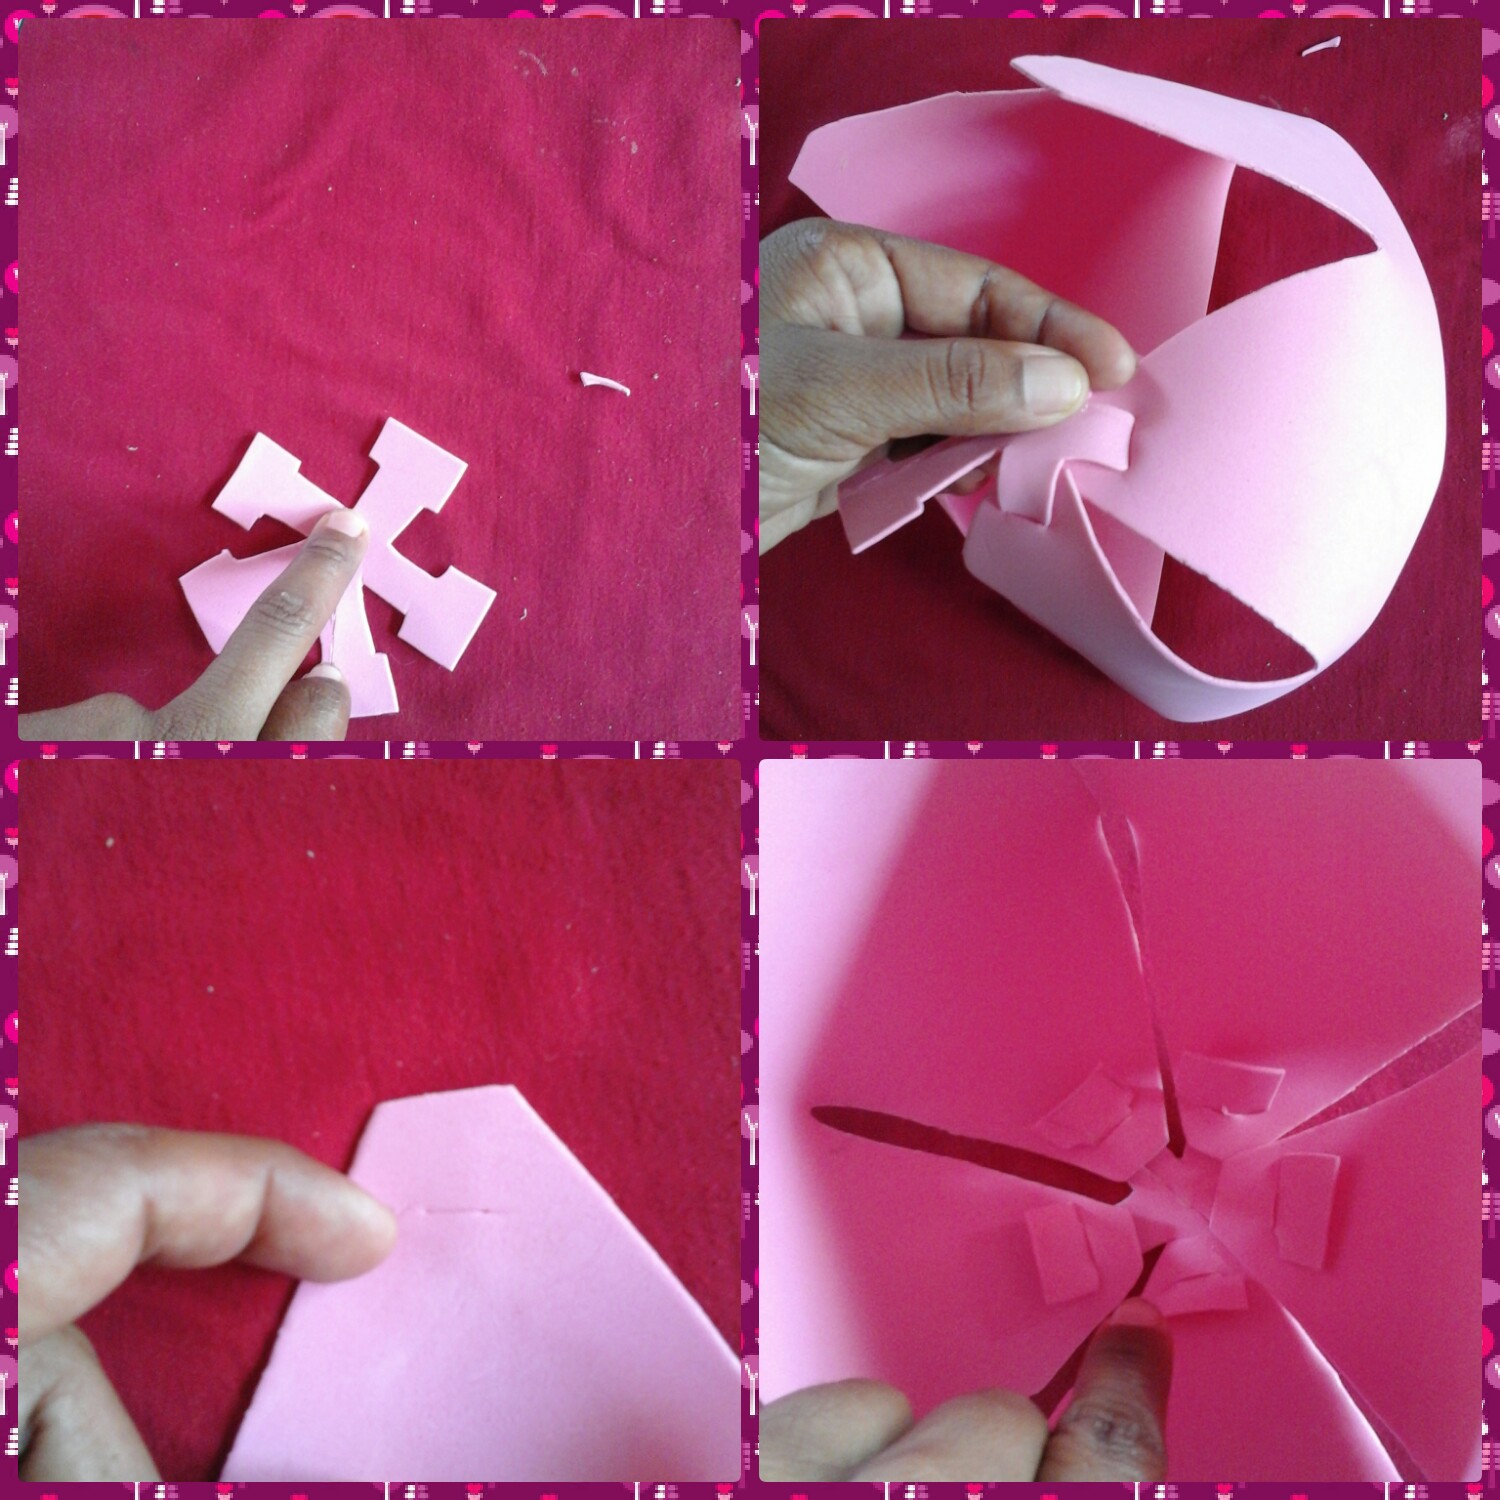
En este paso dibujamos y recortamos sobre foami rosado una figura en forma de asterisco la cual nos servirá para sujetar cada extremo punteagudo. Tomamos cada punta de lo que será la gorra y hacemos un pequeño corte para poder insertar cada punta del asterisco. Pega el sobrante a la parte inferior de la gorra y así no se podrá desarmar.
In this step we draw and cut out on pink foami a figure in the shape of an asterisk which will serve to hold each pointed end. We take each point of what will be the cap and make a small cut to be able to insert each point of the asterisk. Glue the excess to the bottom of the cap so it won't come apart.
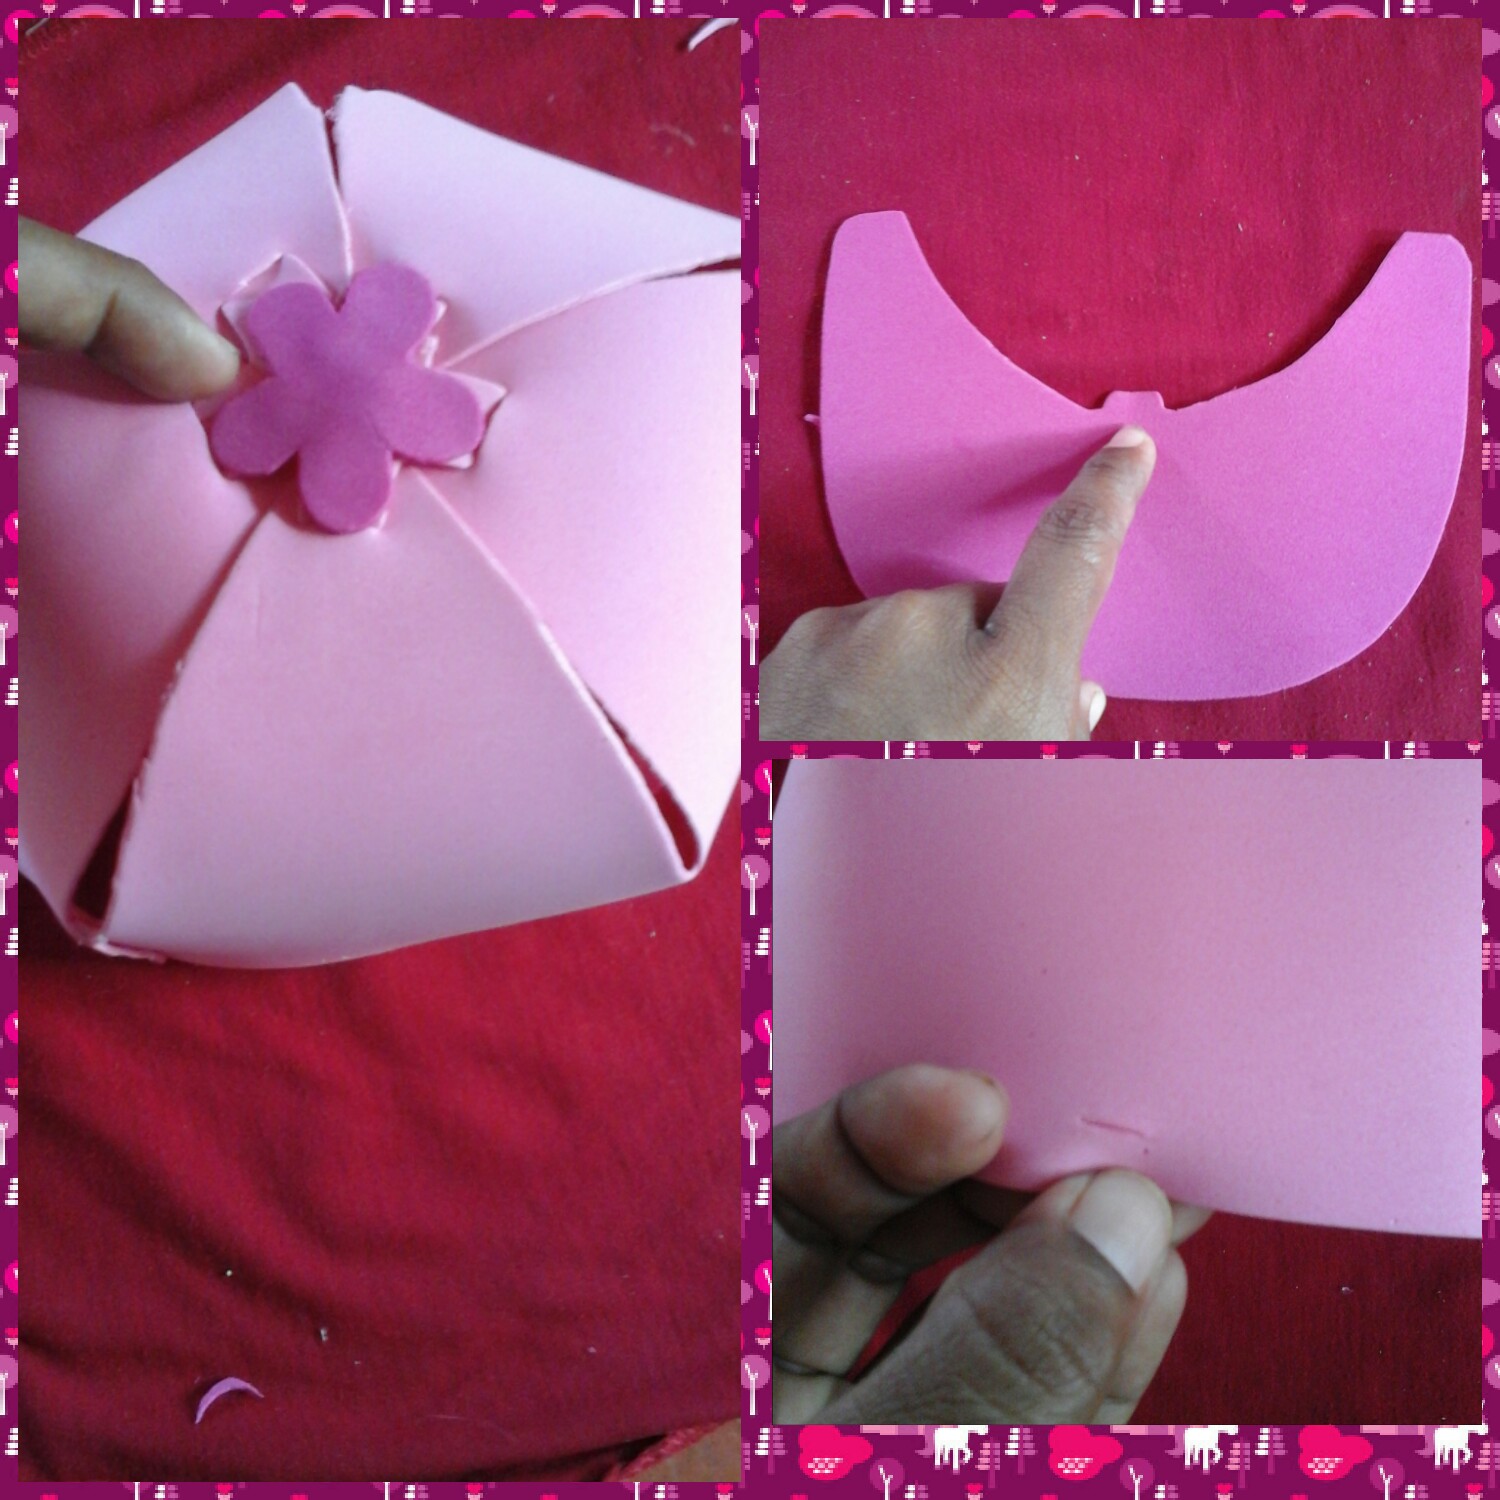
Con un poco de foami fucsia hacemos una flor de cinco petalos delgados, y pegamos sobre la parte superior de la gorra, esto es solo para decorar. Toma la gorra y hazle un pequeño corte en la parte frontal. Para hacer la visera, tomé un patrón de una gorra que ya no uso, marque y recorte, así obtuve una pieza exacta en la cual dejaremos en el borde un mini rectángulo la cual servirá para insertarlo a la parte frontal de la gorra.
With a little fuchsia foami we make a flower with five thin petals, and we glue it on the upper part of the cap, this is just for decoration. Take the hat and make a small cut in the front. To make the visor, I took a pattern from a cap that I no longer use, marked and cut it out, thus obtaining an exact piece in which we will leave a mini rectangle on the edge which will serve to insert it into the front part of the cap.
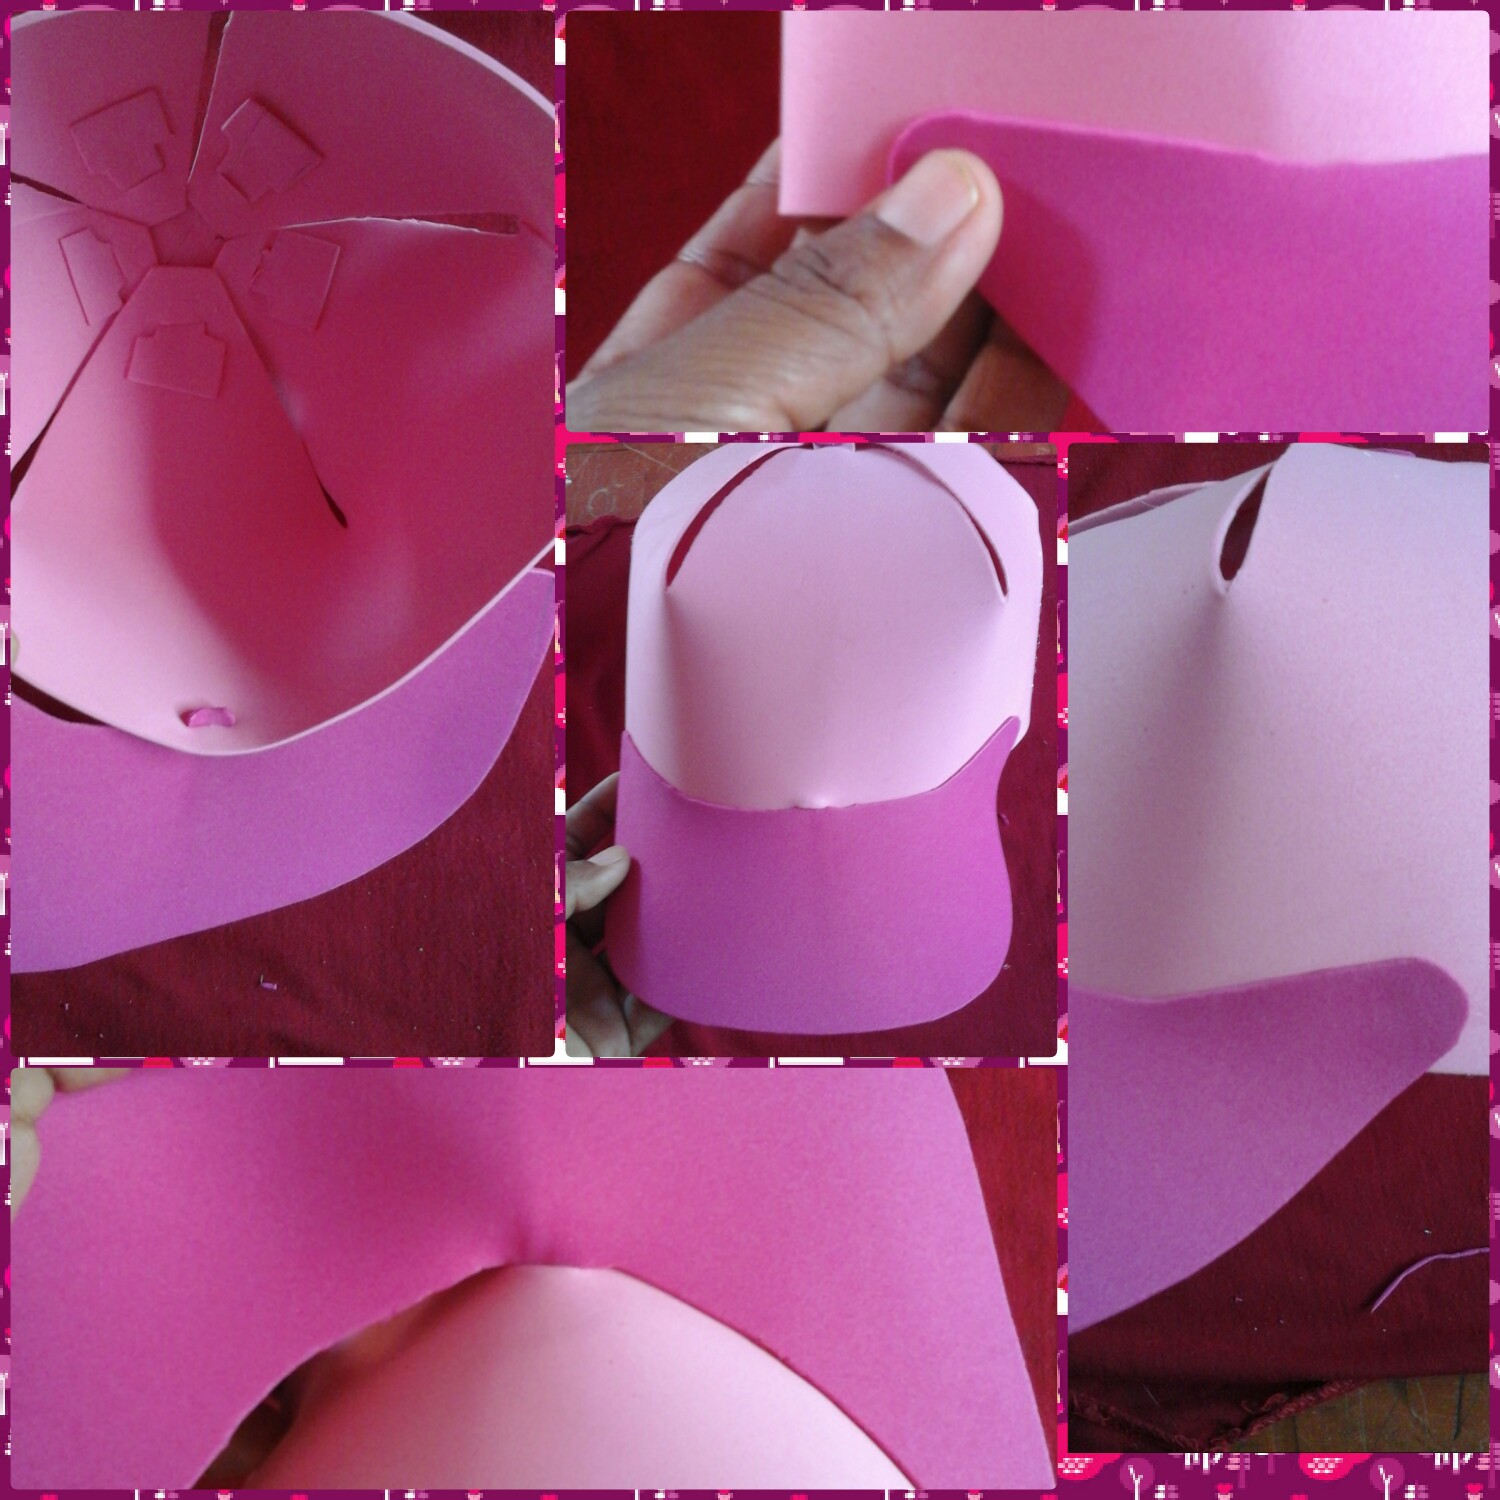
En este paso insertamos nuestra pieza arqueada a la parte frontal de la gorra y pegamos los extremos, derecho e izquierdo. Recordemos que está pieza es muy importante ya que les dará un poco de sombra al rostro de nuestras pequeñas.
In this step we insert our arched piece to the front of the cap and glue the ends, right and left. Let's remember that this piece is very important since it will give a little shade to the face of our little ones.
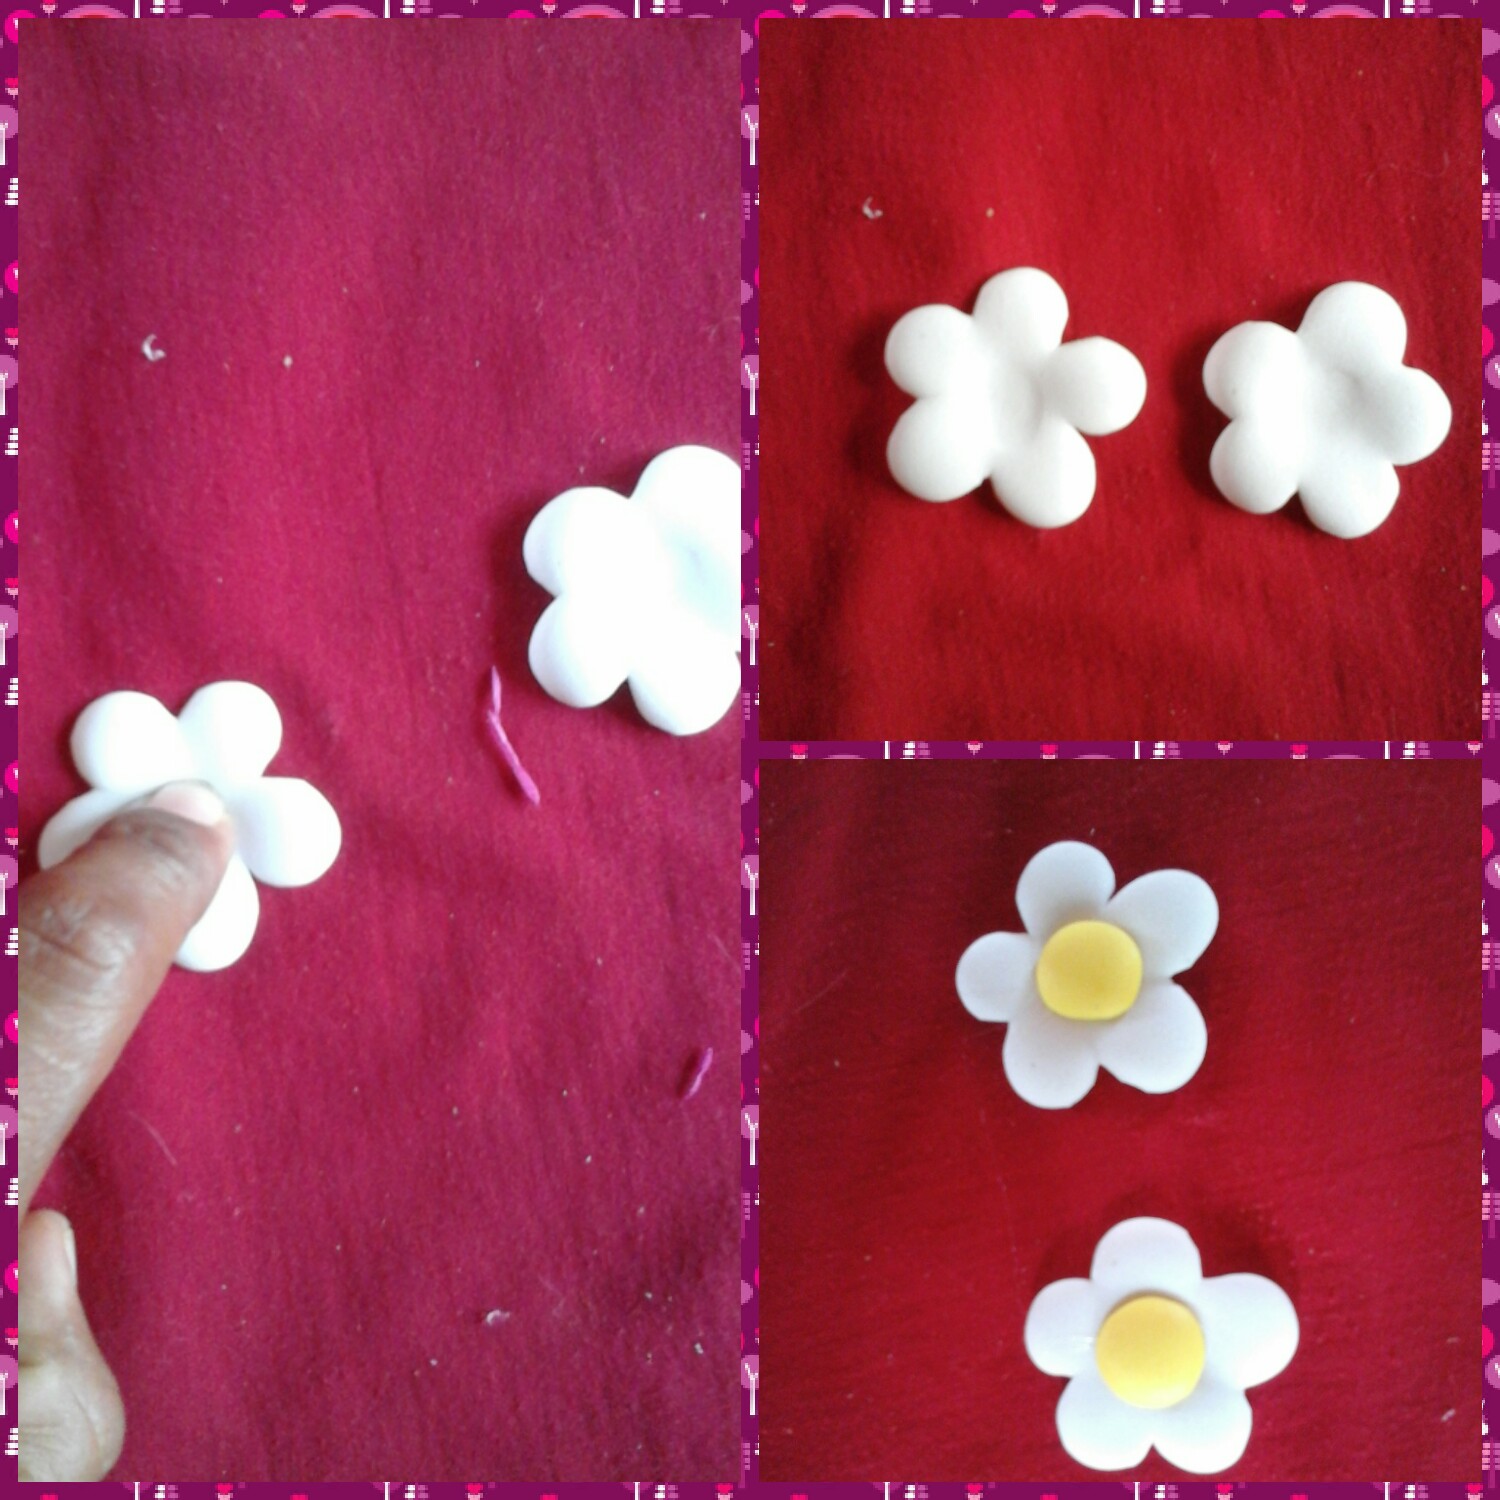
Ya casi finalizando el trabajo hacemos un par de flores blancas y colocamos sobre una plancha caliente para darle forma, colocamos el centro en amarillo. Una vez que terminemos de elaborar las flores, pegamos a los lados de la gorra.
Almost at the end of the work, we make a couple of white flowers and place them on a hot iron to shape them, we place the center in yellow. Once we finish making the flowers, we glue to the sides of the cap.
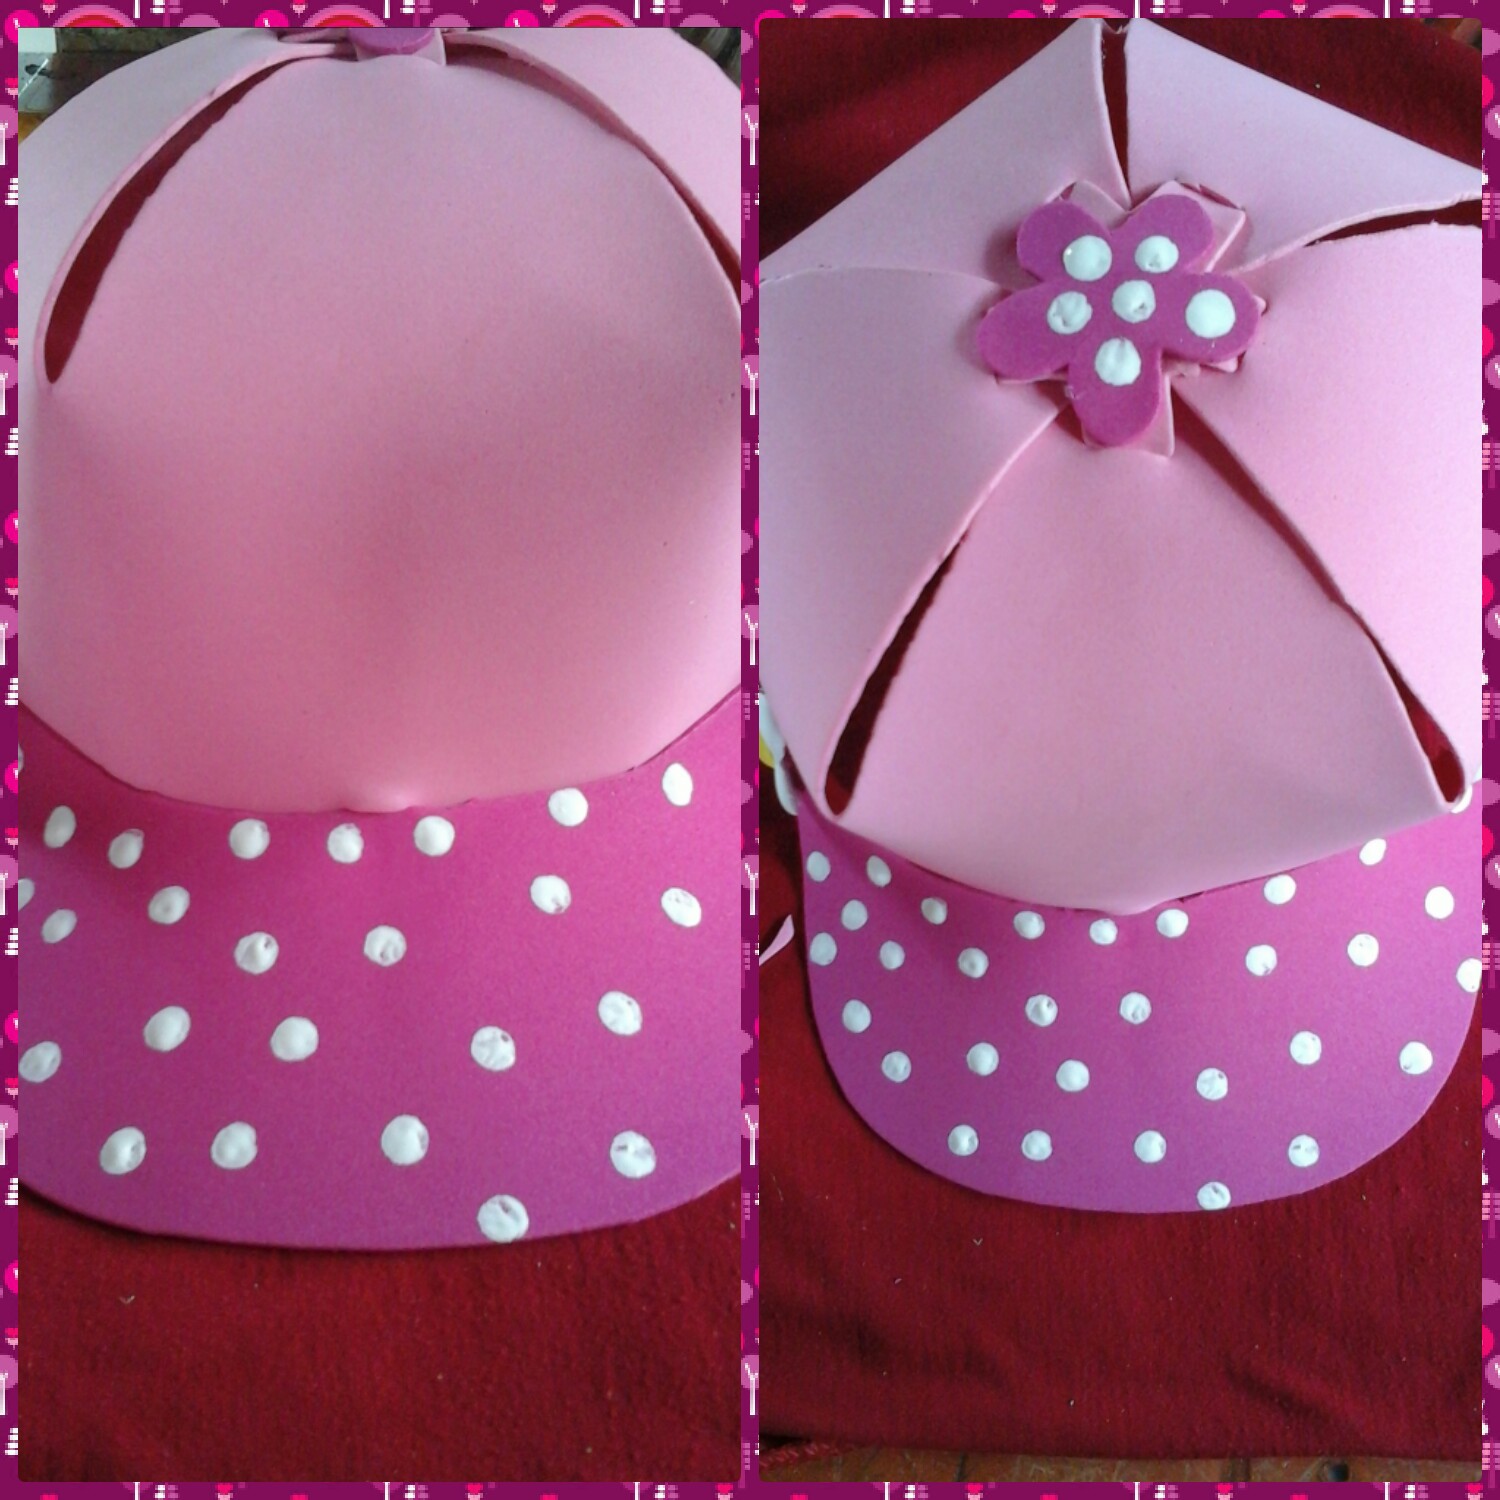
Para finalizar tomamos la parte inferior de un pincel que tenga el grosor de un lápiz, y sumerjimos un poco la punta en pintura blanca y vamos haciendo unos pequeños lunares a nuestra gorra.
To finish, we take the lower part of a brush that has the thickness of a pencil, and we dip the tip a little in white paint and we make some small polka dots on our cap.
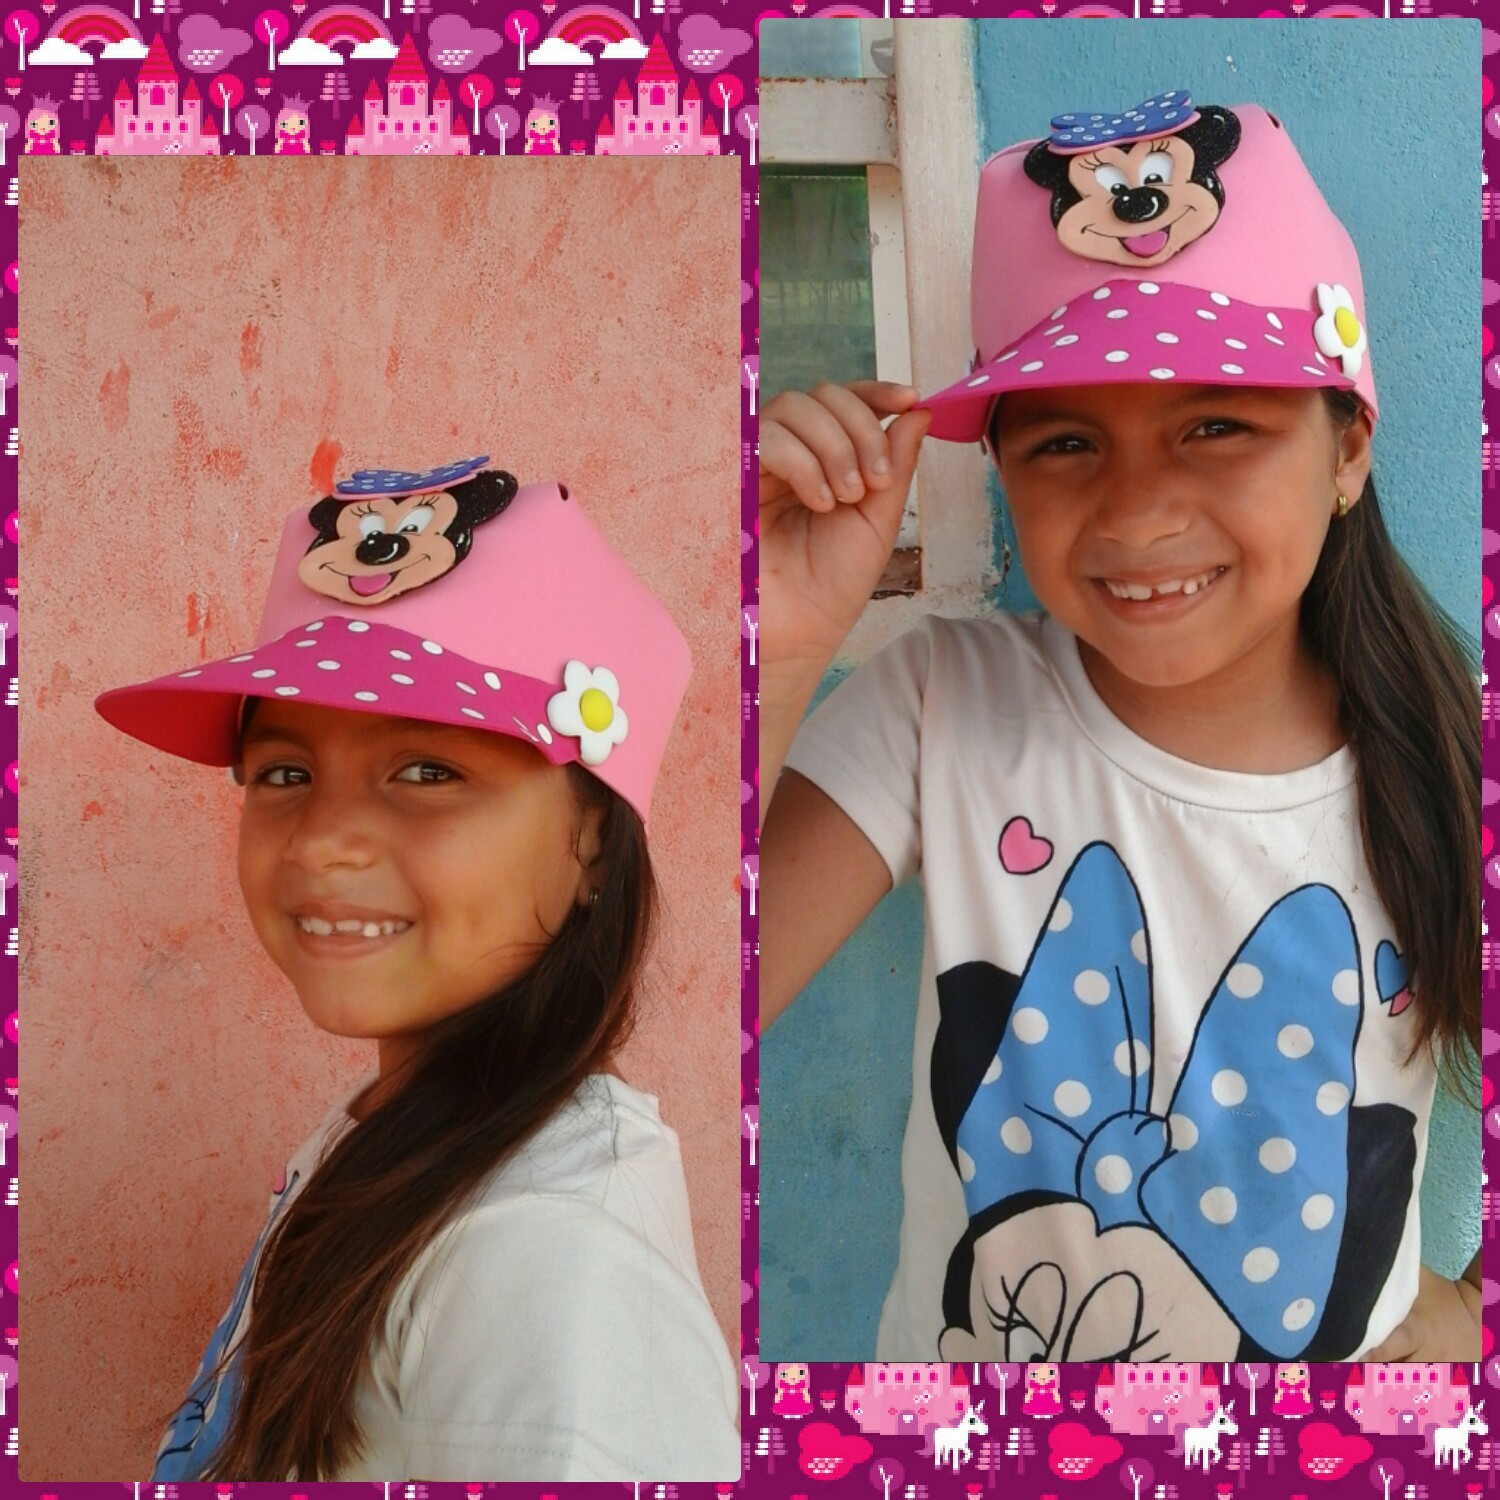
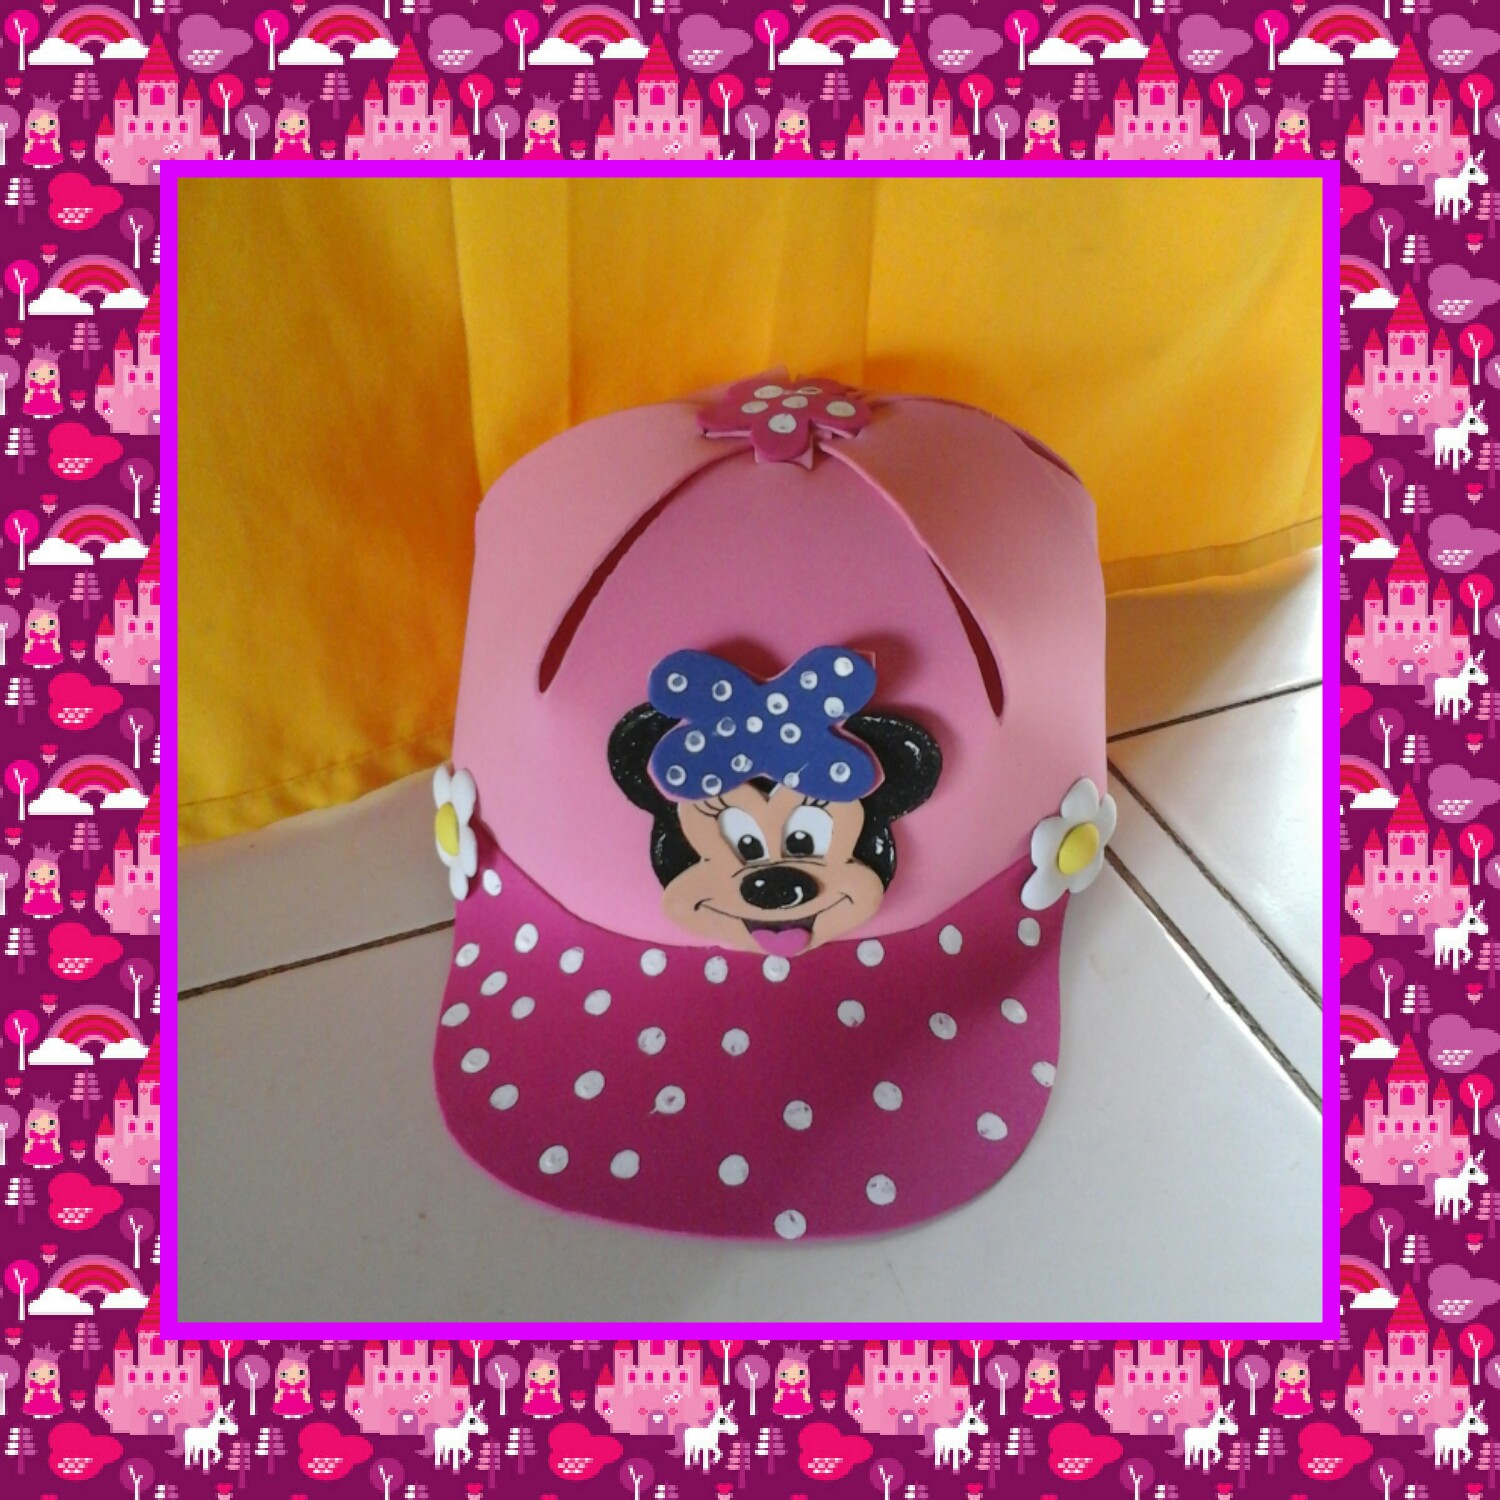
Para finalizar hice a mini y pegue a la parte forntal de la gorra. Si quieres puedes hacerle un lazo o pegar la aplicacion de tu preferencia. De ésta manera hemos terminado esta hermosa gorra rosada para las princesas de la casa. Esta gorra no solo las protegerá del sol sino que también las hará verse más coquetas.
To finish I made a mini and glued to the front part of the cap. If you want you can make a loop or paste the application of your choice. In this way we have finished this beautiful pink cap for the princesses of the house. This hat will not only protect them from the sun but will also make them look more flirty.
Hemos terminado este lindo trabajo de hoy, espero que les haya gustado y que puedan hacerlo en casa, puedes hacerle también a los chamos. Ante todo muchas gracias por visitar mi blog y tomarse un segundo de su tiempo para mirar mi publicacion. Agradecida y sin más que añadir me despido de ustedes deseandoles una feliz tarde con la paz de Dios.
We have finished this nice job today, I hope you liked it and that you can do it at home, you can also do it to the kids. First of all thank you very much for visiting my blog and taking a second of your time to look at my publication. Grateful and without further ado I say goodbye to you wishing you a happy afternoon with the peace of God.
Happy afternoon and have a good time!
Fotos capturadas por mi tablet Samsung galaxy y editadas por Collage_maker.
DO NOT FOLLOW any instruction and DO NOT CLICK on any link in the comment!
Nice keep it up.
if you haven't receive 100 HIVE and 200 LEO than vote LeoFinance for witness
LeoFinance is a well known and great project so i am vouching for it
Vote Here for LeoFinance and get 100 HIVE and 200 LEO now
No hagas click es scam.
Gracias por la alerta.