¡Saludos amigos Creativos de #HiveDiy!💕
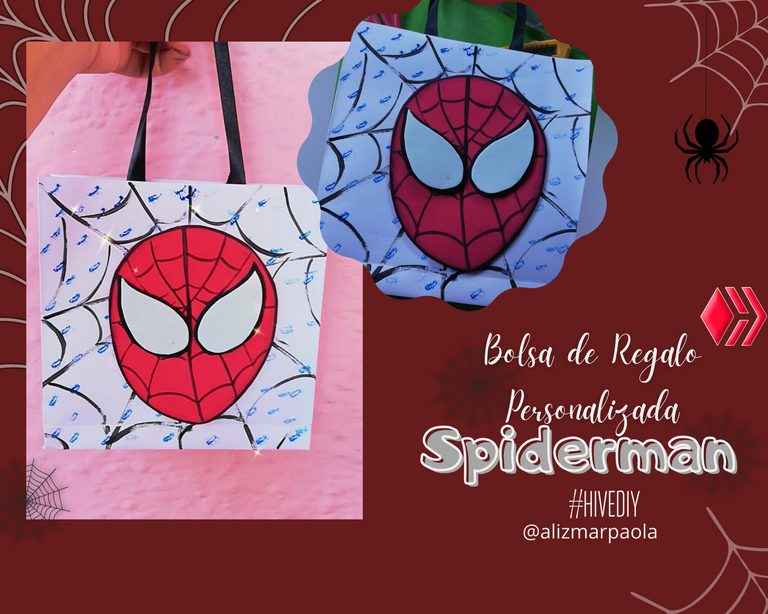
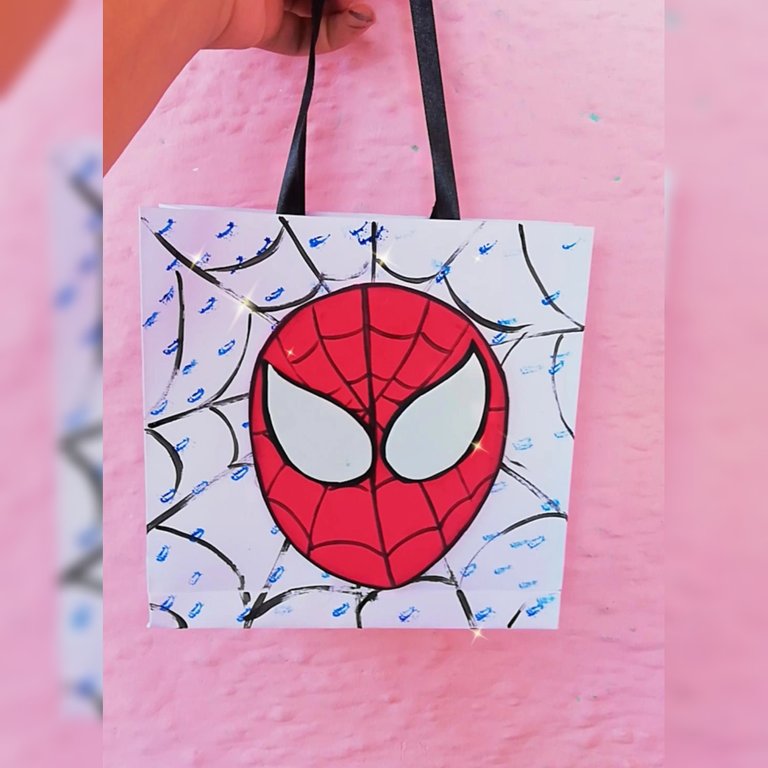
Por lo general en cada reunión, o en cada compartir me gusta dejar un toque personal en cuanto regalos se trata, este fin de semana celebramos el cumpleaños de los primitos de mi bebé, y pues para no comprar bolsa de regalo, decidí hacerla y con una de las temáticas de la fiesta, una bolsa totalmente personalizada. ¡Te muestro el proceso!
Greetings #HiveDiy Creative friends!💕
Usually in every meeting, or in every sharing I like to leave a personal touch when it comes to gifts, this weekend we celebrated the birthday of my baby's little cousins, and well to not buy gift bag, I decided to make it and with one of the themes of the party, a fully customized bag. I show you the process!

Materiales | Materials
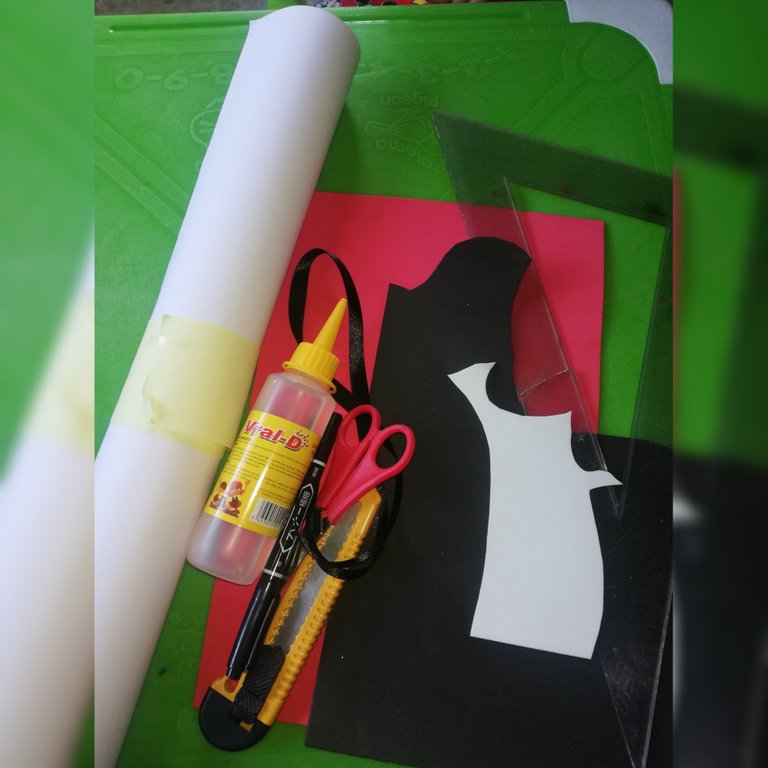
- Cartulina blanca
- Foami rojo, blanco y negro
- Marcador negro
- Silicón
- Tijera
- ½ metro de cinta negra
- Regla
- White cardboard
- Red, white and black Foami
- Black marker
- Silicone
- Scissors
- ½ meter of black tape
- Ruler

Elaboración | Elaboration
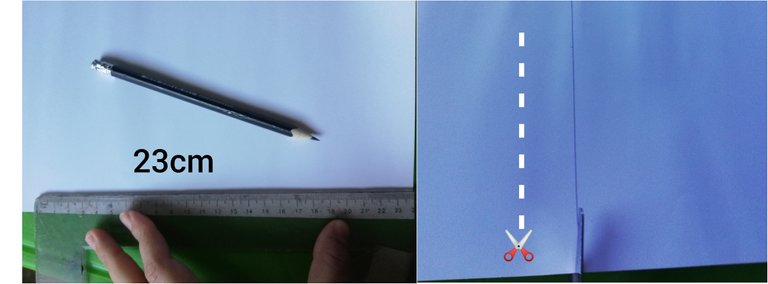
Paso N°1: En la cartulina blanca medi 23cm x lo ancho que trae la misma que era de 48cm. Luego recorte.
Step N°1: On the white cardboard measure 23cm x the width of the same which was 48cm. Then cut out.
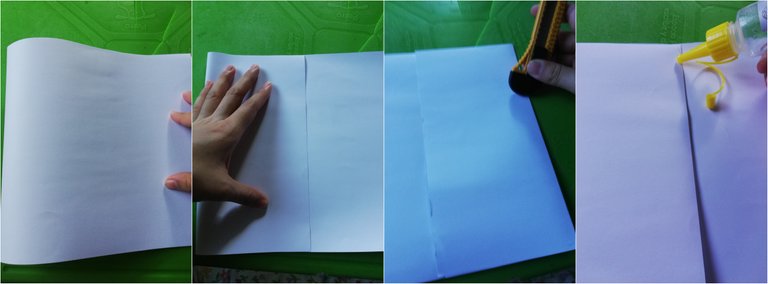
Paso N°2: Luego hice un medio dobles a la mitad solo para ubicar el centro, para proceder a doblar en dos caras a poco más de un cm. Con el corta exacto perfeccione los dobles y pegue en el centro.
Step N°2: Then I made a half fold in half just to place the center, to proceed to fold on two sides to just over one cm. With the exact cutter, perfect the doubles and glue in the center.
Paso N°3: Luego medi aproximadamente 5cm en la parte inferior, y procedi a doblar y a remarcar bien el doblez con el corta exacto.
Step N°3: Then measure approximately 5cm at the bottom, and proceed to fold and mark the fold well with the exact cutter.
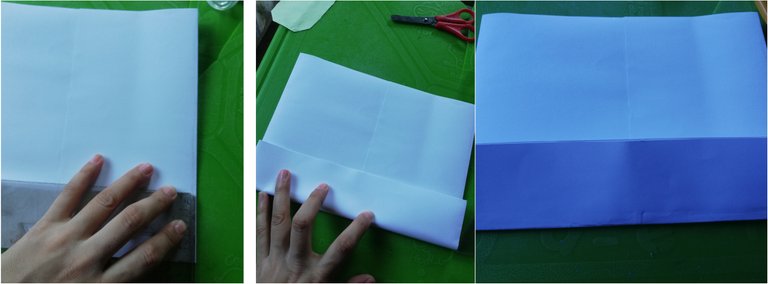
Paso N°4: Abrí el doblez para que al desplegar el mismo quedase en cada lado un triangulo el cual remarcamos bien sus orillos. (ver fotos)
Step N°4: I opened the fold so that when I unfolded it, a triangle was left on each side and the selvages were well marked (see pictures).
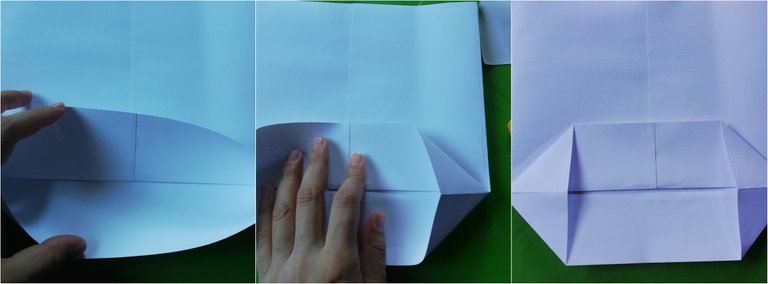
Paso N°5: Trabajé en la parte inferior (donde pronuncié los triángulos) Doble a poco más del centro y repetí el proceso con la otra aleta, quedando los doblez tal como se muestra en la fotografía.
Step N°5: I worked on the lower part (where I pronounced the triangles) I folded a little more than the center and repeated the process with the other flap, leaving the folds as shown in the picture.
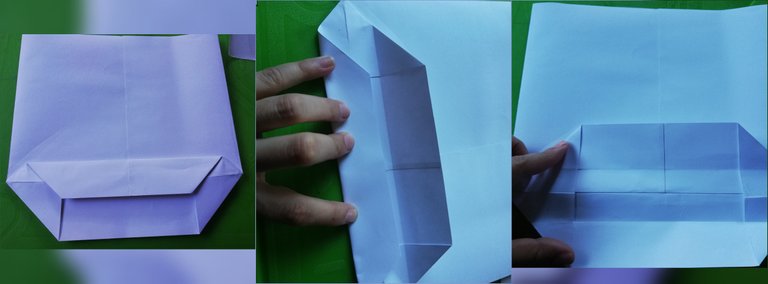
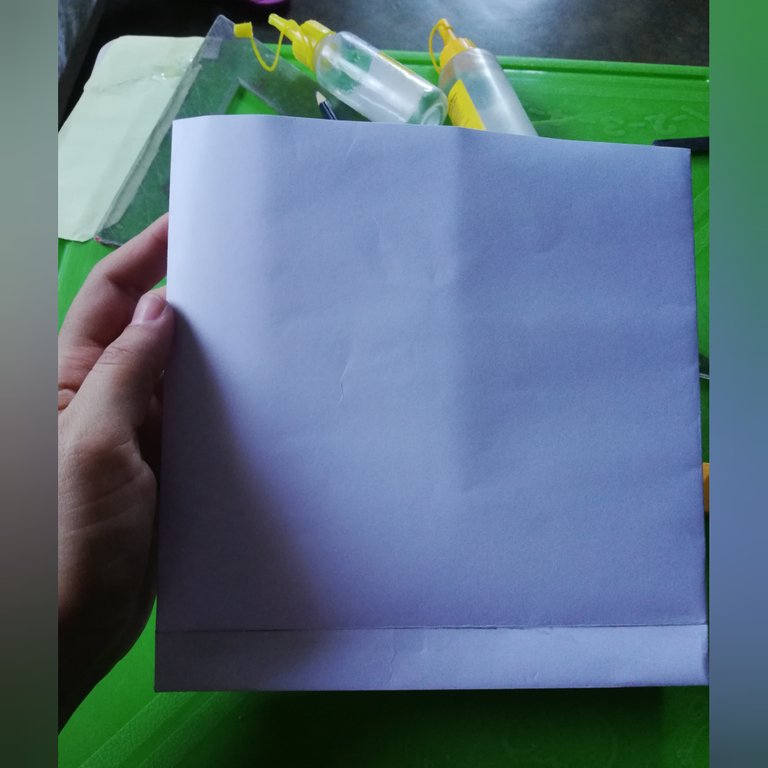
Paso N°6: Apliqué pegamento justo donde se formaban los triángulos pequeños, para de esta forma sellar la parte baja de la bolsa. Luego doble uno de los costados uniendo las aristas. (ver foto)
Step 6: I applied glue just where the small triangles were formed to seal the bottom of the bag. Then fold one of the sides joining the edges (see photo).
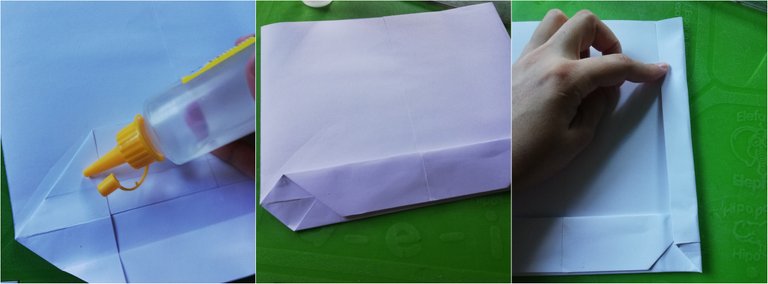
• Una vez hecho el paso anterior fue momento de abrir la bolsita, y se podía apreciar de la siguiente forma..
• Once the previous step was done, it was time to open the bag, and it could be seen as follows....
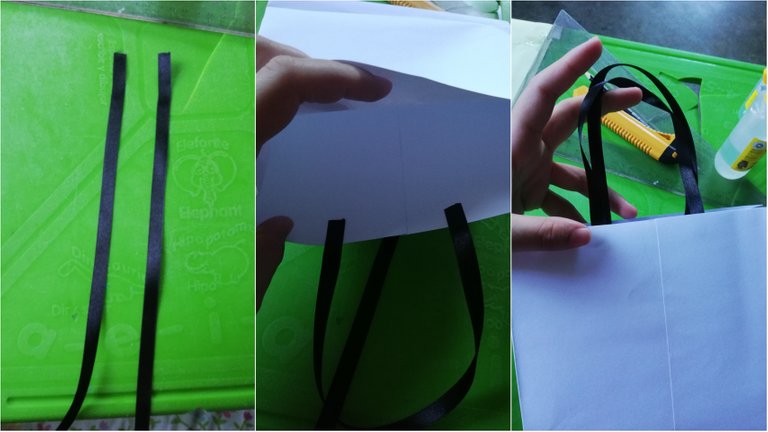
Paso N°7: Dispuse del ½ metro de cinta el cual dividi en dos y procedí a pegar en cada uno de los lados de la bolsa.
Step N°7: I divided ½ meter of ribbon in two and proceeded to glue it on each side of the bag.

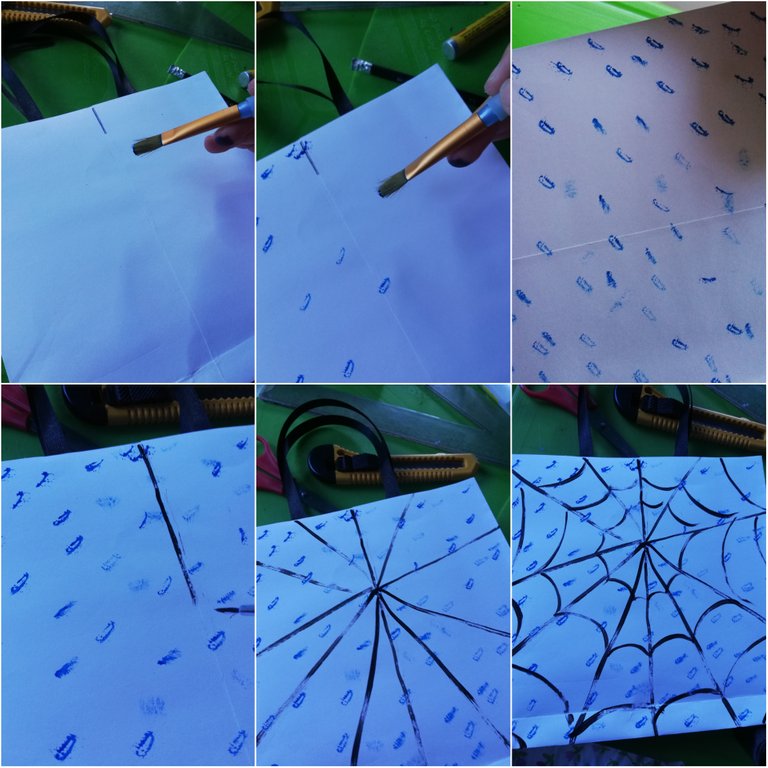
- Pará el decorado | For decoration
Paso N°8: Tomé un pincel y un poco de pintura azul para dar lguns puntadas, luego con pintura negra dibuje sobre la parte que seleccione como frontal una telaraña. (Esto par dar otro toque a mi bolsa).
Step N°8: I took a brush and some blue paint to make a few stitches, then with black paint I drew a spider's web on the part I selected as the front (this to give another touch to my bag)..
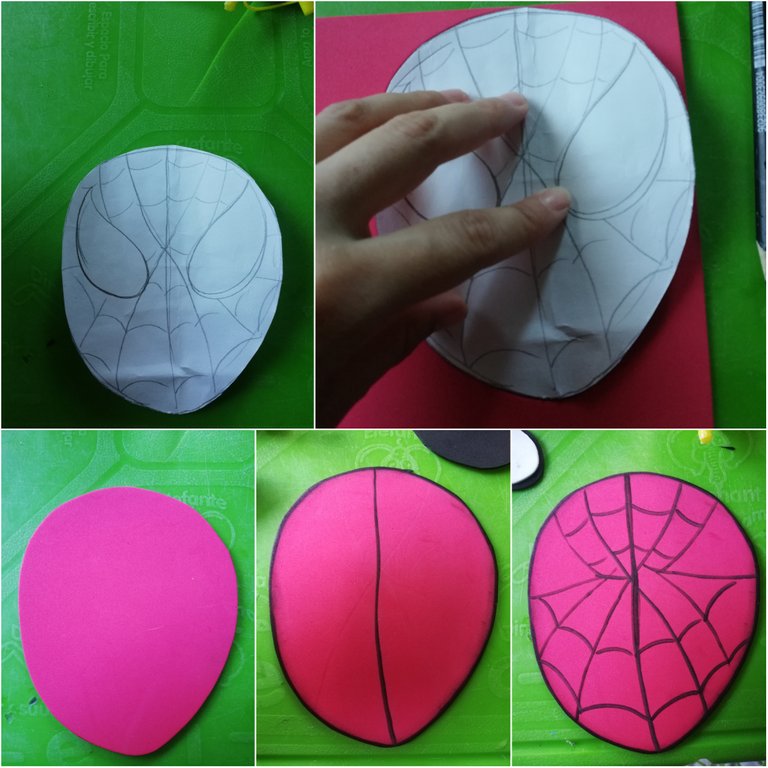
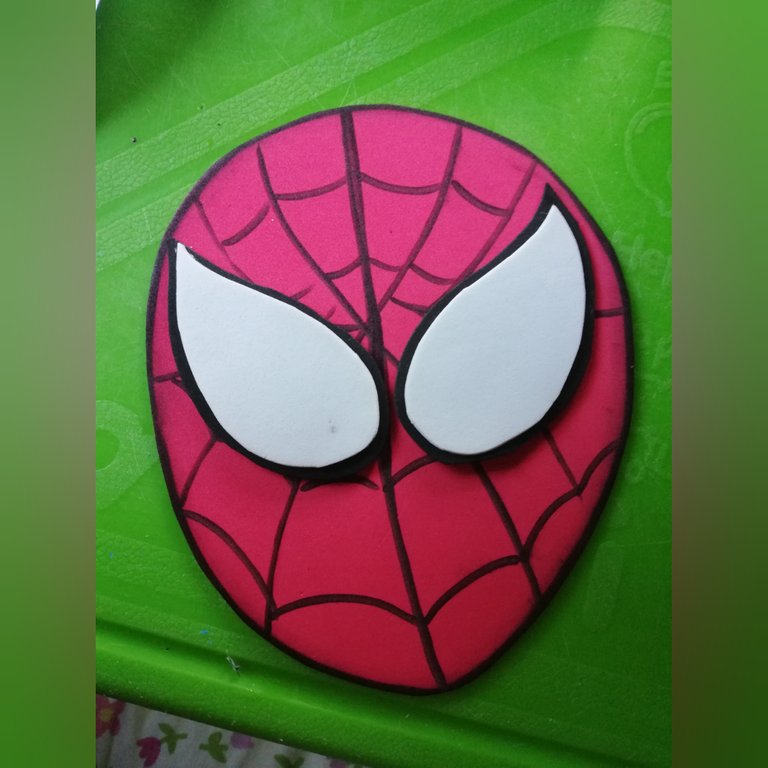
Paso N°9: En una hoja dibuje la cara de spiderman, recorté y utilice como patrón para marcar y recortar en e foami rojo, con el marcador negro difumine todo el borde y realice líneas simulando la telaraña.
Step N°9: On a sheet of paper draw spiderman's face, cut it out and use it as a pattern to mark and cut it out on red foami, with the black marker blur the entire edge and make lines simulating the spider's web.
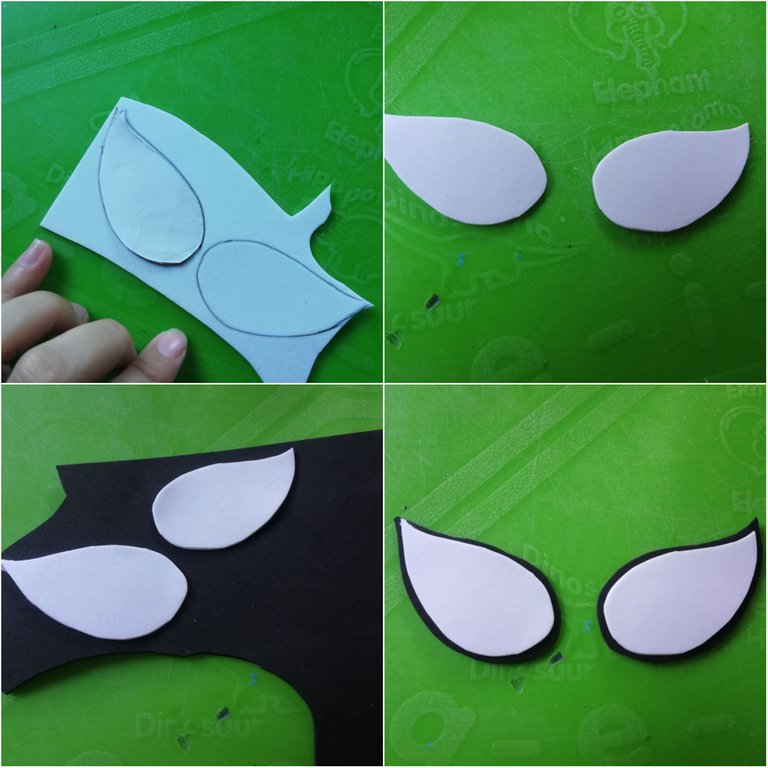
Paso N°10: En el foami color blanco marque los ojos del spiderman, luego recorte y pegue sobre el foami negro para luego recortar nuevamente pero esta dvez dejando un pequeño borde.
Step 10: On the white foami mark the eyes of the spiderman, then cut out and paste on the black foami and cut out again but this time leaving a small border.
• De esta forma quedo mi fácil y estupendo spiderman. Listo para pegar en la bolsa.
• This is how my easy and great spiderman turned out. Ready to glue on the bag.
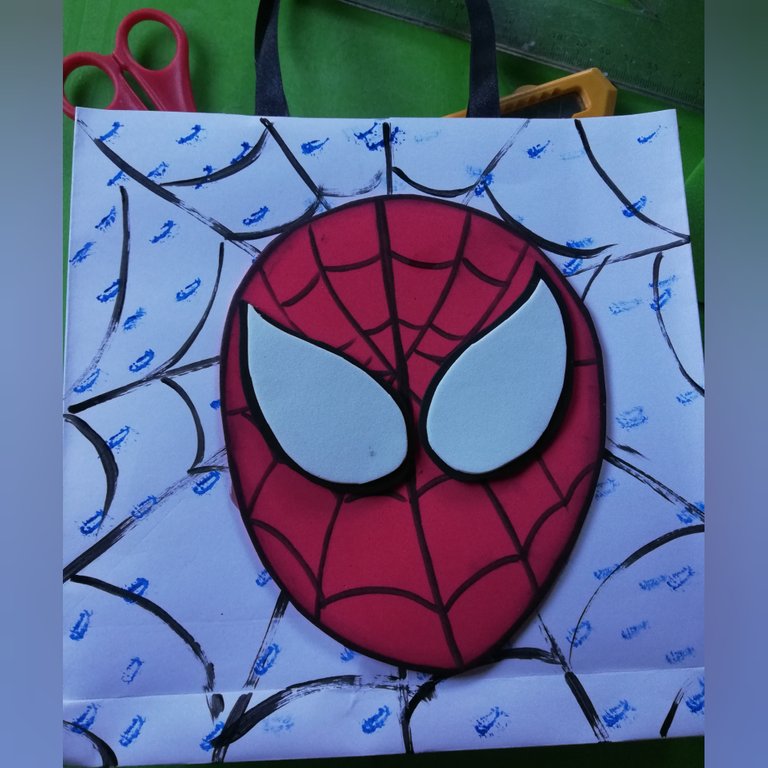

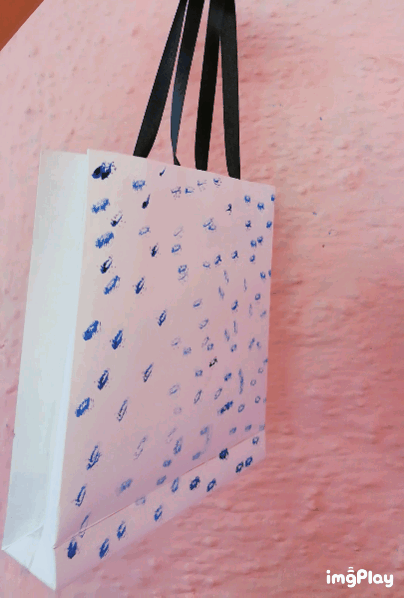
Resultado | Result
Espero esta publicación sea de su agrado y les resulte útil💕
Hasta pronto..
I hope you find this publication useful💕
See you soon..
Ediciones en Canva y Picstar | Editing in Canva and Picstar
**Traducciones en Deepl.com | Translations in Deepl.com

Thank you for sharing this amazing post on HIVE!
Your content got selected by our fellow curator @rezoanulvibes & you just received a little thank you via an upvote from our non-profit curation initiative!
You will be featured in one of our recurring curation compilations and on our pinterest boards! Both are aiming to offer you a stage to widen your audience within and outside of the DIY scene of hive.
Join the official DIYHub community on HIVE and show us more of your amazing work and feel free to connect with us and other DIYers via our discord server: https://discord.gg/mY5uCfQ !
If you want to support our goal to motivate other DIY/art/music/homesteading/... creators just delegate to us and earn 100% of your curation rewards!
Stay creative & hive on!
The rewards earned on this comment will go directly to the people sharing the post on Twitter as long as they are registered with @poshtoken. Sign up at https://hiveposh.com.