Tutorial para realizar un banquito con botellas de refrescos y contribuir con el medio ambiente / Tutorial to make a bench with soft drink bottles and contribute to the environment

Hello friends from the @ built-it community and from #hive, today after being away for a long time I'm back to bring you an extraordinary idea to make better use of some soda pots and this way to contribute to the environment, as you can see in the photo it is a bench for my daughter but made with soda bottles
A way to reuse soda pots for our benefit, and in this way take advantage of the materials that we think are waste, and in this way contribute to the environment so as not to pollute the planet, my daughter he loved his little bench to sit and play, his face says it all
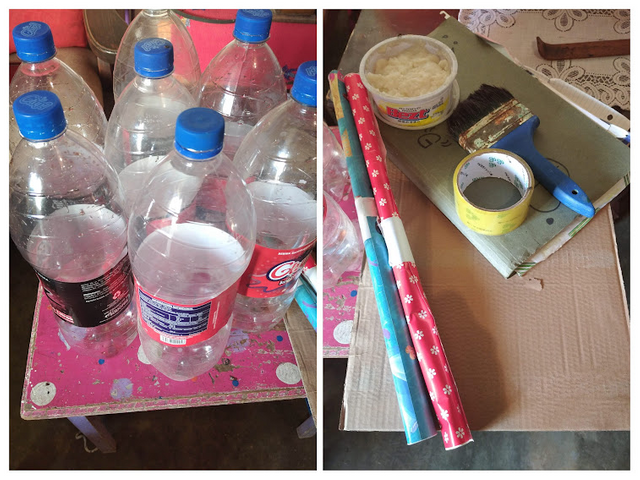
Para realizar este banquito utilice lo siguiente:
- 7 Potes de refresco Bacios claro
- Cinta adhesiva
- Tijera
- Pega casera hecho con harina de trigo
- Papel de regalo para forrar
- Papel de figuras de princesas para decorar
- Hojas de reciclaje
To make this stool use the following:
- 7 Bacios clear soda pots
- Scotch tape
- Scissor
- Homemade paste made with wheat flour
- Gift wrap for lining
- Paper princess figures to decorate
- Recycling sheets
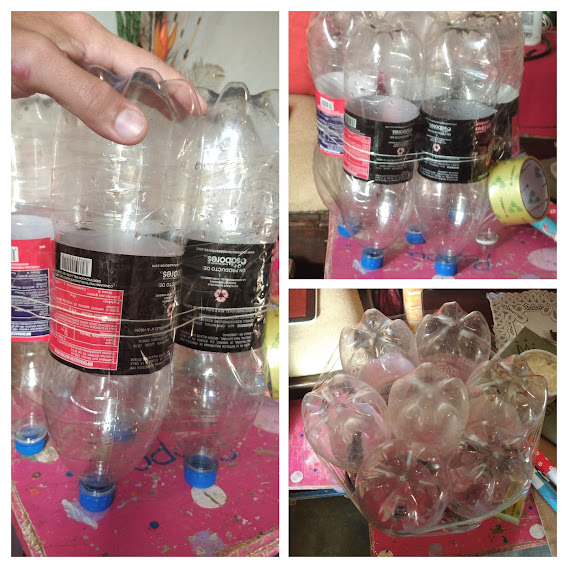
The first thing we must do is join the seven (7) pots of soda with our adhesive tape so that they stay together and firm remember that in the union is the force, in this way the pots will remain together and more resistant to the weight of the person, we can add two more pots and we can create a bench that supports our weight
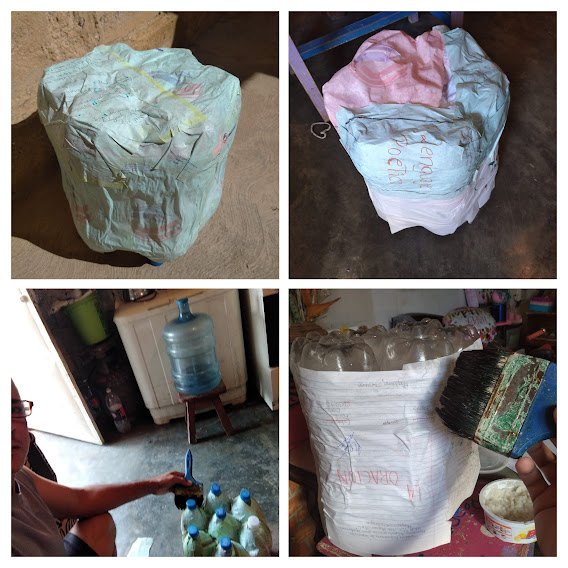
Once we have wrapped our pots with the adhesive tape, we proceed to line the pots with the homemade glue and the recycling sheets to continue strengthening the bench, we are going to place three or four layers always carrying in the sun to dry each time we stick a layer of leaves
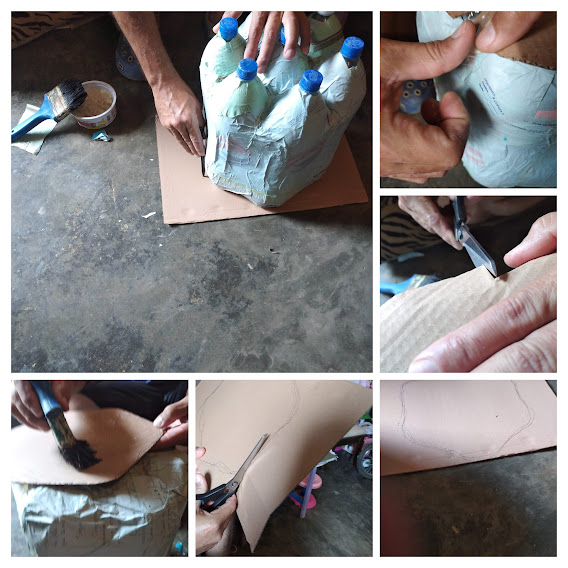
When we see that it is very dry we are going to make the seat with three layers of cardboard, first we mark by placing what will be the seat towards the cardboard to trace it and then cut it and stick it with glue and taking it to the sun to dry again
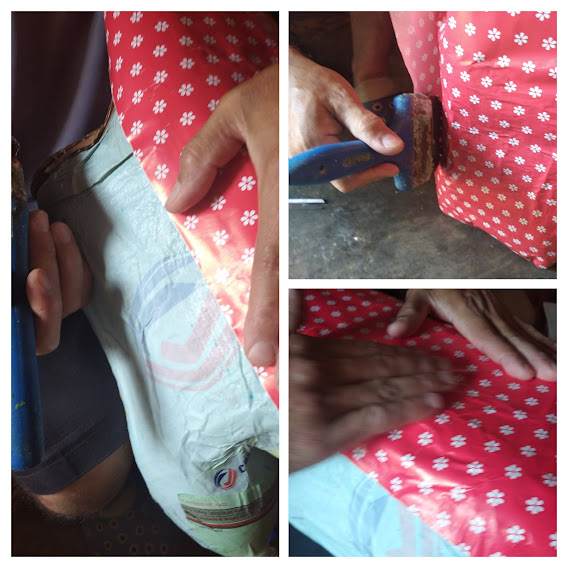
The next step will be to line our bench with the wrapping paper we chose, I used a pink one with little flowers as it was for my daughter, to attach the paper to the bench we used the homemade glue again and took it to the sun to dry
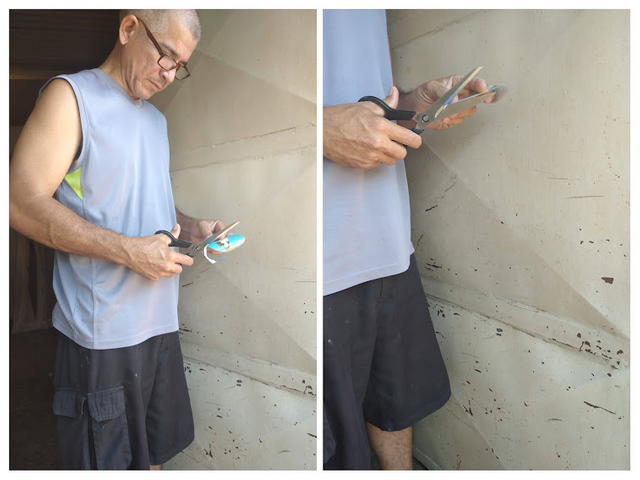
Ahora procedemos a recortar las figuras de princesas para decorar nuestro banquito y de esta forma resalte mucho mas
Now we proceed to cut the figures of princesses to decorate our bench and in this way stand out much more
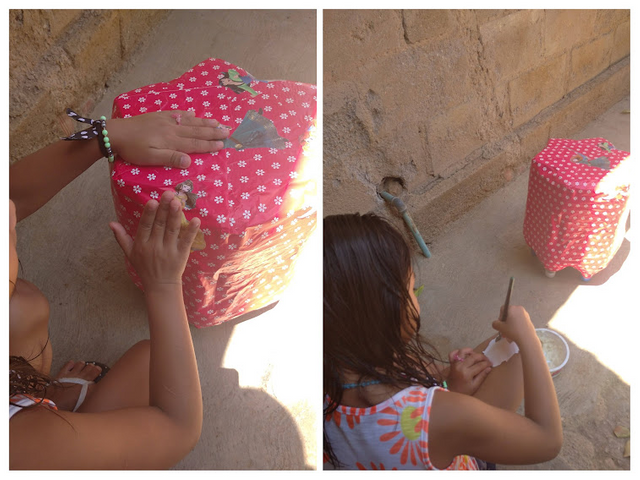
Y pegamos las figuras sobre nuestro banquito aquí mi hija me ayudo ya que quería su banquito rápido
And we glued the figures on our stool here my daughter helped me as she wanted her stool quickly
Y aquí tenemos a mi hija posando para mostrarles su preciado banquito ecológico con materiales de provecho
And here we have my daughter posing to show you her precious ecological bench with useful materials

Bueno amigos hasta aqui el paso a paso de este proyecto que a mi hija le encanto mucho, gacias por visitarme nos vemos en otra publicacion y que Dios los bendiga
@strong56
Recuerden en nuestra mente hay muchas cosas maravillosas, solo tenemos que buscarlas y ponerlas en practica saludos
Well friends so far the step by step of this project that my daughter loved very much, thank you for visiting me, see you in another publication and God bless you
@ strong56
Remember in our mind there are many wonderful things, we just have to look for them and put them into practice greetings
Congratulations @strong56! You have completed the following achievement on the Hive blockchain and have been rewarded with new badge(s):
Your next target is to reach 100 upvotes.
You can view your badges on your board and compare yourself to others in the Ranking
If you no longer want to receive notifications, reply to this comment with the word
STOPSupport the HiveBuzz project. Vote for our proposal!