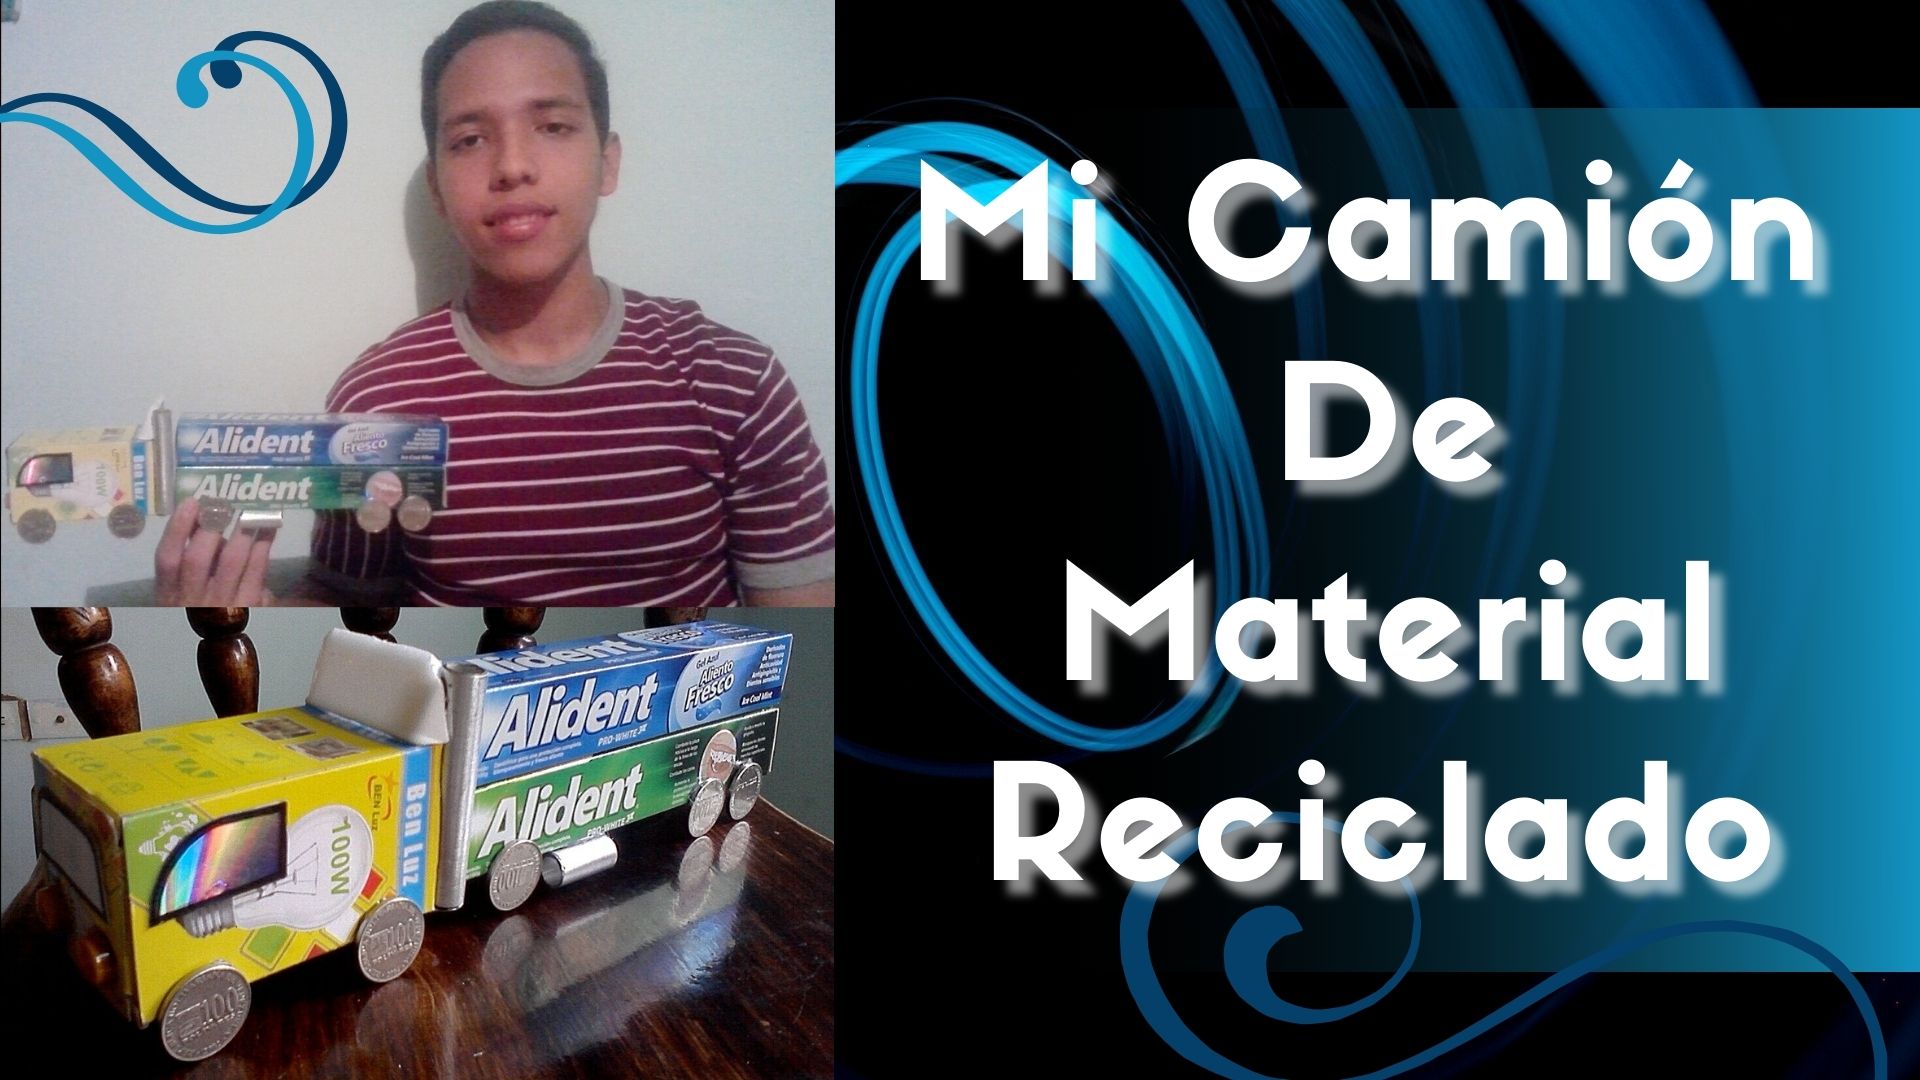
Good morning Hive friends, today I want to show you a creativity that I found very interesting, as I collected some waste materials that I thought were useless, but putting a little imagination I wanted to make a nice truck, with two boxes of toothpaste and a box of a light bulb. Now you are going to see how I made it step by step.
Materiales:
- 2 caja de crema de diente.
- 1 caja de un bombillo.
- Segueta.
- 1 paleta de madera.
- Marcador.
- Regla.
- Pincel.
- Tijera.
- Monedas.
- Pintura.
- Cilicona.
- 1 tubo de aluminio delgado.
- 2 pedacito de CD.
- 1 blíster de pastilla vacío.
Materials:
- 2 box of toothpaste.
- 1 box of a light bulb.
- Reamer.
- 1 wooden palette.
- Marker.
- Ruler.
- Paintbrush.
- Scissors.
- Coins.
- Paint.
- Cilicone.
- 1 thin aluminum tube.
- 2 piece of CD.
- 1 empty tablet blister.
.jpg)

Paso 1:
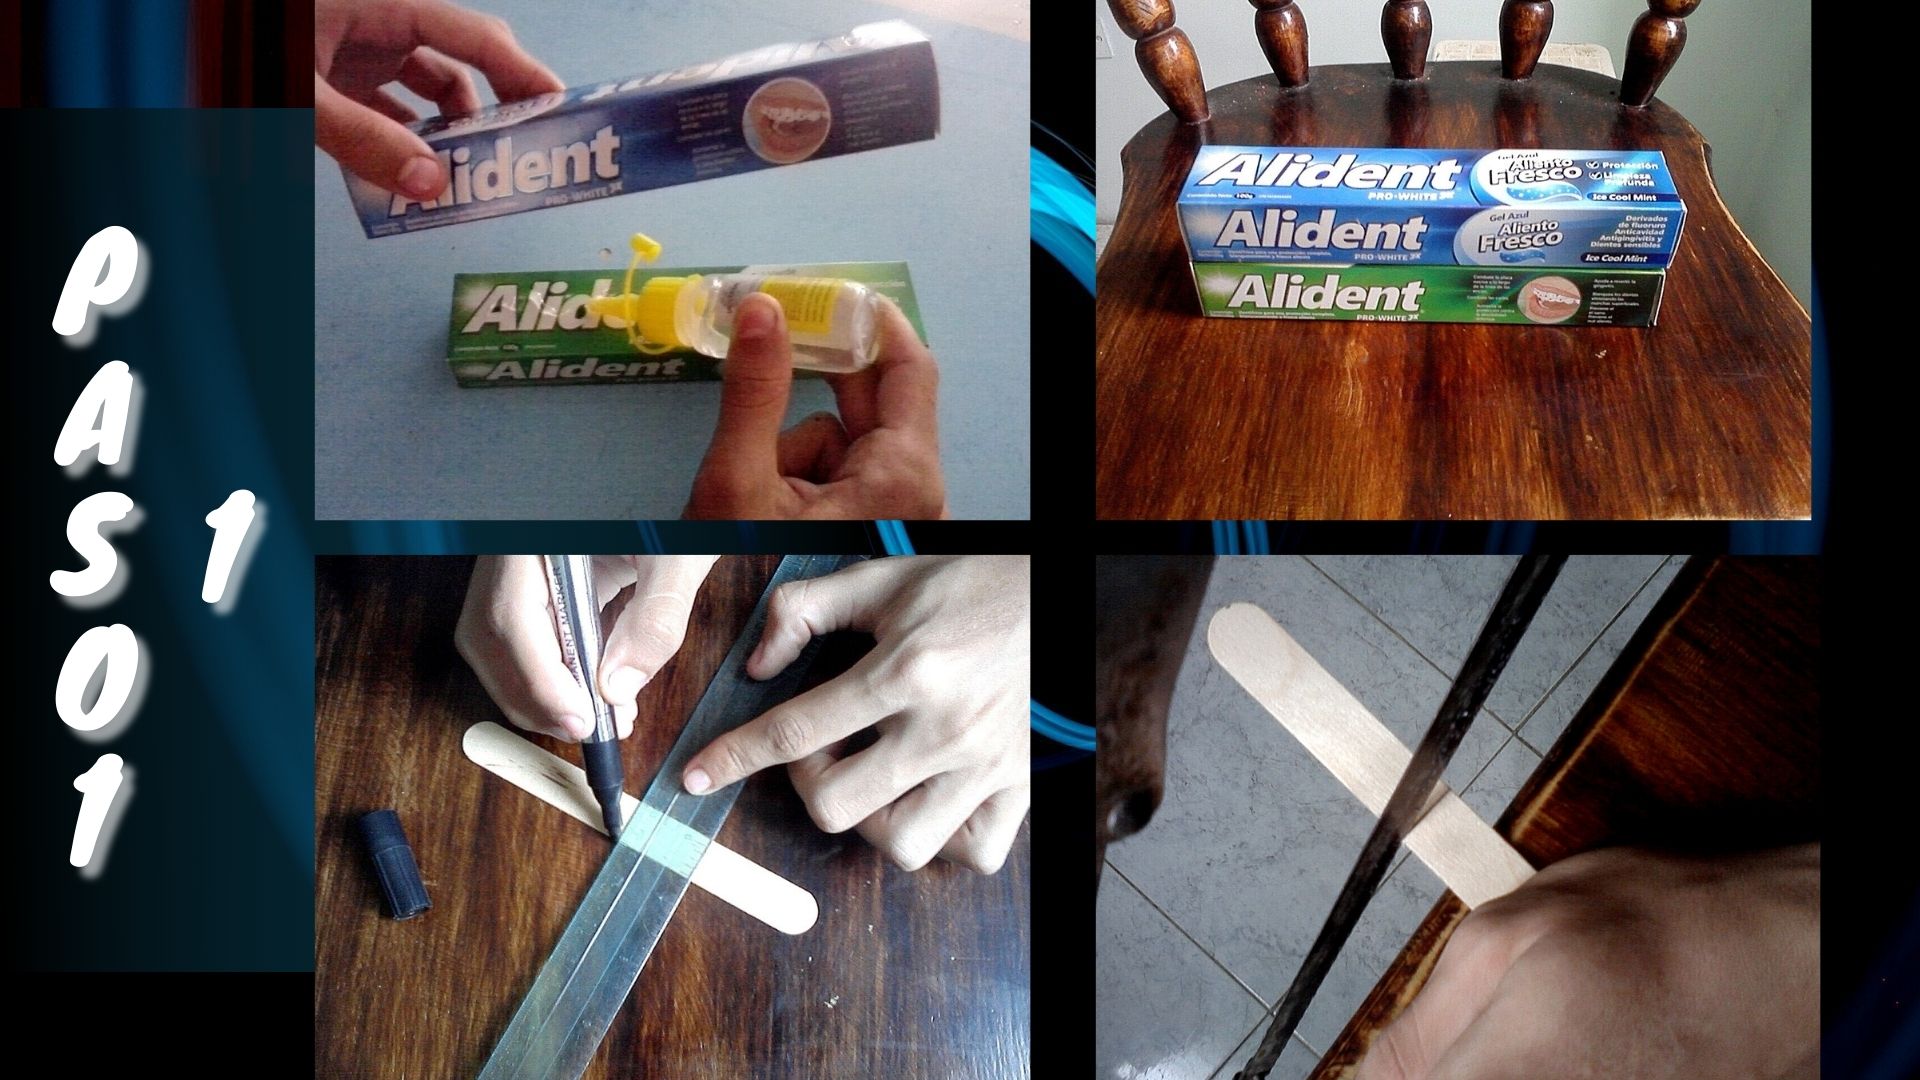
Se comienza pegando las 2 cajas larga, luego se marca la paleta de madera por la mita y se procede a cortar.
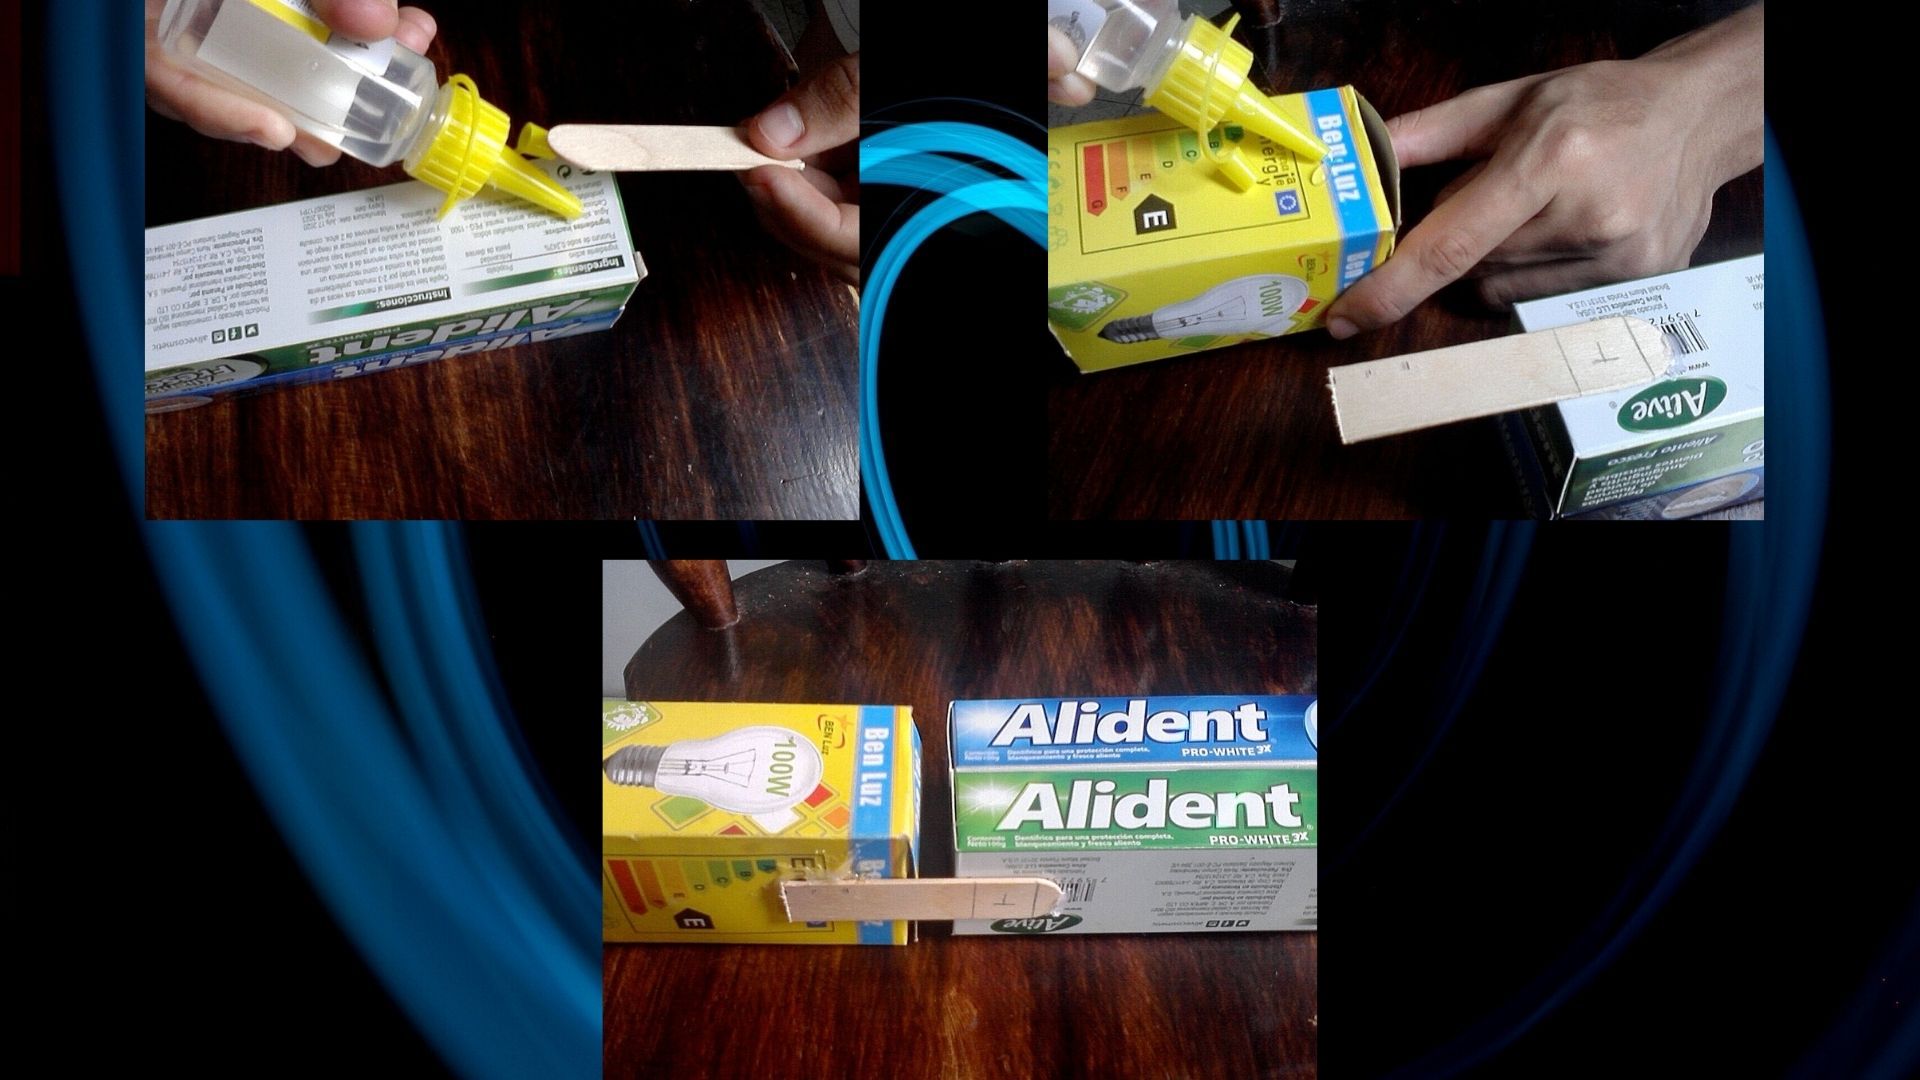
Con la silicona se pega la mita de la paleta, para unir la caja pequeña con las otras dos.
Step 1:
- Start by gluing the 2 long boxes, then mark the half of the wooden pallet and proceed to cut.
- With the silicone glue the half of the pallet, to join the small box with the other two.

Paso 2:
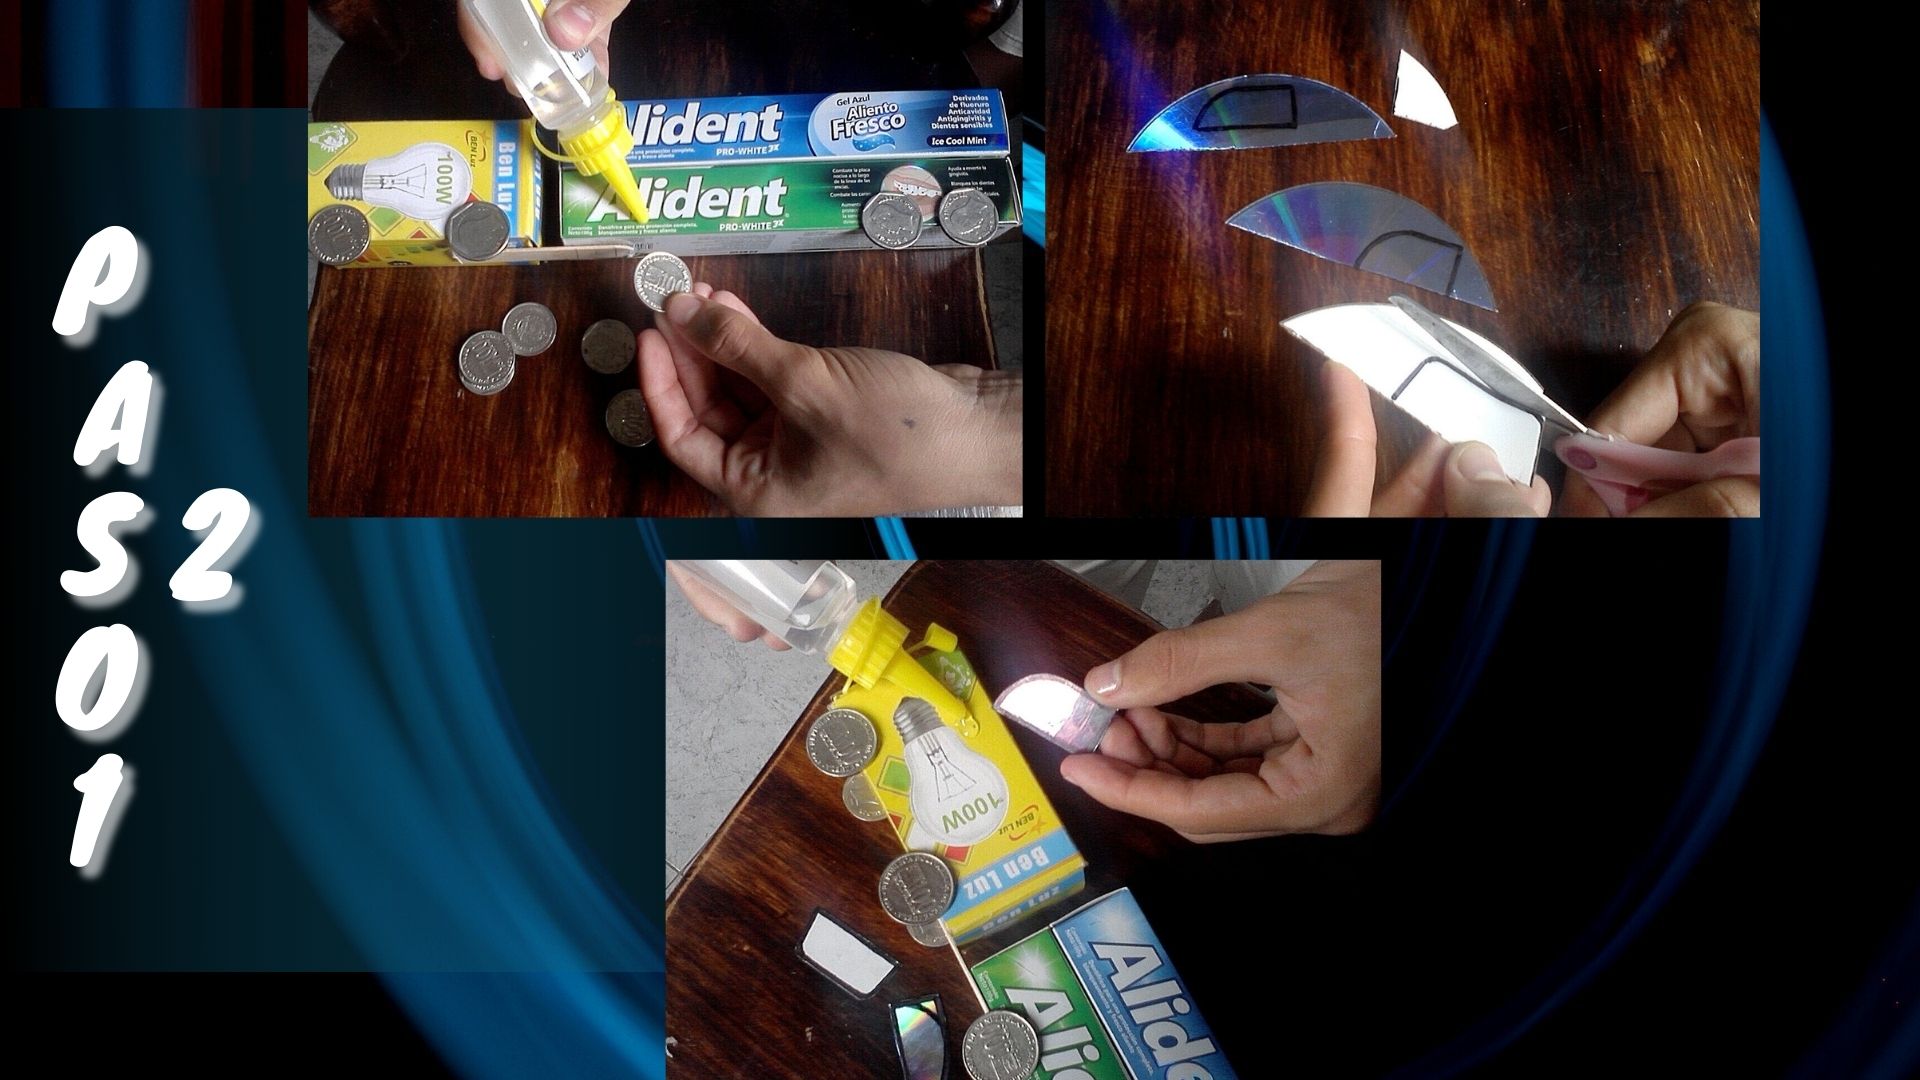
Se le pegan las monedas que vendrían siendo las ruedas del camión.
Se recorta el CD que forman las ventanas y se pegan.
Step 2:
- Glue the coins that would be the wheels of the truck.
- Cut out the CD that form the windows and glue them.

Paso 3:
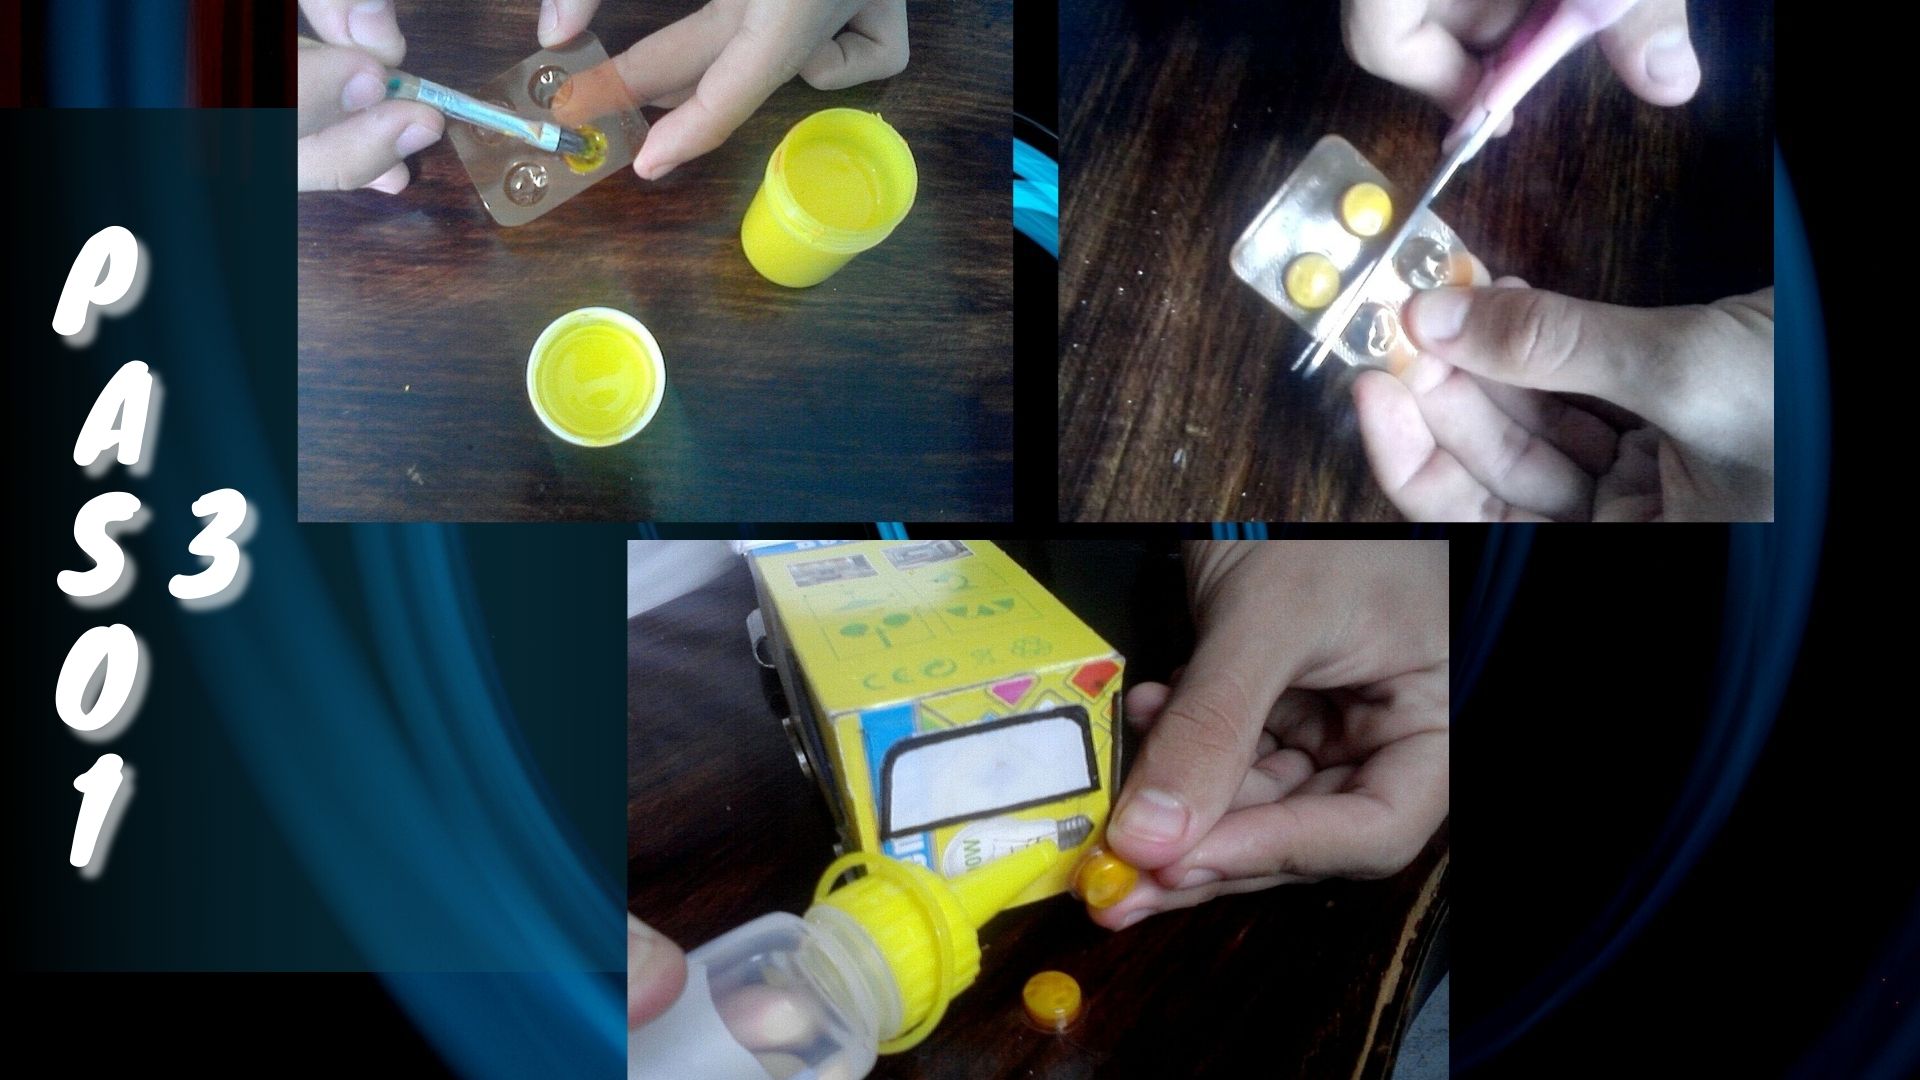
Luego se pintan con el color amarillo los orificios por la parte interior del blíster. Después se corta para ser pegados como focos del camión.
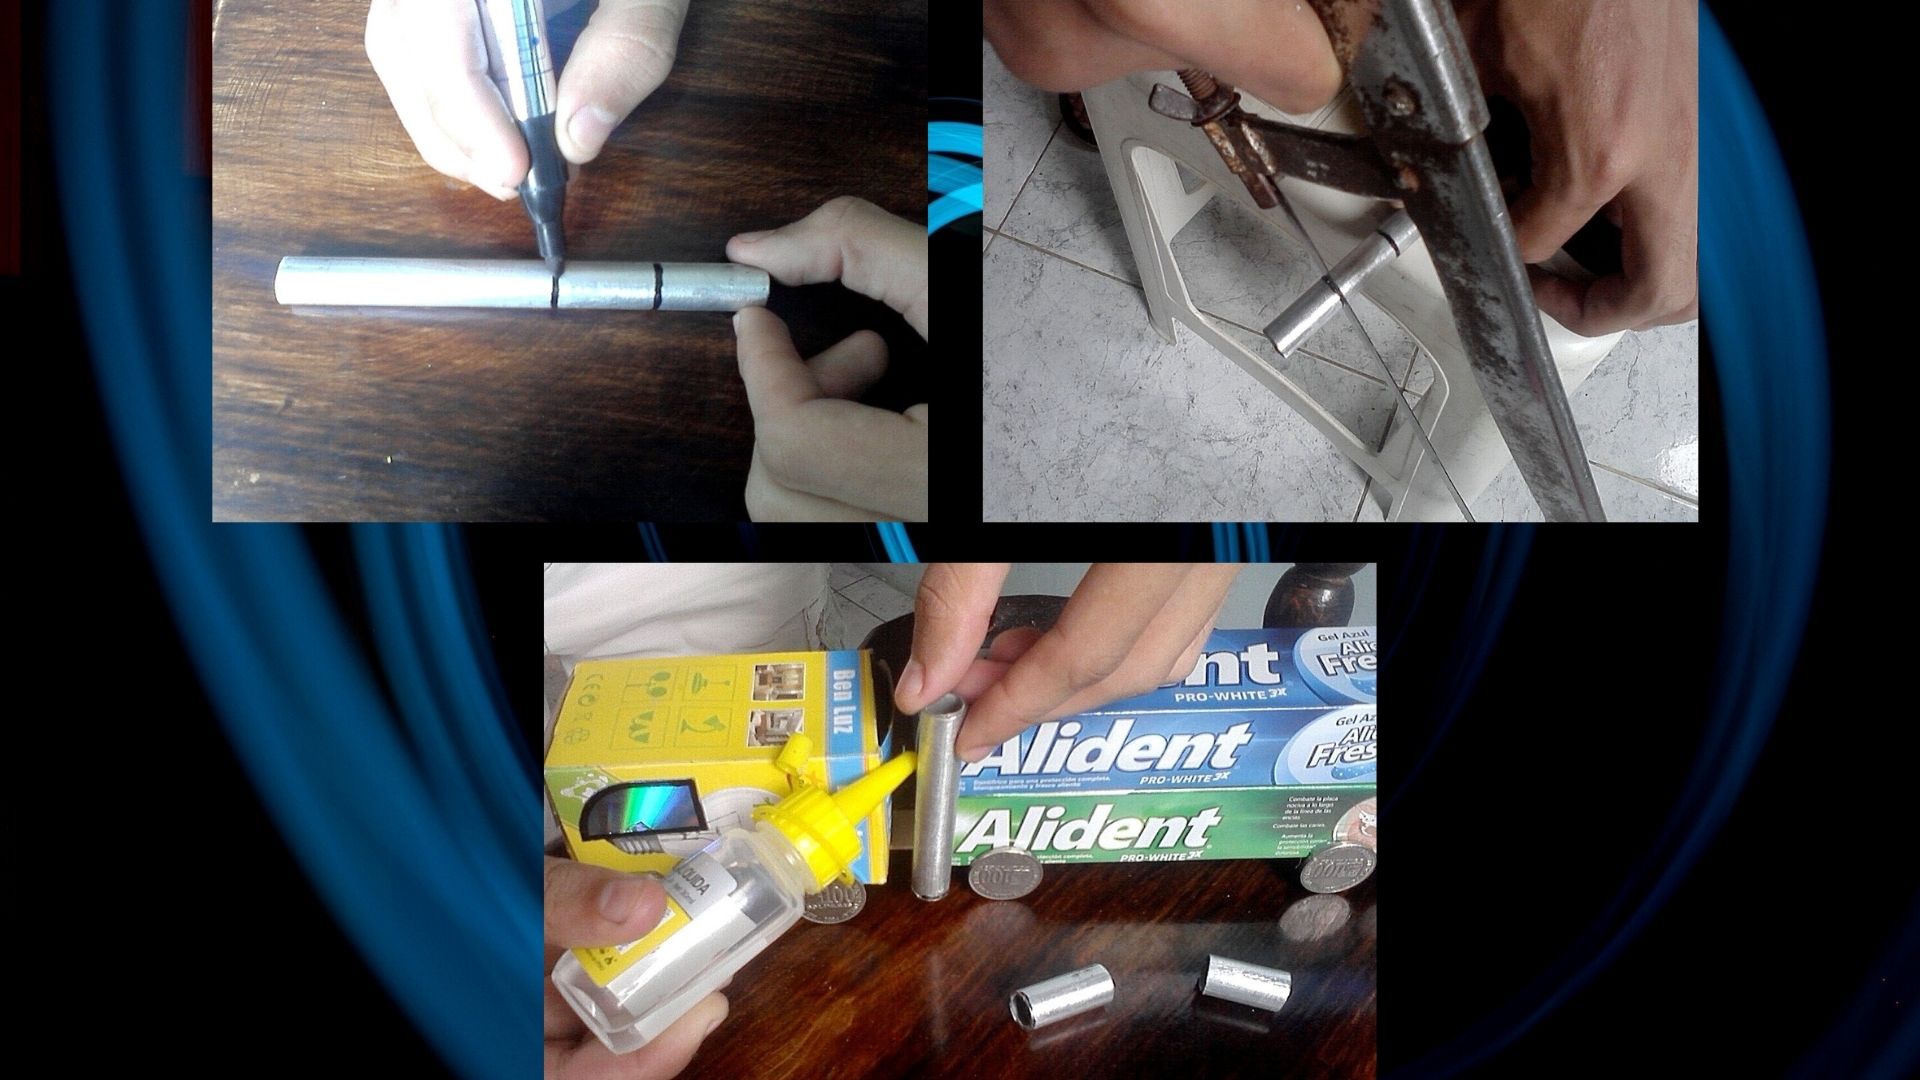
Para terminar con el camión se marca el pedacito de tubo de aluminio, se recorta y luego se pega en un lado del camión, que vendría siendo el tubo de escape y los otros pequeños son los tanques de combustible.
Step 3:
- Then the holes are painted with the yellow color on the inside of the blister. Then cut out the holes to be glued as light bulbs for the truck.
- To finish with the truck, mark the small piece of aluminum tube, cut it out and then glue it on one side of the truck, which would be the exhaust pipe and the other small ones are the fuel tanks.

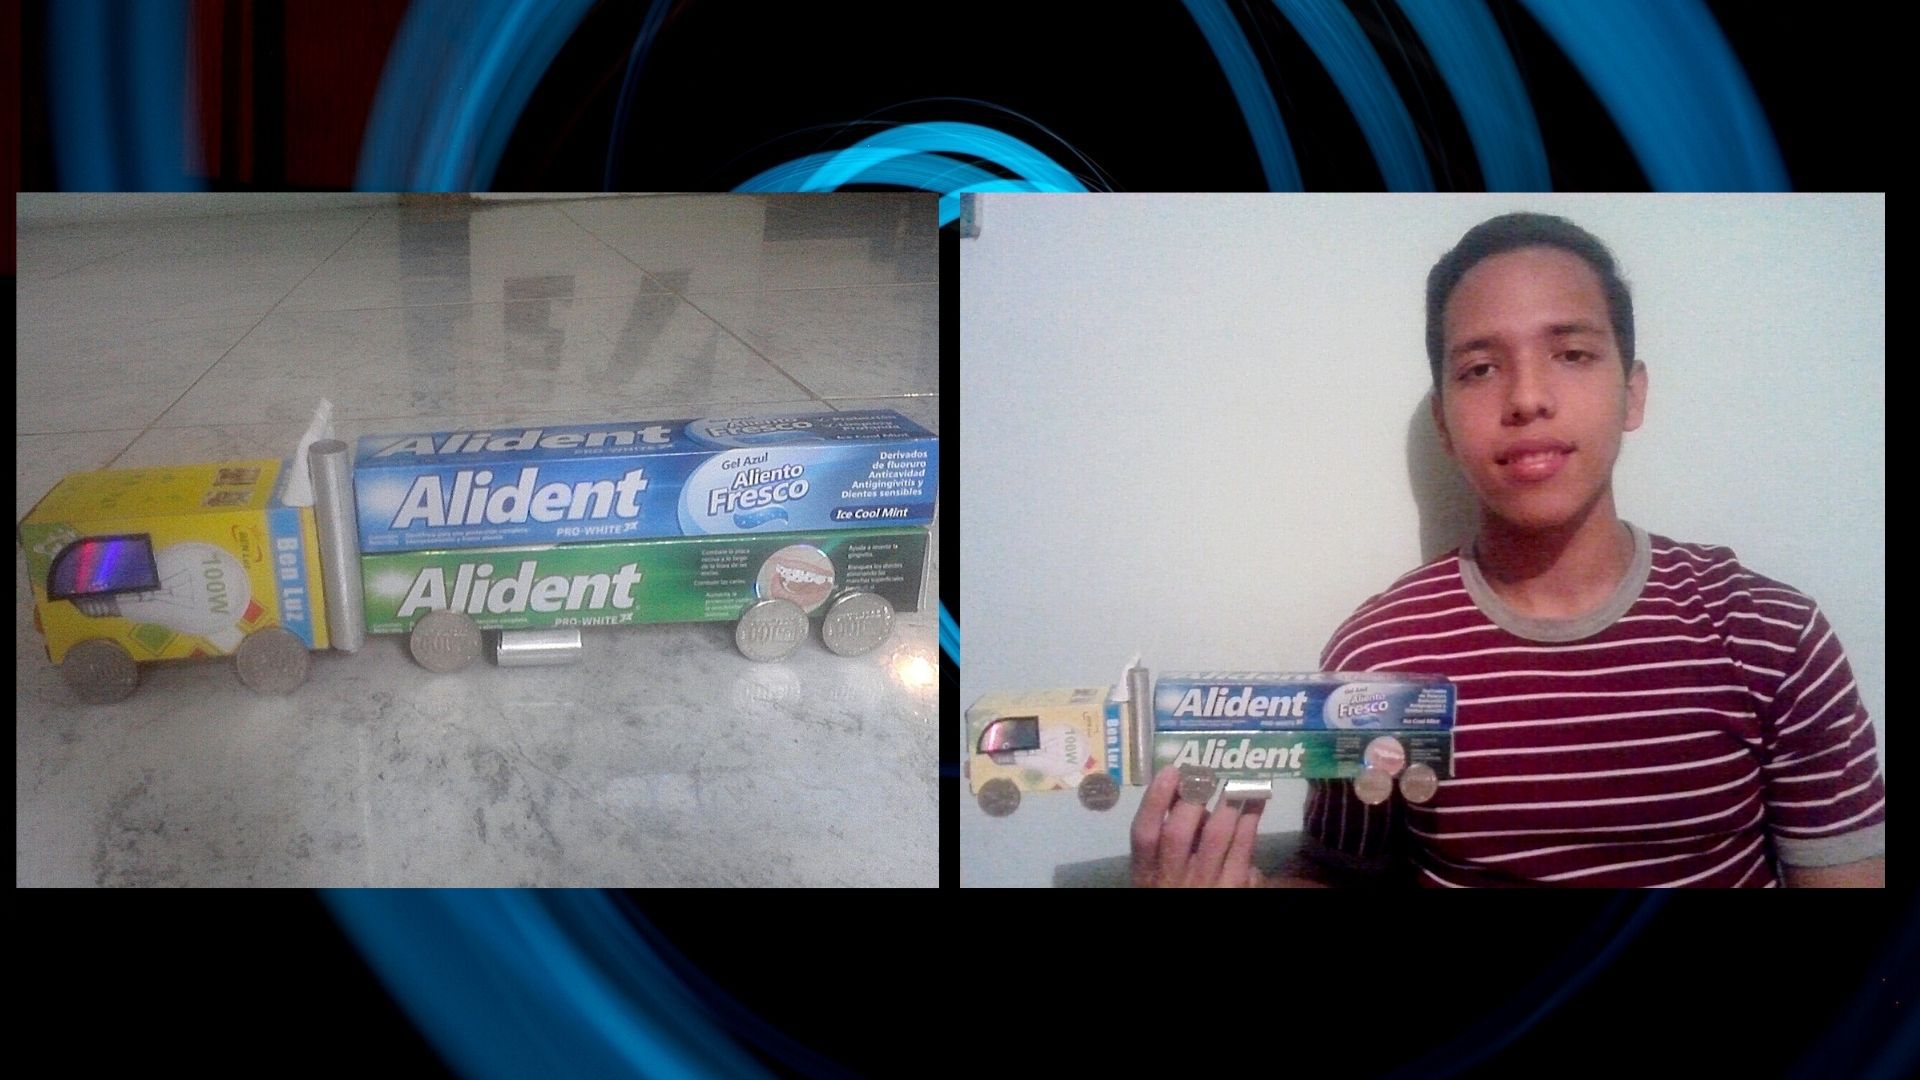
Y así culmine mi camión.
And thus culminate my truck.
.jpg)

Todas las fotos son de mi pertenecía y editada con canva.
All photos are my own and edited with canva.
