Hola comunidad Hive, hoy les traigo un arte que me encanta, ya les había hablado d ella, estoy iniciando en este arte pero lo conocía desde hace años, sólo que aún no me había decidido a comenzar y pues este año me animé.
Hello Hive community, today I bring you an art that I love, I had already told you about it, I am starting in this art but I knew it for years, I just had not yet decided to start and this year I decided to do it.
Esto se llama Miyuki, sí, un nombre extraño y aunque no soy experta, soy una persona que aprende rápido y con sólo algunos tutoriales, aprendí muy rápido. Es una arte muy llamativo ya que las piezas parecen de pixeles.
Les voy a enseñar algo muy sencillo de realizar con este arte, un dige, es un diseño muy fácil para los que quieran iniciar.
This is called Miyuki, yes, a strange name and although I am not an expert, I am a fast learner and with just a few tutorials, I learned very quickly. It is a very striking art since the pieces look like pixels.
I am going to show you something very simple to make with this art, a dige, it is a very easy design for those who want to start.
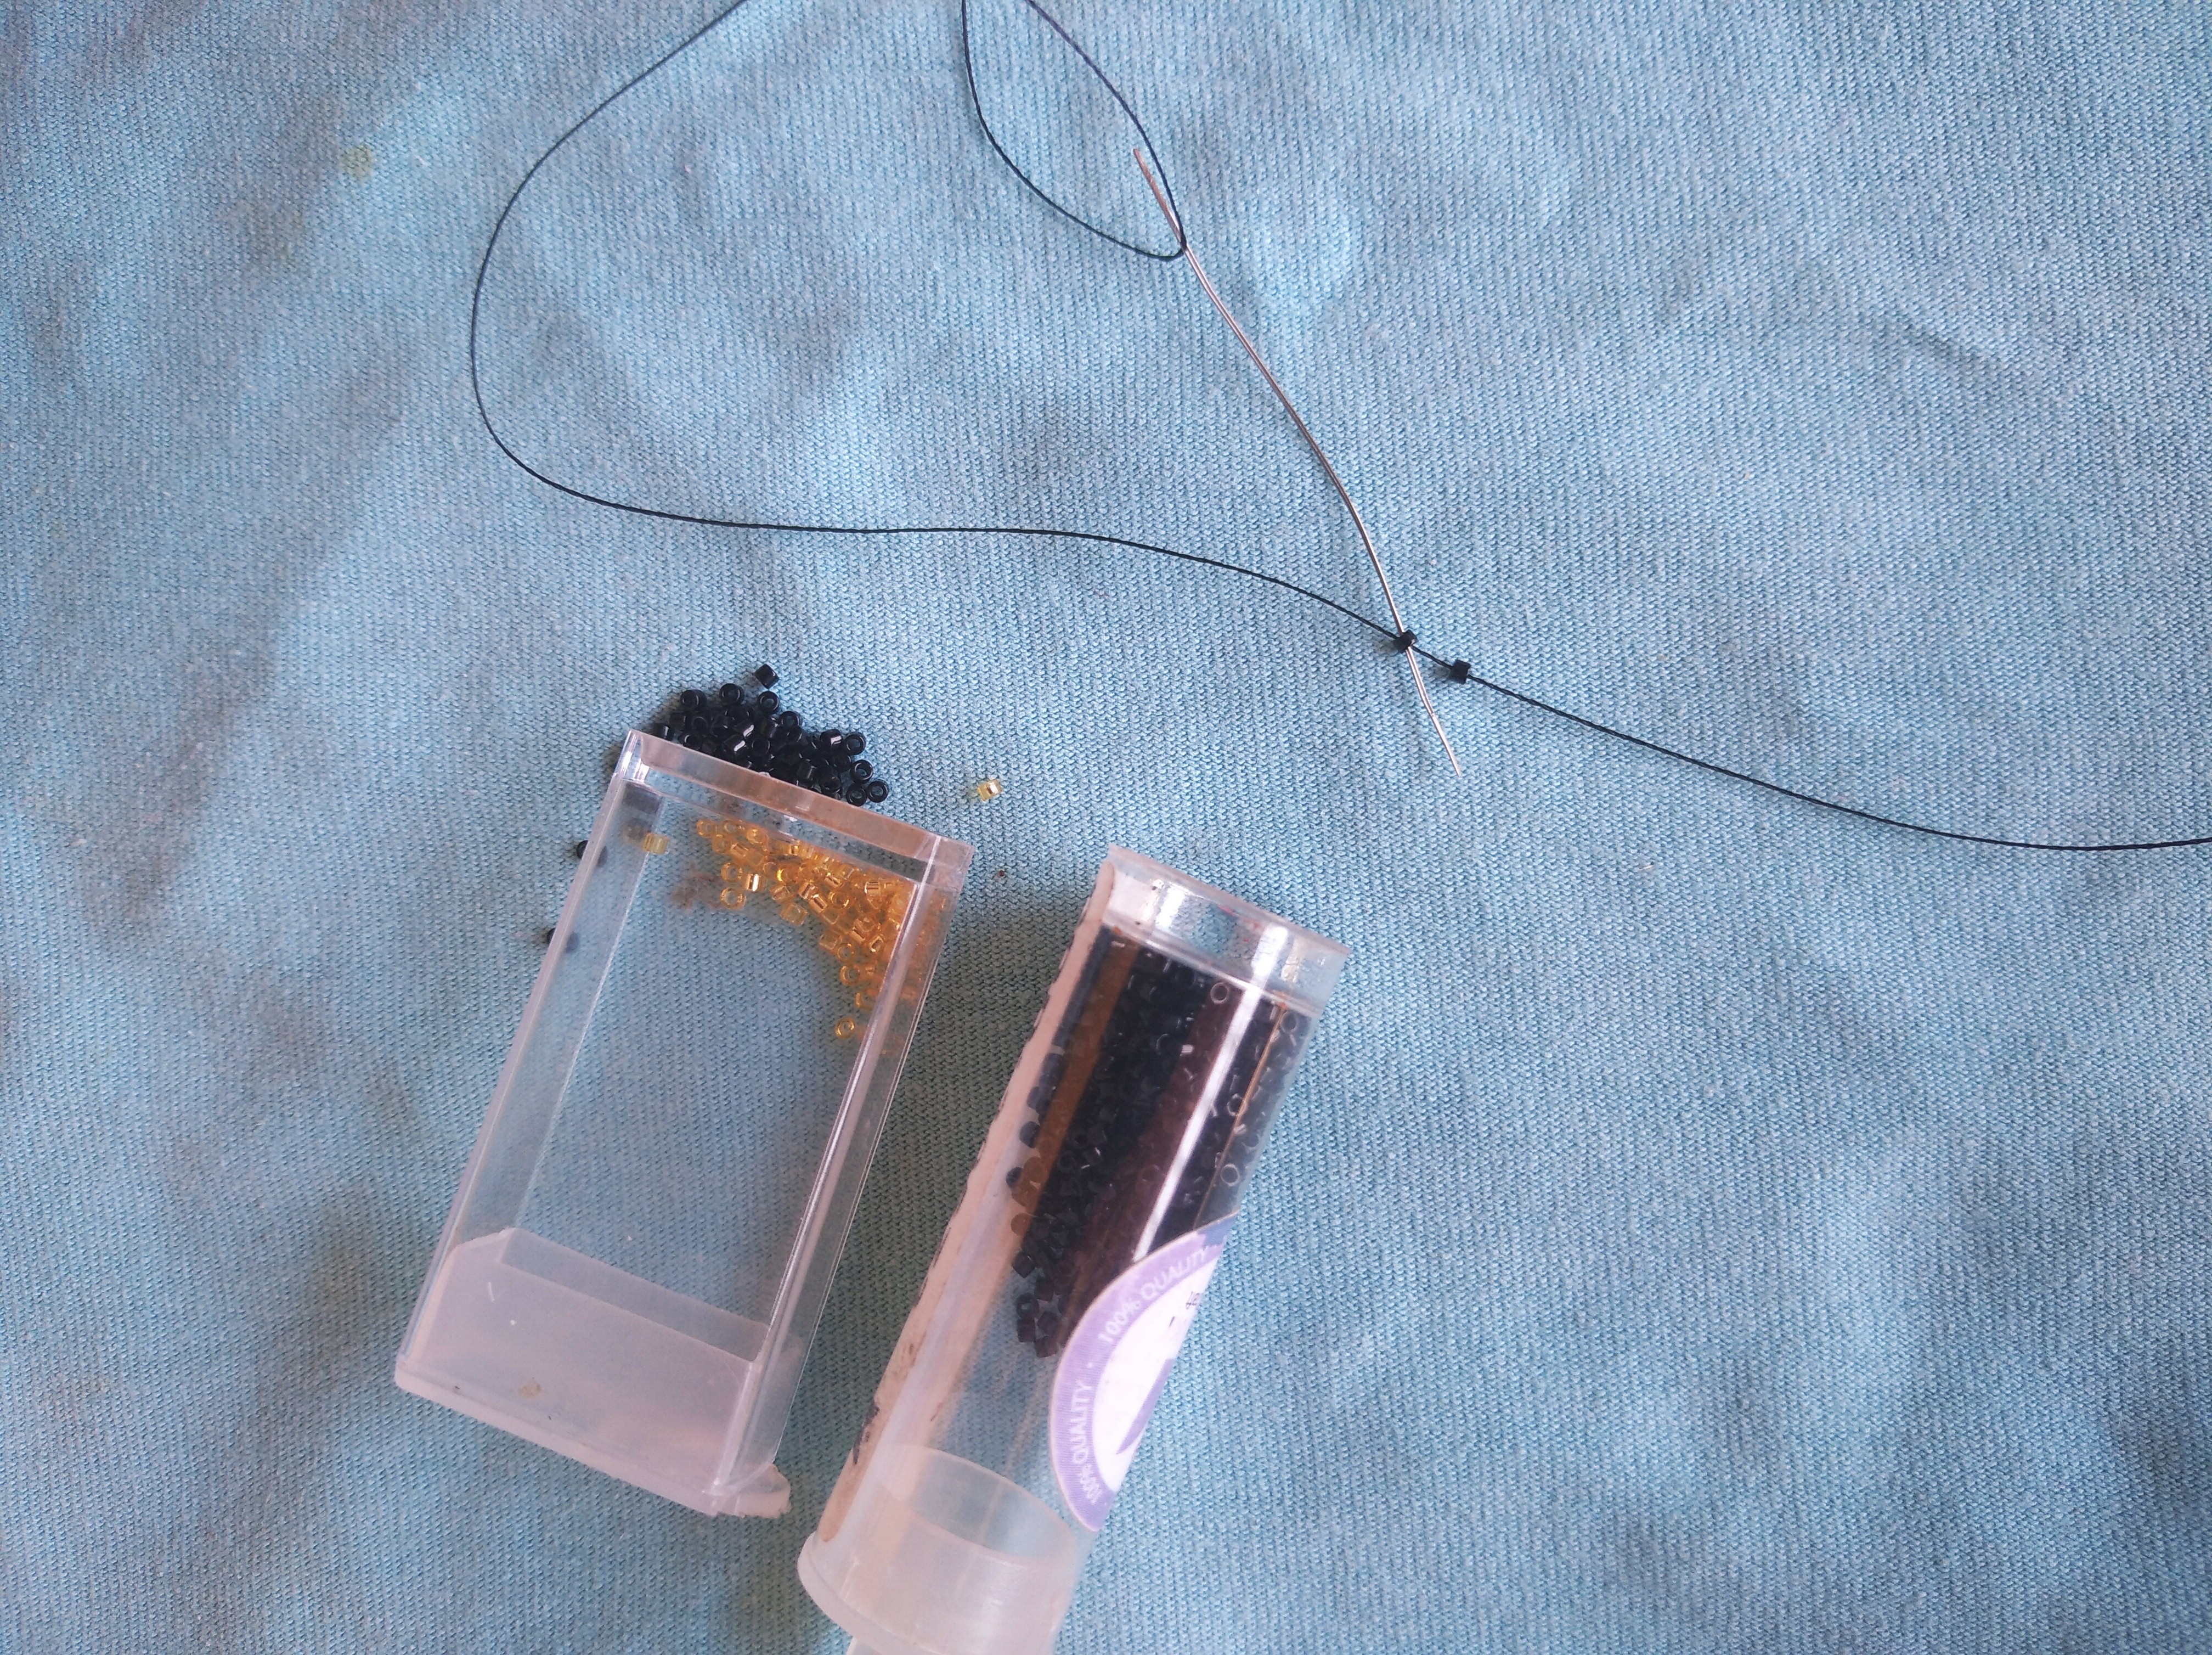
Los materiales que necesitamos son:
- Piedritas Miyuki, las llamamos Delicas Miyuki (también se puede elaborar con Mostacillas, la diferencia es que las delicas tienen algo especial y es que tienen un corte preciso, parecen cuadraditos y se almoldan mientras se va tejiendo).
- Hilo para Miyuki o Nylon para realizar bisturía.
- Tijera.
- Una cadenita o un cuerito para bisutería (esto es a gusto propio de quien lo vaya a realizar).
- Y una aguja para Miyuki (esta aguja es especial, ya que es flexible para hacer estos trabajos).
The materials we need are:
- Miyuki stones, we call them Miyuki Delicas (they can also be made with beads, the difference is that the delicas have something special and that is that they have a precise cut, they look like squares and are molded while weaving).
- Thread for Miyuki or Nylon to make bisturía.
- Scissors.
- A chain or a small string for costume jewelry (this is up to the taste of the person who is going to make it).
- And a needle for Miyuki (this needle is special, since it is flexible to make these works).

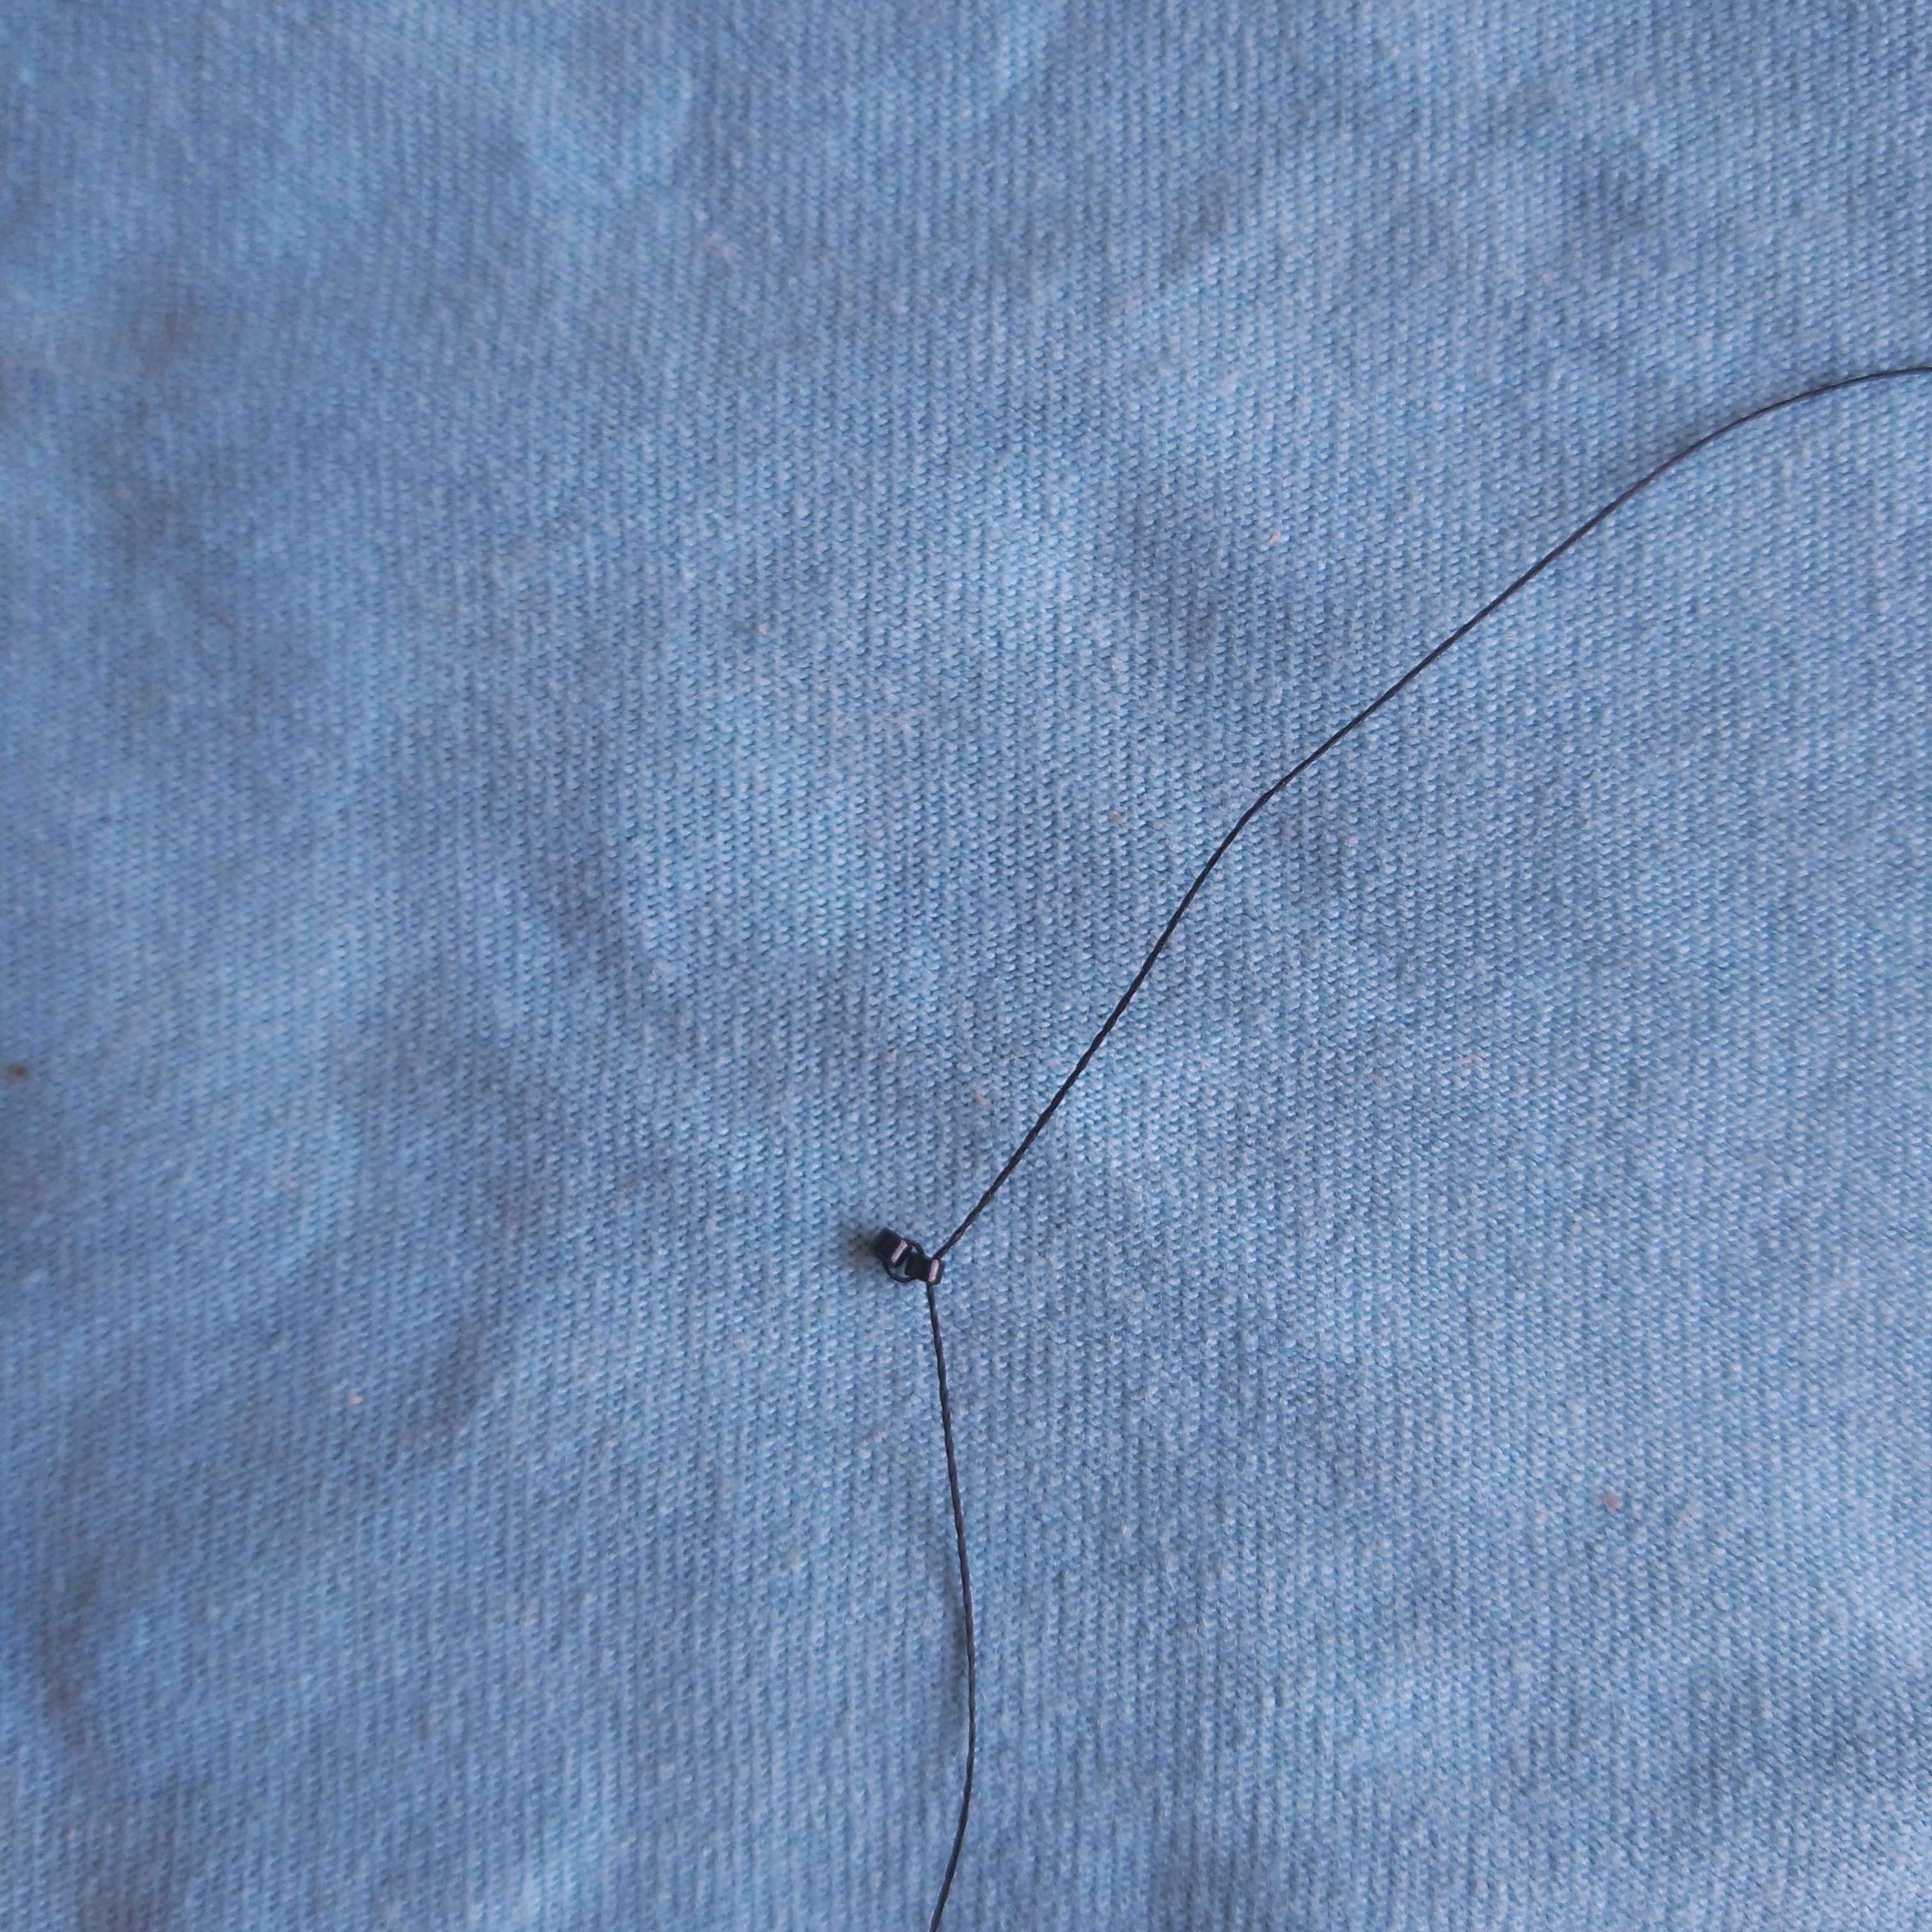
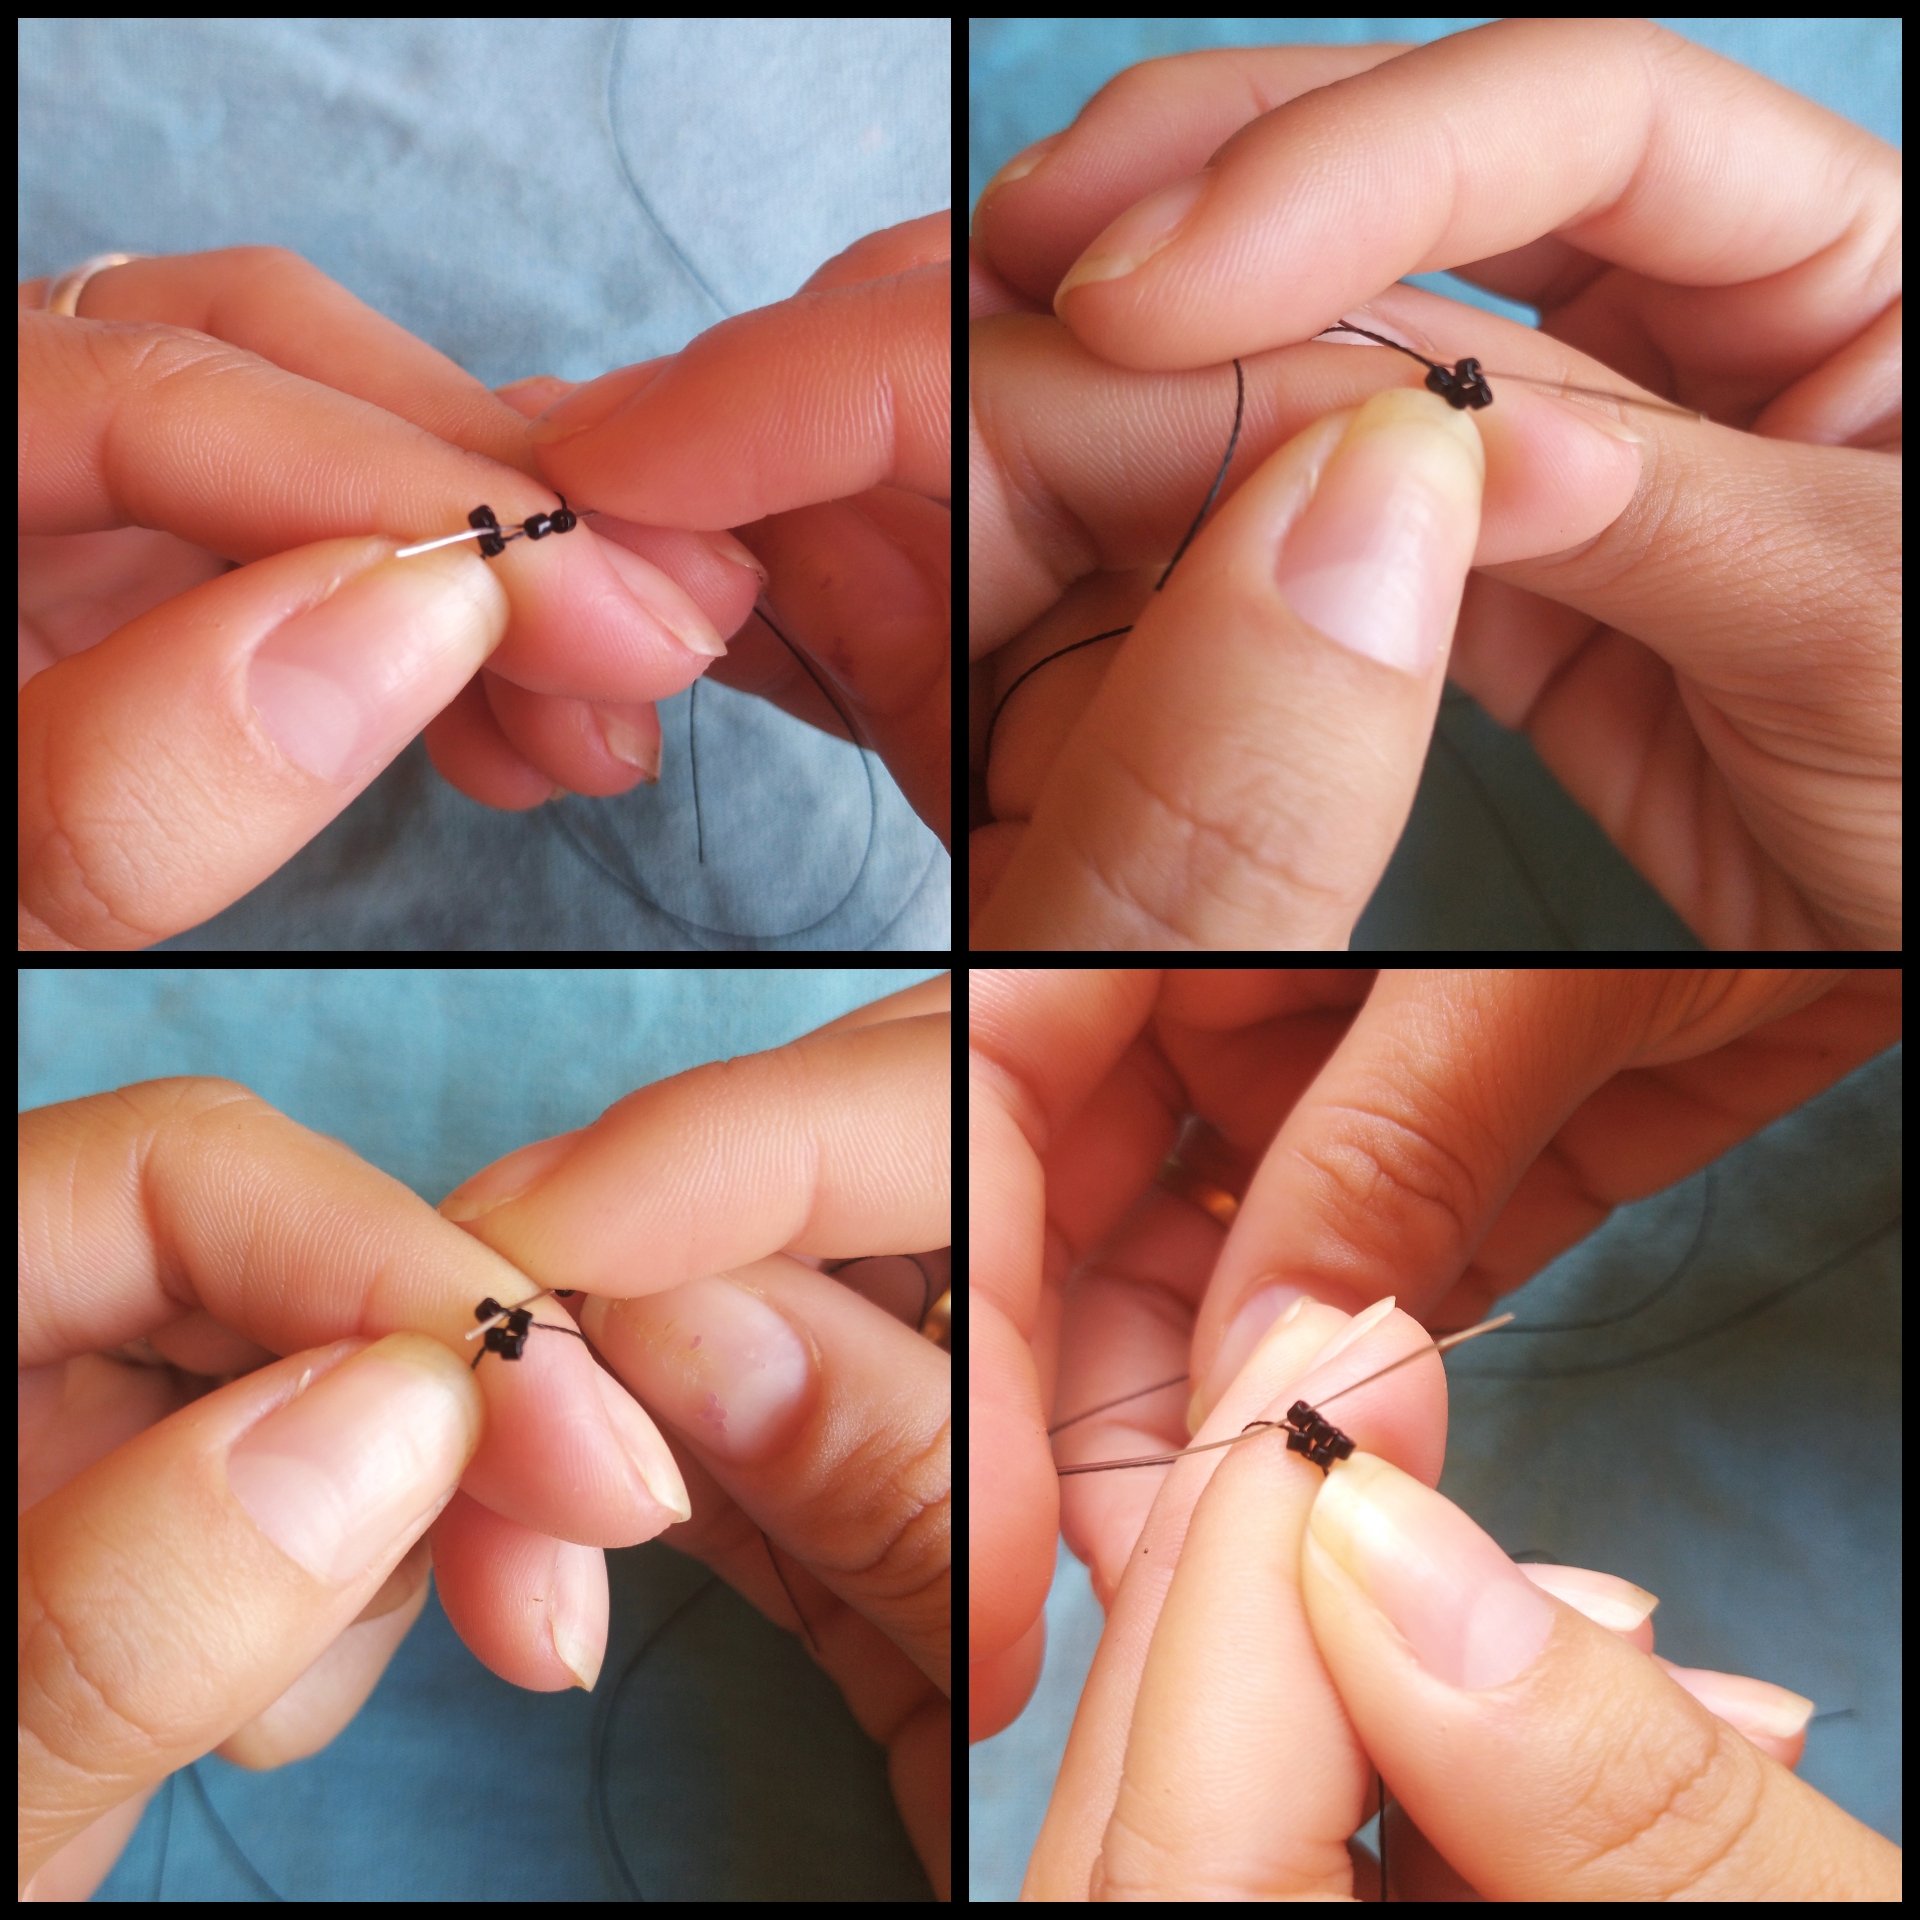
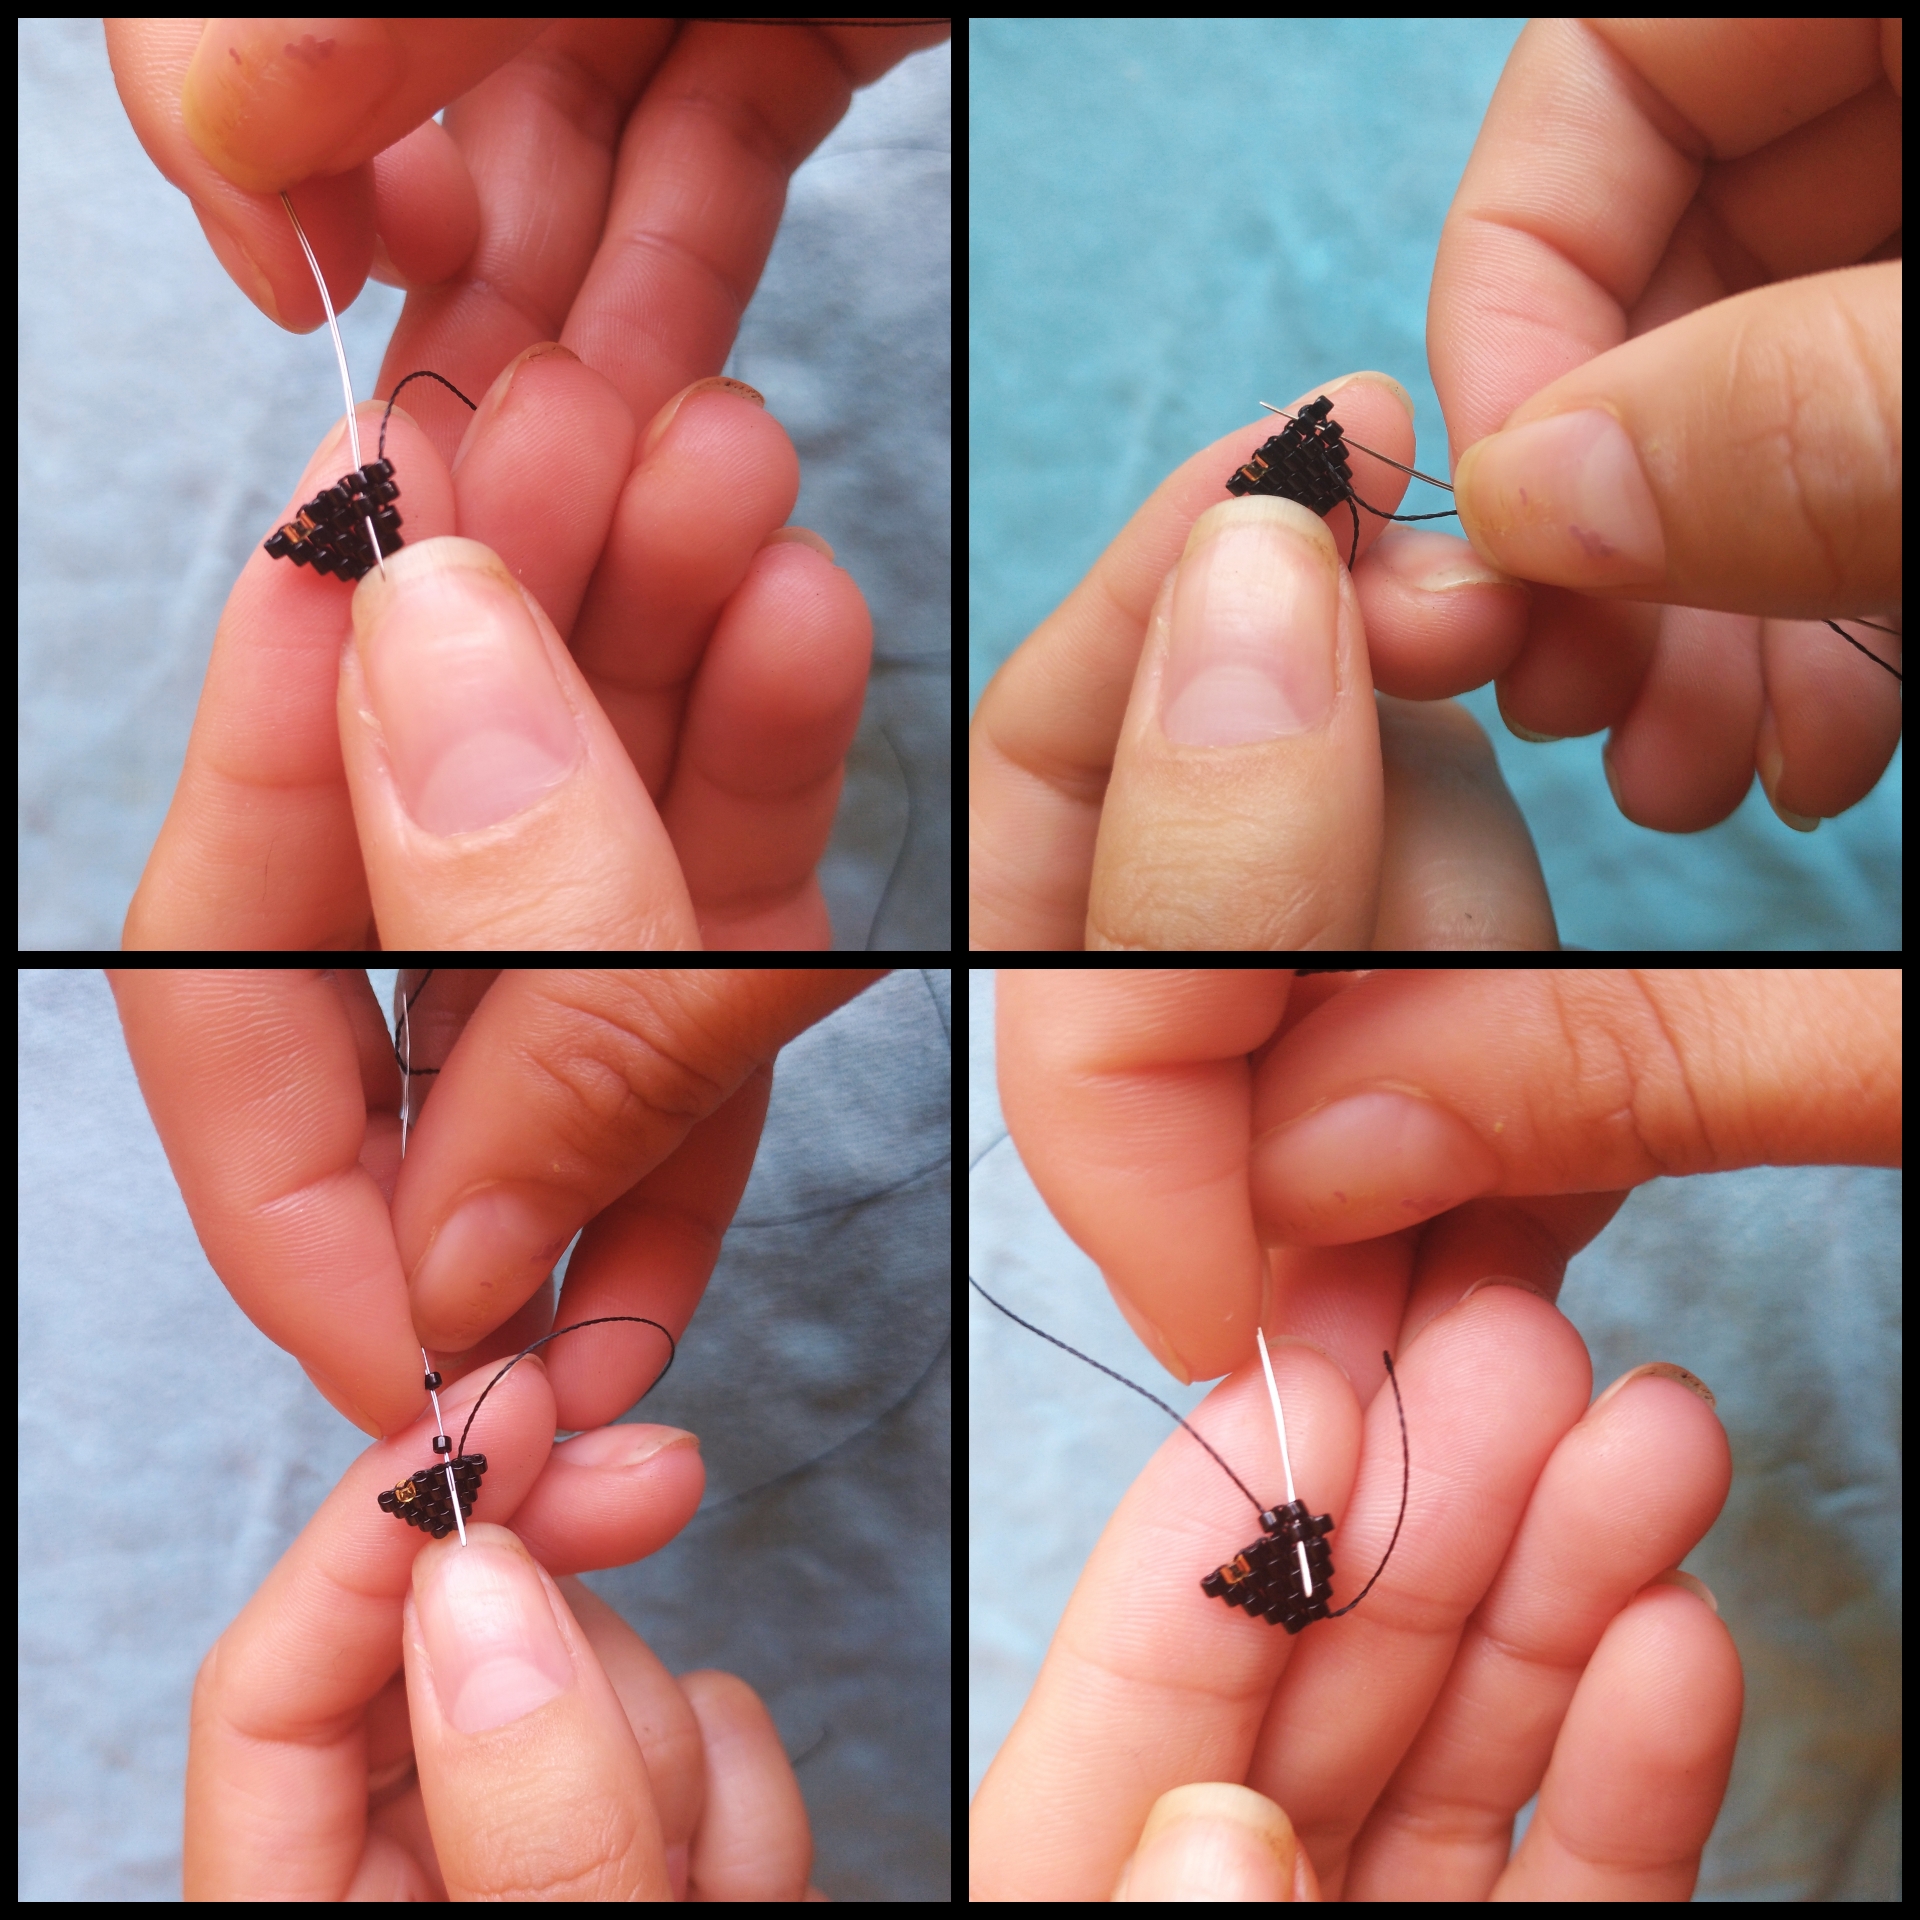
Comenzamos tomando el hilo como de unos 30cm y lo colocamos en la aguja, introducimos dos delicas y las llevamos casi hasta el final del hilo, dejando unos 10cm de hilo al final.
We start by taking the thread about 30cm long and place it on the needle, introduce two delicas and take them almost to the end of the thread, leaving about 10cm of thread at the end.

Pasamos la aguja de atrás hacia adelante de la segunda delica y vemos como se acomodan una junto a la otra.
We pass the needle from the back to the front of the second delica and we see how they fit next to each other.
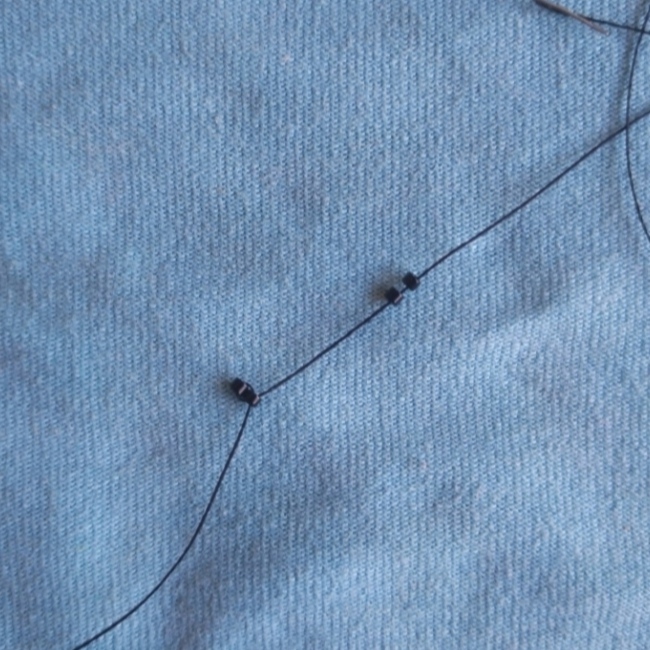
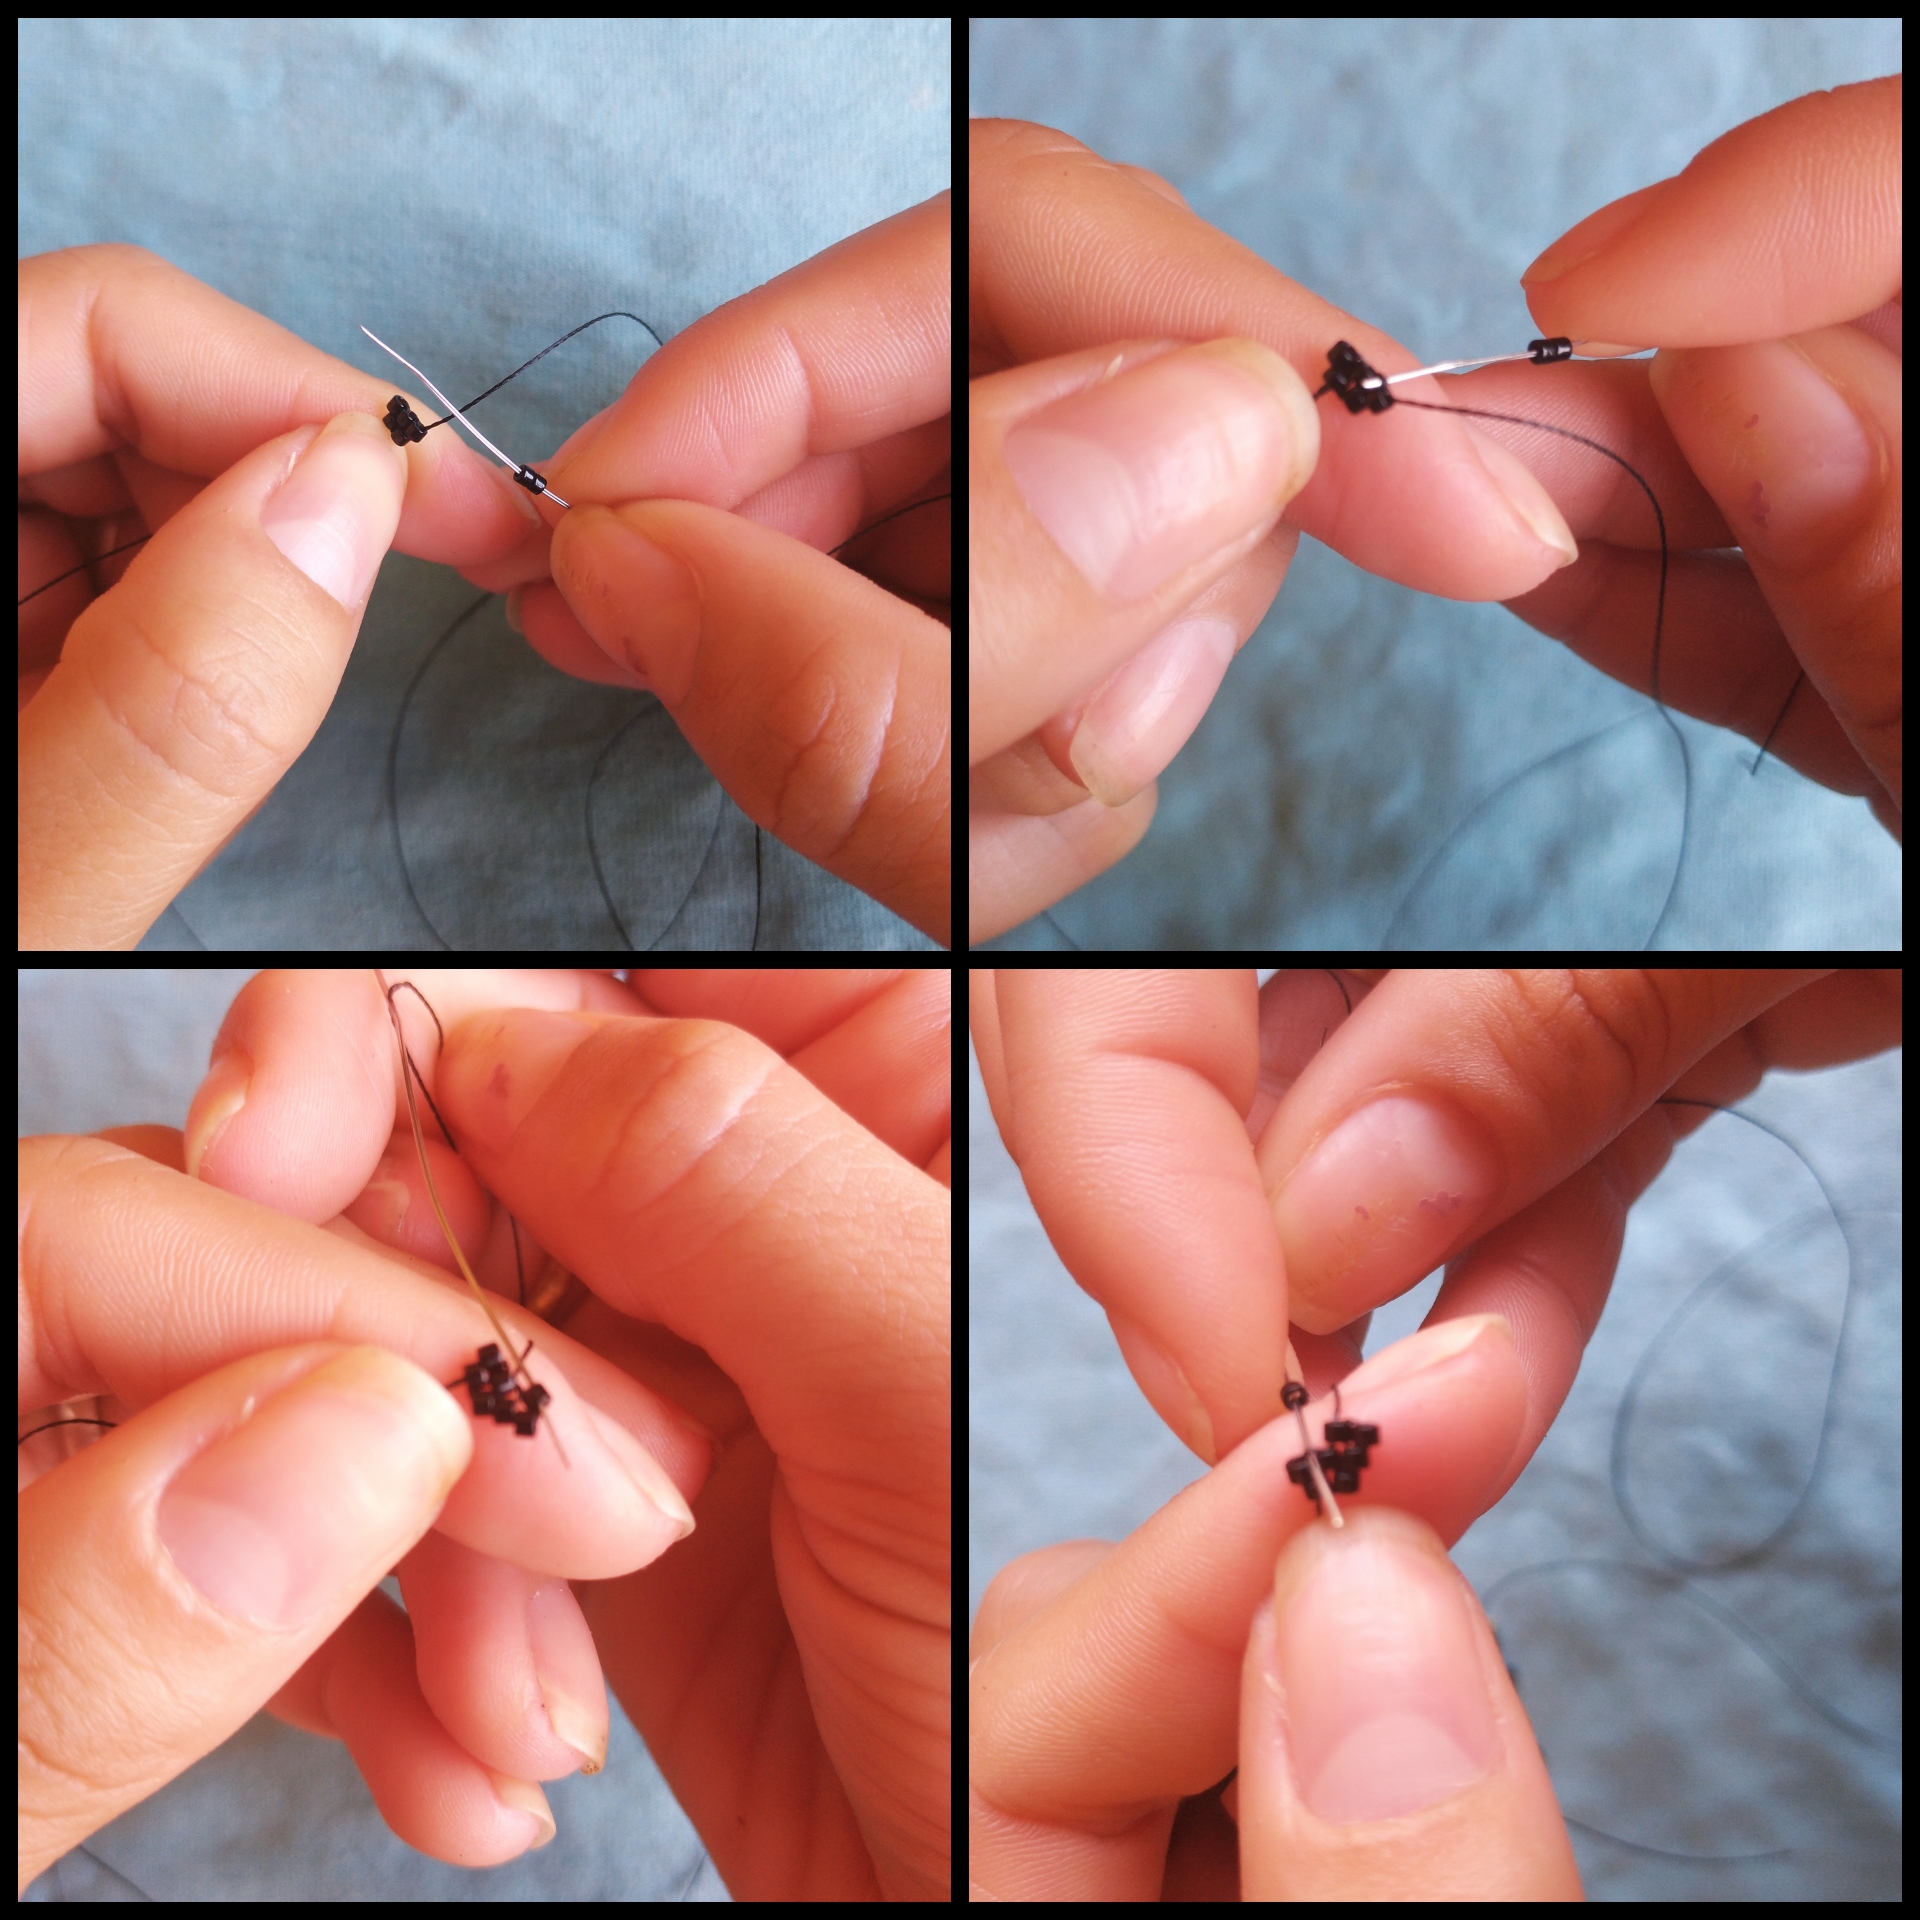
Insertamos dos delicas más en la aguja y pasamos la aguja justo por el hilo que quedó en el medio de las delicas anteriores, luego devolvemos la aguja por la segunda delica para que se fijen y vamos viendo como se van agrupando.
Introducimos la próxima delica en la aguja y hacemos el mismo procedimiento, pasamos la aguja como en el paso anterior y regresamos por la misma delica para que quede fijada.
Insert two more delicas in the needle and pass the needle just through the thread that was left in the middle of the previous delicas, then return the needle through the second delica so that they are fixed and we see how they are grouped.
We introduce the next delica in the needle and we do the same procedure, we pass the needle as in the previous step and we return through the same delica so that it is fixed.
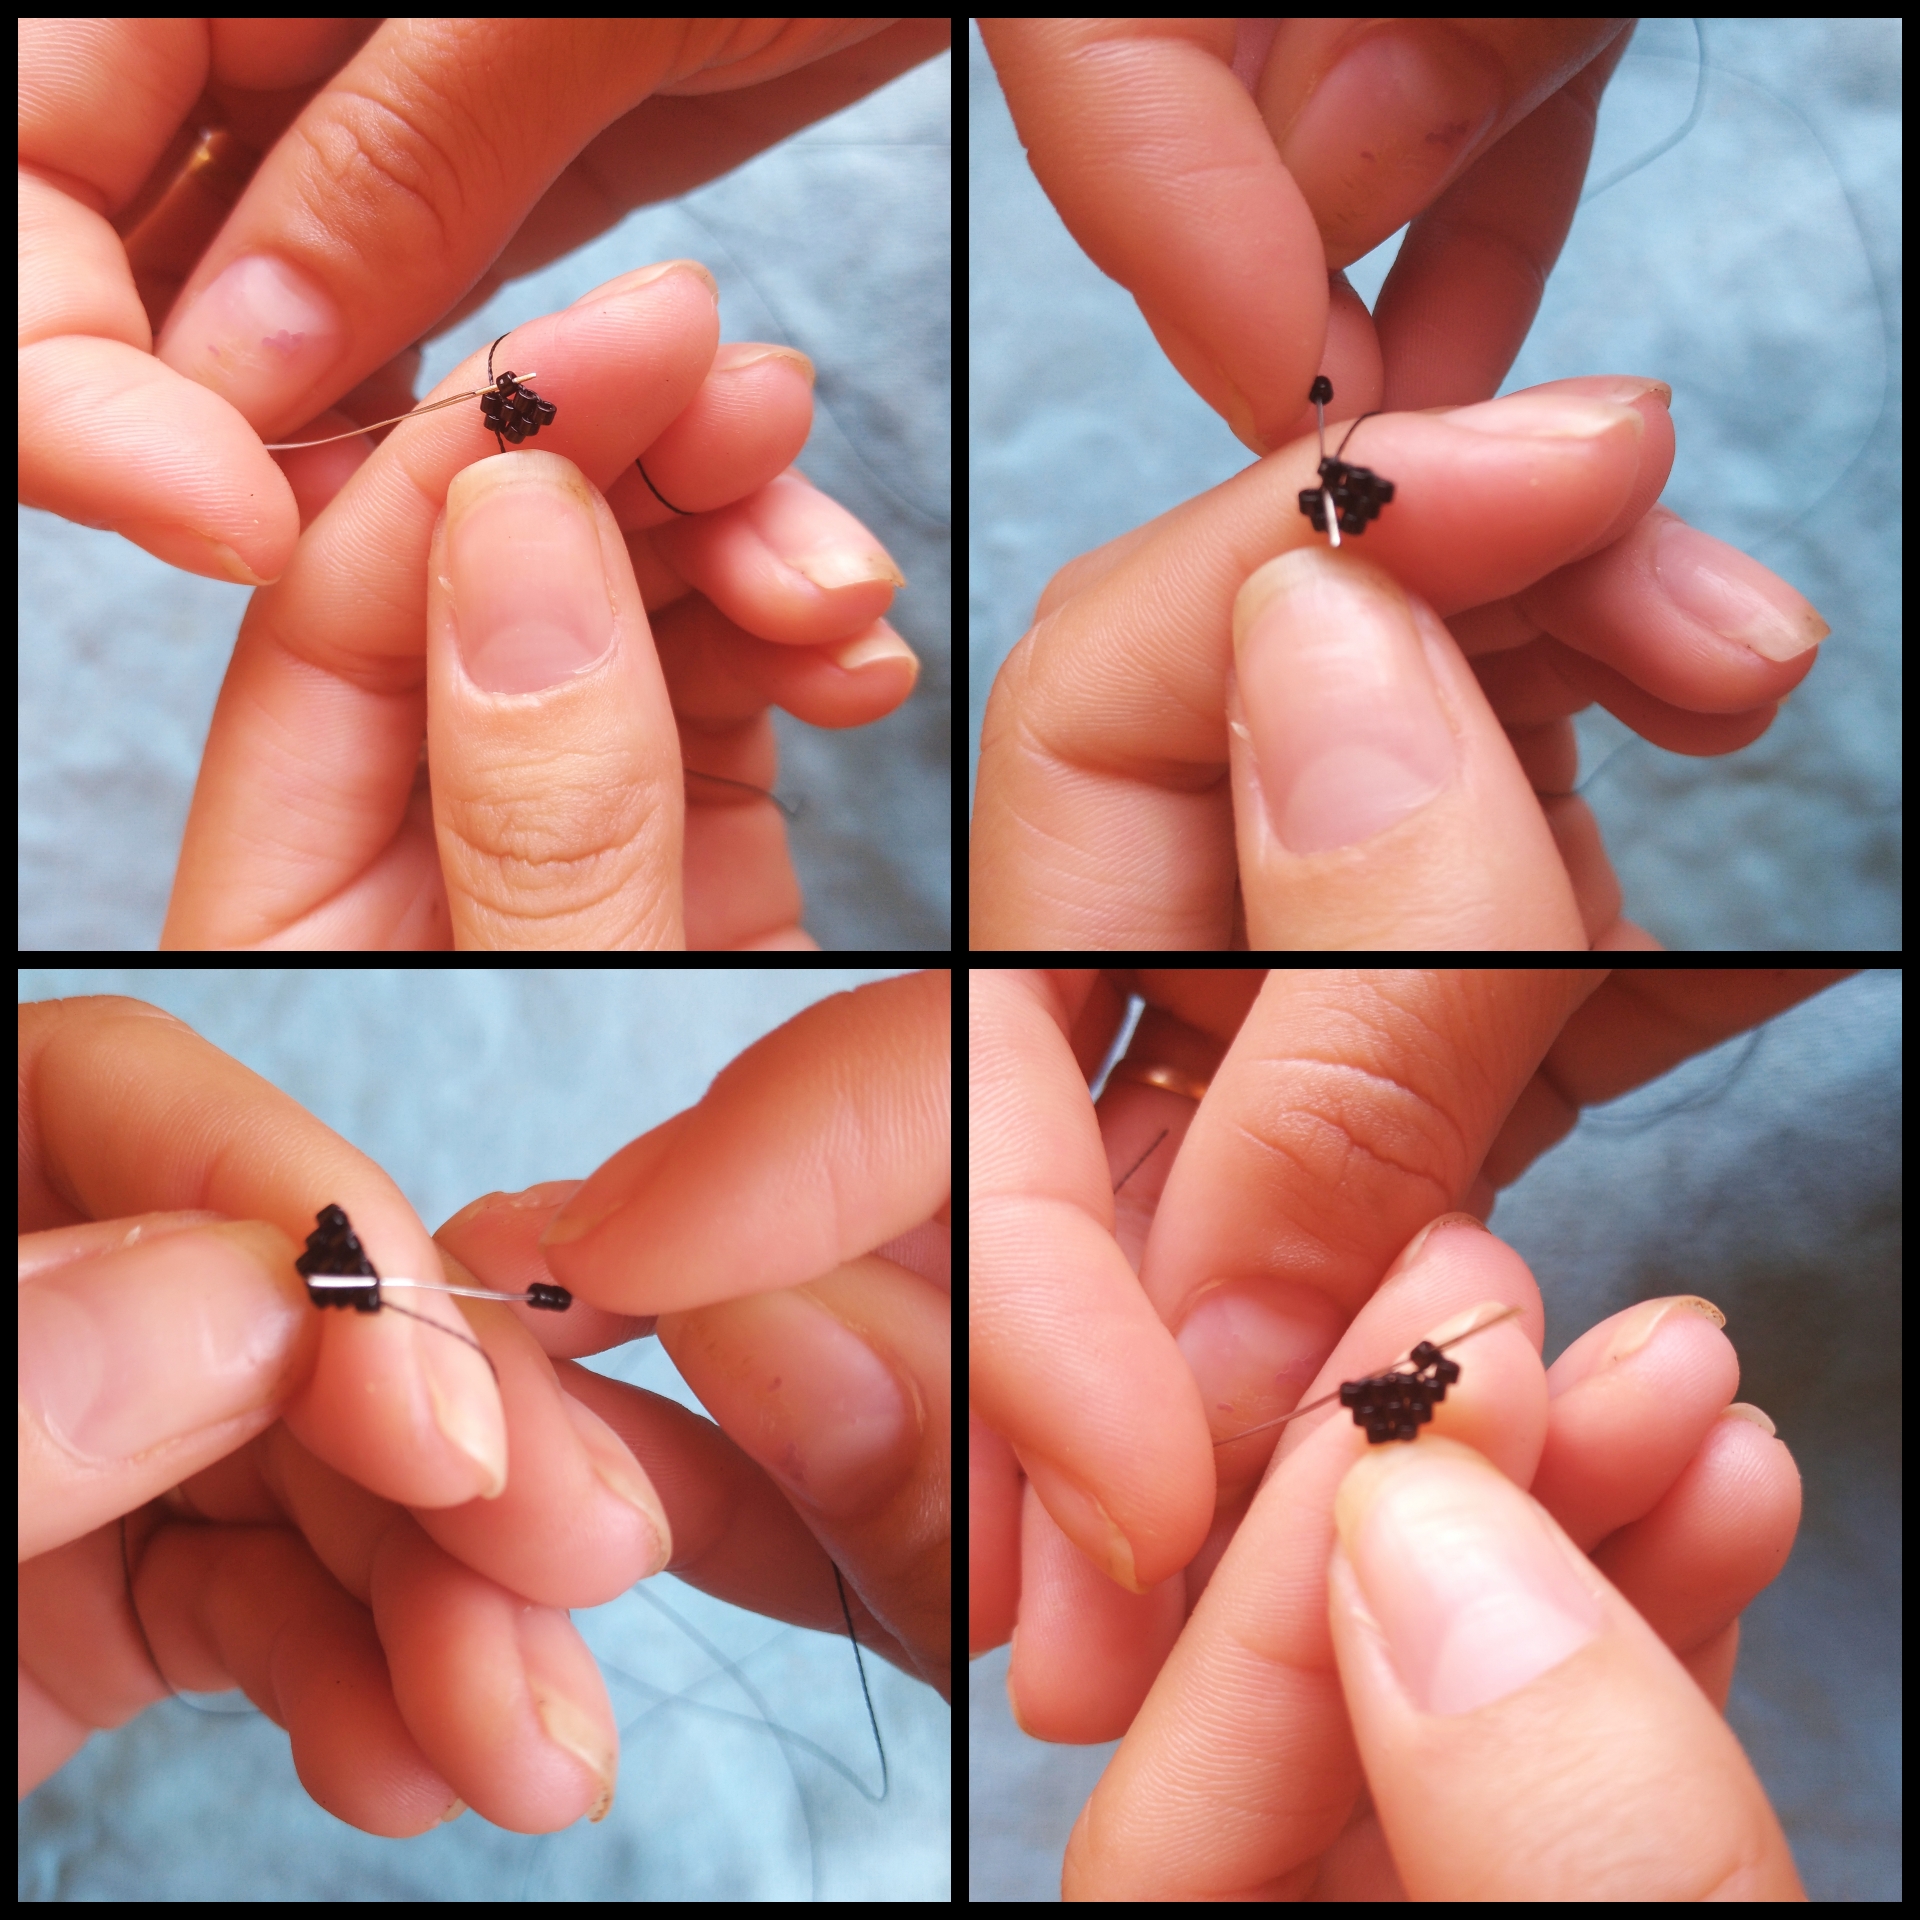
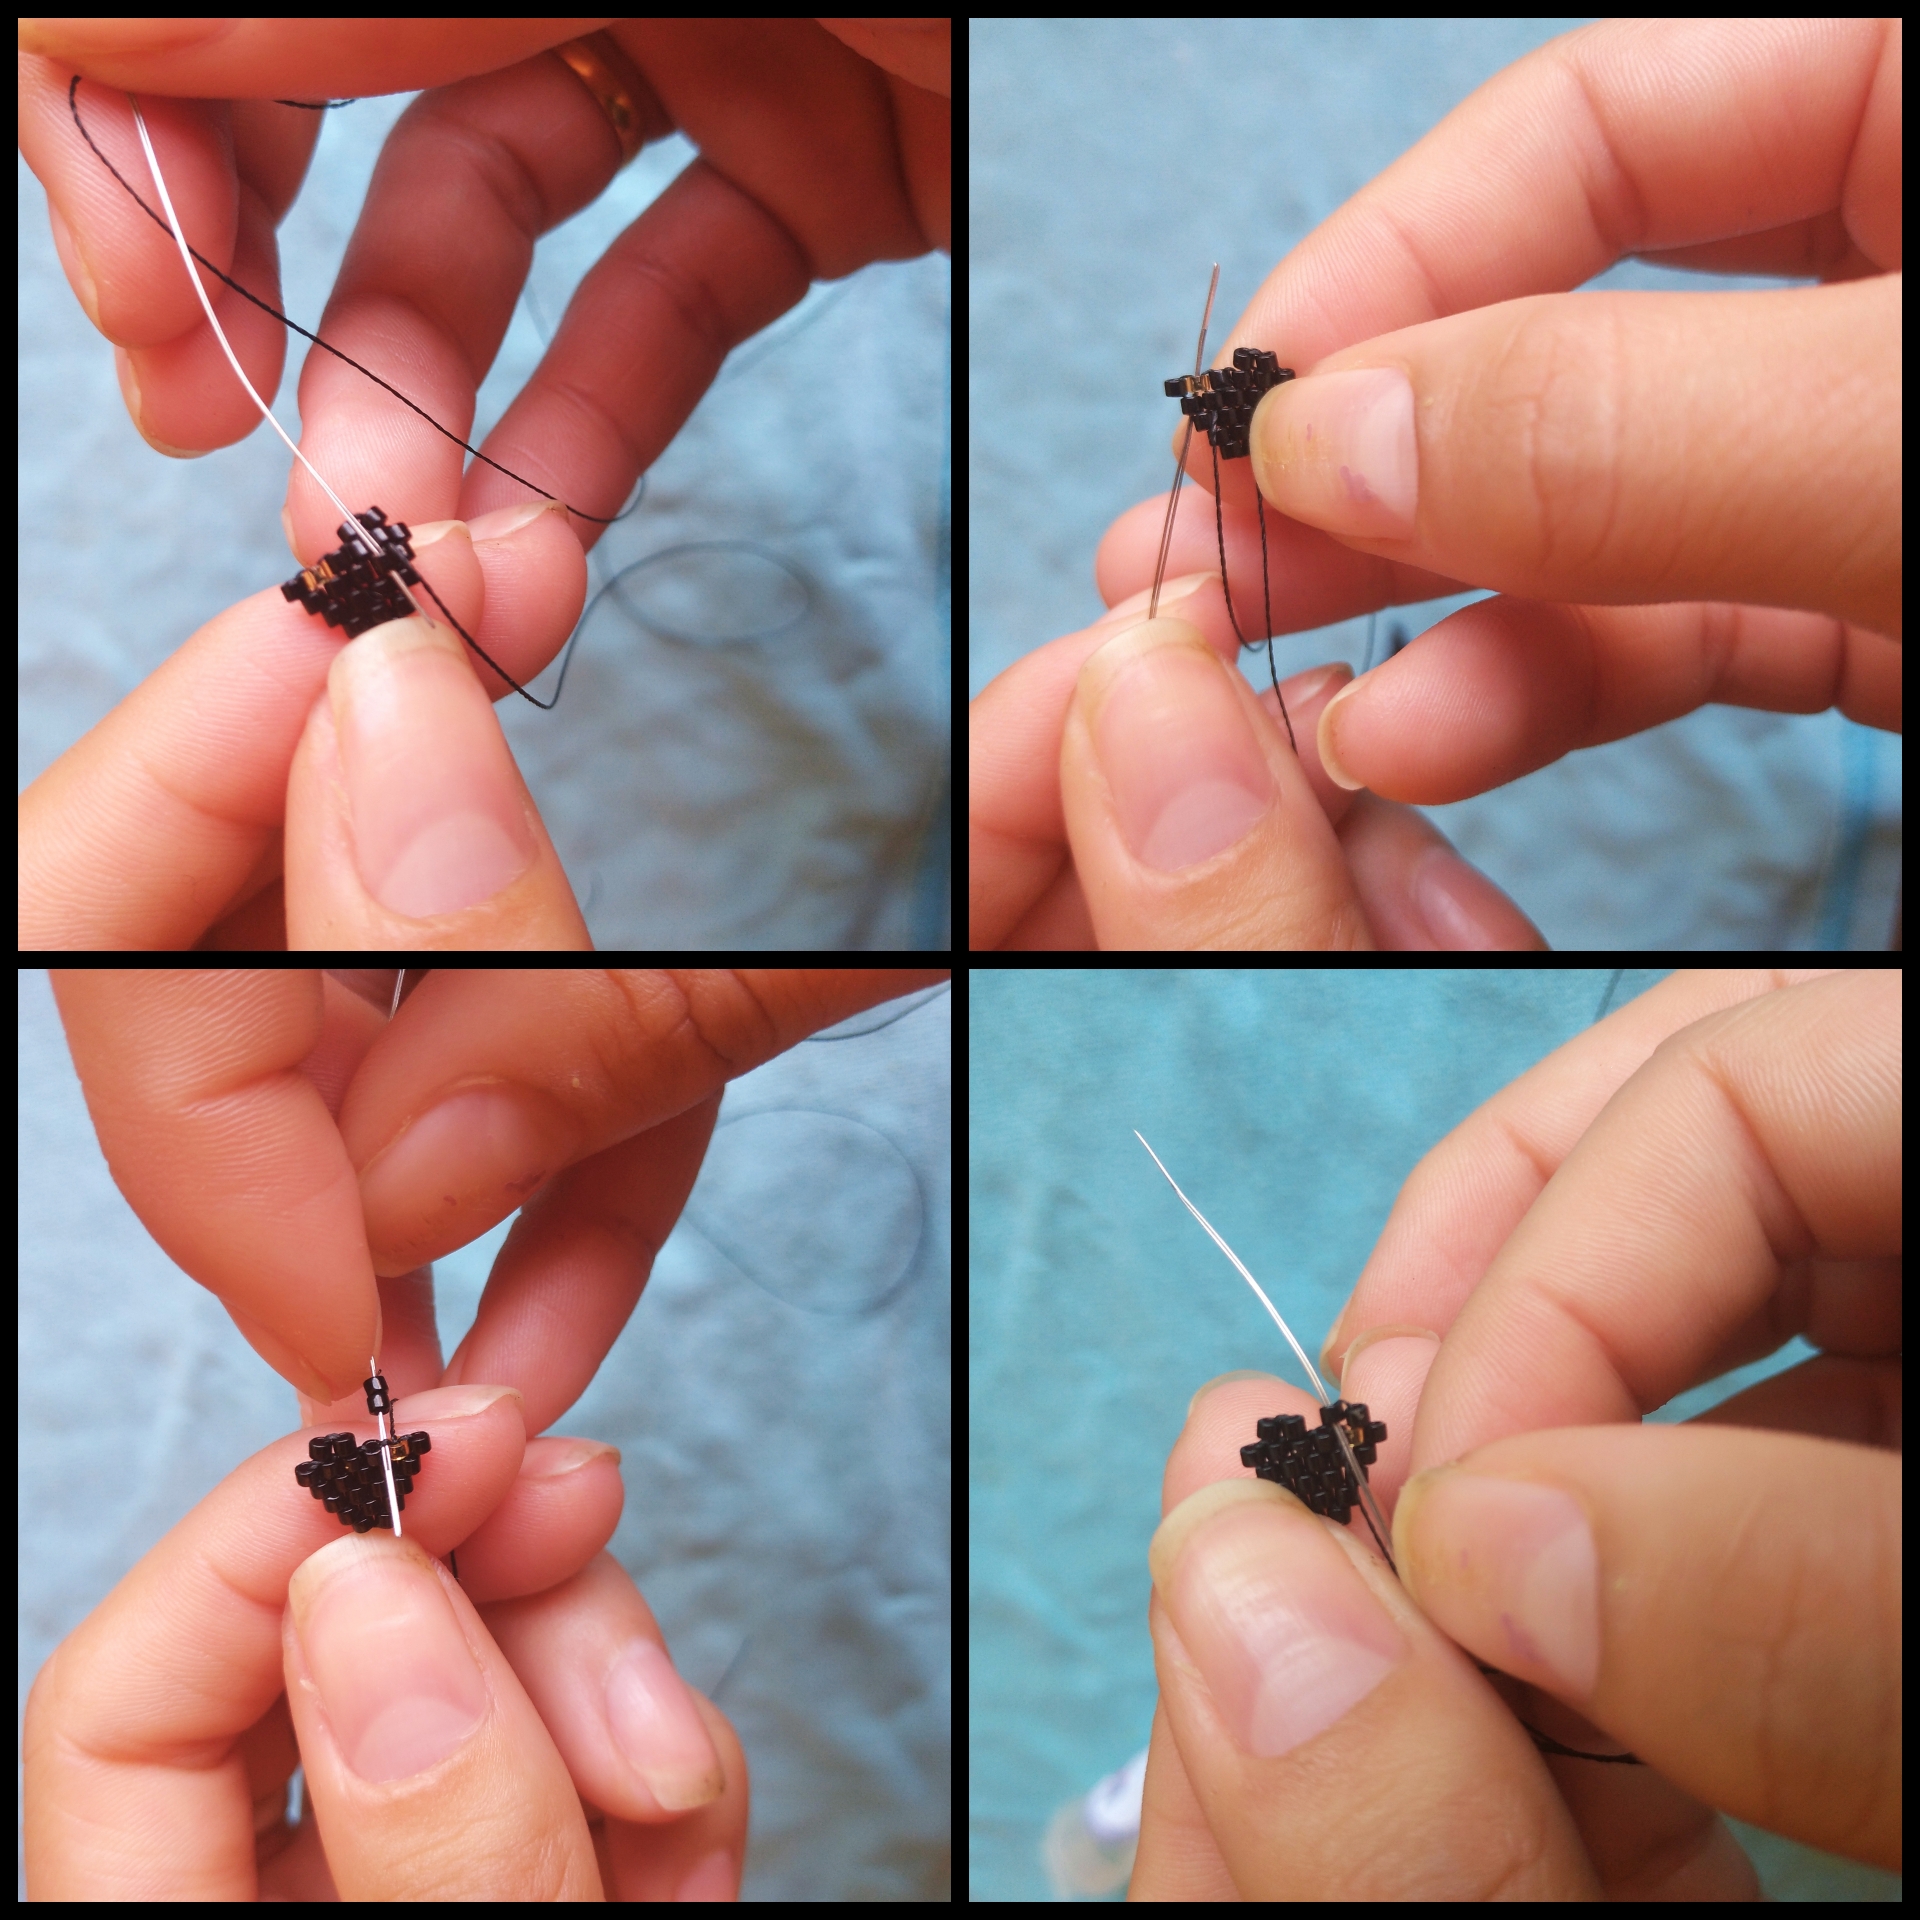
Introducimos nuevamente dos delicas y pasamos por el hilo que pasa en medio de las delicas anteriores, regresamos la aguja por la segunda delica y fijamos, esto que hacemos al iniciar cada fila se llama aumento.
Seguimos estos pasos en cada línea que vamos haciendo y vemos como cada línea va creciendo.
We introduce again two delicas and pass through the thread that passes in the middle of the previous delicas, we return the needle through the second delica and fix, this we do at the beginning of each row is called increase.
We follow these steps in each line that we are making and we see how each line is growing.
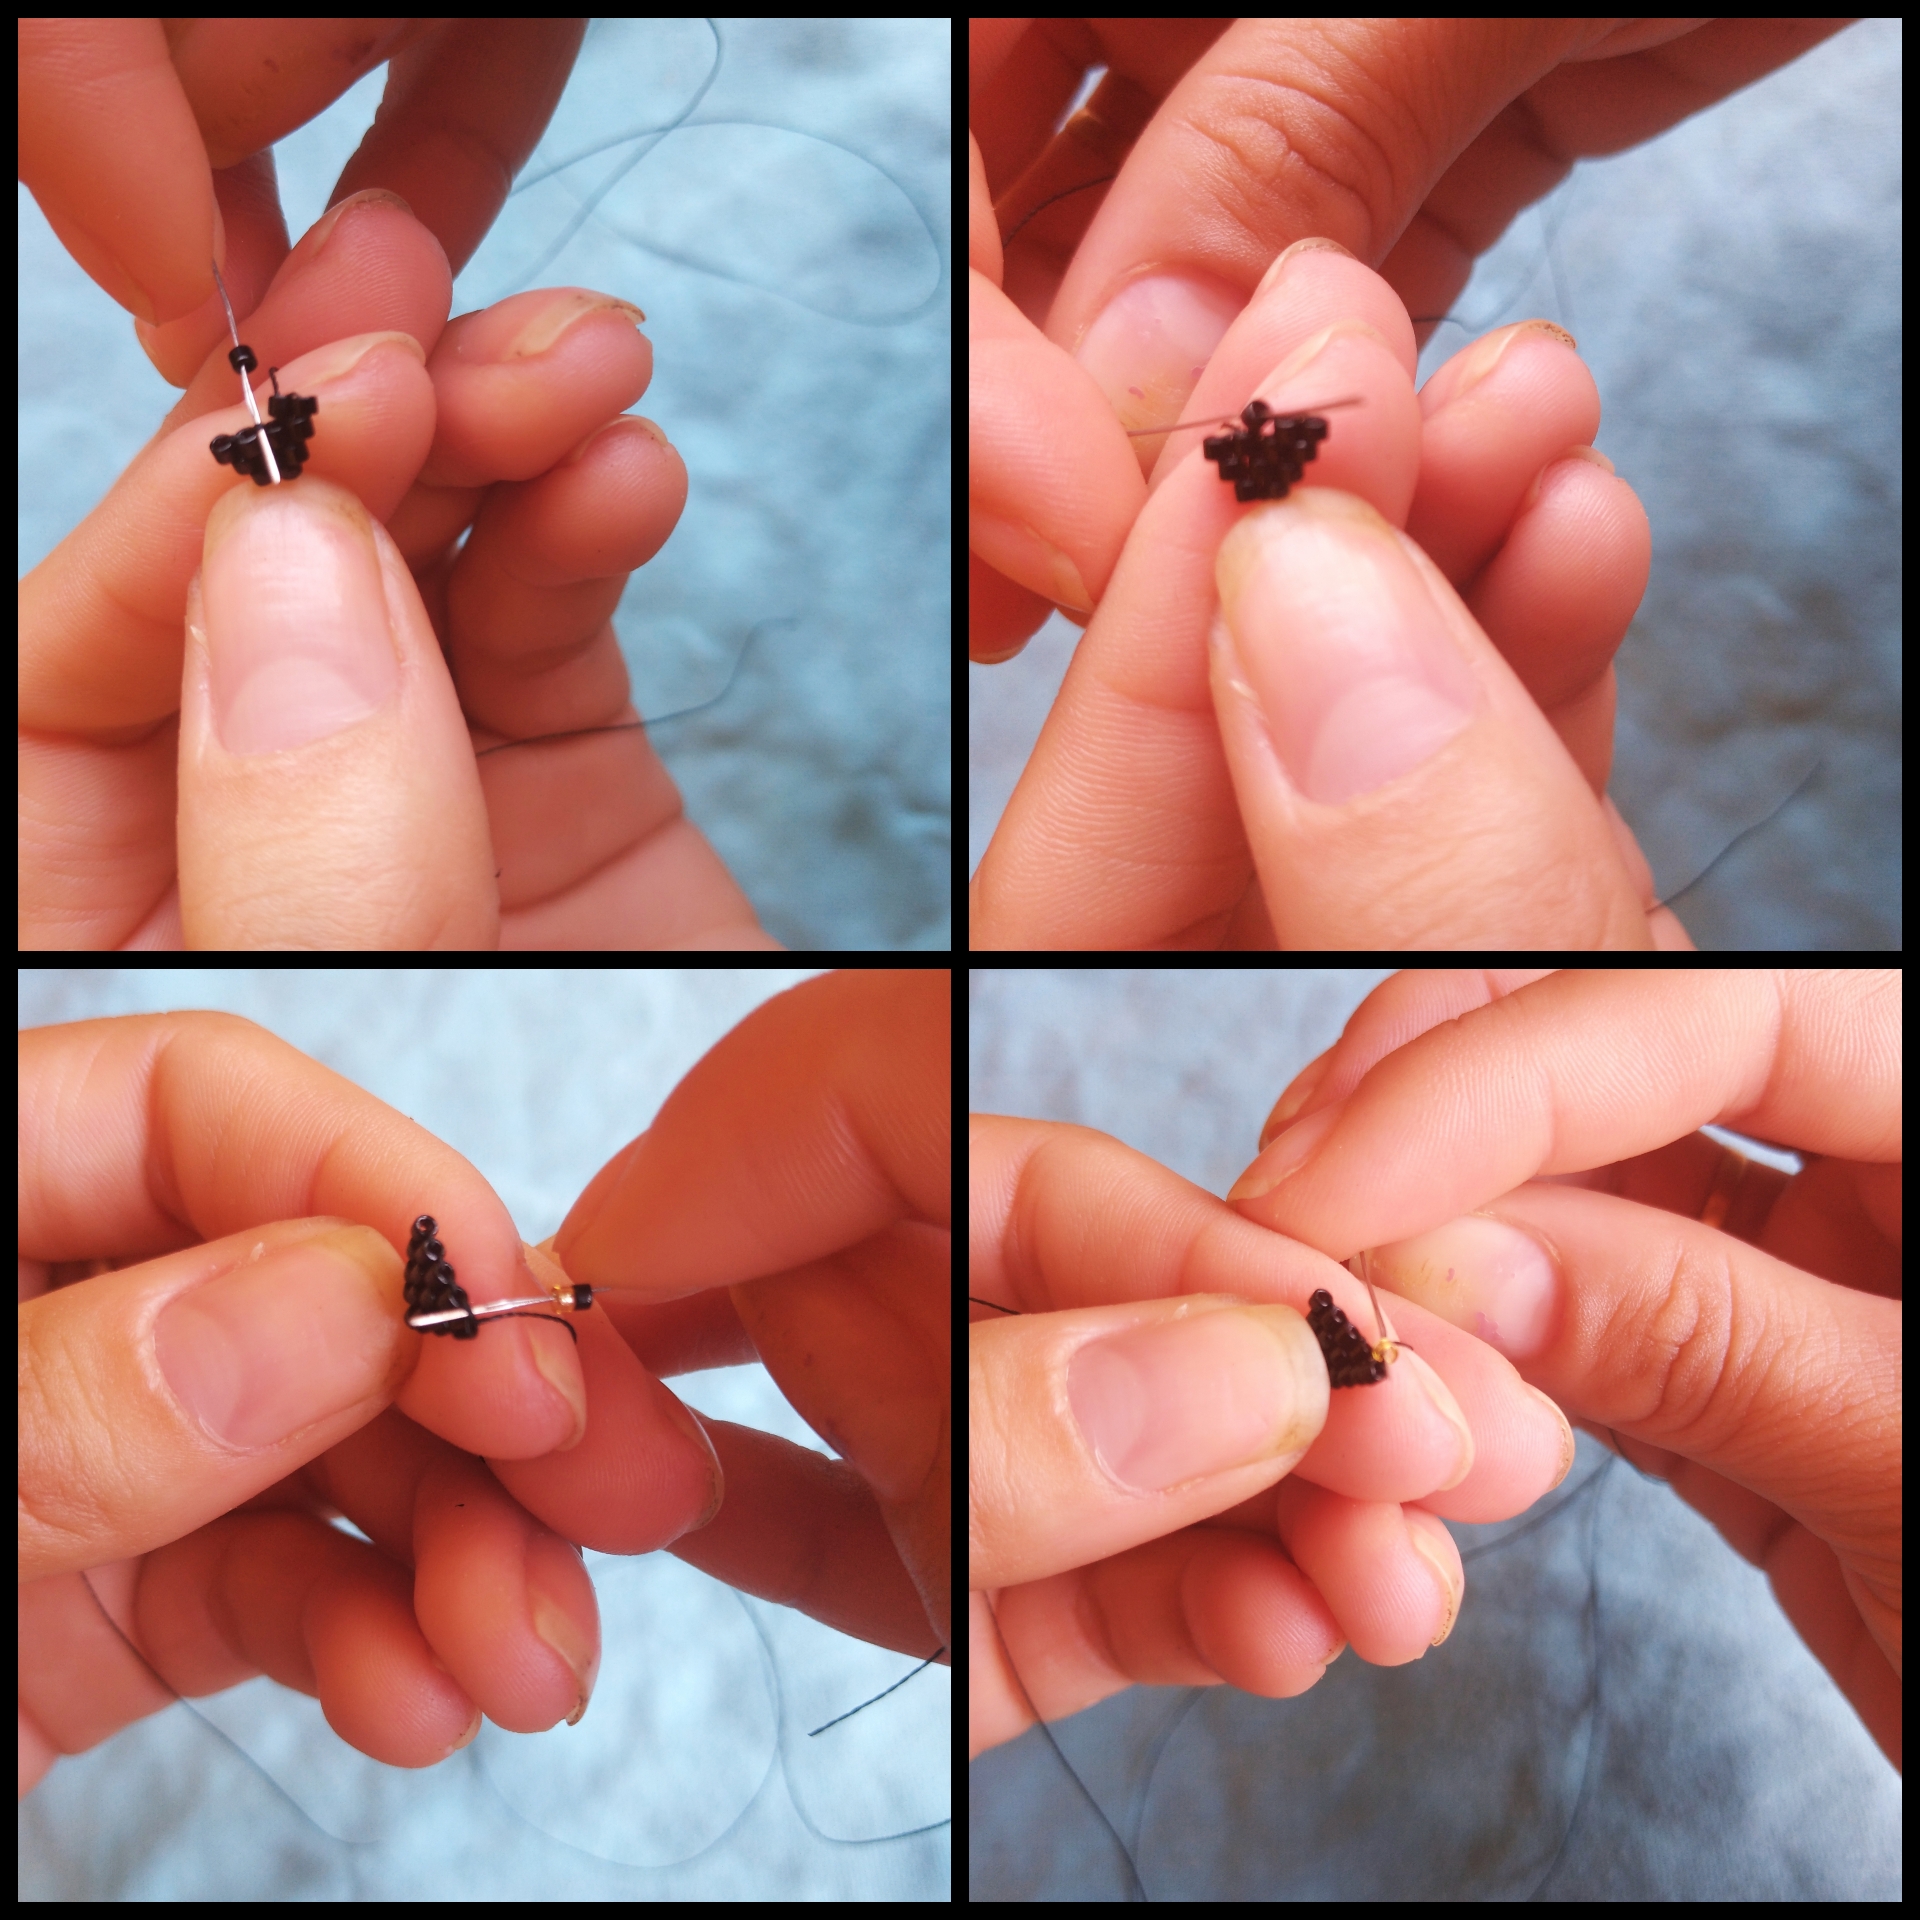
Ahora lo que vamos a hacer es una disminución. Esto se hace, sacando el hilo por le segunda delica de la fila que acabamos de terminar, y una vez tengamos en hilo ubicado, introducimos dos delicas y hacemos el mismo procedimiento que ya hemos venido haciendo.
Now what we are going to do is a decrease. This is done by pulling the yarn through the second delica of the row we just finished, and once we have the yarn located, we introduce two delicas and we do the same procedure we have already been doing.
Volvemos a sacar el hilo por la segunda delica pero del otro extremo y esto se hace pasando el hilo por las delicas hasta que el hilo salga por la delica que necesitamos.
We pull the yarn through the second delica again but from the other end and this is done by passing the yarn through the delicas until the yarn comes out through the delica we need.
Una vez tengamos el hilo ubicado, volvemos a insertar dos delicas en la aguja y realizamos el mismo procedimiento para fijarlas a la fila anterior.
Once we have the yarn in place, we reinsert two delicas in the needle and perform the same procedure to attach them to the previous row.
Ya que tenemos nuestro dige listo, escondemos el hilo al mismo tiempo que vamos reforzando en dige, pasando la aguja con el hilo en forma de zig zag hasta que salga por el otro extremo del dige y así hacemos también con el otro hilo que dejamos al principio de la elaboracion del dige y cortamos el sobrante del hilo.
Once we have our dige ready, we hide the thread at the same time that we are reinforcing the dige, passing the needle with the thread in a zig zag until it comes out of the other end of the dige and so we also do with the other thread that we left at the beginning of the elaboration of the dige and cut the excess thread.
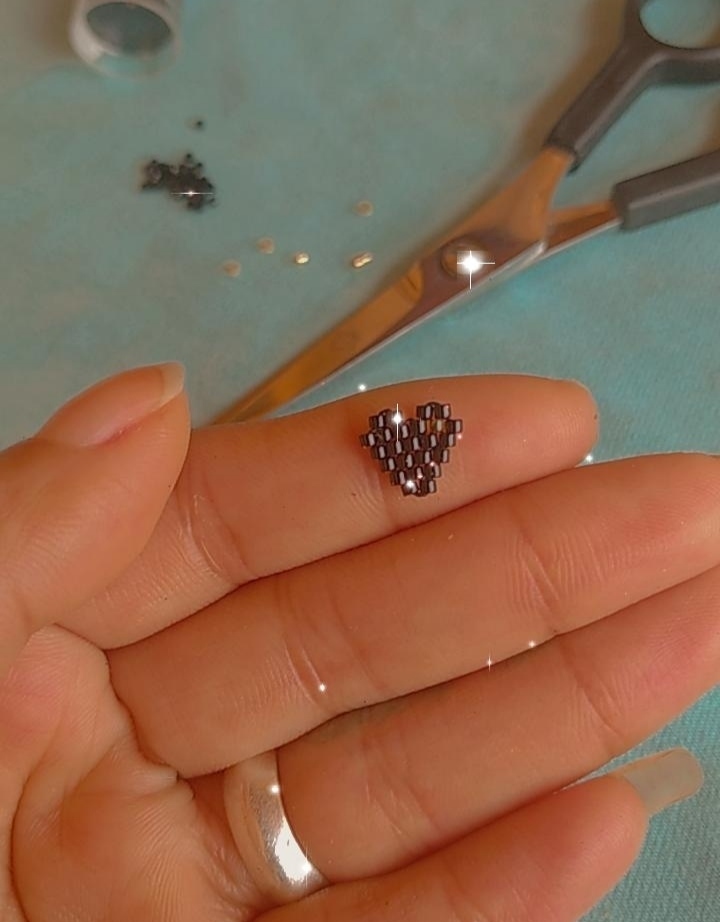
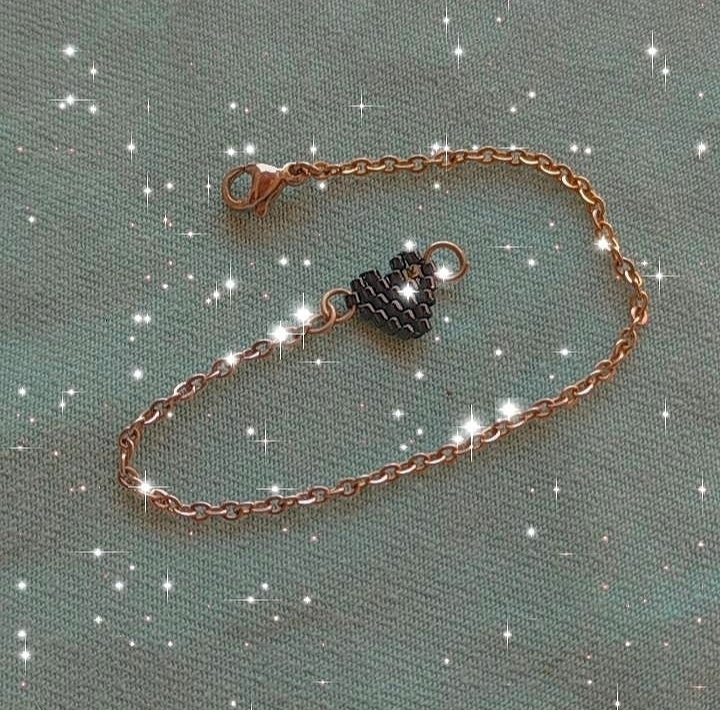
Tenemos nuestro dige listo, podemos usarlo en una cadenita o con un cuerito para pulseras.
Yo encontré una cadenita vieja, le coloque los aritos y un broche y la regalé como una pulsera sencilla.
Este es el resultado. Espero que te animes a realizarla, esto es fácil y una vez que lo hagas, le tomarás amor.
We have our dige ready, we can use it on a chain or with a bracelet string.
I found an old chain, attached the earrings and a clasp and gave it as a simple bracelet.
This is the result. I hope you are encouraged to make it, this is easy and once you do it, you will love it.
Y ya sabes, puedes intentarlo también con pequeñas mostacillas si no tienes las delicas aún, lo importante es que aprendas la técnica poco a poco y éste es un diseño perfecto para comenzar a aprender así que anímate. ❤️
And you know, you can also try it with small beads if you don't have the delicas yet, the important thing is that you learn the technique little by little and this is a perfect design to start learning so cheer up. ❤️
Las fotos fueron tomadas y editadas con teléfono Redmi 8
Photos were taken and edited with Redmi 8 phone
Congratulations @kisbeilyt! You have completed the following achievement on the Hive blockchain and have been rewarded with new badge(s) :
Your next target is to reach 100 upvotes.
You can view your badges on your board and compare yourself to others in the Ranking
If you no longer want to receive notifications, reply to this comment with the word
STOPCheck out the last post from @hivebuzz: