Hello friends of the hive !!! Today I bring you a beautiful recycled tin to use as an ideal cosmetic holder to give to mom on her day for the countries that celebrate that special day this month.
Hola amigos de la colmena!!! Hoy les traigo una hermosa lata reciclada para usar de porta cosméticos ideal para regalar a mamá en su día para los países que se festeja ese día tan especial en este mes.
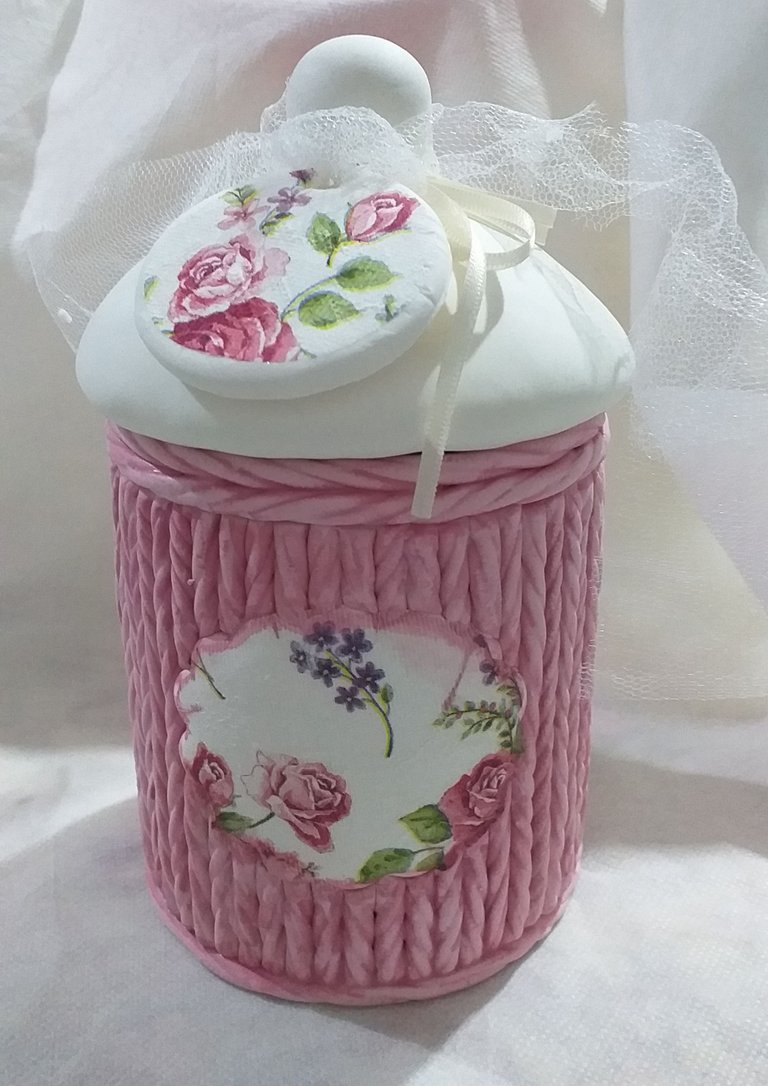
I did this work with a video tutorial by Erica Terán.
Este trabajo lo hice con un video tutorial de Erica Terán.
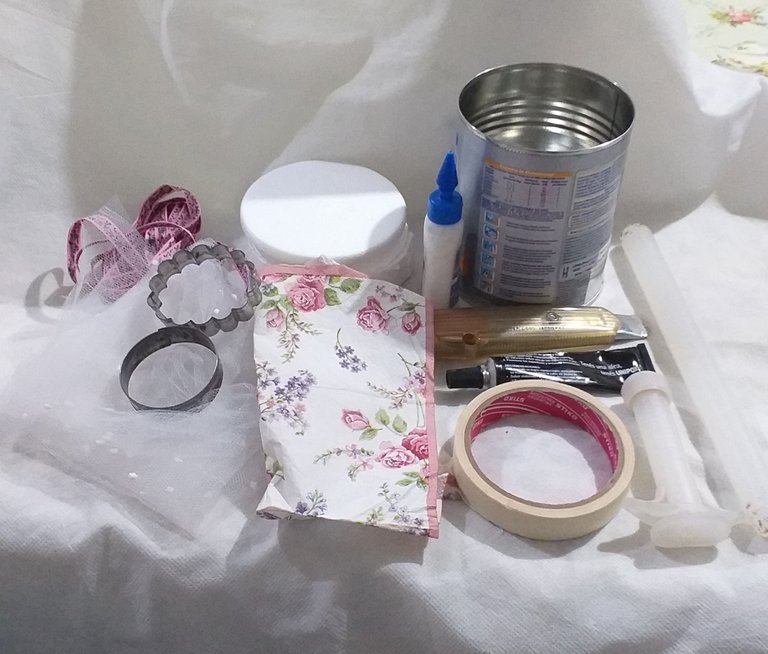
The materials I used are: cold porcelain, vinyl glue, rolling pin, a tin, paper tape, foam circles, cutters, cutters, satin ribbons, tulle, decoupage napkin, ejector and glue.
Los materiales que utilicé son: porcelana fría, cola vinilica,palo de amasar,una lata,cinta de papel, círculos de telgopor, cuter, cortantes, cintas de raso, tul, servilleta para decoupage, eyector y pegamento.
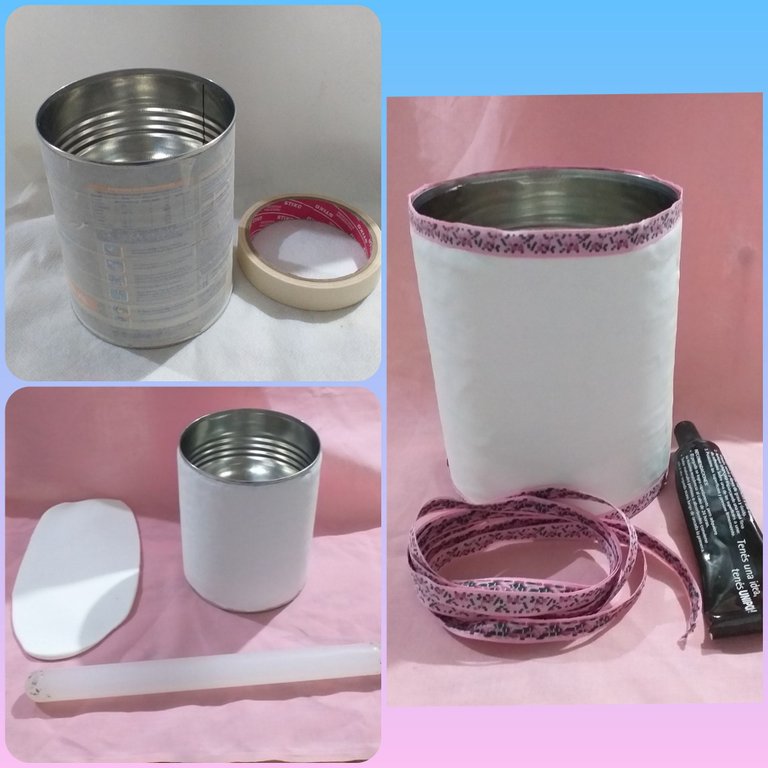
We put paper tape to the whole can. We stretch cold porcelain, cover the entire can with vinyl glue and glue. We remove the surplus.
We glue the satin ribbon on the edge using glue.
Ponemos cinta de papel a toda la lata. Estiramos porcelana fría, cubrimos con cola vinilica toda la lata y pegamos. Quitamos el excedente.
Pegamos la cinta de raso en el borde usando pegamento.
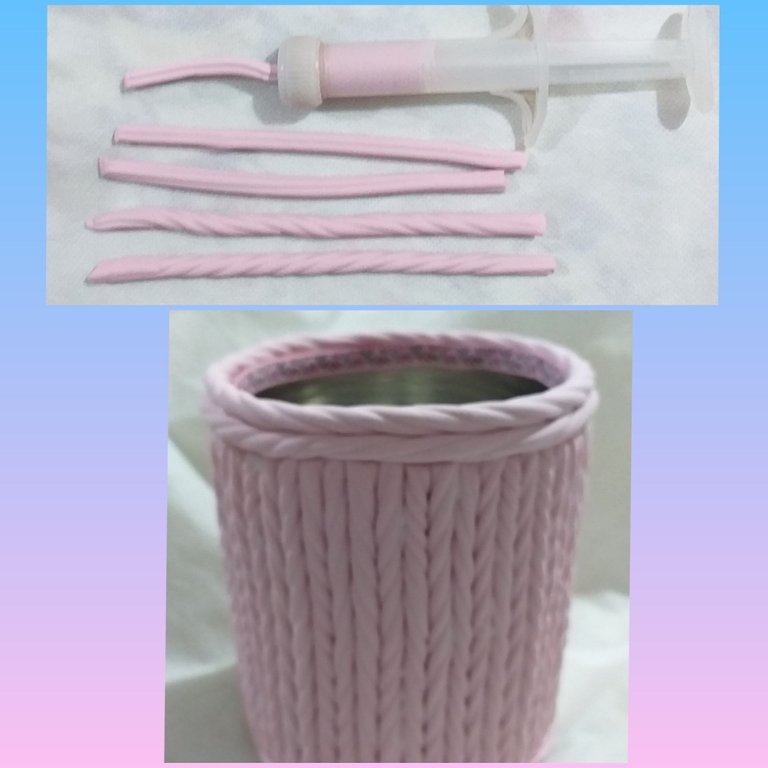
With the ejector we make as many strips as necessary to cover the entire can.
We are cutting the strips of the length of the can, we screw and we are joining two strips to give a wool effect.
Con el eyector hacemos tantas tiras como sea necesaria para cubrir toda la lata.
Vamos cortando las tiras del largo de la lata, enroscamos y vamos uniendo de a dos tiras para dar efecto de lana.
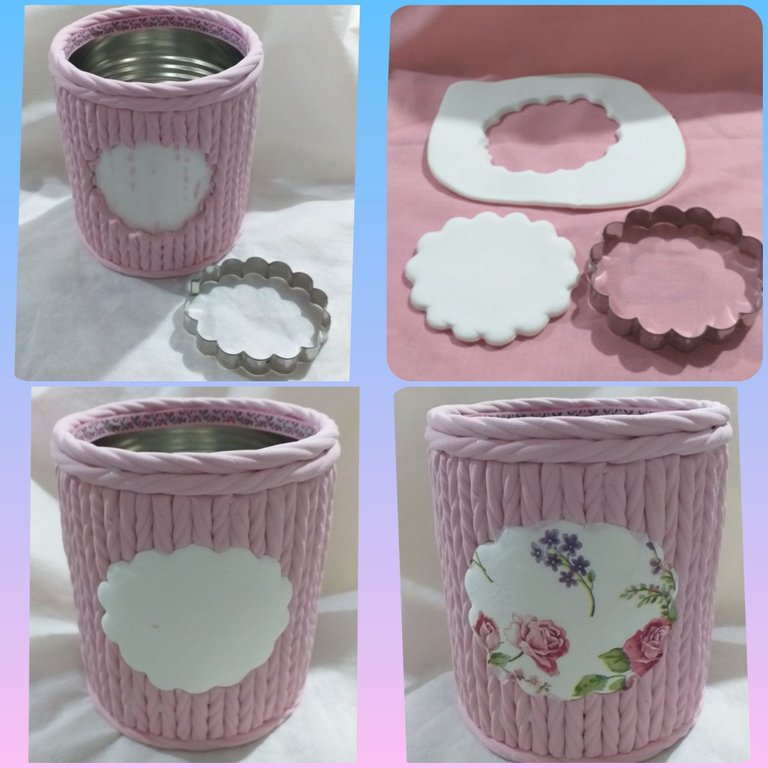
With a cutter we mark in the center of the can and remove that portion.
We stretch cold white porcelain and cut with the same cutting edge.
We paste in the same place that we made the mark.
On the paper napkin we draw the same pattern and cut out. We glue the design on the can.
Con un cortante marcamos en el centro de la lata y quitamos esa porción.
Estiramos porcelana fría blanca y cortamos con el mismo cortante.
Pegamos en el mismo lugar que hicimos la marca.
En la servilleta de papel dibujamos el mismo patrón y recortamos. Pegamos el diseño en la lata.
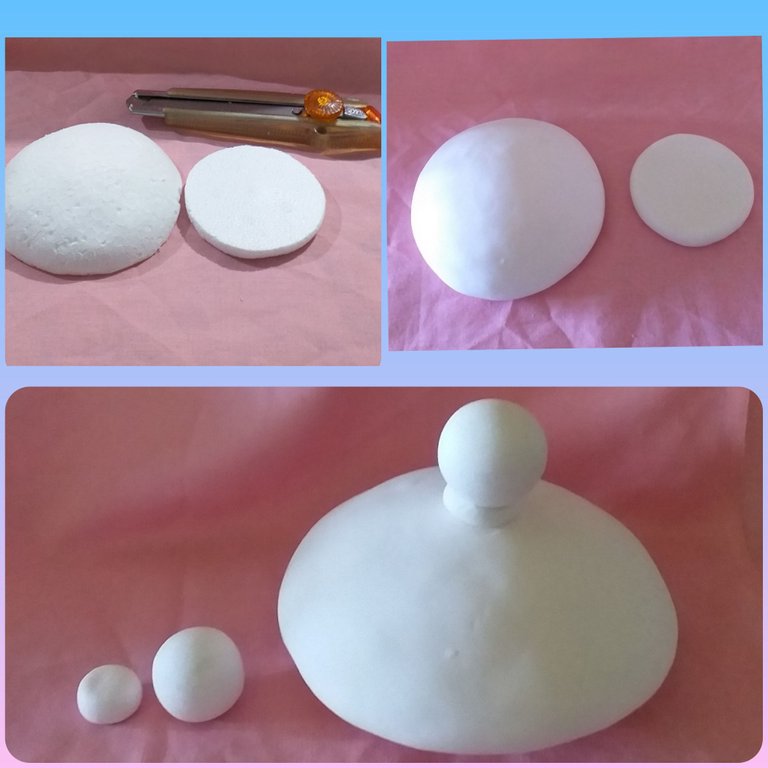
To make the lid we cut with a styrofoam cutter giving the shape of a half sphere, we also cut a smaller styrofoam circle.
We cover the two pieces with dough and glue with vinyl glue.
We make a ball with white dough and flatten. We make another bigger ball. We join and glue it to the lid.
Para hacer la tapa cortamos con un cuter telgopor dando forma de media esfera, también cortamos un circulo de telgopor más pequeño.
Forramos con masa las dos piezas y pegamos con cola vinilica.
Hacemos una bolita con masa blanca y aplanamos. Hacemos otra bolita más grande. Unimos y lo pegamos a la tapa.
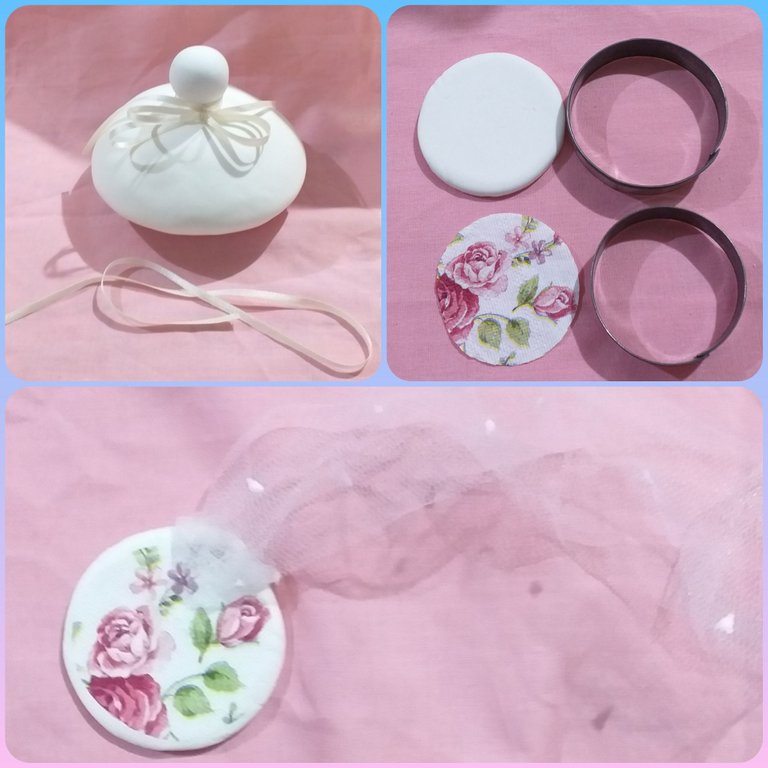
With a satin ribbon we make a bow and tie it to the top.
We roll out dough and cut a circle. With a smaller cutter we mark the circle on the napkin and cut out.
We glue the napkin circle on the dough circle.
We drill at the top. We cut a strip of tulle and pass it through the perforation.
Con una cinta de raso hacemos un moño y atamos a la tapa.
Estiramos masa y cortamos un círculo. Con un cortante más pequeño marcamos en la servilleta el círculo y recortamos.
Pegamos el círculo de servilleta sobre el círculo de masa.
Perforamos en la parte superior. Cortamos una tira de tul y lo pasamos por la perforación.

We tie the circle to the lid. We can make a wash with a little acrylic and paint where we like to give it more color.
And so this beautiful tin is finished with this delicate style. Greetings. Andrea ♥♥♥
Atamos el circulo a la tapa. Podemos hacer una aguada con un poco de acrílico y pintamos donde nos guste para darle más color.
Y así queda terminado esta hermosa lata con este estilo tan delicado. Saludos. Andrea♥♥♥