ESPAÑOL
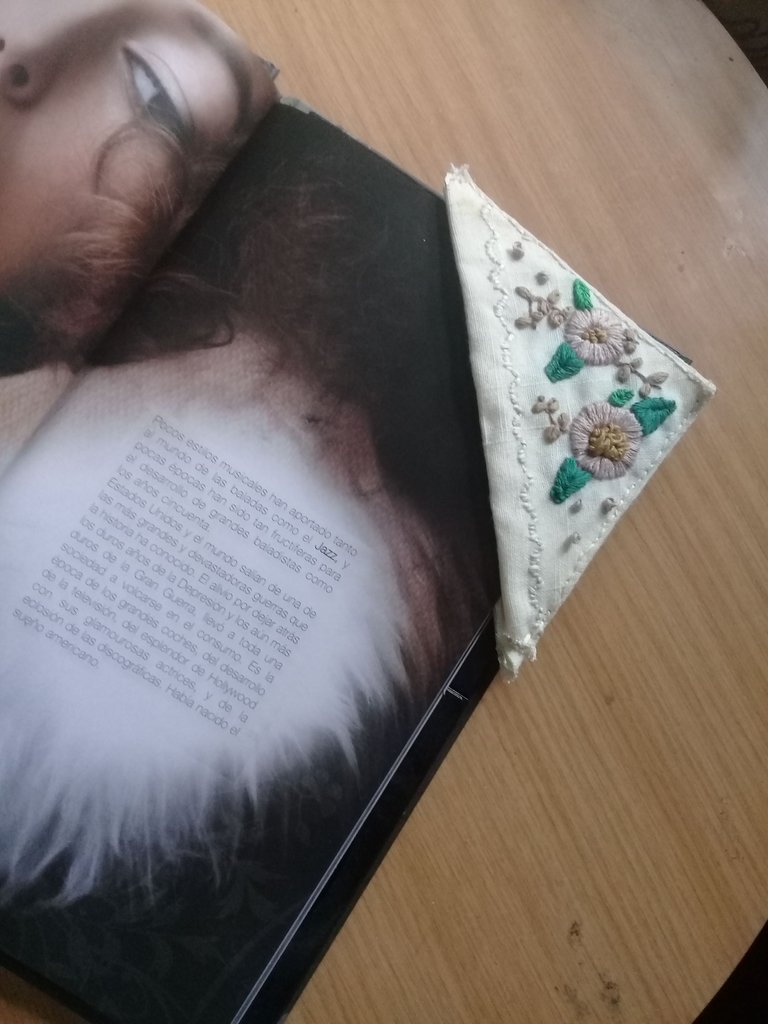
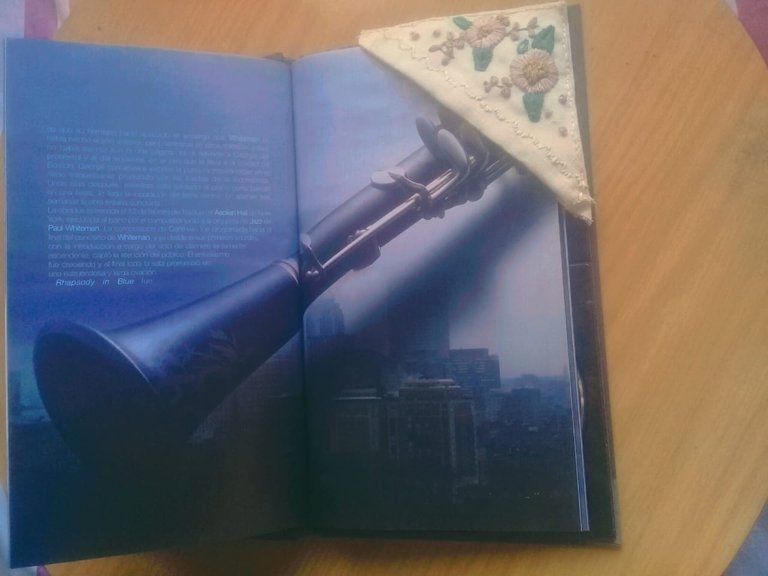
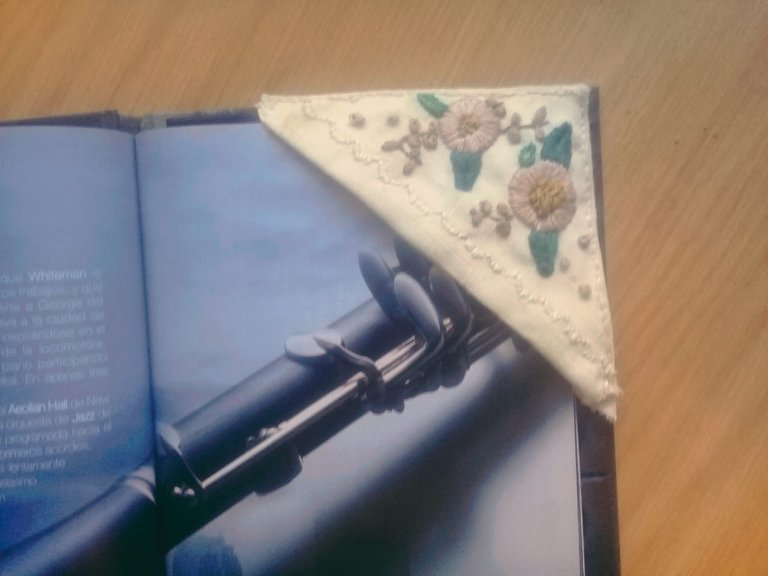
Saludos comunidad de @needleworkmonday, hoy les quiero compartir el cómo realice un separador de libro bordado en una forma triangular. Este separador de libro lo vi hace tiempo en Instagram y quise experimentar elaborar uno. Al principio me enrede bastante, hacía y deshacía, dañe varios retazos de tela, no sabía que diseño de flores hacer: al final me decidí por uno sencillo.
Materiales
-Cartulina
-Tela (puede ser de algodón, de yute o de lino)
-aguja
-hilo de bordar de 4 a 6 hebras
Procedimiento
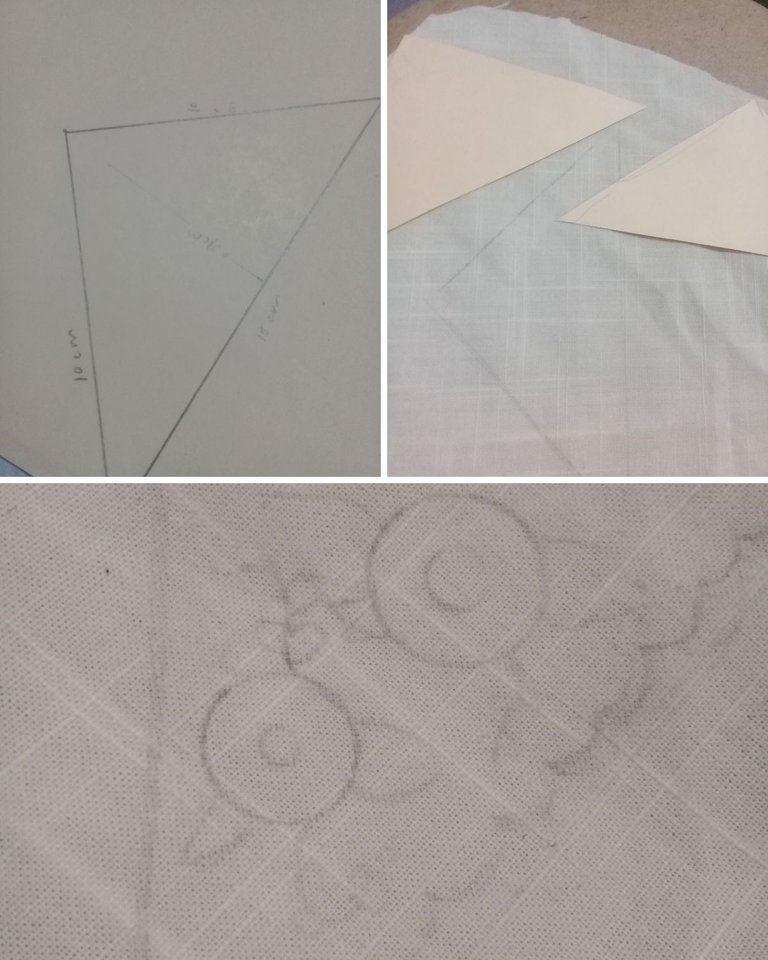
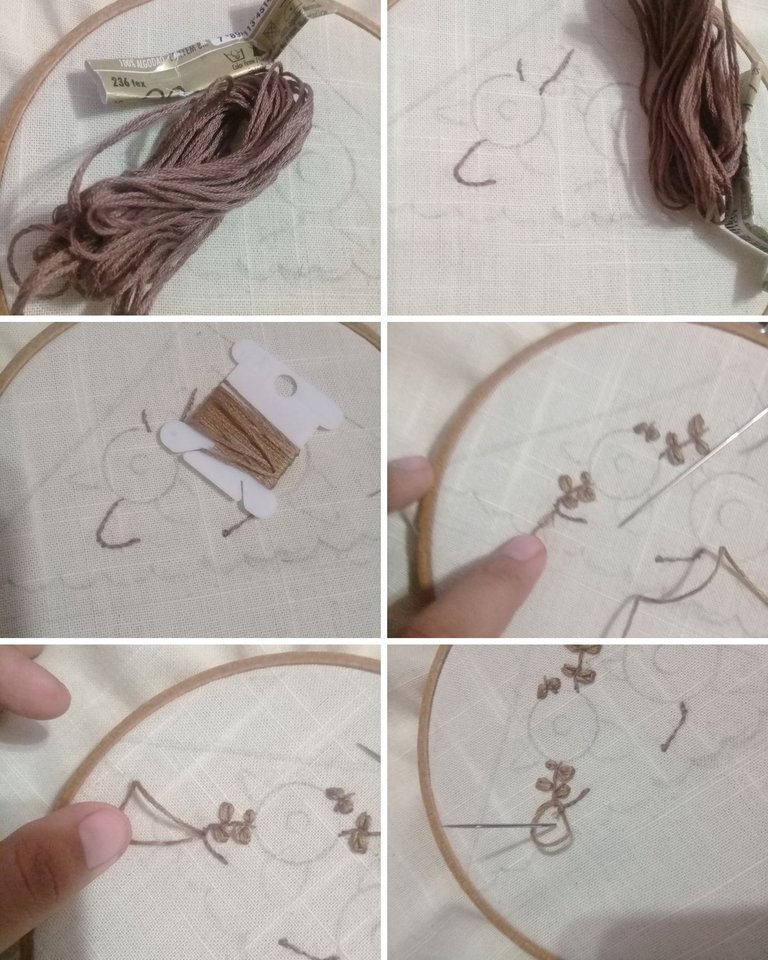
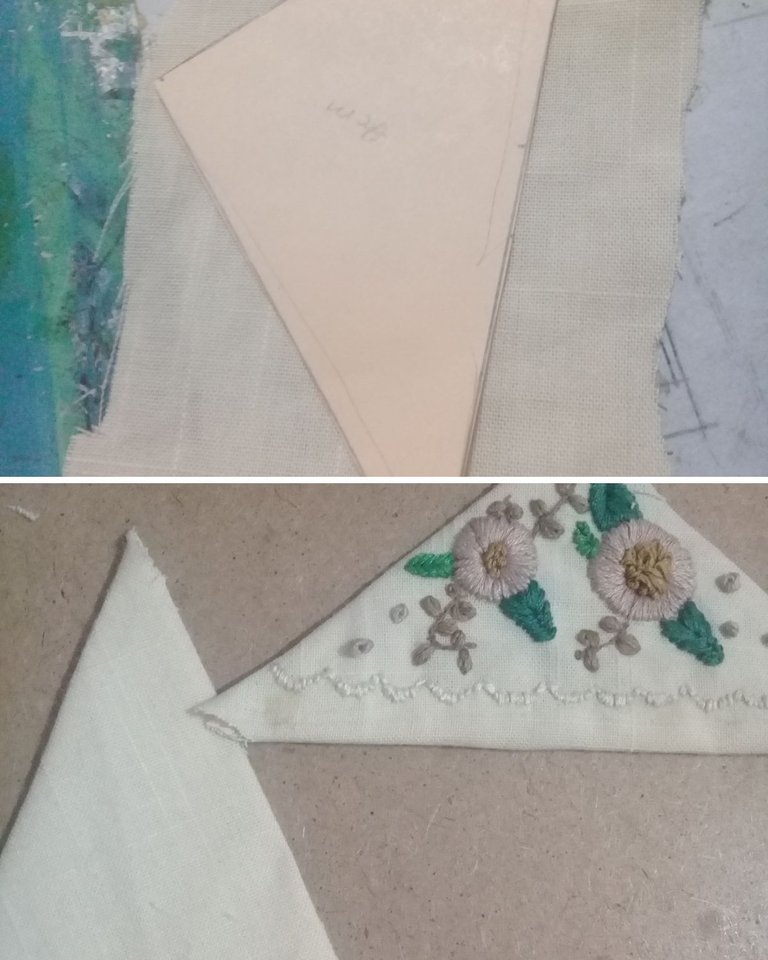
Lo primero que hay que hacer es cortar dos formas de triangulo en cartulina, ambas del mismo tamaño que desees; en mi caso lo hice 10 cm los lados más cortos y el más largo de 15 cm, mientras que la altura fue de 7 cm. Luego, calqué el diseño de las flores, previamente dibujados en una hoja, en una tela que se asemeja a la de lino, con esto, prensé la misma con un aro y procedí a realizar las respectivas técnicas de bordado.
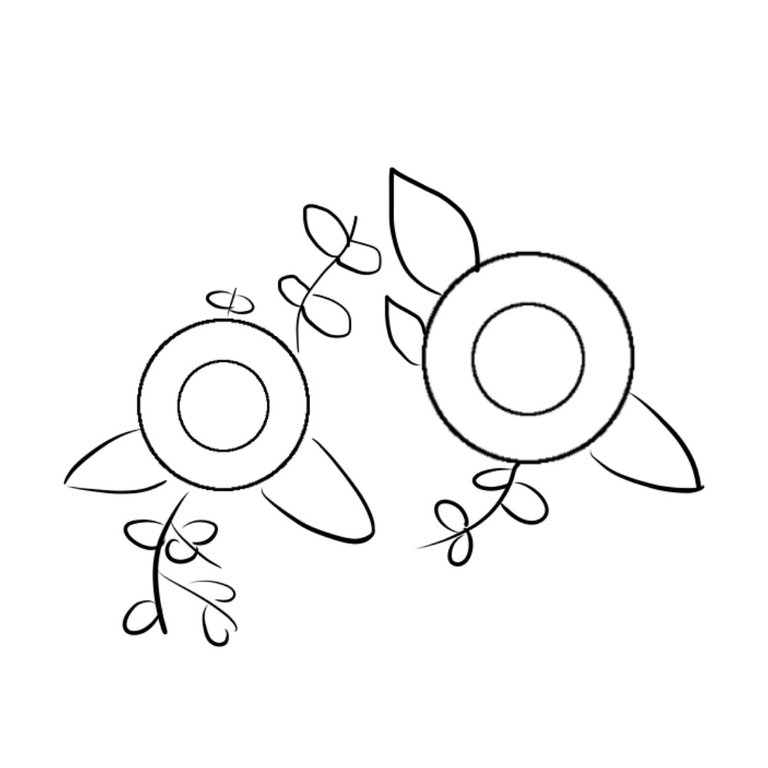
Patrón de bordado digitalizado por mi persona
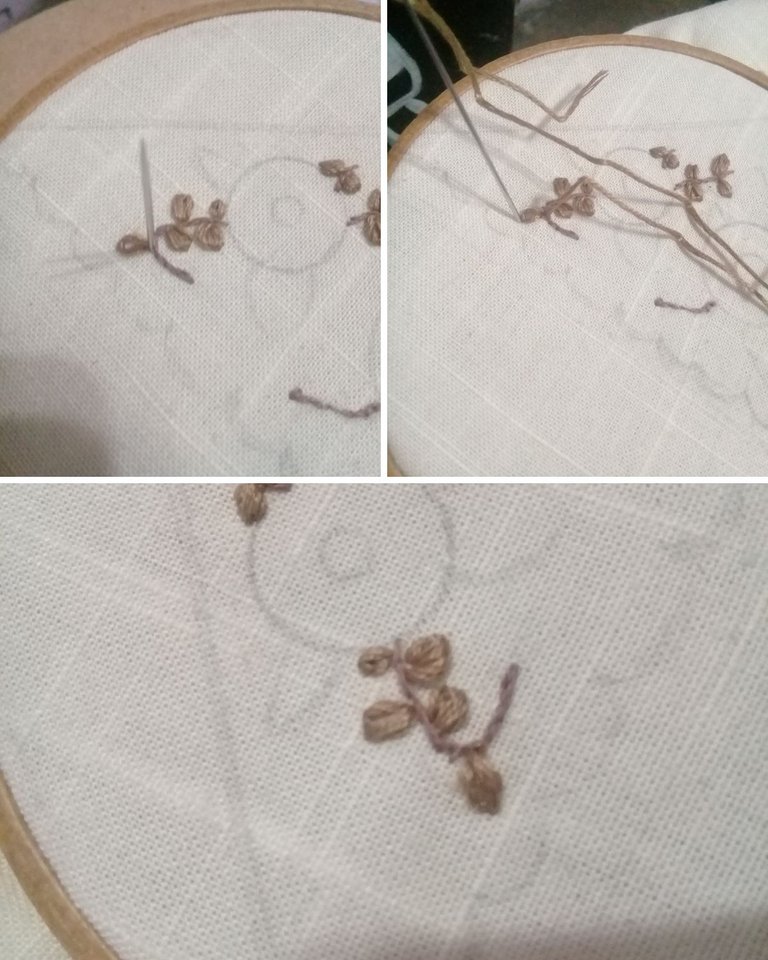
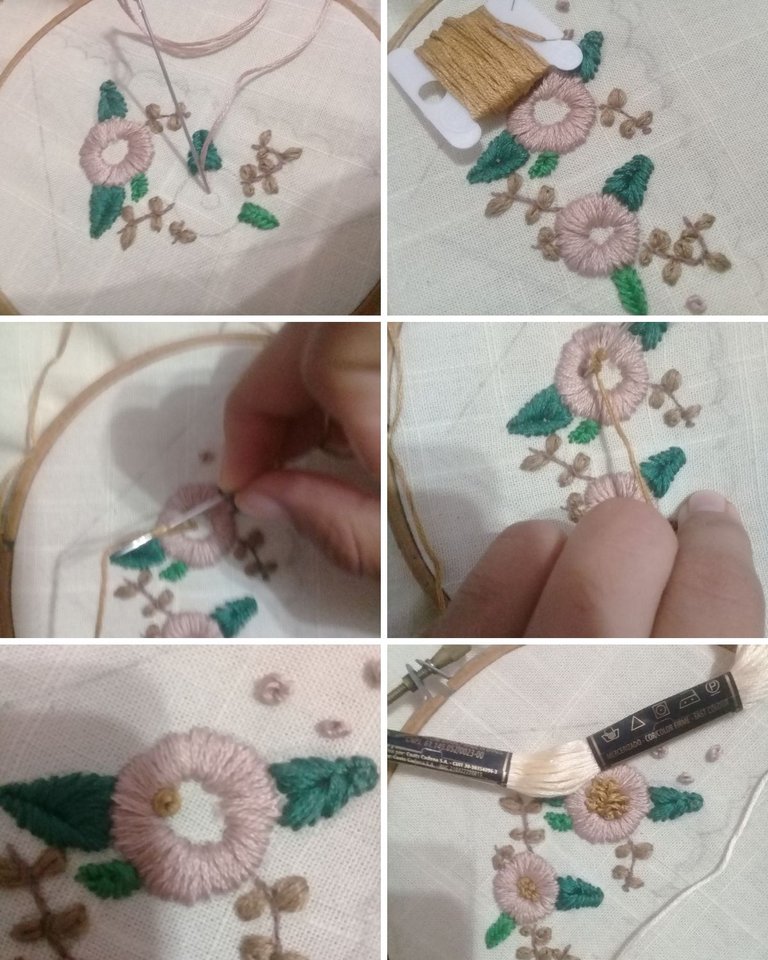
Lo primero fue hacer las ramitas en un color marrón, para ello recurrí a la puntada de paso atrás, mientras que lo que son las mini hojas, fue con la técnica de puntada margarita + la puntada recta. Esta combinación de puntadas consiste de la siguiente manera:
Guiándose por la siguiente ilustración, el proceso es sacar la aguja con su hilo de la tela, ese sería nuestro punto A. Con ello, volvemos a introducir la aguja a la tela por donde entró, es decir, nuestro punto A; pero se deja una porción de hilo sin bajarlo ni prensarlo, que quede suelto. Con ello se saca la aguja por el punto B, como se muestra en la ilustración, ahí si se jala el hilo y por ende se vendrá lo que había quedado suelto anteriormente. Se introduce la aguja un poco más atrás del punto B. Se vuelve a sacar la guja por el punto A se separan un poco las hebras de los hilos para que queden más ancho y se introduce por el punto B, quedando como un pequeño pétalo, lo cual sirve también para formar una flor.
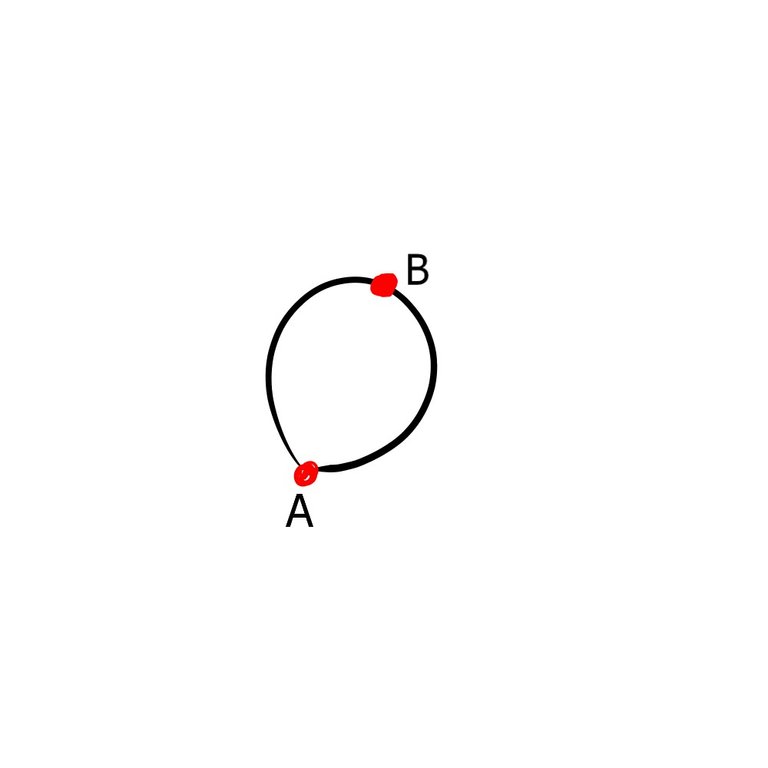
Diagrama de la puntada margarita + puntada recta, ilustrado por mi persona
Con las hojas usé la técnica de la puntada plana, que consiste en hacer o bordar una línea en la mitad de la hoja dibujada (Punto A y B), luego se saca la aguja por el punto C y se introduce por el punto B, se vuelve a sacar por el punto D y se introduce por el punto B, seguidamente se saca la aguja a lado del punto C y se introduce a lado del punto B y así sucesivamente, vas rodando el punto a lado del anterior y asimismo, procederá cuando vuelvas a introducir la aguja a la tela, ya no será en ese punto B si uno poco más arriba de este.
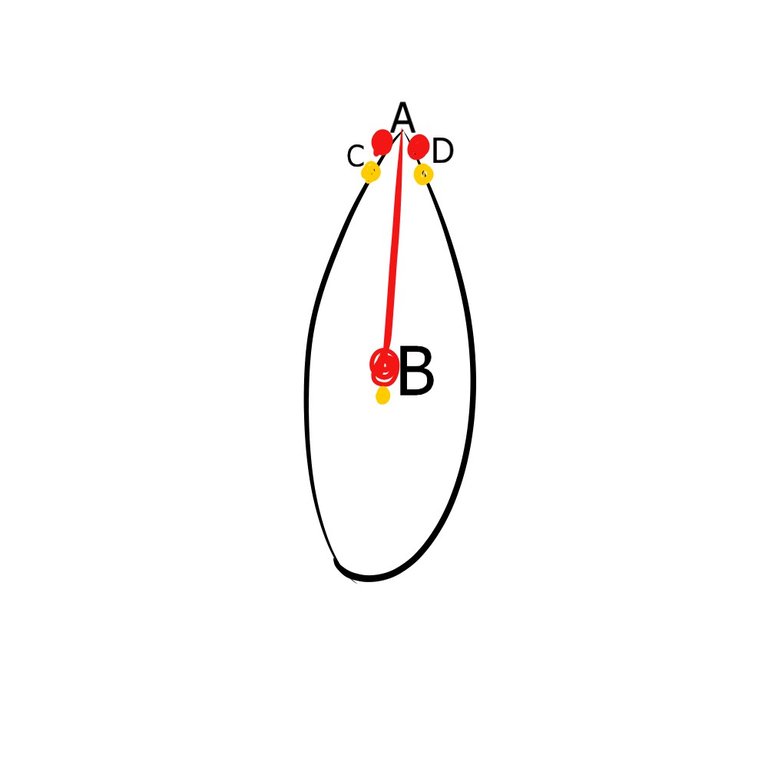
Diagrama de la puntada plana, ilustrado por mi persona
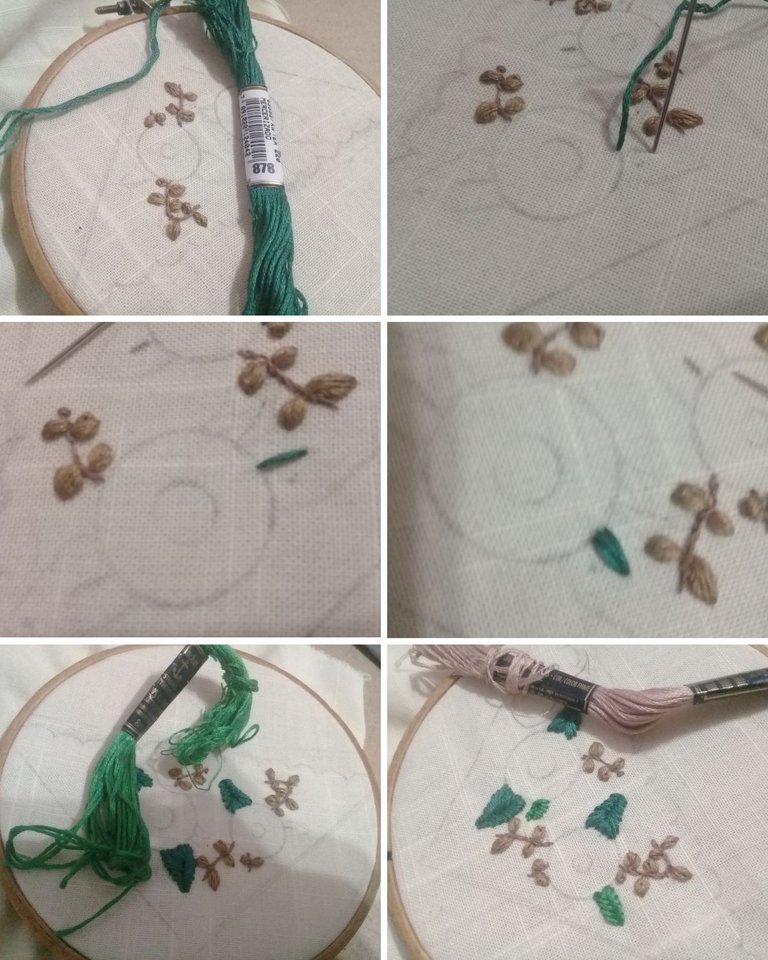
Ya con las flores solo rellene la forma de los dos circulos más grande, quedando el pequeño del centro rellenado con puntada nudo. Y la decoración de abajo lo hice con el paso atrás.
Ya finalizado el bordado, le contornee la forma del triángulo y lo intente ajustar a la cartulina, ya cortada en esta misma forma; se me dificultó bastante este paso, pues no encontraba el cómo, tendré que buscar más adelante un tutorial de como forrar un triángulo. Ya pegado la tela a las cartulinas, cosí ambas caras del triángulo por los extremos más cortos, es decir, los que miden 10 cm, dejando sin unir el más ancho, para que quede como una especie de gorro.
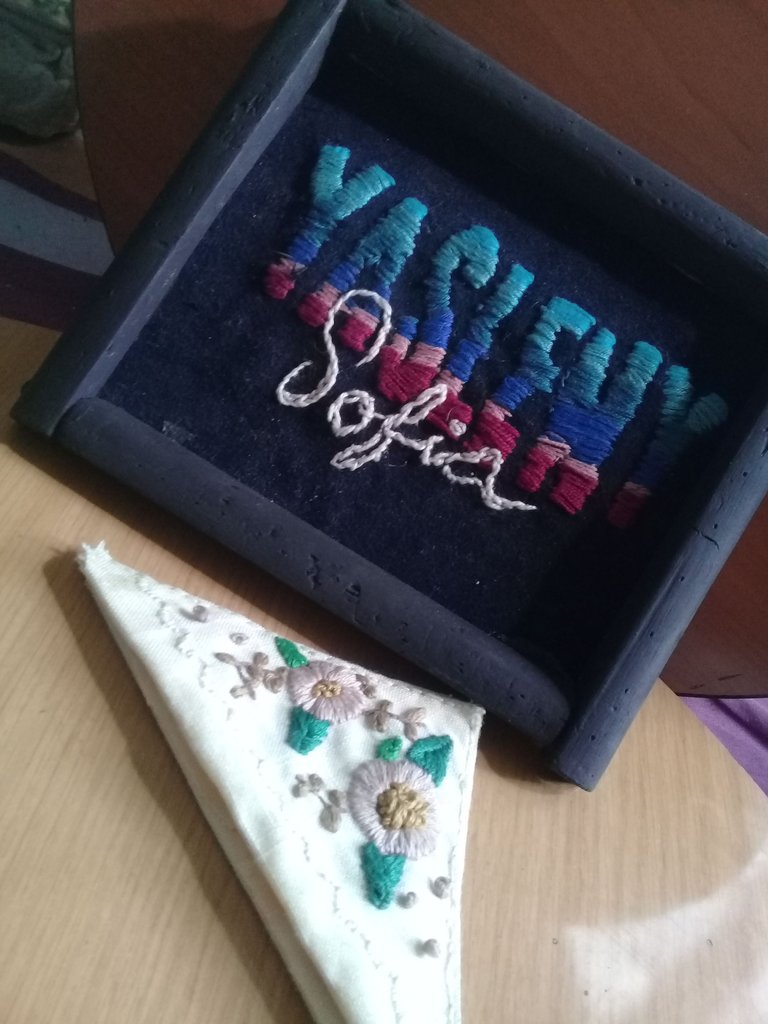
Para serles sincera, no me gustó mucho el resultado, pero como estaba experimentando y viendo cómo es que se hace, no me decepciona, siento que también fallo el diseño y colores empleados. No obstante, me dieron ganas de hacer más, incluso uno con temática de Harry Potter, y ustedes, ¿Qué opinan? ¿Cómo me quedó?
Los collages fueron realizados en CANVA.
Gracias por leer mi post. Espero que les haya gustado. Estaré atenta a responder sus comentarios. Pueden visitar mi blog, seguir mis contenidos y redes sociales
ENGLISH
Greetings @needleworkmonday community, today I want to share with you how I made an embroidered bookmark in a triangular shape. I saw this bookmark some time ago on Instagram and I wanted to experiment with making one. At the beginning I got quite tangled up, I made and unmade, I damaged several fabric scraps, I didn't know what flower design to make: in the end I decided on a simple one.
Materials
-Cardboard
-Cloth (can be cotton, jute or linen)
-Needle
-4 to 6 strands of embroidery thread
Procedure
The first thing to do is to cut two triangle shapes in cardboard, both of the same size you want; in my case I did 10 cm the shorter sides and the longer one of 15 cm, while the height was 7 cm. Then, I traced the design of the flowers, previously drawn on a sheet, on a fabric that resembles linen, with this, I pinned it with a hoop and proceeded to perform the respective embroidery techniques.
Embroidery pattern digitized by myself
The first thing was to make the twigs in a brown color, for this I used the step back stitch, while the mini leaves were made with the daisy stitch + straight stitch technique. This stitch combination consists of the following:
Guided by the following illustration, the process is to remove the needle with its thread from the fabric, that would be our point A. With it, we introduce the needle back to the fabric where it entered, that is to say, our point A; but we leave a portion of thread without lowering or pressing it, so that it remains loose. With it the needle is taken out by point B, as it is shown in the illustration, there if the thread is pulled and therefore it will come what had been left loose previously. The needle is introduced a little further back from point B. The needle is pulled out again through point A, the strands of the threads are separated a little so that they are wider and it is introduced through point B, leaving a small petal, which also serves to form a flower.
Daisy stitch + straight stitch diagram, illustrated by myself.
With the leaves I used the flat stitch technique, which consists of making or embroidering a line in the middle of the drawn leaf (Point A and B), then the needle is taken out through point C and is introduced through point B, it is taken out again through point D and is introduced through point B, Then you take out the needle next to point C and introduce it next to point B and so on, you go rolling the point next to the previous one and likewise, it will proceed when you reintroduce the needle to the fabric, it will no longer be in point B but a little above this one.
Diagram of the flat stitch, illustrated by myself.
With the flowers I only filled in the shape of the two larger circles, leaving the small one in the center filled in with knot stitch. And the bottom decoration was made with the back step.
Once the embroidery was finished, I outlined the shape of the triangle and tried to adjust it to the cardboard, already cut in this same shape; this step was quite difficult for me, as I couldn't find how, I will have to look for a tutorial on how to line a triangle later on. Once the fabric was glued to the cardboard, I sewed both sides of the triangle by the shorter ends, that is, the ones that measure 10 cm, leaving the wider one unattached, so that it looks like a kind of cap.
To be honest, I didn't really like the result, but since I was experimenting and seeing how it's done, I'm not disappointed, I feel that the design and colors used also failed. Nevertheless, it made me want to make more, even one with a Harry Potter theme, and you, what do you think? How did it look like?
The collages were made in CANVA.
Translated using DeepL
Thank you for reading my post. I hope you liked it. I will be attentive to answer your comments. You can visit my blog, follow my content and social networks.
Se ve bastante bien vale. Me agrada como se ve en la página del libro. Cumple con su función y está lindo. 😍
si 😁 es que el que vi en Instagram estaba muy bonito, pero también puede ser por el tipo de tela que usaron. Muchas gracias😊
Yo lo veo muy lindo, el bordado te quedó genial. Pero si no estás conforme ya sabes que siempre se puede mejorar. 🙋 Saludos.
Si, eso sí es verdad. Gracias! 😊
Me gustaría bordar así… Saludos 😀
si se puede, con paciencia y practicando se logra😊
Me parece un proyecto muy bonito y además muy útil.
El bordado es un hermoso arte, te felicito por tener la habilidad para practicarlo.
Saludos!
Muchas gracias😊 es una idea muy didáctica para los amantes de la lectura
Que idea tan bonita, gracias por compartirla ⛅️
Gracias!😊
Not what I expected when I read "bookmark"...😄
I think the design is super cute!! Oh and do some with themes for specific boos (like harry potter) could be great!!
😘
Yes, actually when I saw it on instagram I didn't see it as such either, but when I made it myself I really like this style of bookmark, they are really elegant and beautiful. Thanks for reading my post😊