Cintillo con temática del Día de Muertos [ENG/ESP]

ENGLISH


PARA LAS PORTADAS DE HIVE (1).jpg


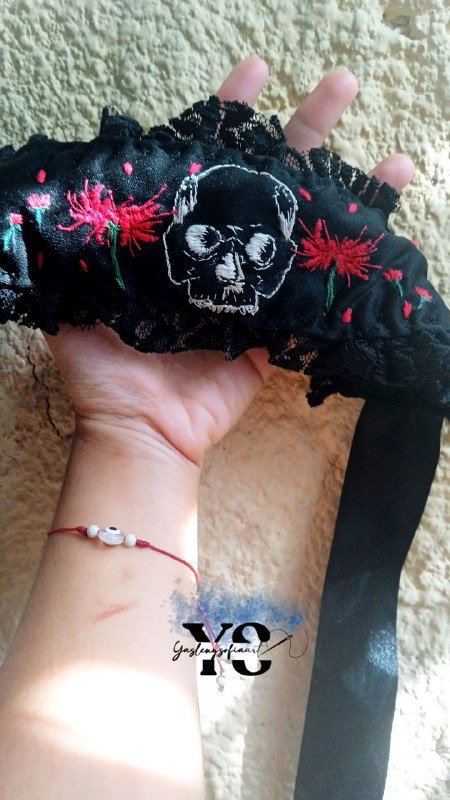
Greetings @needleworkmonday community, today and tomorrow is celebrated mainly in Mexico what is known as the Day of the Dead, a tradition where the dead are honored; a belief that I think is very nice and not dark at all, because nothing better than honoring those who were important in our lives and are no longer here. For this occasion I wanted to make a kind of necklace with lace and embroidery, but the fabric ended up being wider, and in the end its function was a headband.

SEPARADORMATERIALES.png


4979046919741485248.jpg


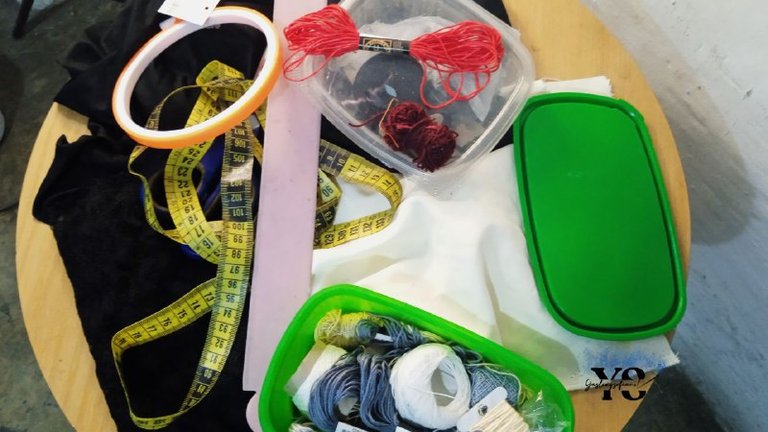
-Red, green and white embroidery threads.

-Black cotton fabric. 1 mt

-White cotton fabric, half a meter.

-Black lace ribbon or black lace fabric. 1.5 mt

-Black ribbon.

-Embroidery hoop.

-Sewing thread.

-Measuring tape.

-Scissors.


SEPARADORPASOAPASO.png


4979046919741485247.jpg


4979046919741485246.jpg


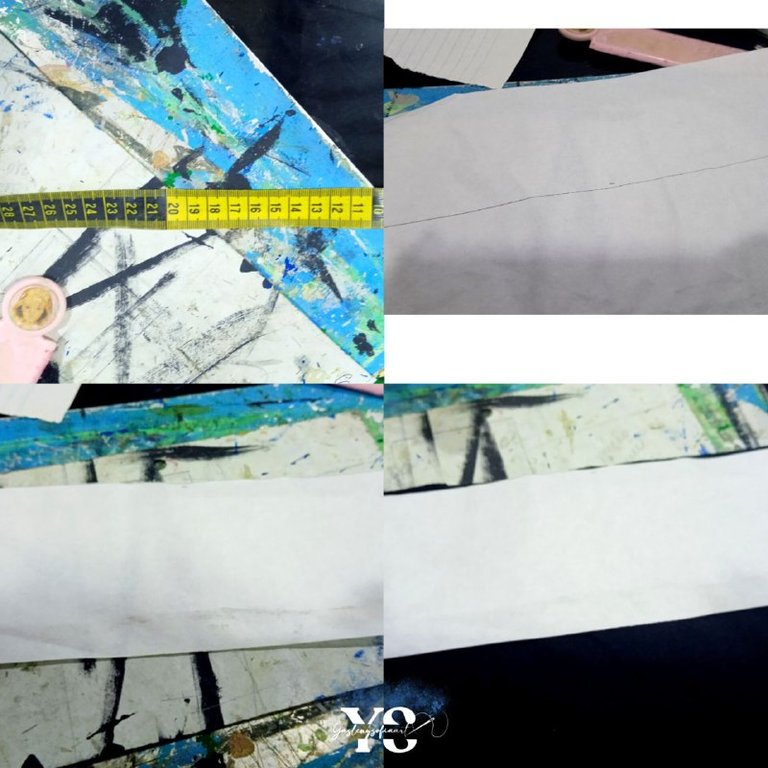
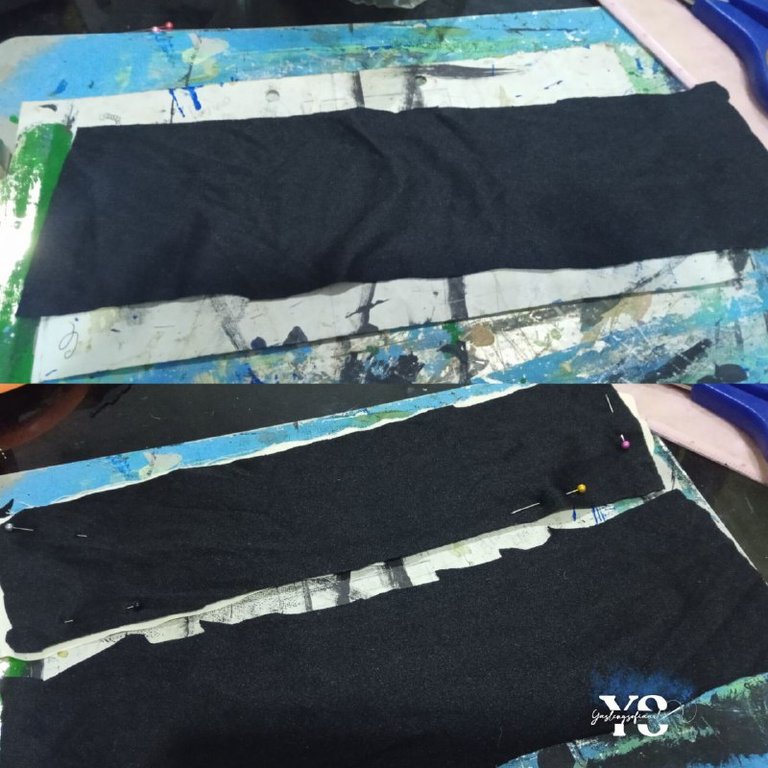
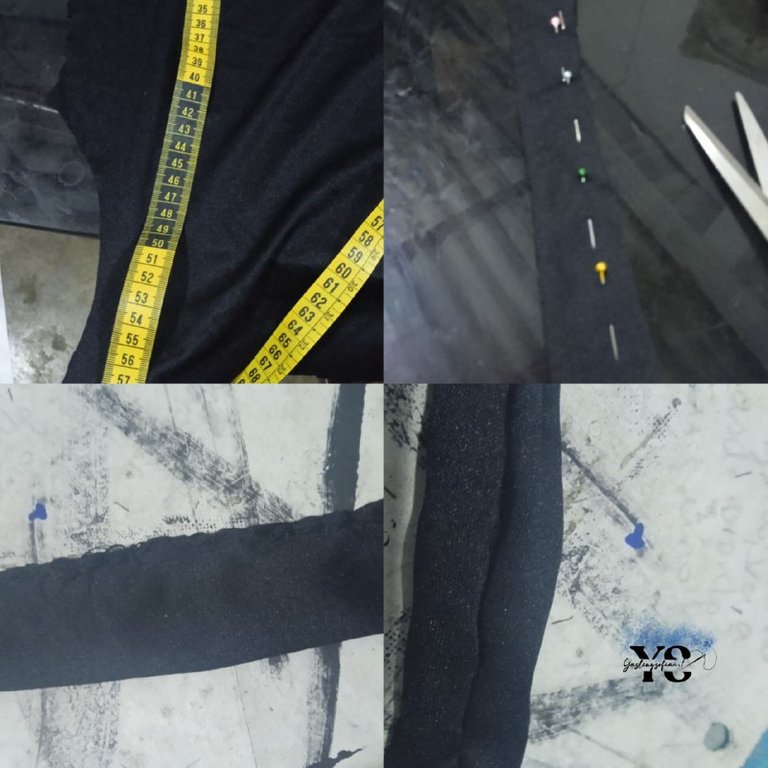
The first thing I did was to take the measurements of my neck, since that was the initial idea, which was between 25 to 30 cm, but I took 35 cm long (because of the doubles and so on) and 6 cm wide, since both ends would bend 1 cm, leaving about 4 cm as space for the embroidery. Taking out two pieces in the black fabric and one in the white fabric, as I thought it would be too light and would not hold well, but in the end I realized that it was not necessary, even so, I had already sewn it to the black fabric.

4979046919741485245.jpg


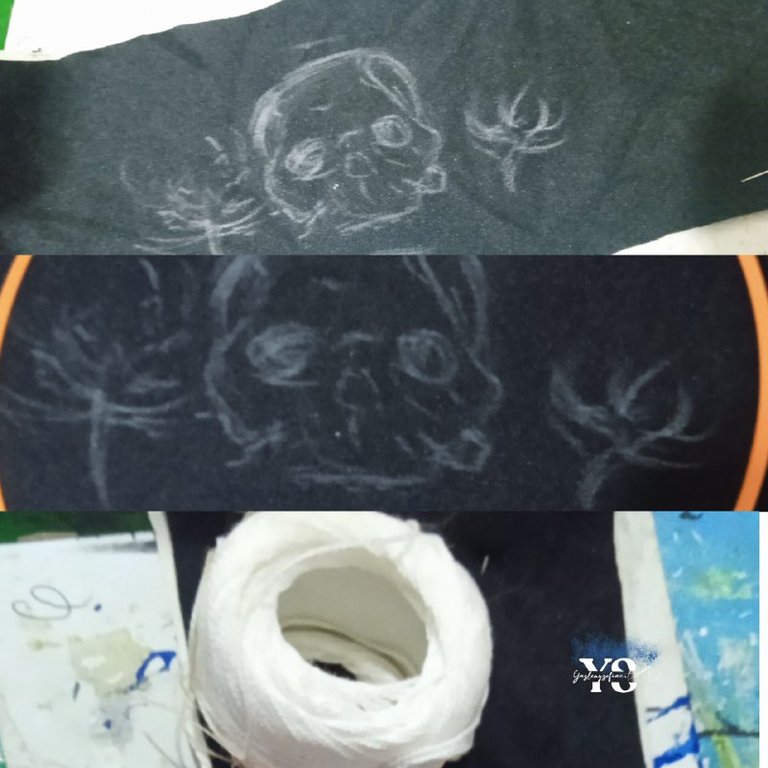
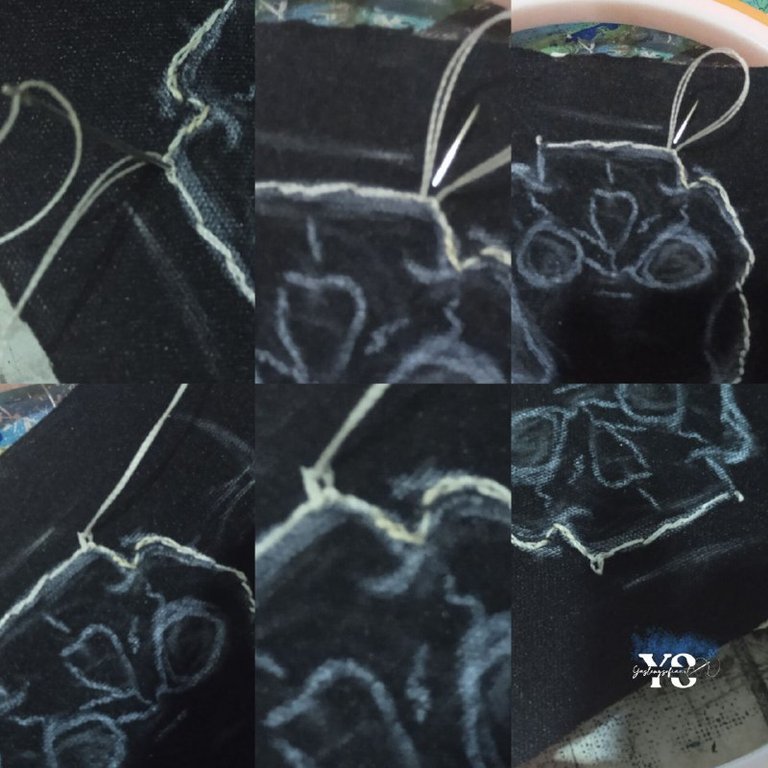
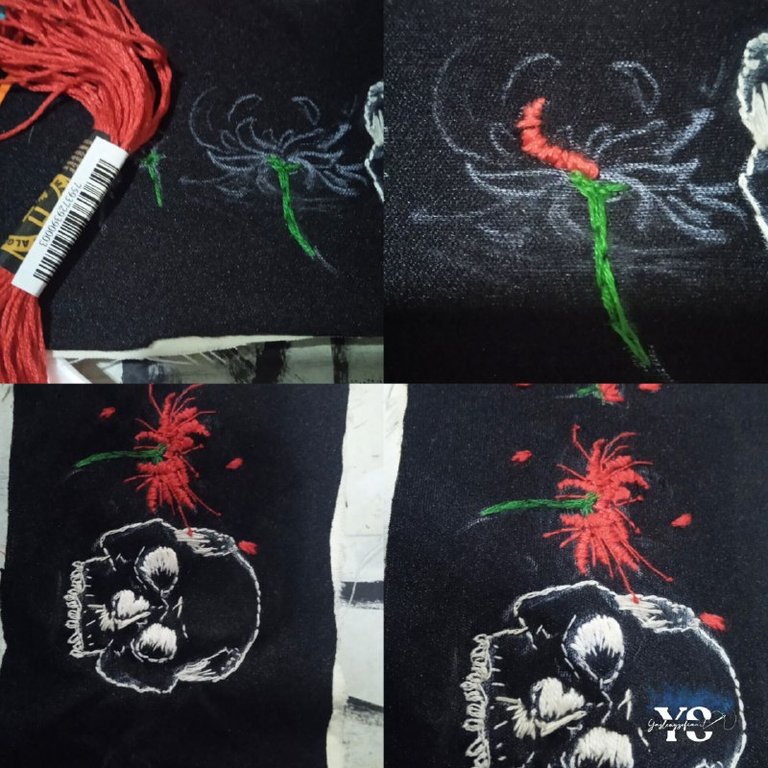
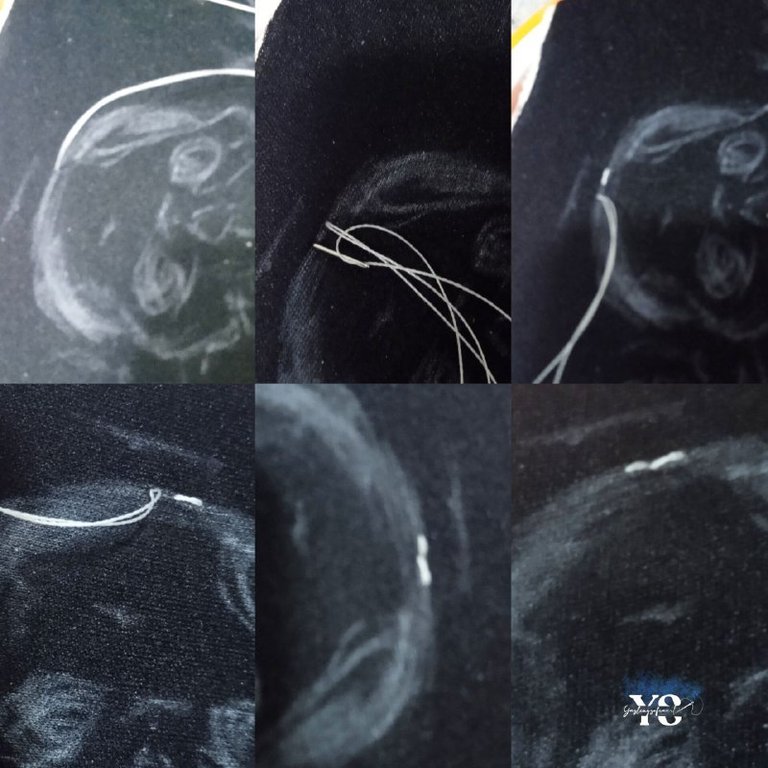
Then, I drew with white color a human skull and some flowers, I was thinking of drawing the marigold flower, however, I decided for the Lycoris radiata (the flower of hell) which is also associated to death and I like its shape. Here is an excerpt from the blog by Kate Nateras (2024) which expresses the following about this flower:


SEPARADORFINAL.png


“The hellflower is a great mourning companion and in some cultures is believed to possess the power to allow the dead to see their past life for the last time. That's why, in addition to the cempasúchil flower, this species occupies an important place in the October and November season.”


SEPARADORFINAL.png


4979046919741485244.jpg


4979046919741485243.jpg


4979046919741485242.jpg


4979046919741485240.jpg


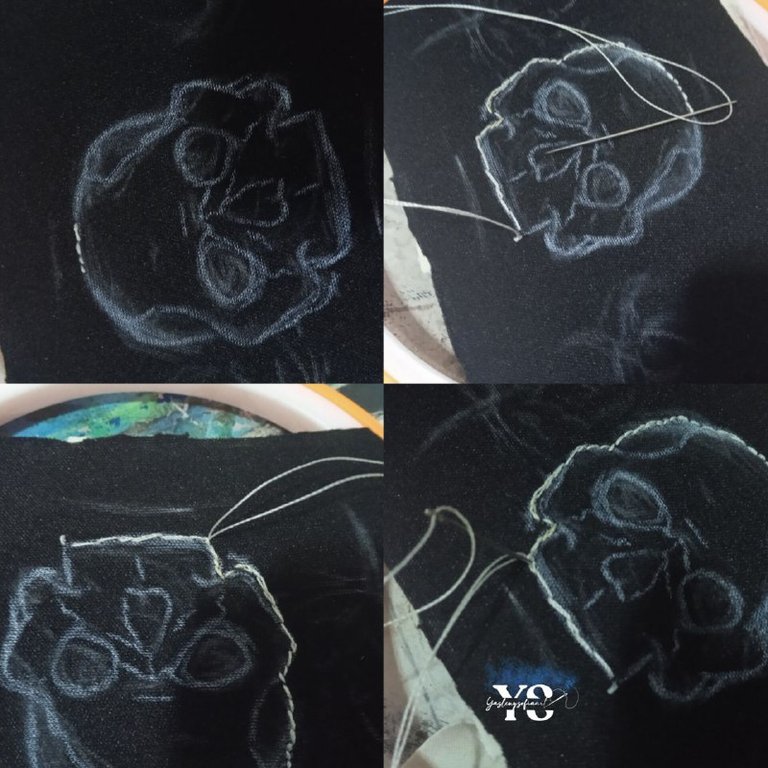
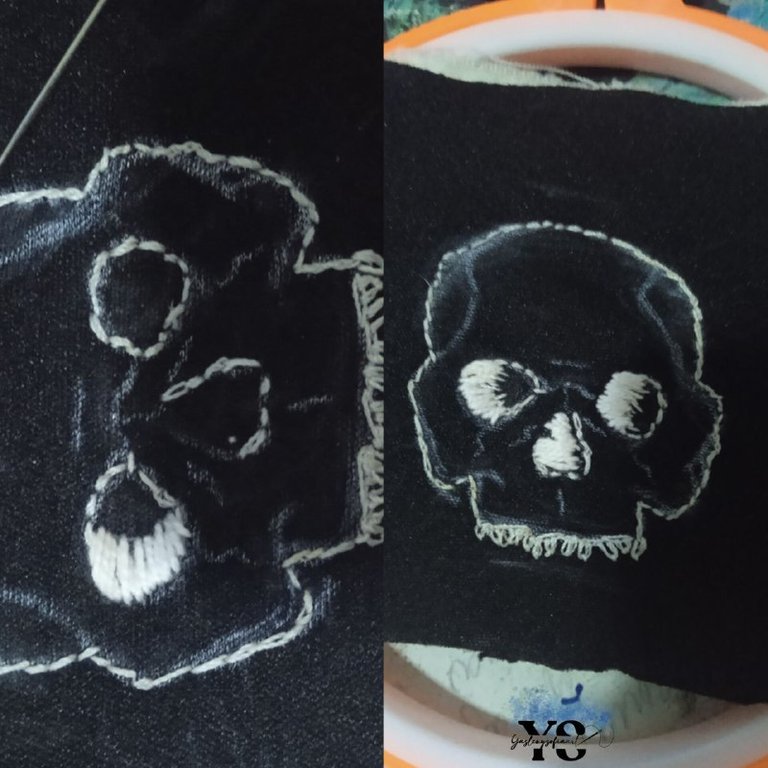
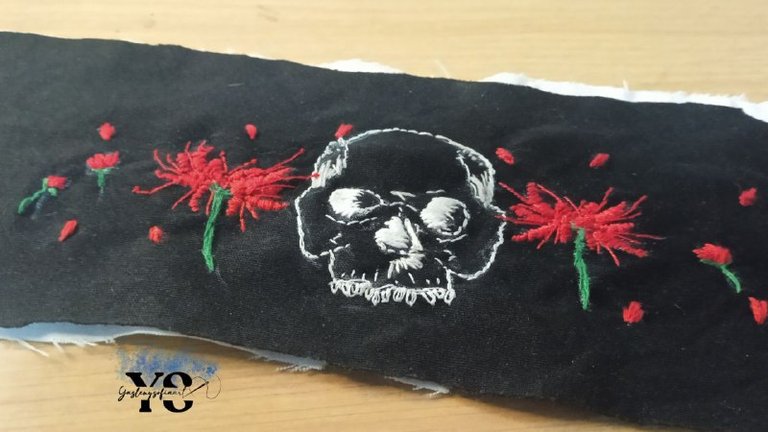
Now, I started to embroider the skull with the step back technique and with white thread; for the teeth, I used the chain stitch, to achieve that oval and square shape that they have. In the area of the eyes, I filled in with the back stitch, to try to give that weft effect.

4979046919741485239.jpg


4979046919741485238.jpg


4979046919741485237.jpg


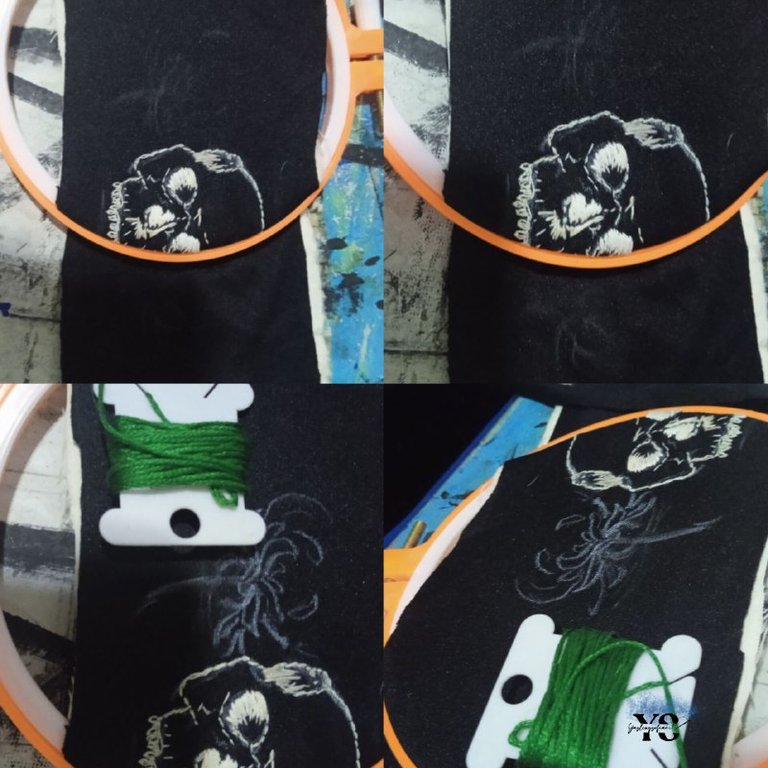
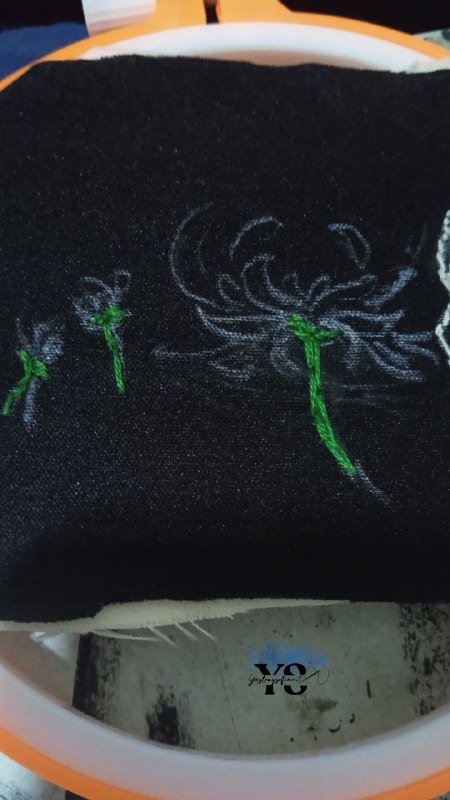
After that, I proceeded to embroider the flowers, starting with what would be the stem or the green areas and then continue with the petals, which was little by little to achieve that spider effect that the flower has, using different thicknesses of threads. For the stem and some parts of the flower I used 3 threads and with the small petals I used only one thread.

4979046919741485236.jpg


I embroidered two complete flowers on the sides of the human skull, plus another 4 that would be in the form of buds and other petals around them as if they were flying. The same amount of elements on one side of the human skull, I did the same on the other side, to obtain a visual balance.

4979046919741485235.jpg


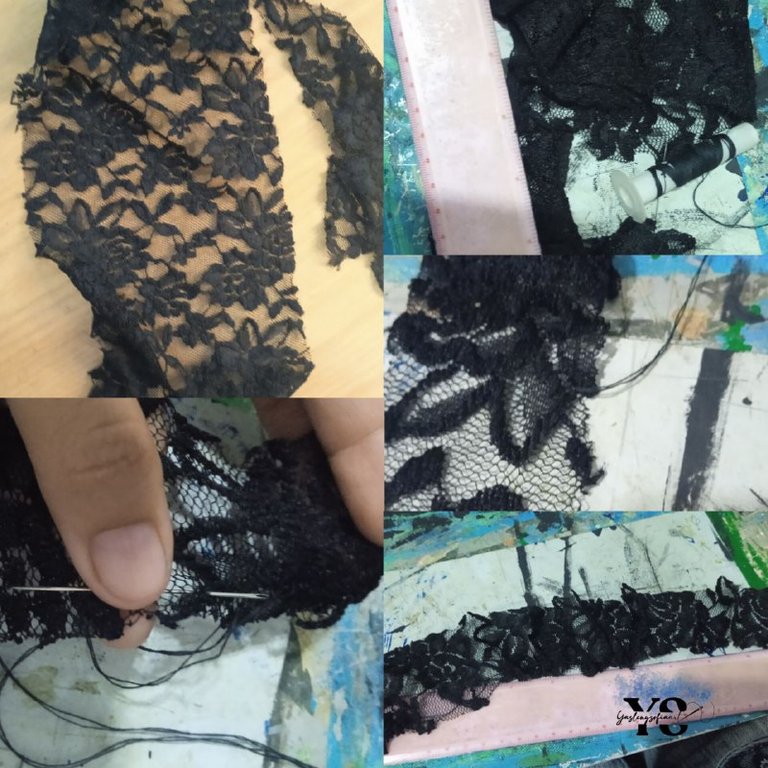
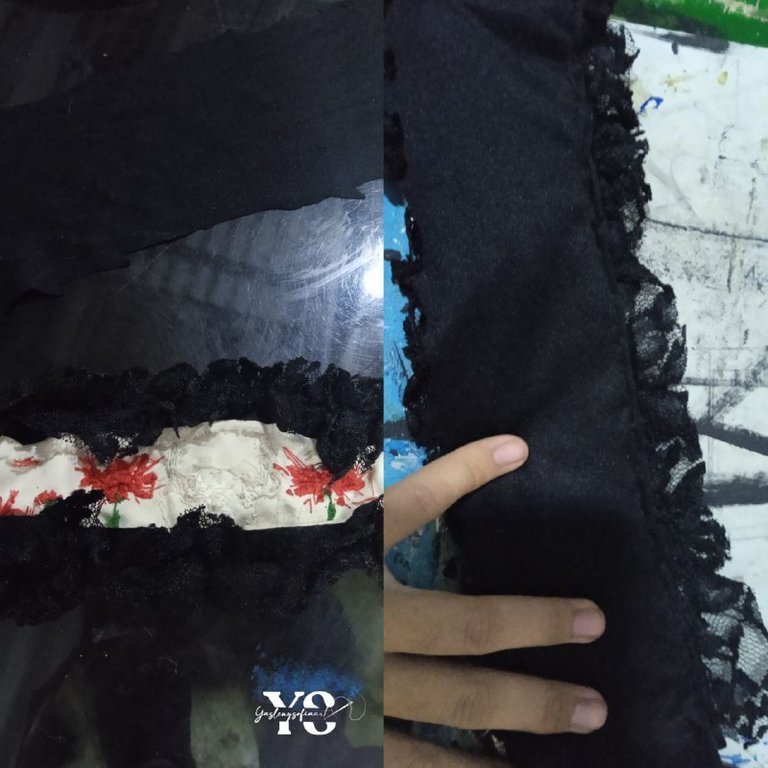
With the lace part, I would sew it first before putting the fabric that goes on the back; as I had no lace tape, I resorted to a lace fabric, which I burned a little on the edges, so that it would not fray, I had sewn it first (as shown in the picture) but it did not work. The width of this fabric, would be 3 cm, leaving 1.5 cm outside the fabric, that is, what would be seen.

4979046919741485234.jpg


4979046919741485233.jpg


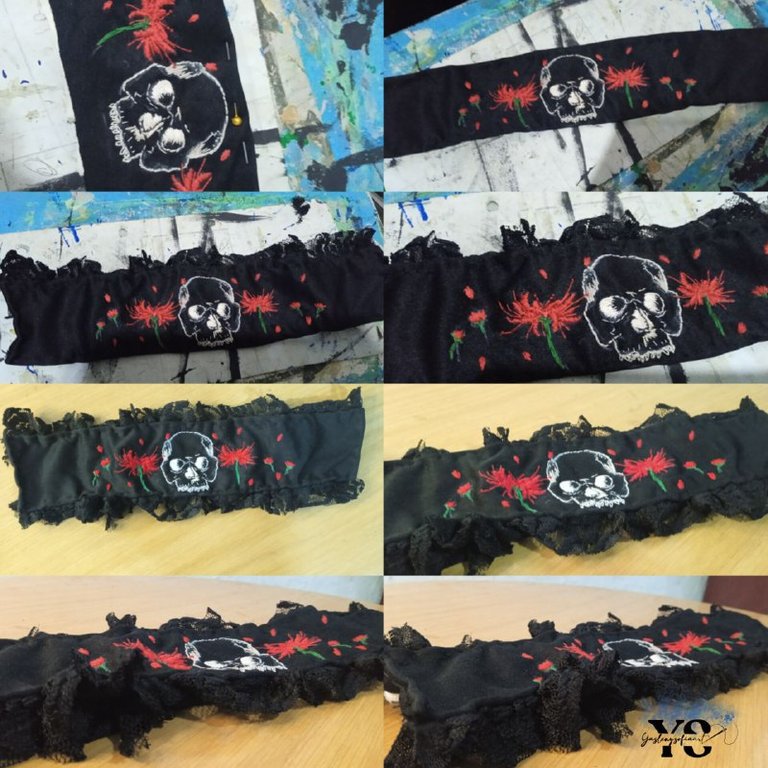
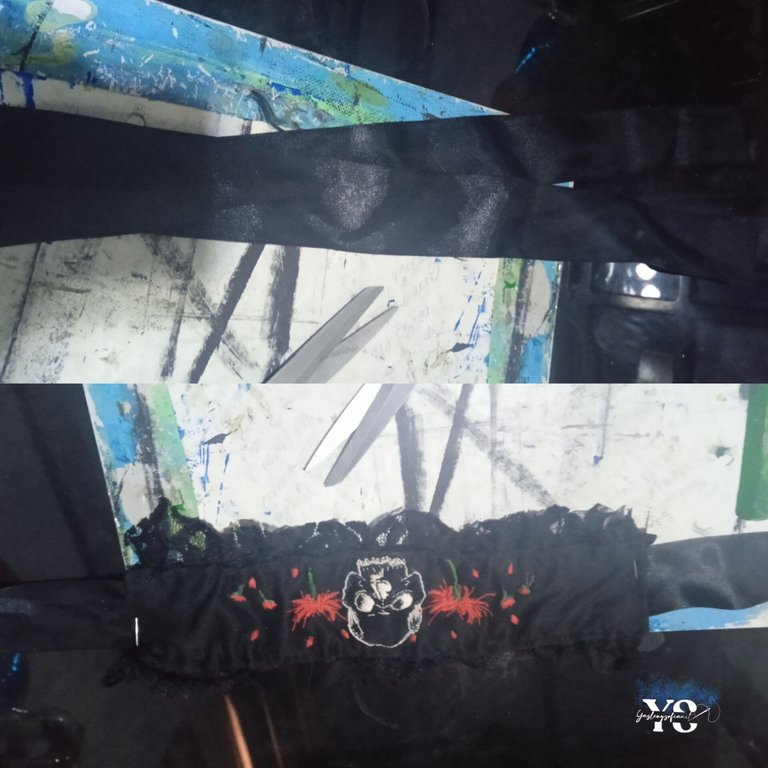
When I finished sewing the lace pieces to the embroidered fabric, I sewed the fabric that goes on the back, without sewing the ends, because that is where the ribbons that will be used to tie them later will be sewn.

4979046919741485232.jpg


At the beginning I wanted to make the strips with the same black fabric, but the result didn't look good and since I had black ribbon, I resorted to this one. So I cut it to the length I wanted it to be, burned the edges a little so it wouldn't fray and sewed it respectively to the rest of the headband.

4979046919741485231.jpg


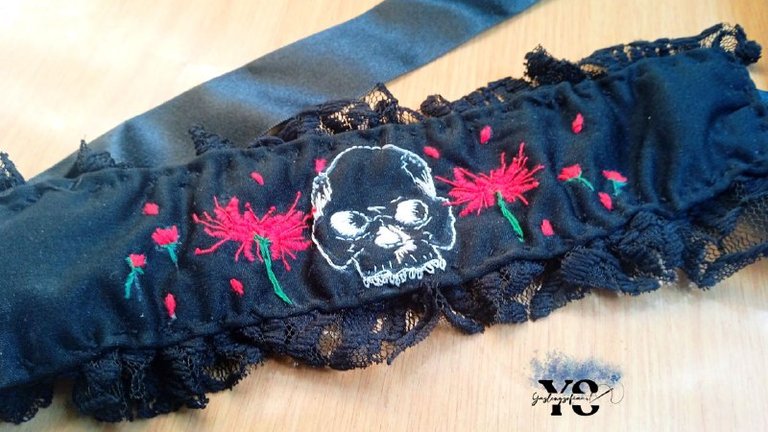
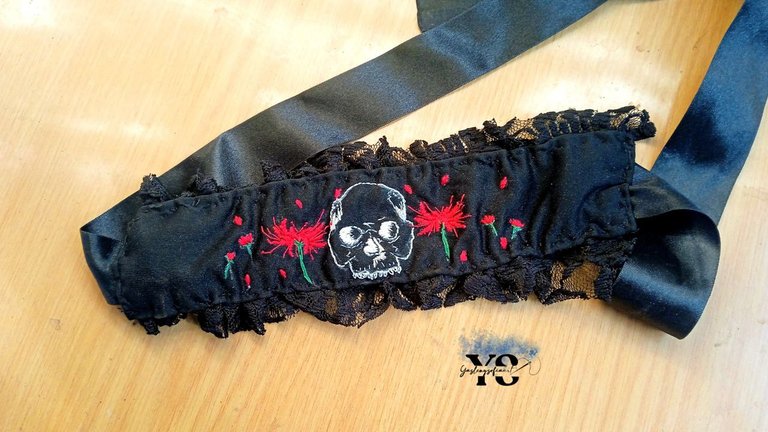
And this is the result…

4979046919741485229.jpg


4979046919741485227.jpg


4979046919741485222.jpg


9aab4d81-b1ae-4313-aa8d-84517b053504.jpg
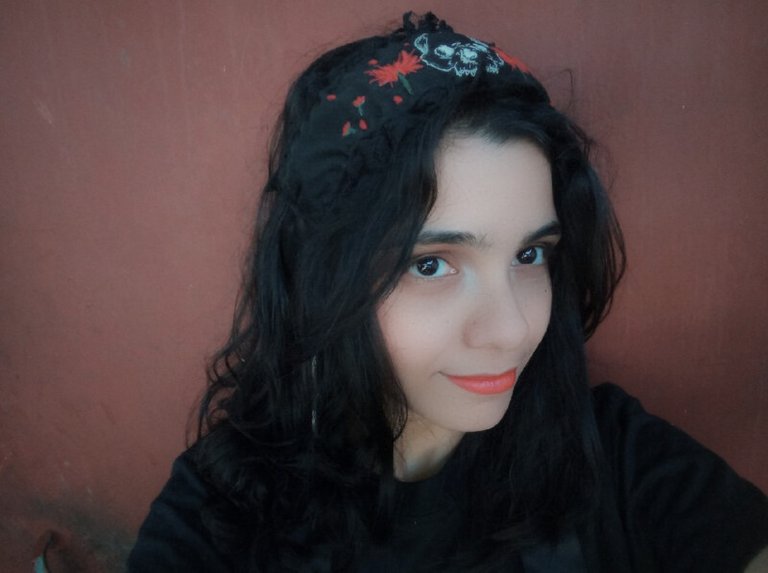
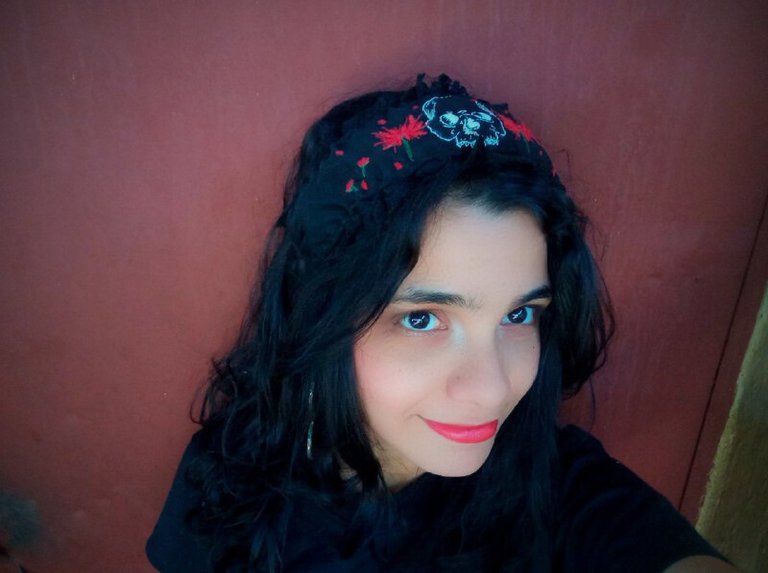
This is how it looks on.


f513bf8b-b756-48fa-bc9a-ef8b71a99d06.jpg


SEPARADORFINAL.png


The images are from my personal archive, taken with my Redmi 9A cell phone. Cover designed in CANVA. Text translated in DeepL.


SEPARADORFINALCONNOMBRE.png


Thank you for reading my post. I hope you liked it. I will be attentive to answer your comments. You can visit my blog, follow my content and social networks.

YaslenySofia.jpg


FACEBOOK / INSTAGRAM / TWITTER


SEPARADORFINALCONNOMBRE.png


ESPAÑOL


PARA LAS PORTADAS DE HIVE.jpg


Saludos comunidad de @needleworkmonday, hoy y mañana se celebra principalmente en México lo que se conoce como el Día de Muertos, una tradición en donde se honra a los difuntos; una creencia que se me hace muy bonita y para nada oscura, porque nada mejor que honrar aquellos seres que fueron importantes en nuestras vidas y ya no están. Para esta ocasión quería hacer como una especie de collar con encajes y bordado, pero termino siendo más ancha la parte de la tela que, al final su función fue un cintillo.

SEPARADORMATERIALES.png


4979046919741485248.jpg


-Hilos de bordar de color rojo, verde y blanco.

-Tela de algodón negra. 1 mt

-Tela de algodón blanca, medio metro.

-Cinta de encaje negra o tela de encaje negra. 1.5 mt

-Cinta negra.

-Aro de bordar.

-Hilo de coser.

-Cinta métrica.

-Tijera.


SEPARADORPASOAPASO.png


4979046919741485247.jpg


4979046919741485246.jpg


Lo primero que hice fue tomar las medidas de mi cuello, pues esa era la idea inicial, el cual entre unos 25 a 30 cm, pero de largo tomé 35 cm (por los dobles y demás) y 6 cm de ancho, ya que ambos extremos doblarían 1 cm, quedando como espacio para el bordado unos 4cm. Sacando dos piezas en la tela en negro y uno en la tela blanca, ya que pensaba que iba a ser muy clarita y no se sujetaría bien, pero al final me di cuenta que no era necesario, aun así, ya la había cosido a la tela negra.

4979046919741485245.jpg


Luego, dibujé con color blanco un cráneo humano y unas flores, pensaba dibujarles la flor cempasúchil, no obstante, me decidí por la Lycoris radiata (la flor del infierno) que está asociada también a la muerte y me gusta su forma. Aquí les dejó un estracto del blog de Kate Nateras (2024) la cual expresa sobre dicha flor lo siguiente:


SEPARADORFINAL.png


“La flor del infierno es una gran compañera de duelo y en algunas culturas se cree que posee el poder de permitirles a los muertos ver su vida pasada por última vez. Por eso, además de la flor de cempasúchil, esta especie ocupa un lugar importante en la temporada de octubre y noviembre.”


SEPARADORFINAL.png


4979046919741485244.jpg


4979046919741485243.jpg


4979046919741485242.jpg


4979046919741485240.jpg


Ahora bien, empecé a bordar el cráneo con la técnica de paso atrás y con hilo blanco; para la parte de los dientes, usé el punto cadeneta, para lograr esa forma entre ovalada y cuadrada que estos tienen. El la zonas de los ojos, fui rellenando con el paso atrás, para tratar de darle ese efecto de trama.

4979046919741485239.jpg


4979046919741485238.jpg


4979046919741485237.jpg


Posterior a ello, procedí a bordar las flores, iniciando lo que sería el tallo o las zonas verdes y luego continuar con los pétalos, lo cual fue poco a poco para lograr ese efecto araña que la flor tiene, usando diferentes grosores de hilos. Para el tallo y algunas partes de la flor usé 3 hilos y con los pequeños pétalos fino, empleé una hebra de hilo nada más.

4979046919741485236.jpg


Bordé dos flores completas a los lados del cráneo humano, más otras 4 que serian en forma de brotes y otros pétalos a sus alrededores como si estuviesen volando. La misma cantidad de elementos de un lado del cráneo humano, lo hice igualmente del otro lugar, para obtener un equilibro visual.

4979046919741485235.jpg


Con la parte del encaje, este lo cosería primero antes de ponerle la tela que va en el reverso; como no tenia cinta de encaje, recurrí a una tela de encaje, el cual quemé un poco en las orillas, para que no se deshilachara, lo había cosido primero (como se aprecia en la imagen) pero no me funcionó. El ancho de esta tela, seria 3 cm, quedando 1.5 cm fuera de la tela, es decir, lo que se vería.

4979046919741485234.jpg


4979046919741485233.jpg


Al terminar de coserlas las piezas de encaje a la tela bordada, cosí la tela que va al reverso, sin coser los extremos, porque ahí va las cintas que servirían para amarrarlos posteriormente.

4979046919741485232.jpg


Al inicio quería hacer las tiras con la misma tela negra, pero no me quedó bien el resultado y como tenia cinta negra, recurrí a esta. Por lo que lo corté del largo que deseara que tuviera, quemando un poco las orillas para que no se deshilachara y cosiéndola respectivamente al resto del cintillo.

4979046919741485231.jpg


Y este es el resultado…


4979046919741485229.jpg


4979046919741485227.jpg


4979046919741485222.jpg


9aab4d81-b1ae-4313-aa8d-84517b053504.jpg
Así luce puesto.


f513bf8b-b756-48fa-bc9a-ef8b71a99d06.jpg


SEPARADORFINAL.png


Las imágenes son de mi archivo personal, tomadas con mi celular Redmi 9A. Portada diseñada en CANVA. Texto traducido en DeepL.


SEPARADORFINALCONNOMBRE.png


Gracias por leer mi post. Espero que les haya gustado. Estaré atenta a responder sus comentarios. Pueden visitar mi blog, seguir mis contenidos y redes sociales.


YaslenySofia.jpg


FACEBOOK / INSTAGRAM / TWITTER


SEPARADORFINALCONNOMBRE.png

Posted Using InLeo Alpha

Sort:  

Soy nuevo por aquí te voy a seguir

Bienvenido a Hive! muchas gracias 🤗 espero disfrute de esta plataforma

GRACIAS POR LA BIENVENIDA

It looks pretty good. It is stylish, elegant, and beautiful. You did a wonderful job! Thank you for sharing this.

Muchas gracias, a mi me gustó mucho el resultado. 😊


Thank you very much, I really liked the result. 😊