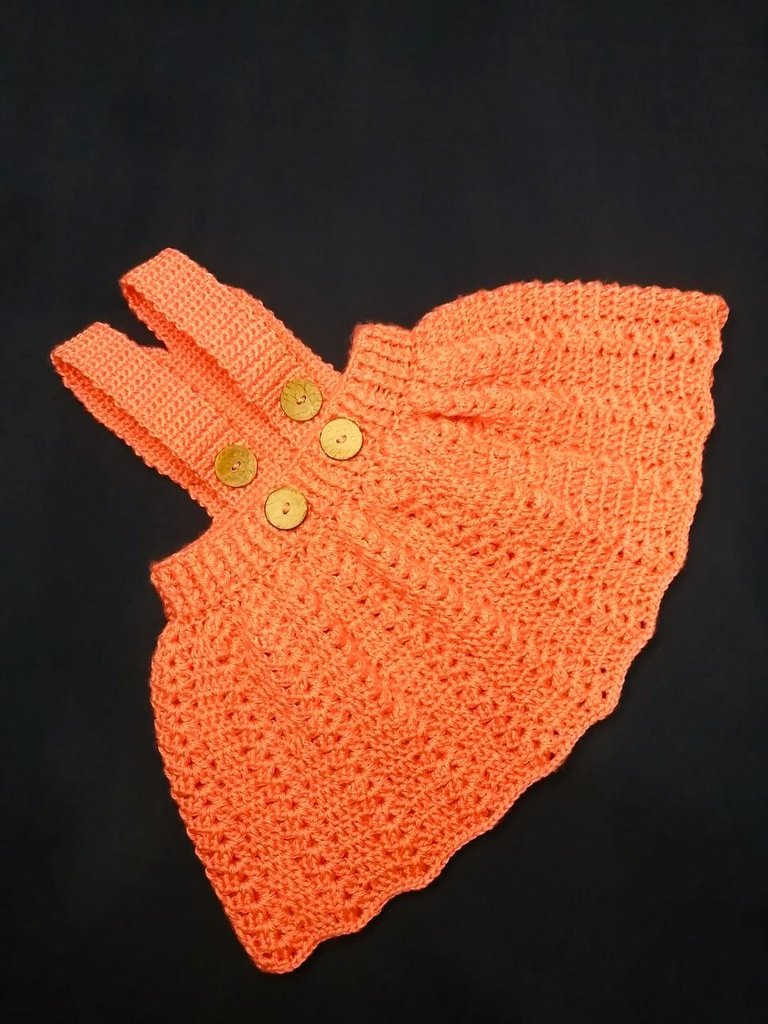
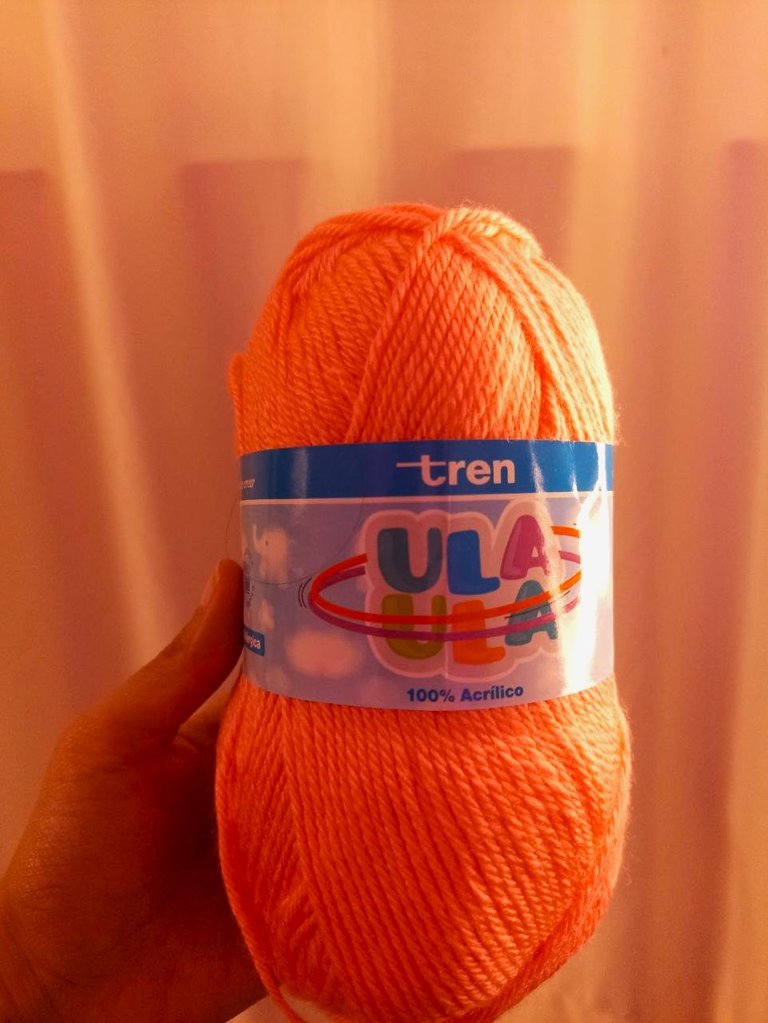
Hola espero se encuentren muy bien, hoy les traigo paso a paso la realización de este bello vestido para niñas desde 3 meces hasta un año, esta muy lindo y muy a la moda, la marca que mas me gusta utilizar es marca Tren este hilo es muy suave de excelente calidad y no pierde sus colores luego del lavado,100% acrílico mercerizado lo que da ese brillo y elegancia a las prendas sin perder la delicadeza de las mismas. Ahora si vamos manos a la obra, iniciemos con los materiales a utilizar para proceder con el paso a paso.
Hello I hope you are very well, today I bring you step by step the realization of this beautiful dress for girls from 3 months to one year, this very cute and very fashionable, the brand that I like to use is brand Tren this thread is very soft of excellent quality and does not lose its colors after washing, 100% mercerized acrylic which gives that shine and elegance to the garments without losing the delicacy of the same. Now let's get down to work, let's start with the materials to be used to proceed with the step by step.
MATERIALES A UTILIZAR:
- Hilo marca tren (Ula Ula) 200 gramos.
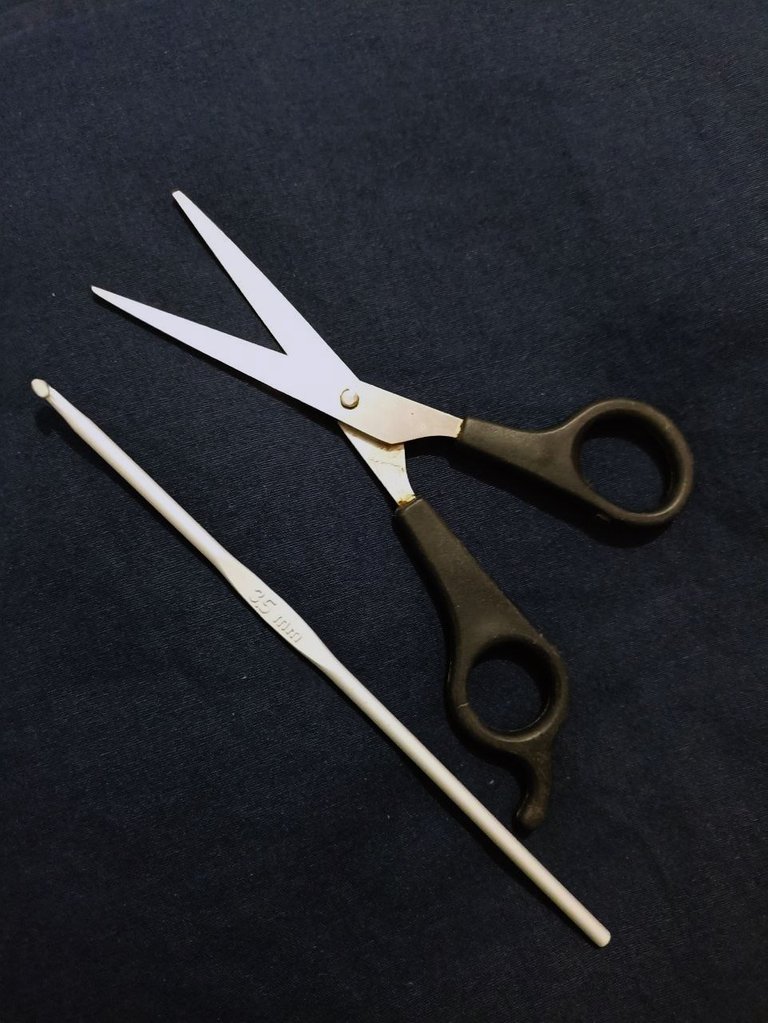
- Ganchillo de 3 milímetros.
- Tijera.
- Botones de madera.
MATERIALS TO BE USED:
- Yarn brand train (Ula Ula) 200 grams.
- Crochet hook of 3 millimeters.
- Scissors.
- Wooden buttons.
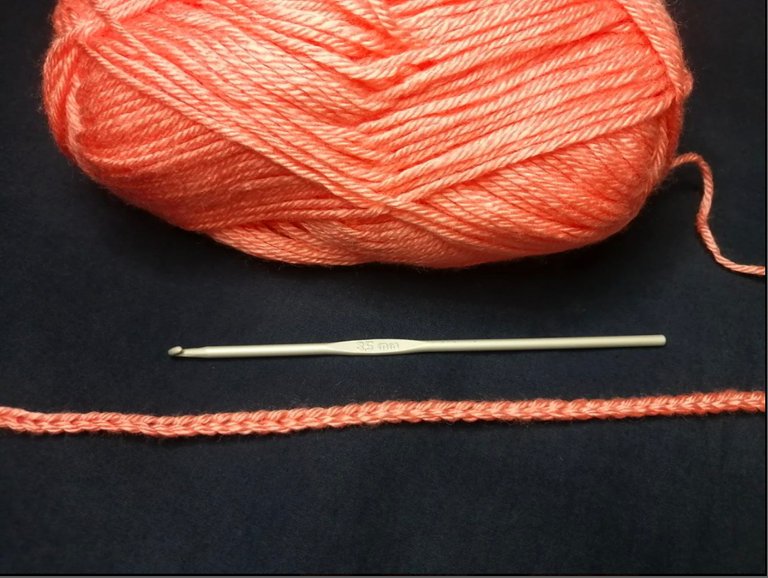
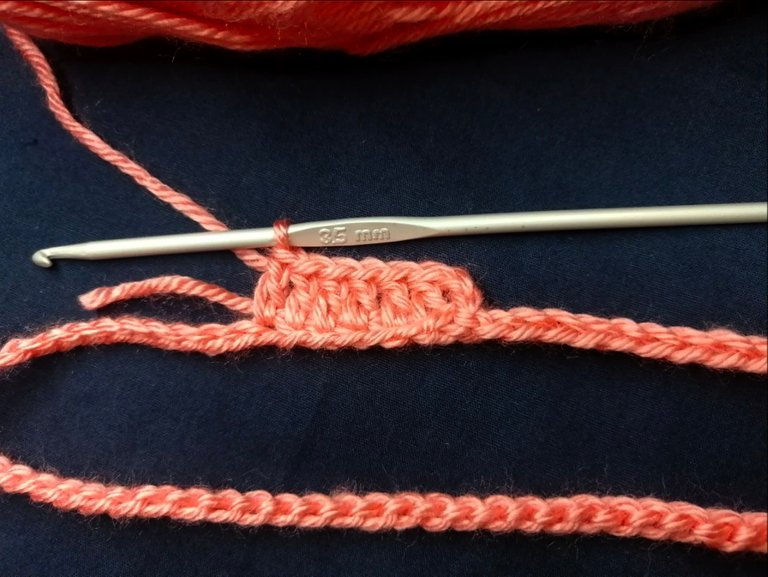
PASO #1 Iniciaremos con el elástico para la cintura, inicie con 88 cadenas, logrando una medida de 42 centímetros, procedemos a colocar la cadena derecha y unimos la ultimo cadena con la primera que realizamos, con un punto deslizado, formando un círculo. Posteriormente subimos con dos cadenas y vamos a realizar una bareta o punto alto en cada cadena hasta llegar al final serán en total 88 puntos altos, al finalizarlos lo unimos con un punto deslizado en la tercera cadena que se elaboro al inicio.
STEP #1 We will start with the elastic for the waist, start with 88 chains, achieving a measure of 42 centimeters, we proceed to place the right chain and join the last chain with the first one we made, with a slipped stitch, forming a circle. Then we go up with two chains and we will make a bareta or high stitch in each chain until we reach the end, there will be a total of 88 high stitches, when we finish them we join them with a slipped stitch in the third chain that was elaborated at the beginning.
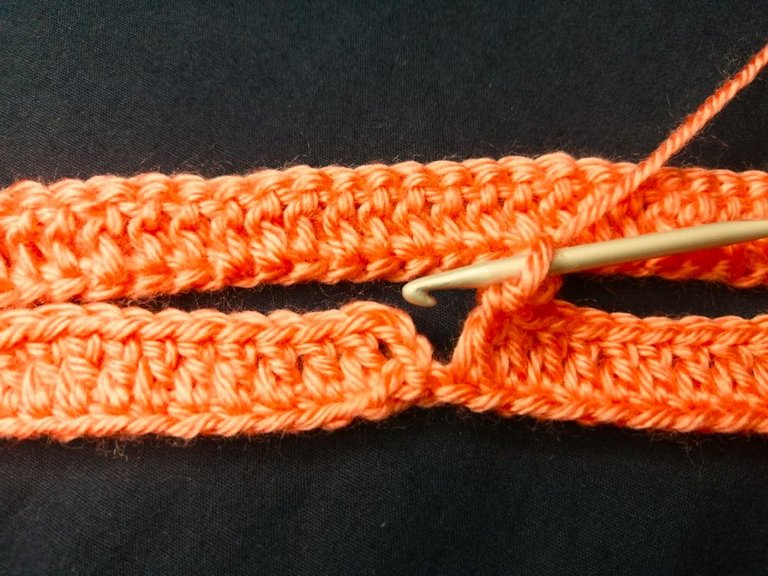
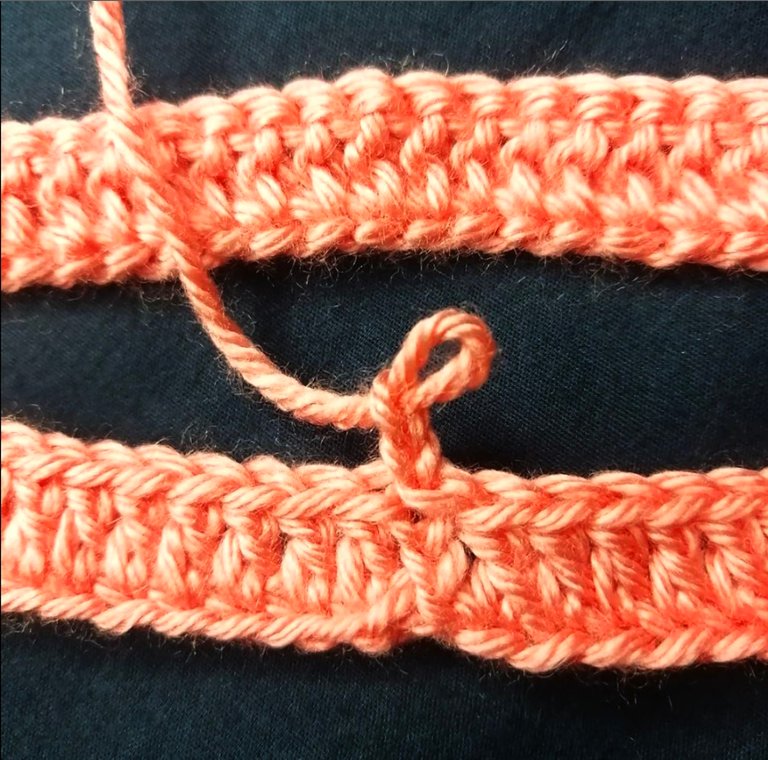
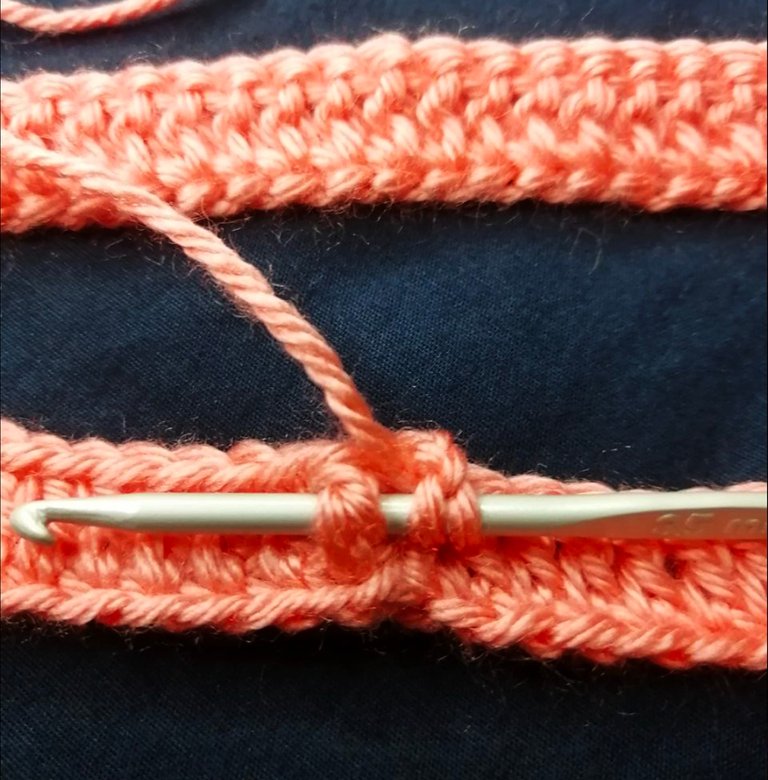
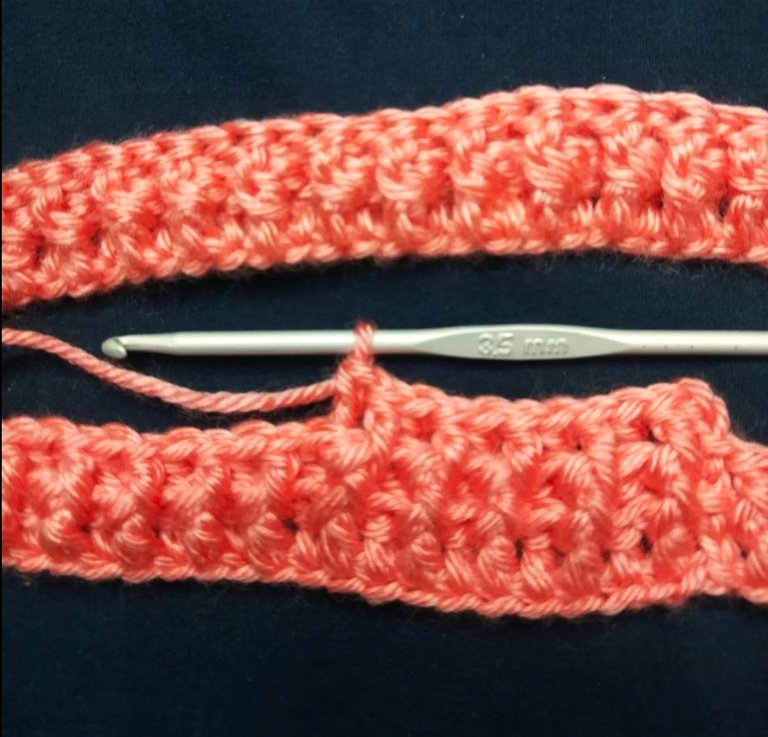
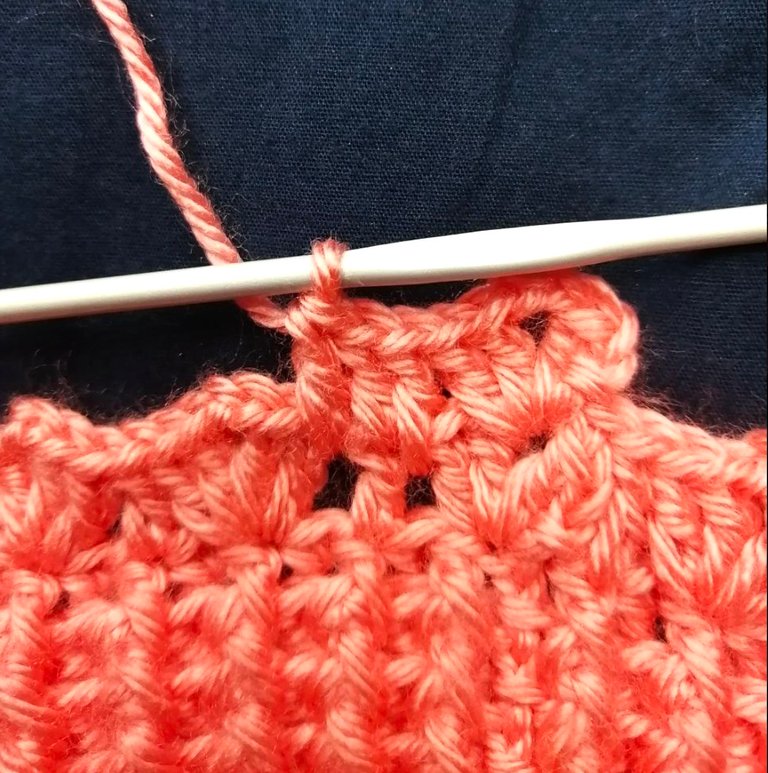
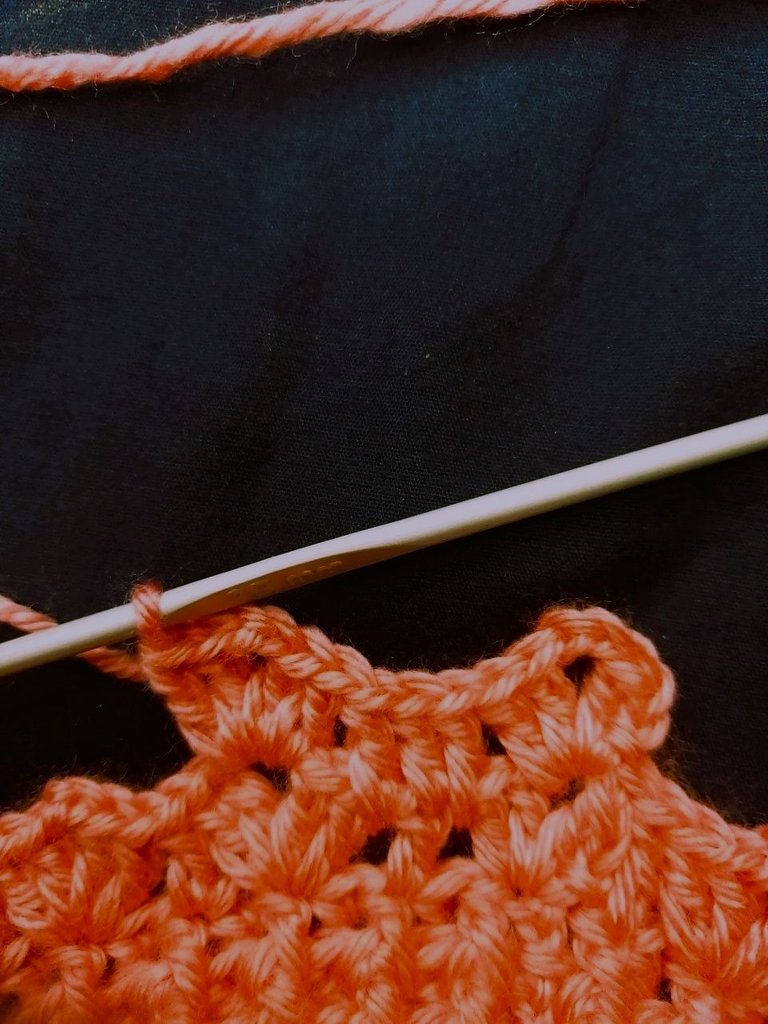
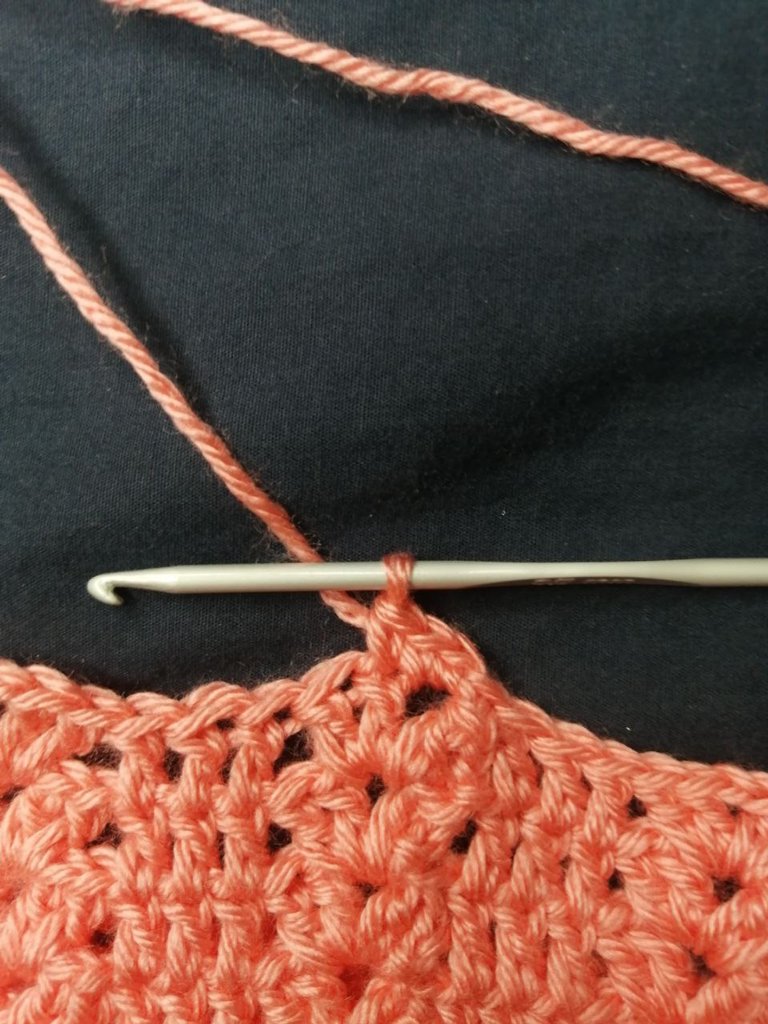
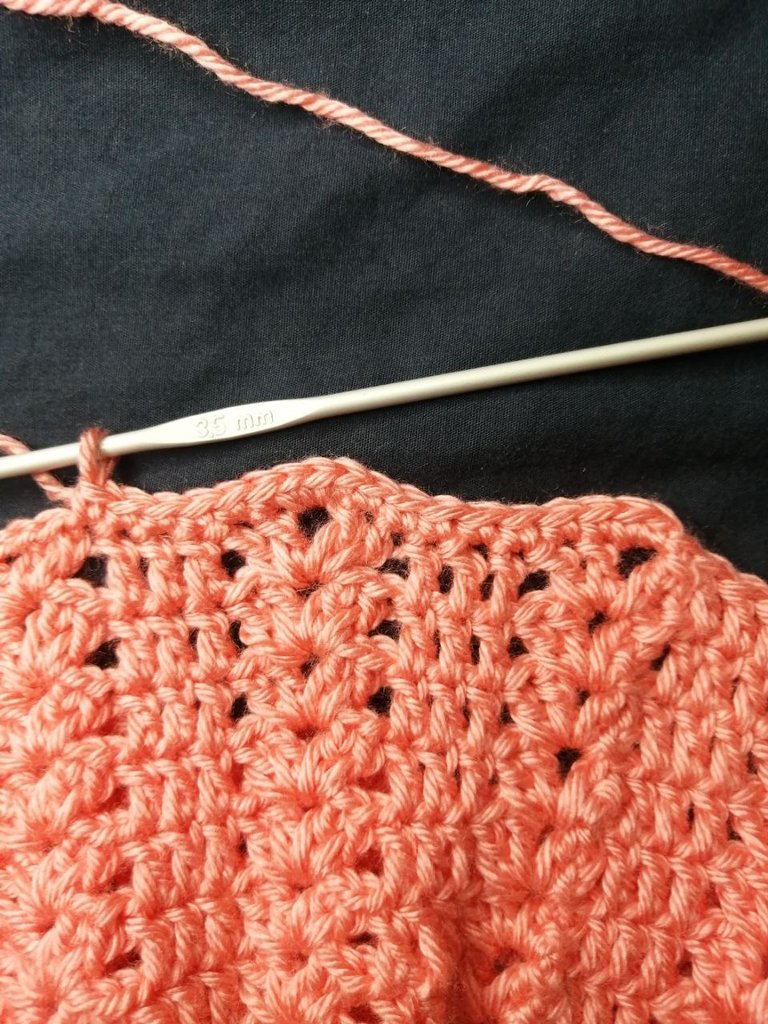
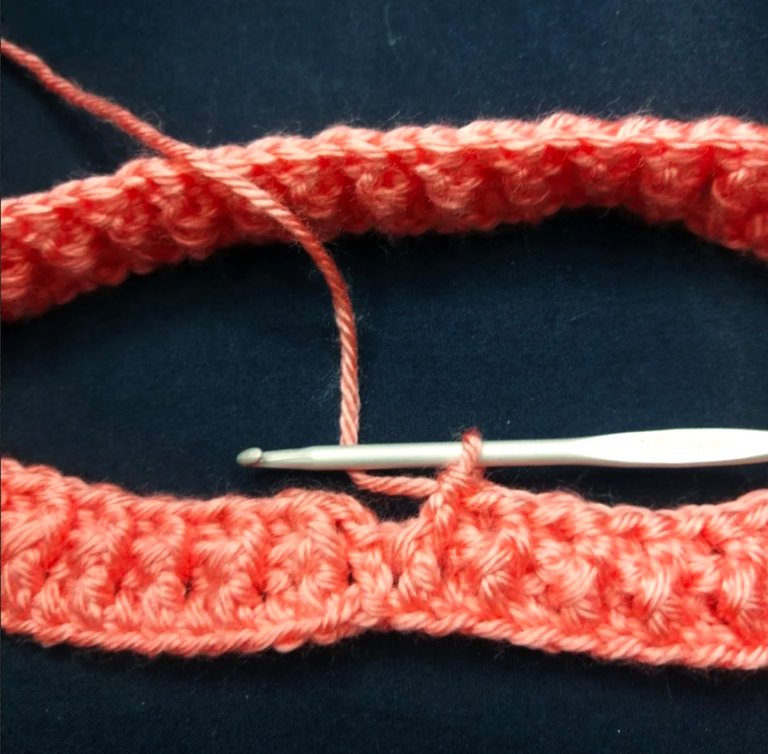
PASO #2 Muy bien ahora vamos con la segunda vuelta, subimos con dos cadenas, posteriormente vamos a iniciar nuestro elástico, vamos a pasar el ganchillo delante del primer punto alto de la primera hilera al hacerlo correctamente veras como ese punto queda pronunciado hacia adelante y realizas un punto alto, en el siguiente punto vamos a colocar el ganchillo en forma contraria es decir ese punto alto va a quedar hacia atrás, coges lazada y realizas un punto alto, así como se muestra en las imágenes, quedara un punto delante del ganchillo y otros detrás, así vamos a completar esta segunda vuelta al finalizar enganchamos en esa primera cadena con la que iniciamos y realizaremos un punto deslizado.
STEP #2 All right now let's go with the second row, we go up with two chains, then we are going to start our elastic, we are going to pass the crochet hook in front of the first high stitch of the first row when you do it correctly you will see how that stitch is pronounced forward and you make a high stitch, in the next stitch we will place the crochet hook in the opposite way, that is to say that the high stitch will be towards the back, you take the loop and make a high stitch, as shown in the pictures, there will be a stitch in front of the crochet hook and others behind, so we will complete this second round at the end we hook in that first chain with which we started and we will make a slipped stitch.
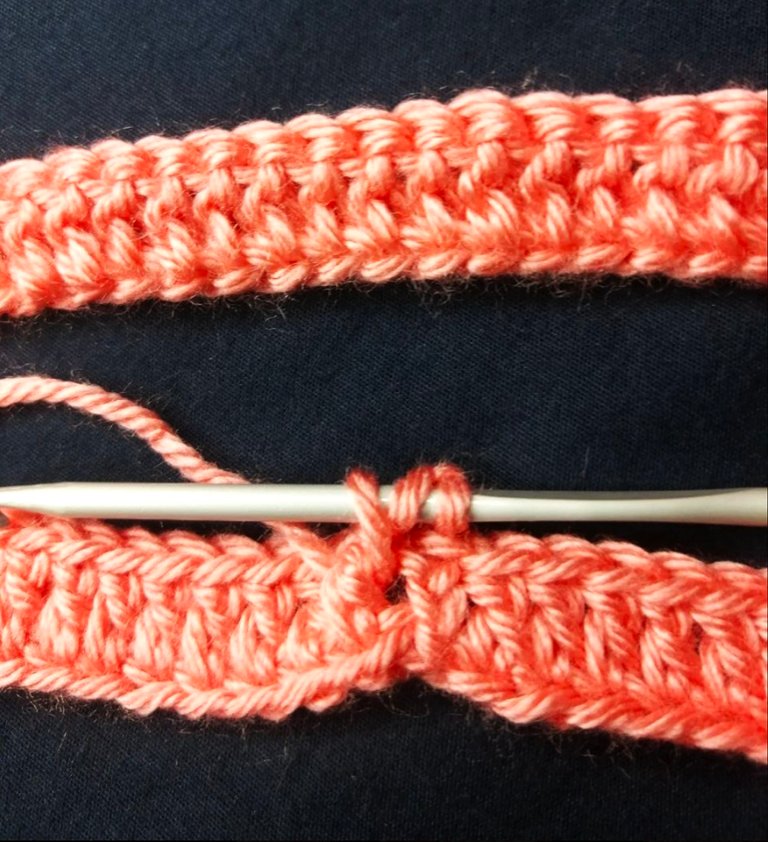
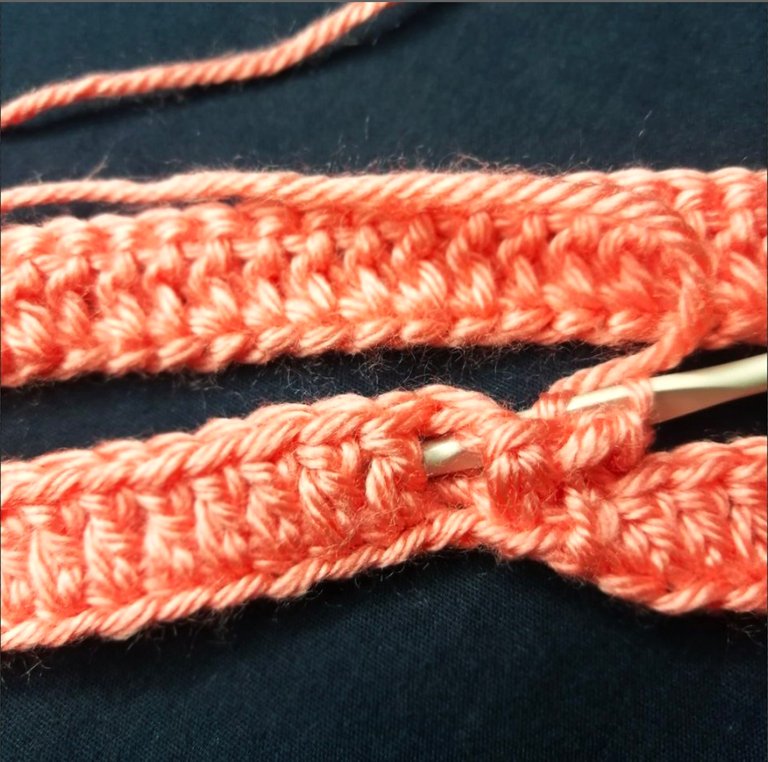
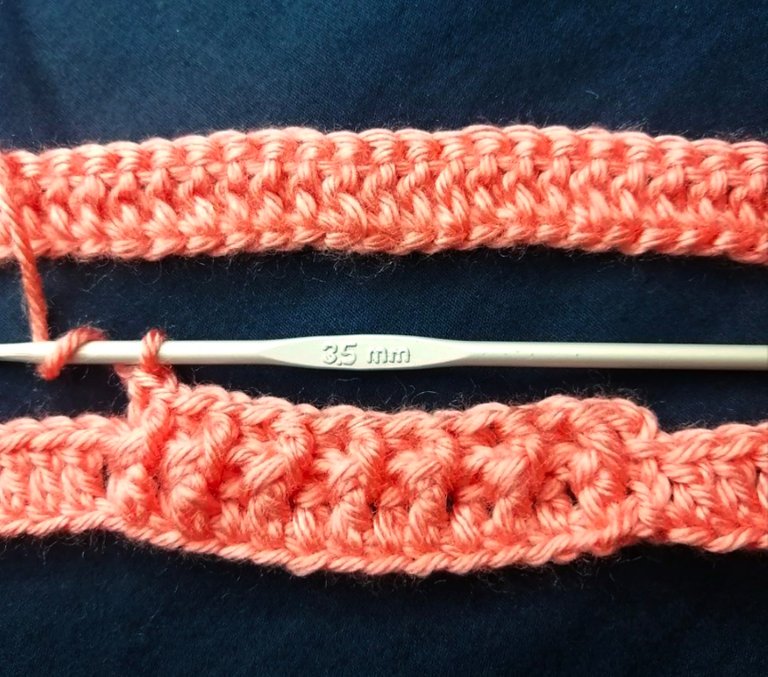
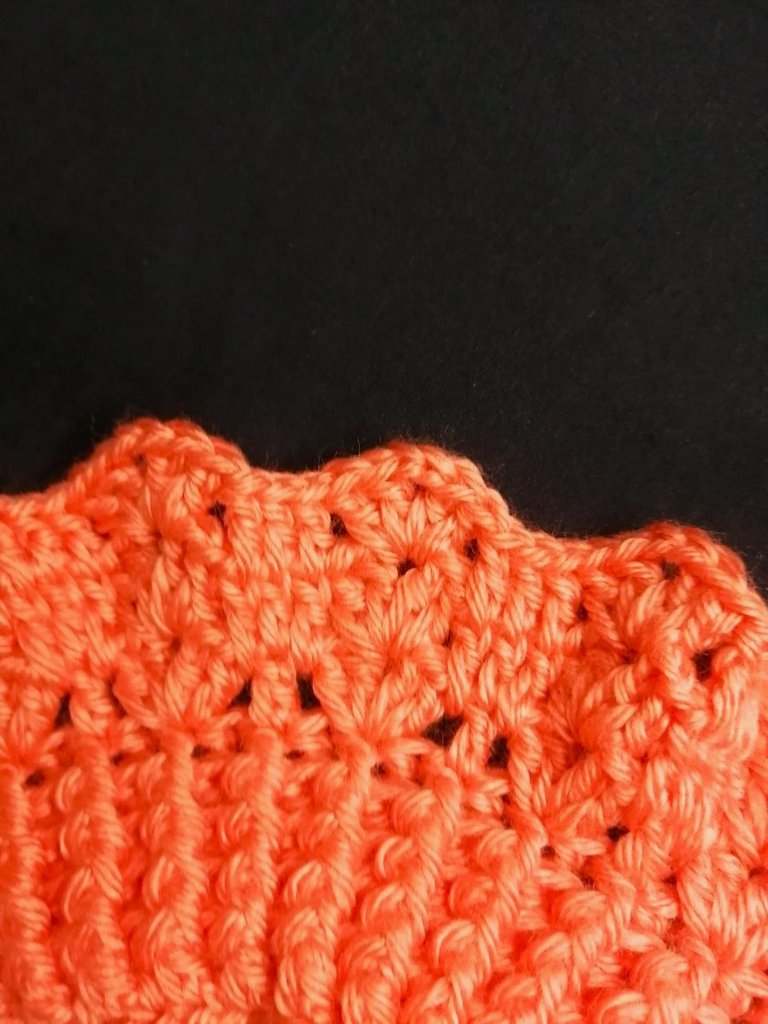
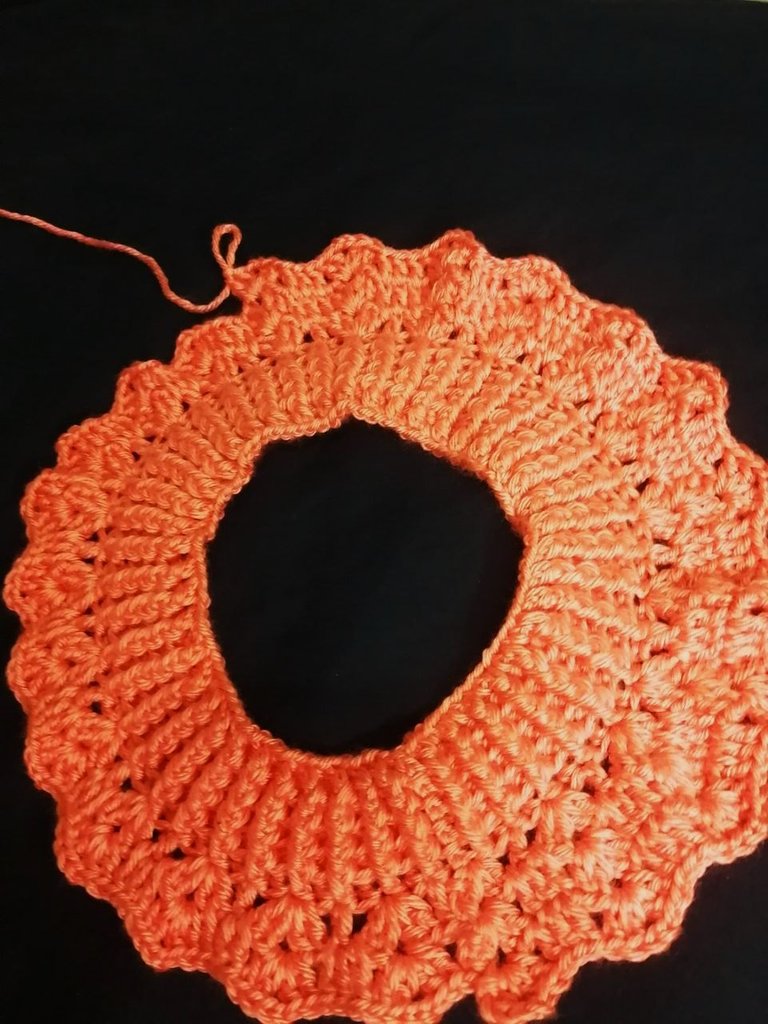
PASO #3 Para iniciar nuestra tercera vuelta subimos con dos cadenas y seguiremos el patrón anterior, el cual consta de tomar ese primer punto alto de la fila anterior ese punto que salió por delante y hacer lo mismo, al encontrarnos con un punto alto tomado por detrás lo repetiremos y así continuaremos esa secuencia, hasta obtener el ancho que desees en esté caso yo realice 5 vueltas con un medida de 4 centímetros de largo, ya eso dependerá de tu preferencia.
STEP #3 To start our third row we go up with two chains and follow the previous pattern, which consists of taking that first high stitch of the previous row that stitch that came out in front and do the same, when we find a high stitch taken from behind we repeat it and so we continue that sequence, until we get the width you want in this case I made 5 rows with a measure of 4 centimeters long, and that will depend on your preference.
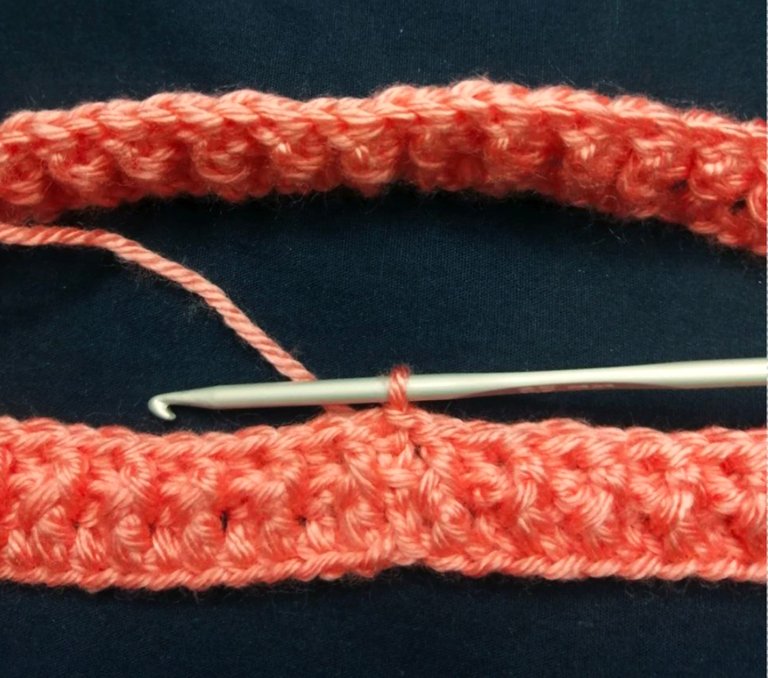
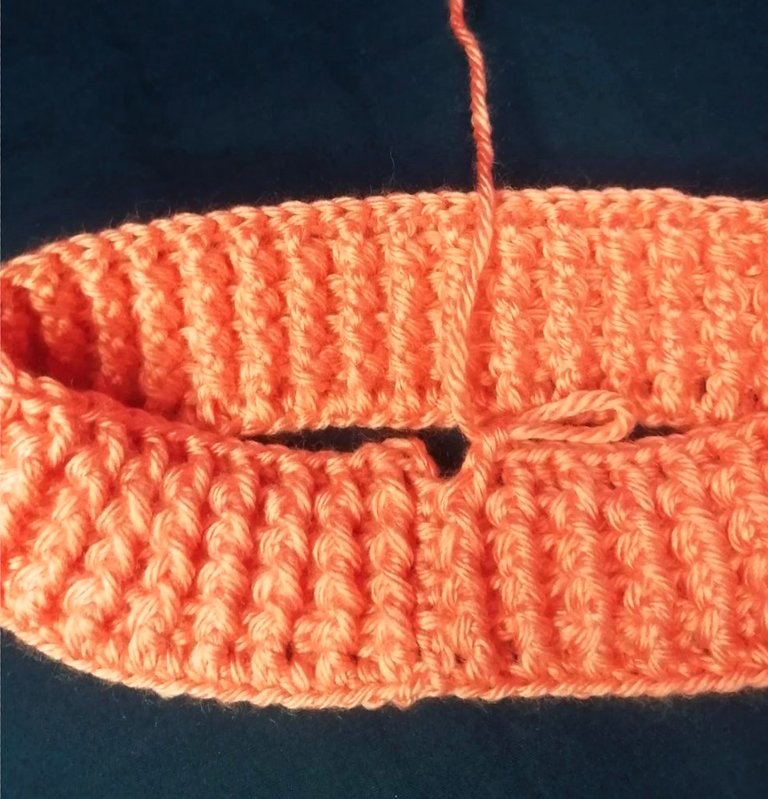
PASO #4 Finalizamos ya nuestro elástico buscando la segunda cadena con la que se inicio y realizamos un punto deslizado, para iniciar la vuelta numero 6, donde empezaremos con el diseño de la falda, subimos con dos cadenas y buscamos el primer punto en él elaboramos un punto alto, luego haremos dos cadenas tomamos lazada y volvemos a enganchar en el mismo punto, hacemos dos puntos altos, todo en el mismo punto, saltamos un punto vamos al siguiente enganchamos y hacemos un punto alto, saltamos el punto que sigue, enganchamos vamos al punto de al lado y repetimos el patrón en esa misma cadena dos puntos altos dos cadenas y dos puntos altos más todo en el mismo punto base, saltamos una cadena vamos a la siguiente hacemos un punto alto, saltamos una cadena y en la que sigue repetimos ese patrón al estilo abanico. Al llegar al último punto alto, nos fijamos en esa primera cadena que realizamos, buscamos la segunda enganchamos y elaboramos un punto deslizado.
STEP #4 We finish our elastic looking for the second chain with which it started and make a slip stitch, to start with the 6th row, where we will start with the skirt design, we go up with two chain stitches and look for the first stitch in it we make a high stitch, then we make two chain stitches we pick up a loop and hook again in the same stitch, we make two high stitches, all in the same stitch, we skip a stitch we go to the next stitch we hook and make a double crochet, we skip the next stitch, we hook we go to the next stitch and repeat the pattern on that same chain two double crochets two chain stitches and two more double crochets all in the same base stitch, we skip a chain we go to the next one we make a double crochet, we skip a chain and in the next one we repeat that pattern in a fan pattern. When we get to the last high stitch, we look at that first chain we made, look for the second chain, hook and make a slip stitch.
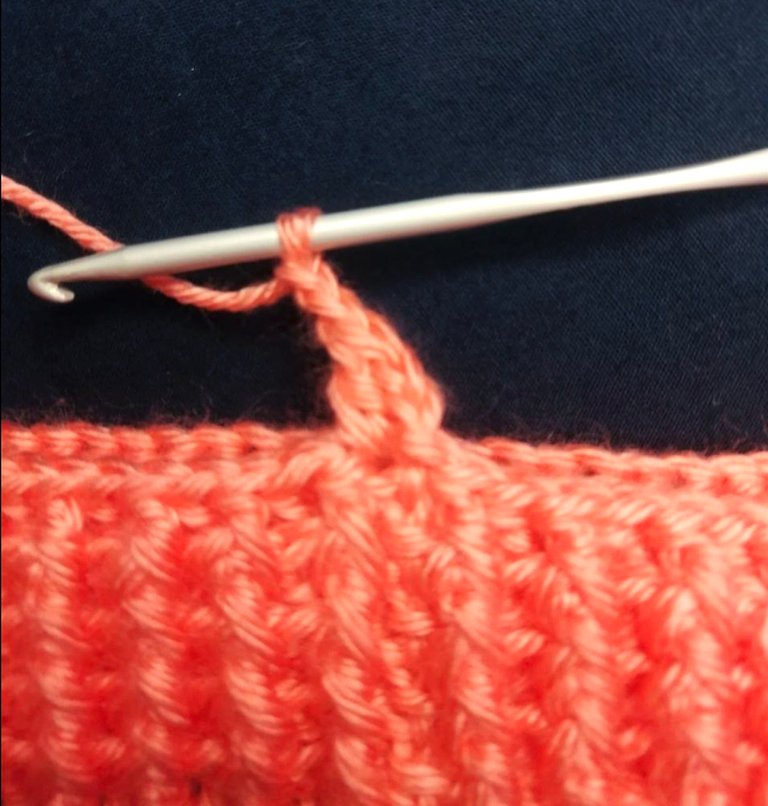
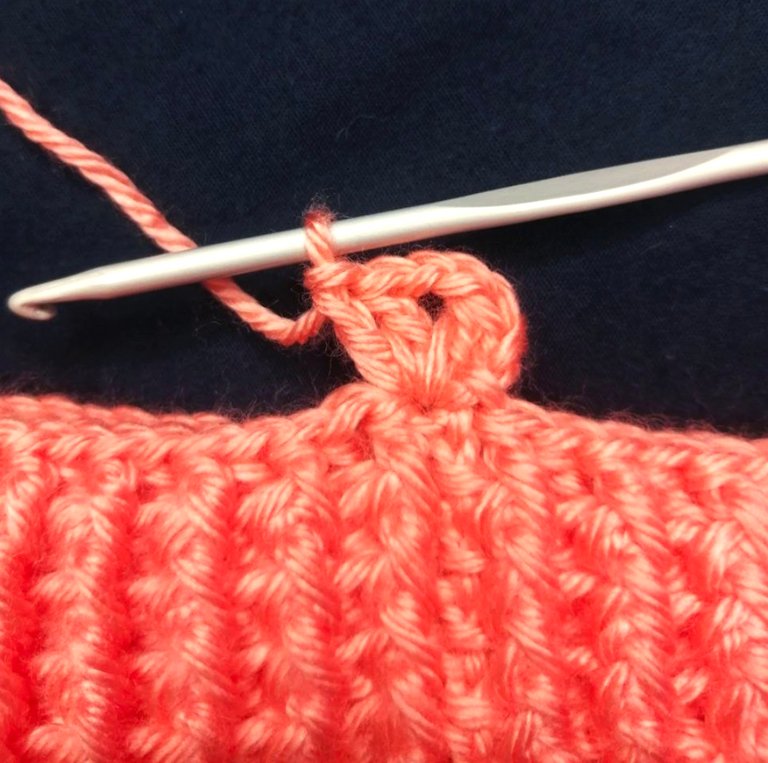
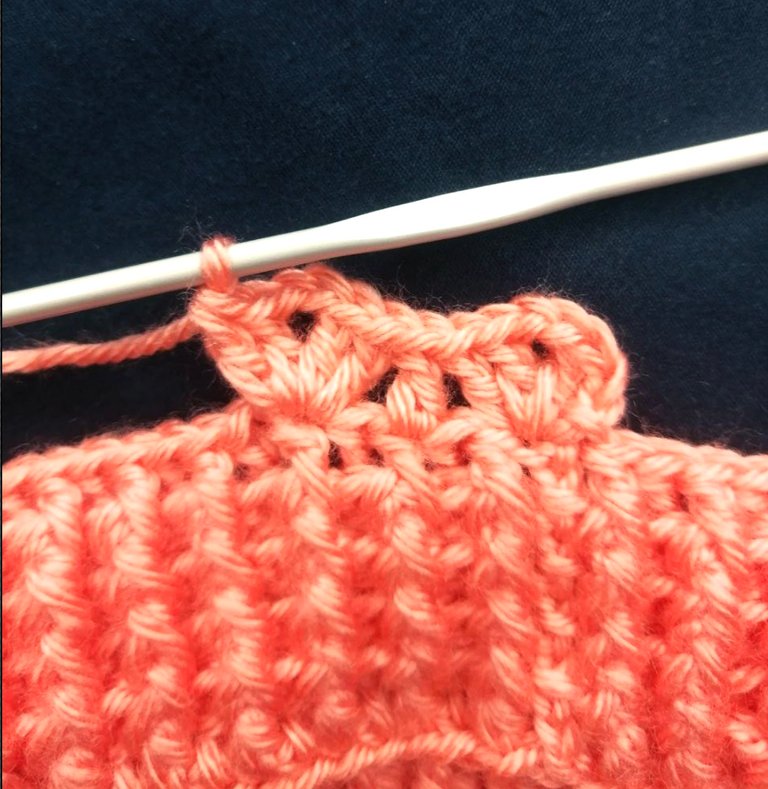
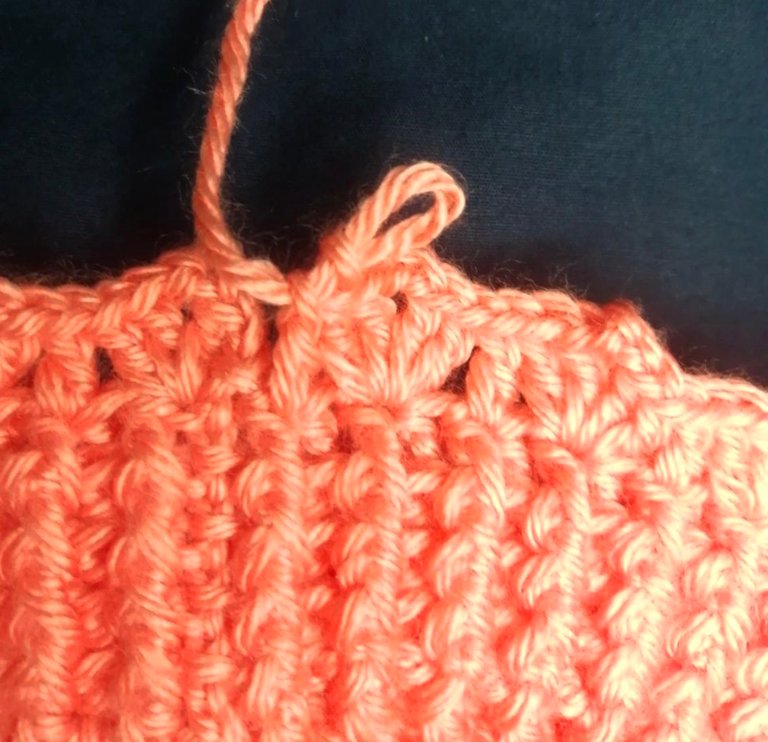
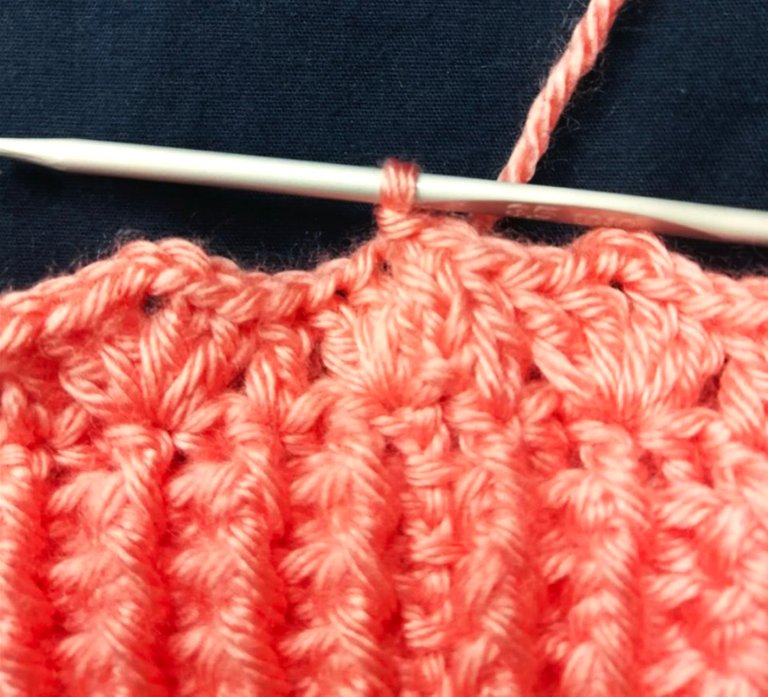
PASO #5 Para continuar la falda en está fila número 7 se realizara el patrón que se repetirá durante toda la elaboración, al haber realizado nuestro punto deslizado de la fila número 6 vamos a pasar el ganchillo por la abertura de dos cadenas del patrón anterior (se verá es espacio), y elaboramos otro punto deslizado, subimos con dos cadenas, luego procedemos a tomar lazada y realizar un punto alto, si contamos esas dos cadenas iniciales mas la que acabamos de realizar serían dos puntos altos o dos varetas en el mismo punto base hacemos dos cadenas tomamos lazada y hacemos un punto alto, tomamos nuevamente lazada y elaboramos otro punto alto buscando esa forma de abanico. Tomamos lazada y realizamos un punto alto en el espacio de la cadena anterior, vamos al siguiente espacio y hacemos otro punto alto y así mismo en el espacio que sigue, es decir modelo abanico todos en el mismo punto, luego tres puntos altos separados, en cada espacio que sigue, cuando veas el abanico de la fila anterior tomas lazada e insertas el ganchillo en ese espacio otorgado por las dos cadenas de la vuelta 6 y en ella se repite el patrón abanico (todo en un mismo punto) dos puntos altos dos cadenas al aire y dos puntos altos mas.
STEP #5 To continue the skirt in this row number 7 we will make the pattern that will be repeated throughout the elaboration, having made our slipped stitch of the row number 6 we will pass the crochet through the opening of two chains of the previous pattern (it will be seen is space), and we make another slipped stitch, we go up with two chains, then we proceed to take a loop and make a high stitch, if we count those two initial chains plus the one we just made would be two high stitches or two rods in the same base stitch we make two chains we take a loop and make a high stitch, we take another loop again and make another high stitch looking for that fan shape. We take the loop and make a high stitch in the space of the previous chain, we go to the next space and make another high stitch and likewise in the space that follows, ie fan pattern all in the same point, then three separate high stitches in each space that follows, when you see the fan of the previous row you take the loop and insert the crochet in that space given by the two chains of the 6th row and it repeats the fan pattern (all in the same point) two high stitches two chains in the air and two more high stitches.
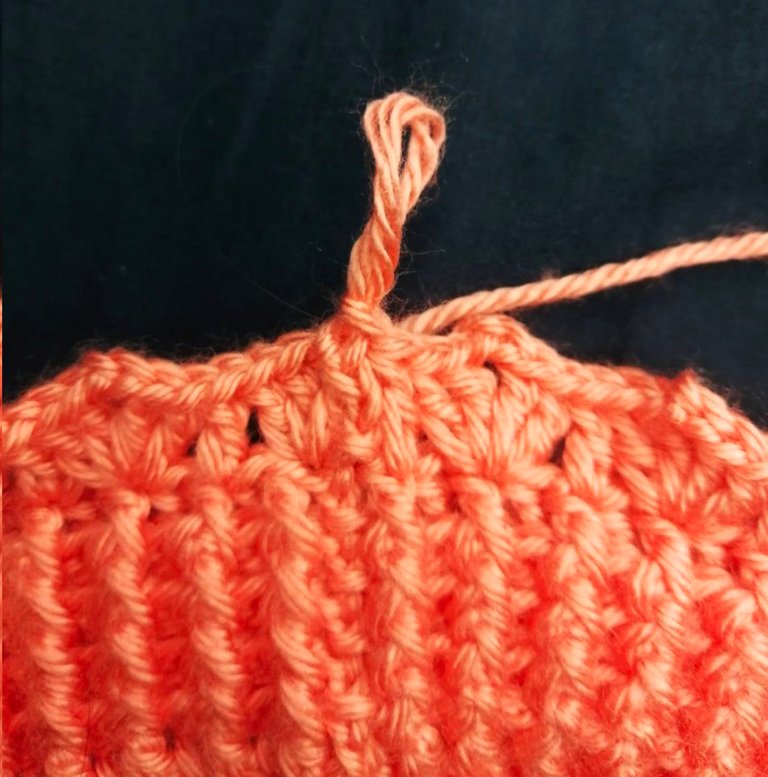
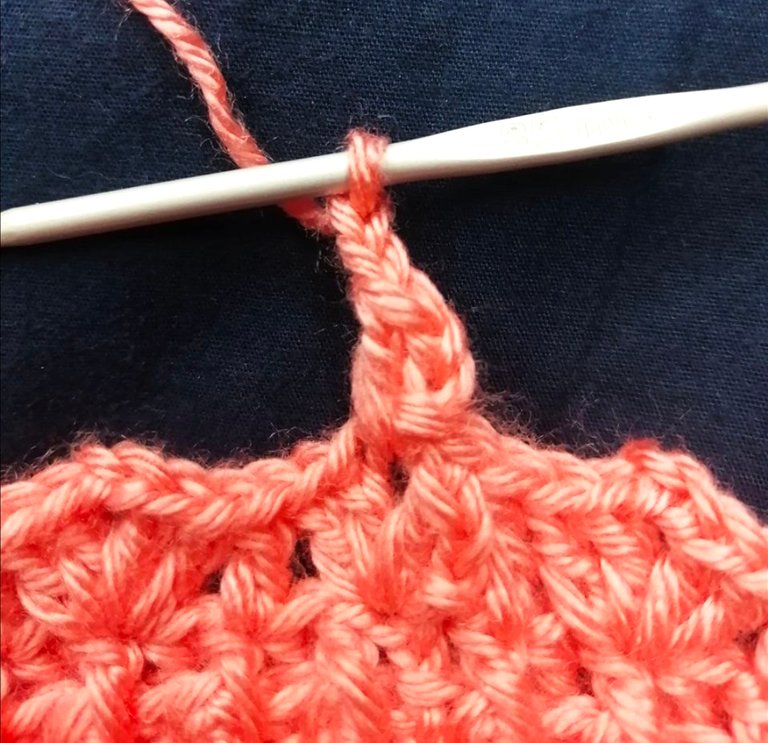
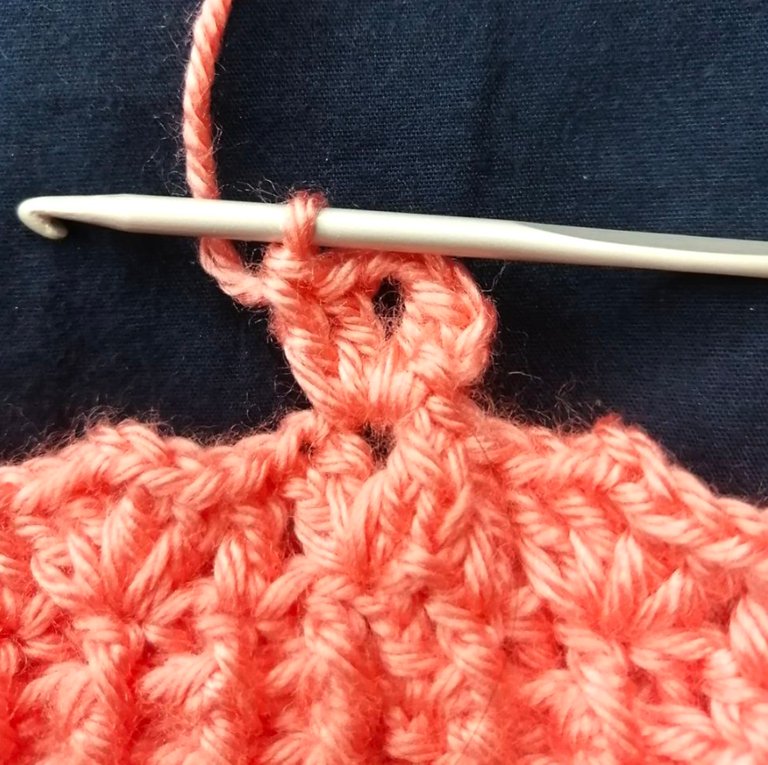
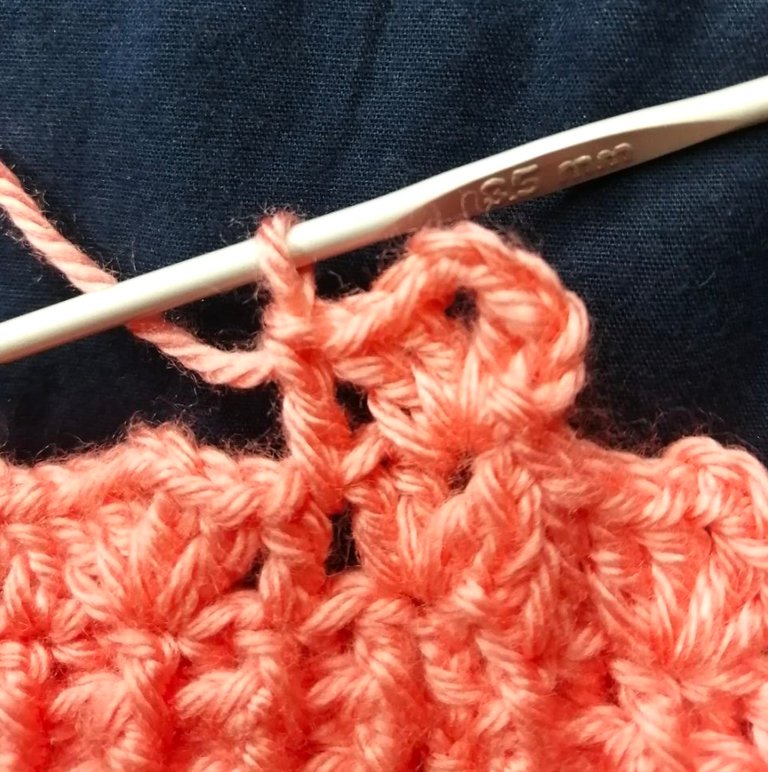
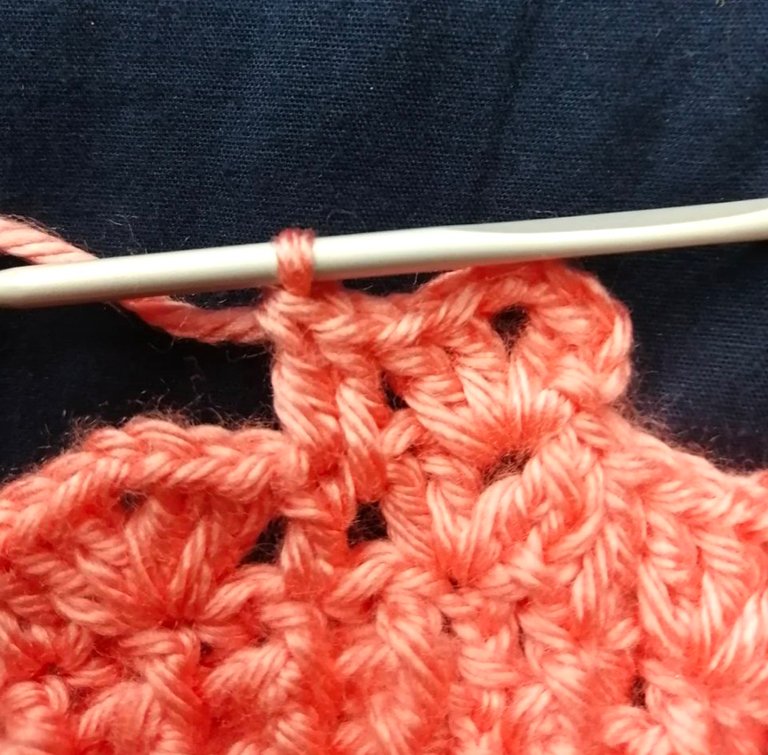
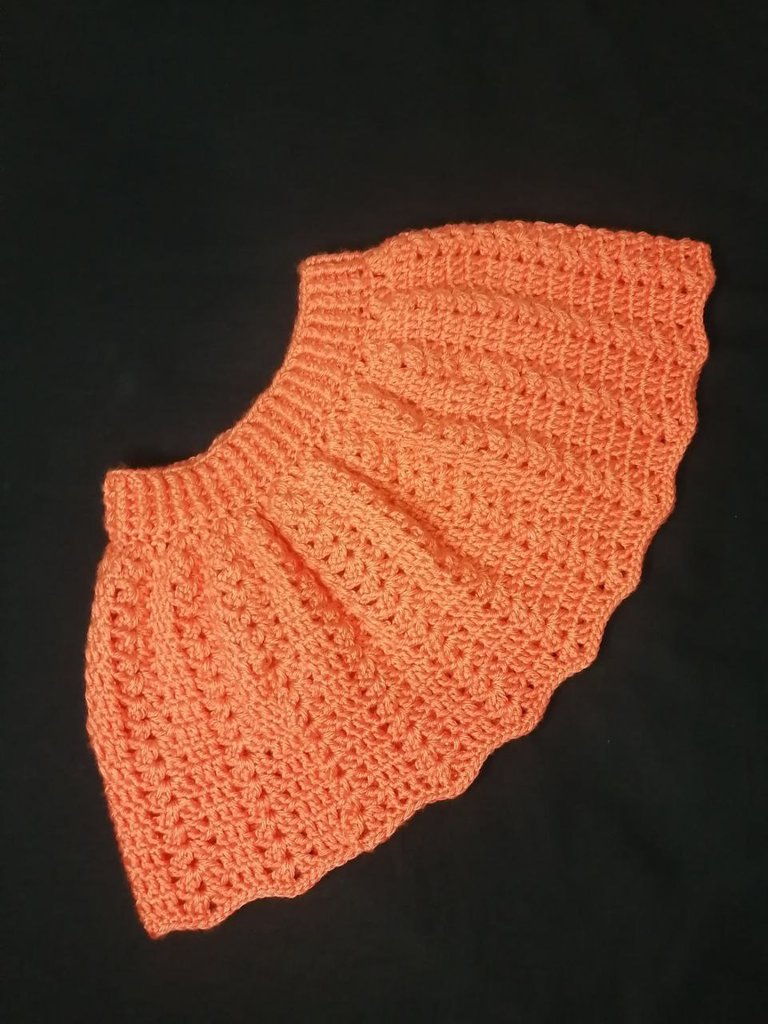
PASO #6 Al culminar la vuelta numero 7, buscaremos las cadenas de inicio en la segunda enganchamos y hacemos un punto deslizado y así será la secuencia, yo realice un total de 16 filas siguiendo este patrón, la medida fue de 24 centímetros de largo desde la elástica hasta abajo. Puedes realizar el acabado que desees, en mi caso preferí hacer un punto bajo en cada punto y así realizar un borde delicado y sencillo.
STEP #6 At the end of the 7th row, we will look for the beginning chains in the second row, we hook and make a slipped stitch and this will be the sequence, I made a total of 16 rows following this pattern, the measurement was 24 centimeters long from the elastic to the bottom. You can make the finish you want, in my case I preferred to make a low stitch in each stitch and thus make a delicate and simple edge.
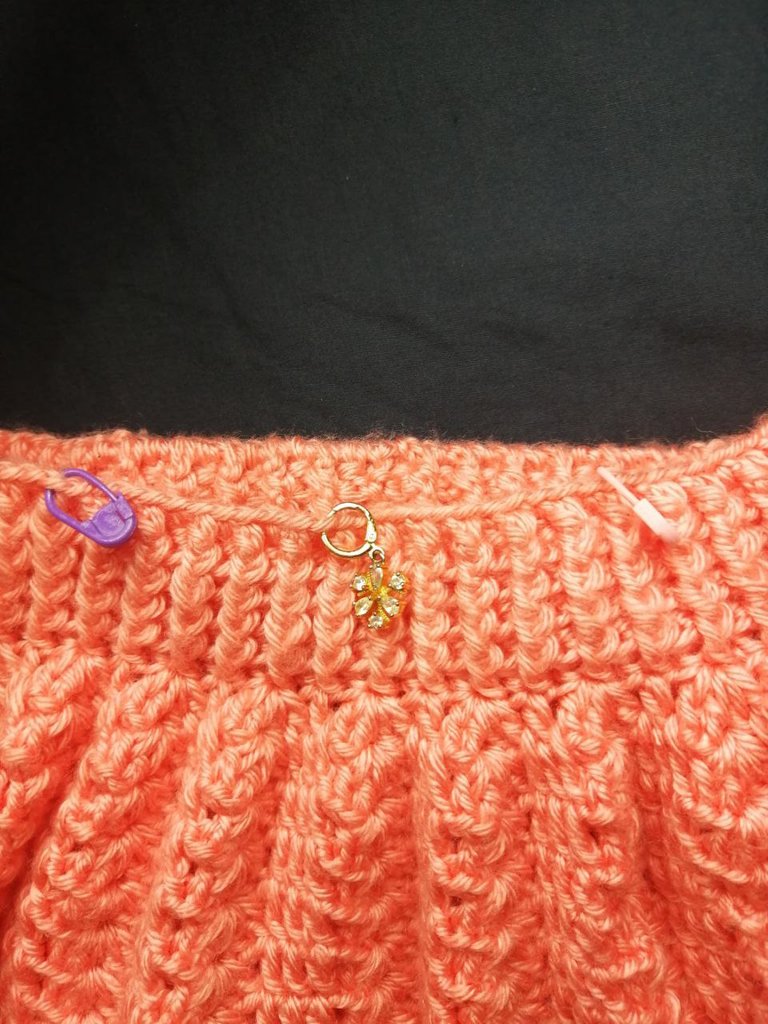
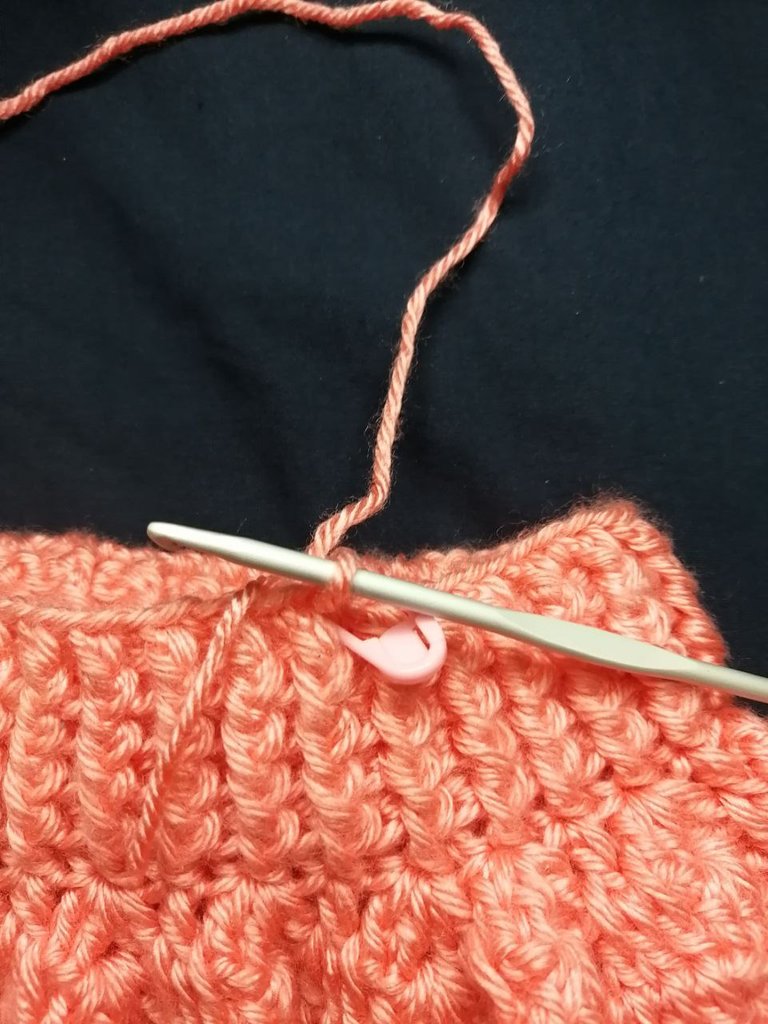
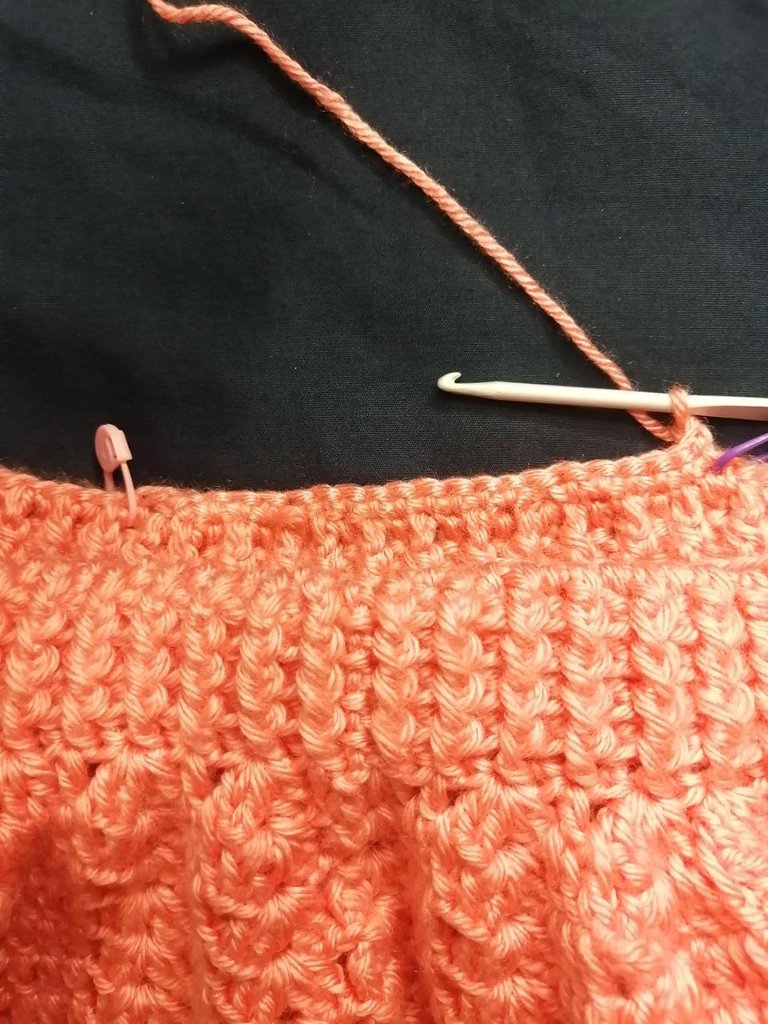
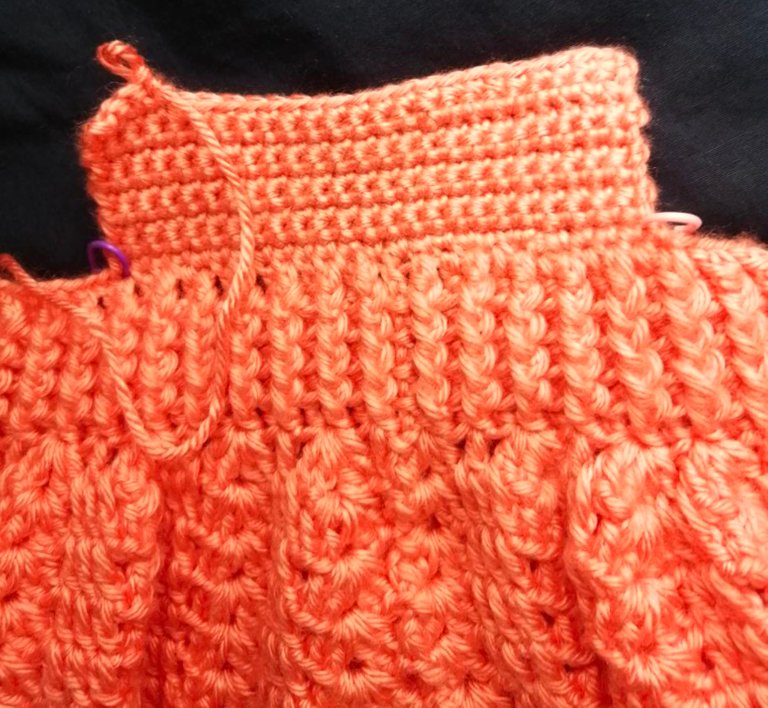
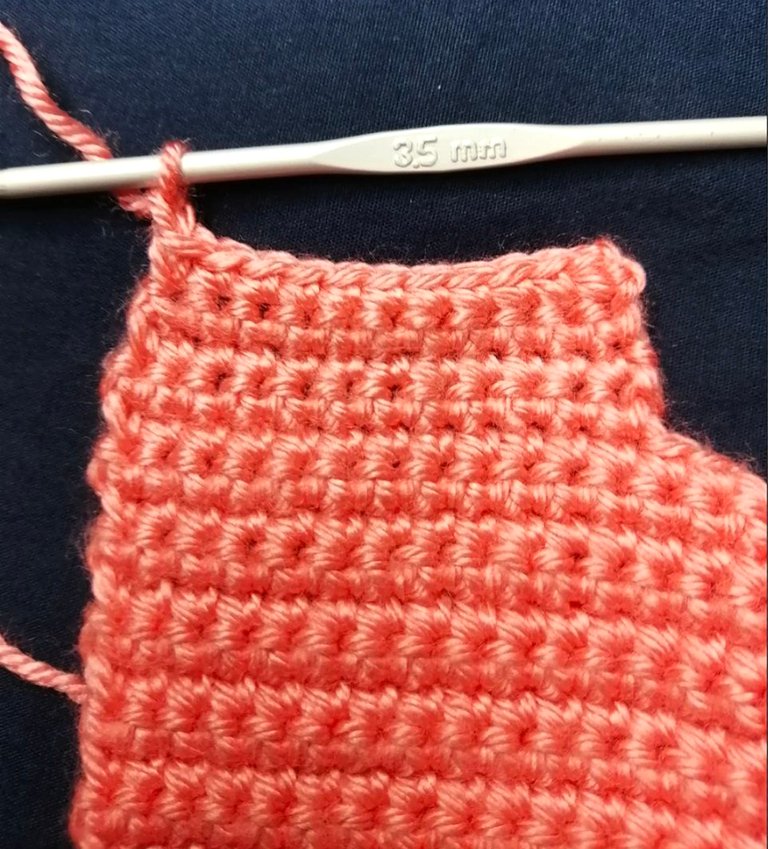
PASO #7 Ya culminada la falda, procedemos a observar ese pequeño margen de la elástica donde se unía una vuelta y otra ese será nuestro centro vamos a contar lo vamos a marcar con algún marcador de puntos o un hilo, contaremos 6 puntos a partir del centro ya marcado de lado derecho y le colocamos otro marcador, nos detenemos en ese punto número 6 y de derecha a izquierda contamos 13 puntos en ese punto numero 13 colocamos otro marcador. Enganchamos el hilo para realizar 13 puntos bajos, al finalizar la primera fila vamos a subir con un punto bajo damos vuelta al tejido y seguimos realizando filas de puntos bajos (estamos formando la espalda). Obtuve una atura de 11 centímetros, 22 filas tejidas y 11 centímetros de ancho.
STEP #7 Once the skirt is finished, we proceed to observe that small margin of the elastic where one lap and another one joined, that will be our center, we are going to mark it with a stitch marker or a thread, we will count 6 stitches from the center already marked on the right side and we place another marker, we stop in that point number 6 and from right to left we count 13 stitches, in that point number 13 we place another marker. We hook the yarn to make 13 single crochet stitches, at the end of the first row we go up with a single crochet, we turn the fabric and continue making rows of single crochet stitches (we are forming the back). I obtained an 11 centimeters width, 22 knitted rows and 11 centimeters wide.
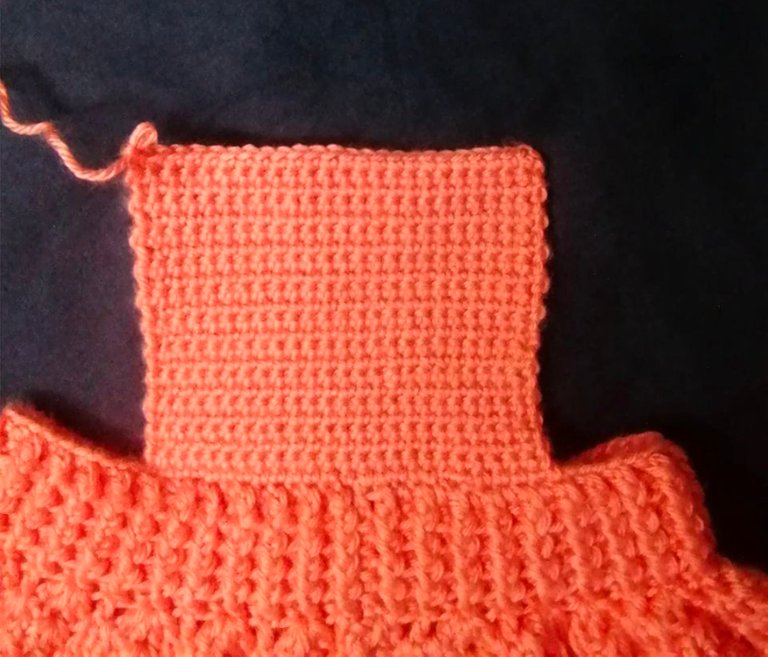
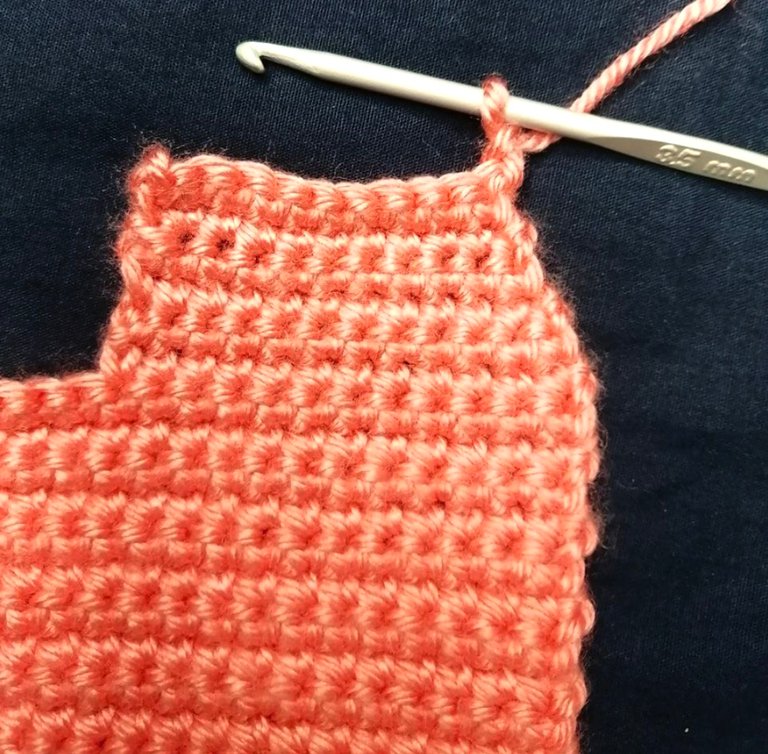
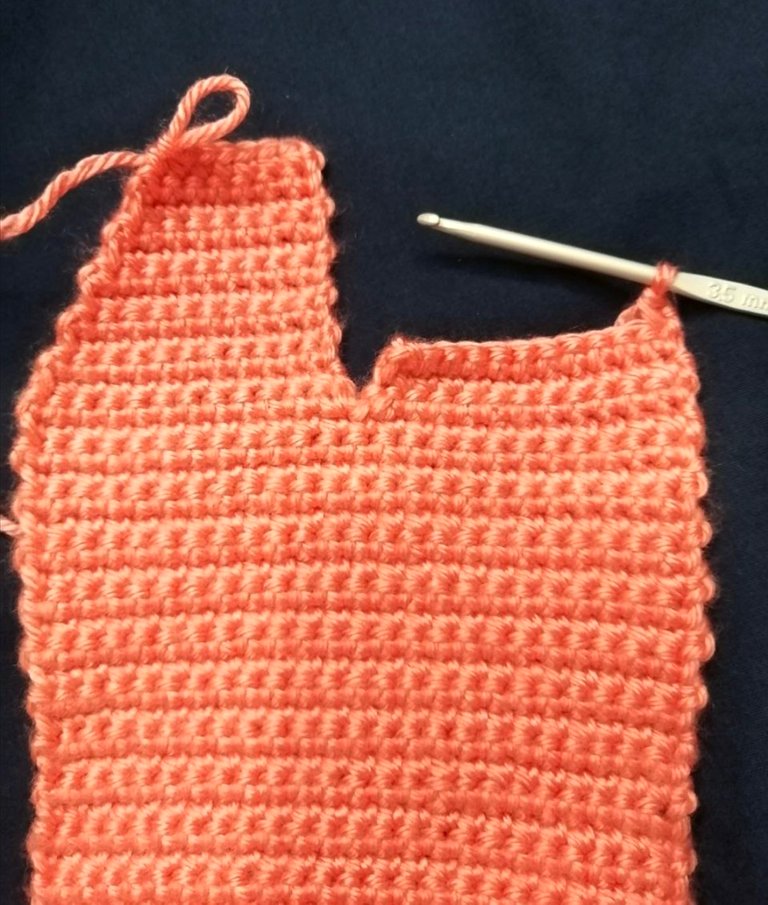
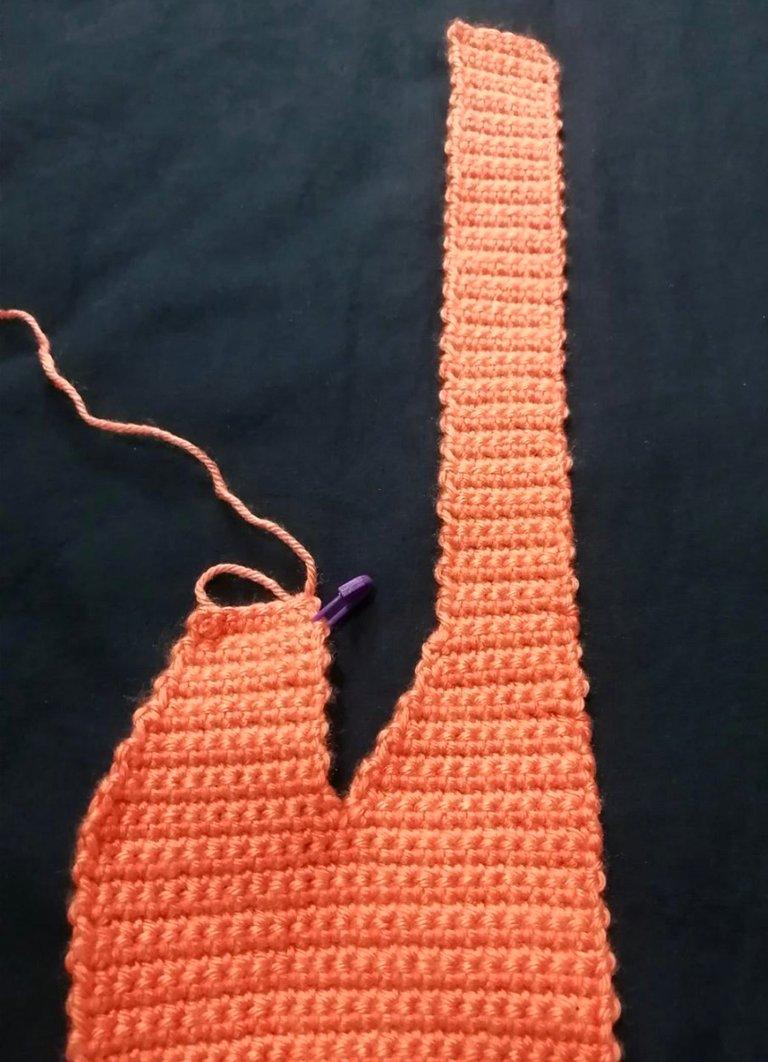
PASO #8 Ya tenemos lista la espalda, ahora vamos a proceder a realizar los tirantes subimos con una cadena y realizamos 12 puntos bajos, subimos con una cadena, damos vuelta al tejido para continuar con la siguiente fila, en esta vamos a saltar el primer punto (no lo tejemos) para hacer un disminución y así finalizar con 11 puntos bajos, realizamos una cadena damos vuelta al tejido y en esta tejemos esos 11 puntos nuevamente, subimos con una cadena y en la siguiente vuelta realizamos otra disminución para obtener 10 puntos bajos, la siguiente vuelta la elaboramos con esos 10 puntos, subimos con una cadena y volvemos a disminuir obviando el primer punto enganchando en el segundo para así tejer 9 puntos bajos, la secuencia sería una fila de disminución, la siguiente fila se teje sin disminución y así vamos hasta quedar con un fila de 7 puntos bajos, al llegar a 7 puntos bajos no disminuimos más y continuamos el tejido hasta obtener el largo deseado.
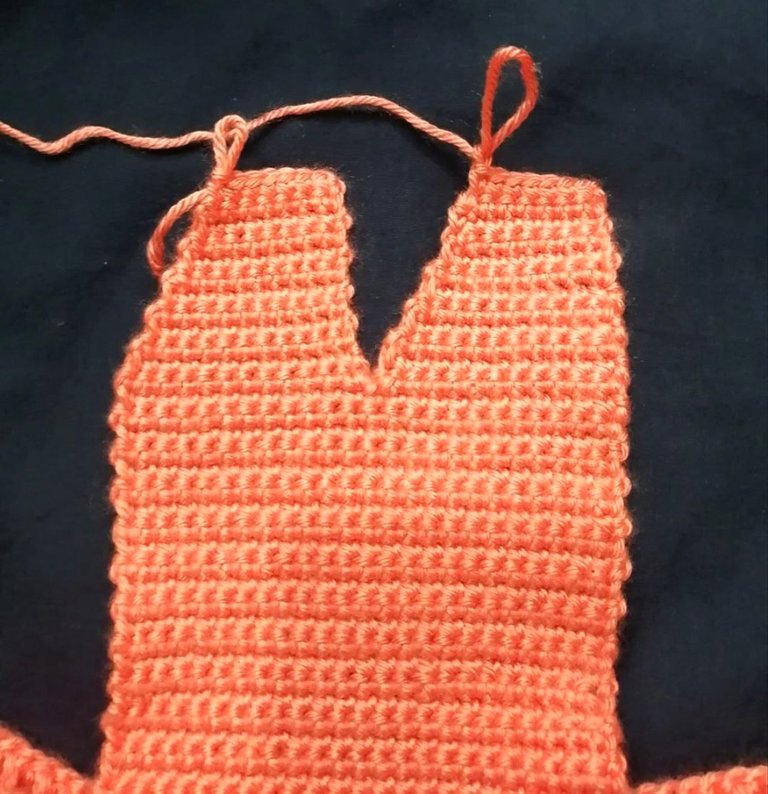
Para realizar el siguiente tirante se engancha el hilo en el punto al lado de donde está el tirante anterior y contamos 12 puntos bajos para así seguir con una fila de disminución y una fila normal sin disminución hasta llegar a la fila donde se tengan 7 puntos bajos.
En cada tirante se realizaron un total de 60 filas de 7 puntos bajos, desde la cintura arriba del elástico hasta la punta del tirante se obtuvieron 36 centímetros de largo y desde el inicio de las 12 cadenas hasta el final del tirante se obtuvieron 26 centímetros de largo.
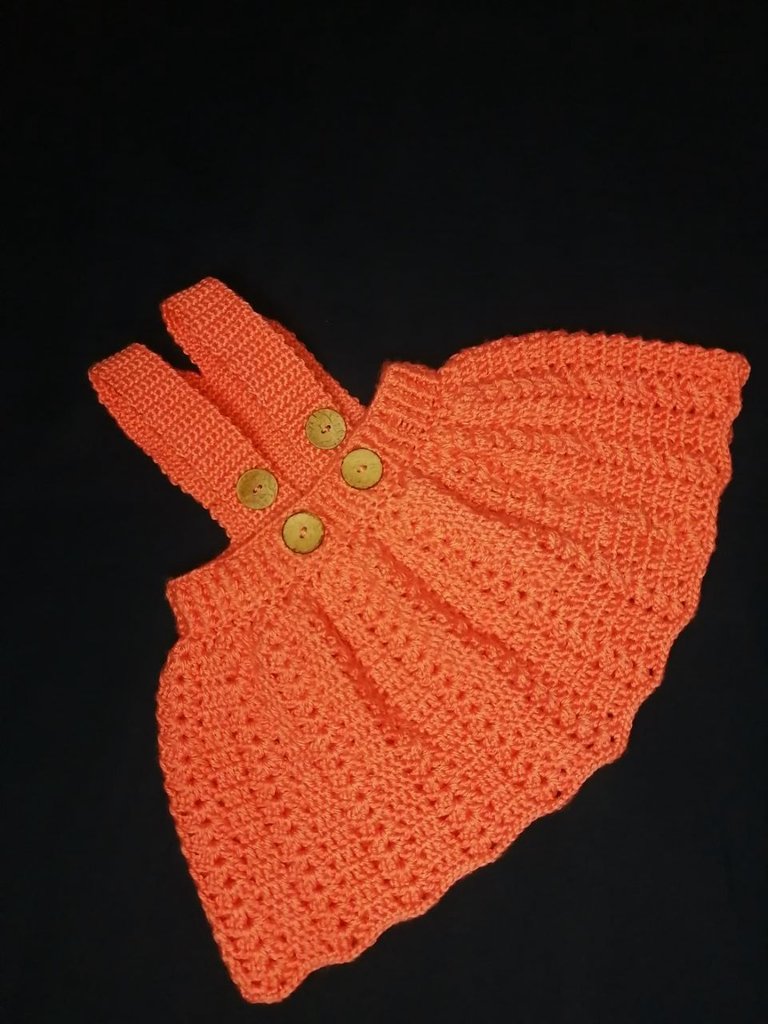
Los botones se pueden coser a la distancia que se desee, se van a encajar o usar como ojal la apertura que existe en la elástica que se elaboro anteriormente.
STEP #8 We already have the back ready, now we are going to proceed to make the straps we go up with a chain and we make 12 low stitches, we go up with a chain, we turn the fabric to continue with the next row, in this we are going to skip the first stitch (we do not knit it) to make a decrease and thus finish with 11 low stitches, we make a chain we turn the fabric and in this we knit those 11 stitches again, we go up with a chain and in the next round we make another decrease to obtain 10 low stitches, the next row is knitted with those 10 stitches, we go up with a chain and we decrease again obviating the first stitch hooking in the second one to knit 9 single crochet stitches, the sequence would be a row of decrease, the next row is knitted without decrease and so on until we get a row of 7 single crochets, when we get to 7 single crochets we do not decrease any more and we continue knitting until we get the desired length.
To make the next strap, hook the yarn in the stitch next to where the previous strap is and count 12 single crochet stitches to continue with a decrease row and a normal row without decrease until you reach the row where you have 7 single crochet stitches.
In each shoulder strap a total of 60 rows of 7 single crochet stitches were made, from the waistband above the elastic to the end of the strap we obtained 36 centimeters long and from the beginning of the 12 chains to the end of the strap we obtained 26 centimeters long.
The buttons can be sewn at the desired distance, they will fit or use as a buttonhole the opening that exists in the elastic that was previously elaborated.
*Todas las fotografias son tomadas por mi persona desde un Huawey P30
This is really beautiful and i believe that my little one will love it. Hope you didn't spend much time and energy to get the dress ready? Thanks for sharing
Thank you very much, it did take some time but it was really worth the effort, it looks beautiful.
Este trabajo se ve tan laborioso y más cuando tienes que parar y tomar la foto, quedó muy lindo
Si, tomo su tiempo, realmente ame realizarlo el resultado me encanto, muchas gracias por tu comentario.
Elizabeth quiere unooooooo! Hermoso trabajo, Barbie. Besitos
aaawwww si sería hermoso vérselo puesto le quedaría bellísimo, gracias corazón.
hermoso, me encantan los tejidos a crochet😍
Muchas gracias, si los tejidos a crochet son muy lindos.
Your crochet pattern is just perfect and the final look of the dress is top-notch.
Such a lovely dress.
Thank you very much for rating this garment, I really enjoyed making it.
You're welcome, thanks the beauty of it, enjoying what we do gives us joy.
Hermosísimo trabajo!
Muchas gracias por tu comentario.
That's a very adorable little jumper you made! Bravo @soybarbie!