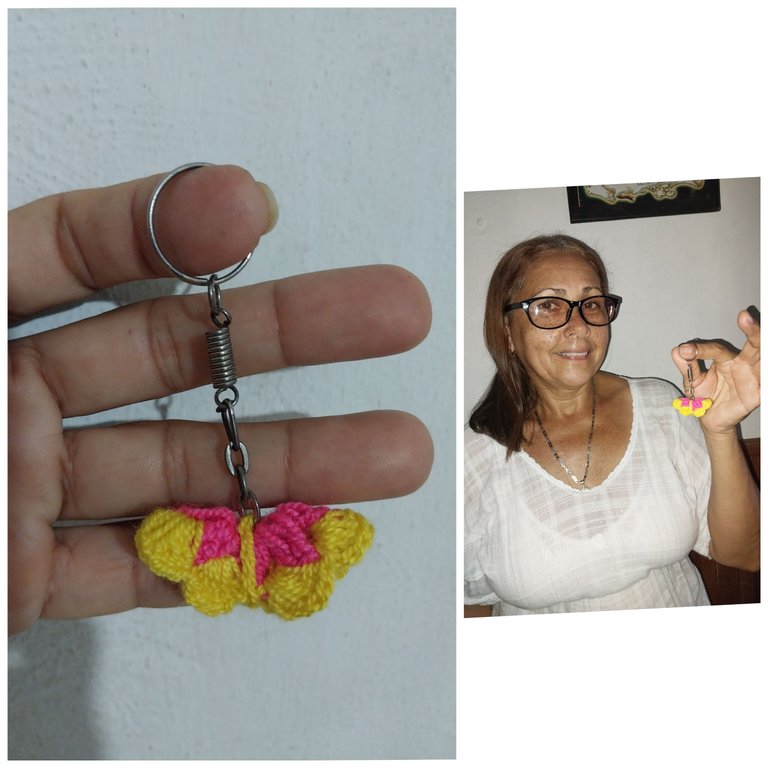
Good afternoon my dear friends of #Hive,a warm 🖐 greeting to all this beautiful community, keep having a fantastic afternoon of this beautiful family Sunday 👪, full of many positive vibes and hand in hand with our Heavenly Father, me here relaxing with this wonderful art of knitting that I share day by day with all of you.
Buenas tardes mis queridos amig@s de #Hive,un saludo 🖐 cariñoso a toda esta hermosa comunidad, sigan pasando una fantástica tarde de este hermoso domingo familiar 👪, lleno de muchas vibras positivas y de la mano de nuestro Padre Celestial, yo aquí relajandome con este maravilloso arte del tejido que comparto día a día con todos ustedes.
In this opportunity I am going to show you how to make a crochet keychain to place the keys of our houses, cars, files in our work and make it easier to find them when we put them in our bags, wallets, shoulder bags, or for a detail that we want to give to any loved one on a special date. Join me to read the step by step and encourage you to become a spider with your wonderful hands 👐.
En esta oportunidad les voy a mostrar como realizar un llavero tejido a crochet para colocar las llaves de nuestras casas, automoviles, archivos en nuestros trabajos y se nos haga más fácil de encontrarlas cuando las coloquemos en los bolsos, carteras , bandoleros,o para un detalle q le querramos obsequiar a cualquier ser querido en una fecha especial. Acompáñame para q leas el paso a paso y te animes a volverte una araña con tus maravillosas manos 👐.
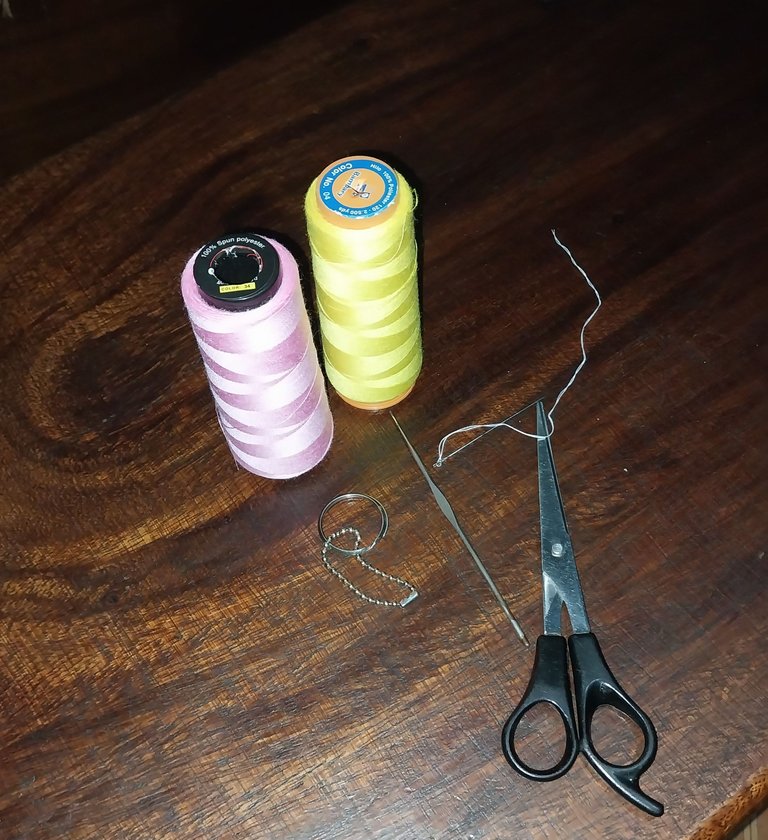
Materials:
Pink colored thread.
Yellow thread.
Scissors.
Needle.
Case number 03.
Chain with its ring.
Small peg.
Materiales:
Hilo color rosado.
Hilo color amarillo.
Tijera.
Aguja.
Estuche número 03.
La cadenita con su aro.
Piqueta pequeña.
Step No. 1
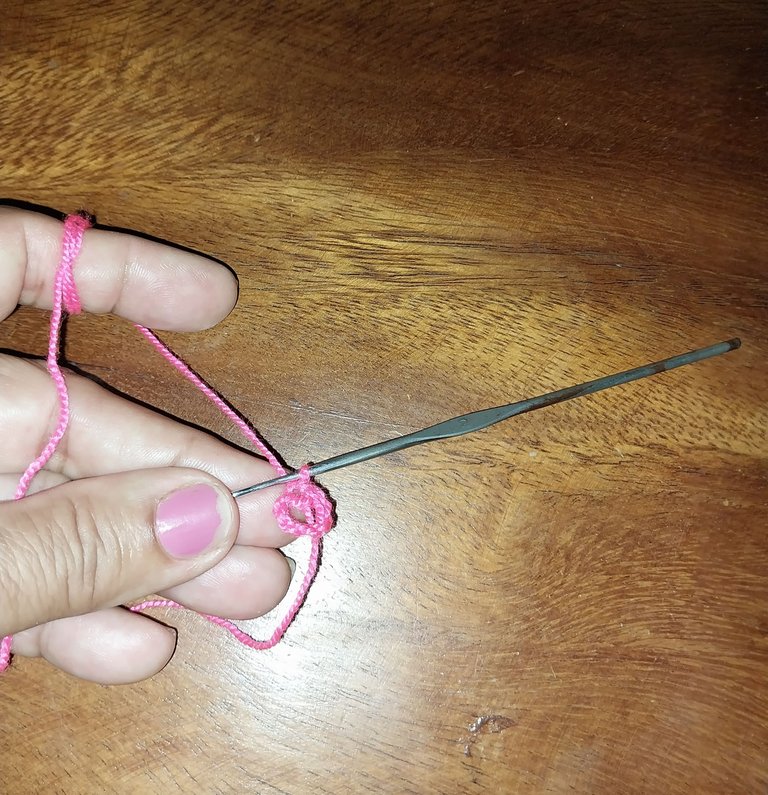
We start by making a magic hoop to continue making eight chains and then we close it with a slip stitch.
Paso No. 1
Comenzamos haciendo un aro mágico para continuar realizando ocho cadenas y luego la cerramos con un punto deslizado.
Step No. 2
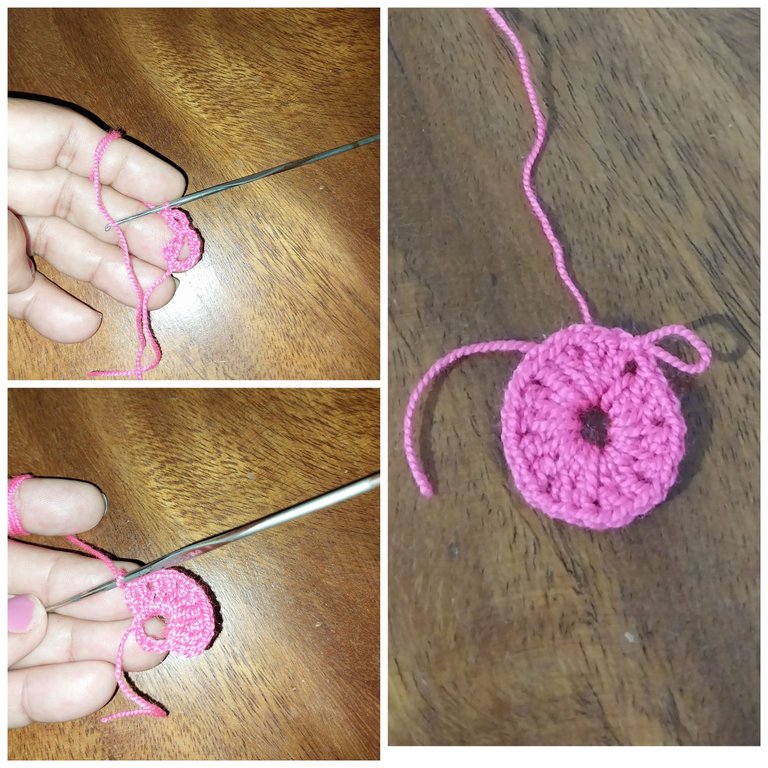
We continue with row number two, knitting three chains upwards to form the first double crochet and then we take a loop and we put the case back next to the double crochet we started with and we knit a chain and knit two double crochets again, and so we continue knitting until we get sixteen double crochets always separating with a chain and at the end of the row we close it with a slip stitch.
Paso No. 2
Continuamos con la vuelta número dos Tejiendo tres cadenas hacia arriba q forma el primer punto alto y luego tomamos una lazada Y volvemos a meter el estuche al lado del punto alto con el q comenzamos y tejemos una cadena y volvemos a tejer dos puntos altos, y así seguimos Tejiendo hasta obtener dieciséis puntos altos siempre separadores con una cadena y al terminar la vuelta lo cerramos con un punto deslizado.
Step No. 3
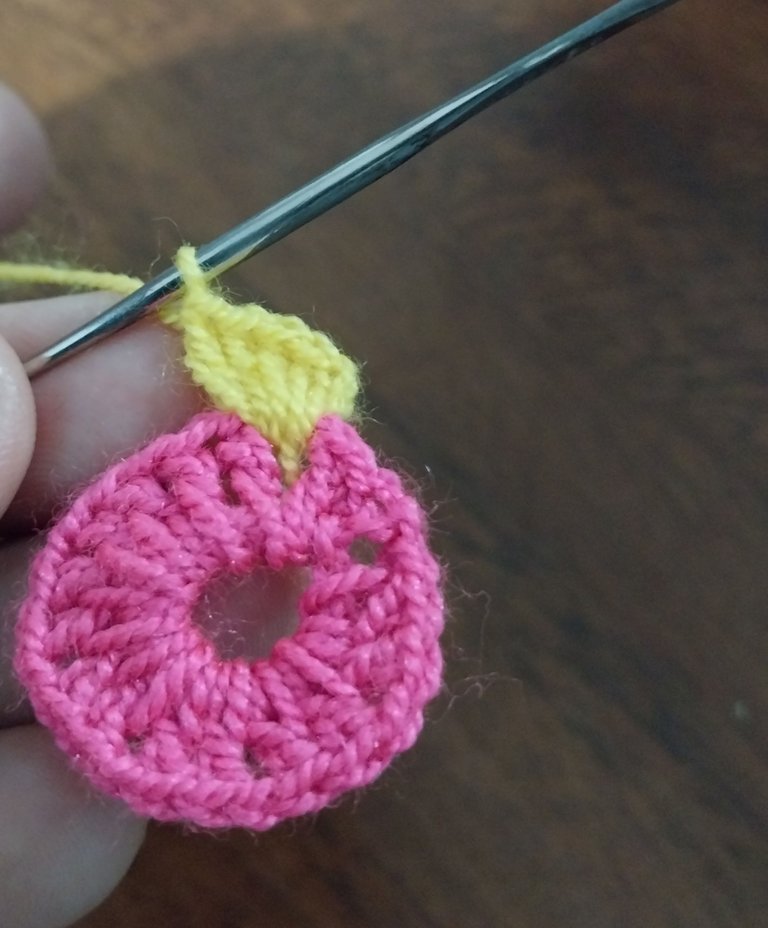
We start round number three by tying the yellow yarn to knit by grabbing a loop and knit it in the same stitch and then we continue grabbing another loop and knit until we make five high stitches and then close it with a slip stitch to give it a petal shape.
Paso No. 3
Comenzamos la vuelta número tres empatando el hilo amarillo para tejer agarrando una lazada Y la tejemos en el mismo punto y luego seguimos agarrando otra lazada y tejemos hasta hacer cinco puntos altos para luego cerrarlo con un punto deslizado para q vaya dando forma de pétalo.
Step No. 4
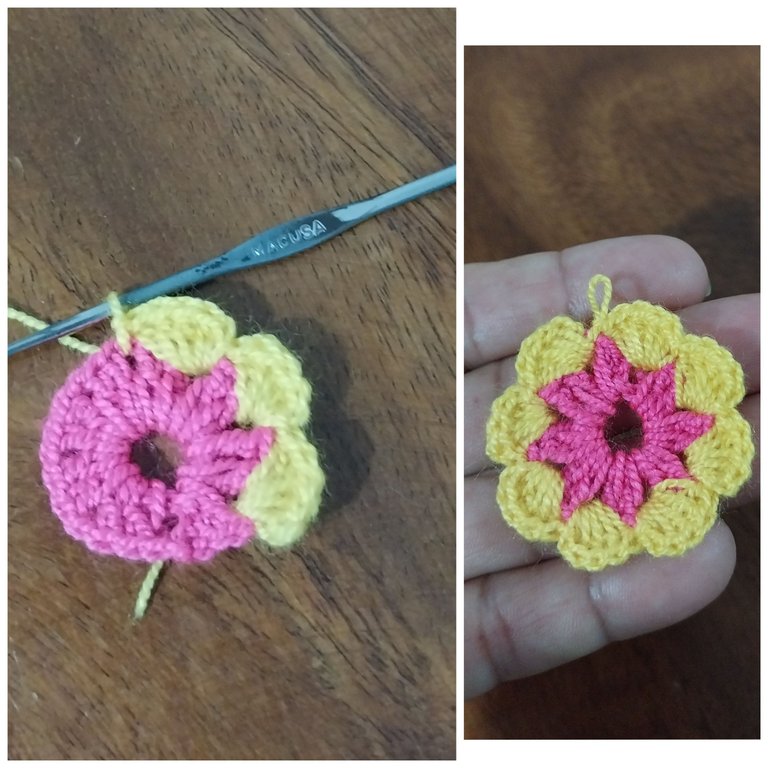
We continue knitting in the chain we made in the previous row separating the two double crochet stitches, we always start with a loop and knit it and we continue knitting until we get five double crochet stitches and we close it with a slip stitch to get another petal and so we continue knitting until we get a flower.
Paso No. 4
Seguimos Tejiendo en la cadena q realizamos en la vuelta anterior separando los dos puntos altos, siempre comenzamos con una lazada y la tejemos y seguimos hasta volver a obtener cinco puntos altos y lo cerramos con un punto deslizado para volver a obtener otro pétalo y así seguimos Tejiendo hasta obtener una flor.
Step No. 5
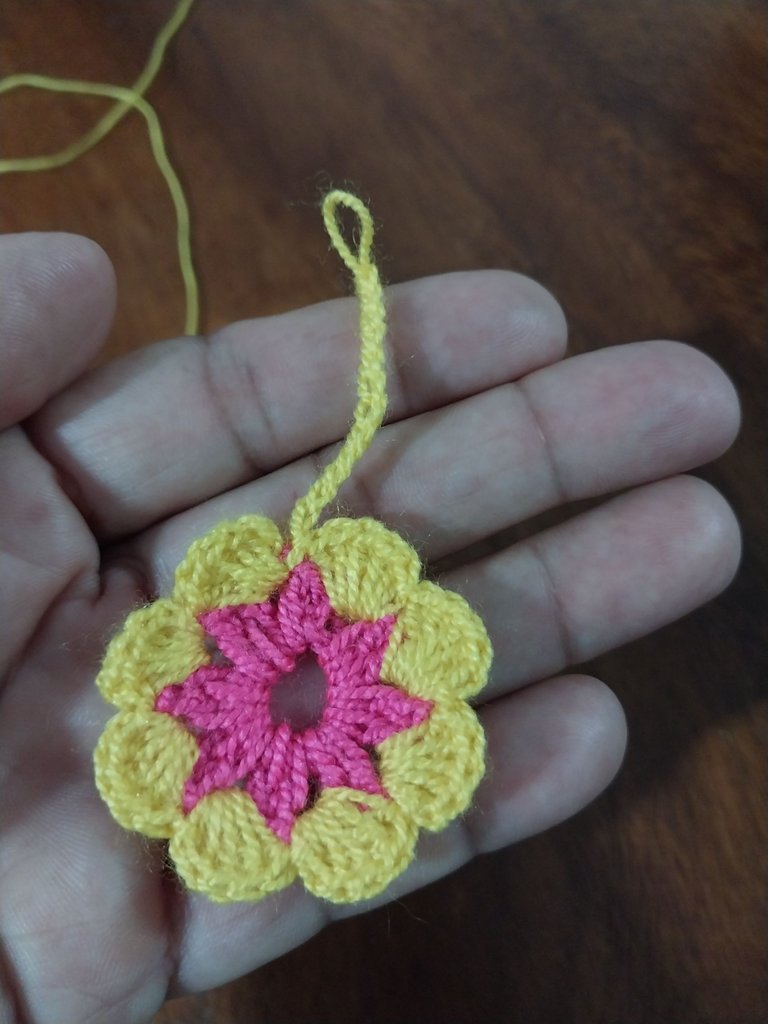
Once the flower is made, we weave twelve chains upwards.
Paso No. 5
Ya realizada la flor, Tejemos doce cadenas hacia arriba.
Step No. 6
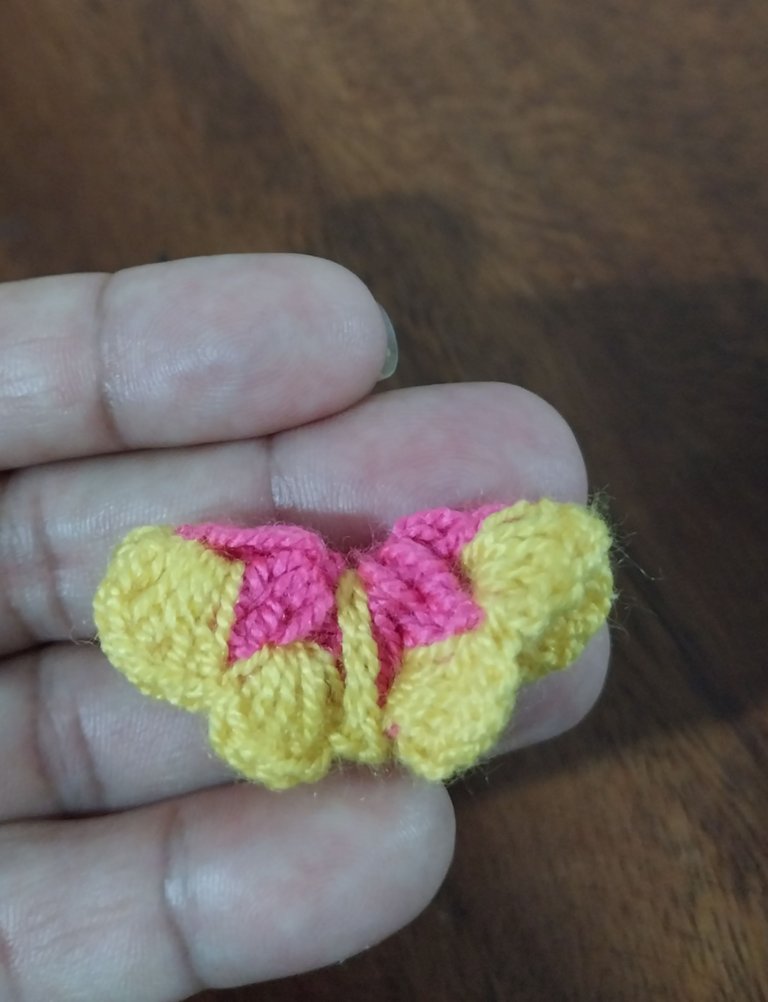
Fold the flower petals with petals and then with the chain of twelve stitches we fold it in half to secure it very well so that it will not come untied, and thus we give it the shape of a butterfly.
Paso No. 6
Doblamos la flor q quede pétalos con pétalos para luego con la cadena de doce puntos cocerla por la mitad para asegurarla muy bien q no se vaya a desatar, y así le damos forma de Mariposa.
Step No. 7
Once the beautiful butterfly is ready, we are going to attach the chain ring with the help of a plier.
Paso No. 7
Ya realizada la preciosa mariposa le vamos a coloca el aro de la cadena con la ayuda de una pinza.
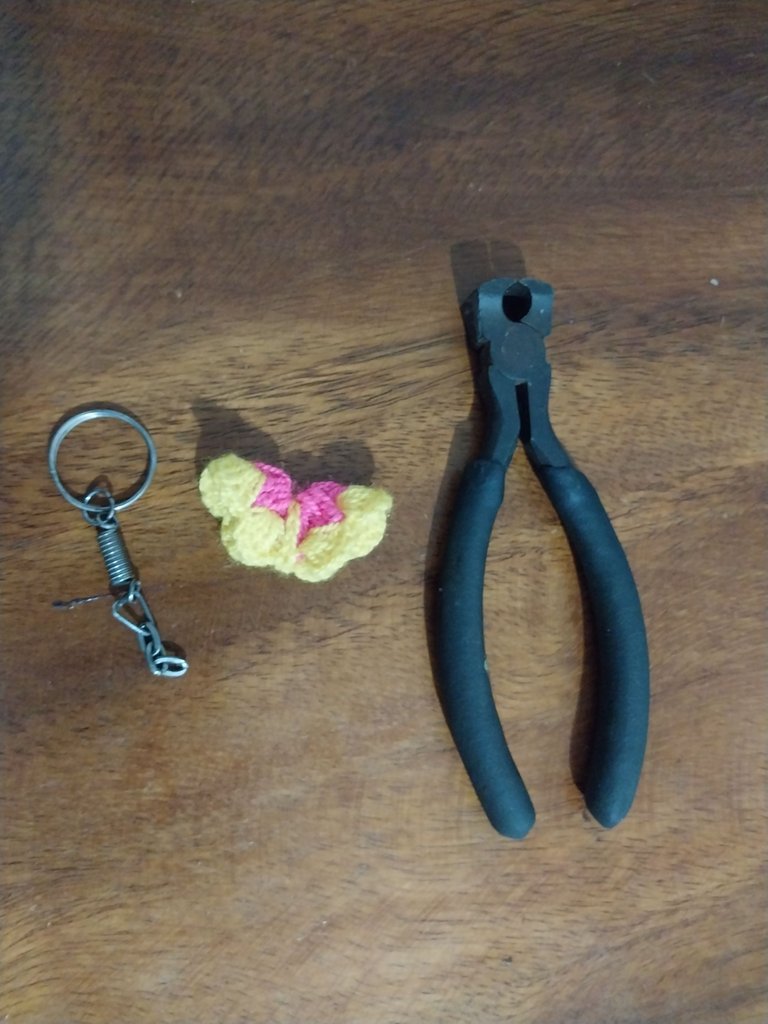
Step No. 8
By securing the ring with the help of this little pin to tighten it well so that it can not get out of the center of the chain that forms this beautiful Butterfly, so we finish this beautiful and tender handmade crochet keychain 🏏 in the shape of a beautiful butterfly.
Paso No. 8
Al asegurar el aro con la ayuda de esta pincita para apretarlo bien q no pueda salirse del centro de la cadena q forma esta hermosa Mariposa, así damos por culminado este precioso y tierno llavero tejido a mano con crochet 🏏 en forma de una preciosa mariposa.
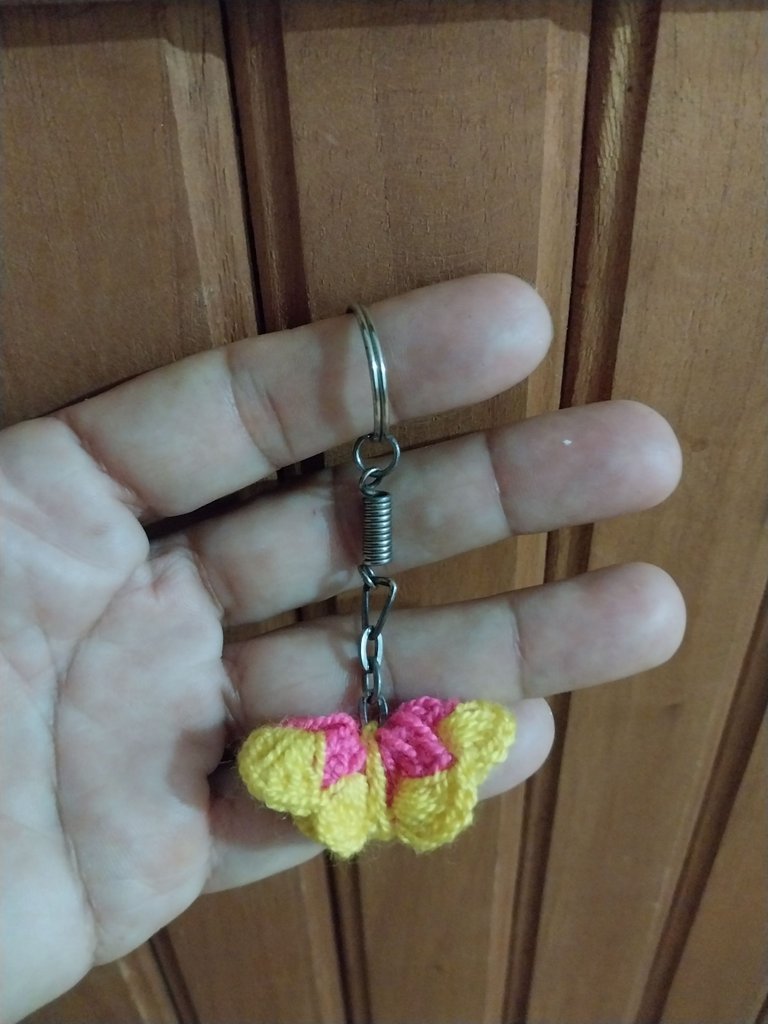
I hope you stay until the end of this post to see how easy and quick it is to make this beautiful butterfly keychain. I loved it.
Espero se queden hasta el final de este post para q vean lo fácil y rápido de hacer este llavero hermoso en forma de Mariposa. Me encantó, quedo cuchi.
Very beautiful.
Graciasss. Feliz día.
Definitivamente quedó cuchi, lo hiciste en unos colores bastante llamativos.
También se puede decorar con algunas mostacillas.
Tejes muy bonito. Gracias por compartir tu contenido con nosotros.
Saludos
Siiii quedo espectacular, Gracias por agradables con mis trabajos. saludo cariñoso.
This is good earring crochet you have just made. I love the color combination.
Graciasss. Bendecido día.
Dear @rosalbaced, we need your help!
The Hivebuzz proposal already got important support from the community. However, it lost its funding a few days ago and only needs a few more HP to get funded again.
May we ask you to support it so our team can continue its work this year?
You can do it on Peakd, ecency,
https://peakd.com/me/proposals/199
Your support would be really appreciated.
Thank you!