
Un cordial saludo a toda la comunidad de Needleworkmonday, espero hayan pasado un sábado bonito y alegre, gracias por estar aquí compartiendo conmigo un nuevo tutorial de corte y costura, en esta oportunidad para damas.
Es normal que como costurera nos olvidemos de nosotras??, pues es posible que a muchas nos suceda que descuidamos por completo hacernos una prenda, o por lo menos a mi me sucede, casi nunca hago algo para mí; y no es porque no quiera o no me guste, simplemente disfruto mas cosiendo para alguien más. Pero está vez deje a un lado todos los otros trabajos que tenía, para hacerme está camisa de rayas que hace mucho quería, está confeccionada en una tela de algodón de rayas rojas y blancas que compre hace un tiempito.. Quise hacer algo sencillo que se me permitiera usar de forma casual para mis días de compras; una linda camisa con un acabado muy bonito en sus mangas cortas y cuello redondo resulto algo perfecto para mí.. Acompañame te muestro su paso a paso.
A cordial greeting to the entire Needleworkmonday community, I hope you had a nice and happy Saturday, thank you for being here sharing with me a new cutting and sewing tutorial, this time for ladies.
Is it normal that as a seamstress we forget about ourselves??, because it is possible that it happens to many of us that we completely neglect making a garment, or at least it happens to me, I almost never make something for me; and it's not because I don't want to or I don't like it, I simply enjoy sewing more for someone else. But this time I put aside all the other jobs I had, to make this striped shirt that I wanted for a long time, it is made of a red and white striped cotton fabric that I bought a while ago. I wanted to make something simple that allowed me to wear casually for my shopping days; A nice shirt with a very nice finish on its short sleeves and round neck turned out to be perfect for me. Come with me and I'll show you step by step.
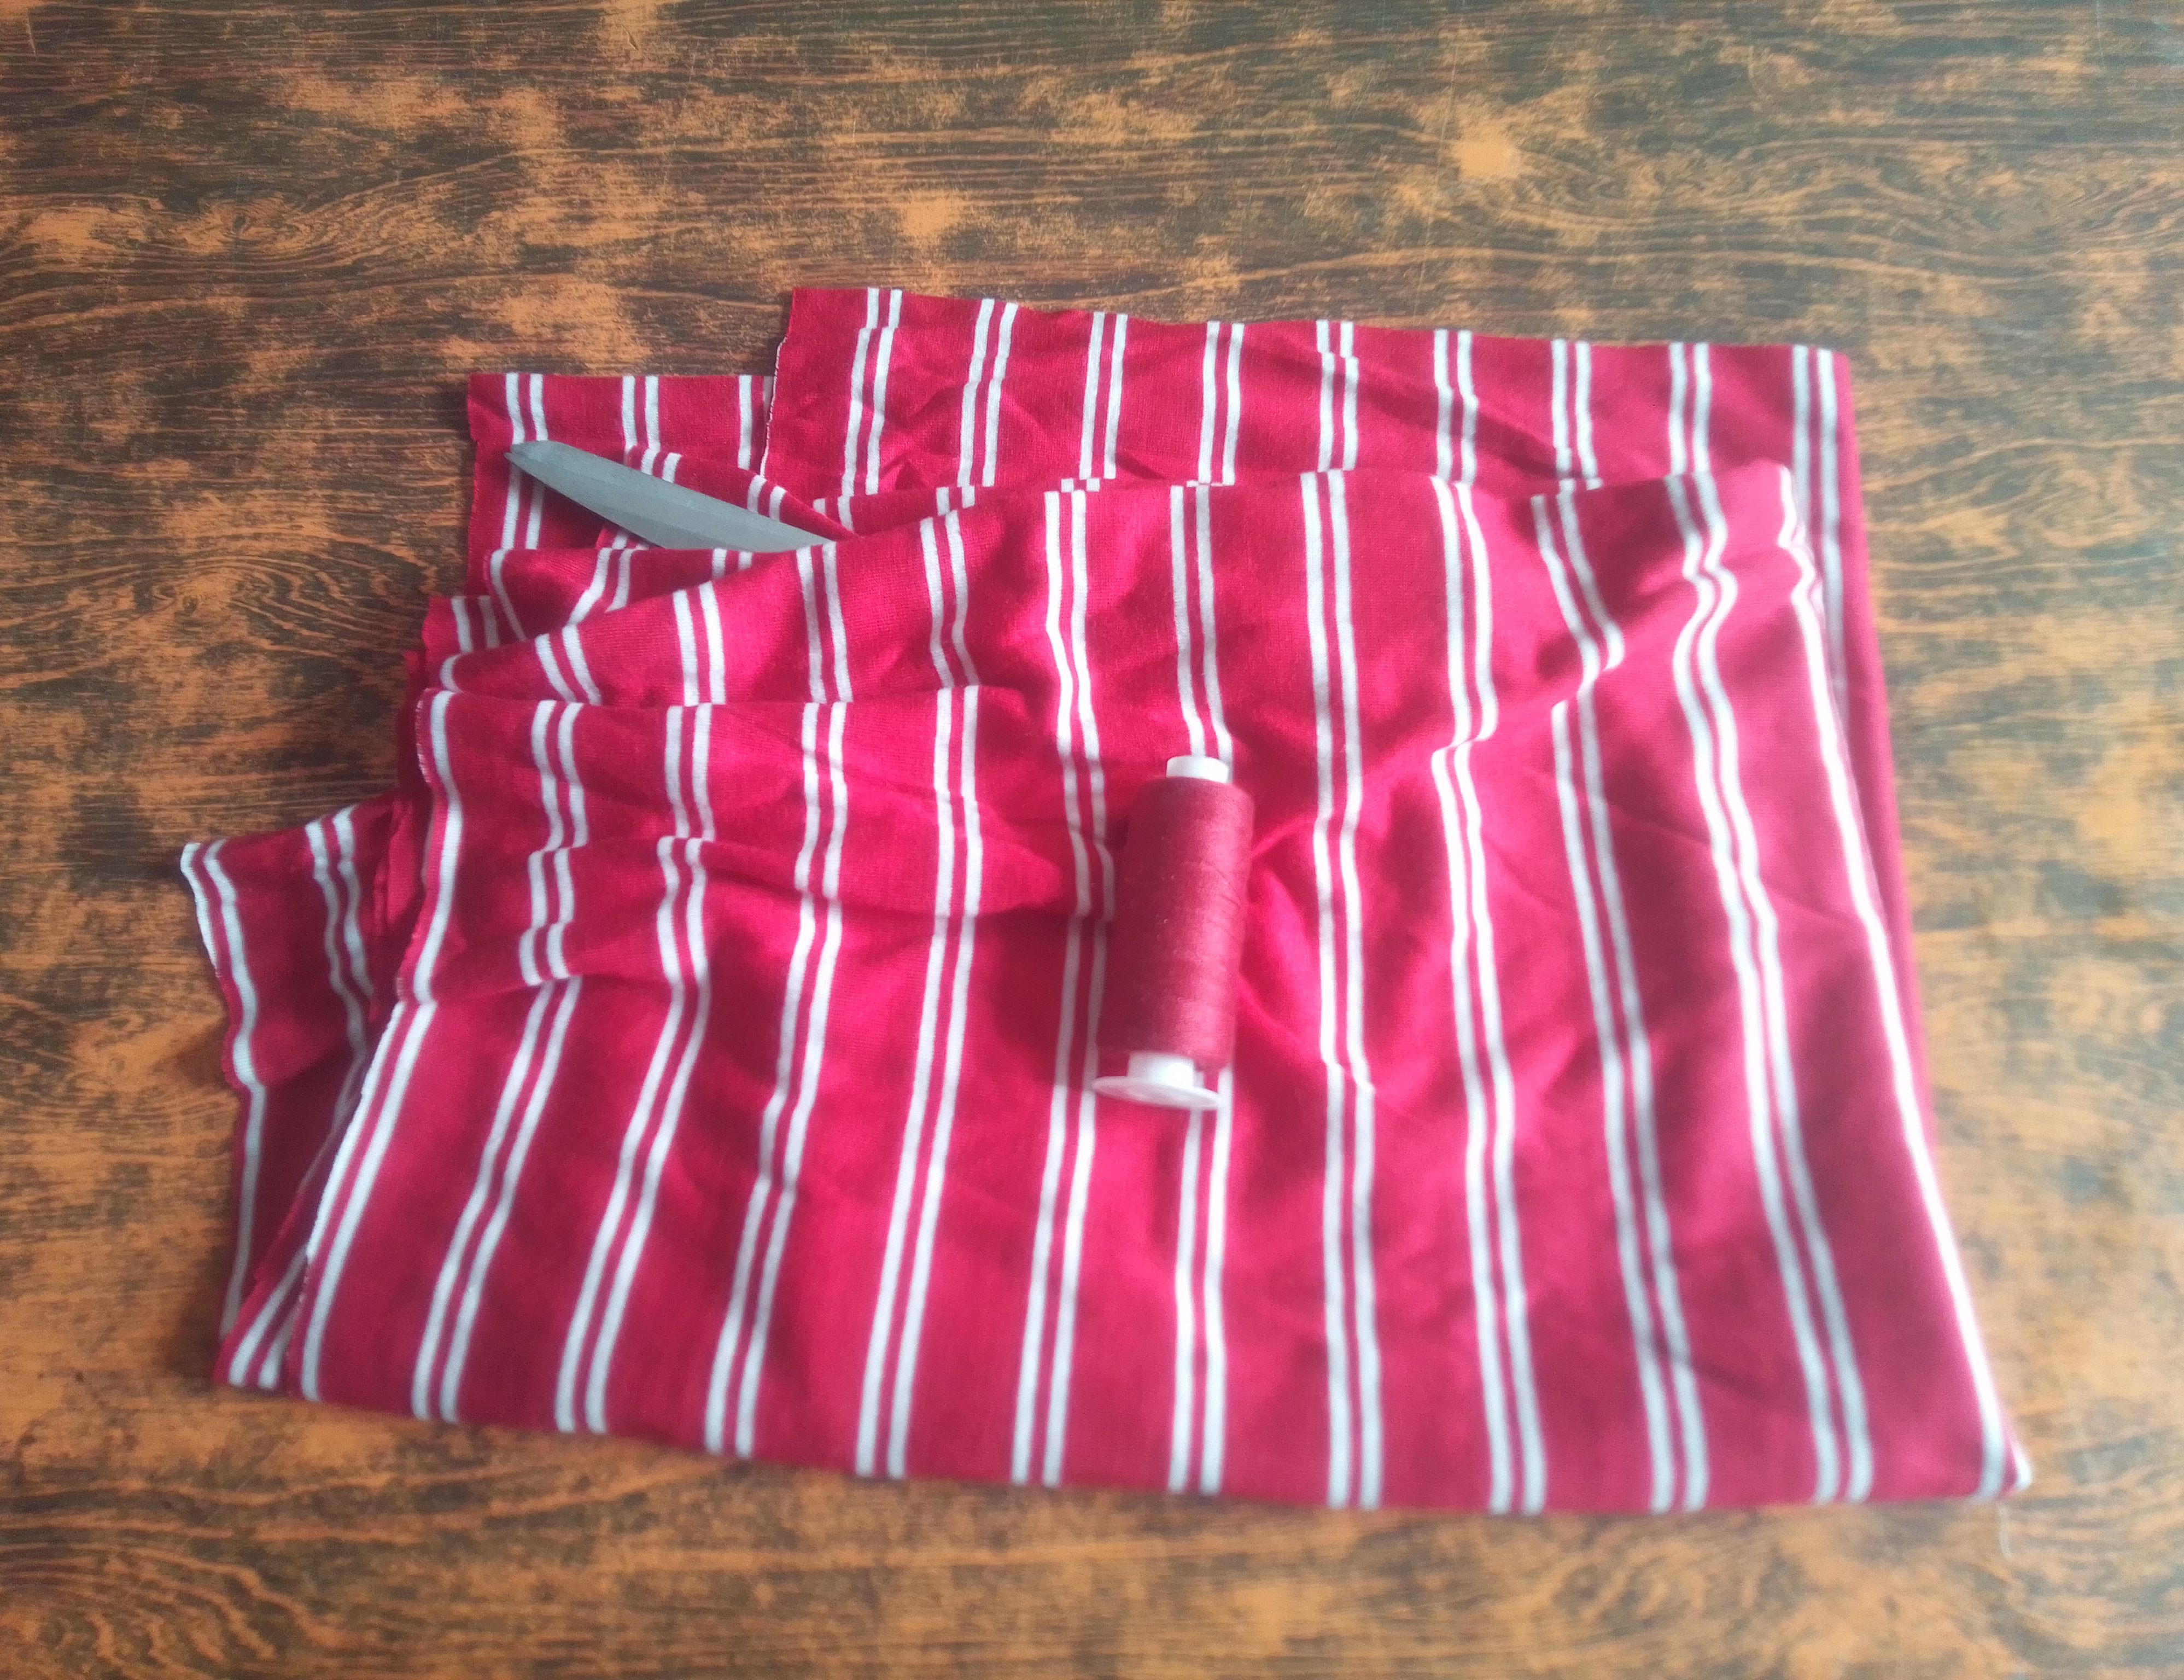
Materiales que necesitas:
- Tela de algodón de rayas.
- Tela roja.
- Tijeras.
- Hilo y aguja.
- Máquina de coser.
- Una prenda molde.
- Striped cotton fabric.
- Red fabric.
- Scissors.
- Thread and needle.
- Sewing machine.
- A mold garment.
(PROCEDIMIENTO)
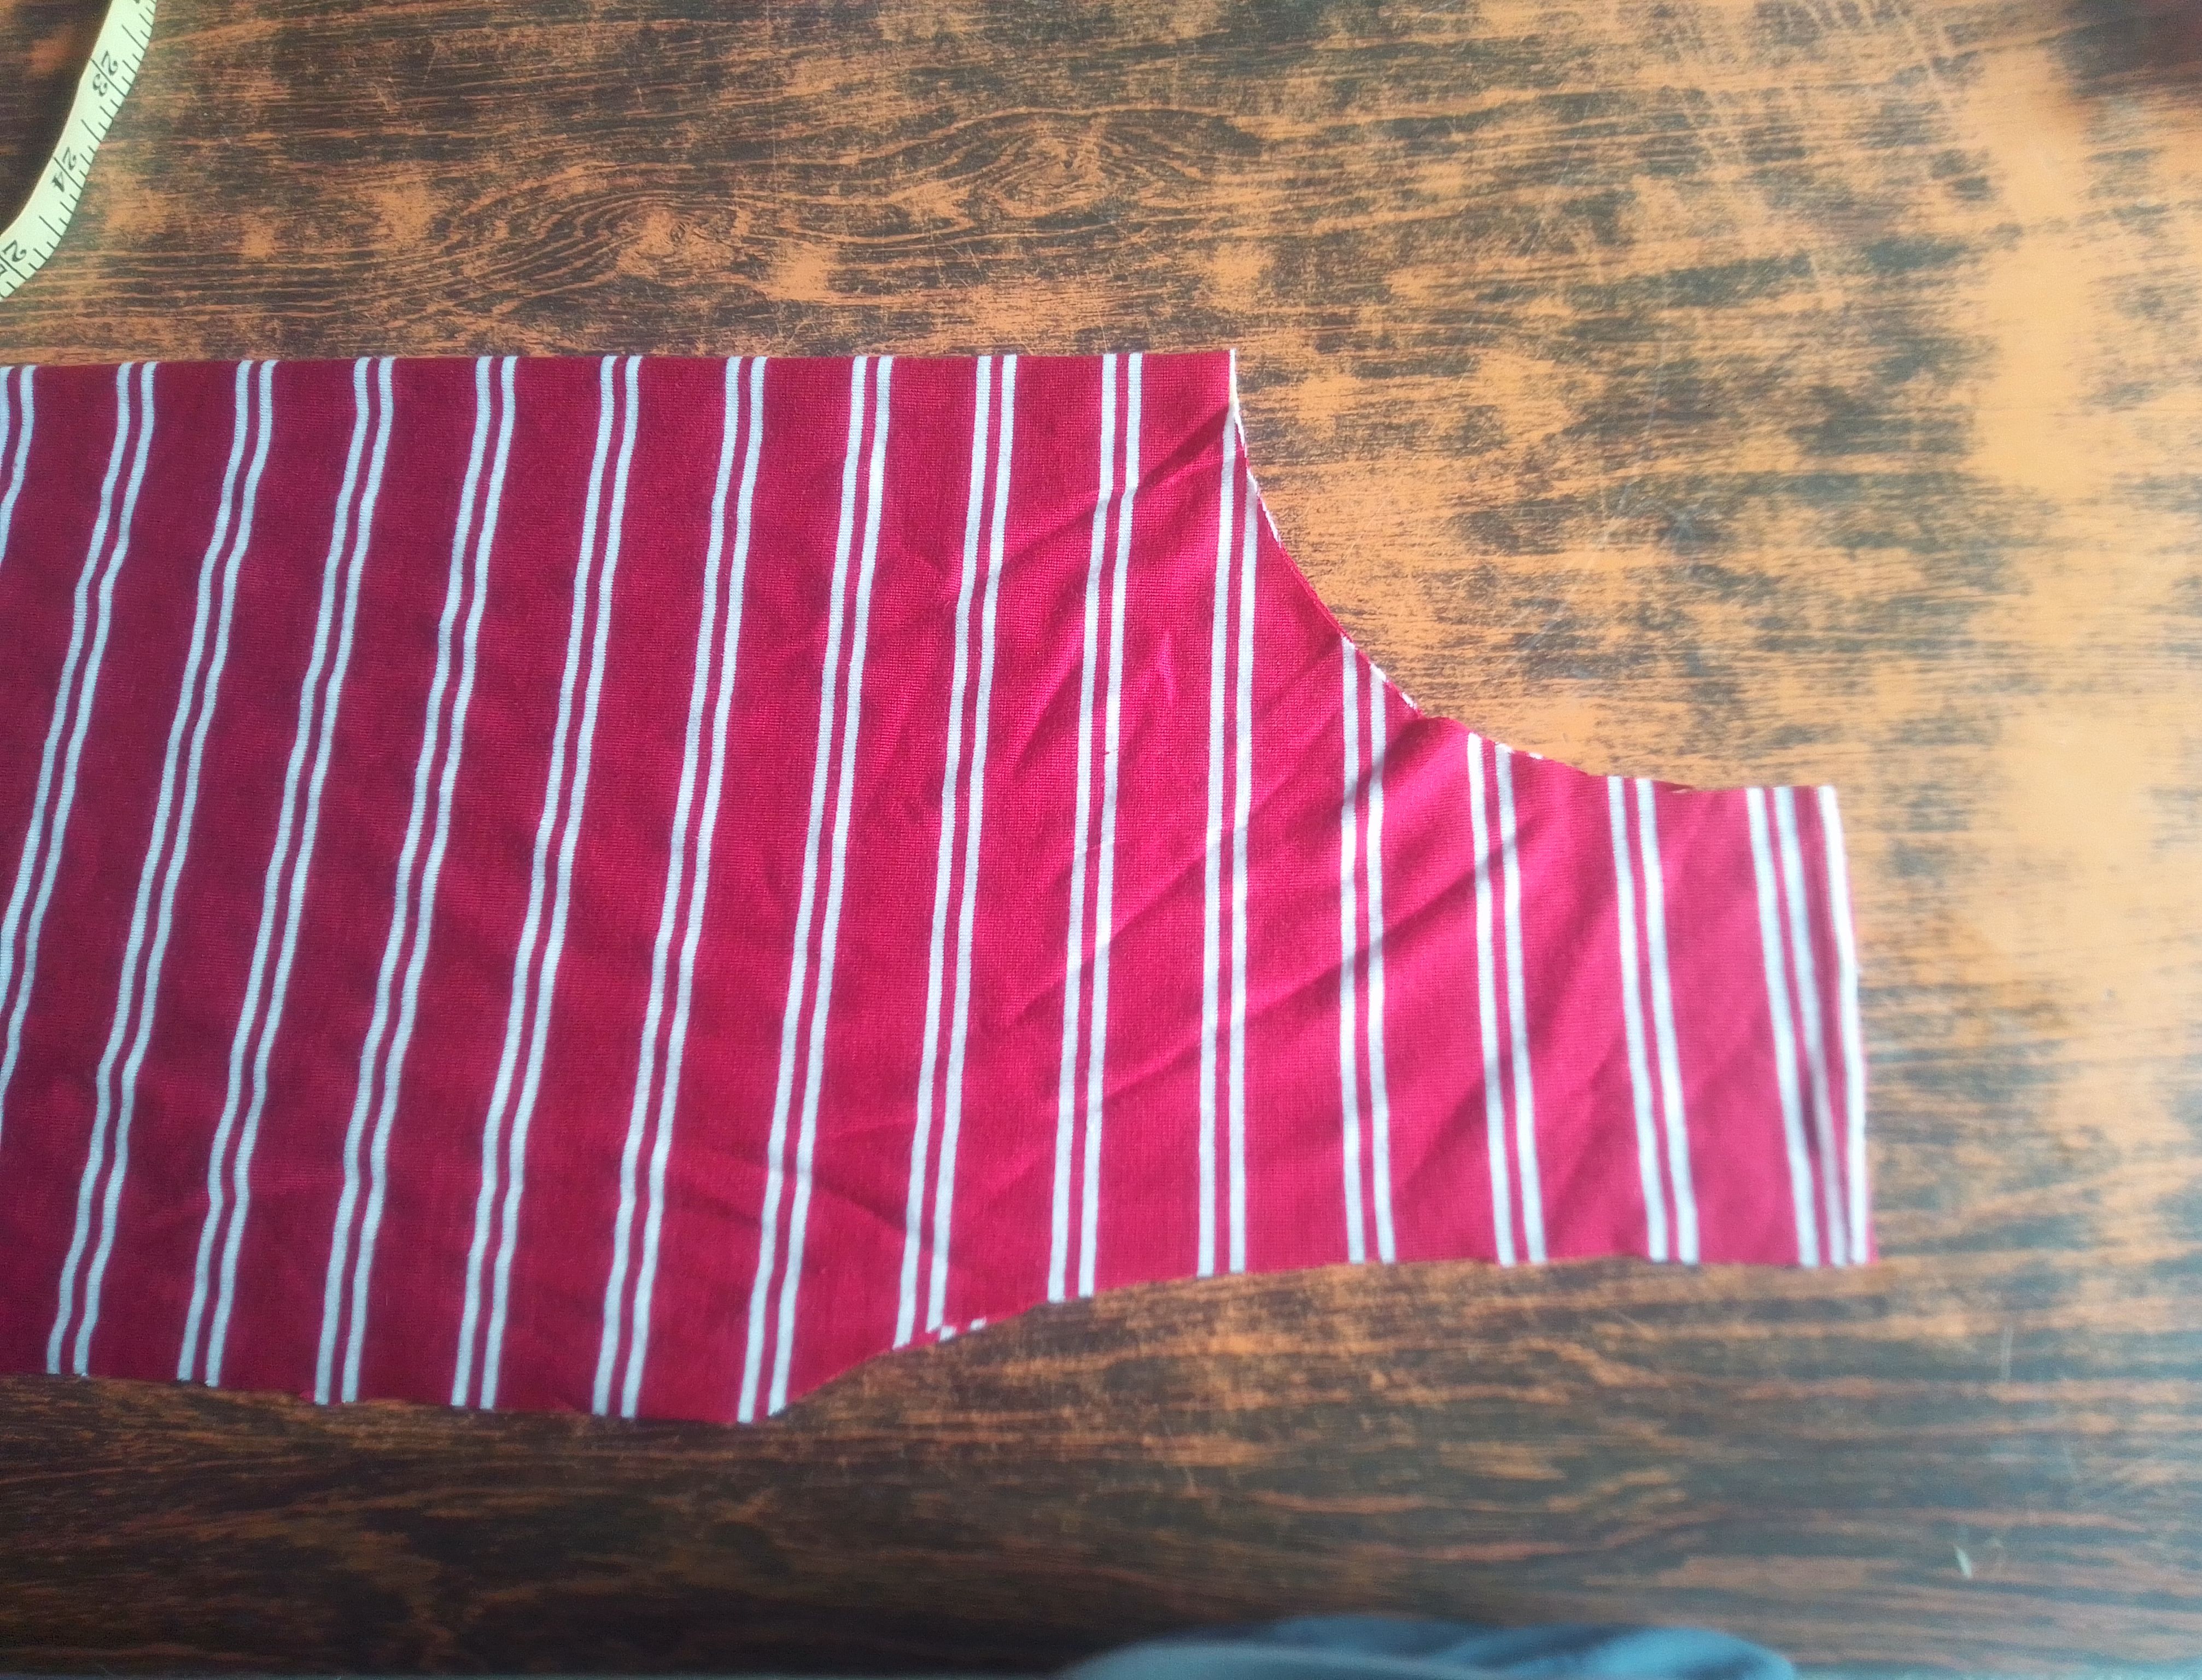
Paso 01
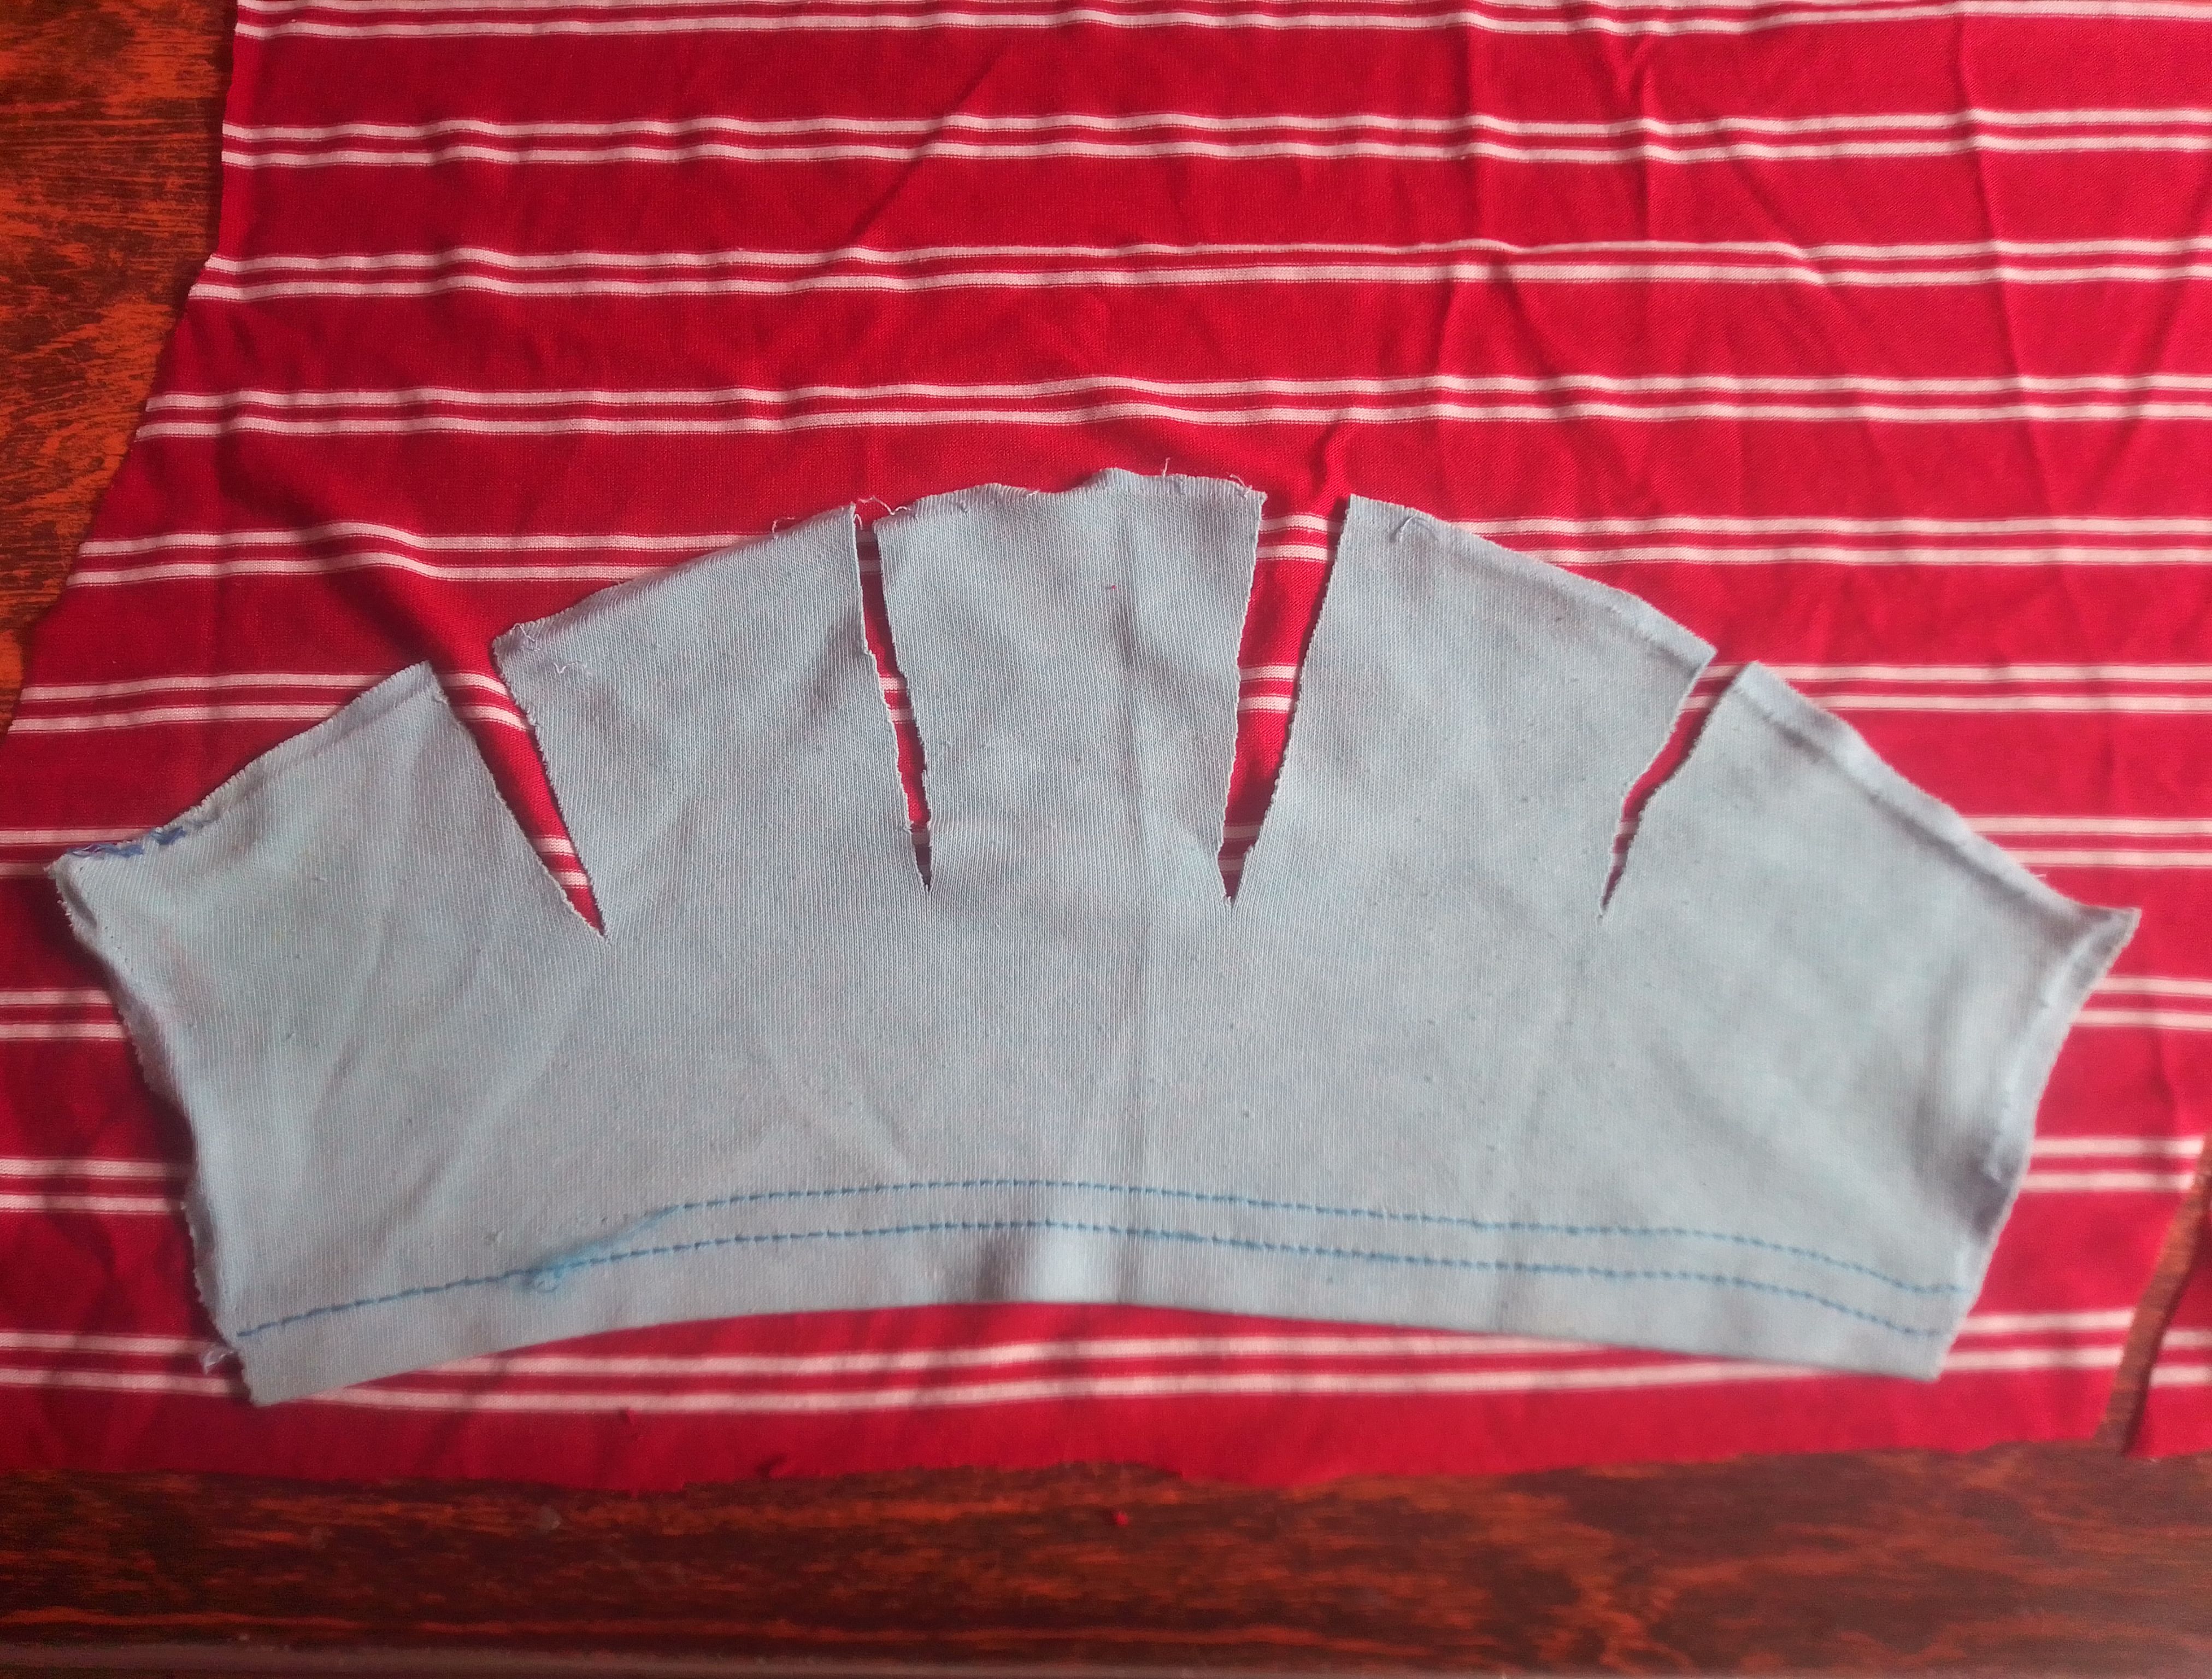
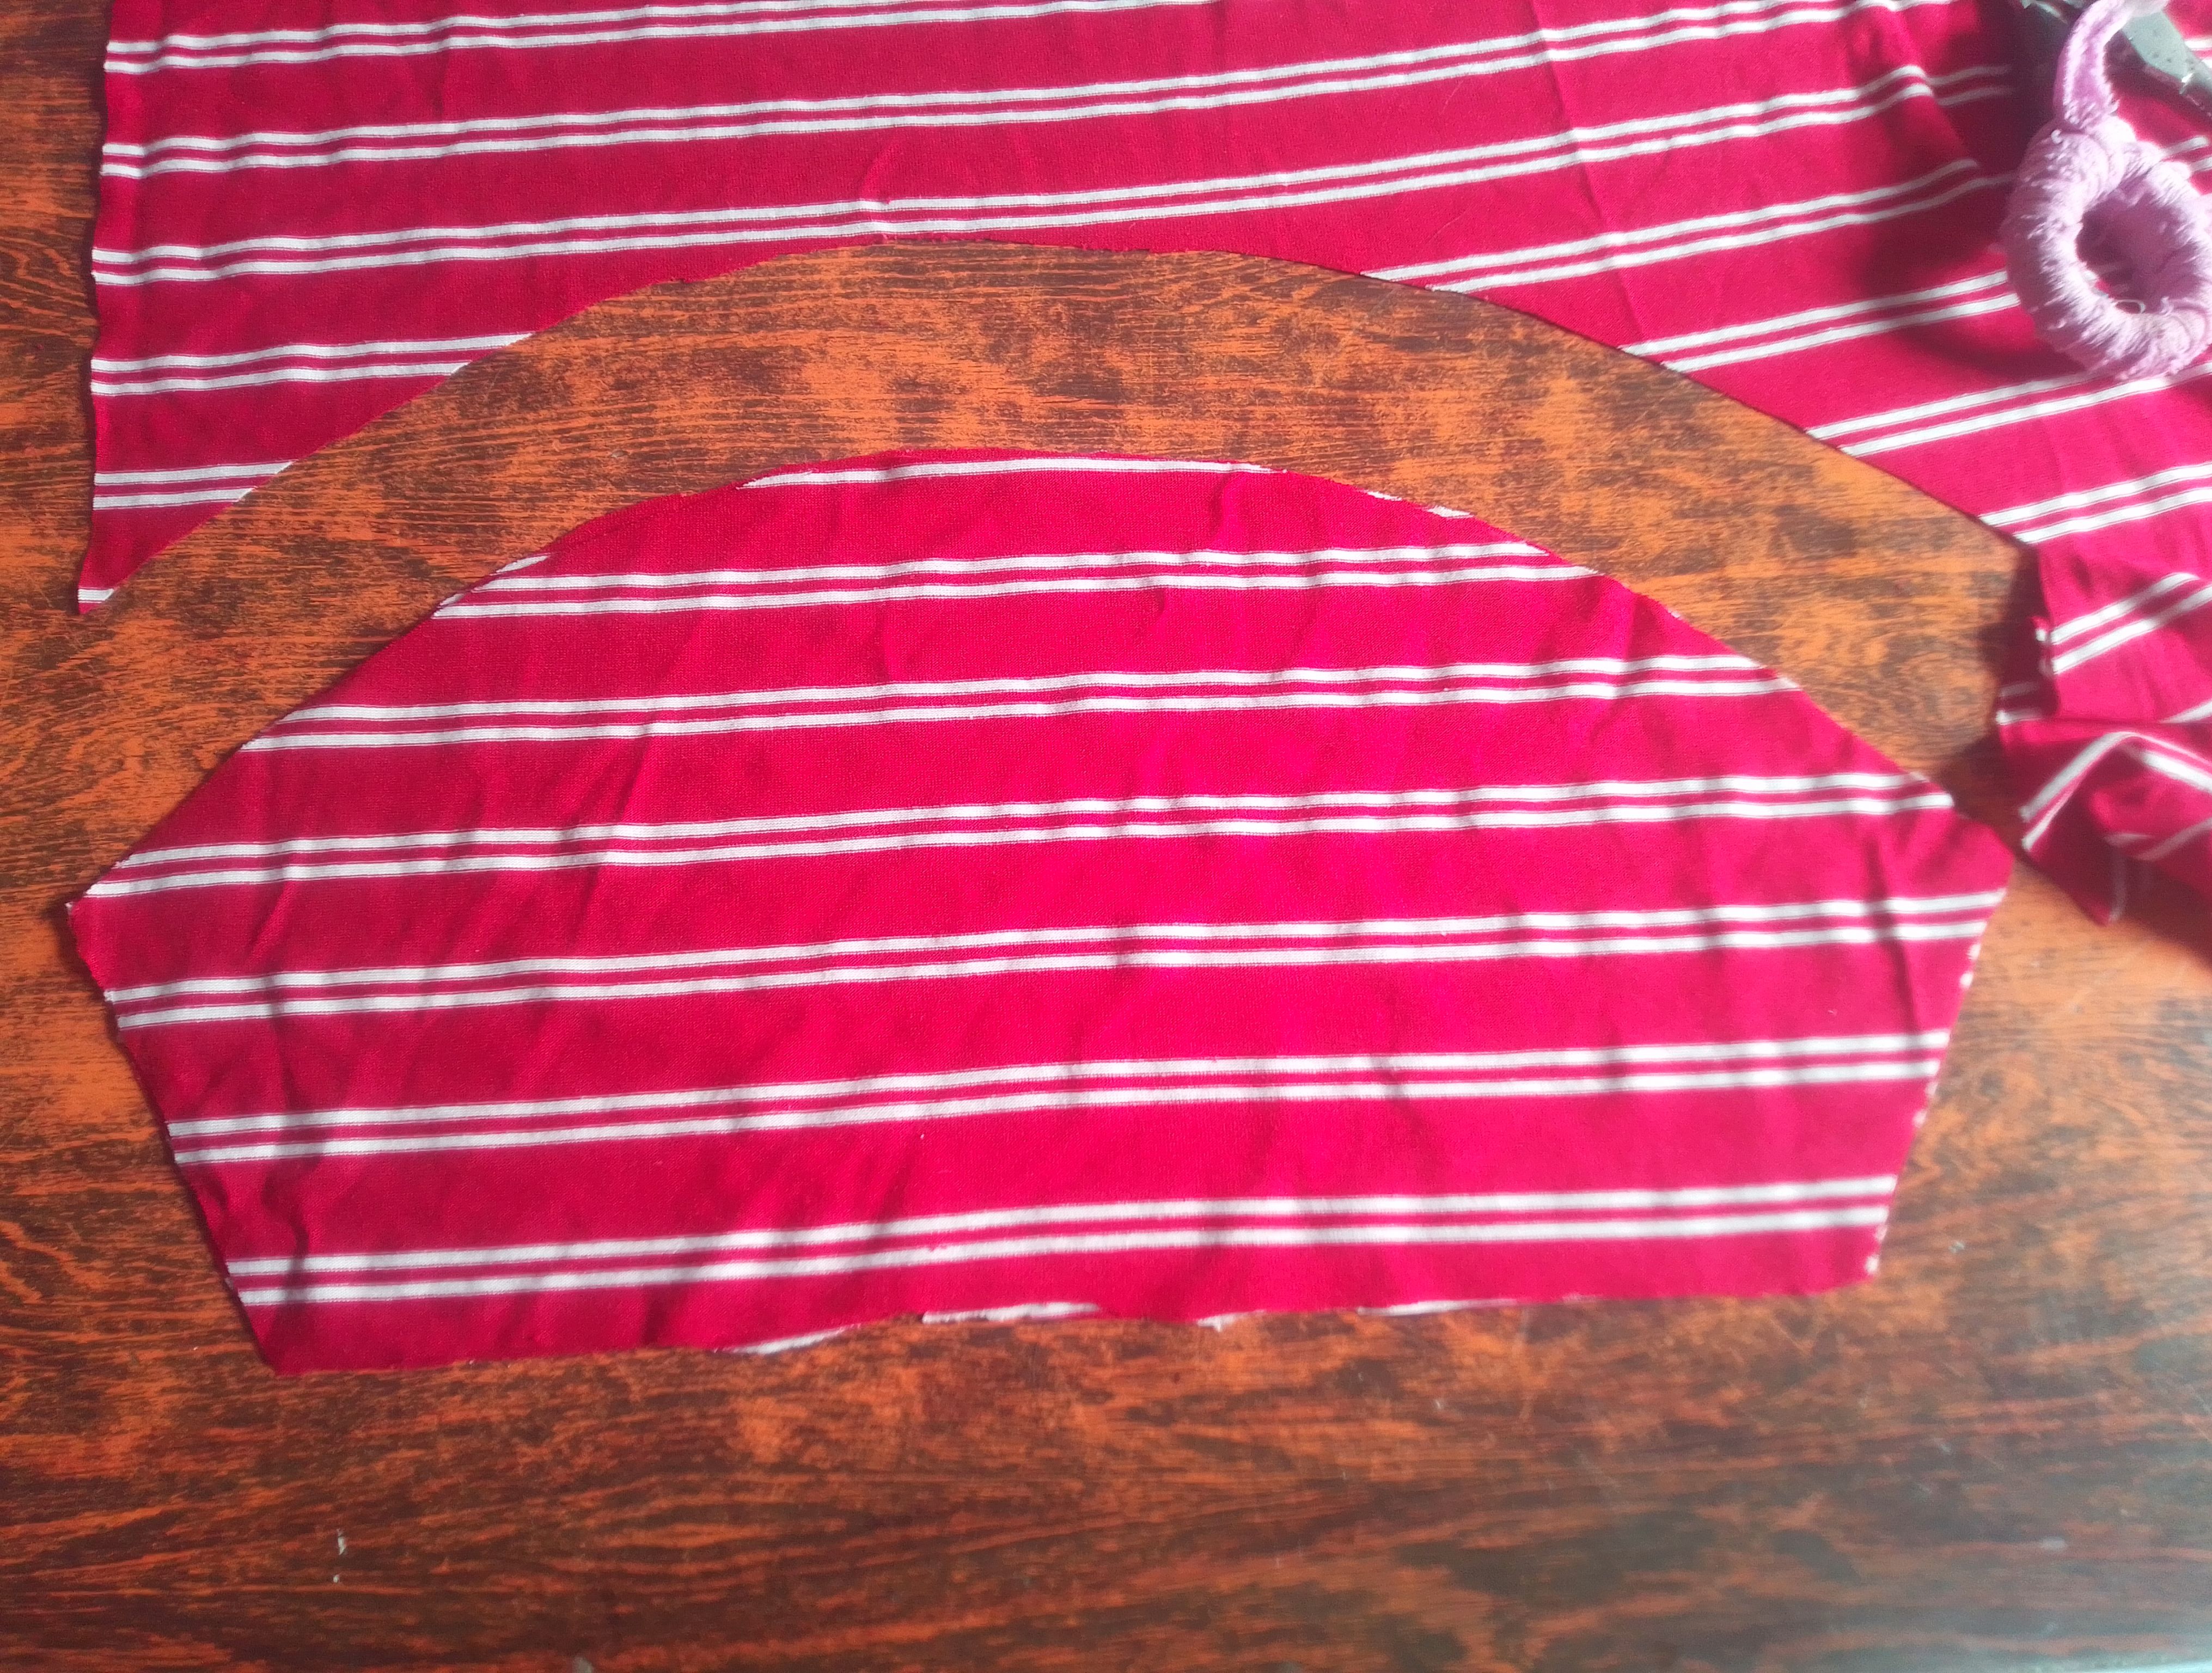
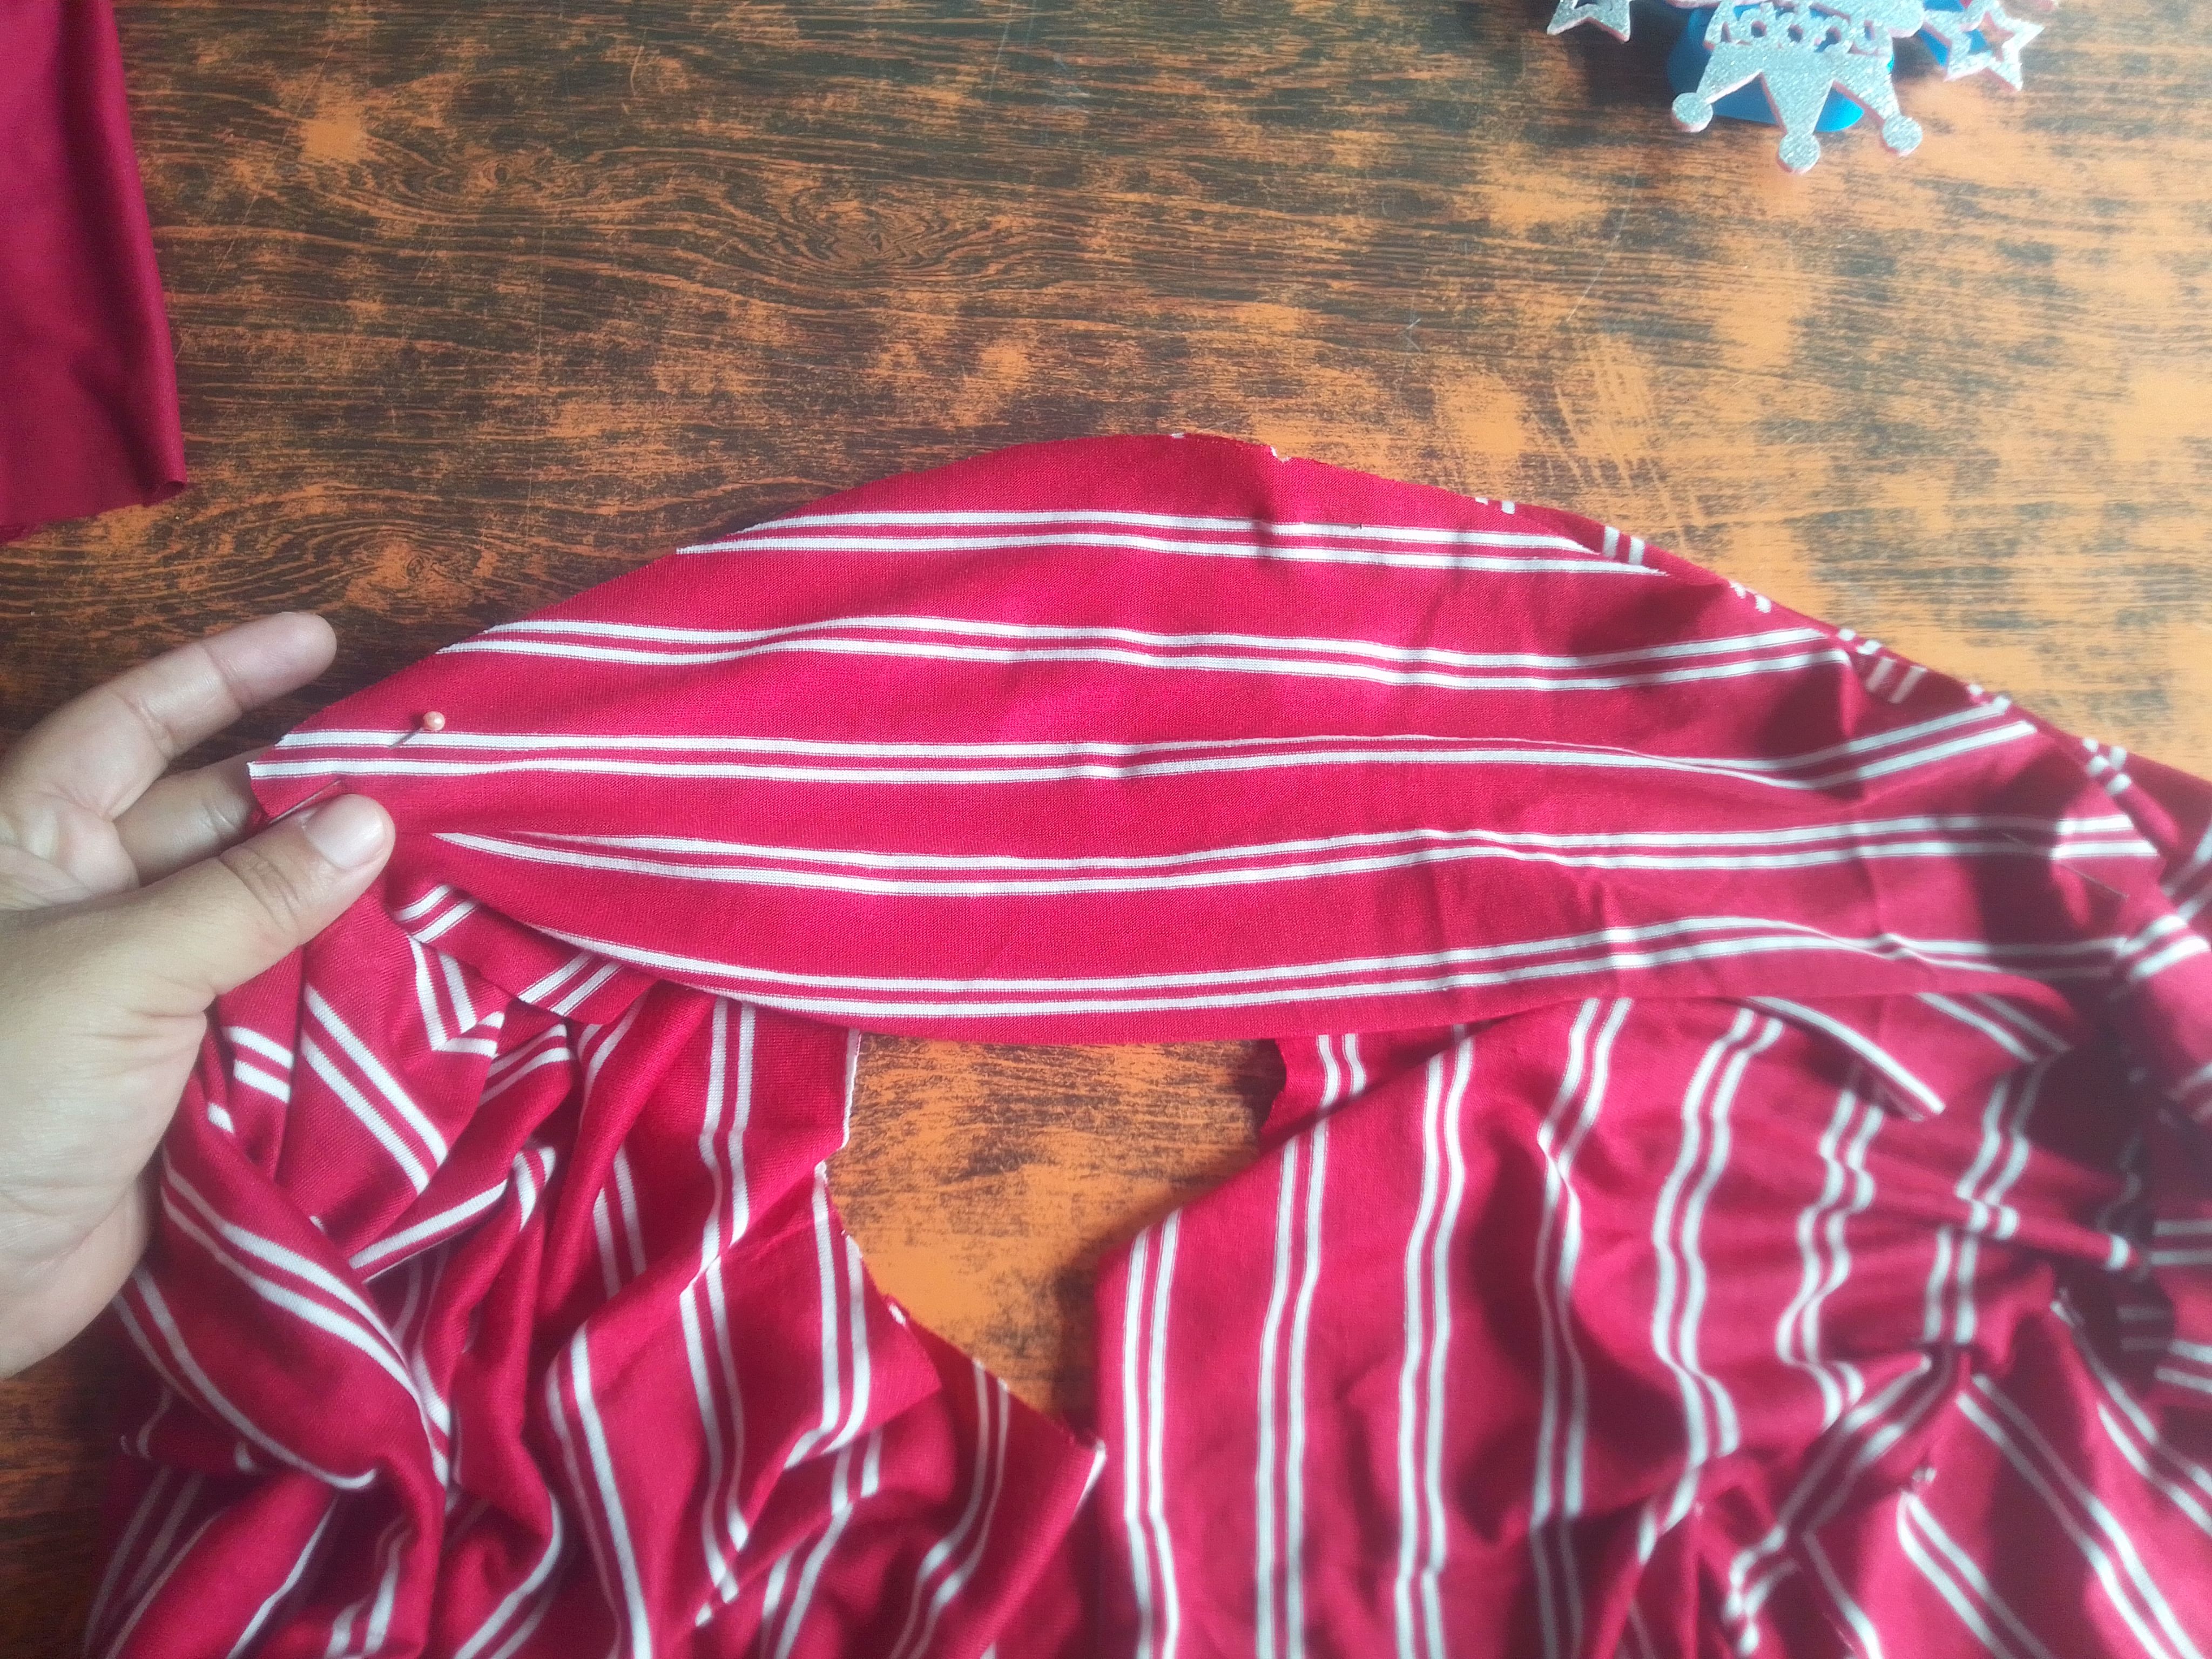
Para dar inicio a está confección voy a cortar mi parte trasera y delantera de la camisa, para esto voy a colocar mi prenda molde sobre la tela doblada a la mitad y cortamos su forma o contorno, respetando el centímetro adicional para pasar la costura. A la pieza delantera le voy a medir 9cm antes de la sisa y voy hacer un corte semicircular para el cuello.
Step 01
To start this construction I am going to cut my back and front part of the shirt, for this I am going to place my template garment on the fabric folded in half and cut its shape or contour, respecting the additional centimeter to pass the seam. I am going to measure the front piece 9cm before the armhole and I am going to make a semicircular cut for the neck.
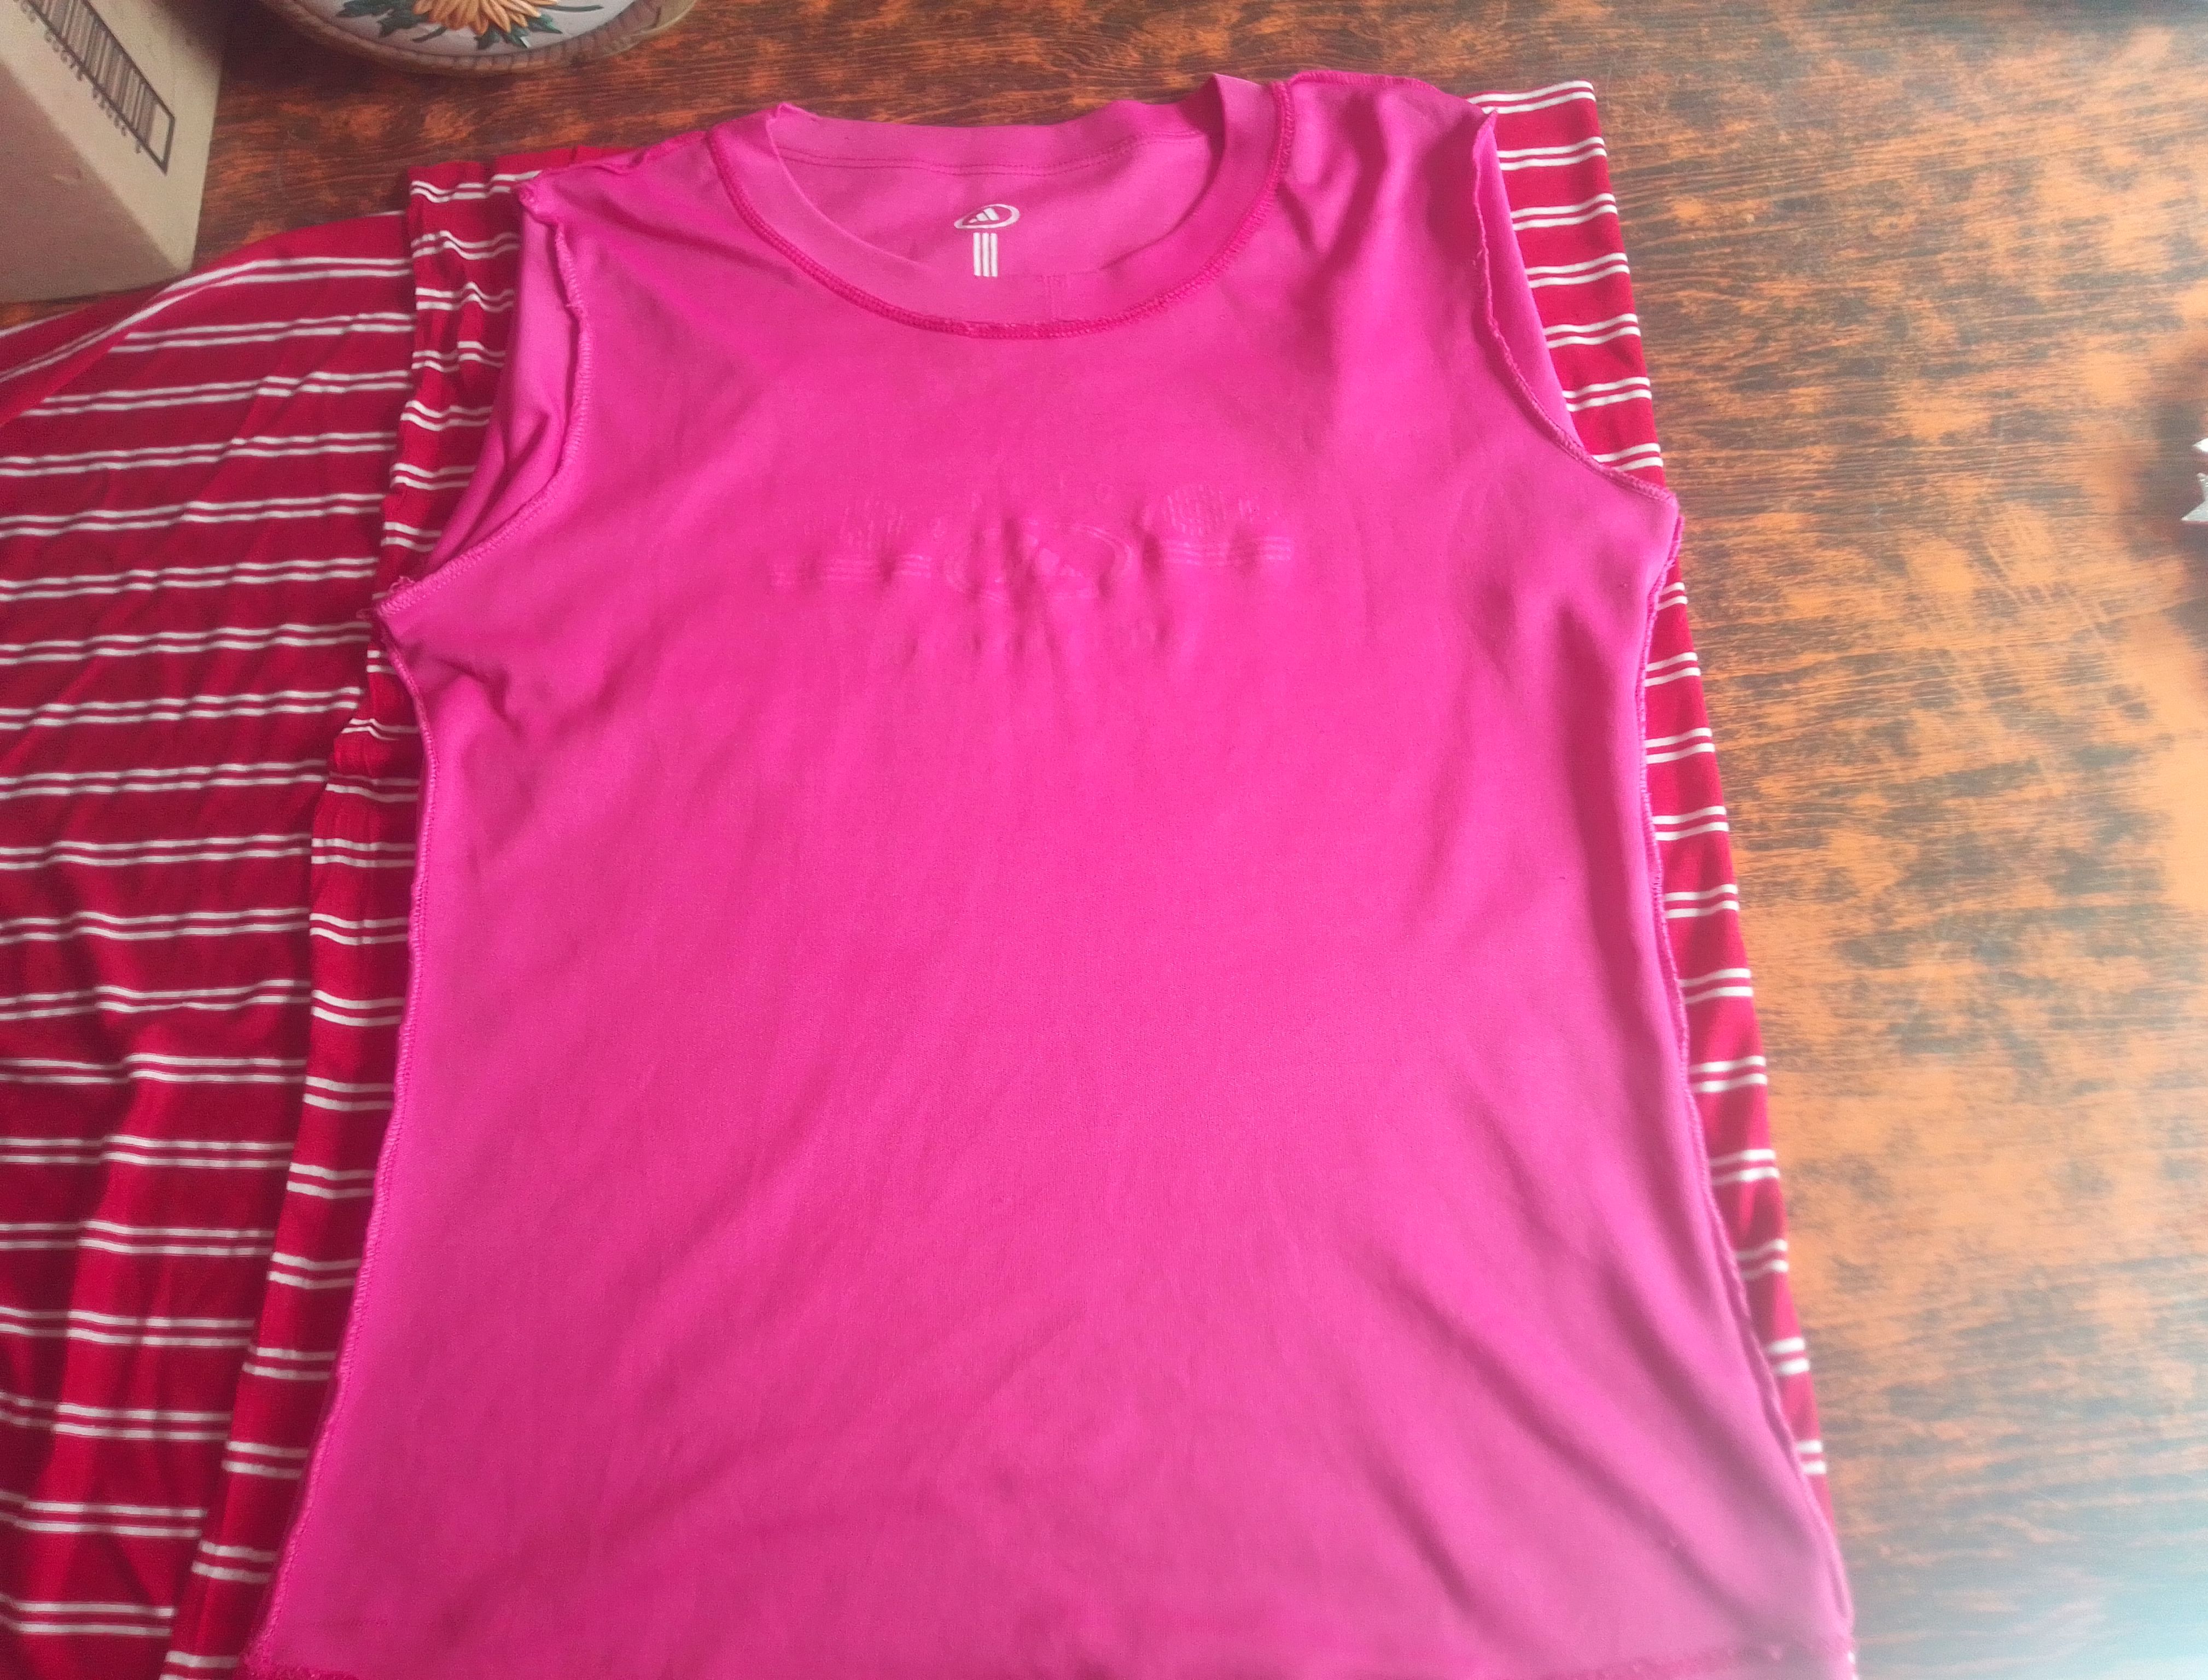
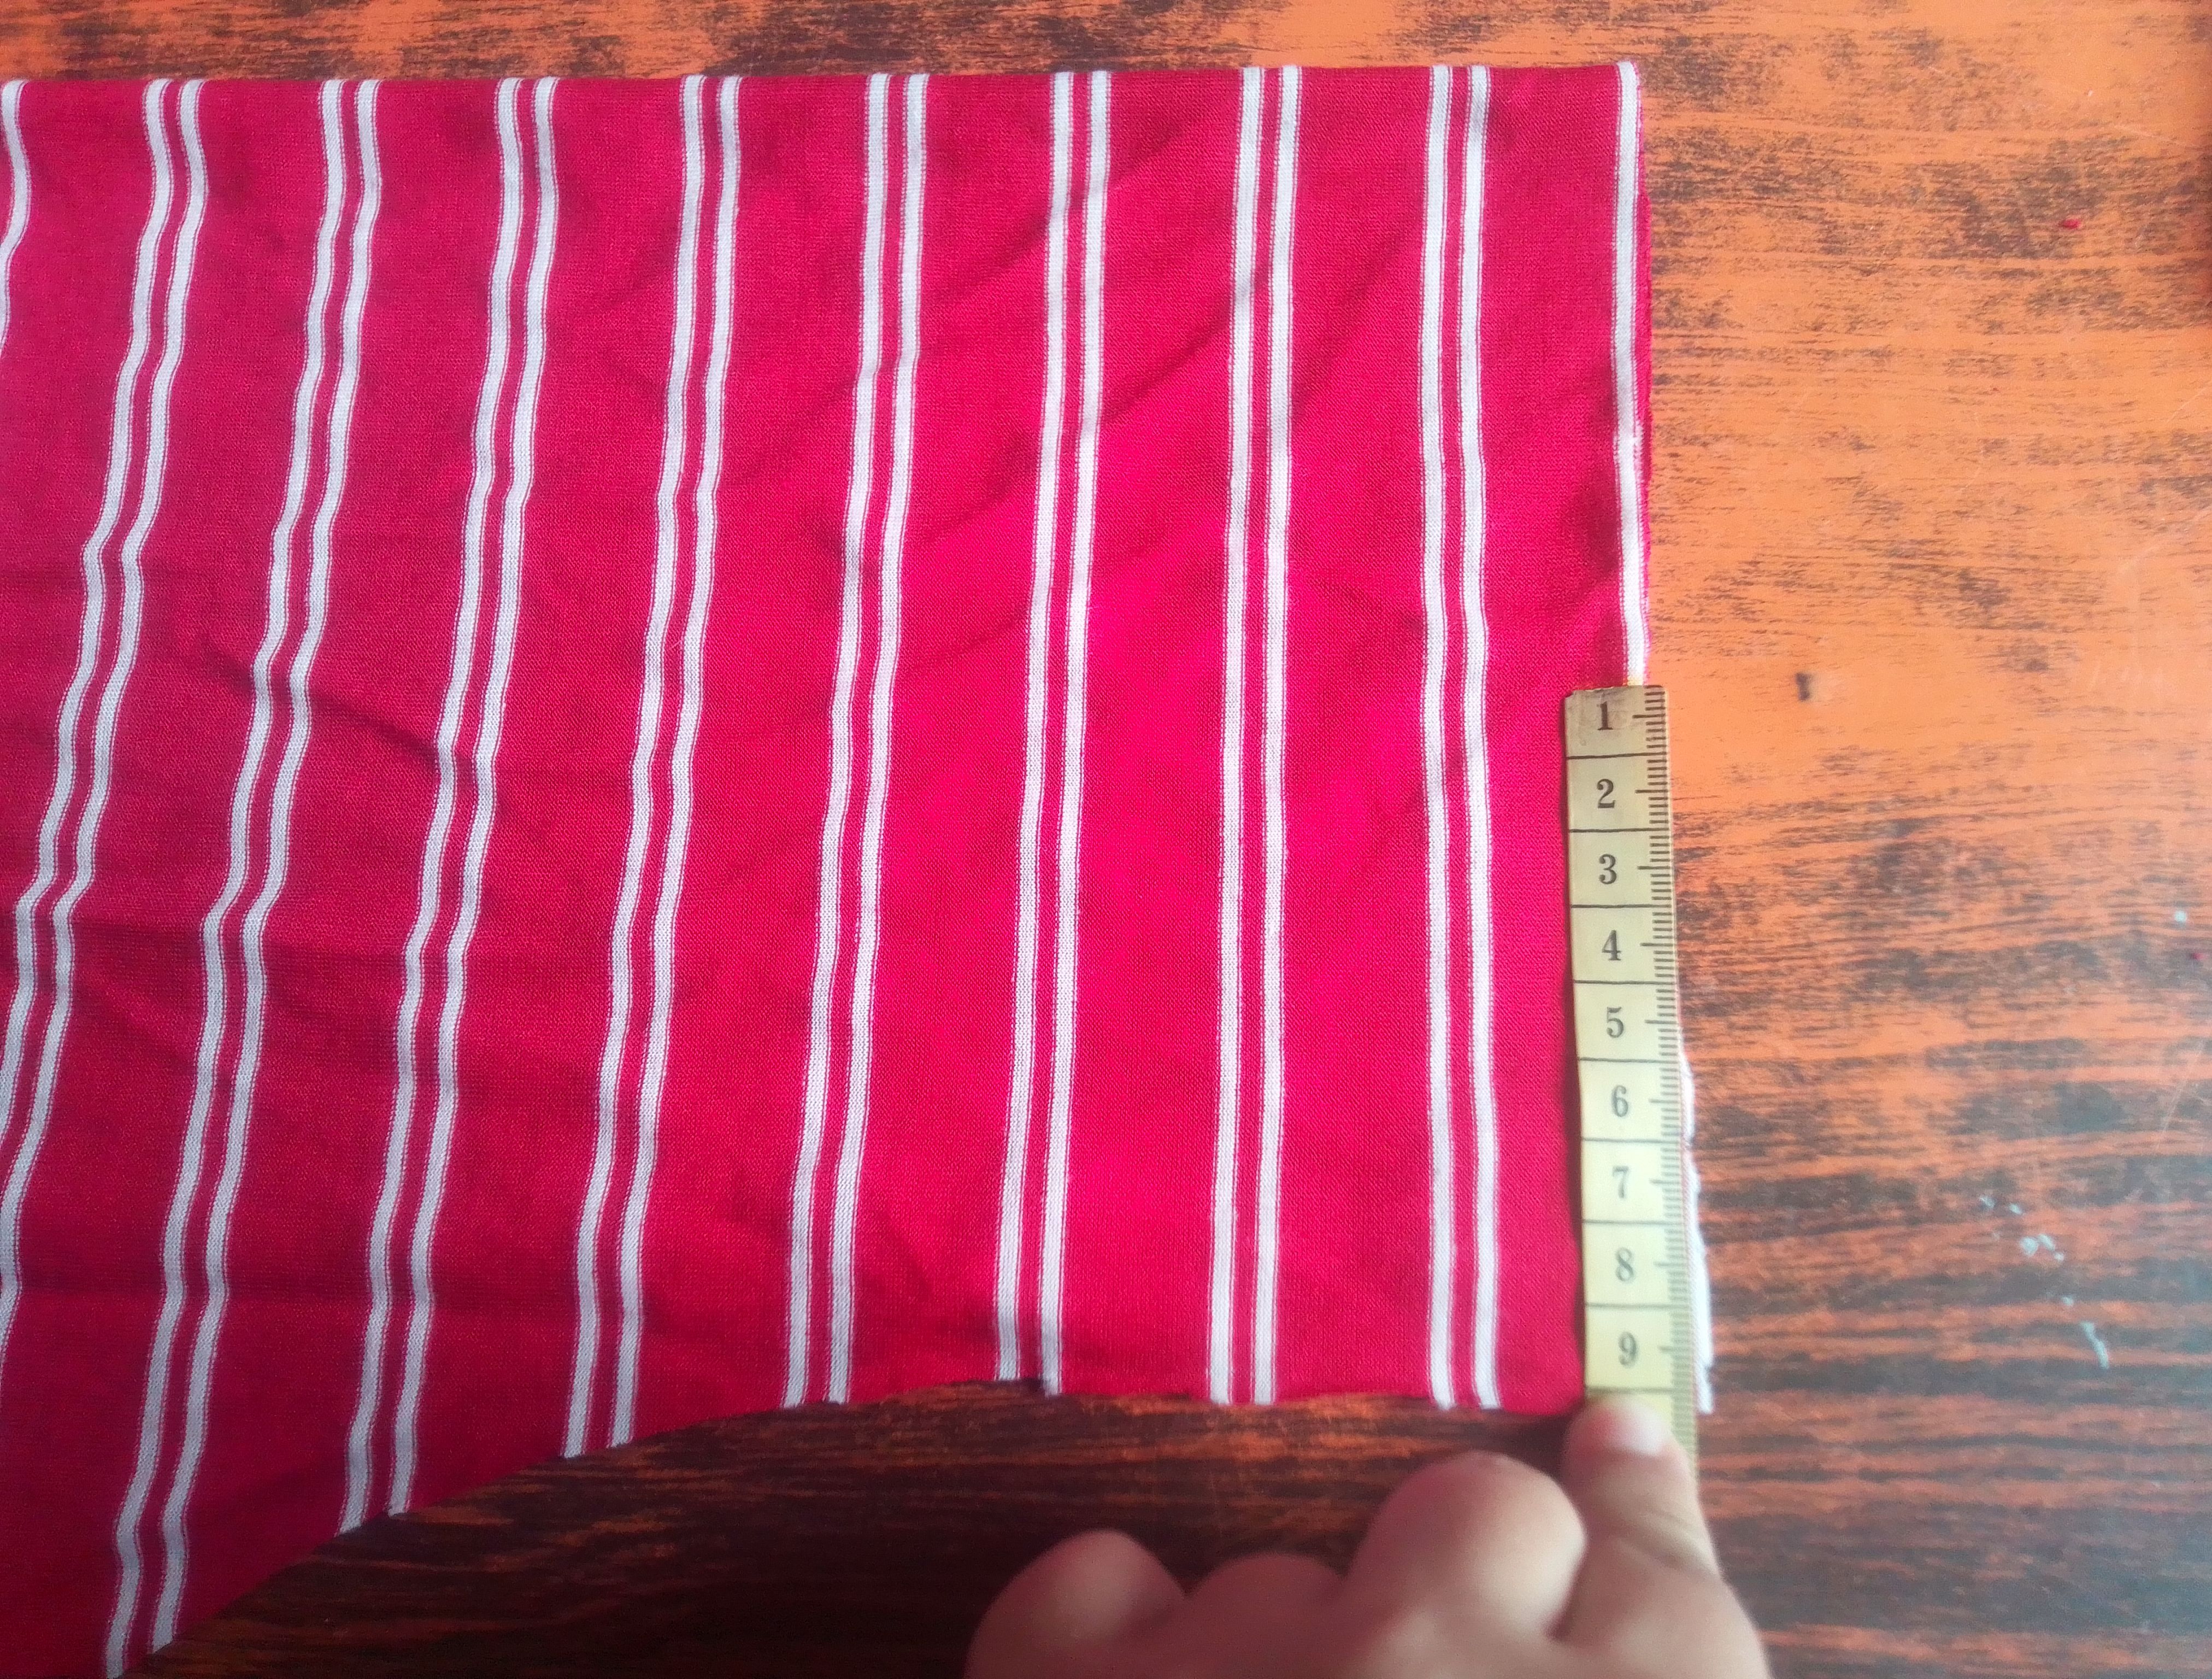
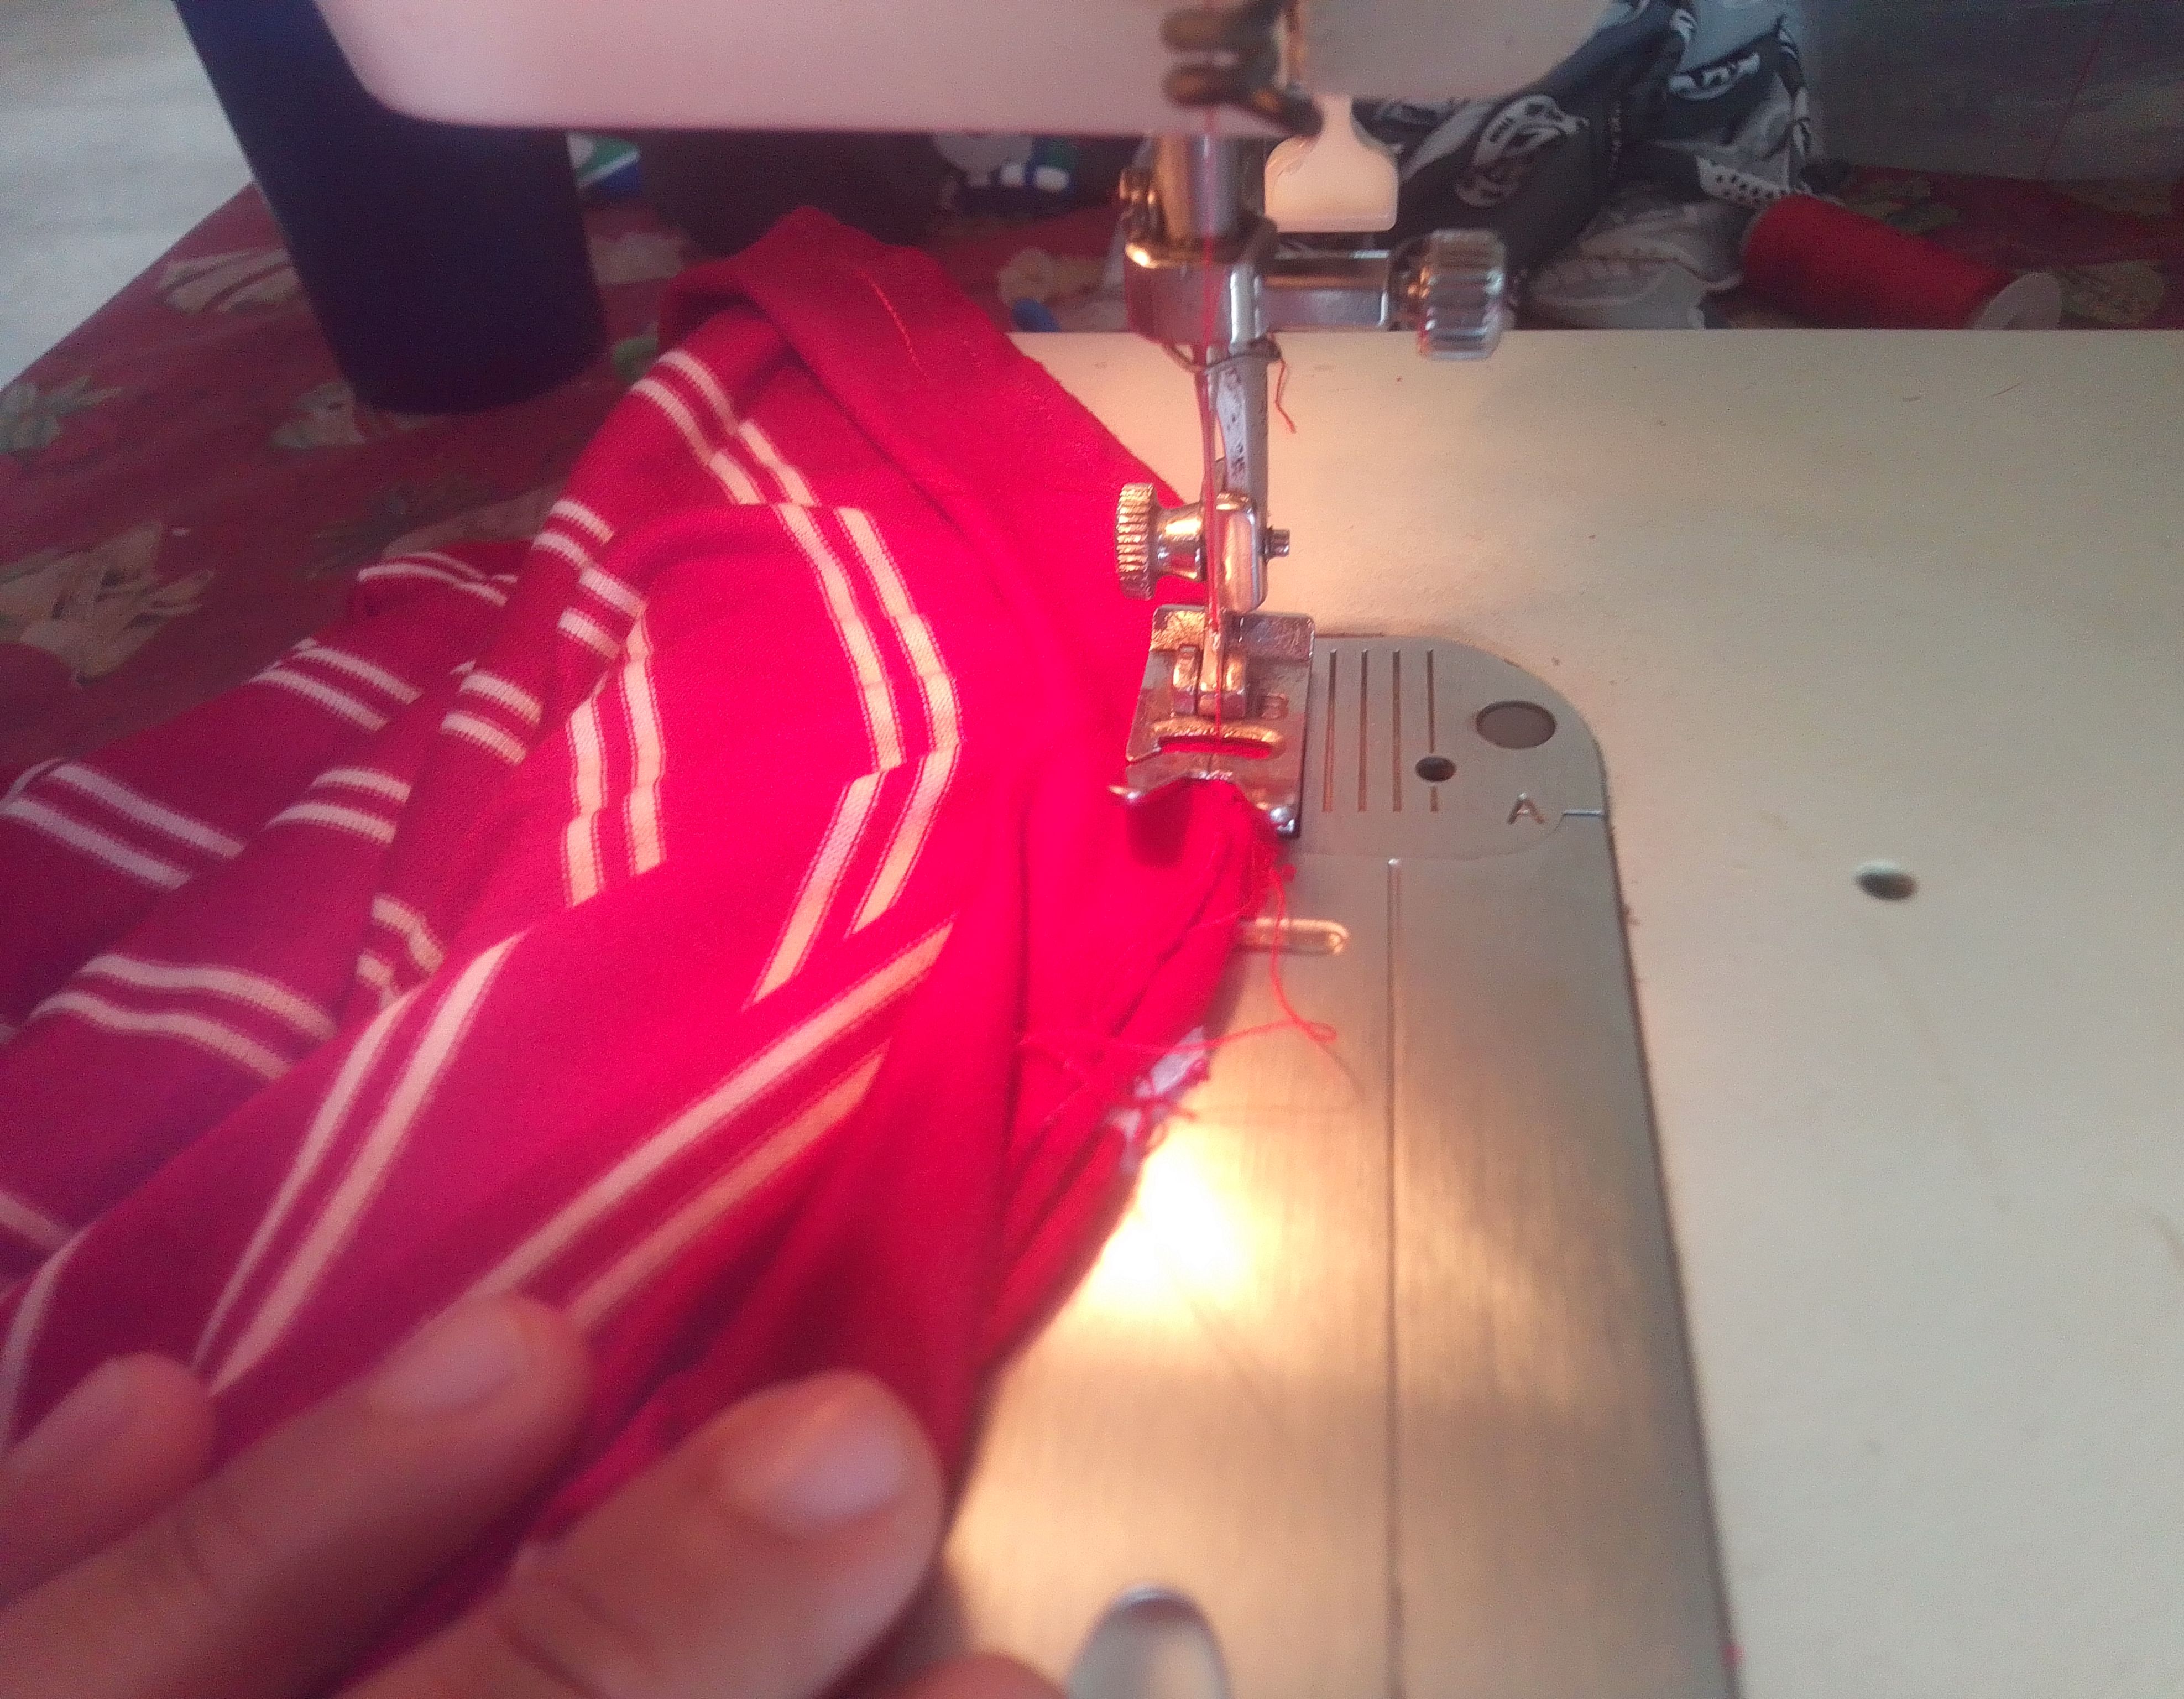
Paso 02
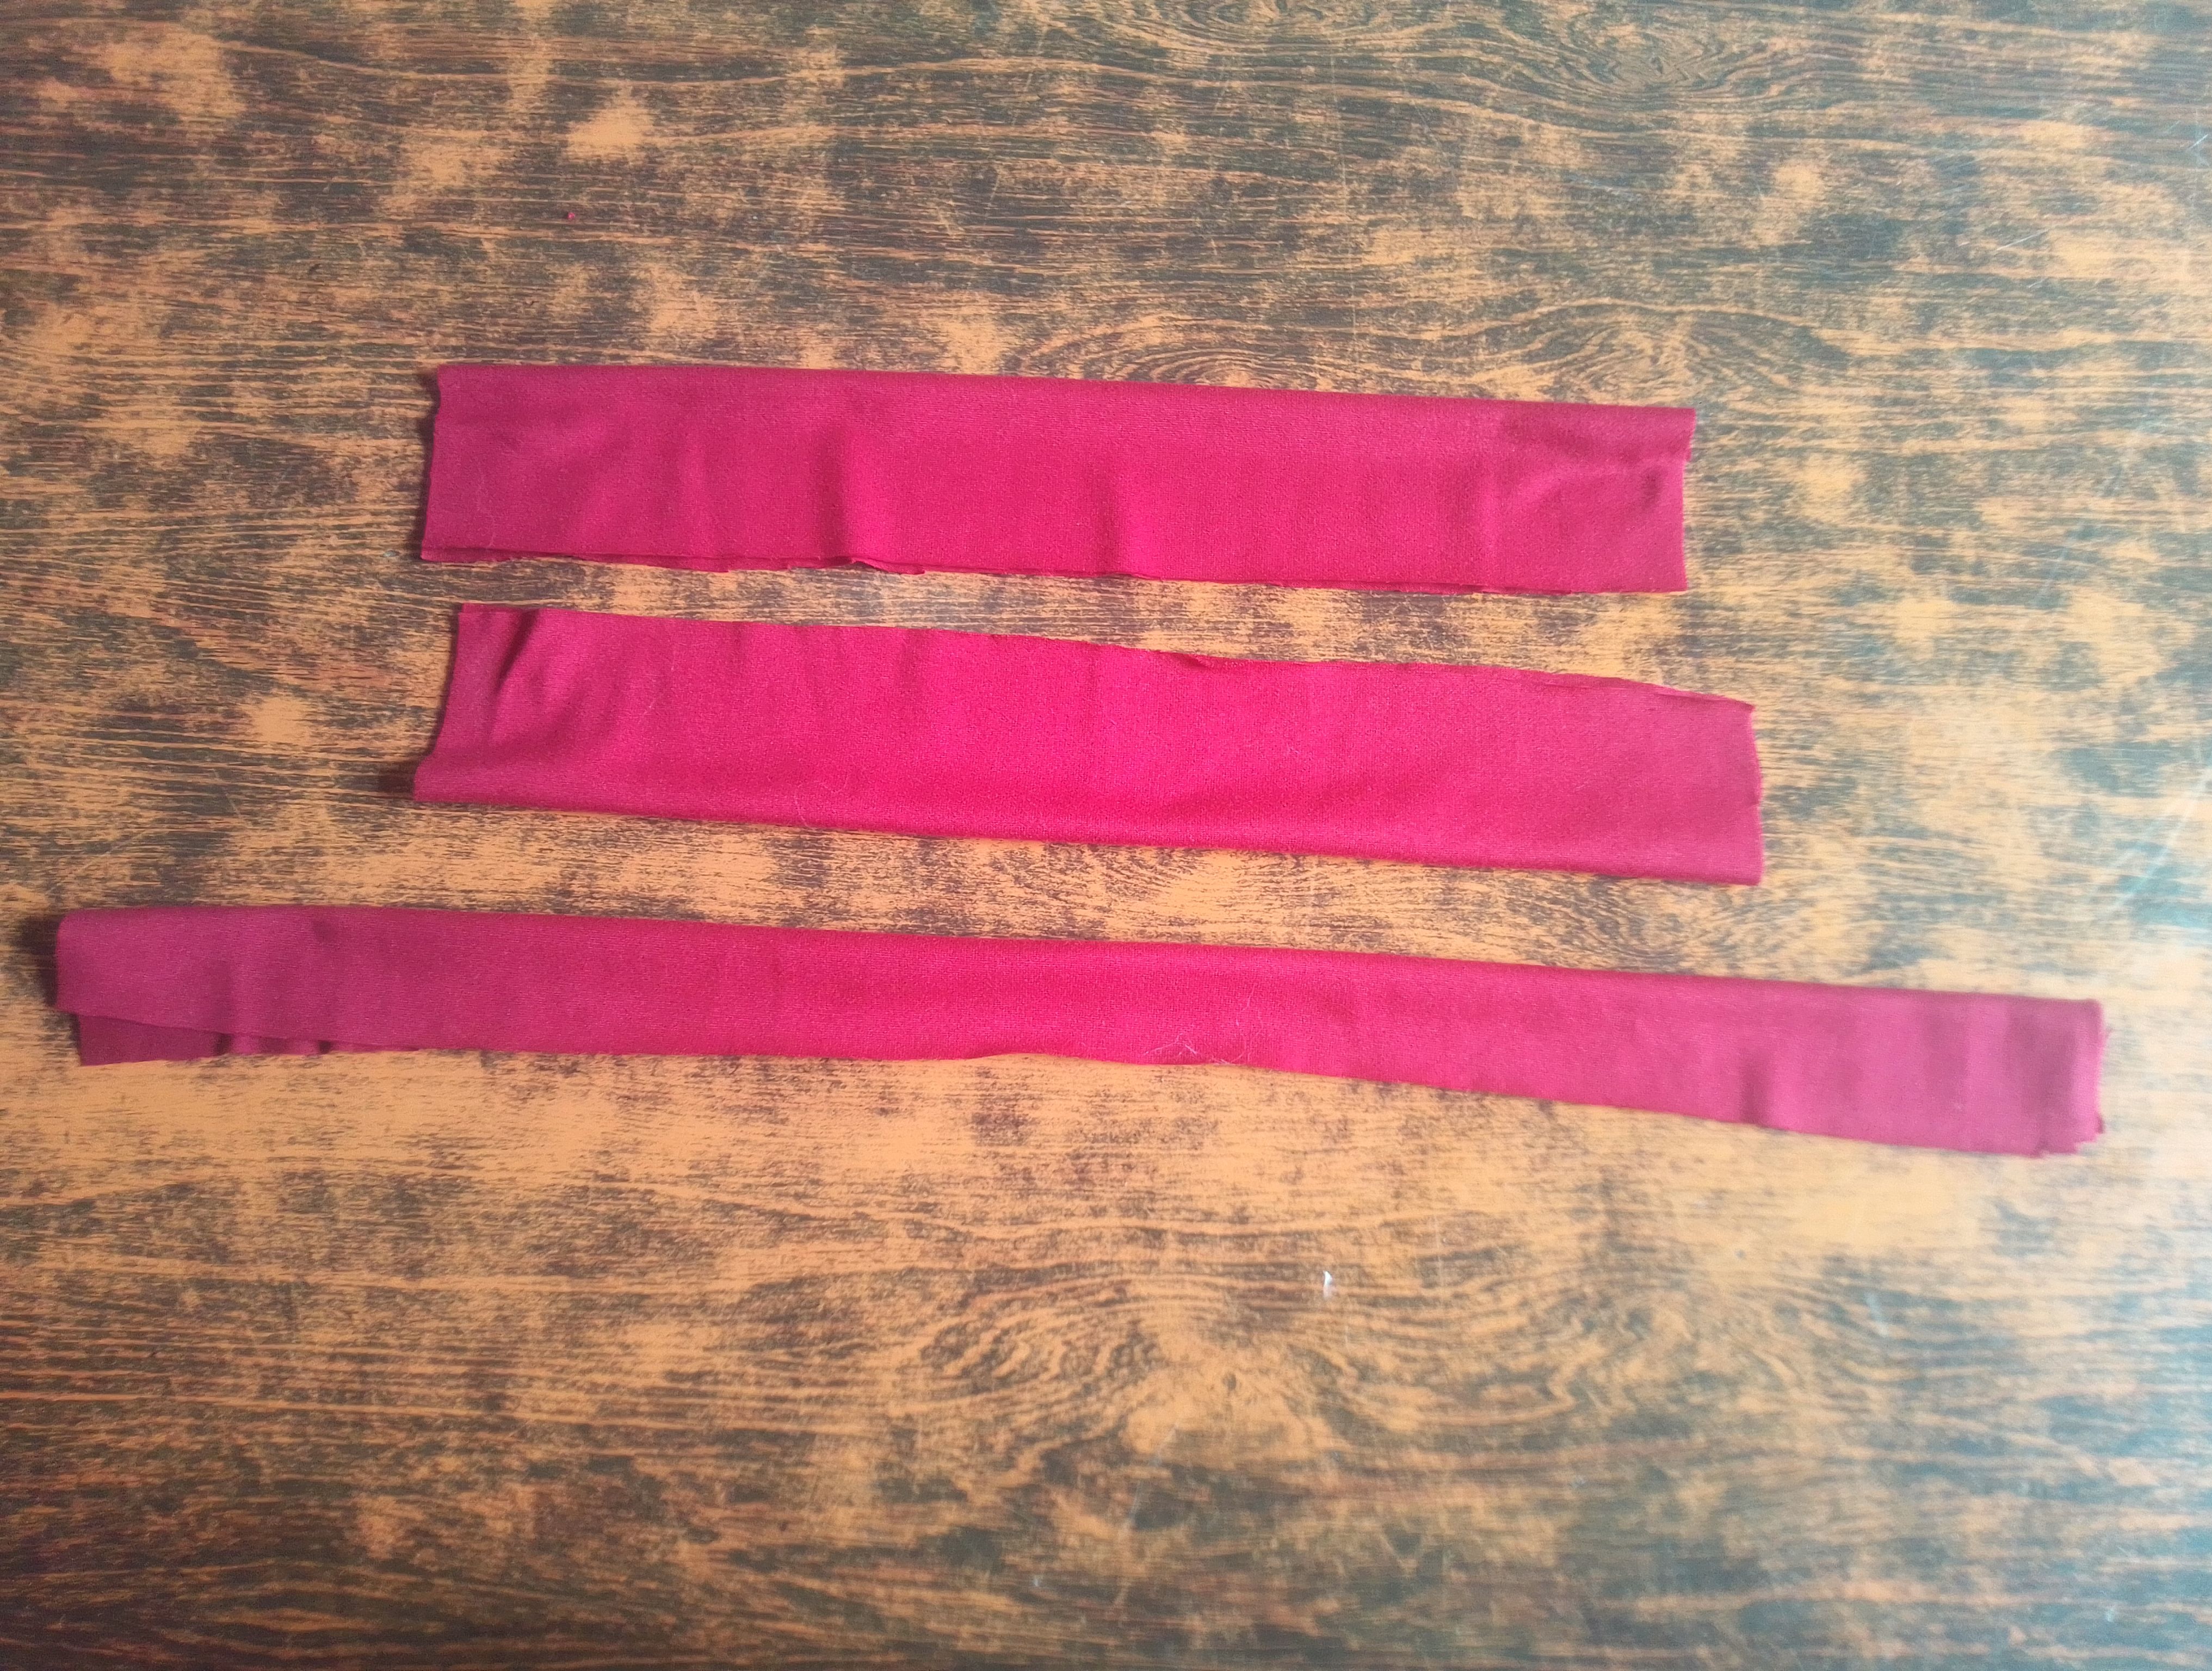
Las siguientes partes que voy a cortar sean las mangas, yo utilizo como patrón una de las mangas de una camisa que desarme y es especial para esto. La coloco sobre la tela simple ubicando la sisa del lado de la tela que estira y cortamos su forma. También voy corta una tira de 35cm de largo por 3cm de ancho para el cuello y unas de 28cm de largo por 4 de ancho para cada manga.
Step 02
The next parts that I am going to cut are the sleeves, I use as a pattern one of the sleeves of a shirt that I disassembled and it is special for this. I place it on the simple fabric, placing the armhole on the side of the fabric that stretches and we cut its shape. I will also cut a strip 35cm long by 3cm wide for the neck and some 28cm long by 4cm wide for each sleeve.
Paso 03
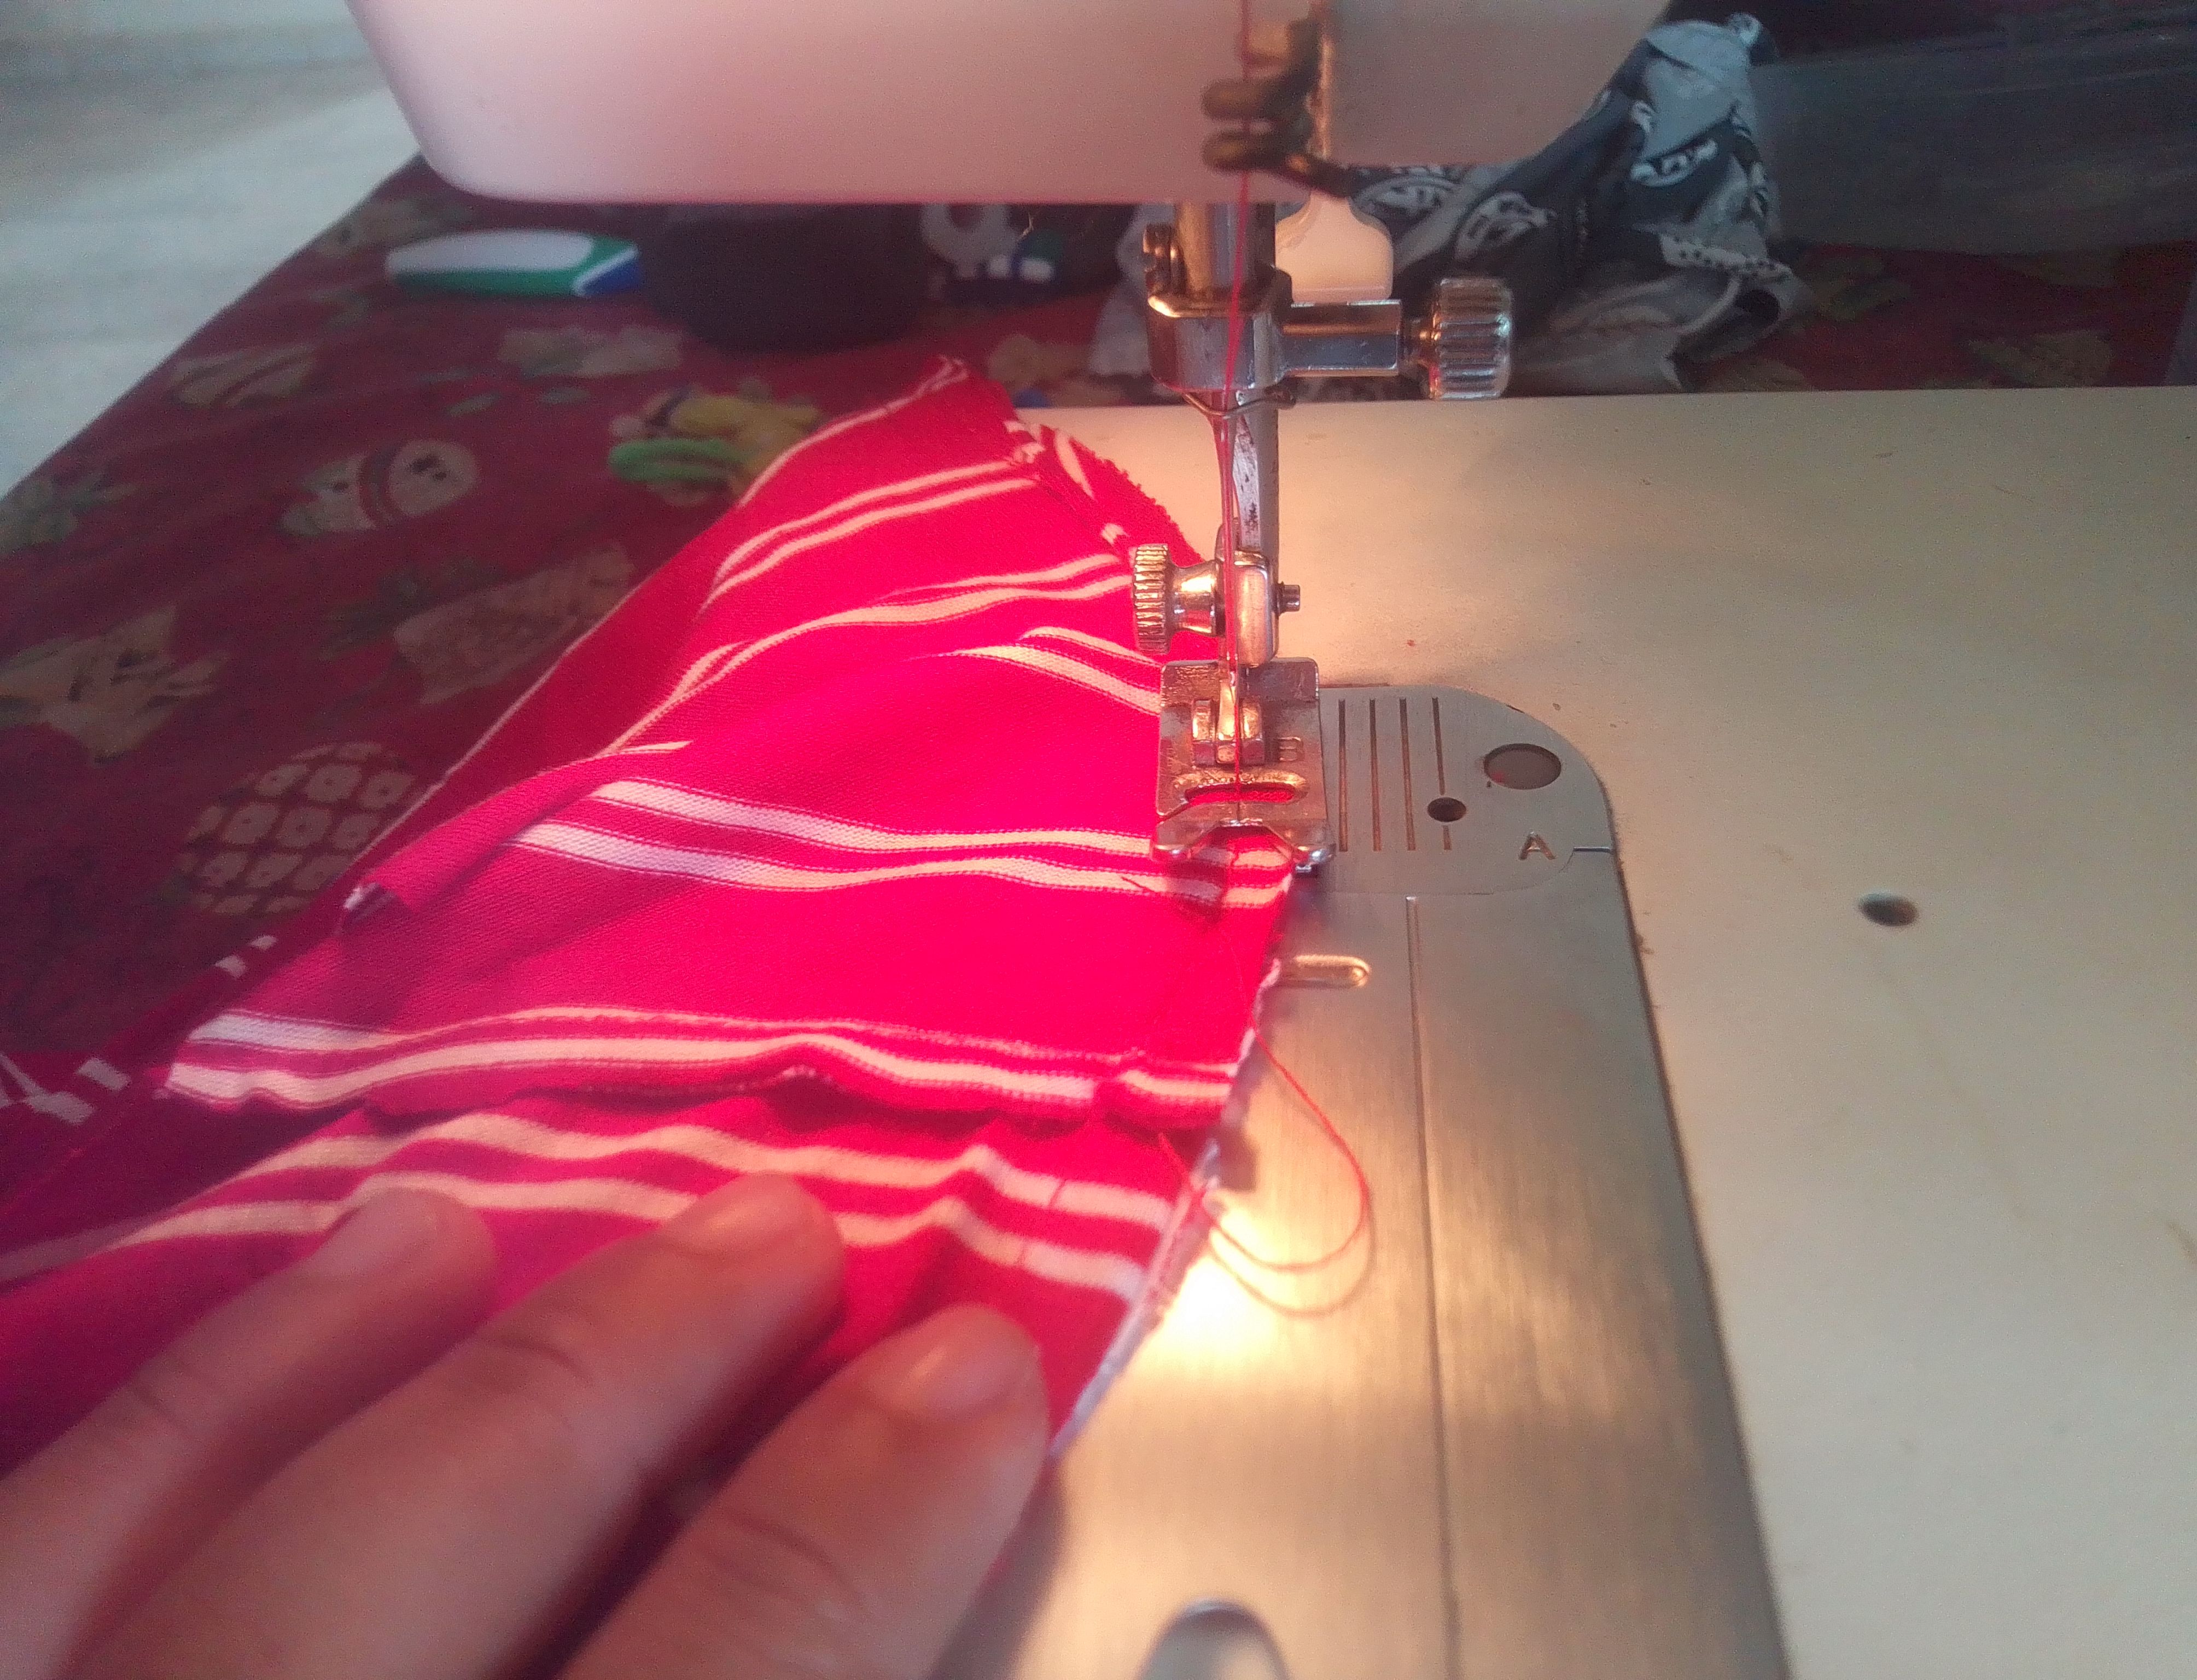
Es momento de unir las piezas y vamos a comenzar a coser la zona de los hombros de la pieza del delantera y trasera con costura recta y zigzag. Abrimos y enfrentamos derechos para ubicar la manga en la parte de la sisa, cosemos con costura recta.
Step 03
It is time to join the pieces and we are going to start sewing the shoulder area of the front and back piece with straight and zigzag sewing. We open and face right sides to place the sleeve in the armhole part, we sew with a straight seam.
Paso 04
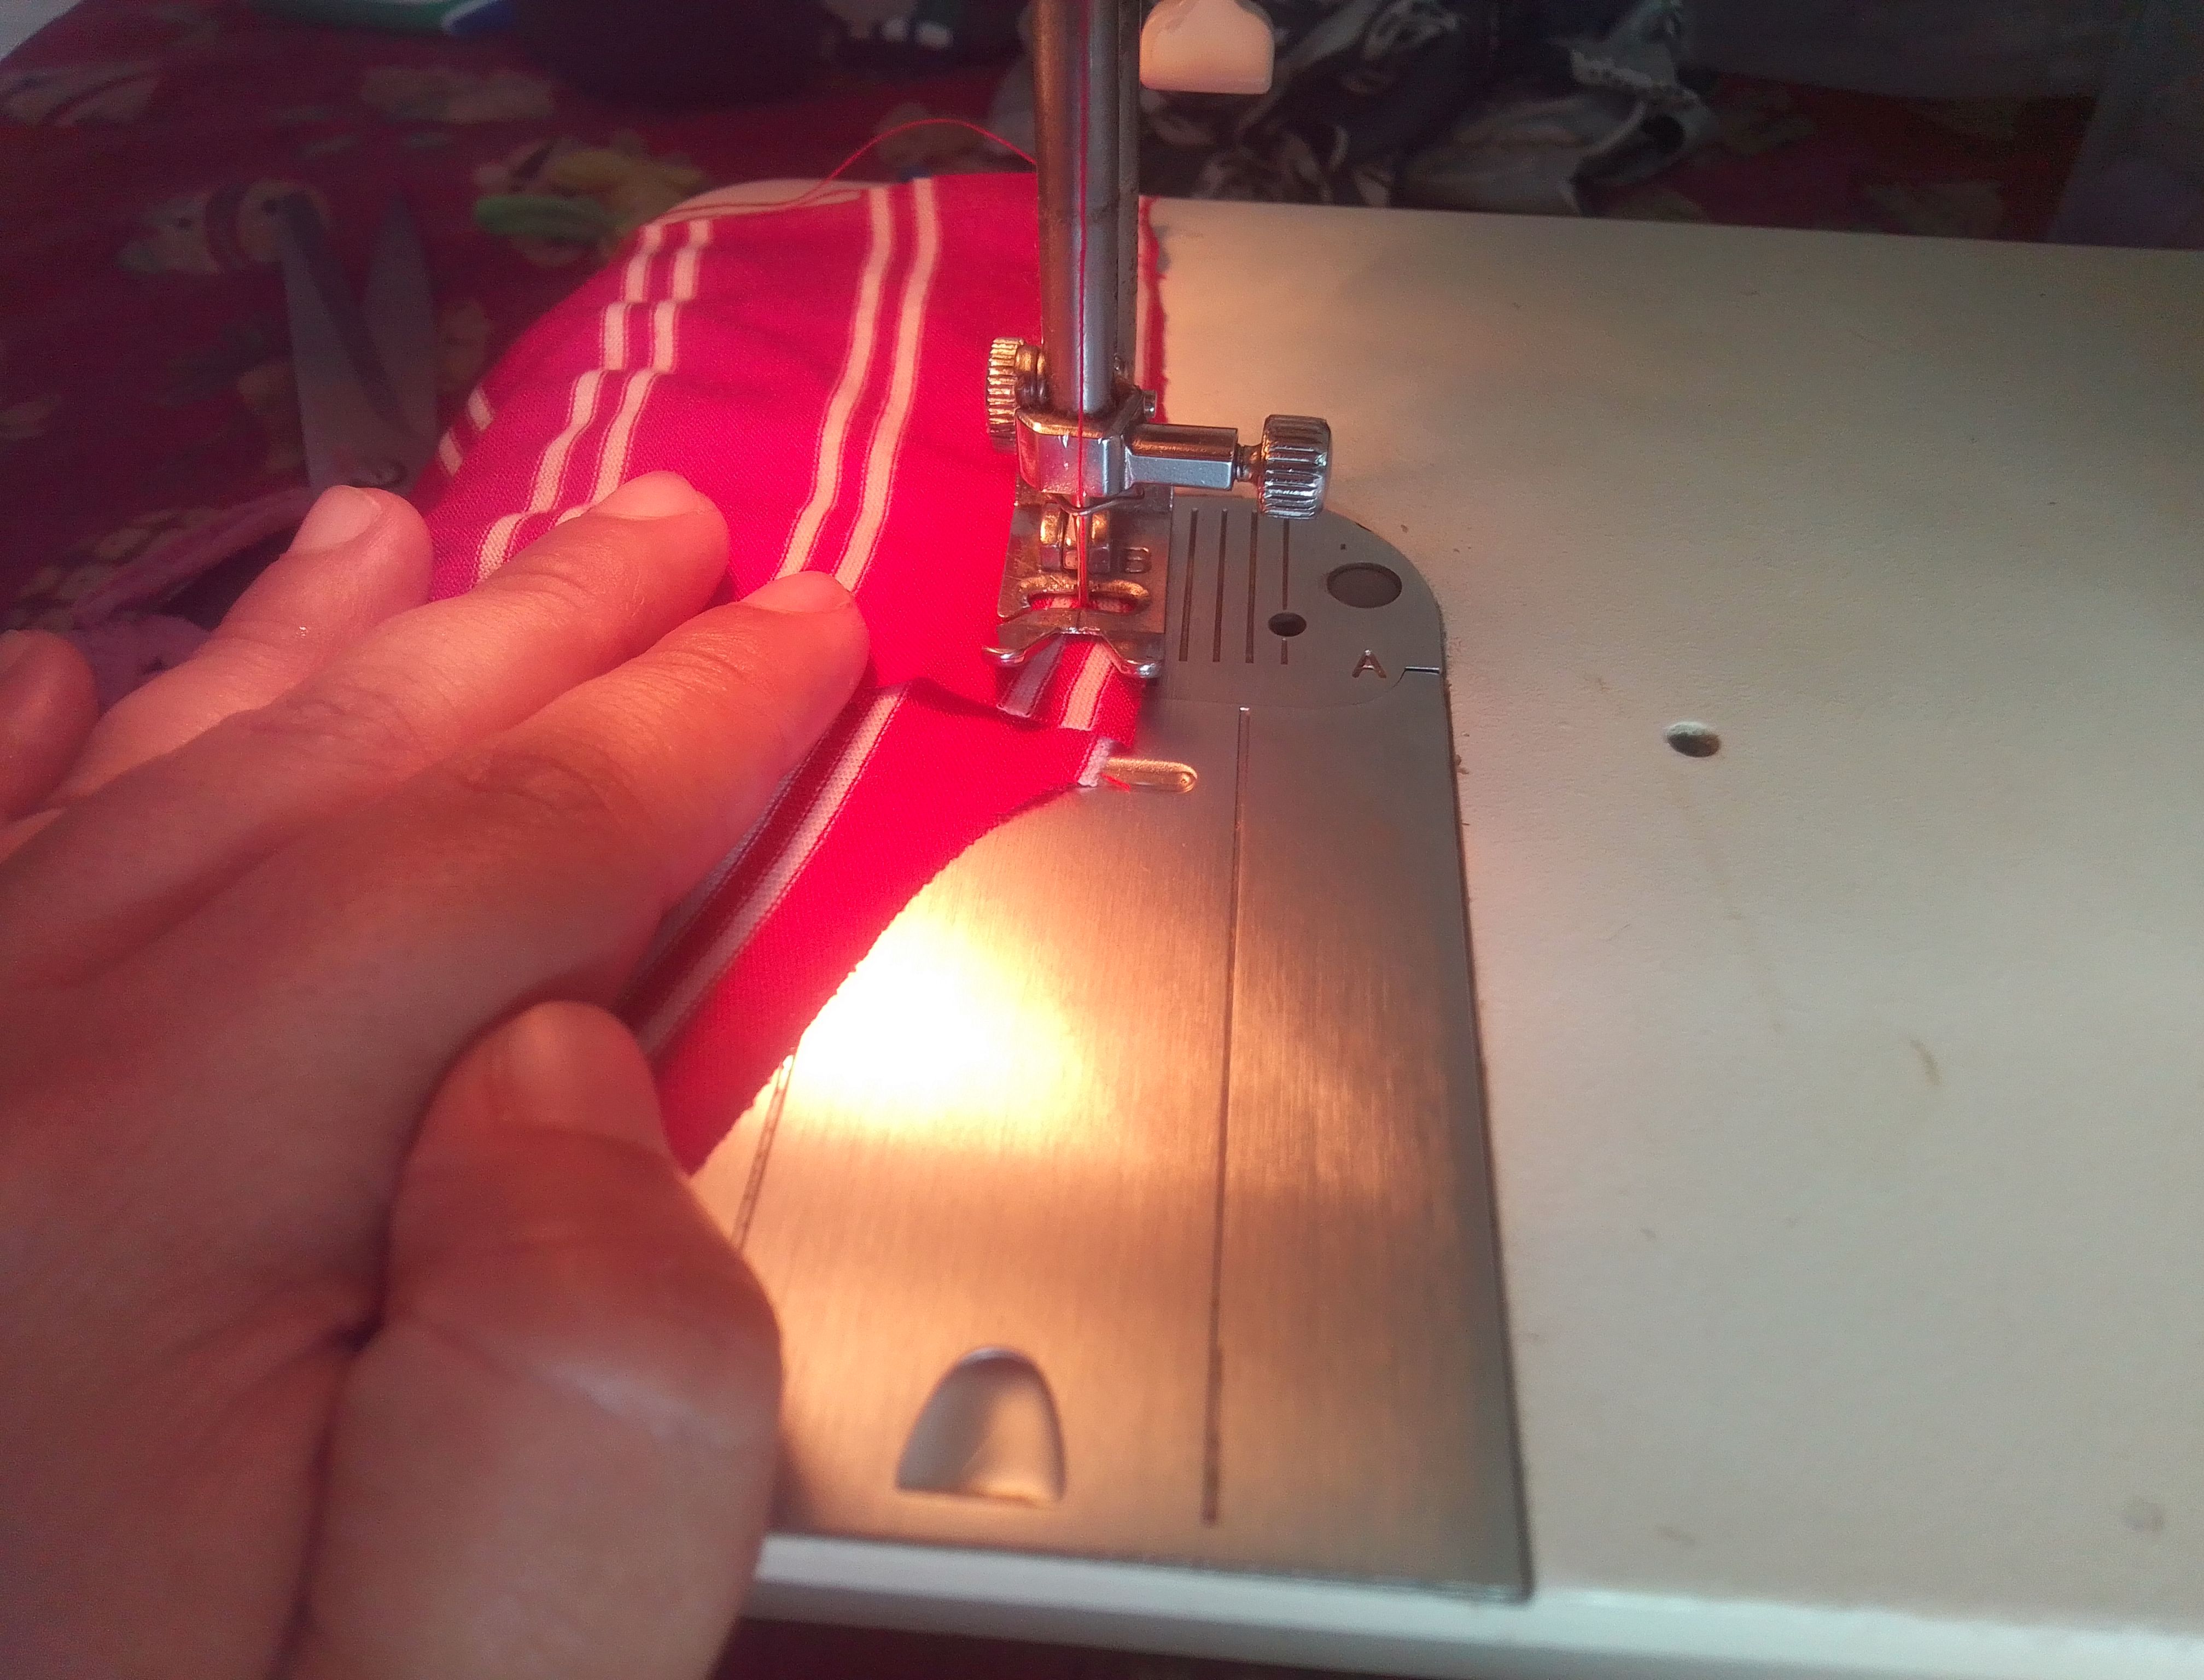
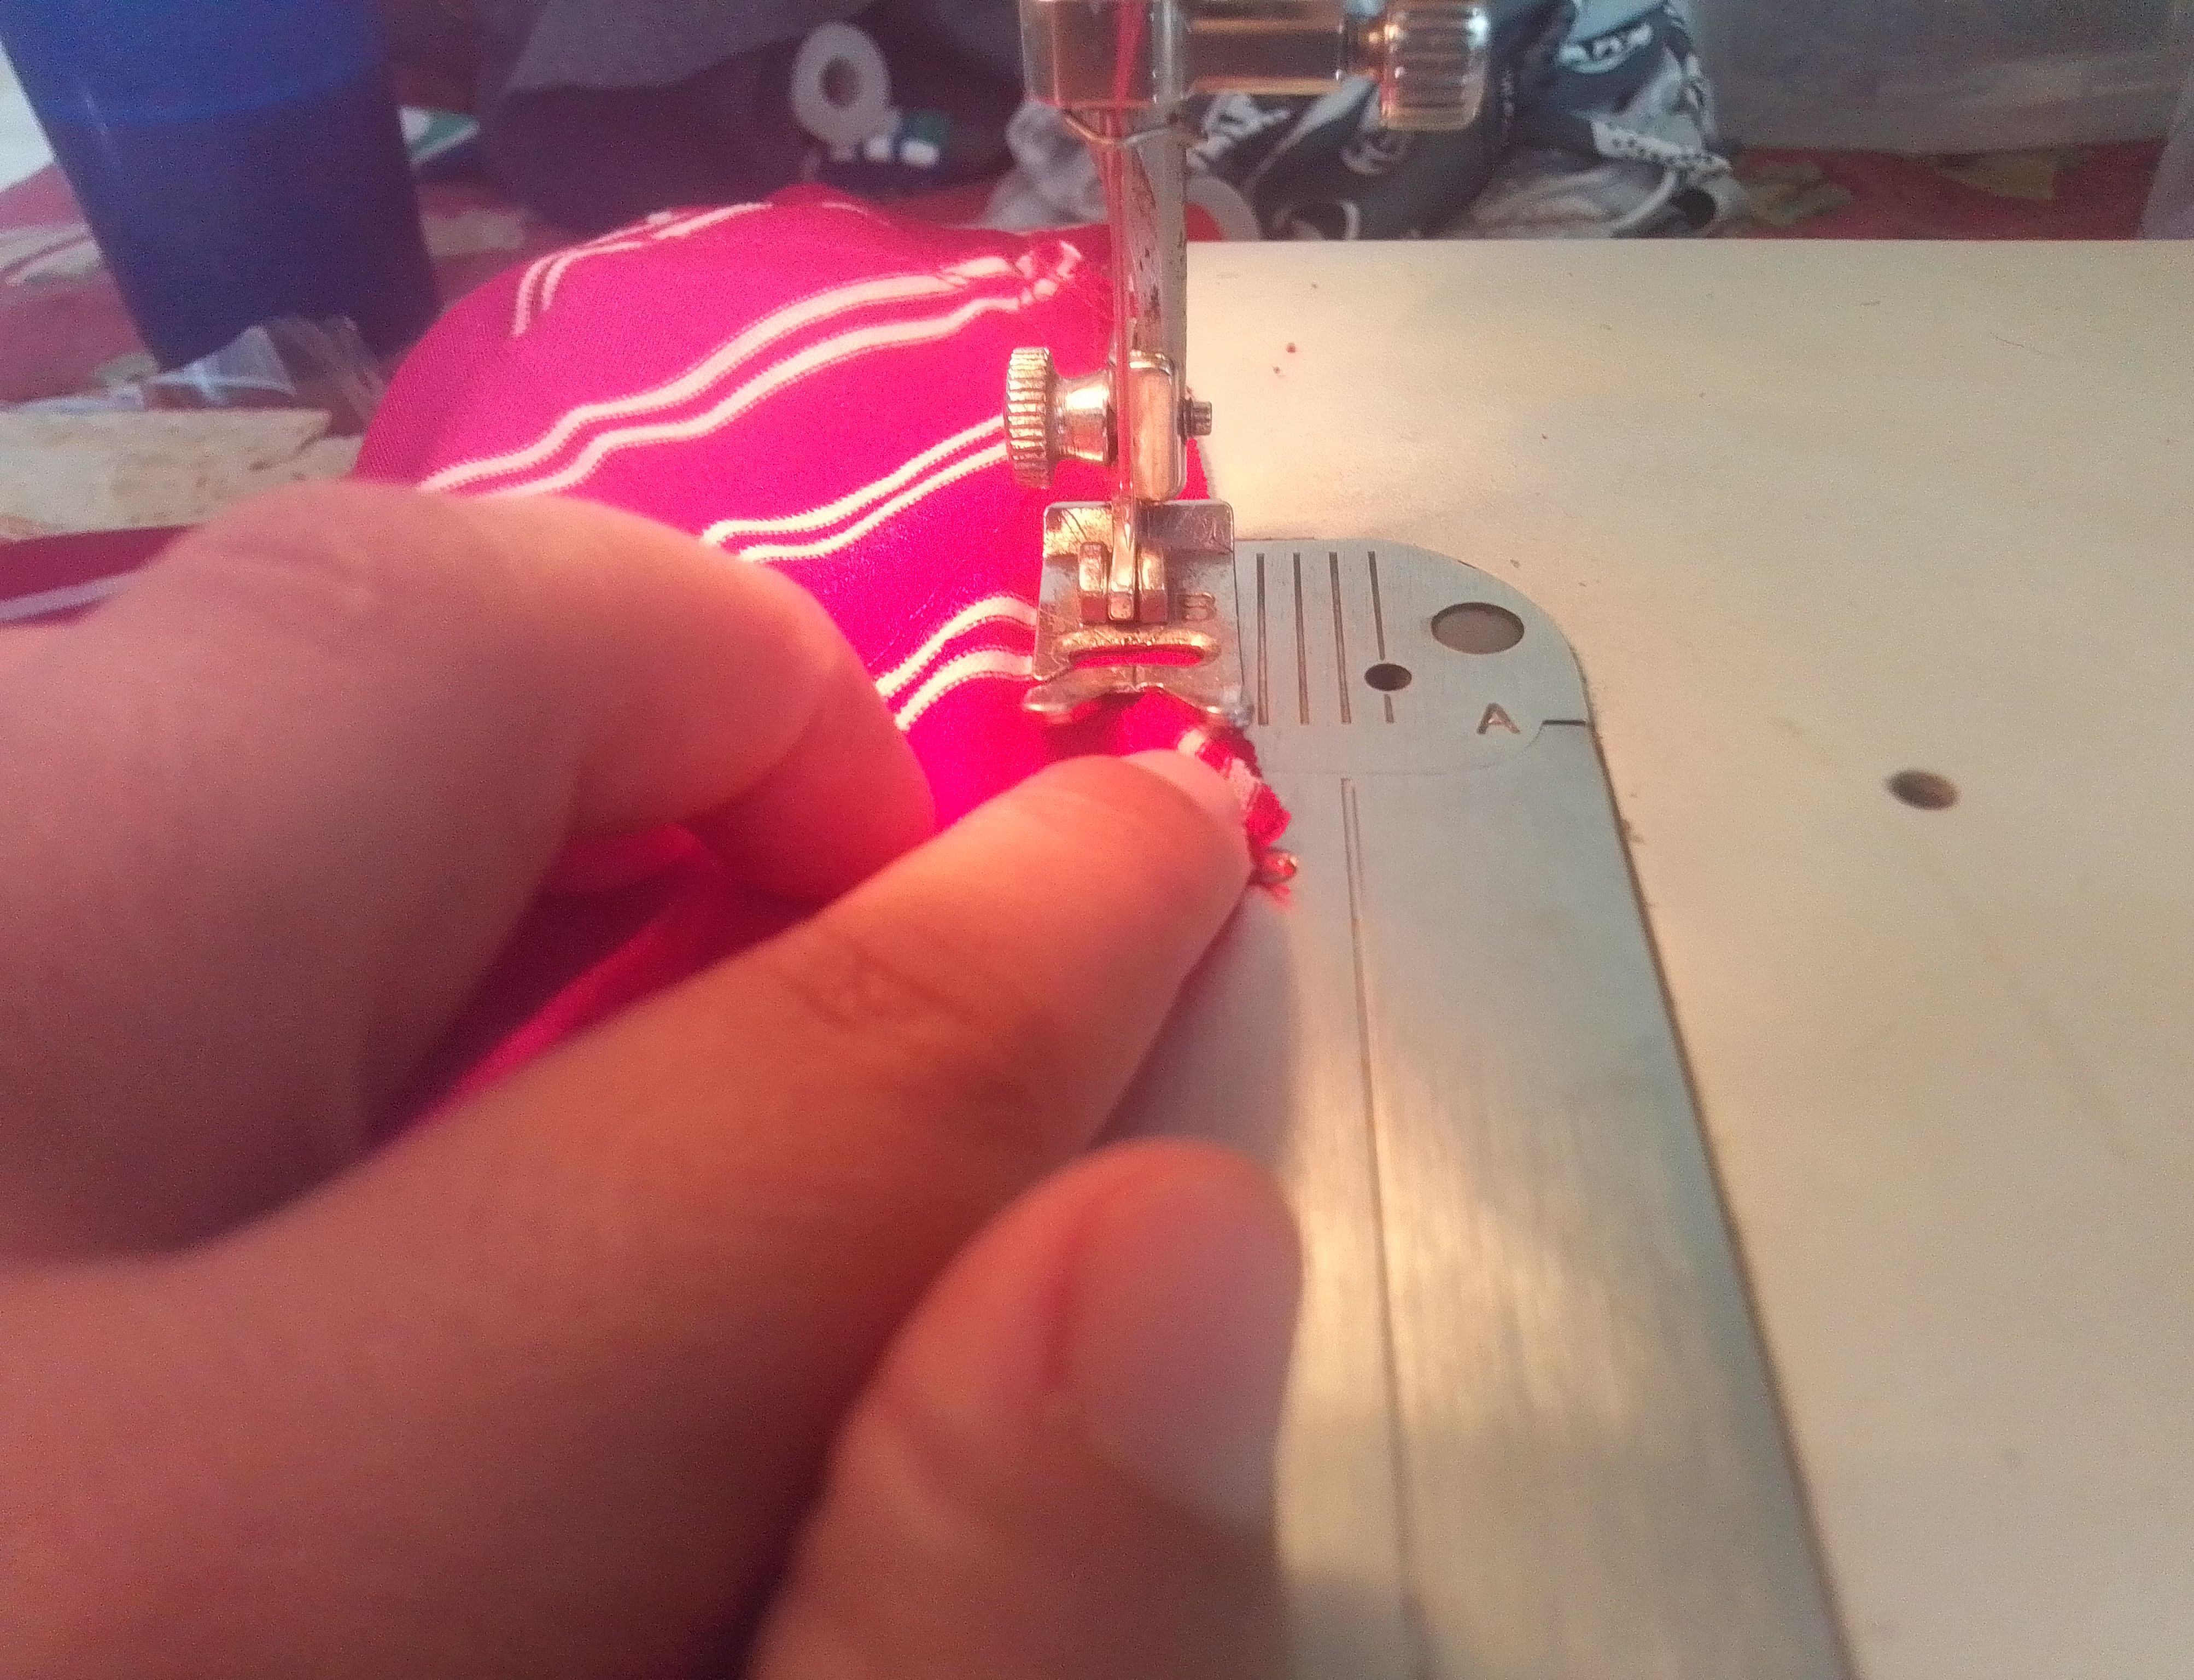
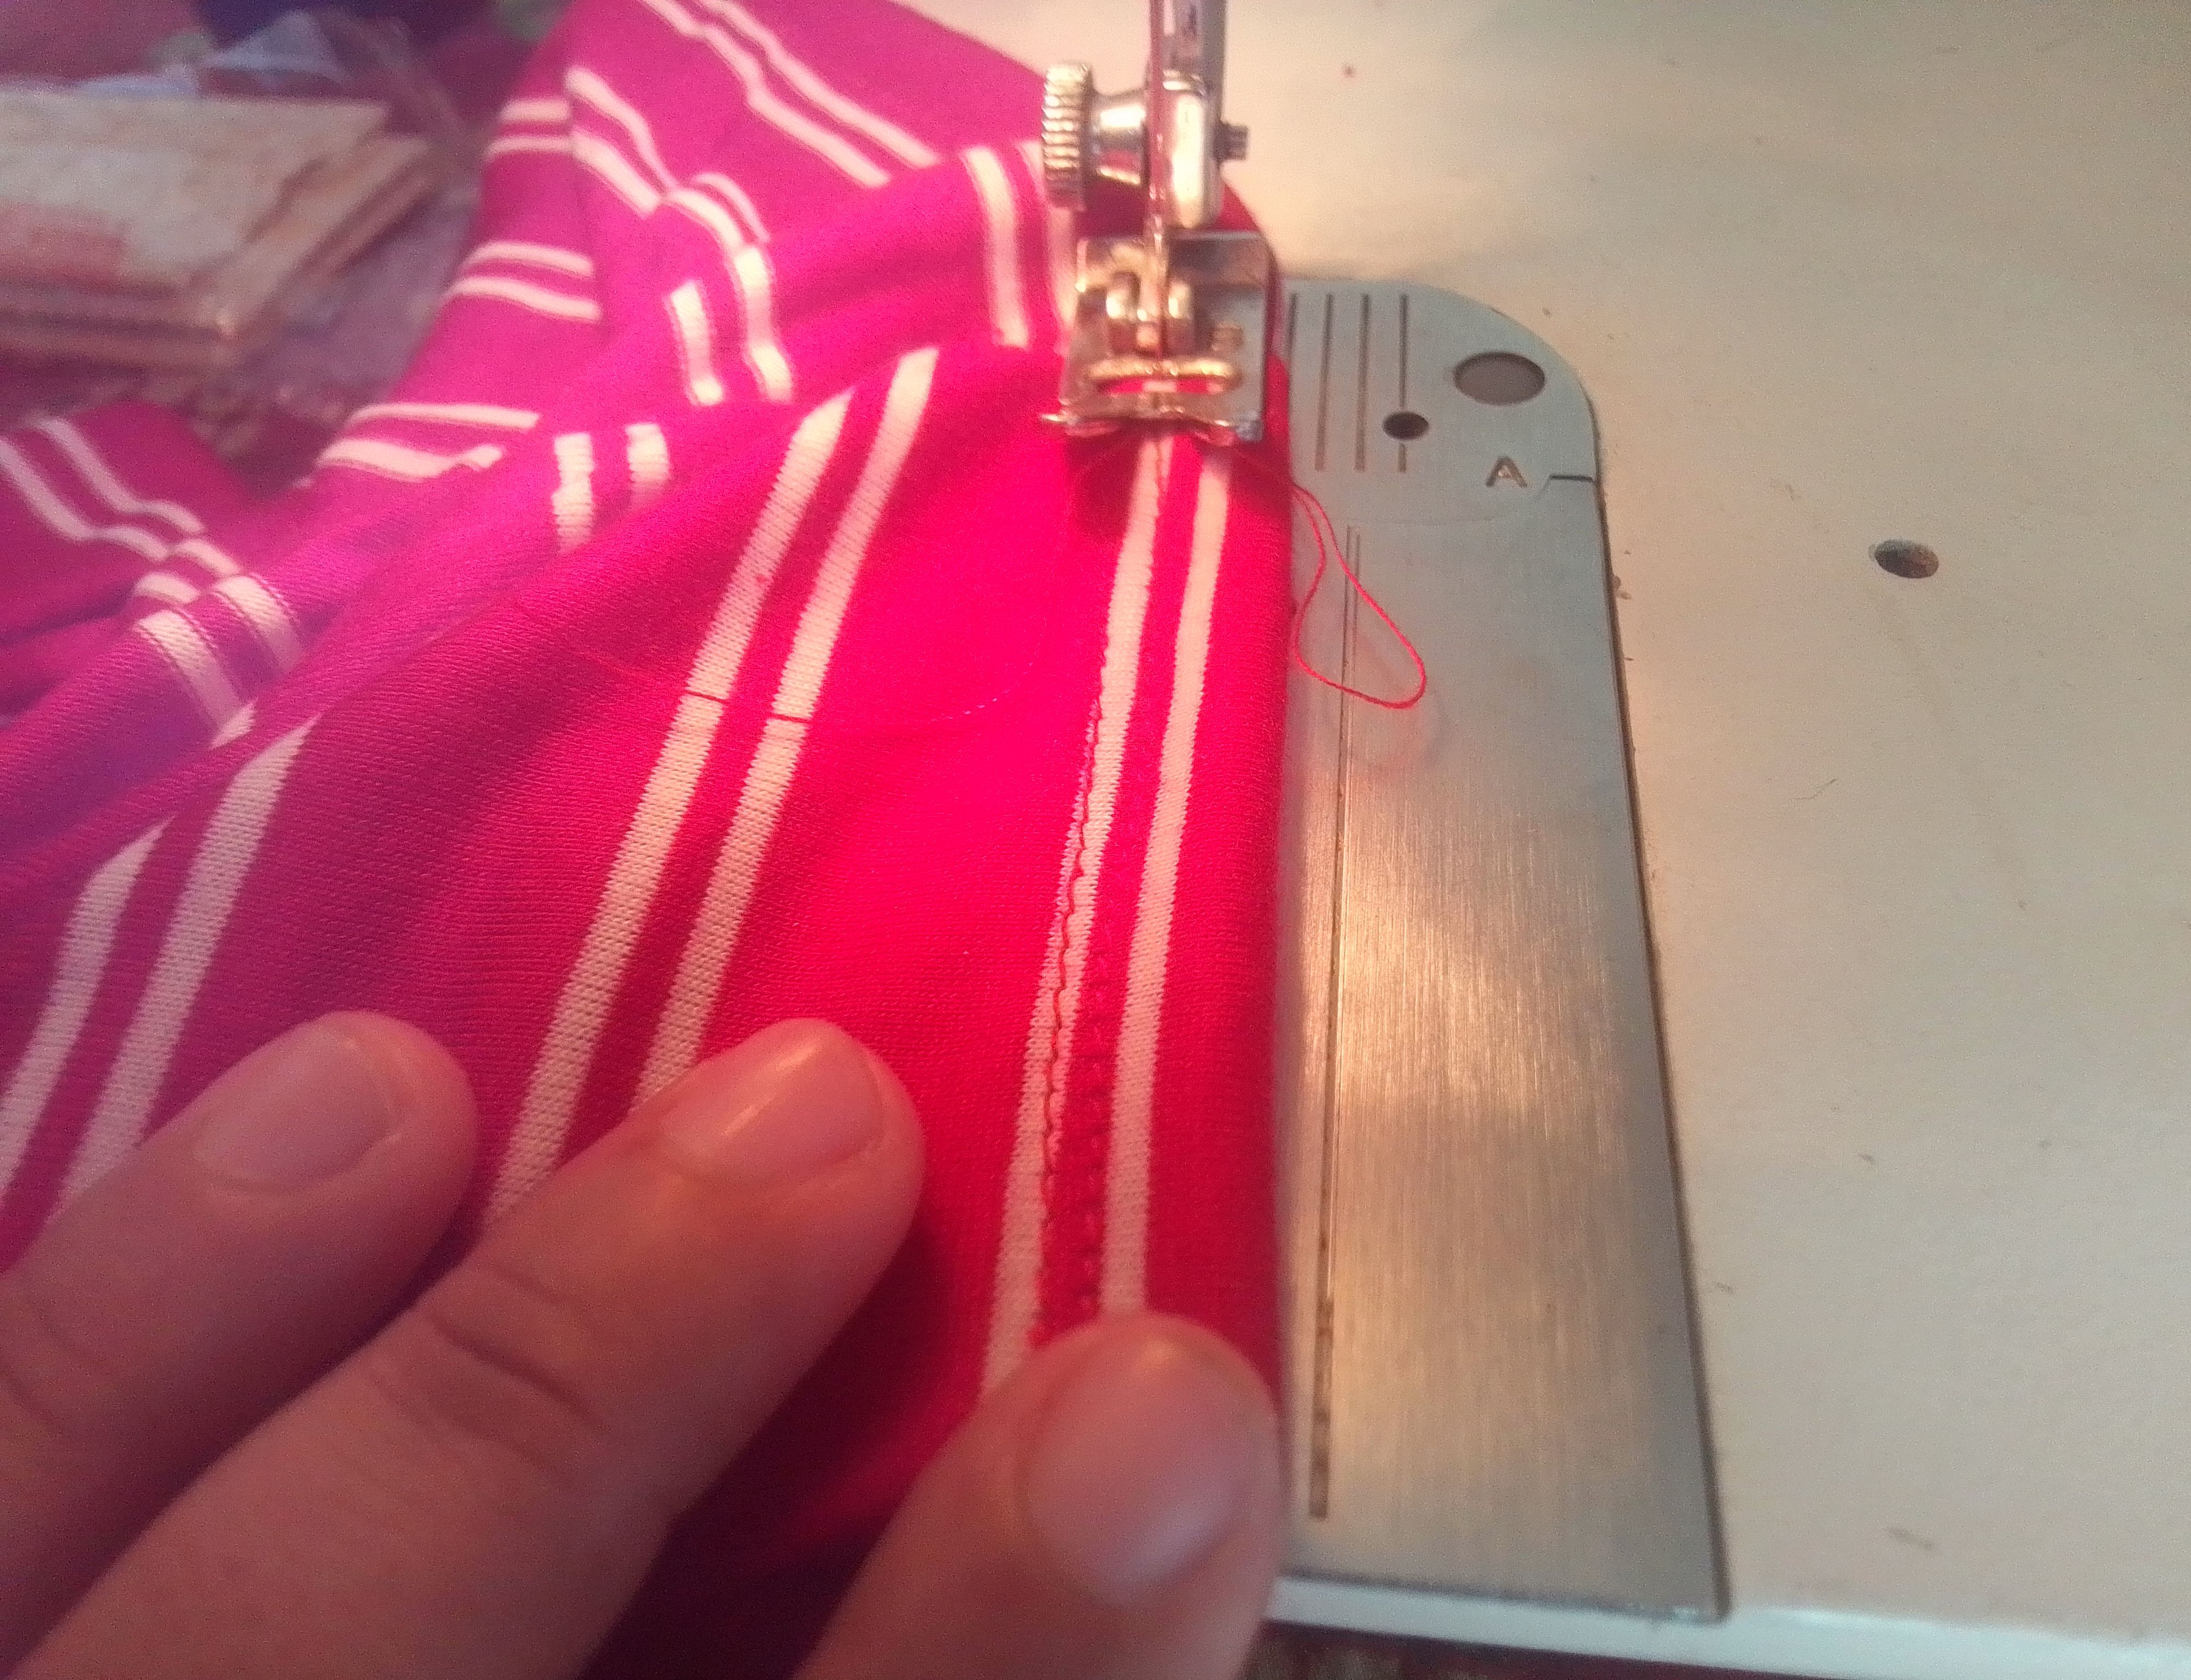
Continuo con la costura de los laterales y dobladillo inferior, en esta pase doble costura para dar un acabado más prolijo.
Step 04
I continue with the sewing of the sides and bottom hem, in this pass double stitching to give a neater finish.
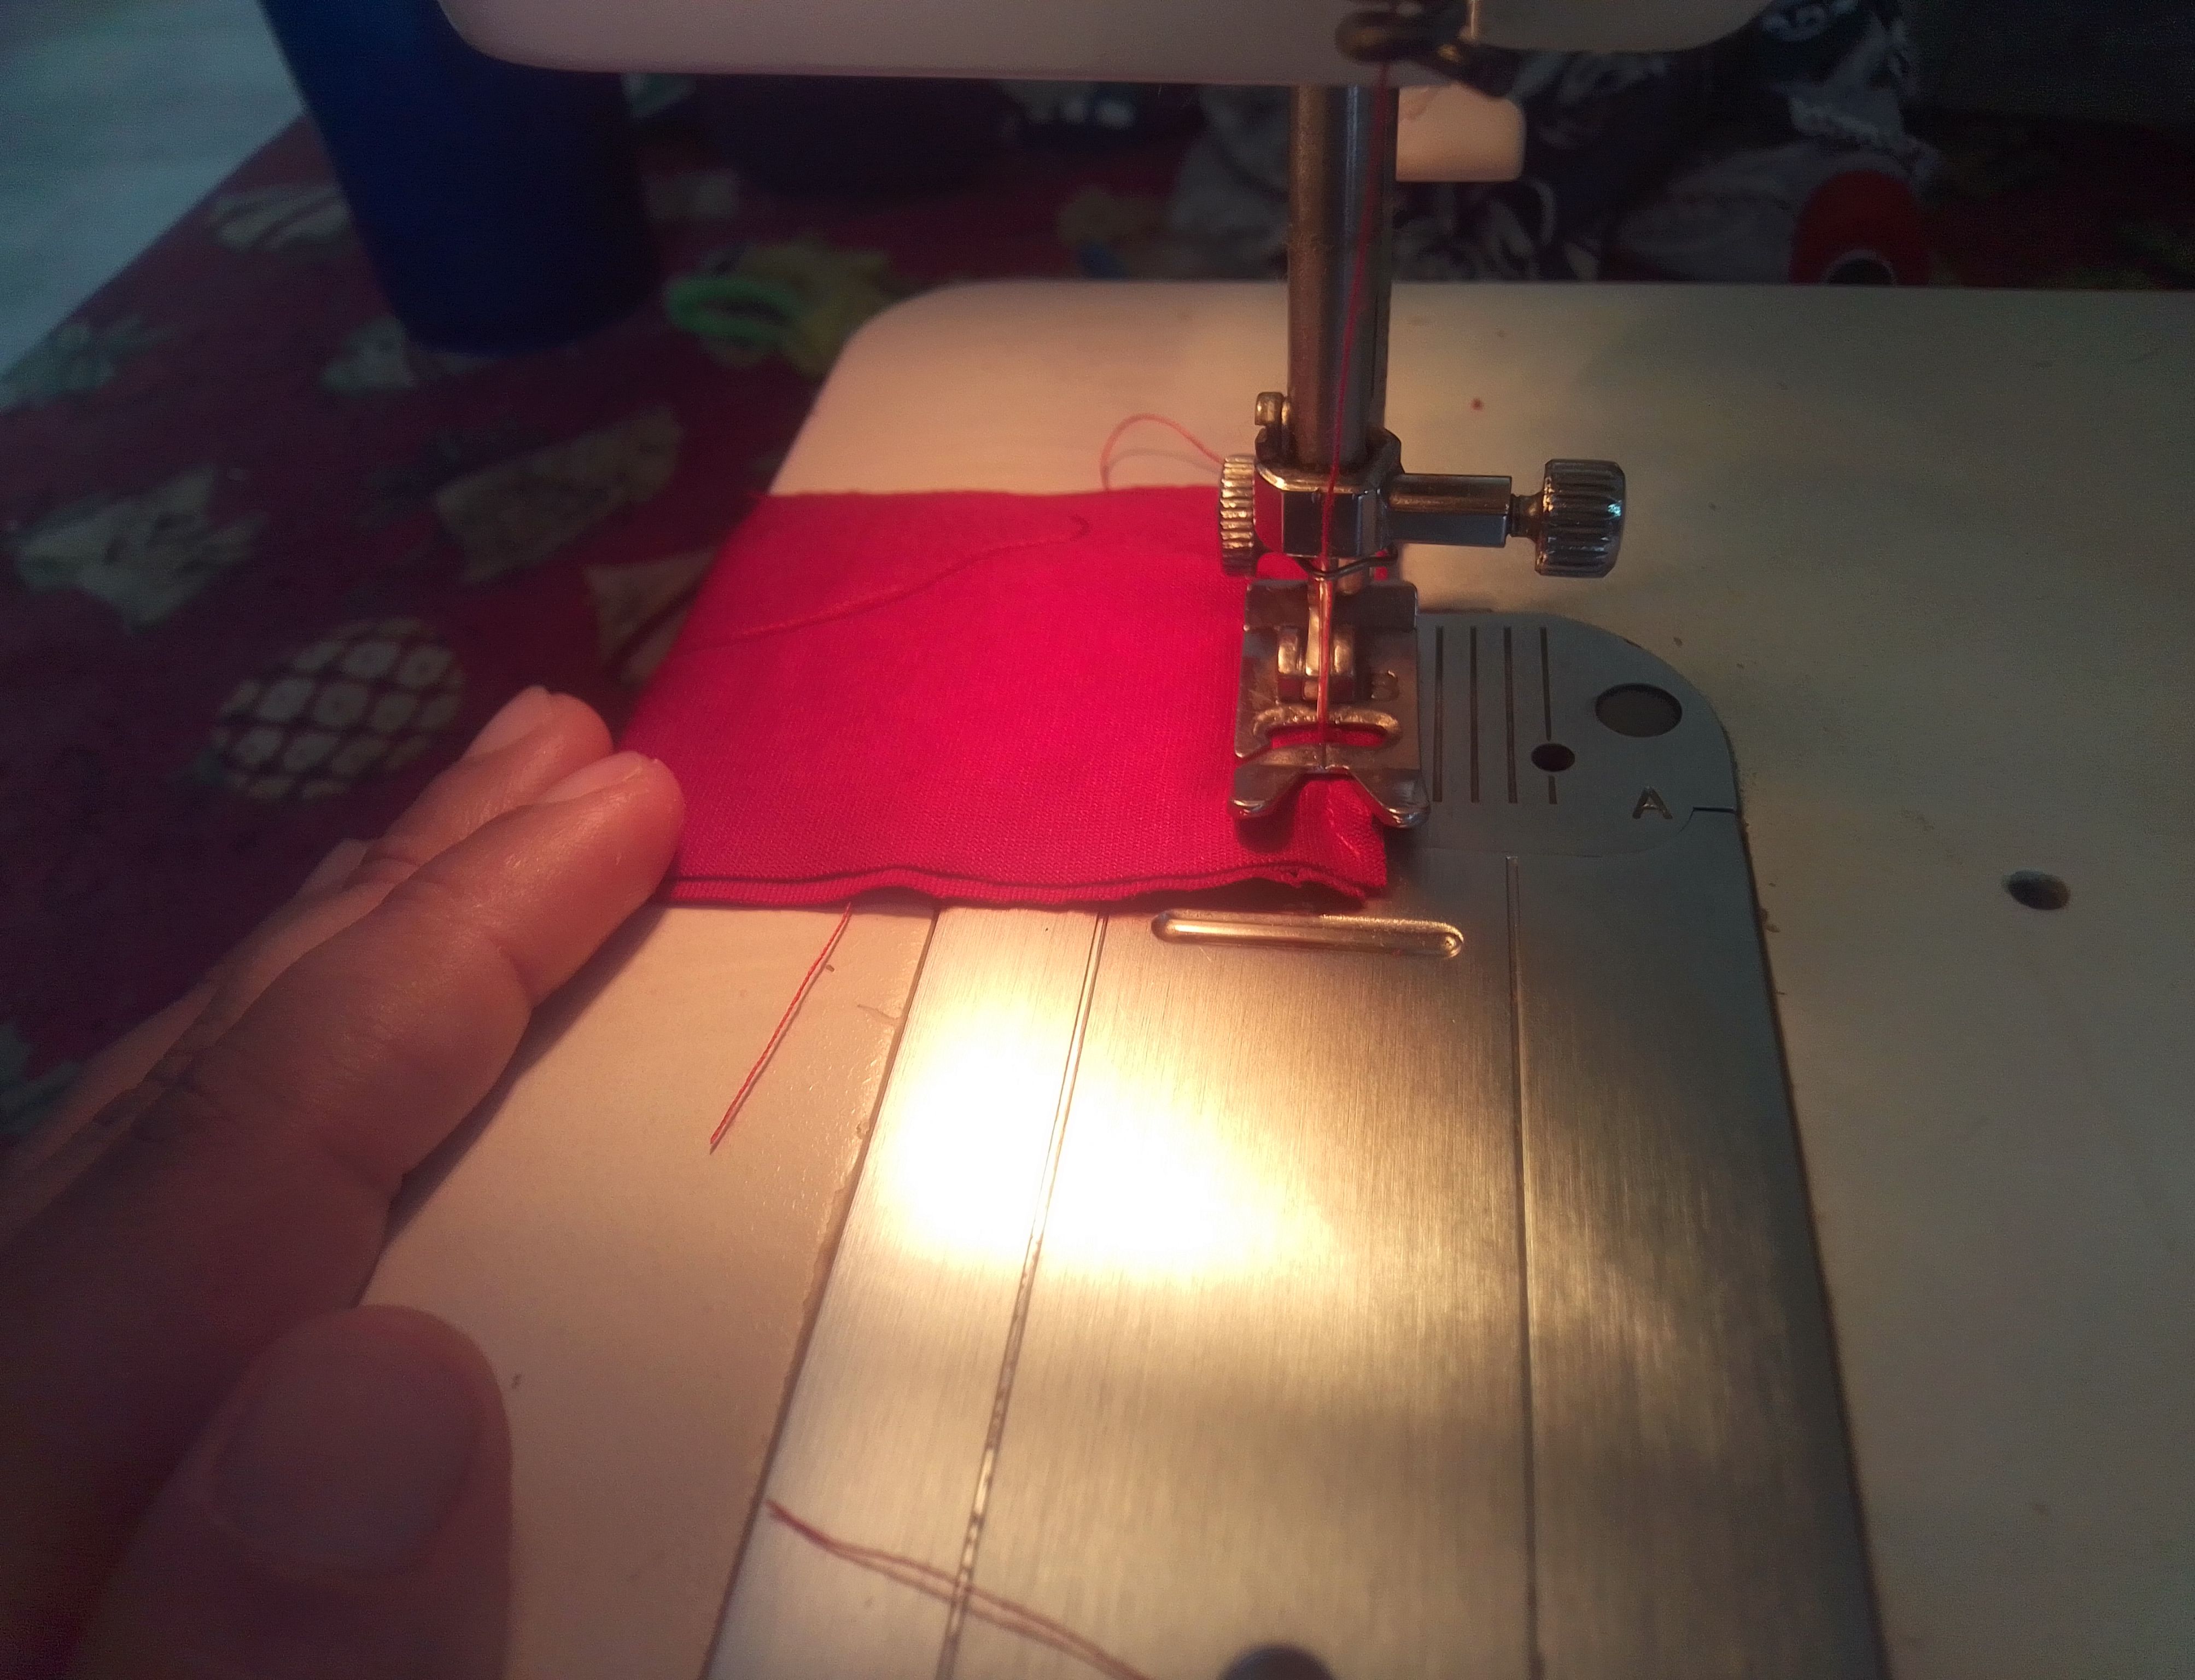
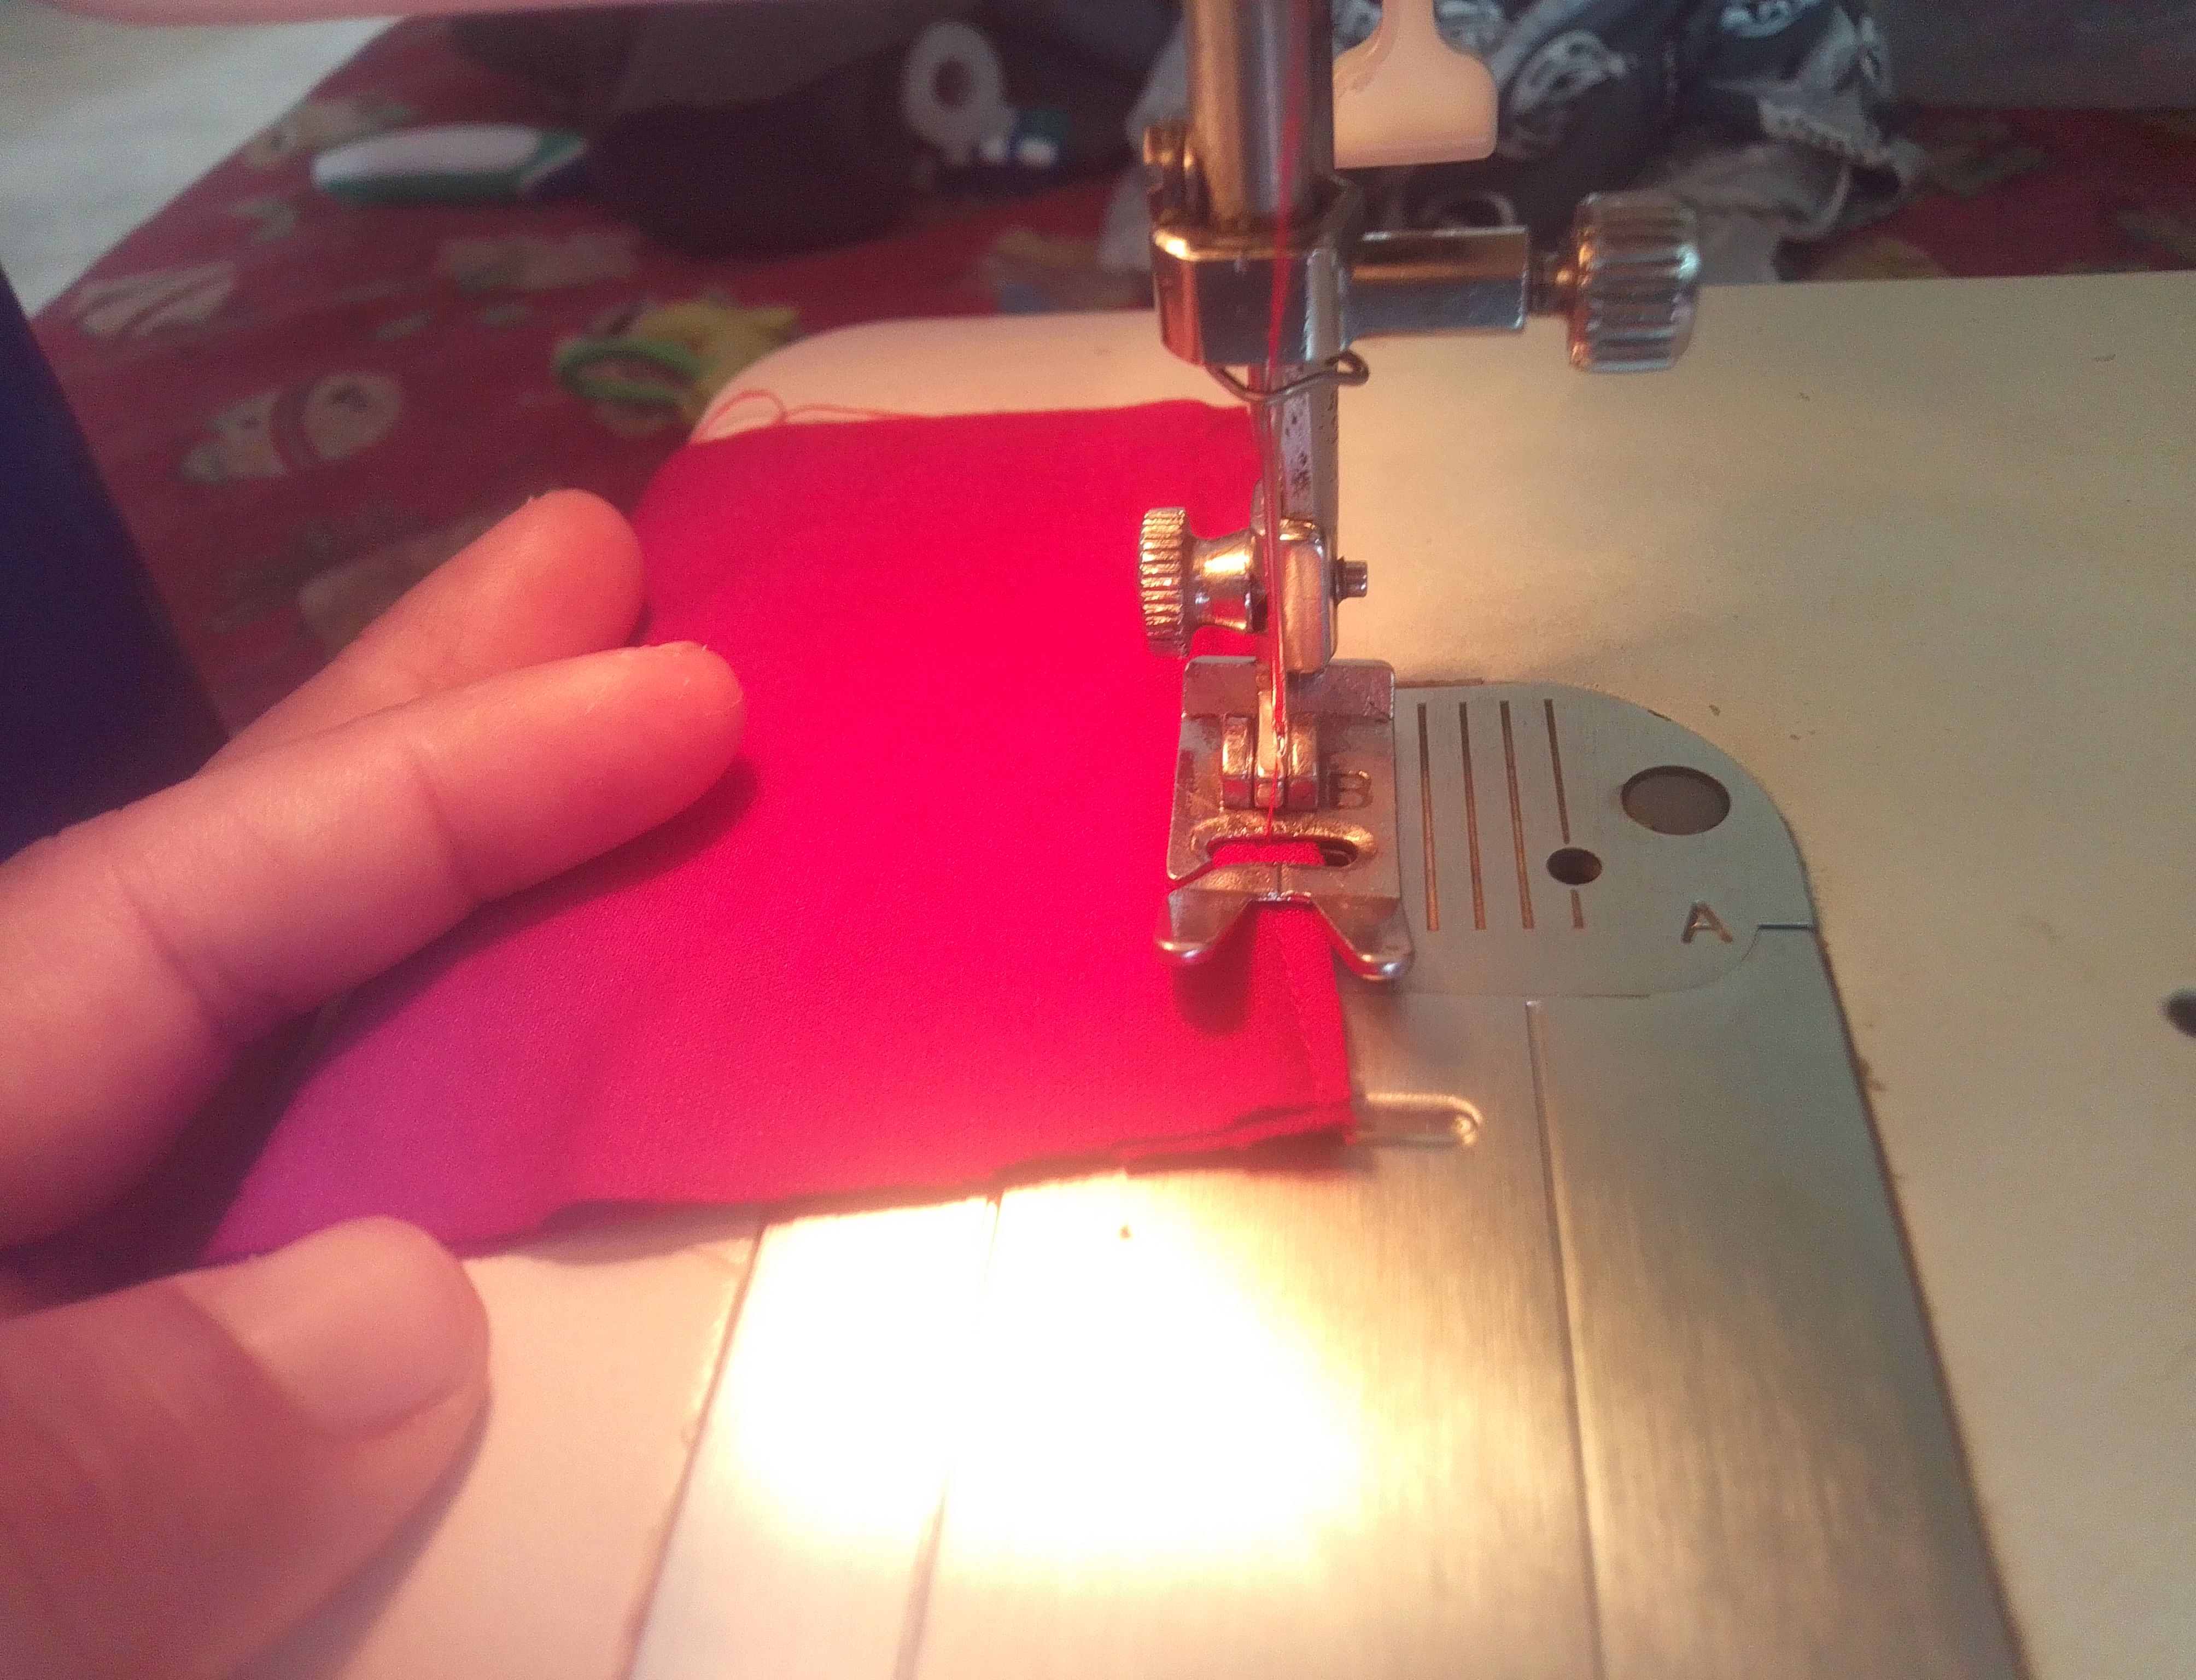
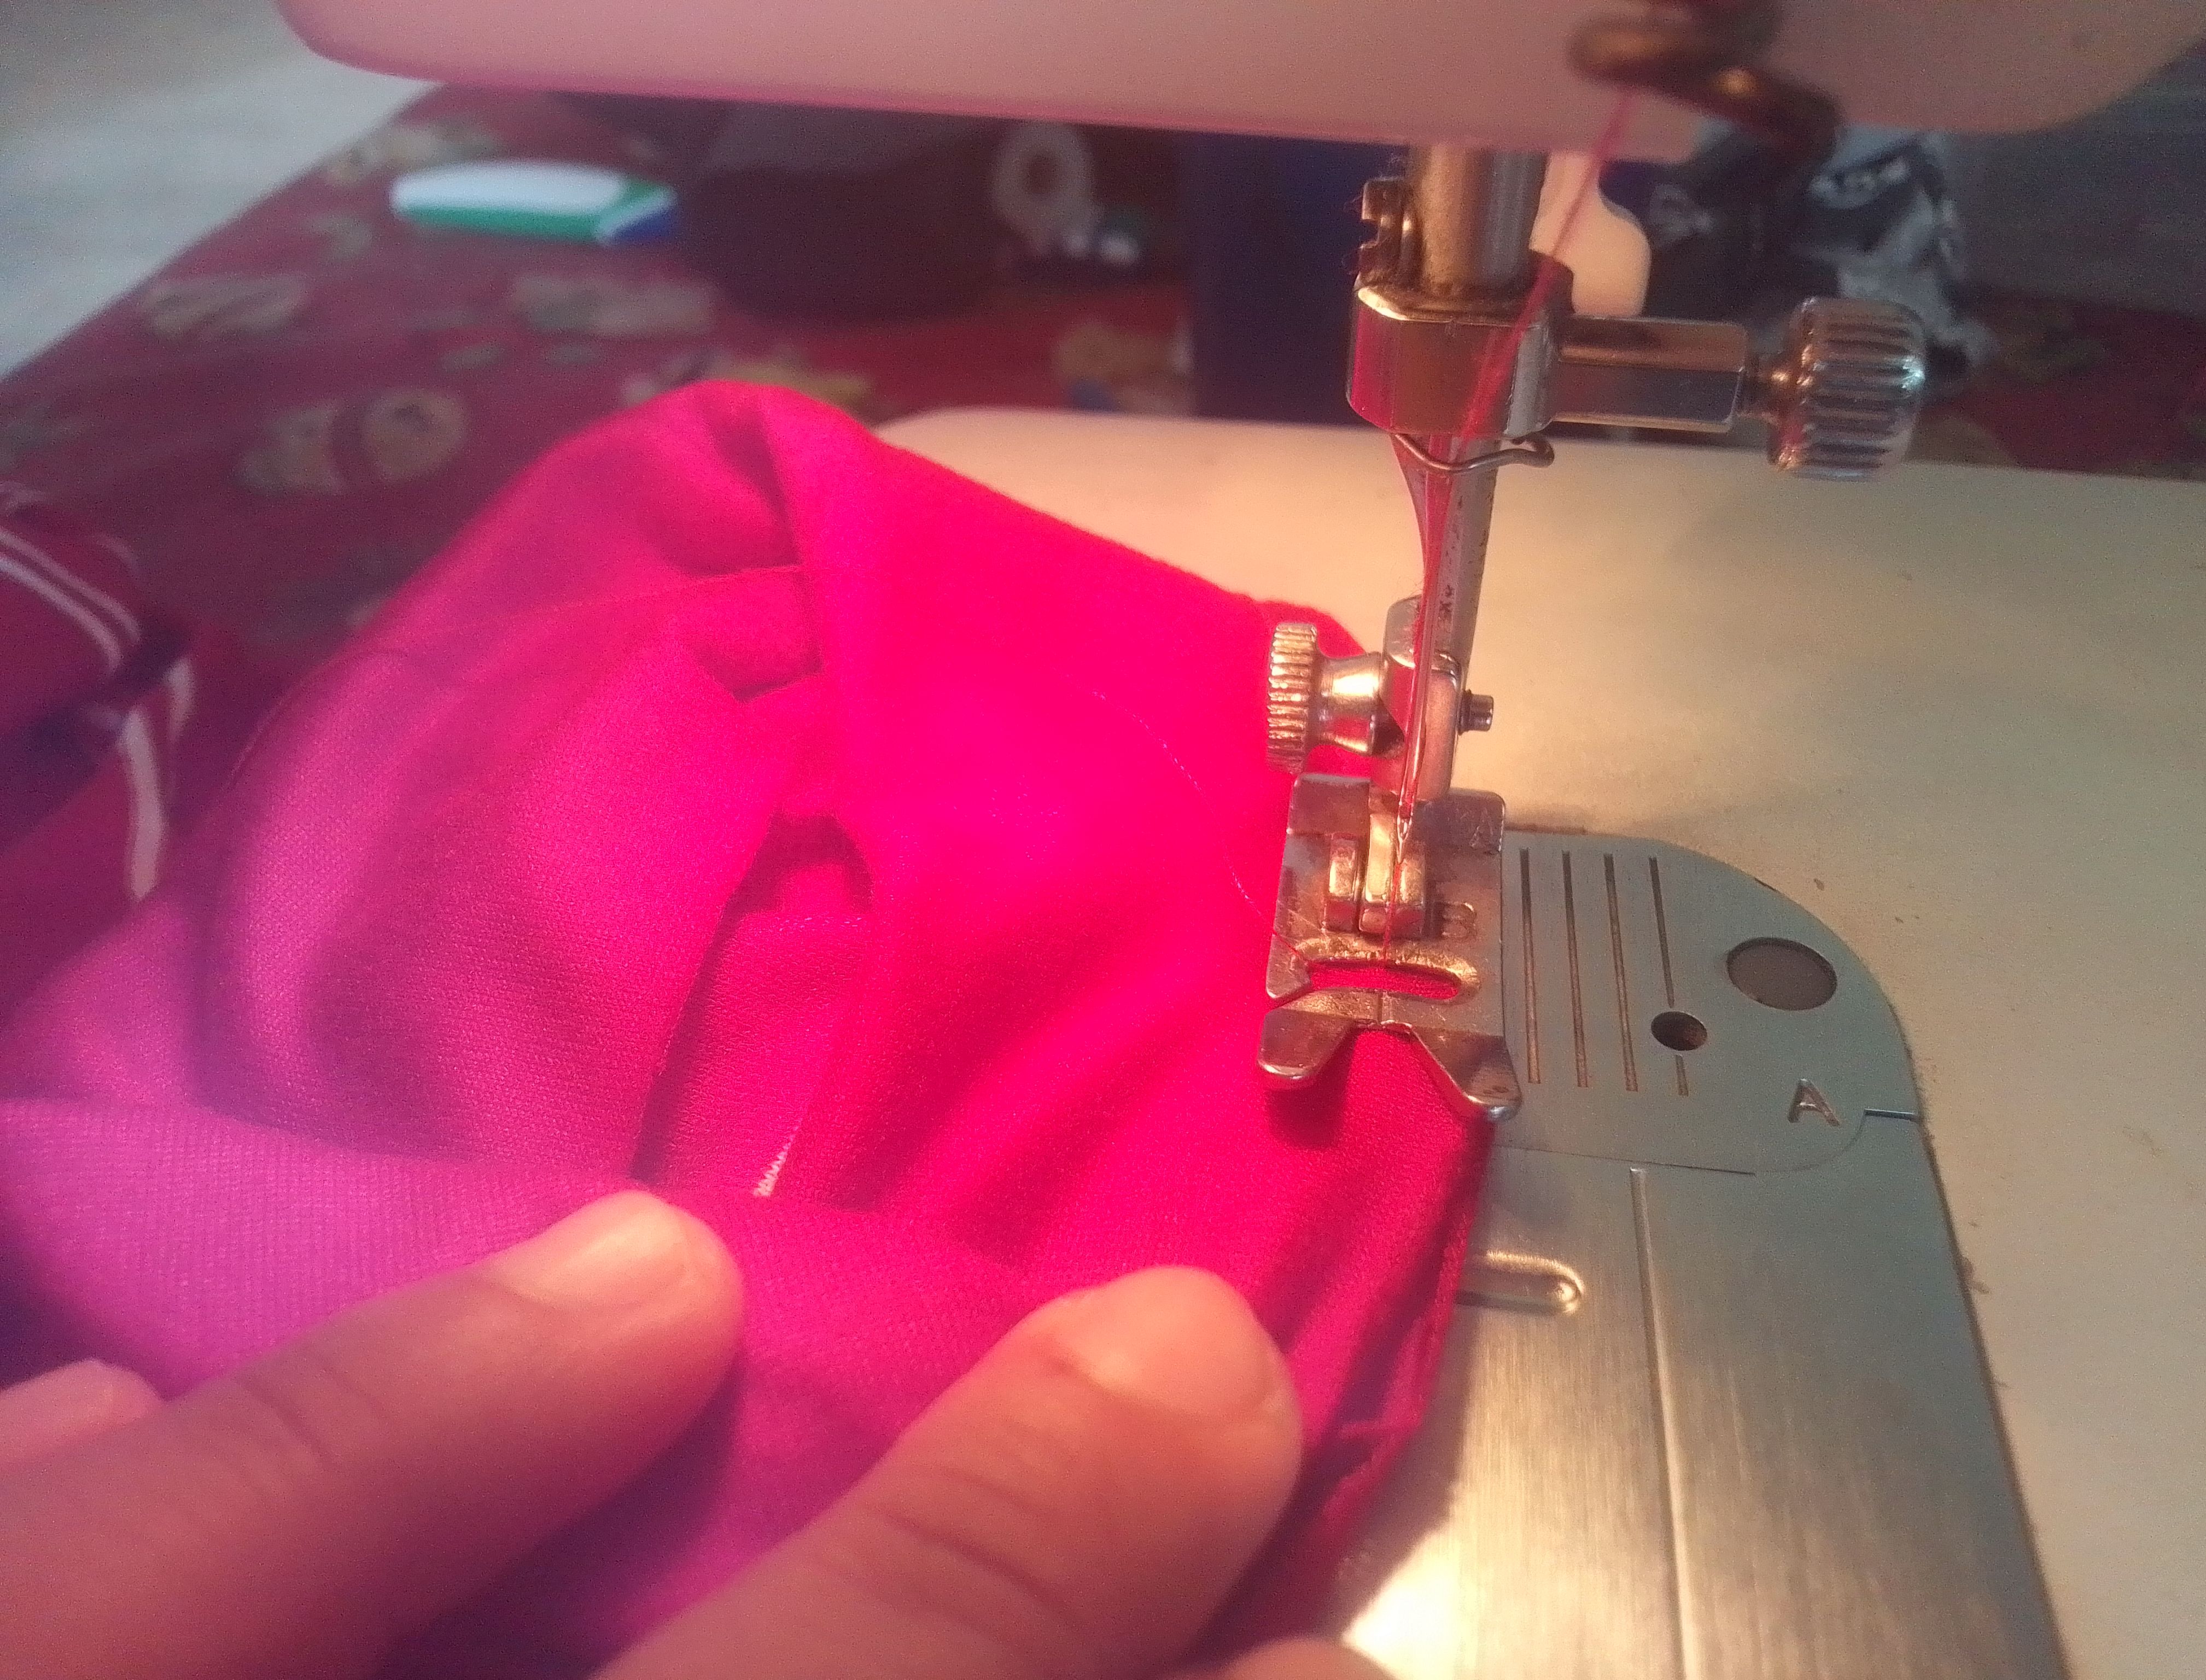
Paso 05
Ahora voy a hacer el cuello, por lo que voy a coser los extremos de la tira que tiene un tamaño más pequeño y la doblo a la mitad, ésta lo voy a ir cosiendo al cuello de la camisa estirandola poquito a poquito al tamaño que tiene. Lo mismo haré con las tiras del cada manga, voy a ubicarla en su parte inferior y paso costura ajustándola a su ancho.
Step 05
Now I am going to make the neck, so I am going to sew the ends of the strip that has a smaller size and I fold it in half, I am going to sew this to the neck of the shirt stretching it little by little to the size it is. I will do the same with the strips of each sleeve, I will place it at the bottom and sew it adjusting it to its width.
Resultado!
Siento que este color me ve muy bien, el diseño es muy juvenil y sencillo de hacer. ¿ Ustedes que opinan de este resultado?
I feel that this color looks very good on me, the design is very youthful and easy to make, what do you think of this result?


Agradecida por tu visita a mi publicación, espero haya sido de su agrado.. Les deseo una linda noche, nos vemos pronto con una proxima idea!
Grateful for your visit to my publication, I hope you liked it. I wish you a nice night, see you soon with an approximate idea!
Muy hermoso diseño amiga! Saludos
Muchas gracias linda.. Feliz noche.
The final result is impressive. It is so beautiful, charming, and lovely. Its design stands out. It suits you well. Nice work!
Grateful...! It always makes me happy to read your words of appreciation... it makes me proud...
Como siempre, muy lindo he inspirador tu trabajo amiga. Felicidades.
Gracias mi bella.. Muchas bendiciones para usted..feliz noche