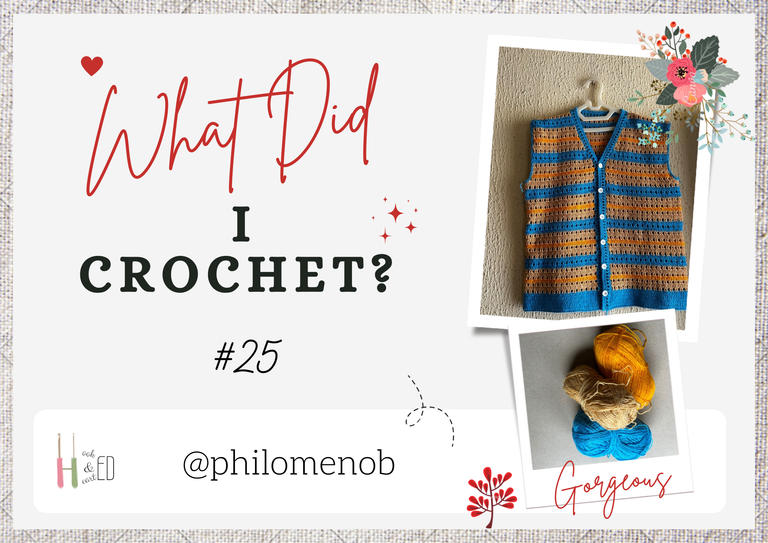
Hi, guys! It’s been a short minute. I didn’t crochet for a couple of days and later started working on a customer’s order so I didn’t have any project to post until now. It feels good to be back!
As always, I’ll give you guys the story behind the project.
I’m part of a youth organistaion called AIESEC. When we go for national conferences, we get to meet memebers from other states where we have the organisation — we call it LC (Local Committee). So I had this friend from LC Akure who really loves my crochet pieces. He suddenly asked for me to make one for him. I was really excited because my work was going to get more eyes on it. He’ll be attending the conference at Benue state at the end of the month and though I wasn’t going, I could send it through my friend. I was a bit sad that I wouldn’t see him wear it, but then there was nothing I could do but settle for pictures. Anyways, we got talking designs and later, price as well.
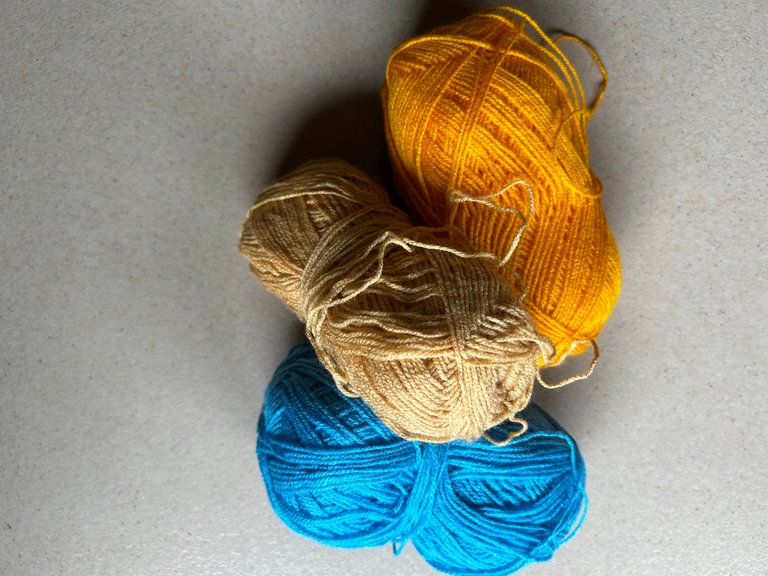
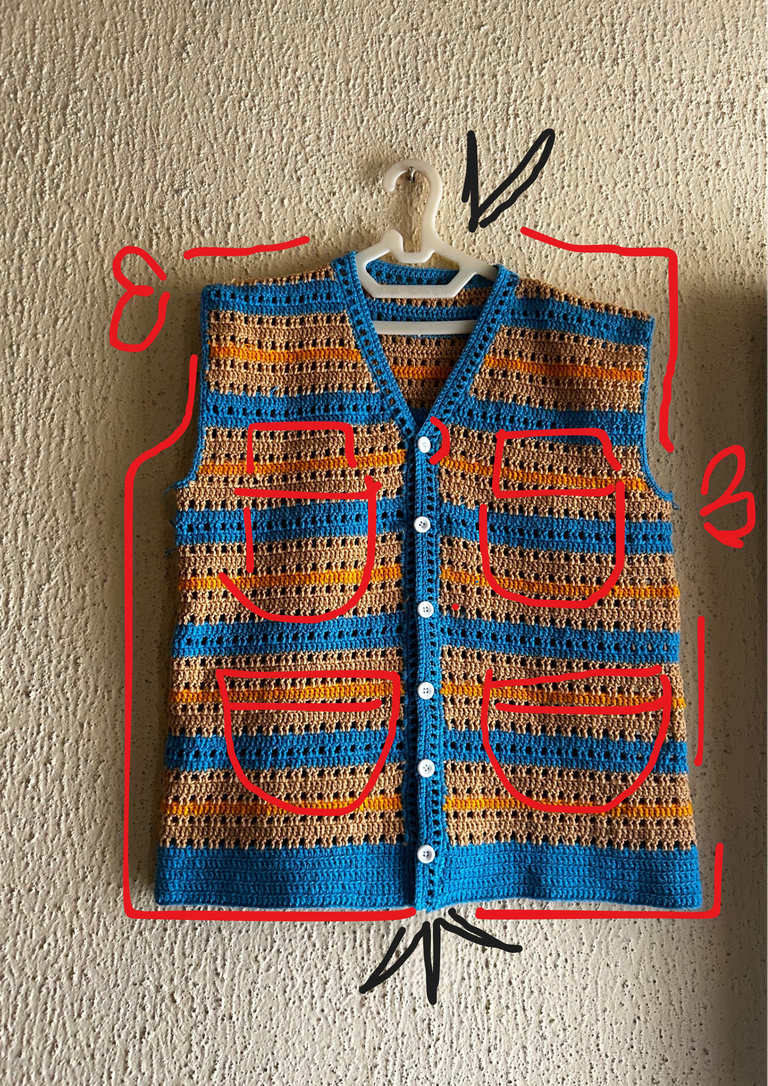
I sent him pictures from Pinterest. He found it difficult to choose a design so he asked me to help him decide. I chose for him and then he gave me the go ahead that he liked the jacket. The jacket was a combination of mesh stitch and single crochet and it was sleeveless, but I decided to substitute the single crochet with double crochet and replace the cloud blue with a slightly deeper shade of blue.
I got the materials the next day, then began. I couldn’t get his measurements, but since I knew his stature and it was a loose piece, I worked with an estimate that I was sure would fit him perfectly.
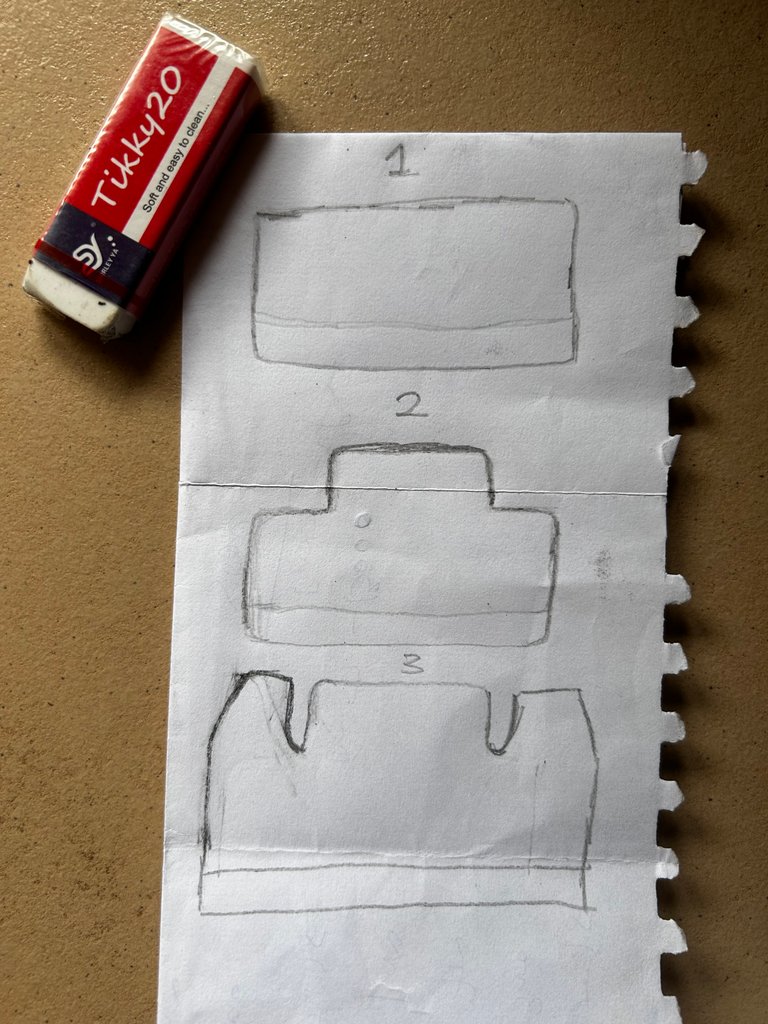
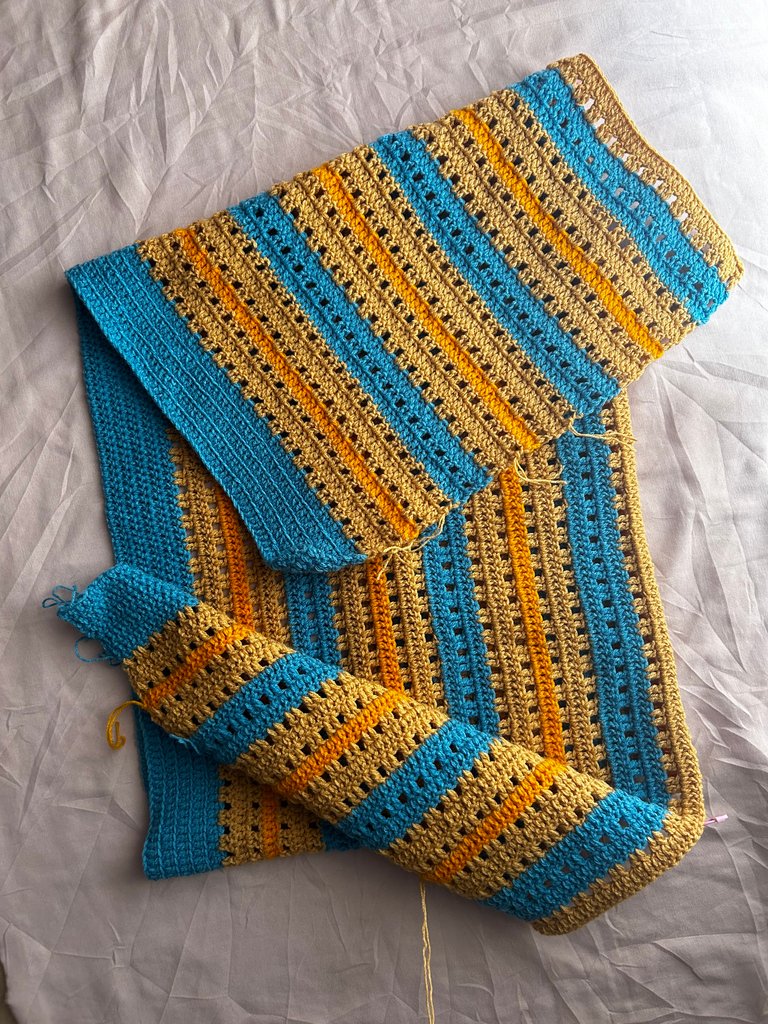
Usually, for a button down shirt, I’d work in panels — a back panel and 2 front panels for the right hand side and left hand side. This time, I decided to do it differently. I’d work it in one long panel that I would fold to form the front as well as the back. Then, when it’s time to shape out the arm holes, I’d work the front and back separately. See below for an illustration. With this method, I wouldn’t have to sew the panels at the sides, only at the shoulders.
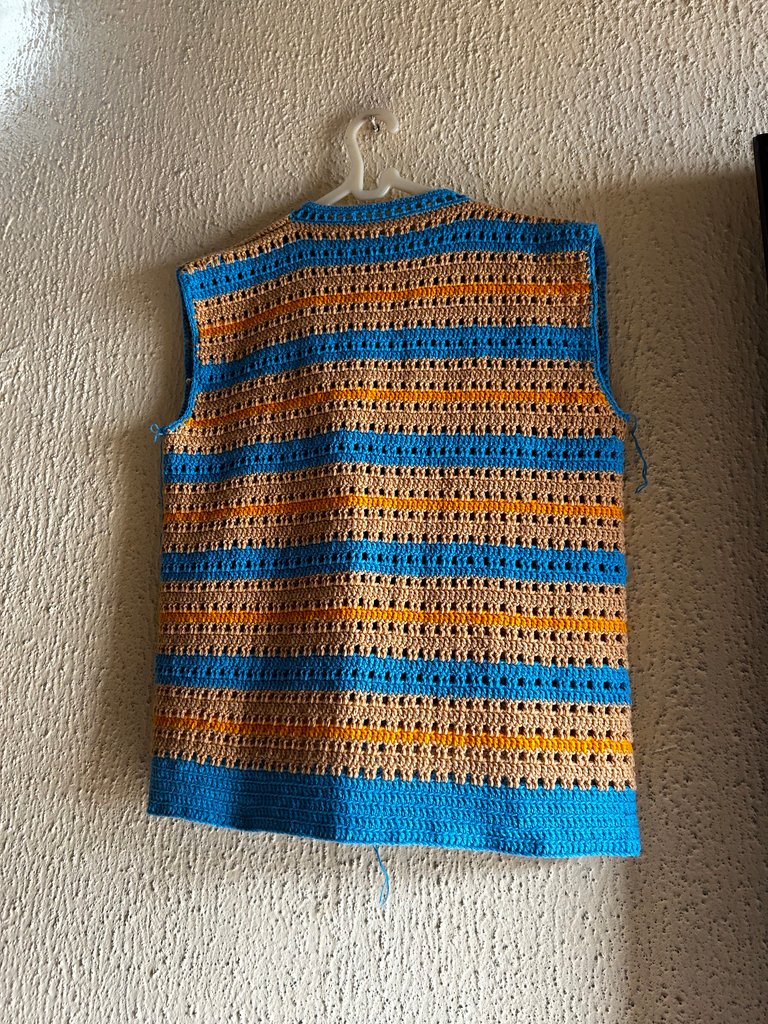
I made the bottom slightly different feom the inspo. How I achieved the look below is by crocheting it as a sort of ribbing. After the foundation chain, I did double crochets then in the 2nd row, I did the double crochets in the back loops. Not only that, rather than chain and turn my work to crochet on the other side, I continued to work on the right side only. That means that at the end of the row, I’d cut my yarn and start from where I began.
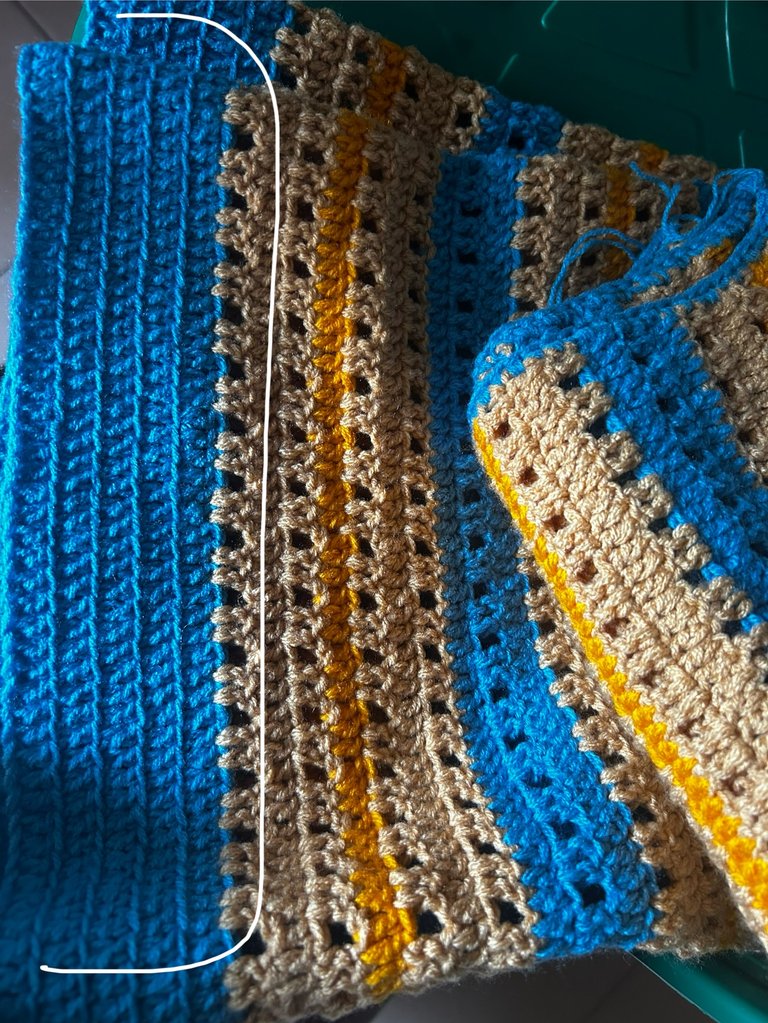
After five rows of that, I began the main body. I was going to be using the mesh stitch of two double crochets in 2 consecutive stitches then a skipped stitch. The pattern was a repetition of 1 row of mesh stitch and 1 row of double crochet. How I did that with the colours was 3 rows of nude, then 1 row of yellow, and 3 rows of nude again. After that, I do 3 rows of blue, then repeat the pattern.
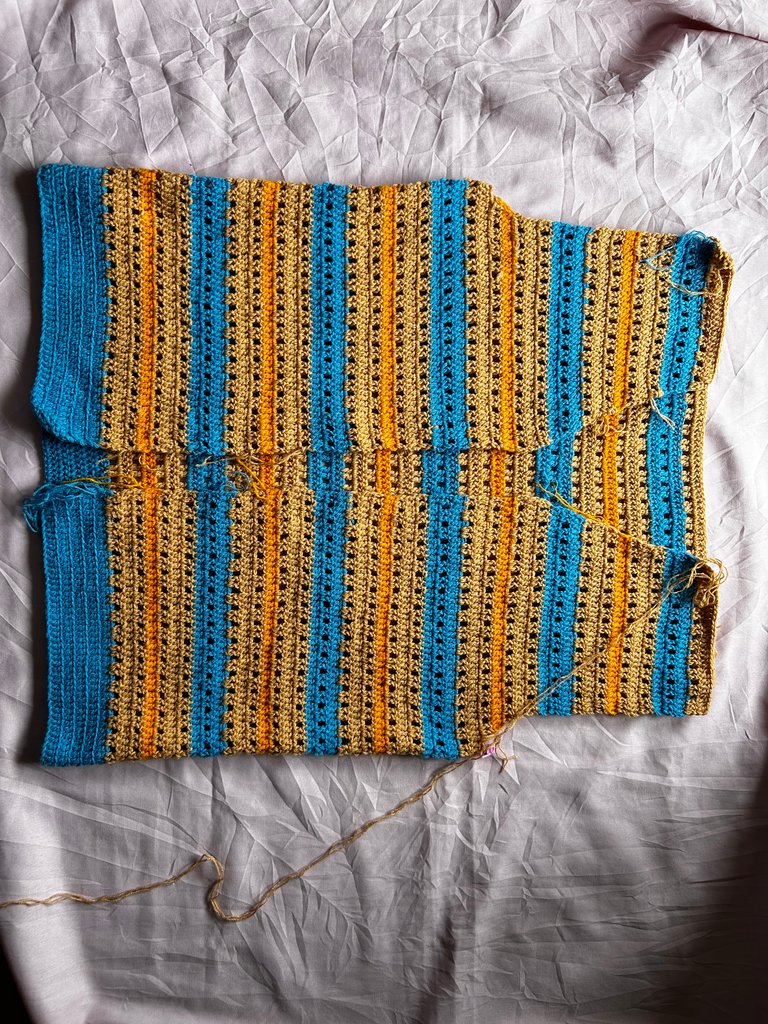
When I got to the underarm, I divided the entire width measurement by 2 (to get the front and back measurements, then removed 2 inches for the plackets (the part for the buttons and button holes) before dividing by 2 again to get each panel of the front. After doing this, I didn’t work with the measurement anymore because I decided to do the calculation with the number of stitches instead of the number of inches. Instead of removing 2 inches for the placket, I removed 8 stitches.
After all the calculations, I continued crocheting. I workd on the back first. I shaped the armhole by leaving two stitches and crocheting from the 3rd stitch, ending the row 3 stitches to the end. For the first three rows, I did reductions at the beginning and end, doing 2 double crochets together. After those 3 rows, it was straight till I did the last row.

I crocheted the front the same only that I worked the right-hand side separately from the left-hand side. Also, I had to make the v by reducing on every row from the fourth till I got to the top.
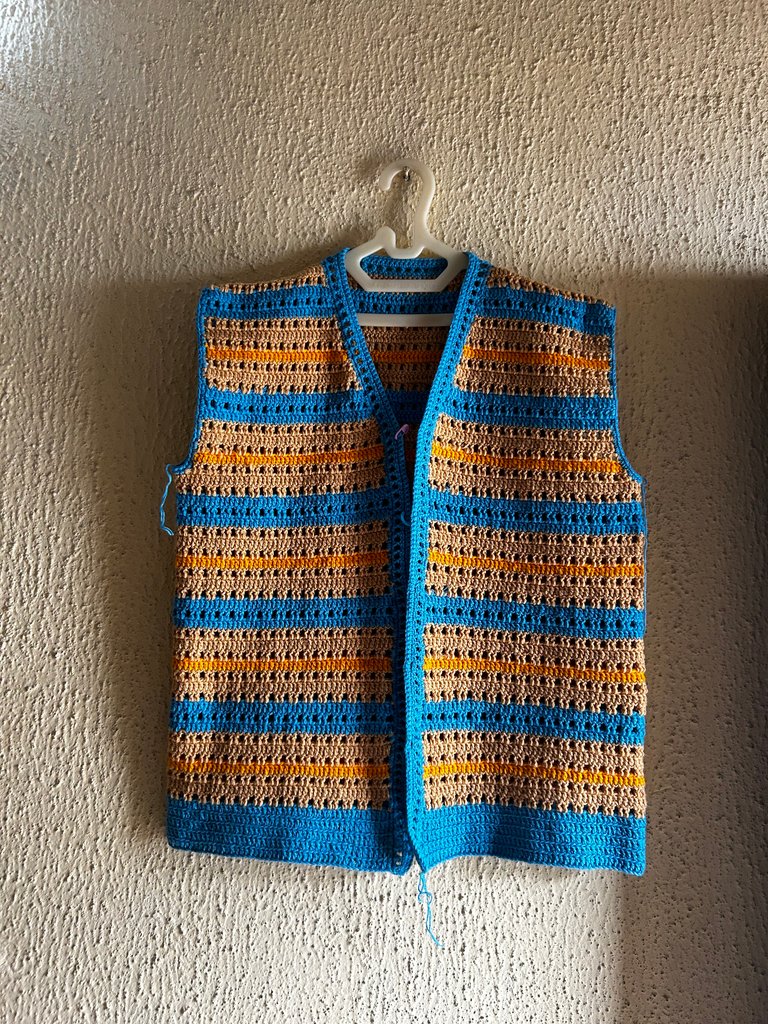
The next step was to join the piece at the shoulders. After that, I started the armholes. The plan was to do the mesh stitch and single crochet like the inspo, but the mesh came out big so I just settled for crocheting round with single crochet. I liked the look of it. Then, I proceeded to work on the placket (the part for the buttons and button holes)
which I crocheted with the mesh stitch and single crochet.
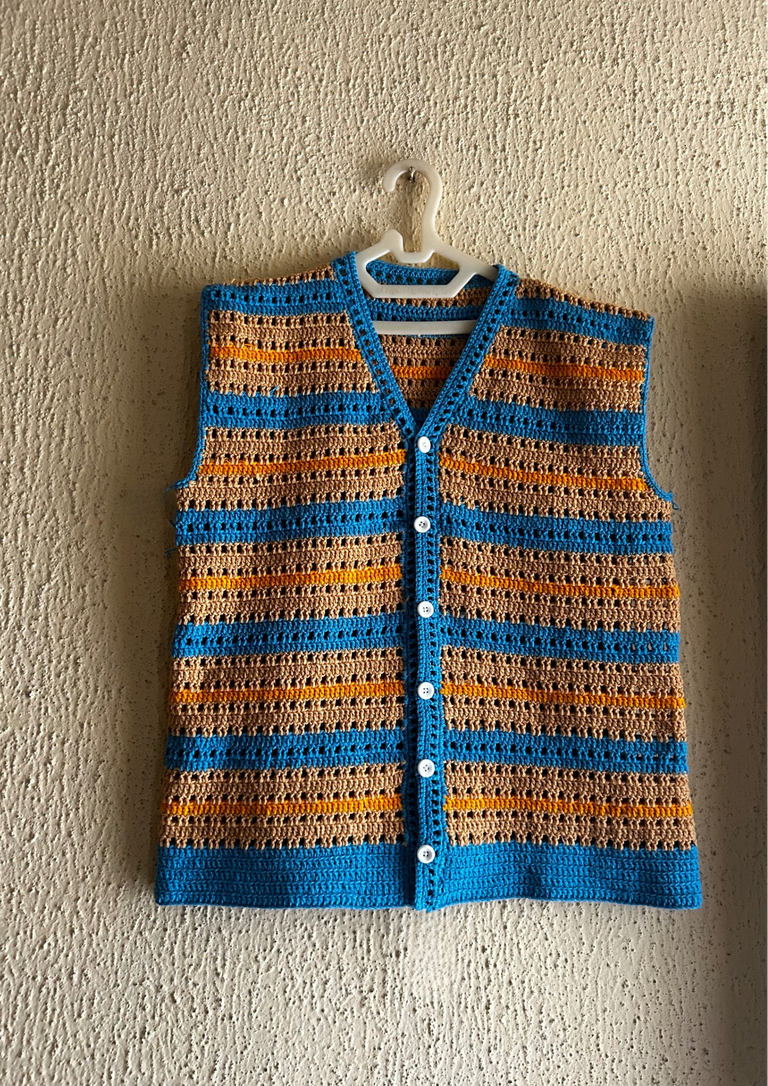
Lastly, I sewed in the buttons. Guys, just take a kook at my creation!
Soon, I began to imagine I’d made the jacket a cargo vest instead. Wouldn’t it eat?
In fact, I’ll be making that soon. The next guy that comes to me to make him a crochet piece would be getting a cargo vest.
Till next time, guys. Ciao!
Your project looks pretty good as is... it was a good design choice. Although surely with all those pockets it could look great too :)
Thank you so much! 😊I appreciate your feedback.
your project is wonderful, it's perfect, clean. i loved the pictures. the whole combination of colors is beautiful. saludos desde Venezuela.
☺️Thank you so much, Carolina! I really appreciate your comment. Thanks for visiting my blog!