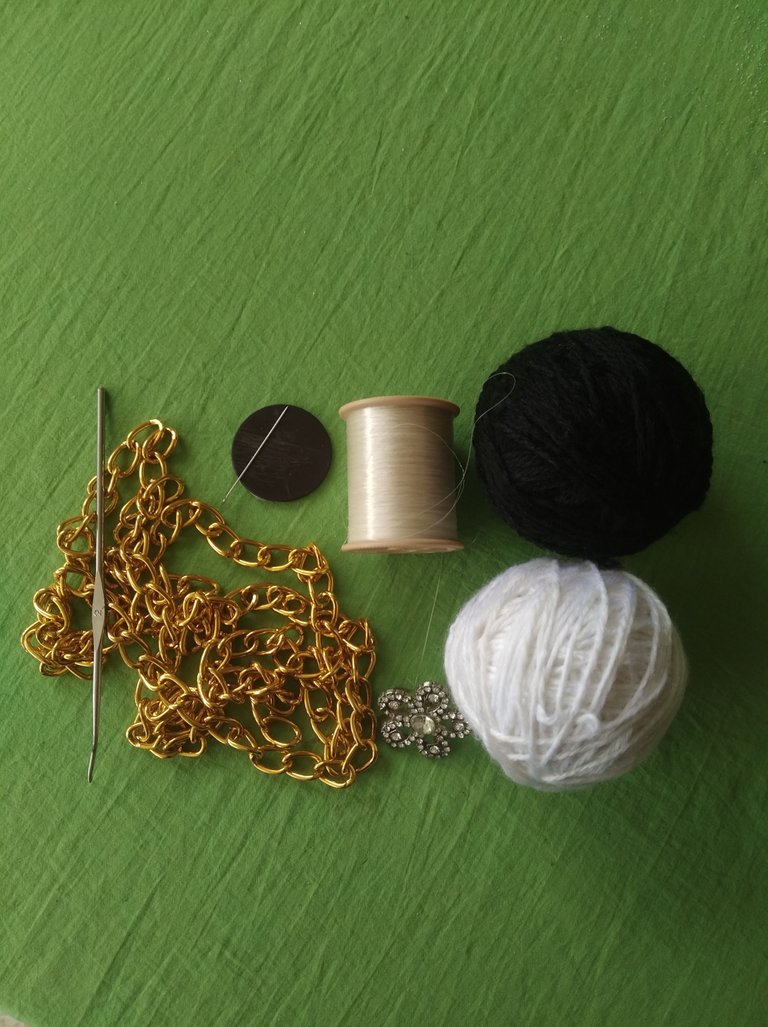
Hoooolaa!! Feliz día querida comunidad de needlworkmonday, estoy muy contenta de volver por aquí después de pasar varios días de reposo por una pequeña operación de un ojo, que ya gracias a DIOS estoy muy bien, hoy quiero compartirles el paso a paso para elaborar este hermoso proyecto que consiste en la realización de una sensacional bandolero para mi sobrina de 13 años. Para ello utilicé: ovillos de lana blanco y negro, una cadena dorada, un broche en forma de flor, hilo de nylon, aguja de tejer N° 2 y una aguja de coser.
Hoooolaa !! Happy day dear community of needlworkmonday, I am very happy to return here after spending several days of rest for a small operation on one eye, which thanks to GOD I am very well, today I want to share with you the step by step to develop this beautiful project which consists of making a sensational bandit for my 13-year-old niece. For this I used: black and white wool balls, a golden chain, a flower-shaped brooch, nylon thread, knitting needle No. 2 and a sewing needle.
PASO A PASO
STEP BY STEP
*Comenzaremos con una cadeneta de 46 puntos con la lana negra, nos devolvemos levantando sobre ella tantos puntos bajo como el tamaño de la cadeneta, al final nos regresamos dando con este mismo color de lana 4 vueltas.
We will start with a chain of 46 stitches with the black yarn, we return by lifting as many double crochets as the size of the chain, at the end we return with this same color of yarn 4 rounds.
*Seguimos uniendo la lana blanca, sobre lo ya realizado con la negra y hacemos nuevamente 4 vueltas con este color y después de estas, volvemos a subir los puntos con la lana negra.
We continue joining the white wool, on what has already been done with the black one and we do again 4 rounds with this color and after these, we go back up the stitches with the black wool.
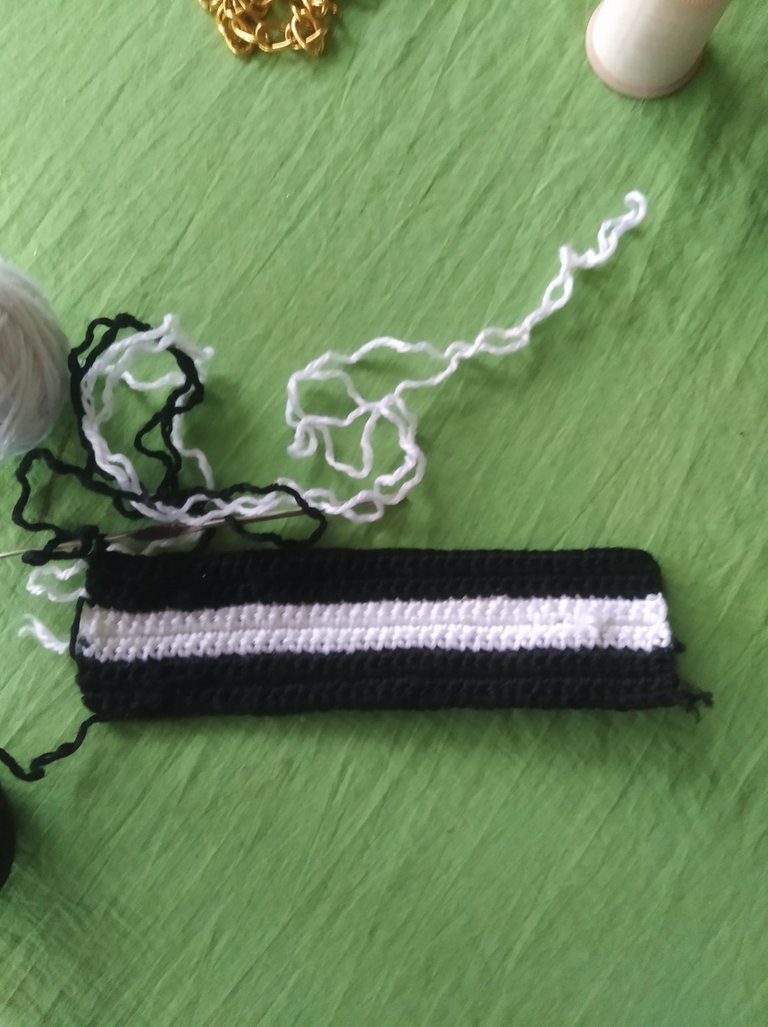
*Esto lo seguimos haciendo intercalando los colores de la lana formando un pilar de líneas blancas y negras.
We continue to do this by interspersing the colors of the wool, forming a pillar of black and white lines.
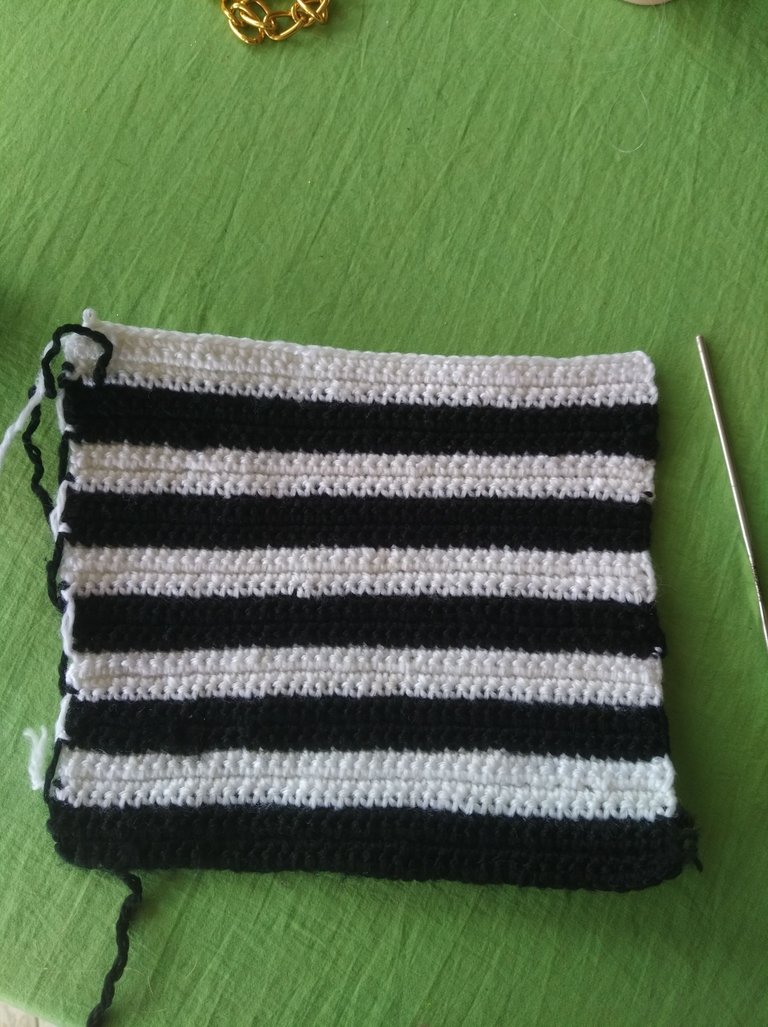
*Así continuamos intercalando los colores hasta llegar a un pilar de 27 líneas, observa muy bien comenzamos con el color negro y debemos terminar con este mismo color, para el momento de hacer el cierre de la bandolera se encuentren las líneas.
So we continue interleaving the colors until we reach a pillar of 27 lines, observe very well we start with the black color and we must end with this same color, by the time we close the bandolier the lines are found.
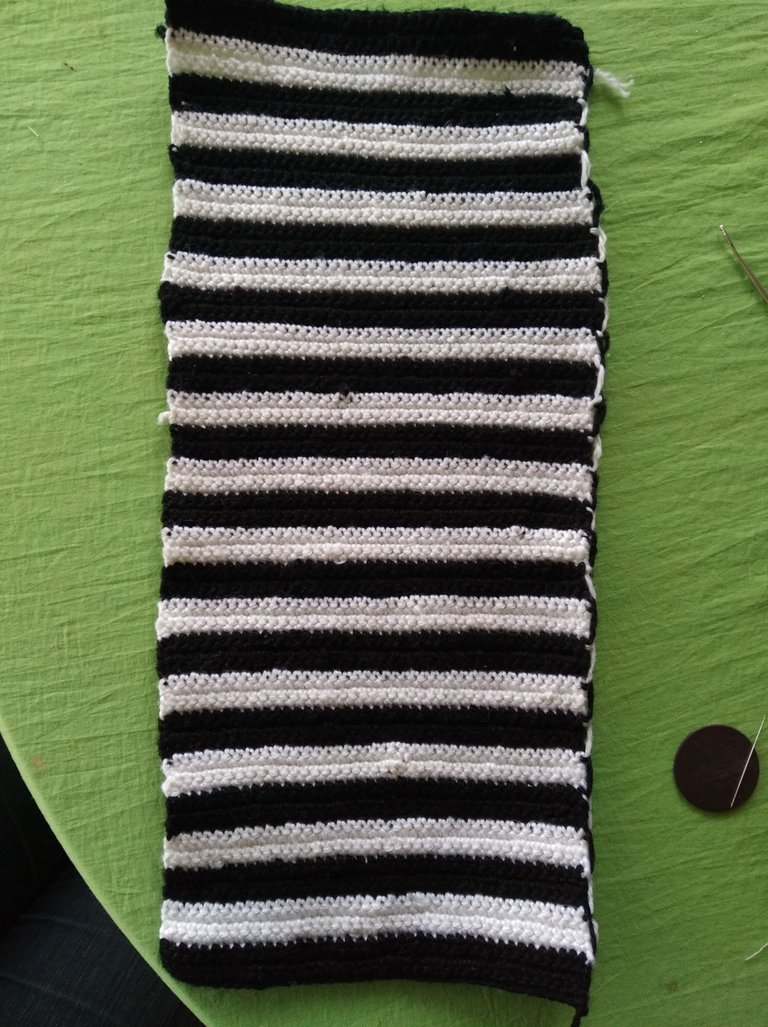
*Ahora doblamos el pilar según el tamaño que desees el bandolero, tomando en cuenta que al doblarlo se encuentren las rayas, dejando dos líneas que servirán como solapa y comenzamos a unirlo cosiendo con el hilo de nylon por ambos lados hasta que quede bien asegurado.
Now we fold the pillar according to the size you want the bander, taking into account that by bending it the stripes, leaving two lines that will serve as a flap and we begin to join sewing with the nylon thread on both sides until it is
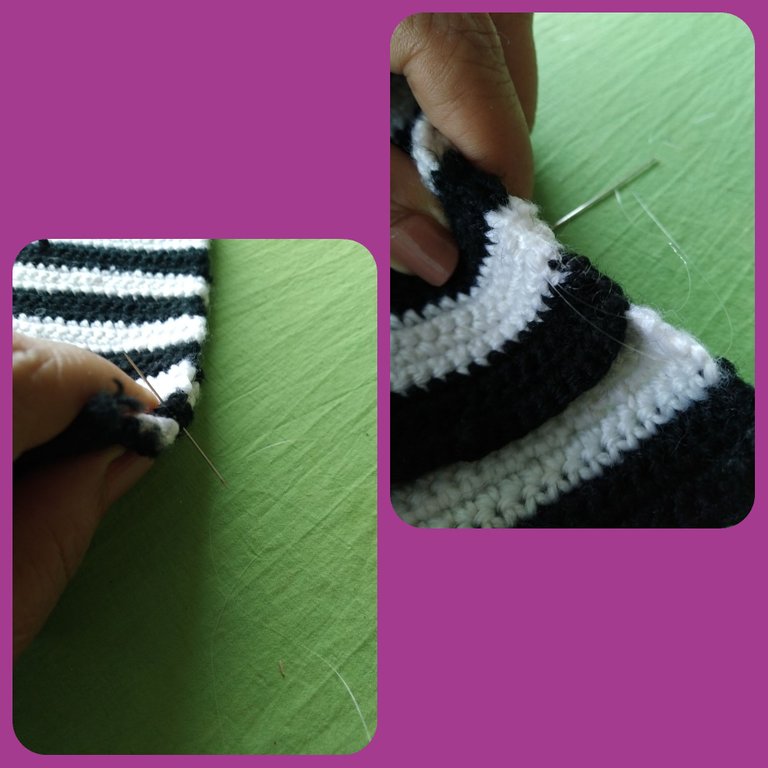
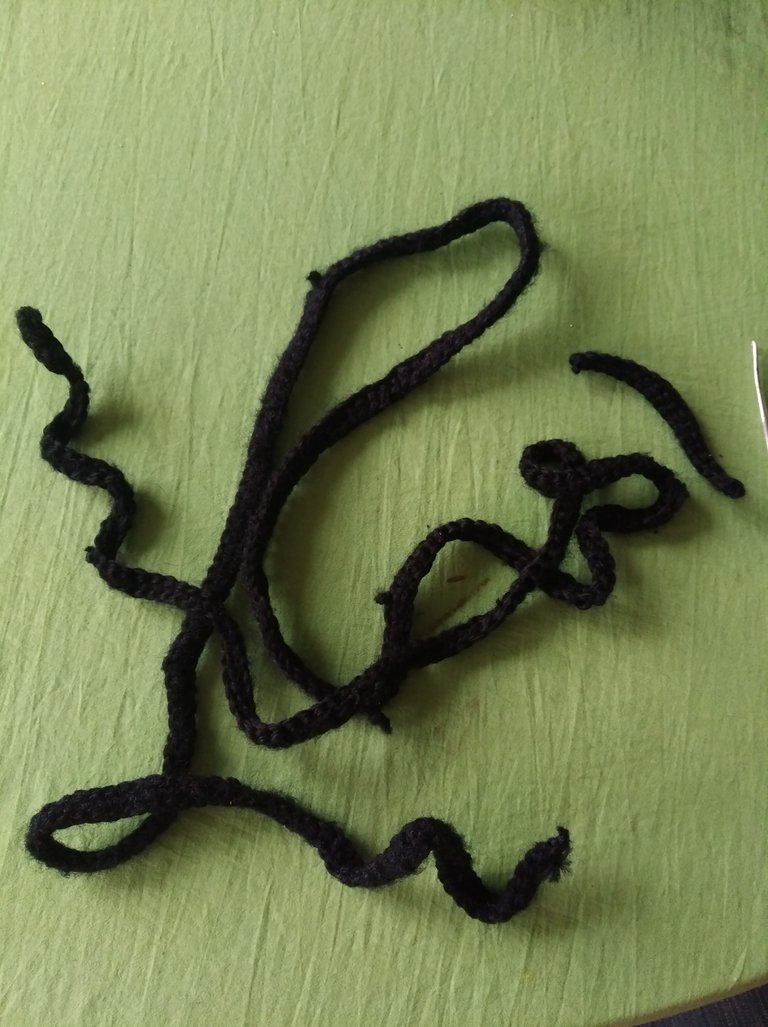
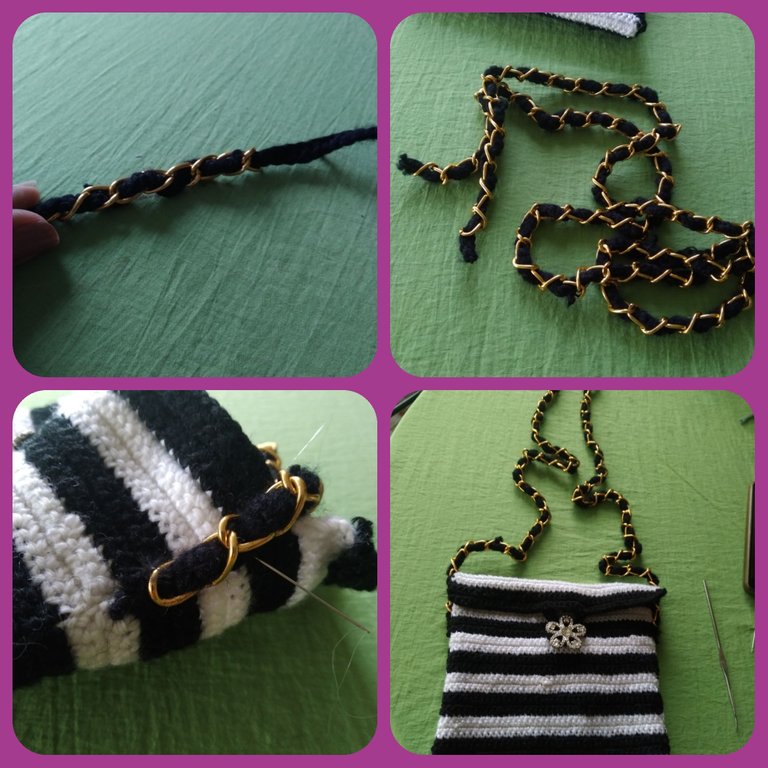
*Seguidamente tejemos una cadeneta de 18 puntos y encima puntos bajos, para hacer el cordón de cierre que pegaremos de la solapa y por otro lado hacemos una cadeneta de 240 puntos y luego puntos bajos, que servirá para colgar la bandolera.
Then we weave an 18-point chain and on top of low points, to make the closing cord that we will stick from the flap and on the other hand we make a 240-point chain and then low points, which will serve to hang the bandage.
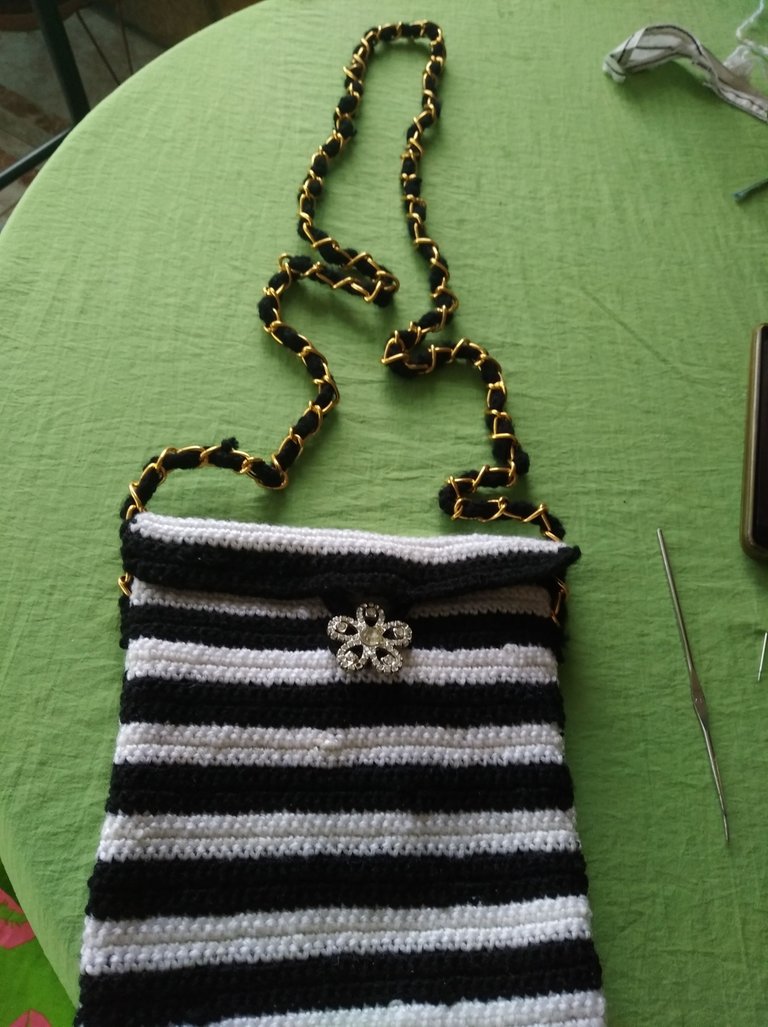
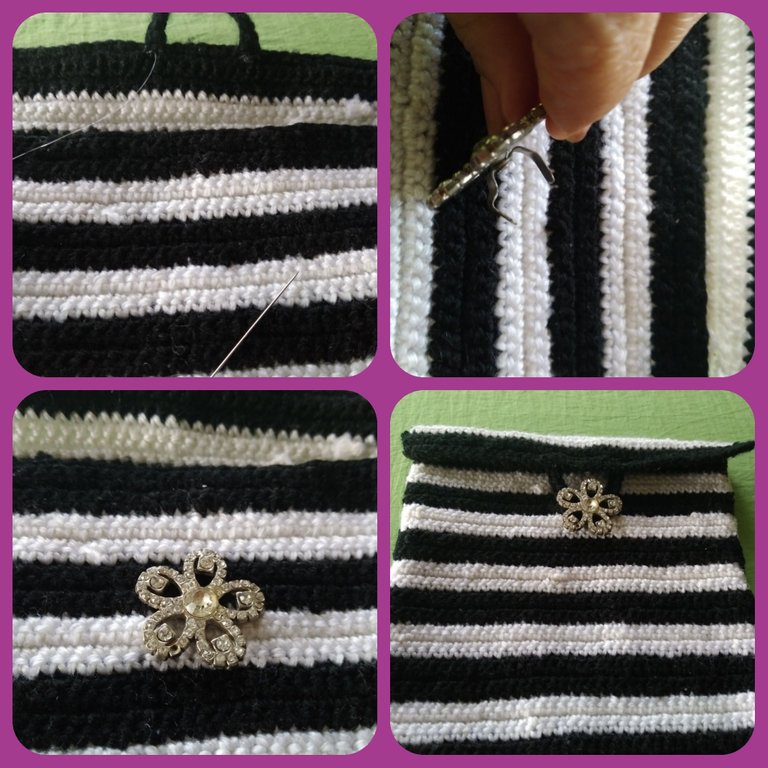
*Pegamos a la bandolera el cordón de cierre y luego pegamos el broche tipo flor y cerramos.
We paste the shingle the closing cord and then we paste the flower-type brooch and close.
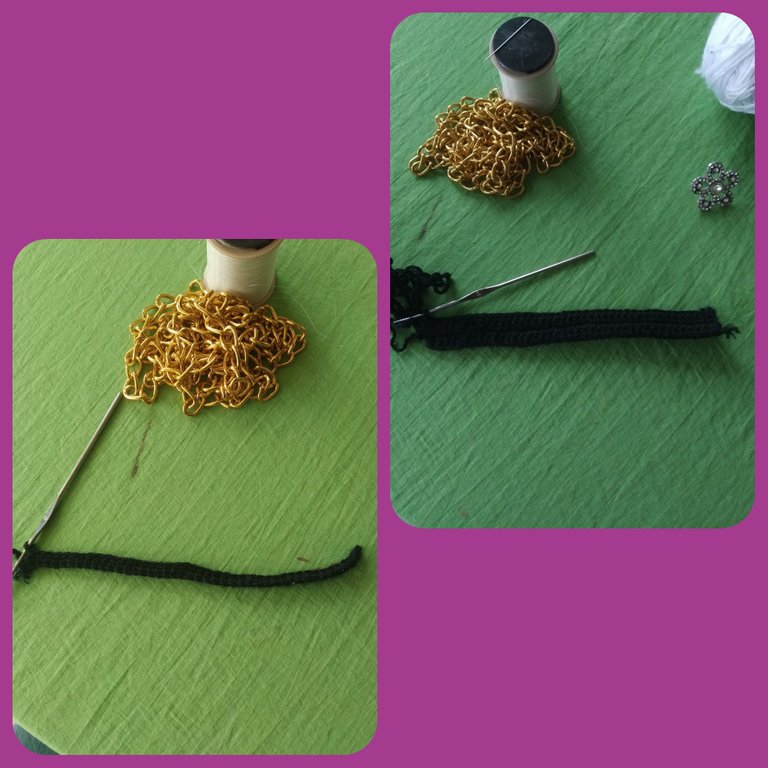
*Ahora procedemos a pasar el cordón para colgar la bandolera a través de los eslabones de la cadena y luego lo pegamos a ambos lados de la bandolera y listo
Now we proceed to pass the cord to hang the shoulder strap through the links of the chain and then glue it to both sides of the shoulder strap and that's it
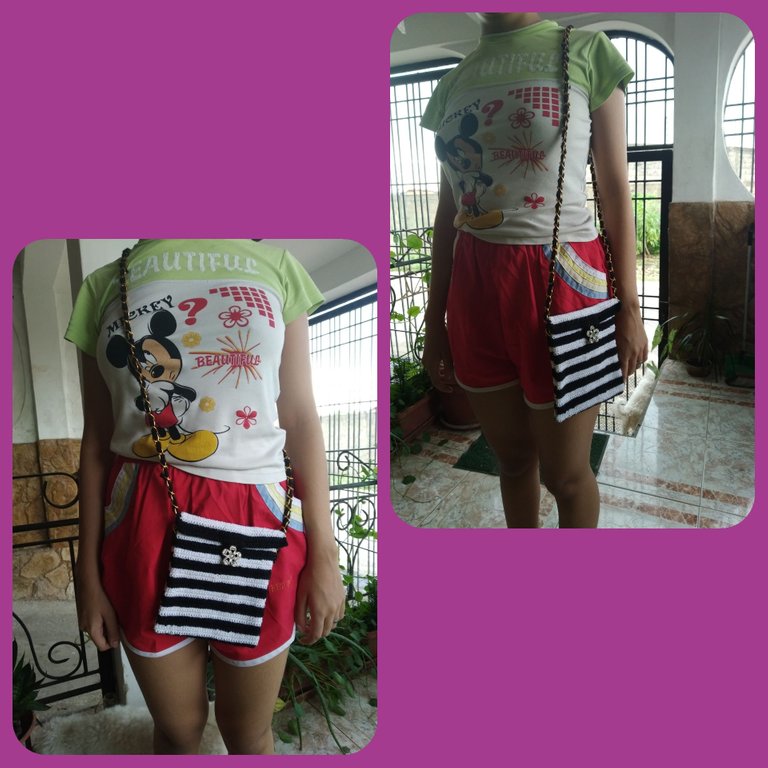
*Ya está listo nuestro proyecto, me encantó realizar esta sencilla bandolera, estoy segura que a mi sobrina Paulina y a ustedes también les va a encantar, ustedes la pueden realizar con sus colores preferidos así como las medidas o tamaño que deseen. Saludos y bendiciones para todos.
Our project is ready, I loved making this simple shoulder bag, I'm sure my niece Paulina and you will also love it, you can make it with your favorite colors as well as the measurements or size you want. Greetings and blessings to all.
Wow lovely bag so nice 👍 weldone and thanks for sharing 😊
Hola @maria1835 es un gusto tenerte de vuelta por la comunidad. Has elaborado una muy bonita bandolera tejida, a mi me encantan los bolsos tejidos lucen muy bien.
Gracias por compartir una publicación muy bonita y ordenada, saludos!