I’m a professional seamstress, and I recently had a customer who wanted me to make him a Duchess Shirt. He wasn’t sure what style he wanted, so I showed him some pictures of different shirts I had made. He ended up choosing a style that was similar to one of the shirts I had made for myself.
I used a pattern to make the shirt, and I added some special touches to make it unique.
The customer was very happy with the shirt, and He even asked me to make another one in a different color.

There's something about the Duchess shirt that just looks and feels amazing. I've been in the bespoke shirt business for sometime now, and I've never made a shirt that my customers love as much as this one.
The Duchess shirt is made with a luxurious fabric that feels amazing to the touch. It's also cut to perfection, with a slim fit that looks great on any body type. And the best part? The Duchess shirt is completely customizable, so you can choose your own collar, and button style to create a shirt that's truly unique.
I'm so proud of the Duchess shirt, and I know my customers will love it too. Thanks for considering it for your next shirt!
Making clothes with quality and beautiful fabric is the best because it gives you that satisfaction in the finishing of the cloth. In this article, I will be outlining how I made this green duchess shirt but before that, the materials I used for the shirt are: duchess fabric, green thread, hard gum paper, buttons, tape, fabric scissors, and gum stay.
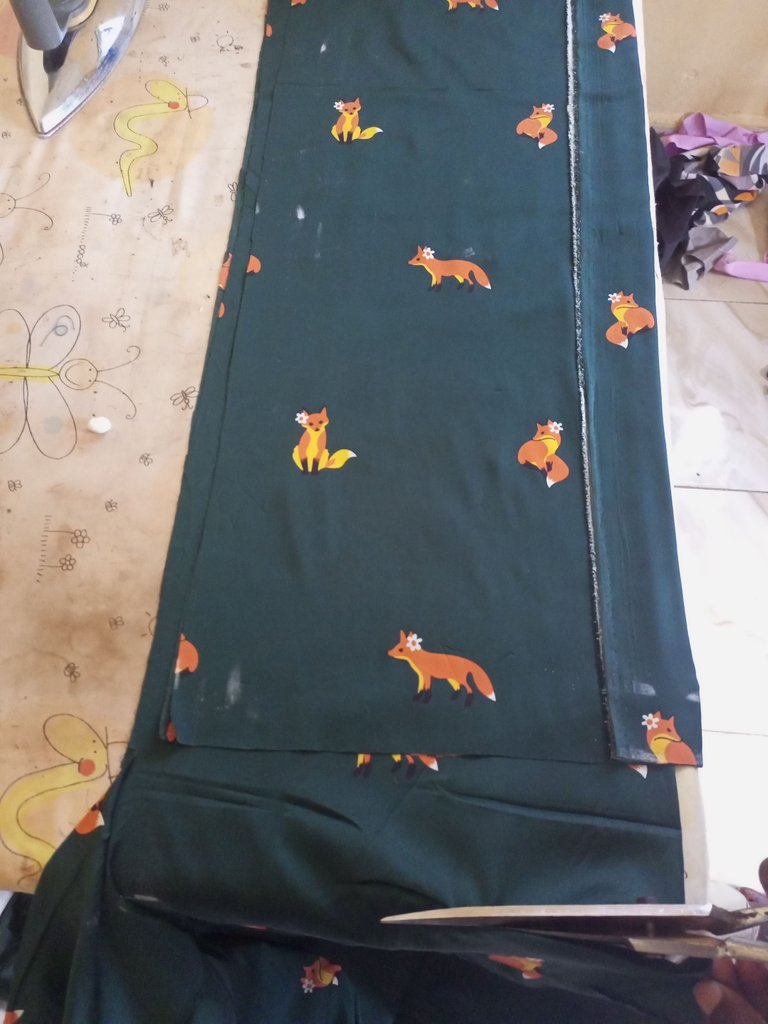
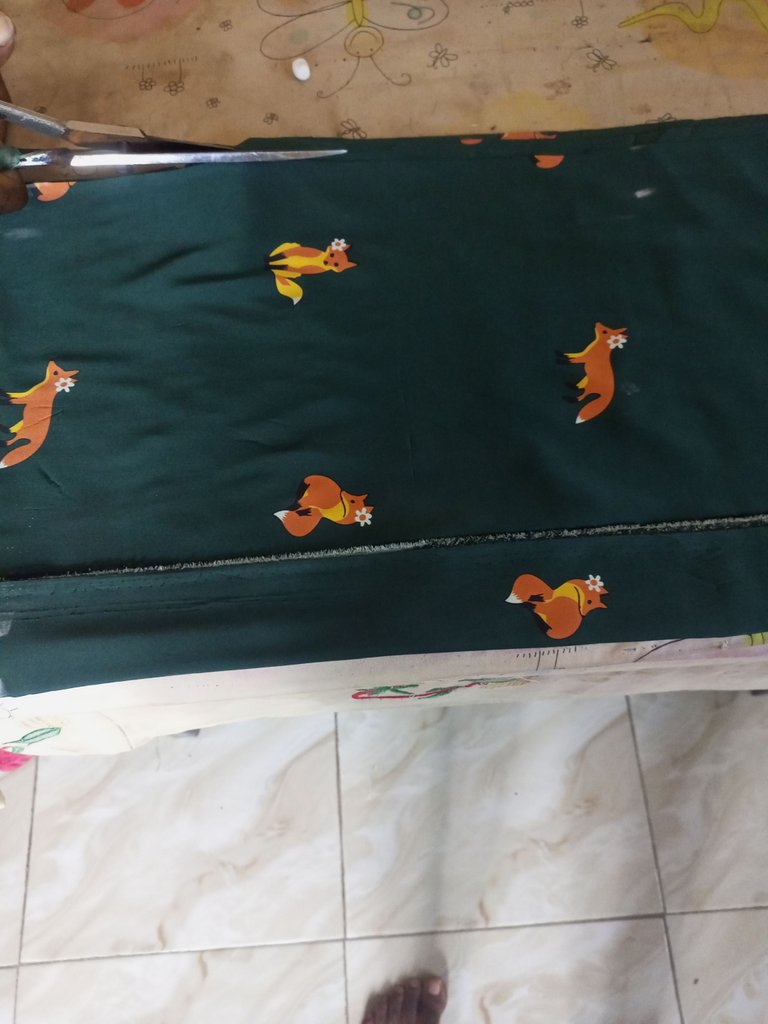
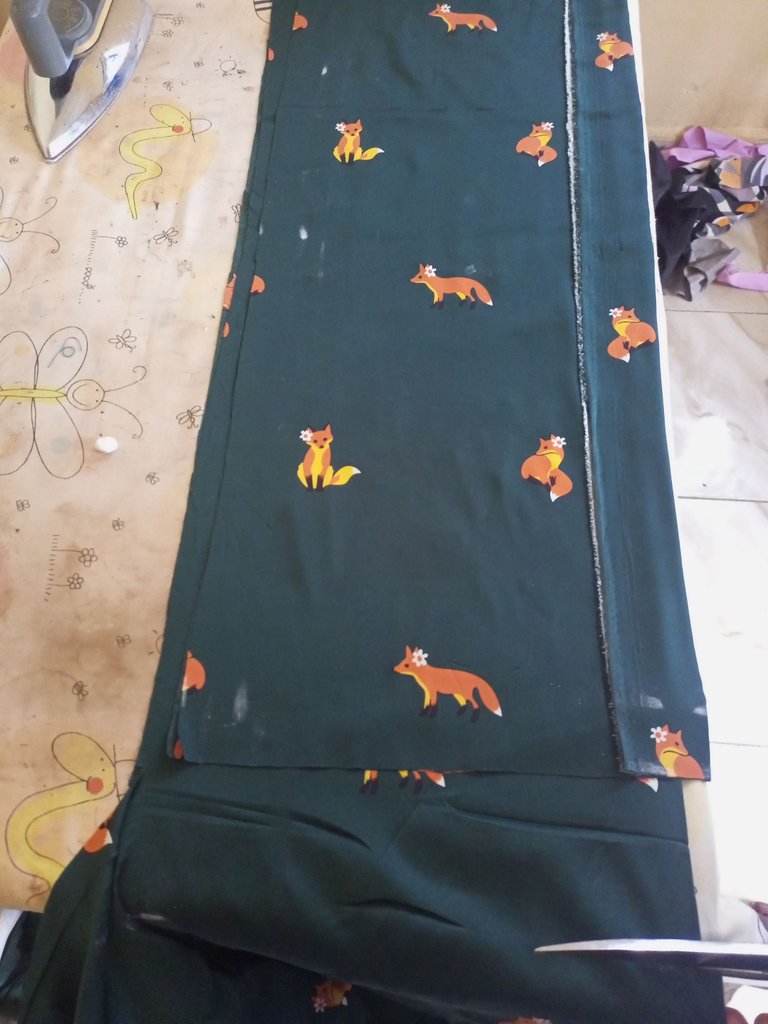
First step: I placed the fabric on my ironing table and ironed out the wrinkles to get a perfect measurement when and after cutting, I double folded the fabric and used my client`s measurement to cut out the front part of the shirt, then I still double folded another part of the fabric, placed the front part of the shirt on top of the folded fabric to cut out the back part of the shirt, then I went cutting out the neck space, armhole, and slitting of the font part into two equal parts, I cut out the short sleeve, the back facing and the collar.
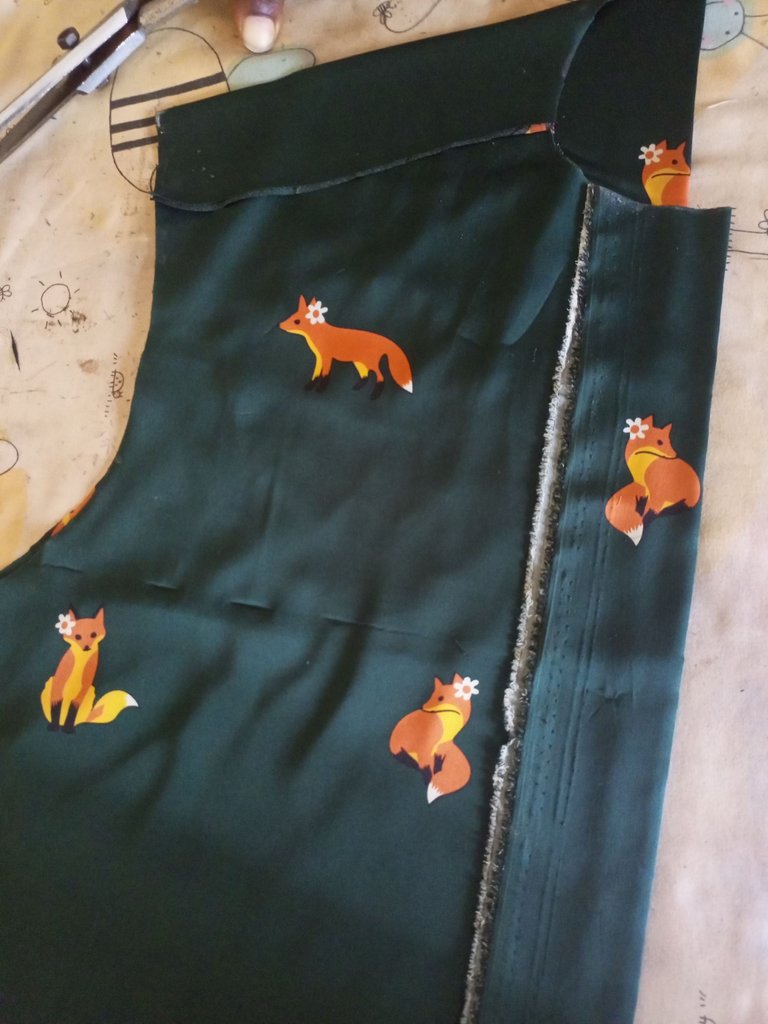
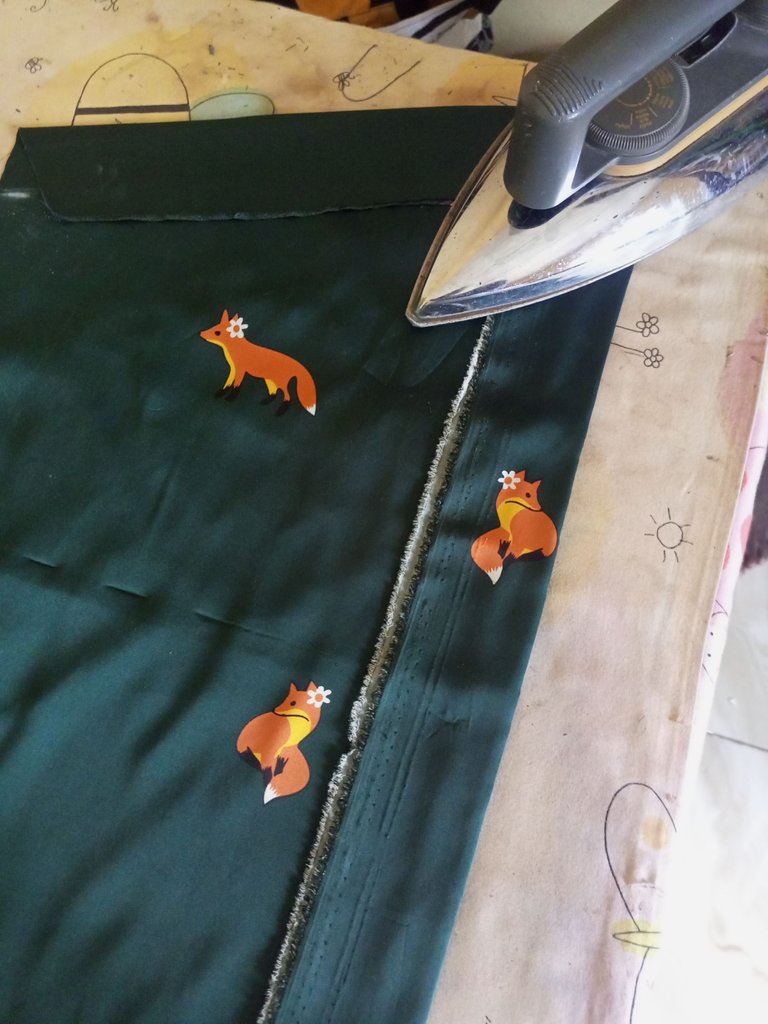
The gumming part: I placed my hard gum paper and cut the shape of the collar out and gummed it on one part of the fabric and cut it out including the fabric for cover stitching, the reason why is good to gum shirt collars is that it makes it firm and brings out the beauty of the shirt when firm and I placed the slitted front parts and gummed the edges with gum stay where I will put the buttons and button holes.
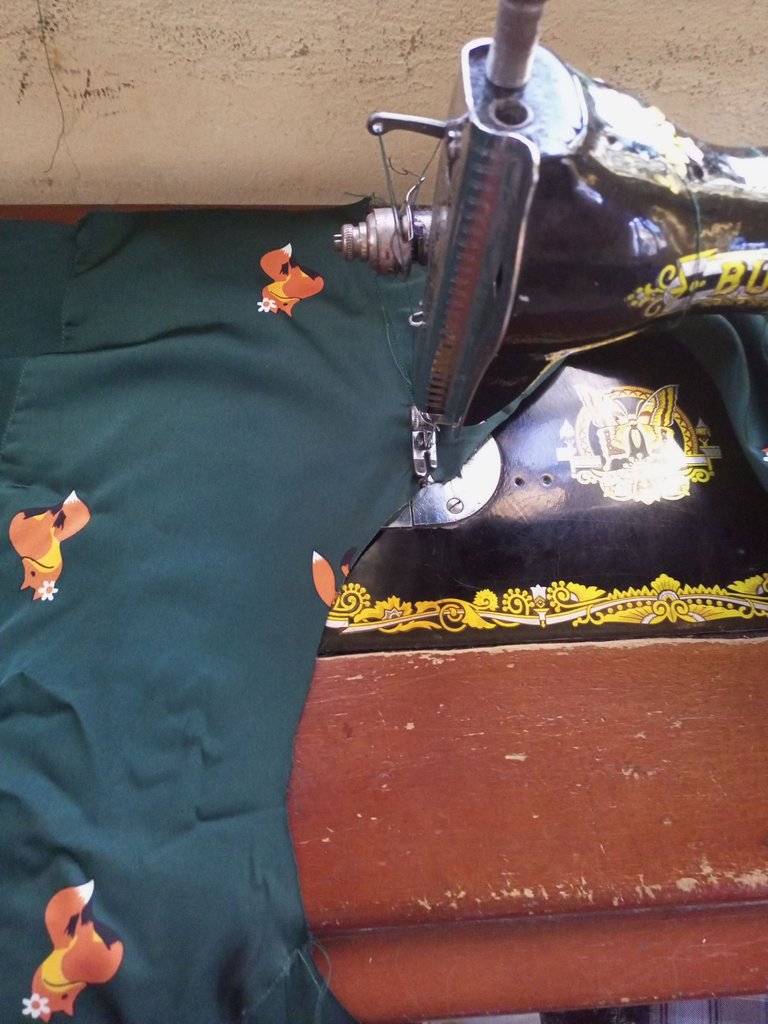
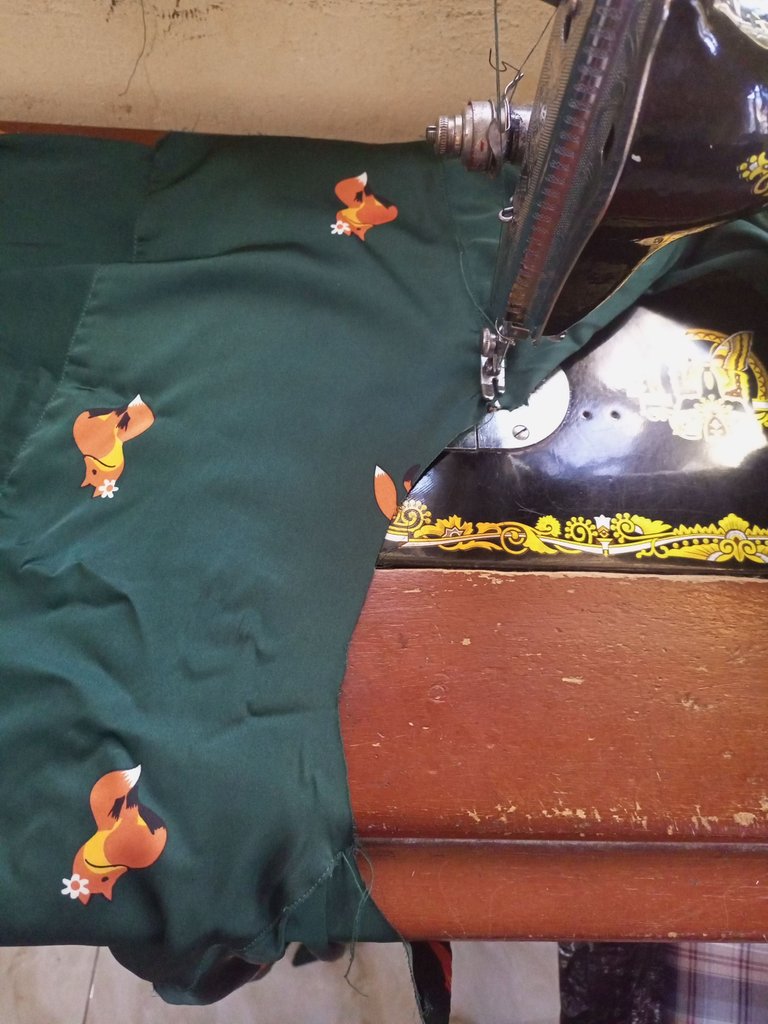
The stitching part: I work with a manual machine, so it takes me a while when stitching clothes, the part I enjoy most is the stitching part because is the process where the clothes manifest to their real shape and is usually fun when stitching, for me anyways. I stitched the back facing on the back part, then joined the shoulders, joined the sleeve to the armhole, joined the collar to the neck, and did a straight stitch from the tip of the sleeve to the down of the shirt on both sides, then stitched the down of the shirt all round. I did double stitching work on both sides and the armhole.
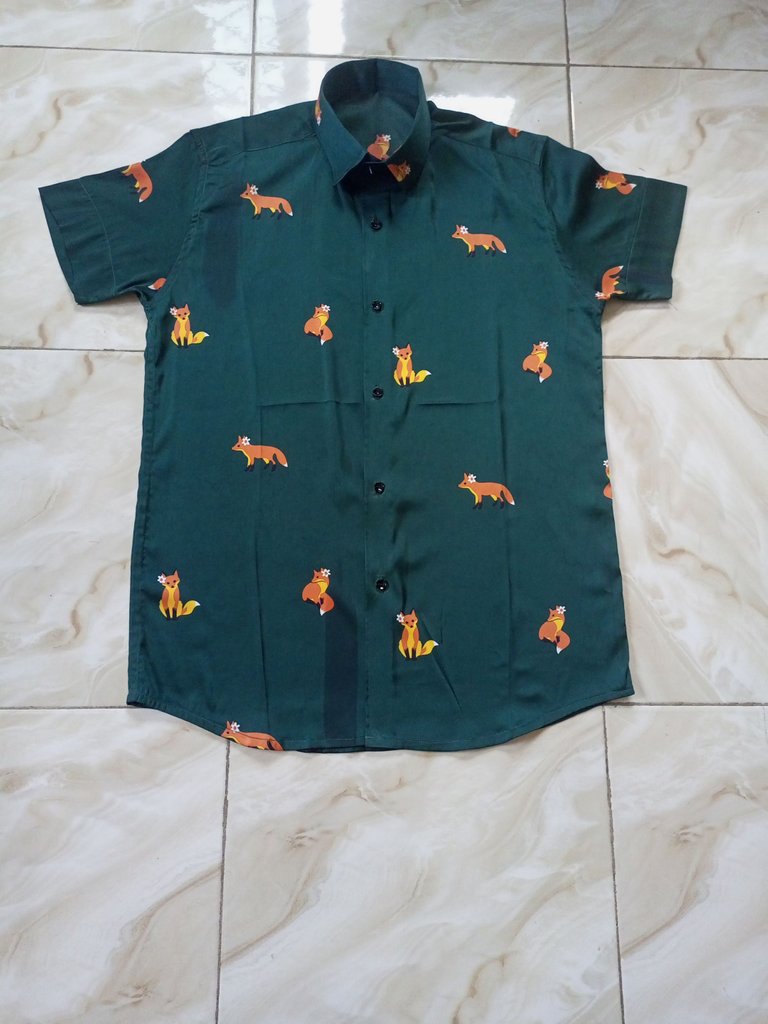
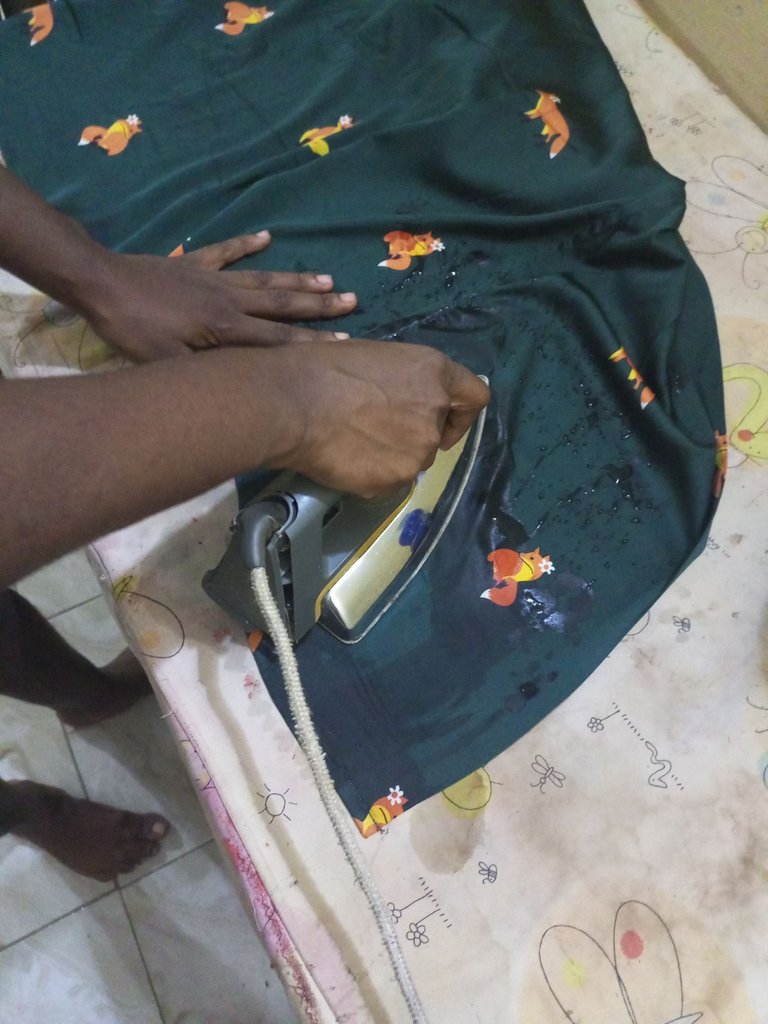
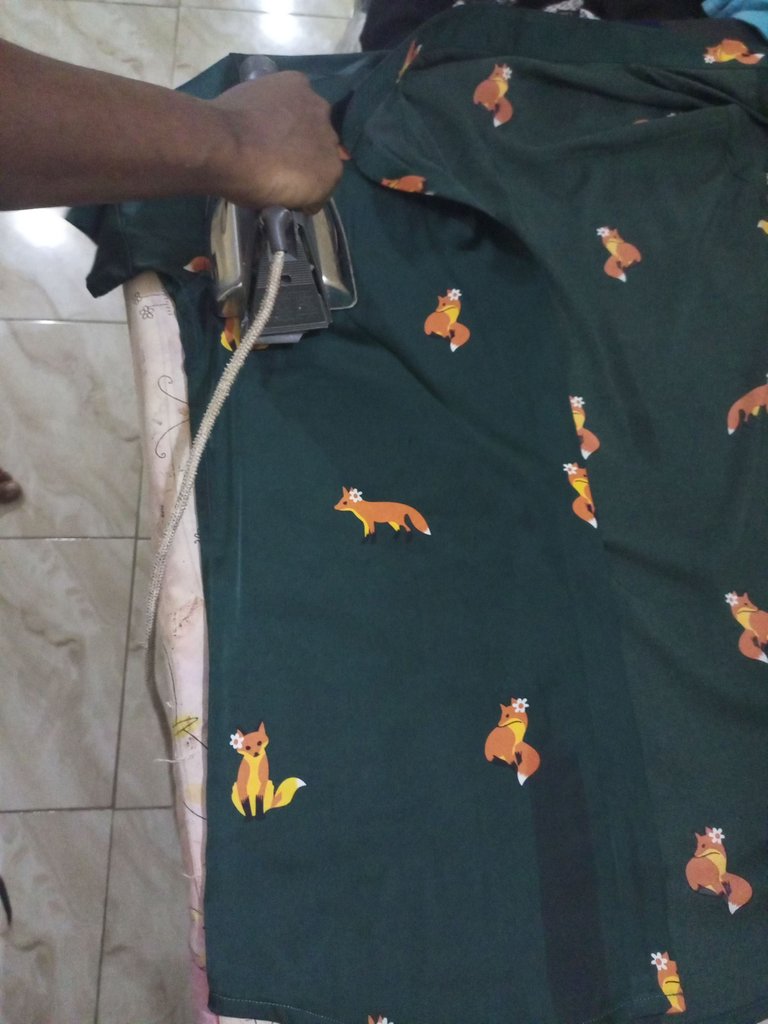
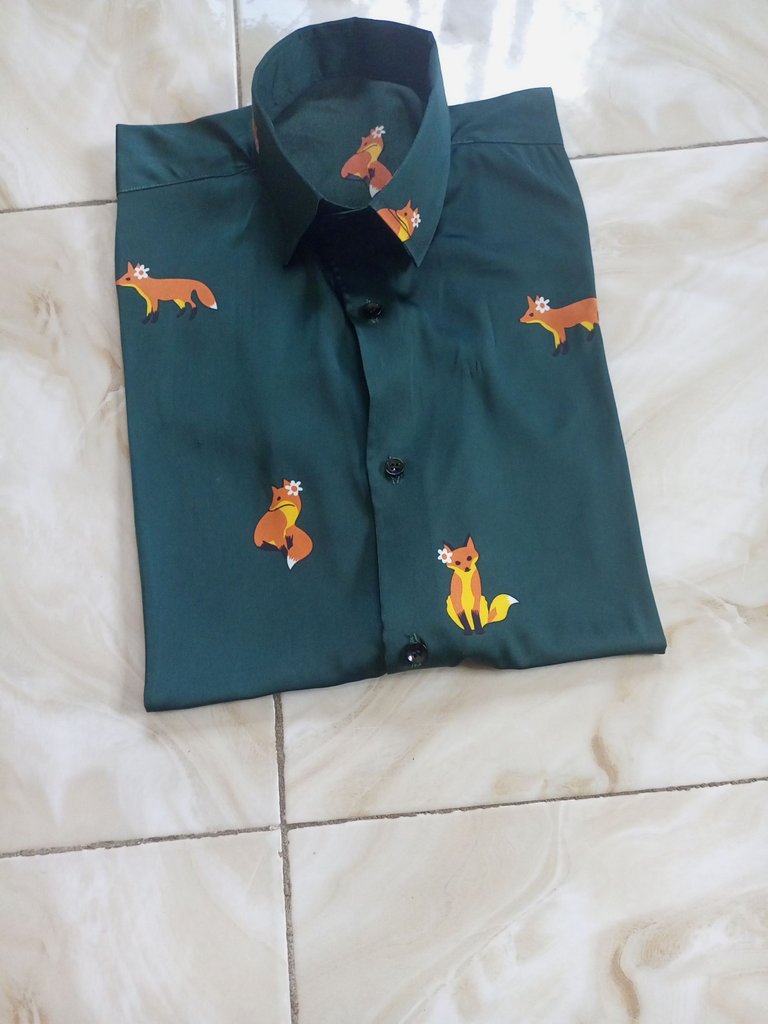
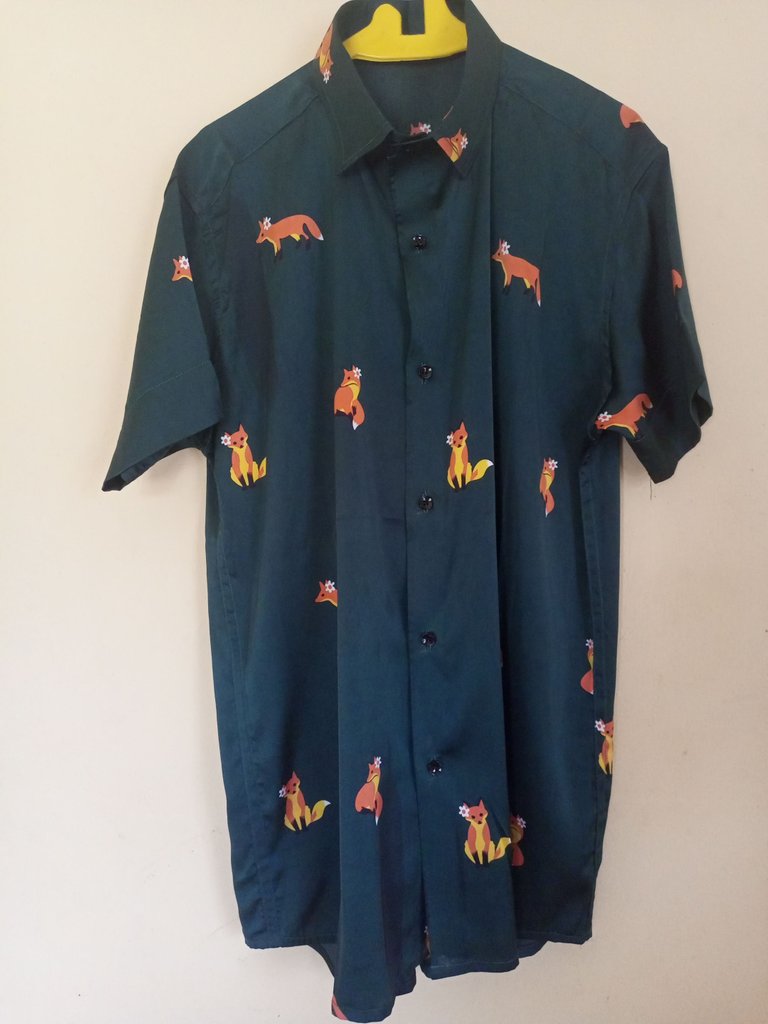
The ironing part: In this level, every part of the cloth is being ironed very well especially where the threads run through to straighten the stitched parts making it more relaxed and well-ironed. The picture below shows the result of the shirt.
Conclusion: My customer got it and called me that he liked the shirt and I was happy I satisfied my client. He also mentioned bringing more fabrics and coming with his friends who saw the shirt and liked it and wants me to make theirs too.
I love ironing clothes before sewing them just like you have done.
Am not a professional seamstress though.
This is beautiful and perfect.
Thanks for sharing.
Thank you
You are welcome
Congratulations @lilianchioma! You have completed the following achievement on the Hive blockchain And have been rewarded with New badge(s)
Your next payout target is 50 HP.
The unit is Hive Power equivalent because post and comment rewards can be split into HP and HBD
You can view your badges on your board and compare yourself to others in the Ranking
If you no longer want to receive notifications, reply to this comment with the word
STOPTo support your work, I also upvoted your post!
Check out our last posts:
Support the HiveBuzz project. Vote for our proposal!
@lilianchioma quedó bella, me encantó el estampado de la tela , gracias por compartir tu trabajo, Saludos 🤗
Looks beautiful and perfect 😍
This shirt looks so beautiful, I love the outcome as well as the material used.
This is a lovely shirt. Ironing material before sewing gives you a neat finishing. Your material design is beautiful. keep up the good work.