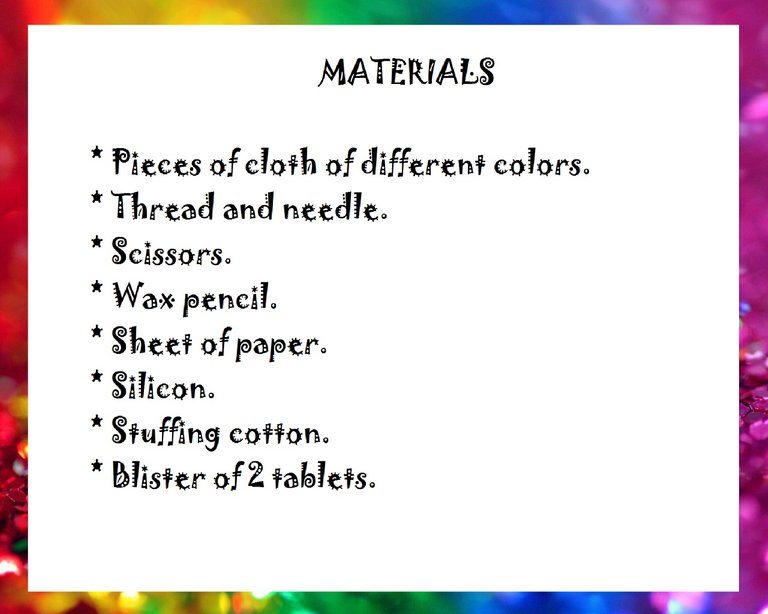

Hello my dear readers of this community, I hope you are well and that you have or have had an excellent day,
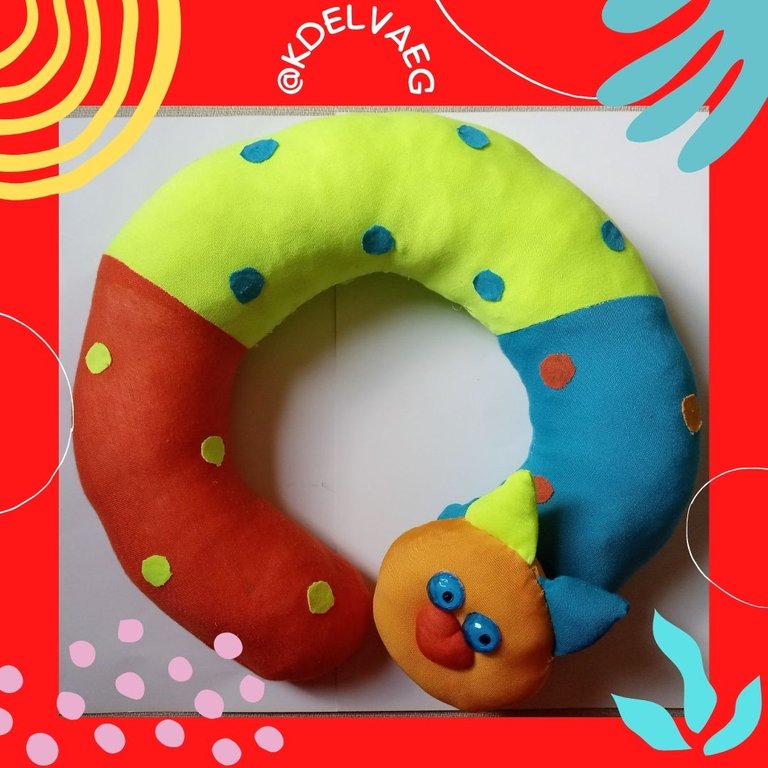
For many days I wanted to make a necklace cushion, but as I know that if I made a normal one, my daughter would want it to play, I decided to make it as if it were for her, so it will have a double function, it will be a necklace cushion and a toy at the same time.
I will explain in detail how I made it.
STEP BY STEP:


The first thing I did was to make a pattern of the cushion, for that I took the wax pencil and the paper and made two circles, I didn't use an exact measurement, I just took two round caps and with that I made the circles.

Once the pattern is ready, I will divide it into 3 parts. Since what I have are scraps of fabric, I will select 3 different colors to make the cushion and I will make each part in a different color, as shown in the pictures.


Now that I have cut out the 3 pieces of the cushion, I will sew them together and then sew it to the other 3 pieces to form the complete cushion.


To decorate the cushion I will make a cat face, so I will cut out pieces of fabric in the shape of triangles in two different colors. I will sew all around leaving one side unsewn so I can stuff it.


With the piece of orange fabric, cut out a circle to make the face, I will sew all around but placing the ears inside the orange fabric so that when I turn it over, the ears will be attached to the face at once.


Cut out also another circle to make the nose, I will also sew all around and fill with the cotton, thus forming a little ball. (I don't know how I did it but it happened to stay in the shape of a heart). 😅


With the blister of the pills, I will cut out the two capsules and on a sheet of paper, I will mark two circles the size of the capsule, I will draw what would be the pupil of the eye. I will glue the capsule to the sheet, cut out and thus form the eyes.

I got so excited when I was finishing sewing the cushion and decorating it that I forgot to take the step by step. I apologize for that, it usually happens when you concentrate on what you are doing to make it look good. But I will explain how I finished it,
With everything stuffed, I closed the face and the cushion and decorated. I cut out several fabric circles, in the different colors I used, to glue them with silicone all over the cushion.
To the face, I sewed the nose right in the center, glued the eyes with silicone and then put silicone on the back and glued it to one end of the cushion. It looks like this,


I hope you liked it and that it serves as a guide to anyone who wants to make one too, of course as always, giving it your personal touch.
I say goodbye as always, but not before thanking you for taking a little of your valuable time to visit my blog, I hope to see you in my next publication, be well and take care of yourselves.


Original creation content:
❤️ All photos are my own taken and edited with my Alcatel cell phone.
💕 The cover image was made with Canva app and edited by me.
❤️ The divider were taken from the Canva page and edited by me in Paint.
💕 The English translation was done with the help of DeepL.


Hola mis queridos lectores de esta comunidad, espero que se encuentren bien y que tengan o hayan tenido un dia excelente.
Desde hace muchos días quería hacer un cojín collarín, pero como sé que si me hacia uno normal, mi hija lo iba a querer para jugar, decidí hacerlo como si fuera para ella, así que tendrá doble función, será un cojín collarín y juguete a la vez.
Le explico con detalles como lo realice.
PASO A PASO:


Lo primero que hice fue sacar un patrón del cojín, para ello tome el creyón y el papel y realice dos círculos, no use una medida exacta, solo tome dos tapas redondas y con eso hice los círculos.

Ya con el patrón listo, lo dividiré en 3 partes. Como lo que tengo son retazos de tela, seleccione 3 colores diferentes para realizar el cojín y sacare cada parte de diferente color, tal como se muestra en las imágenes.


Ahora ya que recorte los 3 pedazos del cojín, los coseré para unirlos y luego coserlo a los otros 3 retazos más para formar el cojín completo.


Para decorar el cojín le haré una carita de un gato, así que recortaré piezas de tela en forma de triángulos de dos colores diferentes. Coseré por todo el alrededor dejando un lado sin coser para poder rellenarlo.


Con el retazo de tela naranja, recorte un círculo para hacer la carita, coseré por todo el alrededor pero colocando las orejas por dentro del tela naranja para que cuando lo voltee, queden las orejas pegadas a la carita de una vez,.


Recorte también otro círculo para hacer la nariz, también coseré por todo el alrededor y rellenaré con el algodón, formando así una bolita. (No se como lo hice pero casualmente me quedo con forma de corazón). 😅


Con el blister de las pastillas, recortaré las dos cápsulas y en una hoja de papel, marcaré dos círculos del tamaño de la cápsula, le dibujaré lo que sería la pupila del ojo. Pegare la cápsula a la hoja, recorte y así forme los ojitos.

Les cuento que me emocione terminando de coser el cojín y decorandolo que se me olvido tomarle el paso a paso. Les pido disculpa por eso, suele pasar cuando uno se concentra en lo que está haciendo para quede bien. Pero le explicare como lo termine.
Ya con todo relleno cerré bien la carita y el cojín y decore. Recorté varios círculos de tela, de los diferentes colores que use, para pegarlos con silicón por todo el cojín.
A la carita, le cosí la nariz justo en el centro, le pegue con silicón los ojos y luego coloque silicon por la parte de atrás y la pegue a una punta del cojín. Quedando de esta manera,


Espero que les haya gustado, que les sirva de guía a cualquiera que desee realizar uno también, claro como siempre, dándole su toque personal.
Me despido como siempre, no sin antes agradecerles que me hayan dedicado un poco de su valioso tiempo para visitar mi blog, los espero en mi próxima publicación, portense bien y cuidense mucho.


Contenido de creación original:
❤️ Todas las fotos son de mi propiedad tomada y editadas con mi celular Alcatel.
💕 La imagen de portada fue realizada con la aplicación Canva y editada por mi.
❤️ El separador fueron tomado de la página Canva y editado por mí en Paint.
💕 La traducción al idioma inglés fue realizada con ayuda de DeepL.
Qué hermoso que quedó!! es muy tierno y de colores super alegres e infantiles❤❤ te felicito!!
Muchas gracias y por visitar mi blog.
Gracias por el apoyo.
This post was shared and voted inside the discord by the curators team of discovery-it
Join our community! hive-193212
Discovery-it is also a Witness, vote for us here
Delegate to us for passive income. Check our 80% fee-back Program
Grateful for your support.
Your content has been voted as a part of Encouragement program. Keep up the good work!
Use Ecency daily to boost your growth on platform!
Support Ecency
Vote for new Proposal
Delegate HP and earn more
Grateful for your support.
Thank you for sharing this amazing post on HIVE!
Your content got selected by our fellow curator @stevenson7 & you just received a little thank you via an upvote from our non-profit curation initiative!
You will be featured in one of our recurring curation compilations and on our pinterest boards! Both are aiming to offer you a stage to widen your audience within and outside of the DIY scene of hive.
Join the official DIYHub community on HIVE and show us more of your amazing work and feel free to connect with us and other DIYers via our discord server: https://discord.gg/mY5uCfQ !
If you want to support our goal to motivate other DIY/art/music/homesteading/... creators just delegate to us and earn 100% of your curation rewards!
Stay creative & hive on!
Thank you very much for taking me into account.
Hola amiga ❣️😁. Que genial que quedó este juguete y almohada y todo cosido a mano. Los colores que elegiste fueron geniales para este proyecto y el detalle de los ojitos quedó muy tierno. Felicitaciones por tu proyecto, gracias por compartir ❣️.
Gracias, me alegra que te haya gustado. Escogí colores bastante llamativo, porque a los niños le llaman mucho la atención los colores. Mi hija quedo encantada. Gracias por visitar mi blog-.
Congratulations @kdelvaeg! You have completed the following achievement on the Hive blockchain and have been rewarded with new badge(s):
Your next target is to reach 4500 upvotes.
You can view your badges on your board and compare yourself to others in the Ranking
If you no longer want to receive notifications, reply to this comment with the word
STOPCheck out the last post from @hivebuzz:
Support the HiveBuzz project. Vote for our proposal!
Excelente te felicito ideal para cuando vamos de viajes largos,
Asi es amiga, ideal para descansar mientras viajamos. Gracias por el apoyo.
Resource based economy.💪🌱♻
That's right, taking advantage of any material that can be recycled.
Cute cat pillow and it looks comfortable! Nice work @kdelvaeg
The truth is that it is quite comfortable, very fluffy. Thanks for visiting my blog.
That's great :). You're welcome
!discovery 28
Thank you very much.