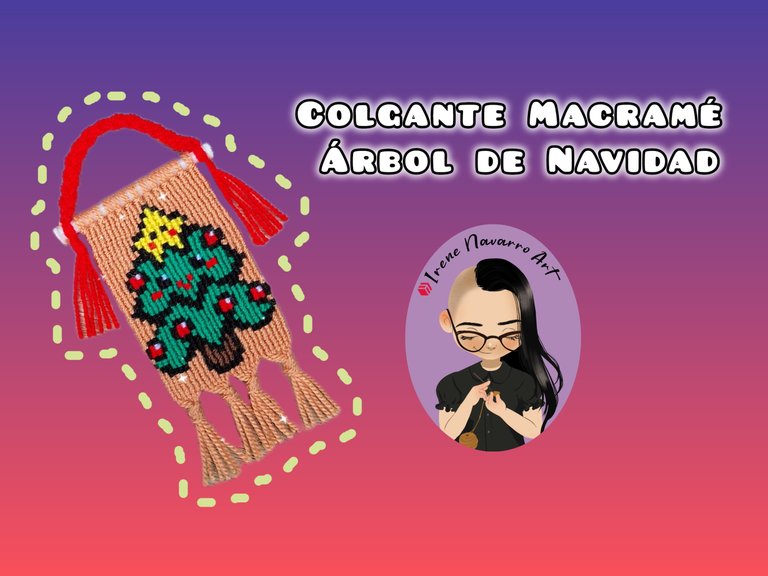
Saludos querida comunidad, estoy muy contenta de compartir con ustedes un nuevo colgante en la técnica macramé, como lo mencioné en la publicación pasada estoy haciéndolos con el fin de colgarlos en mi arbolito de navidad, hasta que todos estén listos no voy a colocar el árbol, por eso estoy trabajando con mucha prisa pero al mismo tiempo como mucho amor y enfoque para que todo salga bien, espero pronto poder completar todas la ideas, pero hoy les comparto un diseño de arbolito de navidad que me pareció muy lindo, espero les guste.
Greetings dear community, I am very happy to share with you a new pendant using the macramé technique, as I mentioned in the last post I am making them in order to hang them on my Christmas tree, until they are all ready I am not going to put up the tree, that is why I am working very quickly but at the same time with a lot of love and focus so that everything goes well, I hope to soon be able to complete all the ideas, but today I am sharing with you a Christmas tree design that I found very cute, I hope you like it.

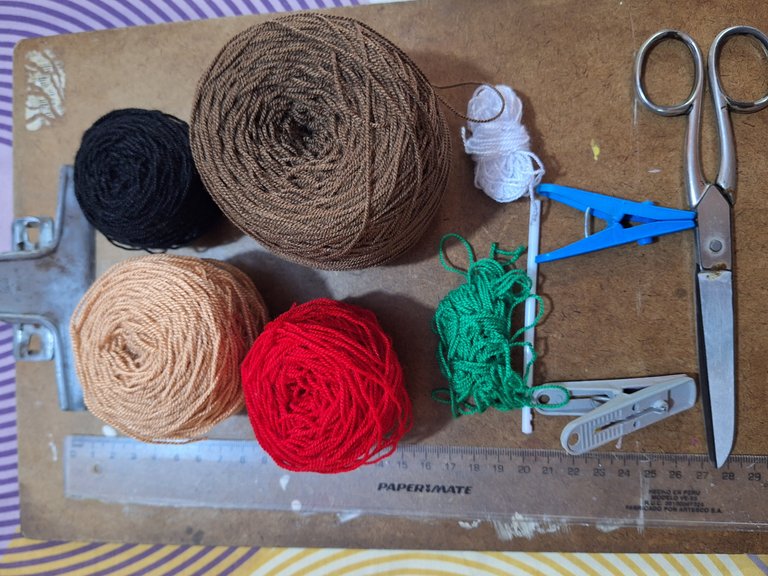
Materiales / Materials
- Hilo acrílico para crochet: beige, rojo, verde, negro, marrón y blanco.
- Tabla
- Tijera
- 2 pinzas para ropa
- Palito de plástico
- Regla
- Patrón
- Acrylic crochet yarn: beige, red, green, black, brown and white.
- Board
- Scissors
- 2 clothespins
- Plastic stick
- Ruler
- Pattern

Proceso / Process
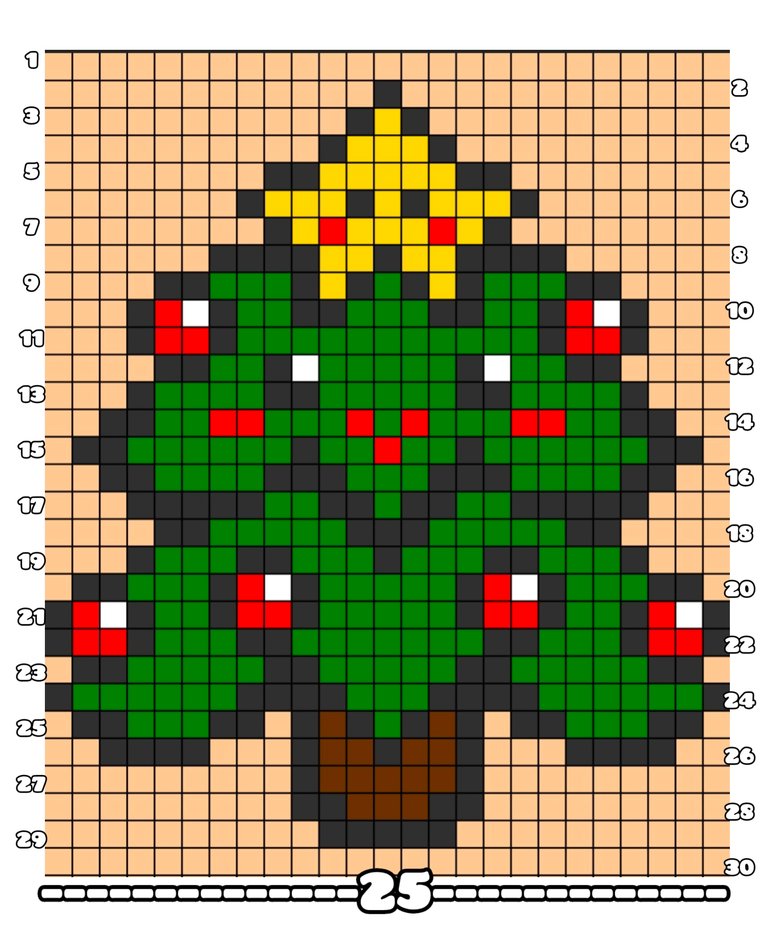
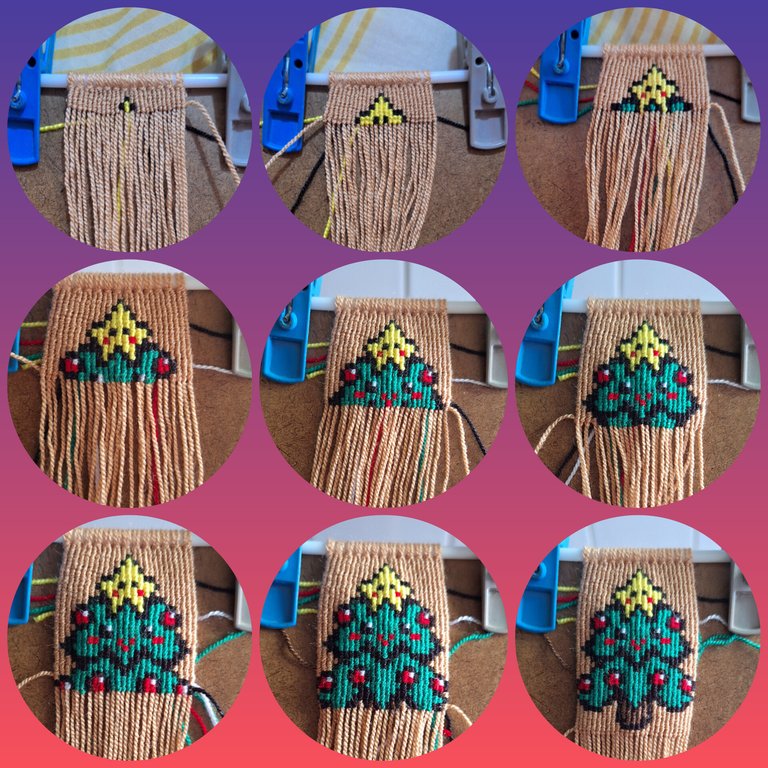
Para hacer este patrón utilicé una imagen referencial que encontré en la web, redibujé el diseño en la aplicación Pixel Station y coloqué los números guía en la aplicación Inshot. Como pueden observar el patrón tiene 25 hilos guía y 30 hileras de nudos.
To make this pattern I used a reference image that I found on the web, I redrew the design in the Pixel Station app and I put the guide numbers in the Inshot app. As you can see the pattern has 25 guide threads and 30 rows of knots.

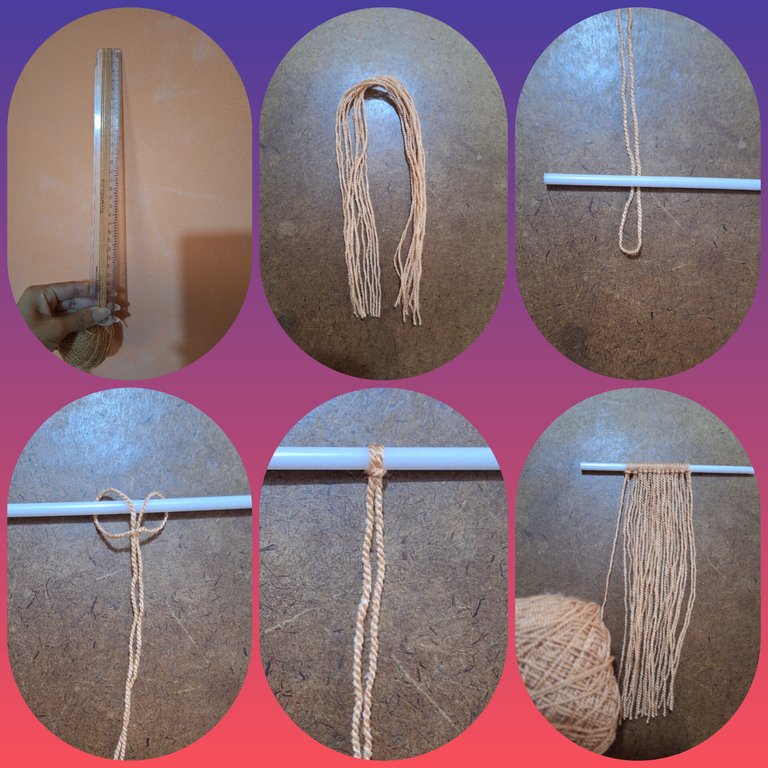
Con hilo beige corté 12 hebras de 30cm y una hebra adicional unida al ovillo, las anudé al palito para formar los 25 hilos guía , dejando la hebra del ovillo como primer hilo anudador
With beige thread I cut 12 strands of 30cm and an additional strand attached to the ball, I tied them to the stick to form the 25 guide threads, leaving the ball strand as the first knotting thread.

Dicen que la práctica hace al maestro pero sinceramente considero que esta técnica es muy sencilla para cualquiera que intente hacerlo, a mi me encanta, se trata de que el hilo anudador envuelva dos veces cada uno de los hilos guía, de izquierda a derecha en la salieras impares y de derecha a izquierda en la hileras pares, se pueden agregar distintos colores de hilo anudador y estos de cruzan por detrás, es decir, que solo se anuda con el color correspondiente en patrón porque cada cuadro representa a un nudo, en pocas palabras no hay nada más relajante que hacer nudos y contar 😊
They say that practice makes perfect, but I honestly think that this technique is very simple for anyone who tries it. I love it. It involves wrapping the knotting thread around each of the guide threads twice, from left to right in the odd rows and from right to left in the even rows. You can add different colors of knotting thread and these cross from behind, that is, you only knot with the corresponding color in the pattern because each square represents a knot. In short, there is nothing more relaxing than tying knots and counting 😊

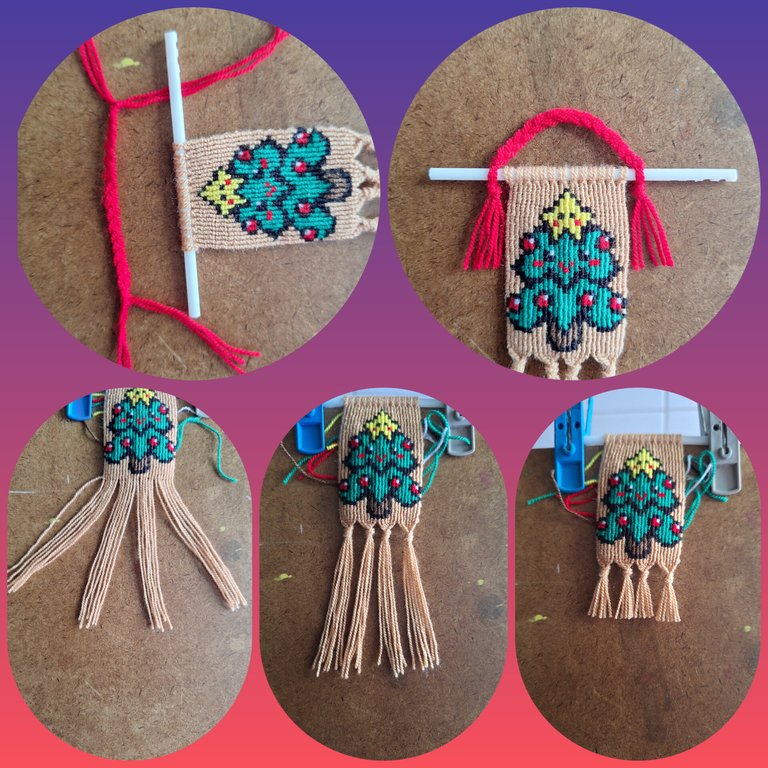
Una vez finalizada las 30 hileras de nudos, separé los hilos e hice 4 nudos , corté las puntas para emparejar los flecos, luego con 6 hebras de 20cm de hilos rojo hice la trenza que anuda al palito de plástico para formar el asa del colgante, así queda un acabado más colorido, también quemo las puntas del palito de plástico pero es opcional.
Once I finished the 30 rows of knots, I separated the threads and made 4 knots, I cut the tips to match the fringes, then with 6 strands of 20cm of red threads I made the braid that knots to the plastic stick to form the handle of the pendant, this way it has a more colorful finish, I also burn the tips of the plastic stick but it is optional.

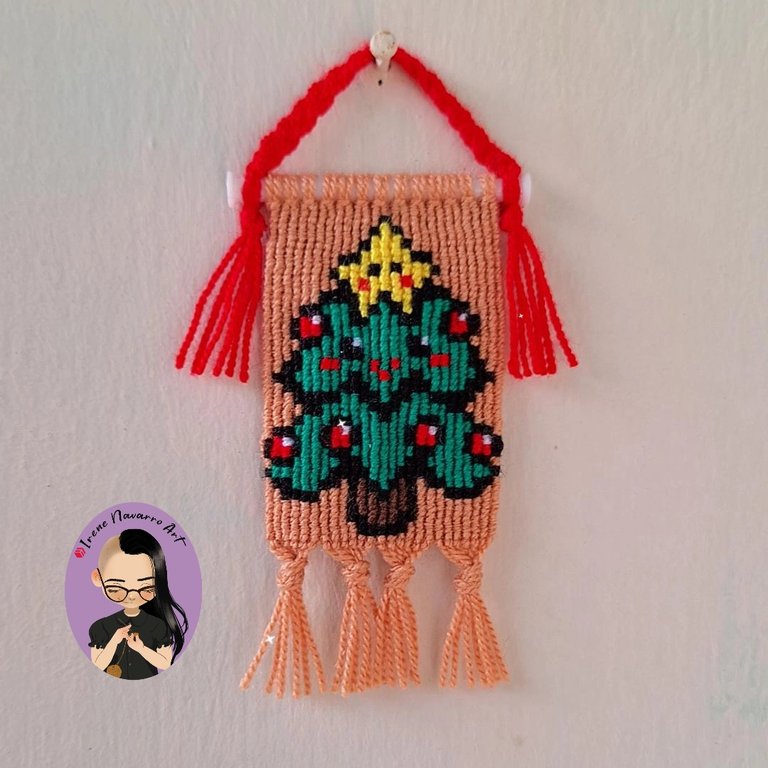
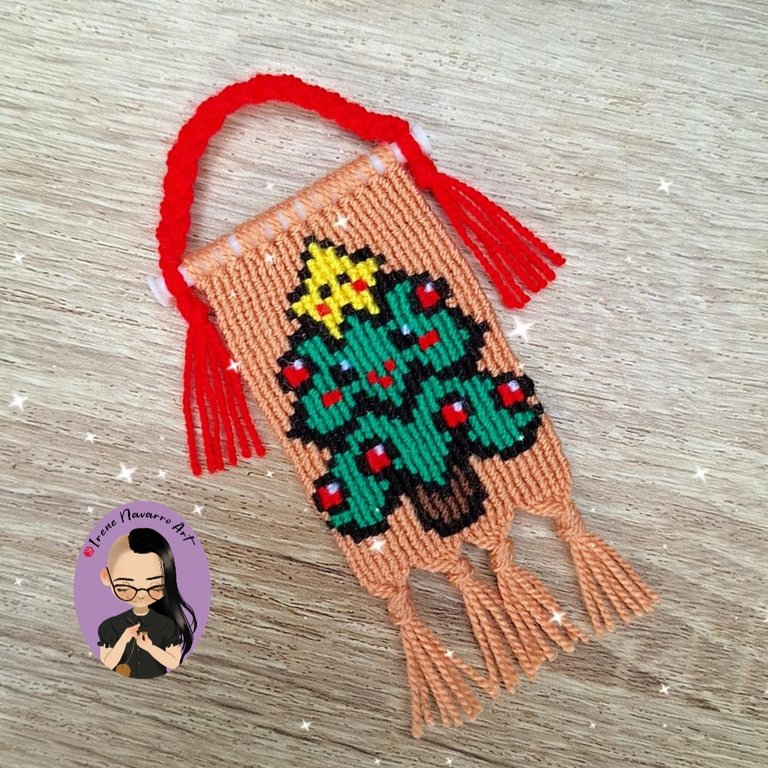
Resultado / Result

Imágenes tomadas con dispositivo Samsung A54. Portada editada en Inshot
Pictures taken with Samsung A54 device. Cover edited in Inshot

Espero les haya gustado. Les invito a leer mis próximas publicaciones y siempre estaré dispuesta a responder sus preguntas y comentarios, también pueden seguirme y contactarme en cualquiera de mis redes sociales. ¡Muchas gracias!
I hope you liked it. I invite you to read my next publications and I will always be willing to answer your questions and comments, you can also follow me and contact me on any of my social networks. Thank you!
Facebook
Twitter
Instagram
Ko-Fi
Discord: irenenavarroart#0361
Posted Using InLeo Alpha
Owww te quedo hermoso amiga, muy cucji, ese arbolito va a quedar hermoso 💚
Siii a mi me encantó que el árbol y la estrella tengan carita jeje. Saludos ☺️
Es hermoso, me encanta que es un pixel art super y se ve tierno tambien, es una gran idea para decorar el arbol de navidad :3 ya quiero ver los proximos
Muchas gracias 🥰 rn esta técnica se pueden llevar a cabo michos diseños basados en pixeles y es muy divertido. Saludos
Que bonito quedó amiga, como siempre tienes una creatividad y un talento increíble 💕
Muchas gracias @naath 🫶🏻
Wow, this is excellent and exceptional piece, I love the technique and you are so good with this. Can't wait to see your Christmas tree decorations and thank you for participating in the contest.
Thank you very much 😁
This is indeed lovely
You made it looks simple though it is not.
Thanks alot for sharing this with us.
Thank you very much 😊
Que hermoso quedó este colgante querida Irene te felicito
Muchísimas gracias @gladymar1973 😊
Feliz día 💖💖