"Hello Hive community in general, and NeedleWorkMonday in particular! Today we want to share with you the process behind the creation of this adorable Sonic Amigurumi that we made for an old client. As many of you know, creating a handmade stuffed toy can be a laborious task, but it's a job that we do with a lot of dedication and love. From the selection of materials to the small details in decoration, each step is important to ensure that the final result is what our client expects. If you're interested in the world of knitting and Amigurumi, keep reading and discover how this little blue hedgehog came to life in our hands!"
¡Hola comunidad de Hive en general y de NeedleWorkMonday en particular! Hoy queremos compartir con ustedes el proceso detrás de la creación de este adorable Sonic Amigurumi que realizamos para un viejo cliente. Como muchos de ustedes saben, crear un muñeco tejido a mano puede ser una tarea laboriosa, pero es un trabajo que realizamos con mucha dedicación y amor. Desde la elección de los materiales hasta los pequeños detalles en la decoración, cada paso es importante para asegurarnos de que el resultado final sea lo que mi cliente espera. Si te interesa el mundo del tejido y los Amigurumis, ¡sigue leyendo y descubre cómo este pequeño erizo azul cobró vida en nuestras manos!
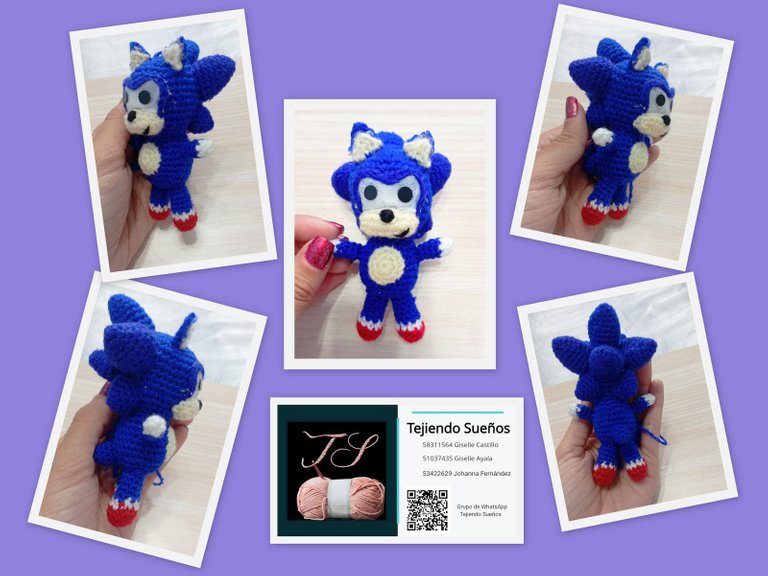 The photos were taken with my mobile phone and the collage was created with my Picasa editor on my PC./Fotos tomadas con mi telefono movil y el collage fue creado con mi editor de Picasa en mi PC.
Well, here we begin the work as we always do, starting with the body. In the case of this little Sonic, we used blue yarn. It's important to highlight that the body and head are knitted in one piece, reaching up to 36 stitches in the head and 30 in the body. (What we see in the photo is the beginning of the head).
Bueno aquí empieza el trabajo, como siempre empezamos por el cuerpo, en el caso de este pequeño Sonic usamos hilo de estambre azul. Es importante destacar que se teje el cuerpo y la cabeza en una sola pieza, llegando hasta 36 puntos en la cabeza y 30 en el cuerpo.(Lo que vemos en la foto es el inicio de la cabeza)
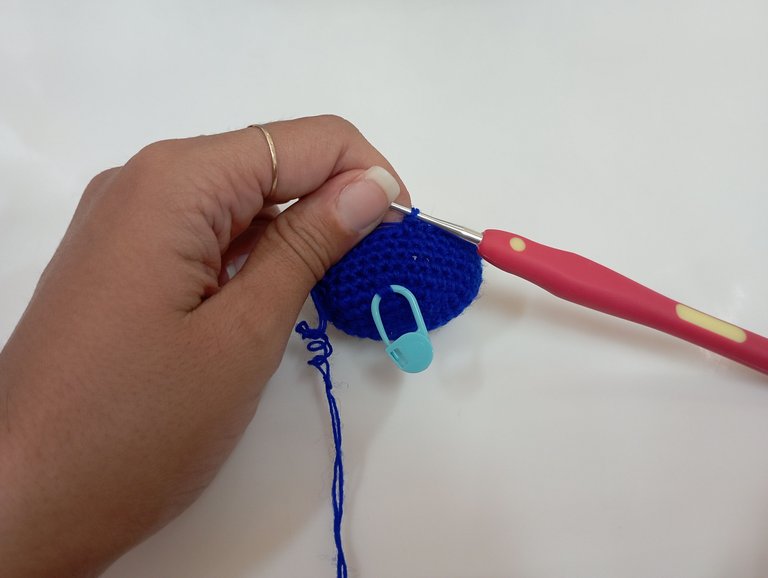 Photo taken with my mobile phone./Foto tomada con mi telefono movil.
Here we can see how it's taking shape - the head is finished and then, without closing it off, we start with the body to ensure it remains in one piece and to avoid sewing at the neck, which can sometimes be difficult to achieve proper stability in that joint.
Aquí podemos ver como va tomando forma, se termina la cabeza y seguidamente sin cerrar comenzamos con el cuerpo, para lograr que quede en una sola pieza y evitar la costura en el cuello que a veces se nos hace difícil lograr la correcta estabilidad en dicha unión.
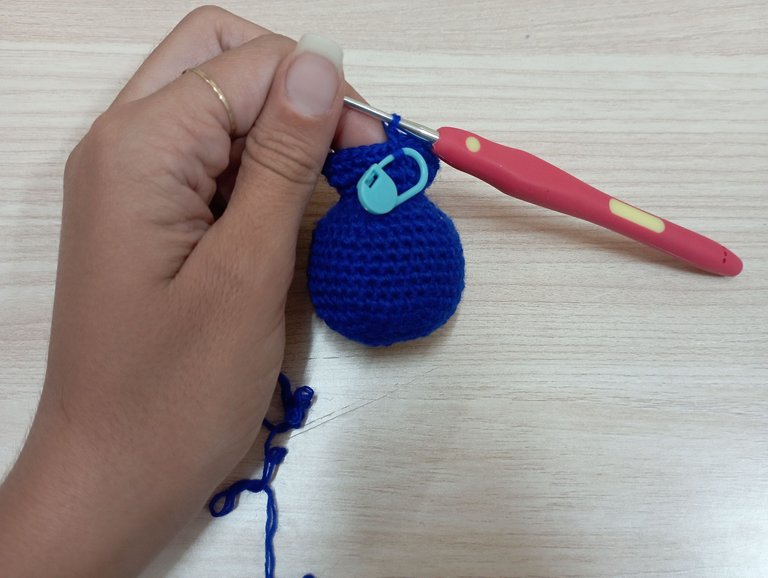 Photo taken with my mobile phone./Foto tomada con mi telefono movil.
As time passes, we continue to progress until we have finished the largest piece, which is probably the easiest to make because, as you would agree with us, in these types of projects, size adds or subtracts difficulty. Well, this is how the body of the little Sonic would look.
Según pasa el tiempo seguimos avanzando hasta que ya terminamos la pieza más grande, pero posiblemente la más fácil de ralizar pues estarán de acuerdo con nosotros que en estos trabajos el tamaño le añade o le quita dificultad. Bueno así quedaría el cuerpo del pequeño Sonic.
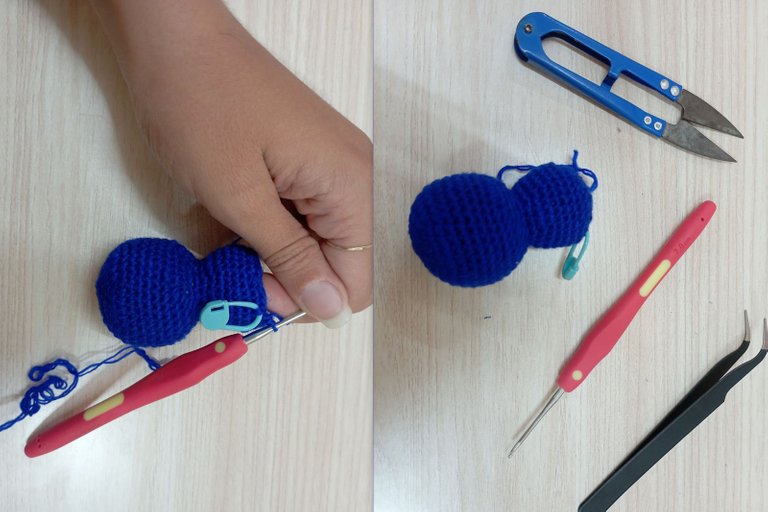 Photo taken with my mobile phone./Foto tomada con mi telefono movil.
Once the body was finished, we started with the rest of the pieces. We began with the arms and legs. In the case of the arms, we started with a magic circle of 6 white yarn stitches up to round 3, then continued with blue yarn in the same 6 stitches for 5 more rounds, and that's it.
Una vez terminado el cuerpo comenzamos con el resto de las piezas, nosotros empezamos con los brazos y las piernas. En el caso de los brazos comenzamos con un anillo mágico de 6 puntos de estambre blanco hasta la vuelta 3 luego continuamos con estambre azul en los mismos 6 puntos por 5 vueltas más y listo.
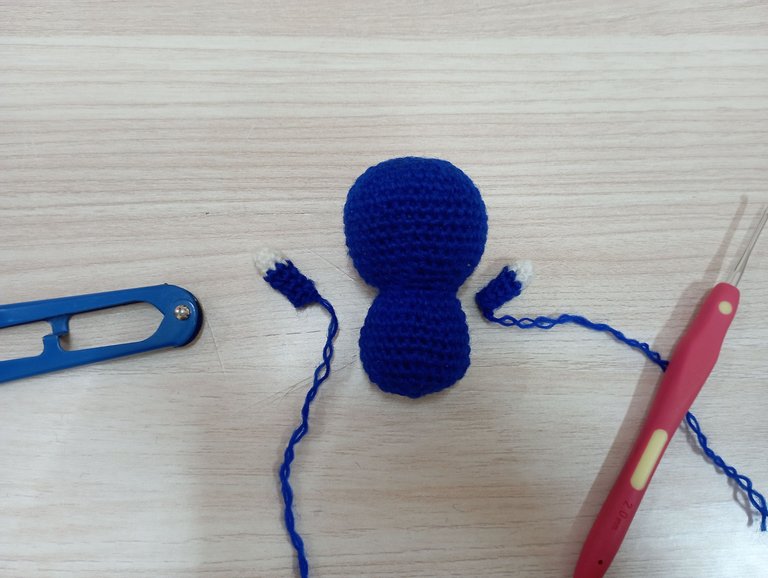 Photo taken with my mobile phone./Foto tomada con mi telefono movil.
With the legs, we made a magic circle of 6 single crochet stitches using red yarn, then we made one increase per stitch to reach 12 stitches and made another round with this amount. This is to achieve the boots. Then, using white yarn, we made two single crochet stitches and one decrease in one round to end up with 9 stitches, and continued with blue yarn for 6 more rounds with this amount to finish the leg. Remember, we have to make two of them 😃😂.
Con las piernas realizamos un anillo mágico de 6 puntos bajos con estambre rojo, luego hacemos un aumento por punto para llegar a 12 puntos y damos otra vuelta en esta cantiadad. Esto es para lograr las botas. Seguidamente pero con estambre blanco en una vuelta hacemos dos puntos bajos y una disminución para terminar en 9 puntos y continuar con estambre azul por 6 vueltas más en esta cantidad y terminar la pierna. Recordar que hay que hacer dos 😃😂.
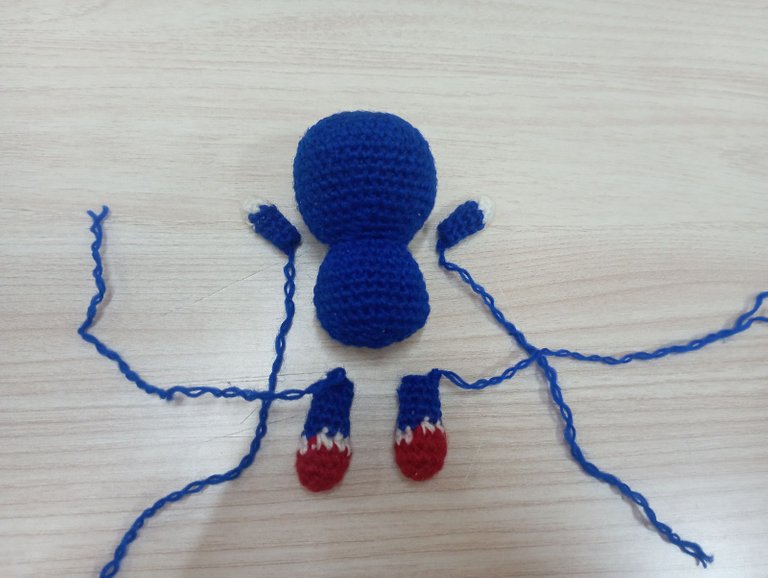 Photo taken with my mobile phone./Foto tomada con mi telefono movil.
Now we continue with the spines of this little blue hedgehog, which has 6 of these pieces. It is important to know that they are not all the same and each one has its position on the head. As a tip, I recommend filling the spines so that they do not lose their shape.
Ahora continuamos con las puas de este pequeño erizo azul, el cual lleva 6 de estas piezas. Es importante saber que todas no son iguales y cada cual lleva su posición en la cabeza, como consejo les digo que rellenen las puas para que no pierdan su forma.
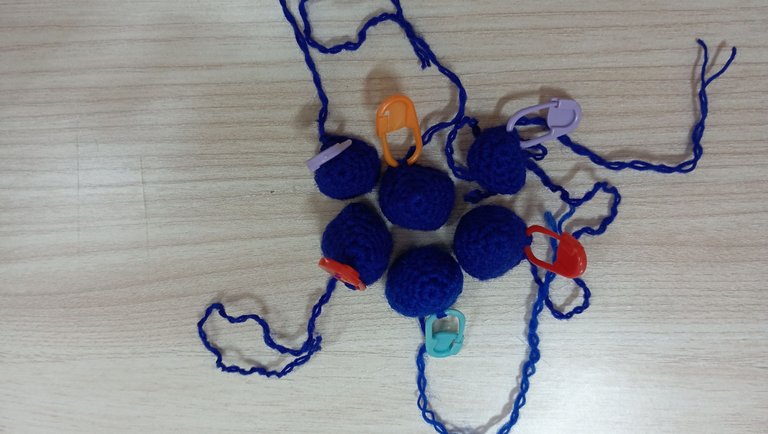 Photo taken with my mobile phone./Foto tomada con mi telefono movil.
We continue with more details such as the snout, belly, ears, and tail. The snout and belly were made with a skin-colored yarn. The ears are two pieces, one blue (the one in the back) and the other skin-colored (the one in front), and are placed facing each other and attached or sewn together. The tail is very similar to the spikes but smaller and also in blue color.
Continuamos con más detalles como el hocico, la barriga y las orejas y la cola. El hocico y las barriga la hicimos con un estambre color piel. Y las orejas son dos piezas una azul (la de atrás) y la otra de color piel (la de alante) y se colocan una frente de la otra pegadas o cosidas. La cola es muy similar a las puas pero más pequeñas y también de color azul.
 Photo taken with my mobile phone./Foto tomada con mi telefono movil.
Once all the pieces are finished, we begin with the assembly process. To be able to see how it is coming together, it is recommended to first fix the pieces with pins, so we ensure they are fixed exactly where we want them. This assembly process is very delicate because it depends on it to get the correct expression for the doll.
Una vez terminadas todas las piezas comenzamos con el proceso de ensamble. Para poder ver como va quedando, es recomendable fijar las piezas con alfileres primero, así nos aseguramos que queden fijadas justo donde queremos. Este proceso de ensamble es muy delicado porque de él depende que el muñeco quede con la expresión correcta.
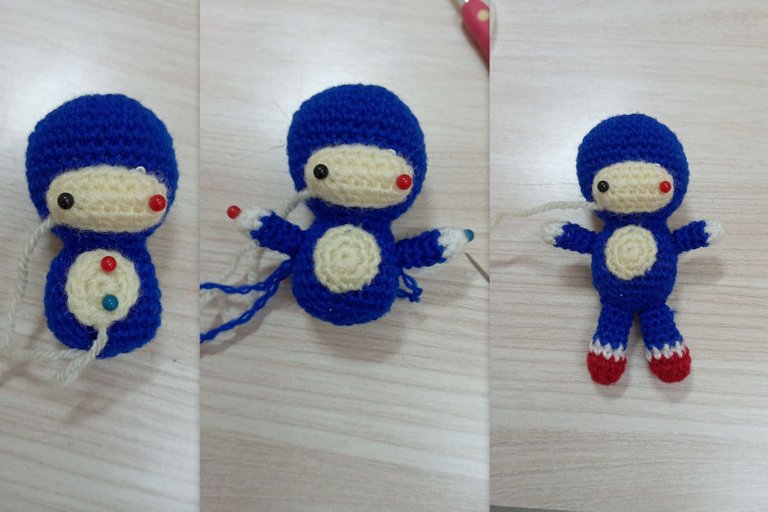 Photo taken with my mobile phone./Foto tomada con mi telefono movil.
The time has come for the final details. We attach the spikes, and for the placement of the eyes, we use a piece of white felt and glue the pupils on top. Then we embroider the nose and a small smiling mouth. We also attach the ears, always taking care of the character's aesthetic. We know that when it comes to well-known characters, the difficulty is much greater because they have a marked expression, and we have to take care of the details.
Ya llegó el momento de los detalles finales, le colocamos las puas y luego para la colocación de los ojos utilizamos un pedazo de fieltro blanco y encima pegamos las pupilas. Luego le bordamos la nariz y una pequeña boca sonriente también le ponemos las orejas, siempre cuidando la estética del personaje, sabemos que cuando se trata de personajes tan conocidos la dificultad es mucho mayor pues poseen una marcada expresión y tenemos que cuidar bien los detalles.
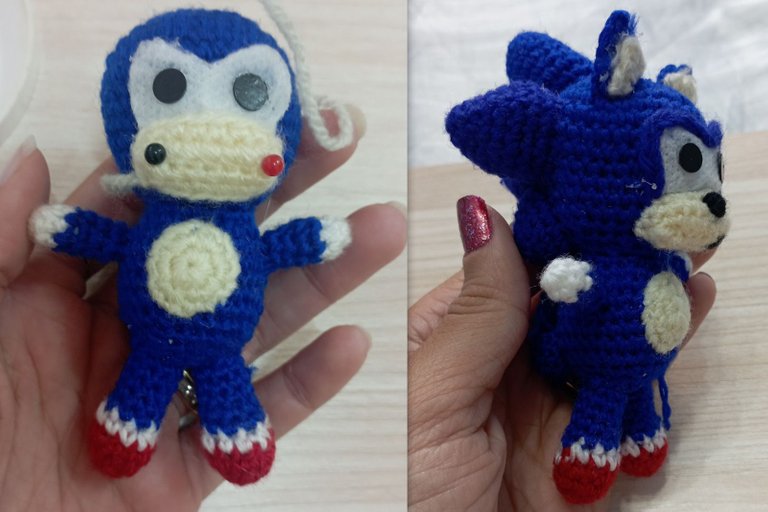 Photo taken with my mobile phone./Foto tomada con mi telefono movil.
At this point, there's little left to do, we just have to attach the hardware since this little doll is a keychain. Then, we wrap it up and add the presentation card, and it's ready to be delivered to the customer...
Bueno llegado este punto quedo poco por hacer, solo hay que colocarle el herraje ya que este pequeño muñeco es un llavero luego lo envolvemos y colocamos la tarjeta de presentación y listo para entregar al cliente...
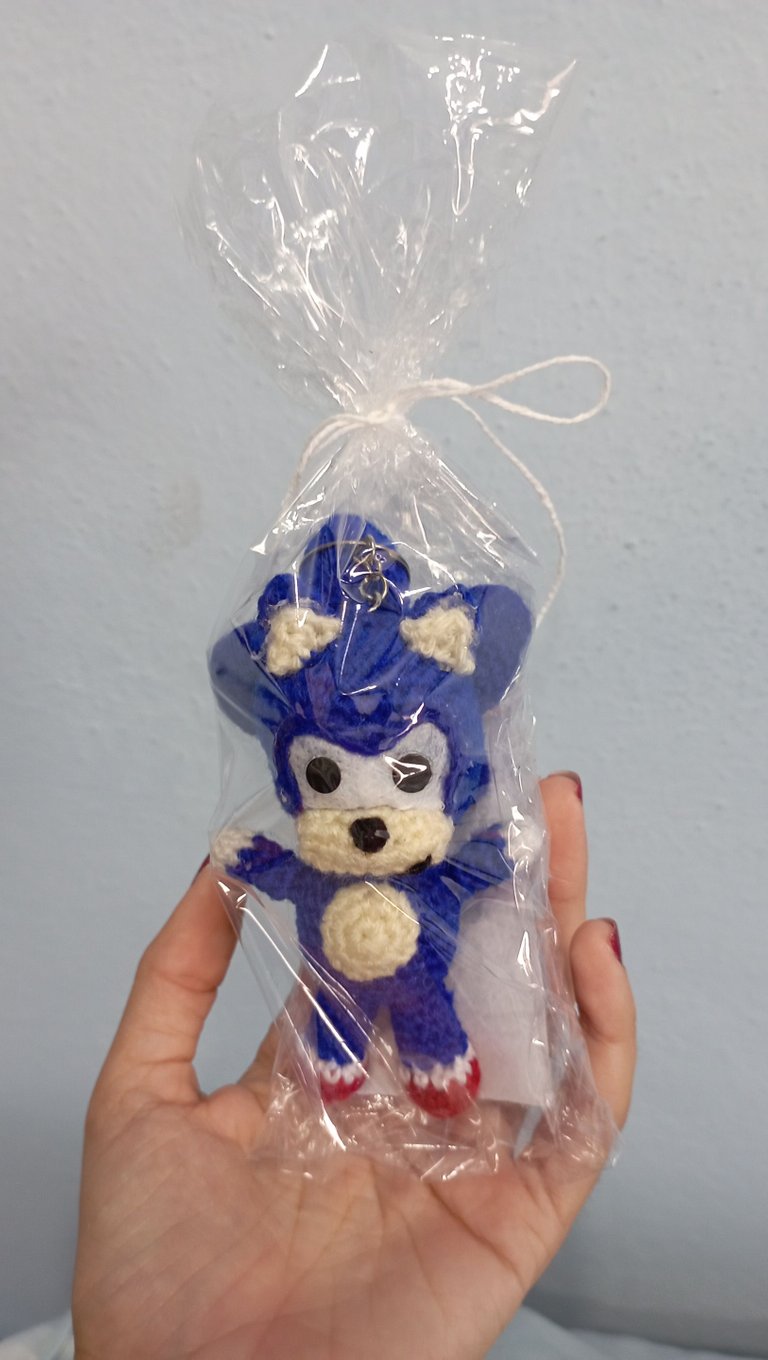 Photo taken with my mobile phone./Foto tomada con mi telefono movil.
If you want to see more of our work, follow us on our Facebook page or join our Whatsapp group.
Si quiere ver mas de nuestros trabajos siganos en nuestra pagina de Facebook o únase a nuestro grupo de Whatsapp.
~~~ embed:1644374836481761284 twitter metadata:MTQ4NDI4MTAxMzQxMzAyMzc1Nnx8aHR0cHM6Ly90d2l0dGVyLmNvbS8xNDg0MjgxMDEzNDEzMDIzNzU2L3N0YXR1cy8xNjQ0Mzc0ODM2NDgxNzYxMjg0fA== ~~~
The rewards earned on this comment will go directly to the people( @semarekha, @dayadam ) sharing the post on Twitter as long as they are registered with @poshtoken. Sign up at https://hiveposh.com.
This is so cute, you've done a great job with the step by step tutorial, thanks for sharing @giselleayala
Una belleza. A mí hijo le encanta este personaje, pero hasta ahora no me animo por todas las formas que tiene. Tiene genial. Felicidades
Beautiful creativity and great medium to express creativity
https://leofinance.io/threads/@dayadam/re-leothreads-cp7z85ca
The rewards earned on this comment will go directly to the people ( dayadam ) sharing the post on LeoThreads,LikeTu,dBuzz.
Que lindo trabajo, me encanto ese amigurumi de Sonic, esta muy bien trabajado cariño. Te felicito, y te deseo muchos éxitos en este maravilloso mundo de hive @giselleayala. Lindo día para ti... 💕
Congratulations @giselleayala! You have completed the following achievement on the Hive blockchain And have been rewarded with New badge(s)
Your next target is to reach 100 upvotes.
Your next target is to reach 50 replies.
You can view your badges on your board and compare yourself to others in the Ranking
If you no longer want to receive notifications, reply to this comment with the word
STOPCheck out our last posts:
Support the HiveBuzz project. Vote for our proposal!
Hola @giselleayala bienvenida a nuestra comunidad de artesanos, es un placer tenerte publicando tus creaciones por acá. En esta comunidad encontrarás muchas personas amables que comparten tu misma pasión por las manualidades y las artes con agujas. Como eres nueva en la comunidad, te voy a dejar algunas pautas que son importantes a tener en cuenta al momento de publicar acá. Saludos y bendiciones.
Cada semana los trabajadores de la aguja de todo el mundo compartimos nuestro trabajo, patrones, consejos, ideas y atajos mientras nos apoyamos unos a otros. El objetivo es inspirar a Hive blockchain a darle una oportunidad a la artesanía.
Los lunes usamos la etiqueta #needleworkmonday y los demás días usamos la etiqueta #needlework sin la palabra lunes. Compartimos y publicamos nuestro trabajo directamente desde la página de la Comunidad.
Animamos a nuestros miembros a que compartan el proceso de su trabajo a través de fotos. Esto no sólo valida su trabajo sino que nos lleva al viaje creativo con ustedes.
Para más información sobre lo que hacemos y para nuestras pautas de publicación por favor visita nuestras FAQs.
Importante leer Oh, Just Another Tutorial
¡Hola Giselle!. Tejer este personaje es entretenido, sobre todo las púas (cómo no olvidarlas, jaja). ¡Gran trabajo!. Un abrazo.
This is really screat but simple. The outcome of your crochet look beautiful
Muchas gracias a todos por el gran apoyo que me han brindado espero seguir haciendo las cosas de su agrado para que podamos aprender todos unos de otros... GRACIAS...