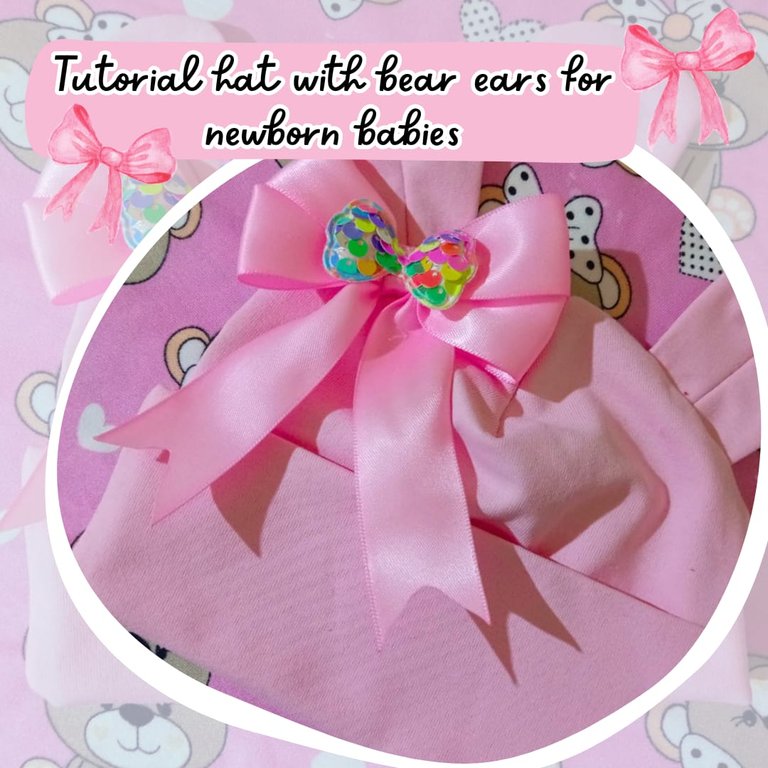
un saludo mi querida comunidad @needleworkmonday esta vez les comparto un proyecto muy especial como es un gorrito para bebe recién nacido con orejitas de oso, elaborado en una tela muy suave y cómoda de algodón con bastante elasticidad. Para realizar este diseño se emplea muy poco tiempo y el resultado sobrepaso mis expectativas, ademas se puede decorar de acuerdo a su gusto y su preferencia, con cintas para hacer un lazo o con cualquier otro detalle que sirva como adorno para hacerlo lucir mas coqueto y llamativo. Materiales en mano que comenzamos con este sencillo paso a paso.
Greetings, my dear @needleworkmonday community! This time, I'm sharing a very special project with you: a newborn baby hat with bear ears, made from a very soft and comfortable cotton fabric with plenty of elasticity. This design takes very little time to make, and the result exceeded my expectations. You can also decorate it to suit your taste and preferences, with ribbons to make a bow or any other detail that serves as an embellishment to make it look more cute and eye-catching. With your materials at hand, let's get started with this simple step-by-step guide.
- Tela de algodón
- Alfileres
- Tijera
- Hilo
- Cinta
- Aplicación de lazo (Decoración)
- Silicon caliente
- Cotton fabric
- Pins
- Scissors
- Thread
- Ribbon
- Bow appliqué (decoration)
- Hot glue gun


Inicie dibujando un patron sobre una hoja de cartulina segun la talla que quería, en este caso para recién nacido, el cual consiste en un rectángulo de 17,5 cm x 42 cm.
Una vez recortado el patron lo coloco sobre la tela y sacare un total de dos pares, ya que nuestro gorrito de hoy será reversible, en este caso no influye mucho porque usare la misma tela, pero si deseas puedes sacar un par de rectángulos en otra tela en combinación para tener dos modelos en uno de gorrito.
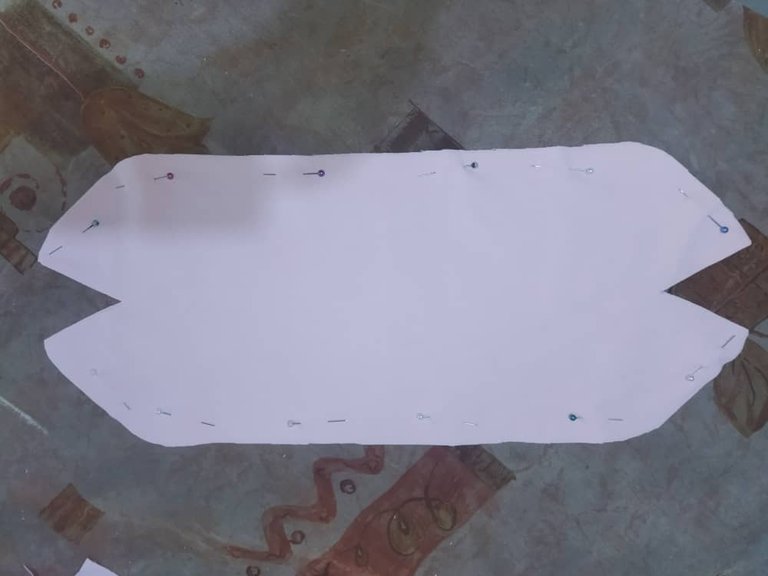
Tomaremos de referencia el centro del rectángulo desde el lado mas corto y mediremos 5 cm, le sacamos la mitad y luego del centro hacia arriba otros 5 cm, luego en cada extremo realizaremos un corte triangular hasta la medida que marcamos anteriormente. Nos ubicamos en el centro y dibujaremos un triangulo hasta la medida de los 5 cm, una vez hecho esto recortamos y nos quedaría asi.
Start by drawing a pattern on a sheet of cardstock according to the size you want, in this case for a newborn, which consists of a rectangle measuring 17.5 cm x 42 cm.
Once the pattern has been cut out, place it on the fabric and cut out a total of two pairs, as today's hat will be reversible. In this case, it doesn't matter much because we will be using the same fabric, but if you want, you can cut out a couple of rectangles in another fabric to have two designs in one hat.
We will take the center of the rectangle from the shortest side as a reference and measure 5 cm, take out the middle and then another 5 cm from the center upwards. Then, at each end, we will make a triangular cut up to the measurement we marked earlier. We will locate ourselves in the center and draw a triangle up to the 5 cm measurement. Once this is done, we will cut it out and it will look like this.


Seguidamente dibujaremos sobre un papel unas orejas del tamaño que queramos que tenga en nuestro gorrito, tambien recortaremos un par de piezas, es decir 4 orejitas, las cosemos por la cara principal, una pequeña costura por el centro de menos a mas y las ubicamos a un lado del triangulo que recortamos anteriormente, tratando que ambas queden en la misma distancia del centro.
Colocamos la otra pieza del gorro sobre esta cara donde ubicamos las orejas y cosemos con costura recta y zig zag todo el contorno menos el triangulo.
Next, draw ears on paper in the size you want them to be on your hat. Cut out a couple of pieces, i.e., four ears, sew them on the main side with a small seam from bottom to top, and place them on one side of the triangle you cut out earlier, trying to keep them both at the same distance from the center.
Place the other piece of the hat on top of the side where the ears are located and sew with a straight stitch and zigzag stitch around the entire outline except for the triangle.


Por último haremos coincidir la abertura que nos queda y las cosemos de la misma manera para que asi nos quede todo nuestro gorrito cerrado listo para ser decorado. En mi caso yo realice un lazo con cinta y se lo coloque en unas de las orejas, y su vez le pegue con silicón caliente una aplicación en forma de lazo con lentejuelas de colores para que se vea muy llamativo y resalte este detalle. Este paso queda a su imaginación y creatividad.
Finally, we will match the remaining opening and sew it in the same way so that our hat is completely closed and ready to be decorated. In my case, I made a ribbon bow and attached it to one of the ears, and then I used hot glue to attach a bow-shaped appliqué with colored sequins to make it really eye-catching and highlight this detail. This step is up to your imagination and creativity.


Listo de esta manera he terminado con este proyecto como es un hermoso y coqueto gorrito con orejas de oso para recién nacido que esta muy de moda, una buena opción a la hora de personalizar o darle ese toque llamativo a nuestras confecciones. Espero les guste y sea de mucho provecho. Saludos y bendiciones
And with that, I have finished this project: a beautiful and cute bear ear hat for newborns that is very fashionable, a great option for personalizing or adding that eye-catching touch to our creations. I hope you like it and find it useful. Greetings and blessings.


| Pueden seguirme en 💙: | You can follow me on 💙: |
|---|---|
| eveyese1312 | |
| Discord | eveyese1312#6211 |
Las fotos y el contenido son de mi autoria
Imágenes editadas en PowerPoint Canva y PicMonkey
Para la traducción usé el traductor: DeepL
The photos and content are my own.
Images edited in PowerPoint Canva and PicMonkey
For the translation, I used the translator: DeepL
Awwww this is so lovely and the baby looks so adorable in the hat. Lovely job friend.
selected by @ibbtammy
Que lindo y delicado trabajo amiga. Feliz Navidad
Hola amiga. Muchas gracias me alegra mucho que te haya gustado. Igual para ti y tu familia les deseo una Feliz navidad. Saludos para Rafael 🎅🎄
¡Ay, qué gorrito tan lindo! Gracias por el tutorial, me animaré hacer uno para mi sobrina más pequeña.
So lovely and the dream of every mother. Babies are the cuties thing ever and they must be dressed in bright and colorful wears to protect their delicate skin.
Thanks for sharing this beautiful diy process.