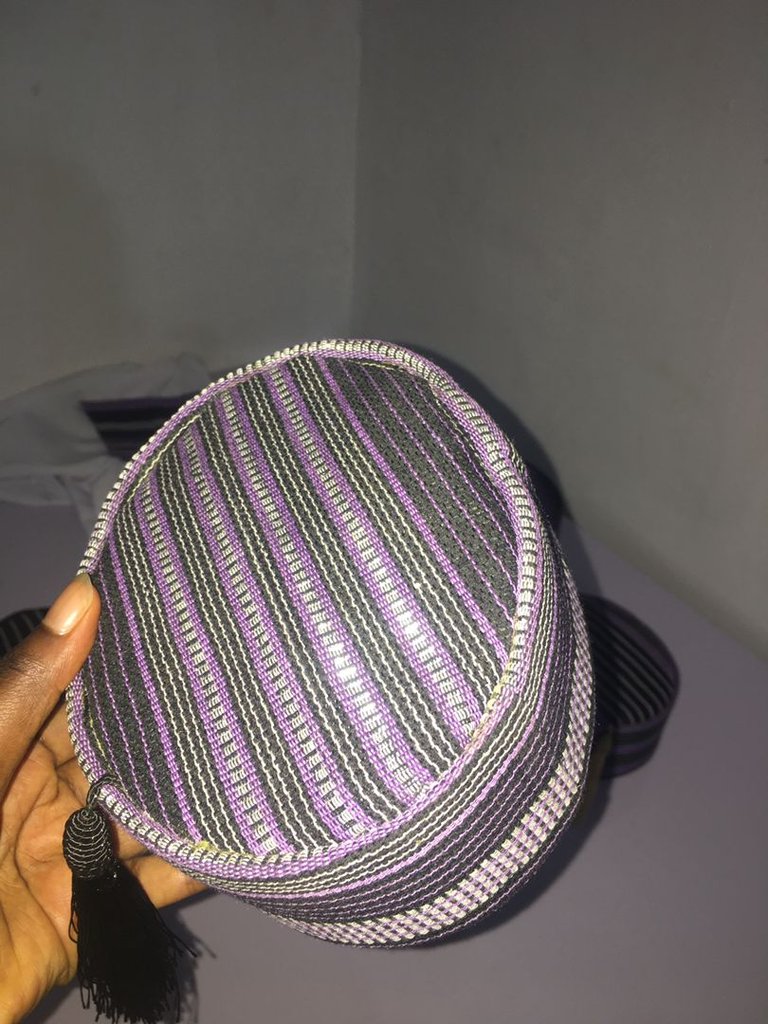
Last week, my friends and I were gearing up for the annual community festival, an event we looked forward to all year because we get to meet all our street friends that we grew up together that has either gotten married, moved out of the area either for work or school. This time, my group decided to dress up as character of the trending rich Nigerian aunties, We wanted to give the touch different Nigeria bubu gowns but with a signature of the awolowo cap to make it extra classy.
"The Awolowo cap was named after the great Awolowo because it became his signature cap which he wore regularly".
So we took it to the designers in the area but we couldn't get anyone that was less busy and could meet up with making all of our caps cause it was already a day to the event,The night before event, we were all at my place, stressing about the incomplete costume.
That’s when I had an idea, I suggested that we make the cap ourselves. My friends were skeptical at first, but desperate times called for creative measures. and that when my survival insistent thought I could do something Which I did, to be very honest am not so good with tailoring or cutting but I came from a long family of fashion designers from my dad to my siblings so we can say I have seen a lot from them
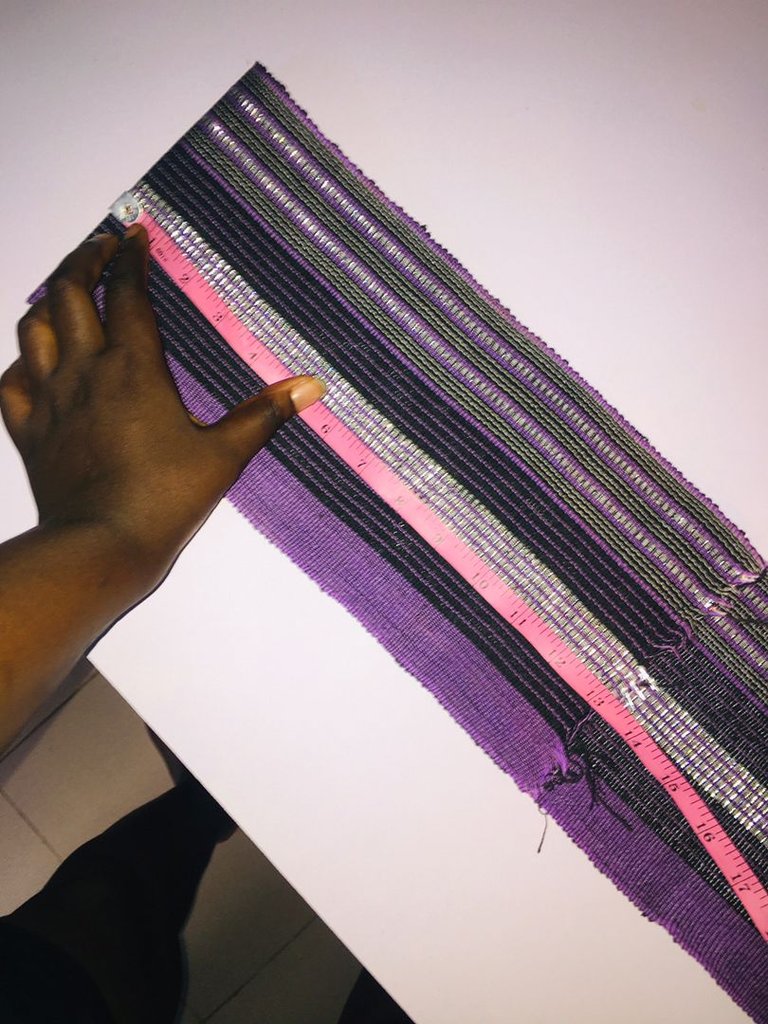
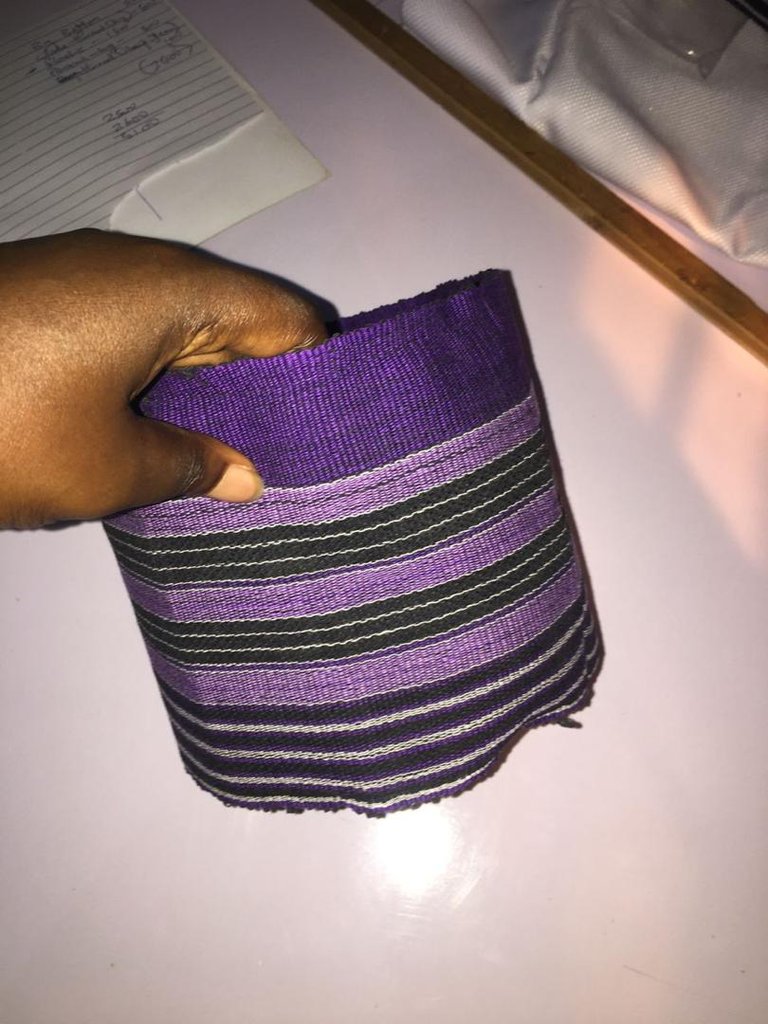
So I decided to save i and my friends since it's urgent so I picked one of the Aso oke material and told them to follow my lead.
Materials used
_ Cap material (for me I use Aso oke)
_Evostic gum
_Super glue
_Linen material
_1/2 inch foam
_Elastic band
_Cardboard or Marco leather (both are good)
The process
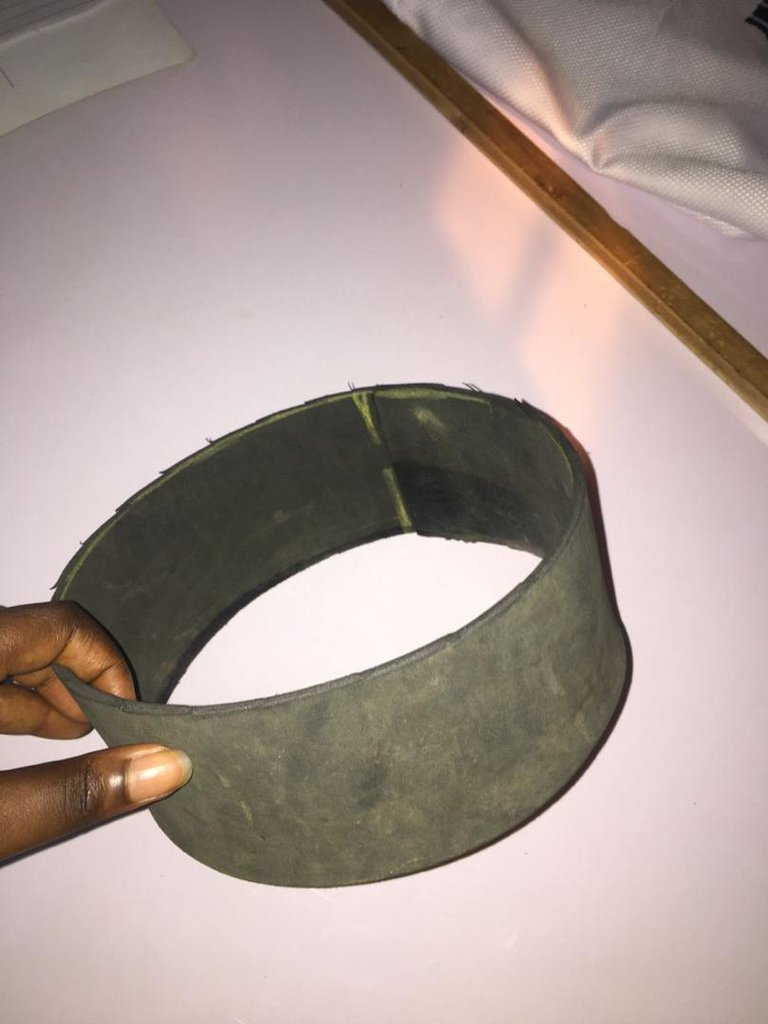
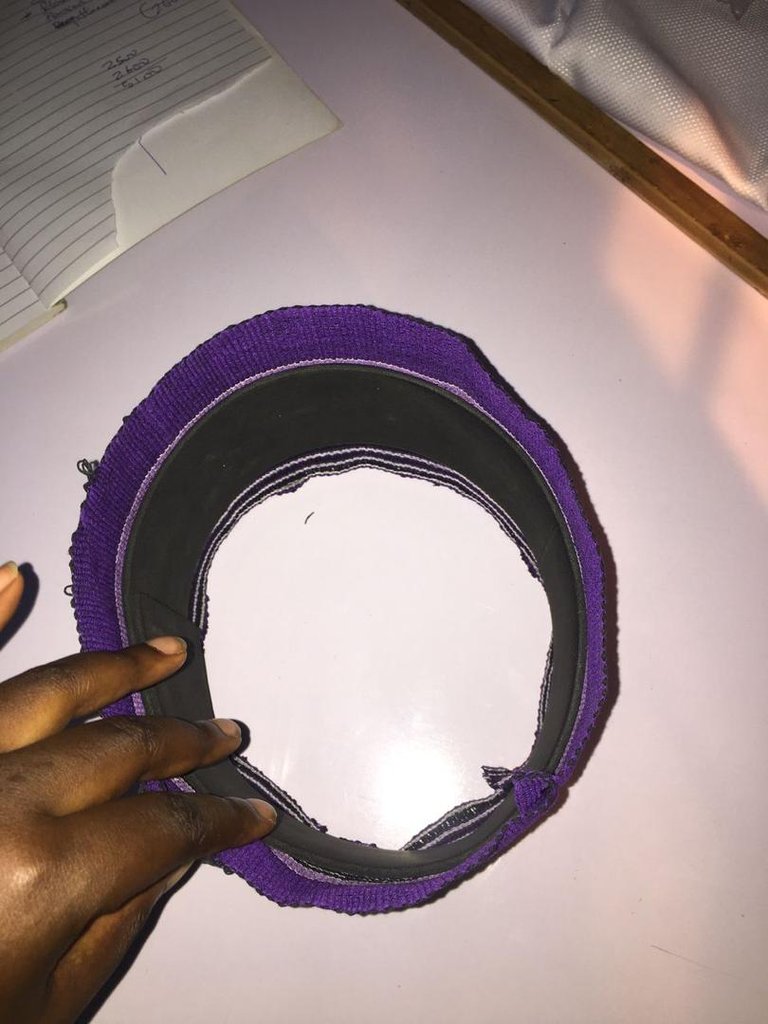
I measure the head circumference and then cut it out on both the cap material and the leather material
Note: do not forget to add an extra inch on both the cap material and leather.
I applied Gum on the one inch allowance left extra during cutting on the leather and leave it to sticky dry, then Gum both ends together
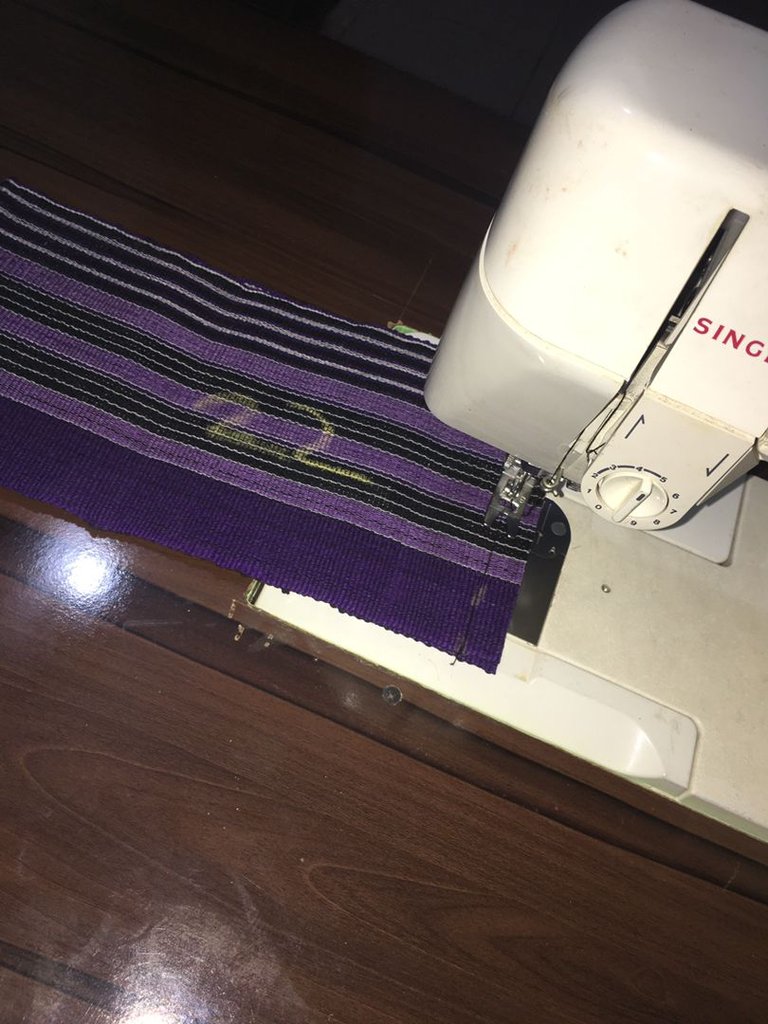
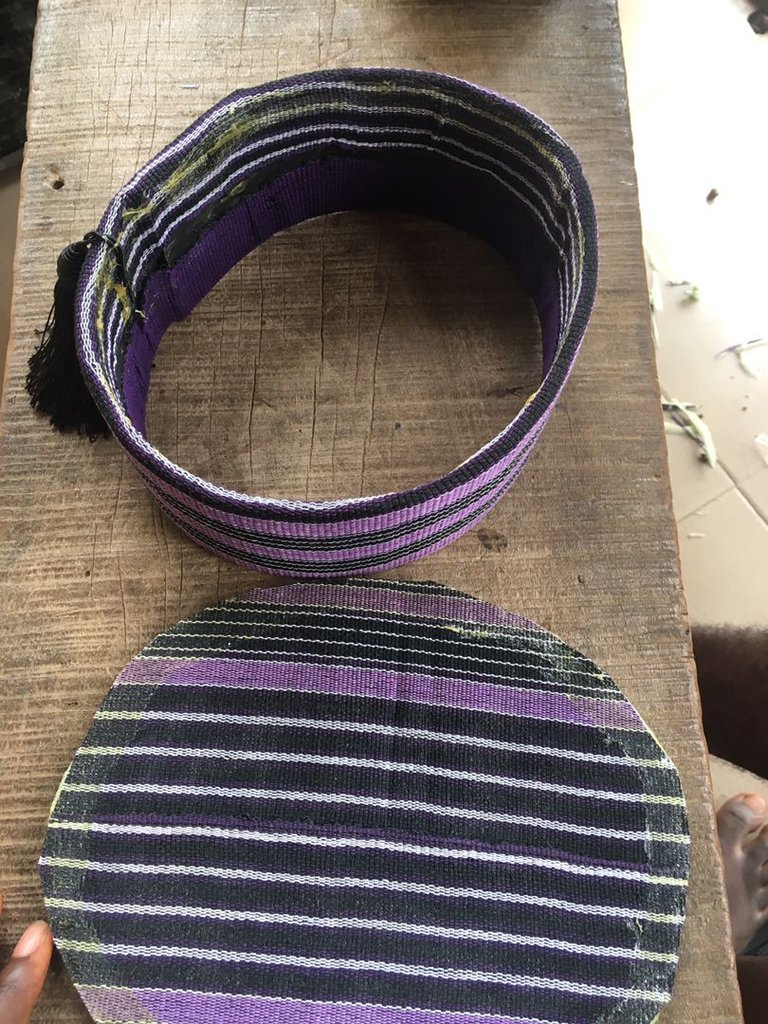
Pick the cap material on the other hand and sew down to get the head measurement
Then fix the leather into the cap
Apply Gum to all sides then adjust with my hands to fit head size
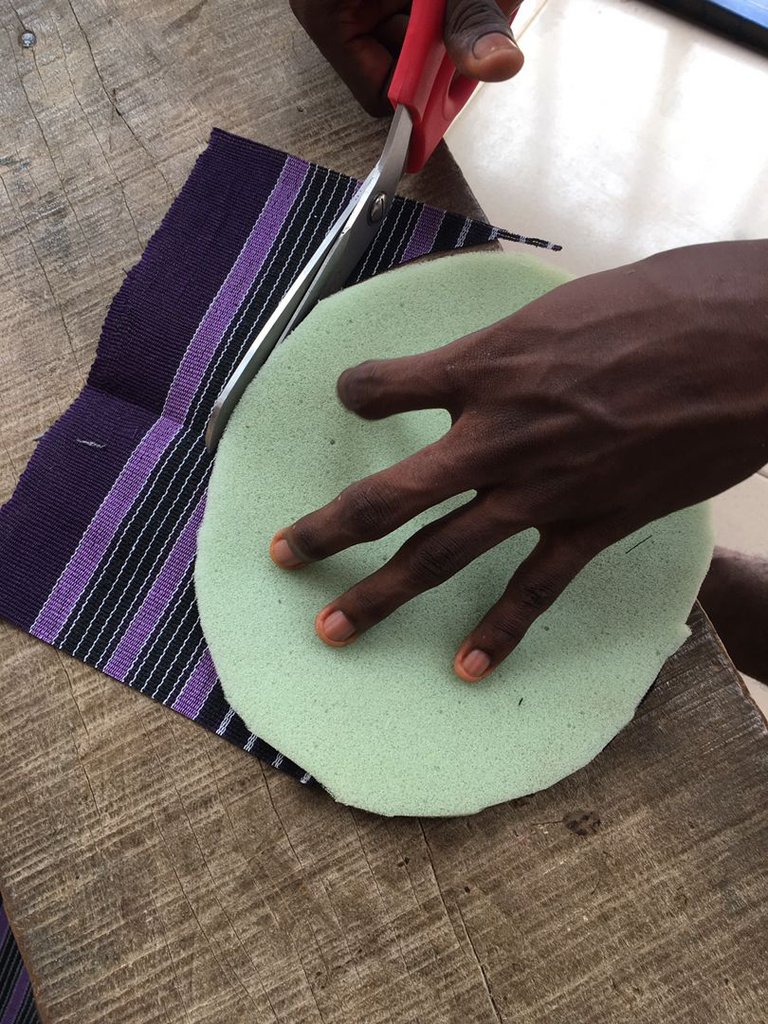
Join the remaining material left after cutting the head circumference, then cut out the cap circumference on the pieces that was joined and the 1/2 inch foam then Gum them together to become one like this
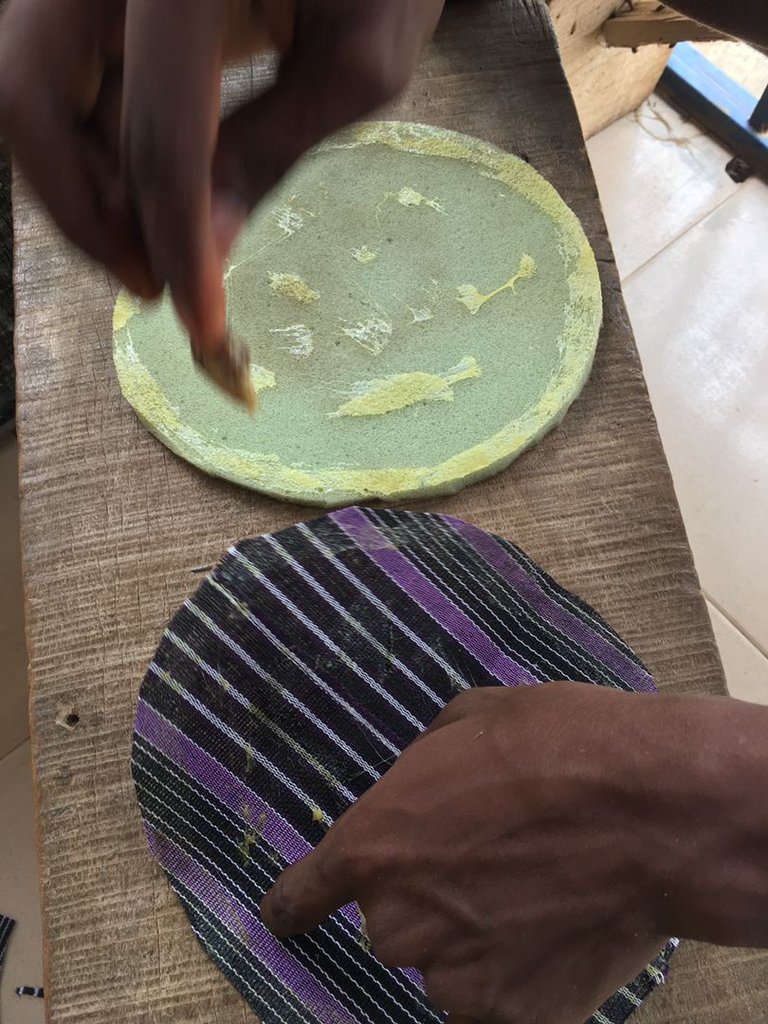
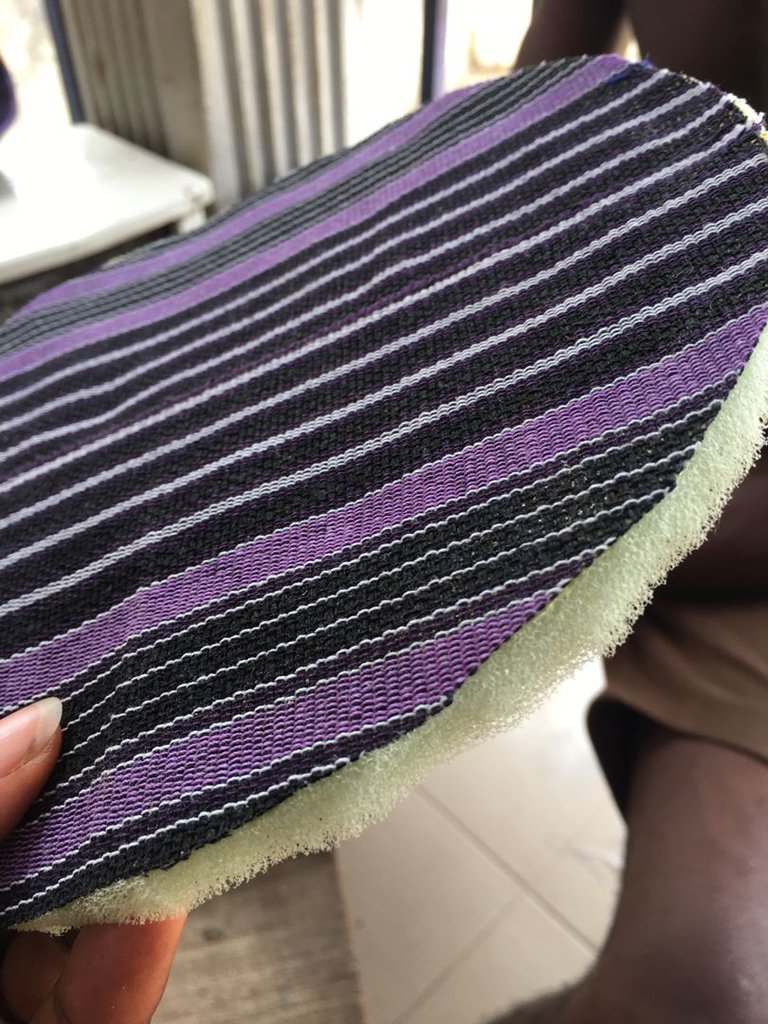
Apply Gum on the foam edges and the top edge of the cap and stick together the gum area

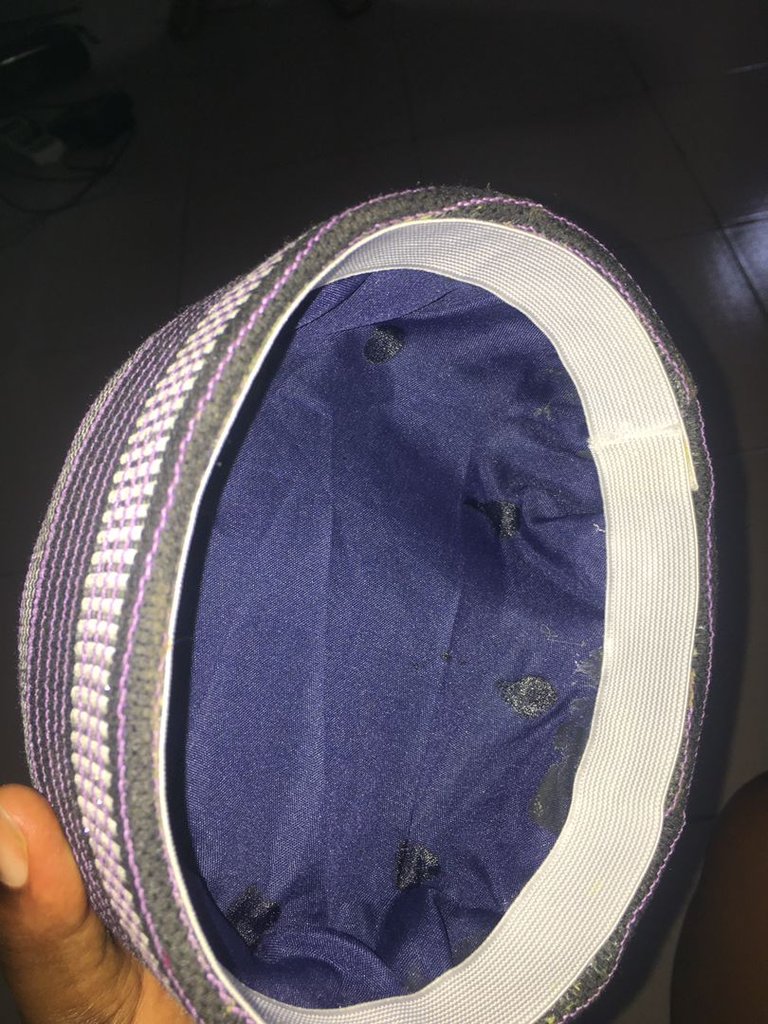
After that, cut round pieces of linen and glue it to the inner part of the cap to make ur cap neat.
Then glue your elastic band round the linen edge and cap edge to give it a firm and final neat look
And few hours before the event all of our caps were ready
I hope y'all like my caps 😁
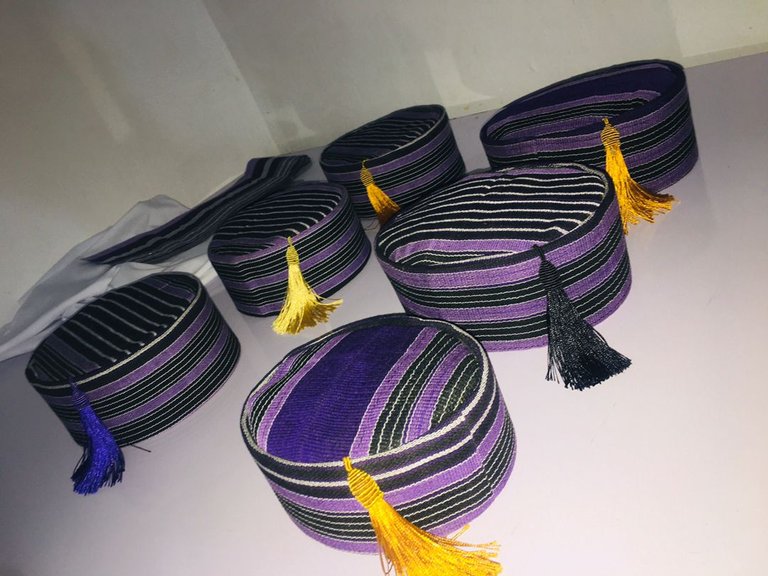
Ps: we added this rops to beautify and differentiate our caps it was added when when sticking the foam edge and cap edge together
All pictures by me 🤩
Posted Using InLeo Alpha
Congratulations @bigsavvy! You have completed the following achievement on the Hive blockchain And have been rewarded with New badge(s)
Your next target is to reach 100 upvotes.
You can view your badges on your board and compare yourself to others in the Ranking
If you no longer want to receive notifications, reply to this comment with the word
STOPWow, so this cap is made using leather and foam, I'm looking at making one for my nephew too, your DIY process just made it easier fir me to follow, I was going to watch a YouTube video for it.
It's looking good, especially with the colorful fringe arranged. You did well.
Thank you 😊
I hope you can send me a picture of it when you do
Am glad it's helpful
Wow! These are really beautiful
I like the fact that you were creative about it.
I didn’t know where it was heading in the beginning but when I saw the result I literally said wow.
Thank you 😊😊😊
You’re welcome
Hello @bigsavvy Welcome to NeedleWorkMonday community.
Every week needleworkers from around the globe get together to share our work, patterns, tips, ideas and shortcuts as we support one another. Our goal is to inspire the Hive blockchain to give crafting a try.
On Monday’s we use the #needleworkmonday tag and on all other days we use the #needlework tag without the word Monday attached. We share and post our work directly from the Community page.
We encourage our members to share about their needlework life with us. We love hearing stories and what types of things inspired your projects. We challenge you to put some feeling and emotion into your publications and help us get to know the needler behind the fabric.
Feel free to share photos of your work but it’s optional if you choose to share the steps with us (we do require you share the step process in at least one of your posts for validation purposes). If you just want to needle and share about that time we’d love to hear about it. 😊
For more information about what we do and for our posting guidelines please visit our FAQs.
I also invite you to join our Discord channel.
https://discord.gg/zqnNm3ABtQ
Thank you 🧵 🪡 ~
Thank you 😊