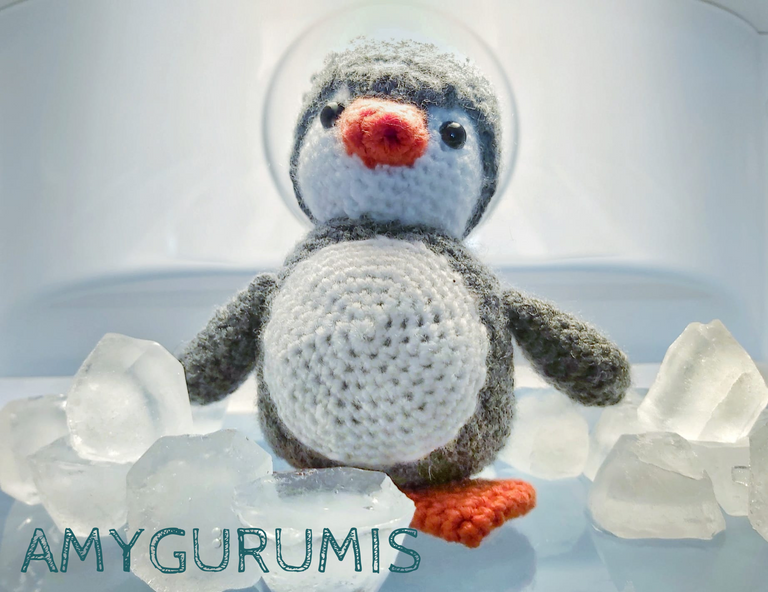
Hi everyone! It's been a few days since my last post on the community, I shared a chochet butterfly that was perfect if you are a begginer on the chochet world as I am. At the end of the post I said that my next proyect was a penguin, so here you have a free pattern of this very cute baby penguin! ❤️
¡Hola a todos! Han pasado algunos días desde mi última publicación en la comunidad, compartí una mariposa crochet que era perfecta si eres un principiante en el mundo crochet como yo. Al final del post dije que mi próximo proyecto era un pingüino, ¡así que aquí tenéis un patrón gratis de este monísimo pingüino bebé! ❤️
I wanted to do it because yesterday was the birthday of one of my bestfriends and as I'm still learning I didn't feel confindent enough to make an amigurumi of his dog. So I asked her about an animal that she likes but can't have and promised her that next year she will have a little copy of his dog.
This pattern it's a little more difficult that the ones I've made before but we are here to learn a little more everyday jeje. Hope you like it and as usual if you have any suggestions on what my next amigurumi would be, any questions or anything you want to share with me, leave it on the comments and I'll try to read and reply them all 🙂
Quise hacerlo porque ayer fue el cumpleaños de una de mis mejores amigas y como sigo aprendiendo no me sentía con la confianza suficiente para hacer un amigurumi de su perro. Así que le pregunté acerca de un animal que le gusta pero que no puede tener y le prometí que el próximo año tendrá una pequeña copia de su perro.

Este patrón es un poco más difícil que los que he hecho antes pero estamos aquí para aprender un poco más cada día jeje. Espero que os guste y como siempre, si tenéis alguna sugerencia sobre cuál sería mi próximo amigurumi, alguna duda o algo que queráis compartir conmigo, déjamelo en los comentarios e intentaré leerlos y responderlos a todos 🙂
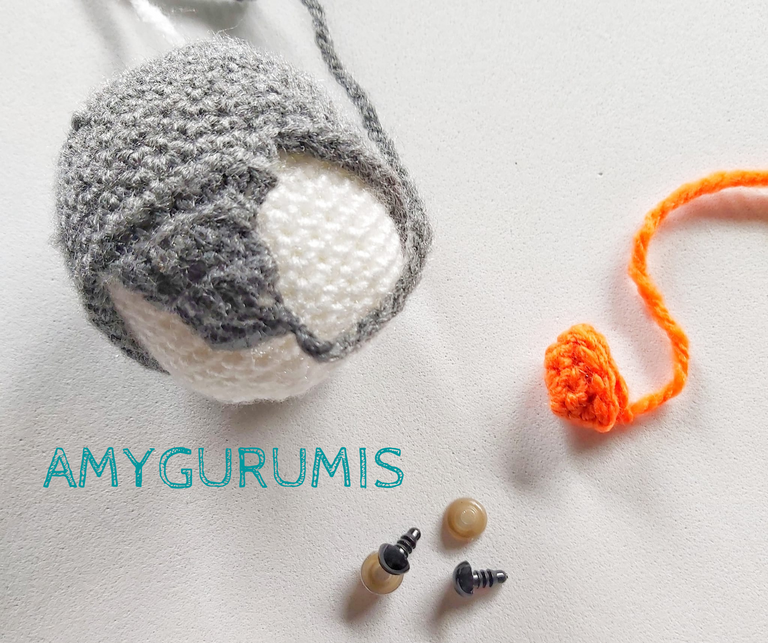
Material needed:
- Grey, white and orange/yellow yarn.
- Crochet needle 3.5mm
- Sewing needle
- x2 Security eyes
- Synthetic Cotton filling
Material necesario:
- Lana gris, blanco y naranja/amarillo.
- Aguja de crochet 3.5mm
- Aguja de coser
- x2 ojos de seguridad
- Relleno de algodón sintético
HEAD < White >
- Magic ring (6st)
- 6 inc (12)
- 1sc / 1 inc (18)
- 2 sc / 1 inc (24)
- 3sc / 1 inc (30)
- 4 sc / 1 inc (36)
- to 18. 1sc on every st (36)
19 . 4pb 1 dis
20 . 3 sc / 1 dec
21 . 2sc / 1 dec
Close with a slip stitch and leave aside
CABEZA <Blanco>
1. Anillo mágico (6º)
2. 6 aum (12)
3. 1pb / 1aum (18)
4. 2 pb / 1 aum (24)
5. 3pb / 1aum (30)
6. 4 pb / 1 aum (36)
7. a 18. 1pb en cada pt (36)
19 . 4pb 1 dis
20 . 3 pb / 1 dism
21 . 2pb / 1 dis

Cerrar con punto raso y dejar aparte
HEAD COVER < Grey >
- Magic ring (6st)
- 6 inc (12)
- 1sc/ 1 inc (18)
- 2 sc / 1 inc (24)
- 3sc /1 inc (30)
- 4 sc / 1 inc (36)
- to 15. 1 sc on ever st (36)
Now it's gonna be a little tricky to explain so again, any questions on the comments and I'll try my best to explain this part the best as possible.
16 . On the last stitch of round 15, turn the knitted piece and do a chain stitch. Now make 8 single stitches.
17 . Turn again the knitted and do a chain stitch.
Skipping the first stitch do 7 single stitches.
18 . Turn again and do a chain stitch.
Skipping the first stitch do 6 single stitches
19 . Turn again and do a chain stitch
Skipping the first stitch do 5 single stitches.
20 . Turn again and do a chain stitch
Skipping the fist stitch do 4 single stitches.
21 . Turn again and do a chain stitch. Without skipping any stitch do 4 single stitches and close with a slip stitch.
This part should look like a "triangle" and its the part between the eyes.
Leave aside.
CUBIERTA DE LA CABEZA < Gris >

1. Anillo mágico (6pt)
2. 6 aum (12)
3. 1pb/ 1aum (18)
4. 2 pb / 1 aum (24)
5. 3pb /1 aum (30)
6. 4 pb / 1 aum (36)
7. a 15. 1 pb en cada pt (36)

Ahora va a ser un poco difícil de explicar, así que de nuevo, cualquier pregunta en los comentarios y haré todo lo posible para explicar esta parte lo mejor posible.

16 . En el último punto de la vuelta 15, gira la pieza tejida y haz un punto de cadeneta. Ahora haz 8 puntos simples.
17. Volvemos a girar el tejido y hacemos un punto de cadeneta.
Saltando el primer punto haz 7 puntos simples.
18. Gira de nuevo y haz un punto de cadeneta.
Saltarse el primer punto hacer 6 puntos simples
19. Gira de nuevo y haz un punto de cadeneta.
Saltando el primer punto haz 5 puntos simples.
20. Gira de nuevo y haz un punto de cadeneta.
Saltando el punto del puño haz 4 puntos simples.
21. Gira de nuevo y haz un punto de cadeneta. Sin saltar ningún punto haz 4 puntos simples y cierra con un punto raso.
Esta parte debe verse como un "triángulo" y es la parte entre los ojos.
Dejar de lado.
BODY < Grey >
- Magic ring (6st)
- 6 inc (12)
- 1sc/ 1 inc (18)
- 2 sc / 1 inc (24)
- 3sc / 1 inc (30)
- 4 sc / 1 inc (36)
- 5 sc / 1 inc (42)
- to 19. 1 sc on every st (42)
20 . 5 sc / 1 dec (36)
21 . 4 sc / 1 dec (30)
Close with a slip stitch and leave aside
CUERPO < Gris >

1. Anillo mágico (6º)
2. 6 aum (12)
3. 1pb/ 1aum (18)
4. 2 pb / 1 aum (24)
5. 3pb / 1 aum (30)
6. 4 pb / 1 aum (36)
7. 5 pb / 1 aum (42)
8. a 19. 1 pb en cada pt (42)
20. 5 pb / 1 dism (36)
21. 4 pb / 1 dism (30)
Cerrar con punto raso y dejar aparte
BELLY < White >
This would be the white belly sewed to the body.
- Magic ring (6st)
- 6 inc (12)
- 1 sc / 1 inc (18)
- 2 sc / 1 inc (24)
- 3 sc / 1 inc (30)
- 4 sc / 1 inc (36)
- and 8. 1 sc on every st (36)
Close with a slip stitch and leave aside
VIENTRE < Blanco >

Este sería el vientre blanco cosido al cuerpo.
1. Anillo mágico (6pt)
2. 6 aum (12)
3. 1 pb / 1 aum (18)
4. 2 pb / 1 aum (24)
5. 3 pb / 1 aum (30)
6. 4 pb / 1 aum (36)
7. y 8. 1 pb en cada pt (36)
Cerrar con punto raso y dejar aparte
FOOT (Make 2) < Orange >
- 6 chain stitches
- Skip the fist stitch and do 4 single stitches, Increase on the last one, 4 single stitches and again an increase on the last sticth. (12)
- to 8. 1 sc on every st (12)
9 . 4 sc/ 1 dec/ 4 sc / 1 dec (10)
Close with a slip stich and leave aside
PIES (Hacer 2) < Naranja >
1. 6 puntos de cadeneta
2. Saltar el primer punto y hacer 4 puntos simples, aumentar el último punto, 4 puntos simples y nuevamente un aumento en el último punto. (12)
3. a 8. 1 pb en cada pt (12)
9. 4 pb/ 1 dism/ 4 pb/ 1 dism (10)
Cerrar con punto raso y dejar aparte
ARMS (Make 2) < Grey >
- Magic Ring (6sc)
- 6 increases (12)
- to 10. 1 sc on every st (12)
Close with a slip stitch and leave aside
BRAZOS (Hacer 2) < Gris >
1. Anillo Mágico (6pb)
2. 6 aumentos (12)
3. al 10. 1 pb en cada pt (12)
 Cerrar con un punto raso y dejar aparte
BEAK < Orange >
- Magic Ring (6st)
- 1 sc / 1 inc (9)
- 1 sc on every st (9)
Close with a slip stitch and leave aside
PICO < Naranja >
1. Anillo Mágico (6pt)
2. 1 pb / 1aum (9)
3. 1 pb en cada pt (9)
Cerrar con punto raso y dejar aparte
TAIL < Grey >
- Magic Ring (6sc)
- 1 sc / 1 inc (9)
- 2 sc / 1 inc (12)
- 1 sc on every st (12)
Close with a slip stitch and leave aside
COLA < Gris >

1. Anillo Mágico (6pb)
2. 1 pb / 1 aum (9)
3. 2 pb / 1 aum (12)
4. 1 pb en cada pt (12)
Cerrar con punto raso y dejar aparte

Now we start putting them all together.
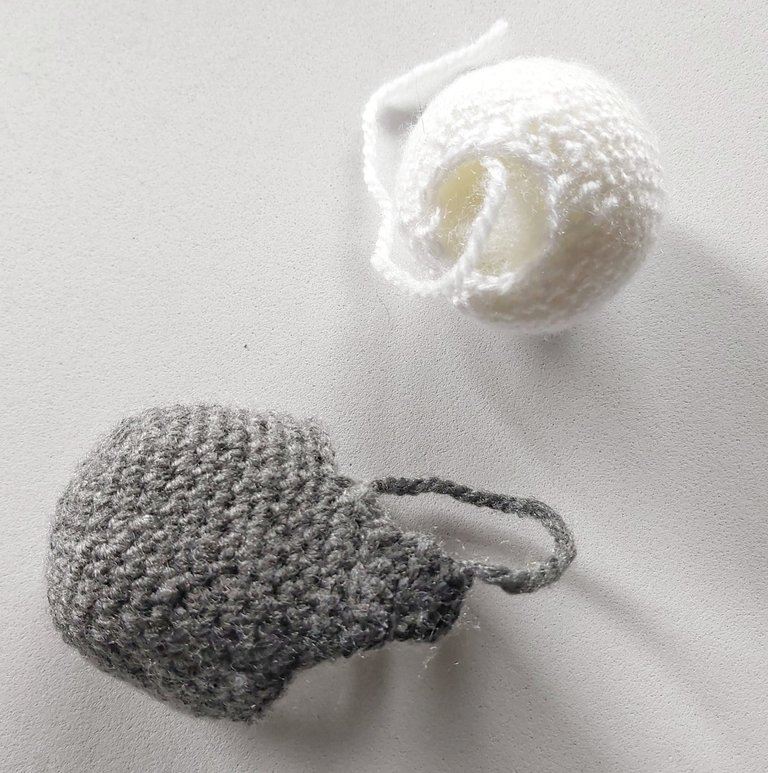
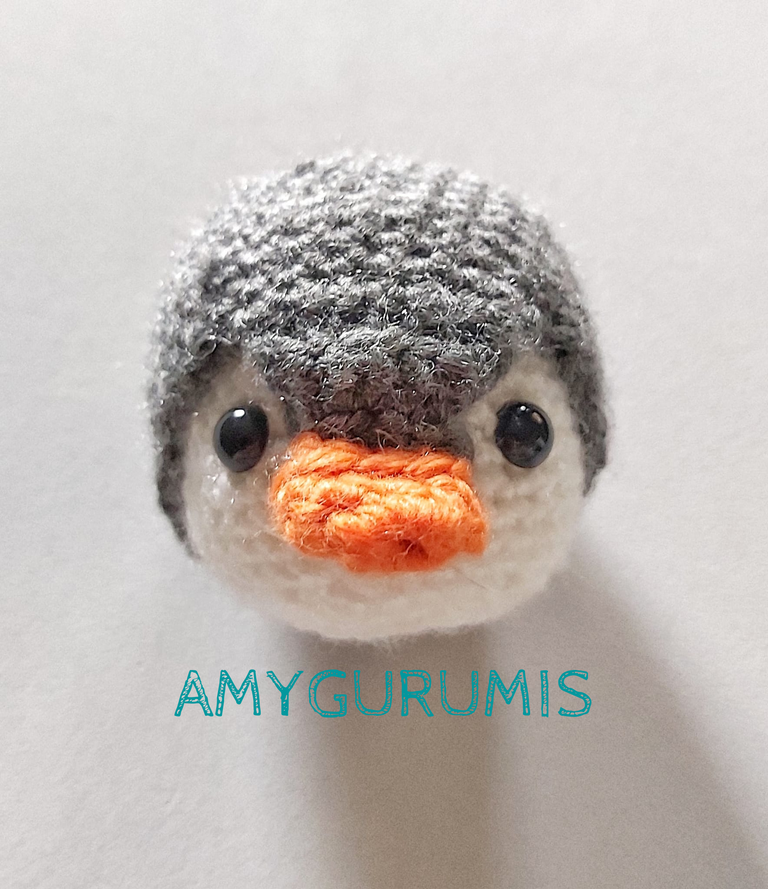
We will start by the head. We put the cover on the head lining the opening of the head with th back side of the head cover.
Ahora empezamos a juntarlos todos.
Empezaremos por la cabeza. Colocamos la tapa en la cabeza alineando la abertura de  la cabeza con la parte trasera de la tapa de la cabeza
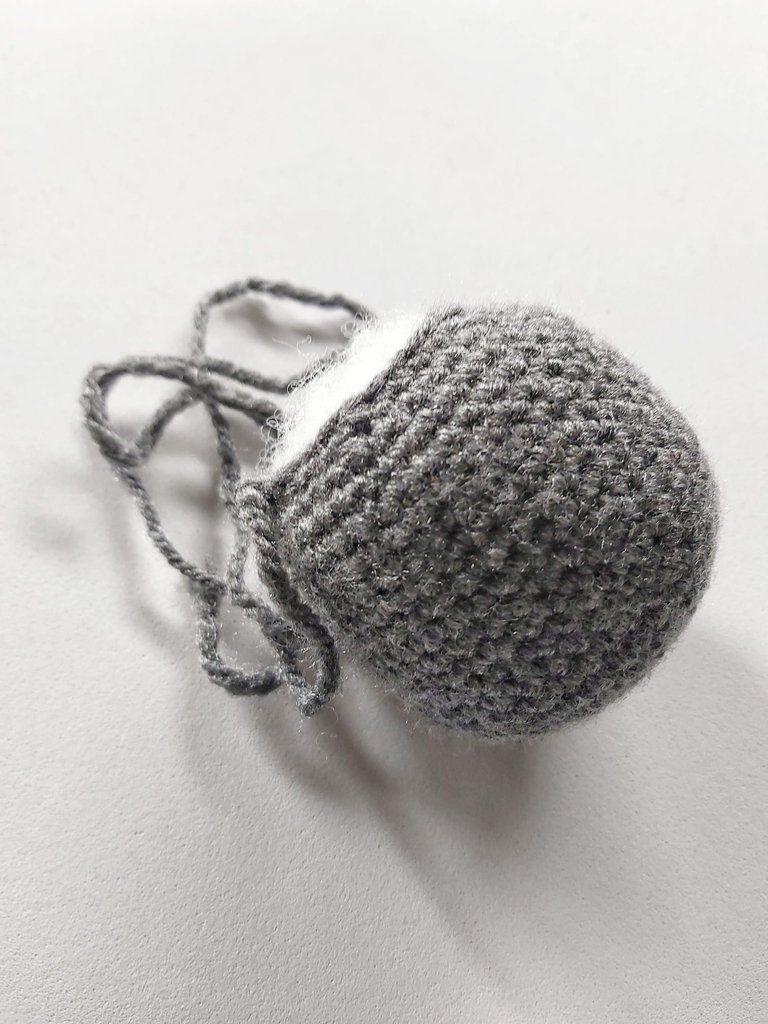
We also take 2 security eyes and the beak, that we will sew at the end of the "triangle". The eyes we can put them closer or more separated, I put then 2 stitches away form the triangle.
The head should look something like this:
También ponemos los 2 ojos de seguridad y el pico, que coseremos al final del         "triángulo". Los ojos los podemos poner más cerca o más separados, yo los coloco a 2              puntos de distancia del triángulo.
La cabeza debe verse algo como esto:
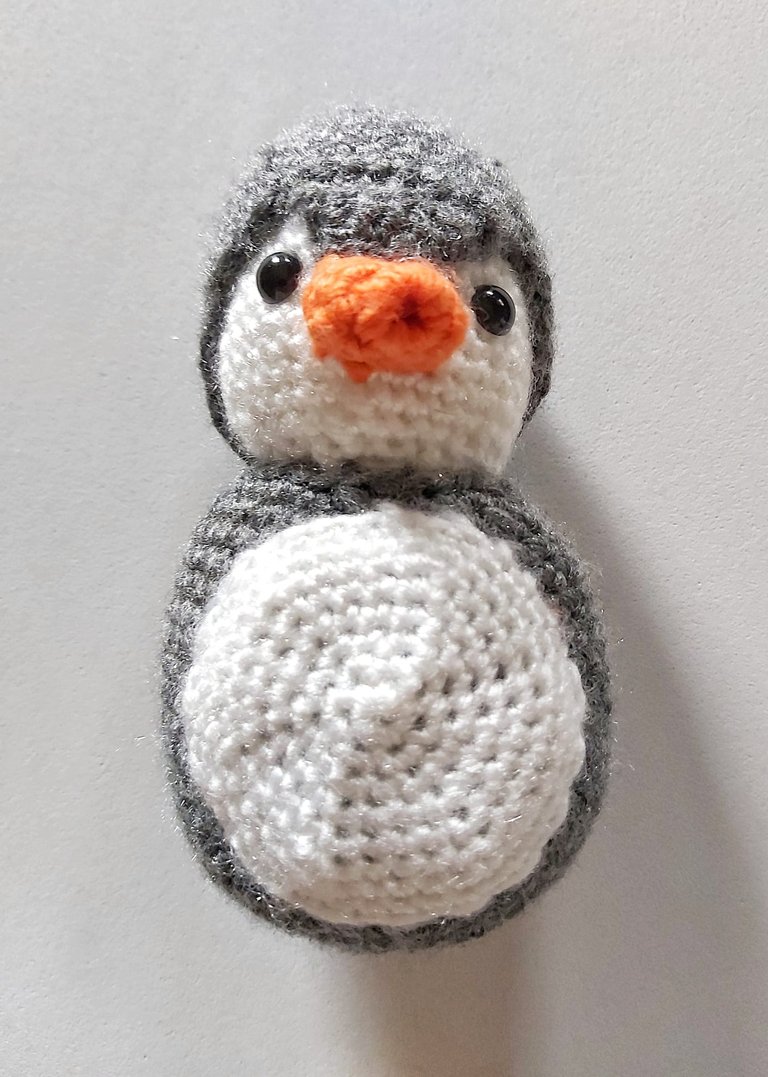
Now we sew the head to the body, we use the grey coloured yarn that was extra from the body and sew it. The hole on the body is bigger than the head one but it's okey, you dont need to sew it just at the end of the head but a bit more up. We also sew the white belly to the body
Ahora cosemos la cabeza al cuerpo, usamos la lana de color gris que sobraba del     cuerpo y lo cosemos. El agujero del cuerpo   es más grande que el de la cabeza pero está  bien, no hace falta coserlo al final de la cabeza sino un poco más arriba.
También cosemos la panza blanca al cuerpo.
At the end we sew the tail at the back, the arms on the side but not too close to the head and the foot at the bottom following the circle of the crochet and TADA!! Our cute baby penguin is here!
Al final cosemos la cola por detrás, los brazos por los lados pero no muy pegados a la cabeza y los pies por abajo siguiendo el círculo del crochet y TADA!! ¡Nuestro lindo bebé pingüino está aquí!
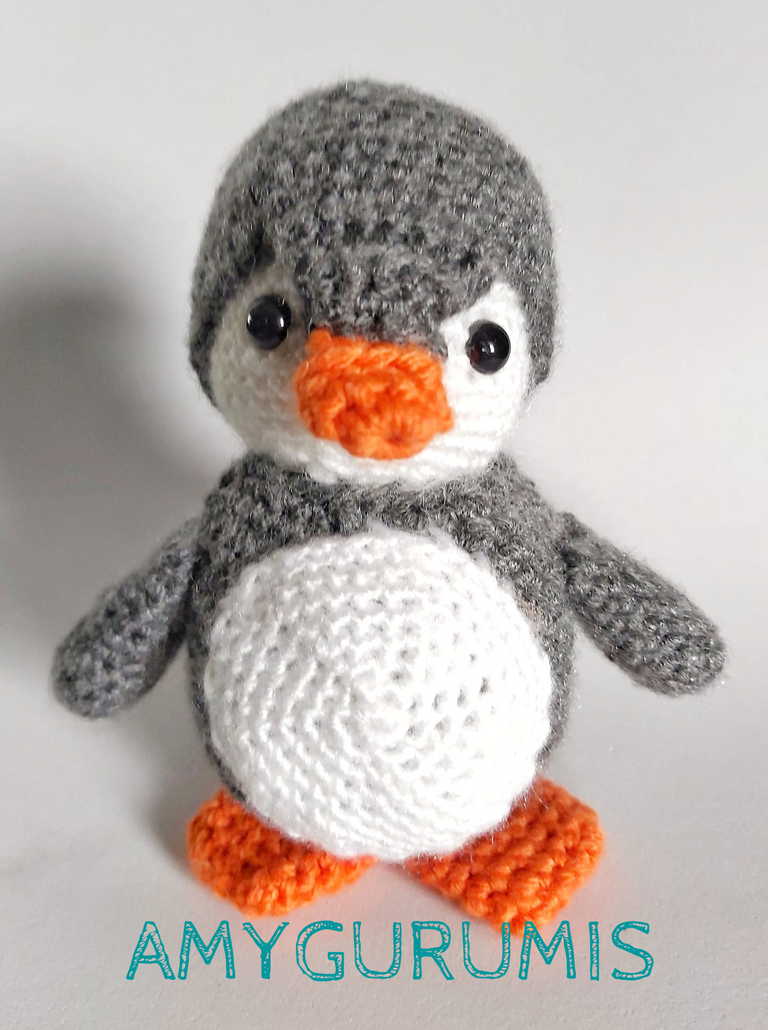
Hope you liked it as much as my best friend did, it's about the size of the hand palm and really adorable.
I would love to see you making some of the patterns I share and tagging me on your post. Hope you're having a lovely day ❤️
See you soon!
Espero que les haya gustado tanto como a mi mejor amiga, es del tamaño de la palma de la mano y realmente adorable.
Me encantaría verte haciendo algunos de los patrones que comparto y etiquetándome en tu publicación.
Espero que estés teniendo un hermoso día ❤️
¡Hasta pronto!
I love penguins and wouldn't mind having one like this for a toy.
The color mix is so perfect and makes it beautiful
It really looks beautiful thanks for sharing @amygurumis
Es un hermoso y tierno pingüino el que nos compartes, gracias por compartir el patrón con toda la comunidad.
Tu post ha sido seleccionado por nuestro personal en nombre del Programa de Incubación de la Comunidad OCD y ha recibido un voto positivo de OCD! ¡¡¡Felicidades!!! Por favor, sigue compartiendo contenido de calidad 😊.
Te invitamos a compartir cualquier proyecto relacionado con las agujas directamente en la Comunidad NeedleWorkMonday. Los lunes usamos la etiqueta #needleworkmonday y los demás días la etiqueta #needlework.
Escrito por @kattycrochet para la Comunidad NeedleWorkMonday.
Congratulations @amygurumis! You have completed the following achievement on the Hive blockchain and have been rewarded with new badge(s):
Your next target is to reach 100 upvotes.
You can view your badges on your board and compare yourself to others in the Ranking
If you no longer want to receive notifications, reply to this comment with the word
STOPTo support your work, I also upvoted your post!
Check out the last post from @hivebuzz:
Support the HiveBuzz project. Vote for our proposal!
Un trabajo que requiere paciencia y práctica, este pingüino te ha quedado muy bello, será un gusto ver tus publicaciones @amygurumis
!discovery 22
This post was shared and voted inside the discord by the curators team of discovery-it
Join our community! hive-193212
Discovery-it is also a Witness, vote for us here
Delegate to us for passive income. Check our 80% fee-back Program
Your content has been voted as a part of Encouragement program. Keep up the good work!
Use Ecency daily to boost your growth on platform!
Support Ecency
Vote for new Proposal
Delegate HP and earn more
Thank you for sharing this amazing post on HIVE!
Your content got selected by our fellow curator @stevenson7 & you just received a little thank you via an upvote from our non-profit curation initiative!
You will be featured in one of our recurring curation compilations and on our pinterest boards! Both are aiming to offer you a stage to widen your audience within and outside of the DIY scene of hive.
Join the official DIYHub community on HIVE and show us more of your amazing work and feel free to connect with us and other DIYers via our discord server: https://discord.gg/mY5uCfQ !
If you want to support our goal to motivate other DIY/art/music/homesteading/... creators just delegate to us and earn 100% of your curation rewards!
Stay creative & hive on!
He looks cute. I also wanted to make a penguin but postponed since designing a pattern for it will take time. Is this your own pattern?
Normally I like to mix patterns, I think this penguin has the body from one pattern and head and feet from another. I do that because sometimes it's hard to find that one pattern that you like it all or you know how to crochet all the stitches and also I'm still learning, I just been crocheting for about a month or so.
Have a lovely day <3🙂
Got it. when mixing patterns it is good be careful, unless if the sizes didn't match, the toy will turn out to be something we don't expect. In the white circular part of the peng body, I have noticed holes among stitches. it will look more beautiful if you can use a hook like 3.0mm next time. I am just suggesting my idea for you 🤗.
I am normally using 2.0mm hook for 3ply acrylic yarn. when my stitches are tight, my filling doesn't comes out 😁. so the finishing looks good.
Thanks for the tips!! I'll try next time, I was using the 3,5mm because sometime stitches get really tight and I can barelly put the kneedle inside but I take it for the next one and tell you how it went haha
thanks <3
yeah it is bit hard at the beginning. I was also practicing with 3.5 when I started. then I changed into 3.0 and then to 2.0.
Congratulations @amygurumis ! Your post has been placed in the spotlight for this week's NeedleWorkMonday Community Featured Posts #173!
Thank you for your quality post and for being a part of the needlework community!
NeedleWorkMonday has a Spanish Channel 🧵🪡🧶chat-general-en-español on Discord moderated by our lovely @kattycrochet and @lauramica! We warmly welcome you to this new creative space!
That's one adorable penguin @amygurumis! Bravo!