
FULL ENGLISH VERSION
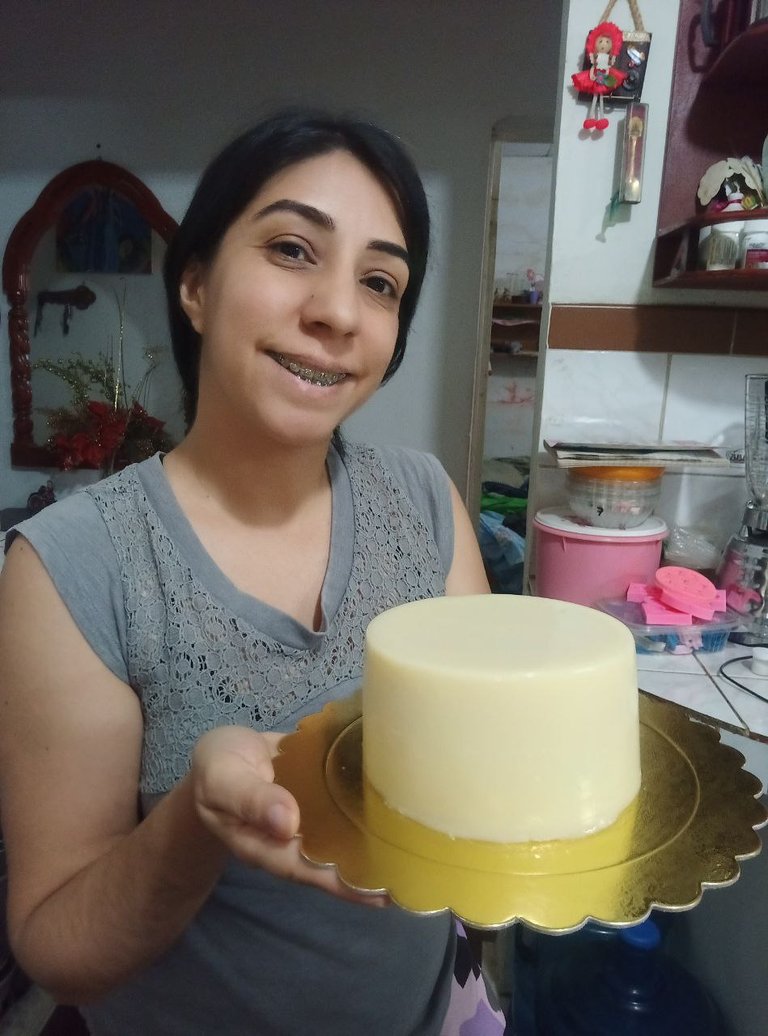
A mosaic jelly that does not look like a mosaic ❤️.
Hello hello beautiful people of HIVE and the community @foodiesbeehive in this opportunity I want to share with you a technique to make delicious mosaic jellies but that on the outside you don't notice that they are a mosaic jelly and have colored jellies inside.
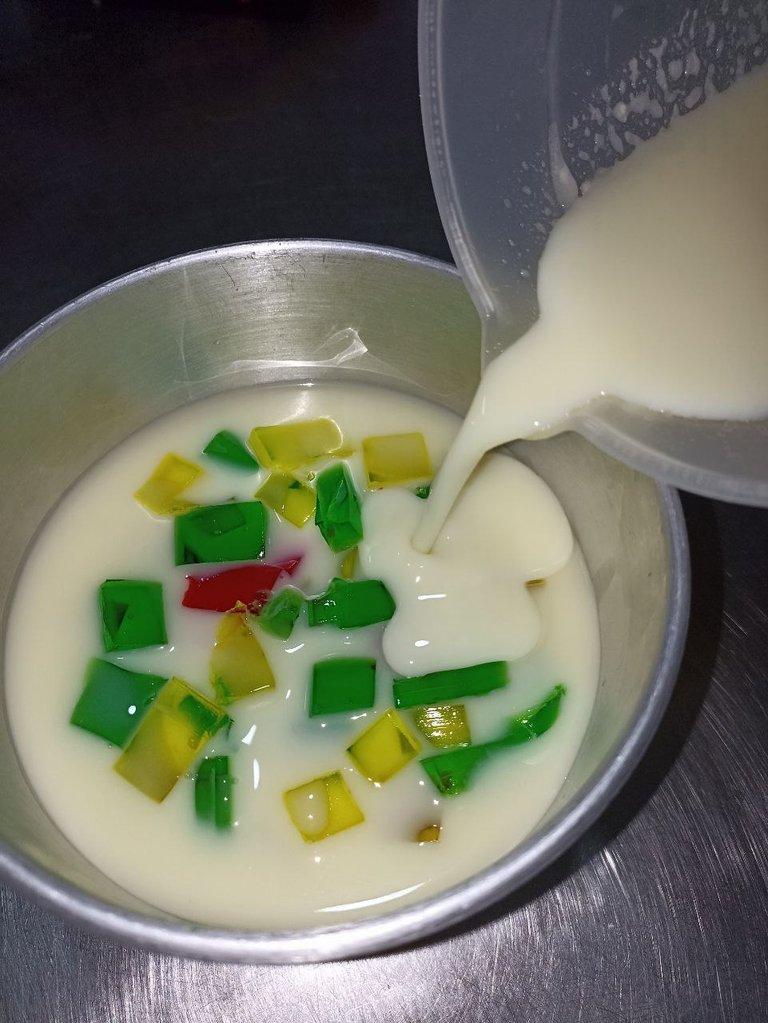
For those who may not know them, mosaic jellies are milk jellies that are filled with squares of colored jellies and when chopped they look like a very pretty and delicious mosaic of colors.
Many of you probably know them, they are quite traditional at parties and super delicious. If you know them, you have surely noticed that in this type of mosaic jellies you tend to see the colored squares on the sides.
This time I want to show you how to hide these squares and make delicious jellies with a lot of contrast of flavors but with a clean and neat finish on the outside that lends itself to make infinite styles of decorations, we can paint, decorate, combine with the design of the cakes and when chopping have a delicious mosaic jelly and not a simple milk jelly.
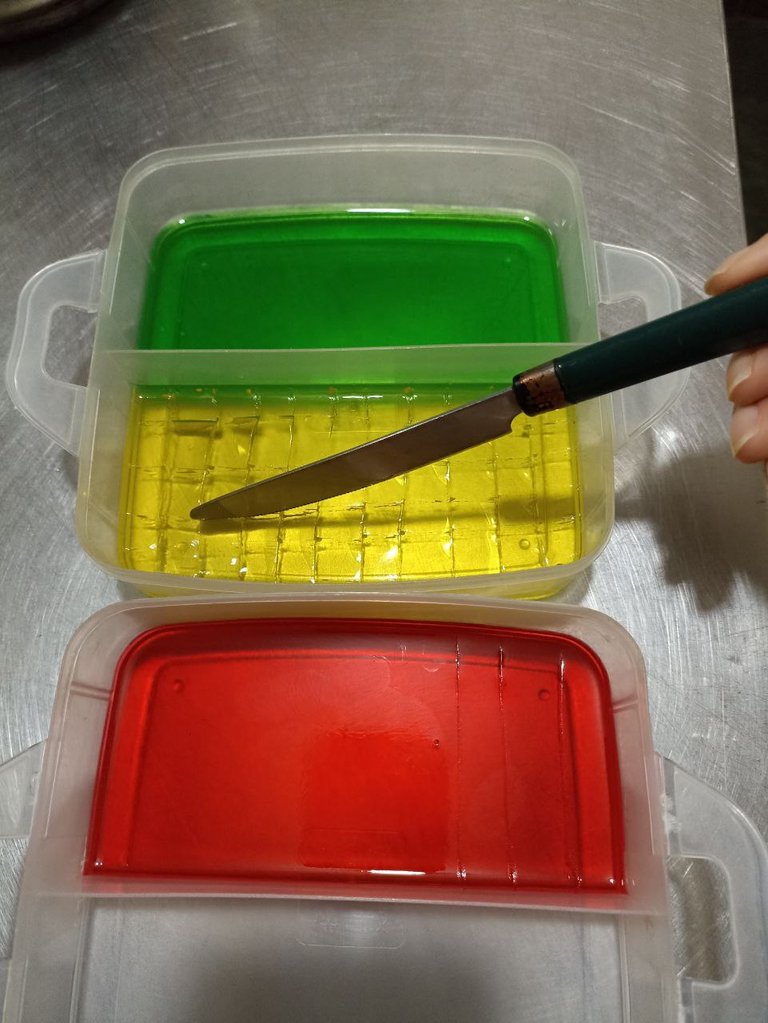
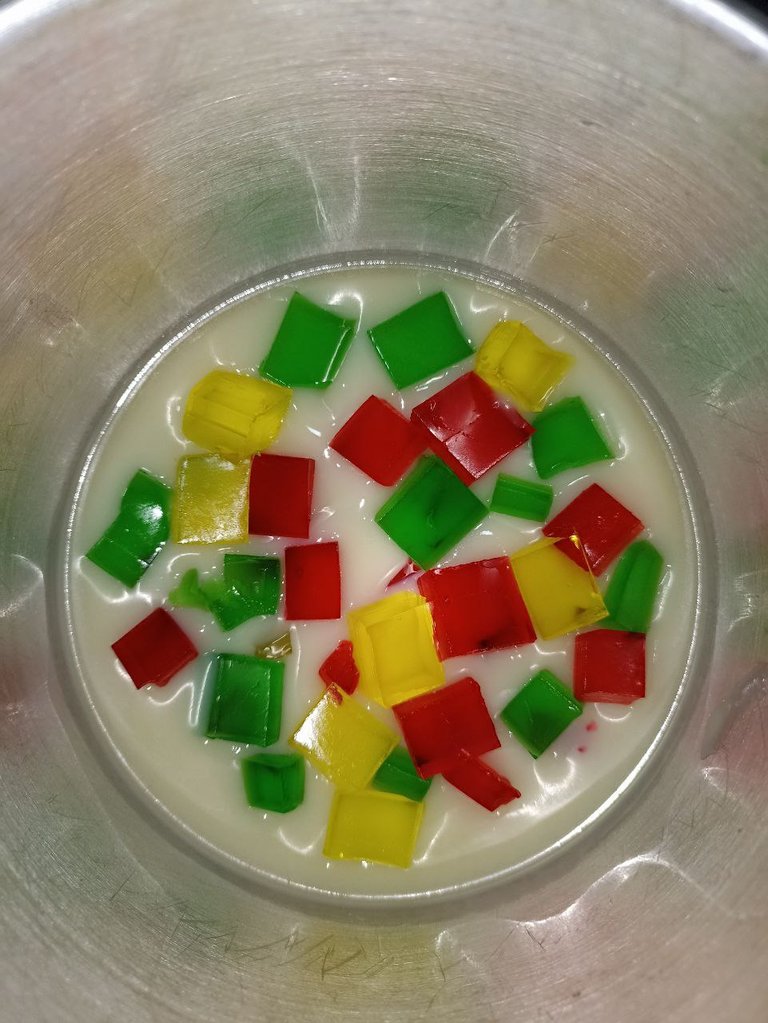
The first thing we have to do is to prepare citric jellies with the colors and flavors we want, put them to curdle and when they are hard, chop them into small squares as you can see in the picture.
On the other hand we must have milk jelly, if you do not know how to make it at the end of the post I will leave you a simple recipe.
Note: the milk jelly must be at room temperature, it cannot be warm or hot to start the process.
 |  |  |  |
|---|
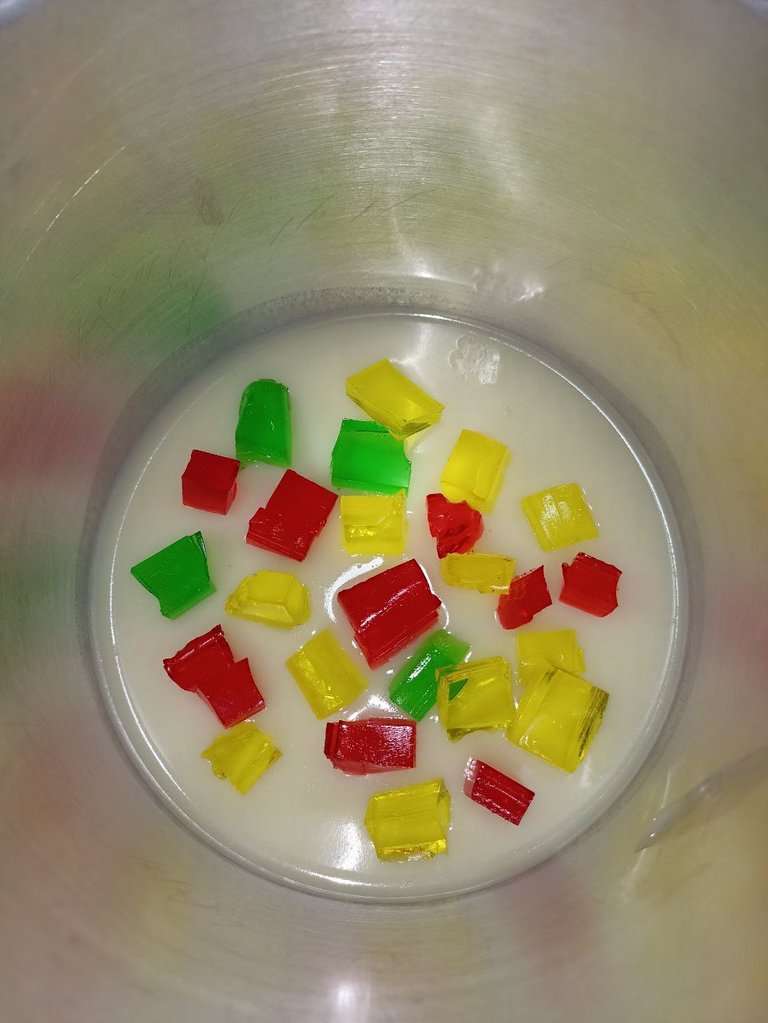
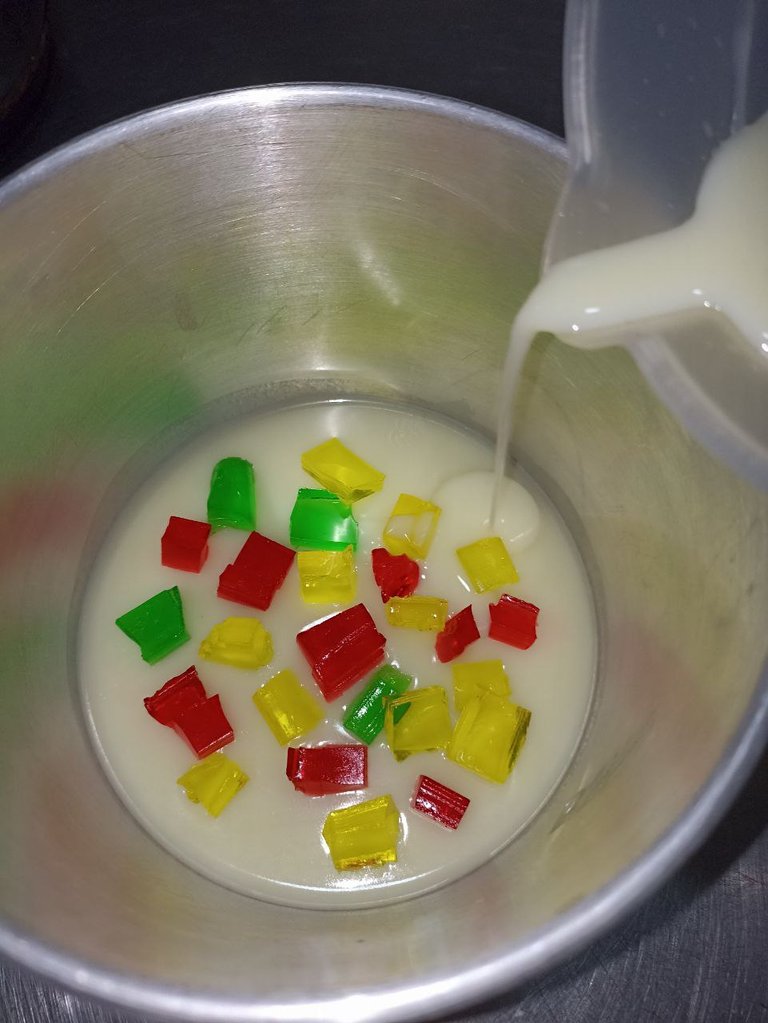
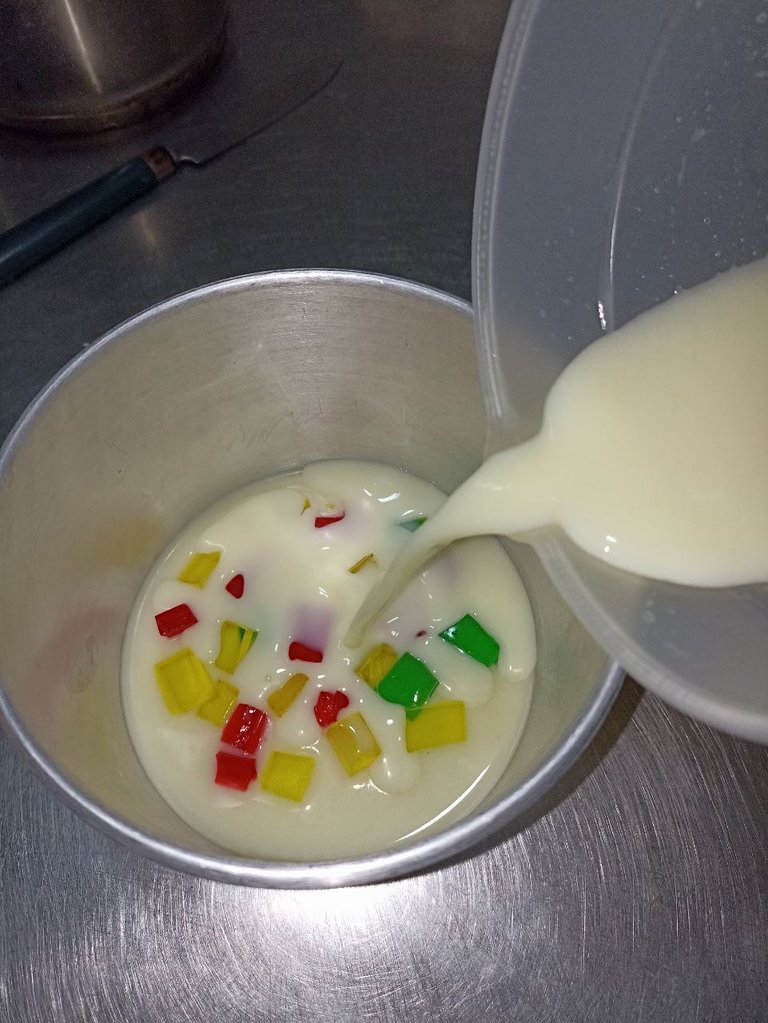
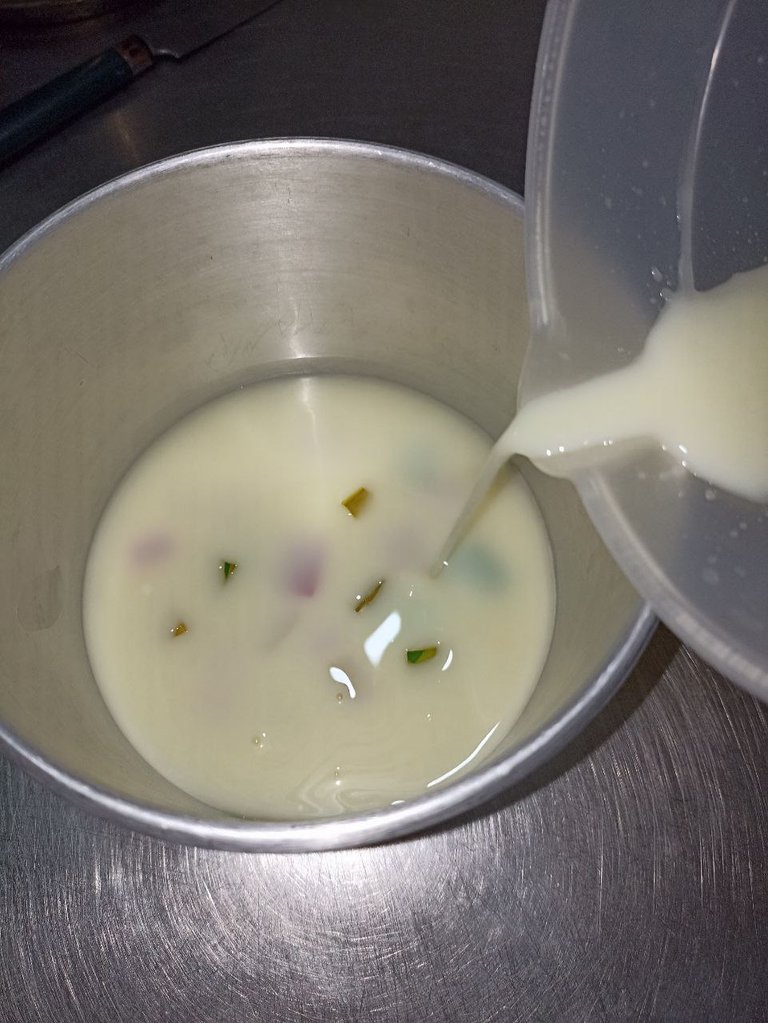
To begin to assemble our mosaic jelly with hidden edges the first thing to do is to place a thin layer of milk jelly in a container, about 1 cm thick, this first layer of milk jelly we take it to refrigerate a few minutes until it is semi curdled. Here I used a 12 cm cake pan to make the gelatin, it was a small gelatin.
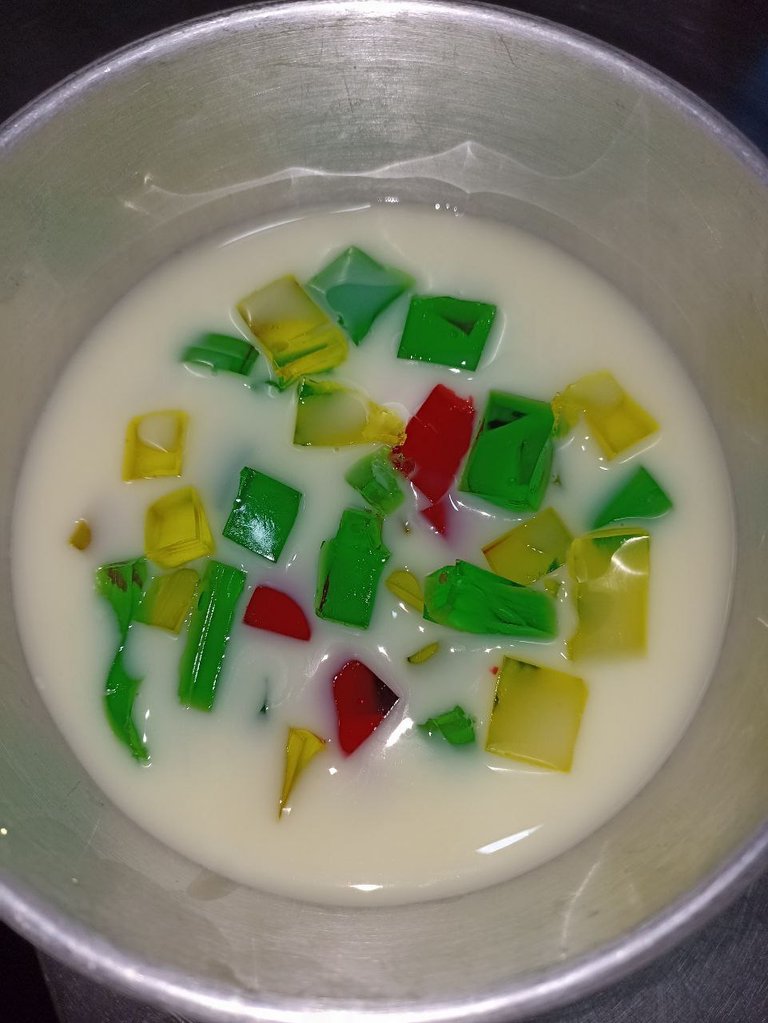
After the first layer is semi-set, we begin to place the colored squares in the central part, leaving a space between the colored squares and the edges of the container.
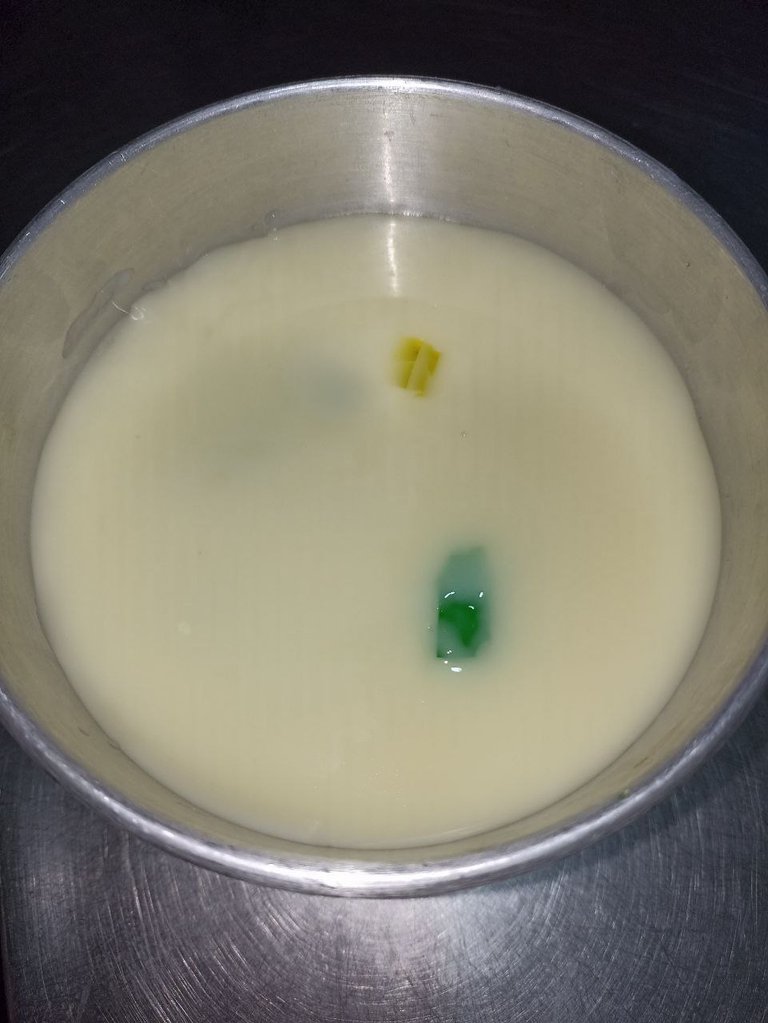
After we have placed the first part of the colored squares, we add milk gelatin very carefully, a thin layer that does not completely cover the squares, we refrigerate for a couple of minutes and when this layer is semi-set, which helps to keep the colored gelatin squares in place, we add more milk gelatin until it is completely covered.
 |  |  |  |
|---|
Repeat this process until the jelly is completely set and finally cover the last squares with milk jelly.
Luego esperamos que la gelatina esté bien durita antes de desmoldar. En lo personal me gusta desmoldar con agua tibia y no uso ningún tipo de aceite ni nada para ayudar a desmoldar, sólo agua tibia y cómo dato súper importante les cuento que si van a usar torteras de metal como la que use el agua debe estar tibia super bajito, una temperatura como para bañar a un bebé.
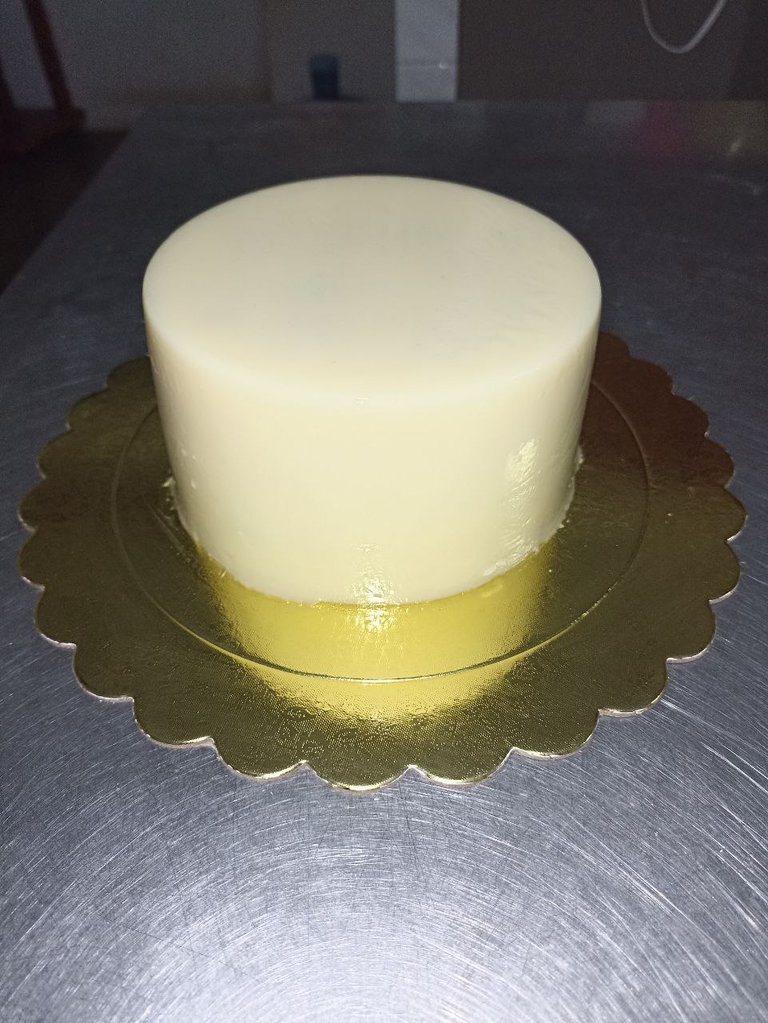
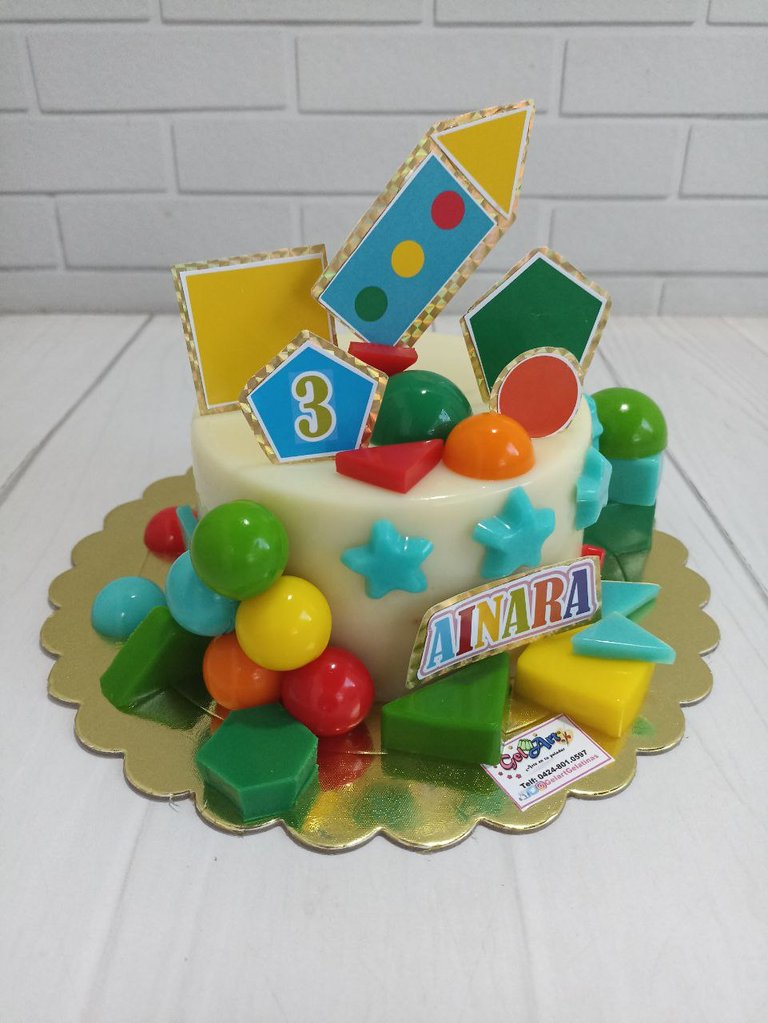
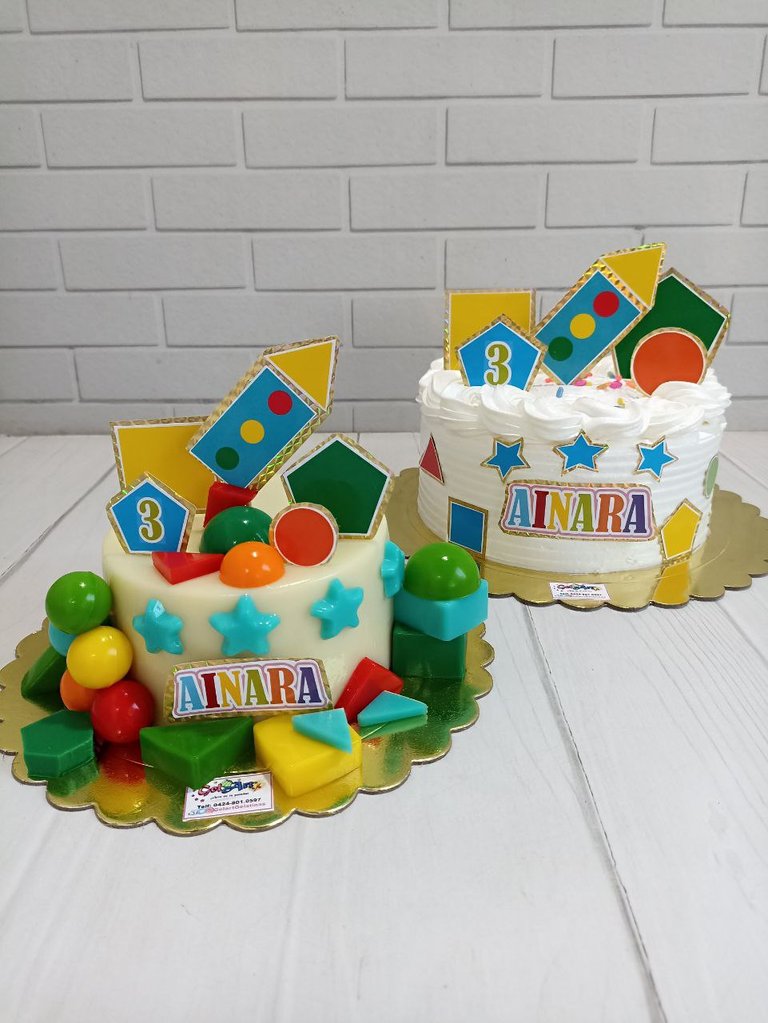
And this is how this gelatin turned out, you will see it as white and simple but it is just what I was looking for, because the decoration goes on the outside and I wanted it to match the cake, which was a white cake.
With this technique gelatins can be a kind of canvas where imagination is the limit 🥰 but inside they are a real explosion of delicious flavors 🤤 personally I like the mix of creamy and citrus in gelatins, I feel that when the gelatin is only milk or only citrus the taste is boring, instead when it has both it is another level.
 |  |  |
|---|
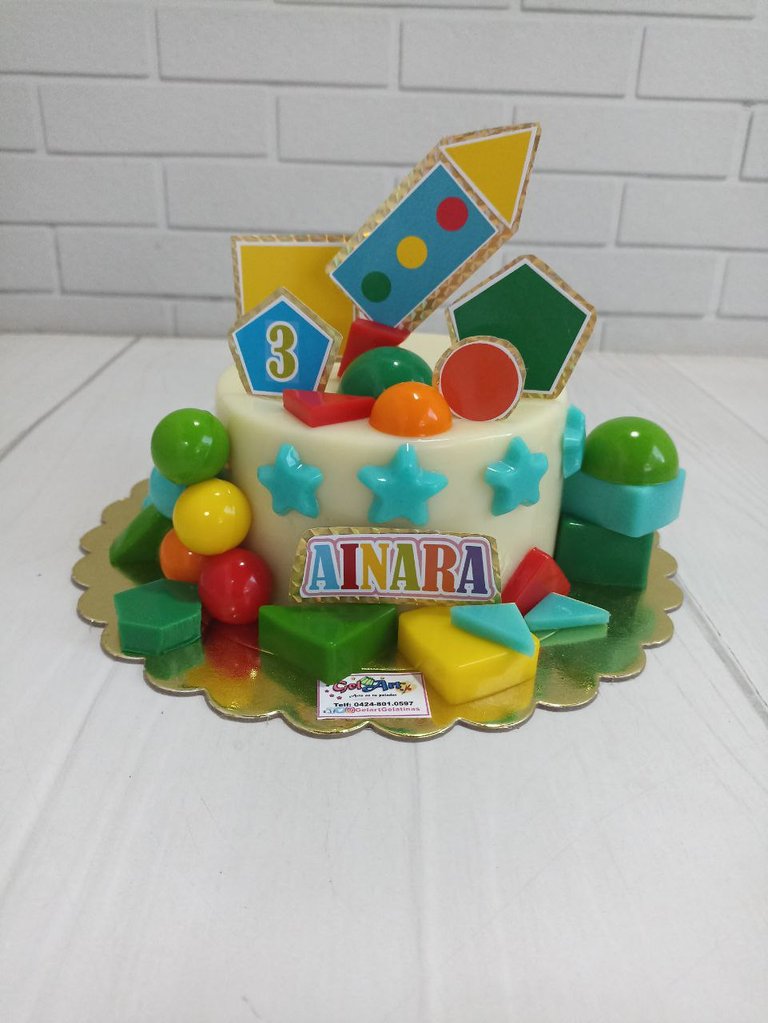
And after a decoration with Toppers and jelly figures this is how it turned out, it went from being something simple to something very cute and colorful, the design was requested for a little girl who loves to play with geometric figures, build towers and her mom asked me if I could leave some jelly figures for the girl to play with and I left some of them outside, I hope she had a lot of fun with her jelly ❤️.
And for those of you who have made it this far, here is a simple recipe for making milk jelly.
Ingredients:
- 1 condensed milk.
- 750 ml of liquid milk.
- 1 cup sugar.
- 5 tablespoons of unflavored gelatin.
- 3/4 cup of water.
- 1 tablespoon essence.
Preparation:
First hydrate the powdered gelatin with the water. Leave it for several minutes until it goes from being wet and creamy to dry and a little hard.
Then in a pot we take half of the milk, the cup of sugar and heat until the sugar dissolves and the milk is steaming, at this point we turn off the fire.
On the other hand we melt the gelatin that we had hydrated, we can melt it in the microwave or bain-marie. When the gelatin is liquid add it to the hot milk mixture, mix well, then add the remaining milk, condensed milk and essence. I used butter flavor is one of my favorites.
And that's all for today friends ❤️ hope you liked my post today 🥰 thank you so much for reading me and giving love to my content ❤️ God bless you 🙏 receive from me sweet hugs and until a next one.
The photos used throughout the post were taken with my Redmi 10S phone.
Banners & Signatures Made in Corel Draw Photo-Paint
Translation to English with DeepL
My Social Media


Español

Una gelatina mosaico que no parece mosaico❤️
Hola hola gente linda de HIVE y de la comunidad @foodiesbeehive en esta oportunidad quiero compartir con ustedes una técnica para hacer deliciosas gelatinas de mosaico pero que por fuera no se note que son una gelatina mosaico y tiene gelatinas de colores por dentro.

Para quienes quizás no las conozcan, las gelatinas mosaico son unas gelatinas de leche que están rellenas de cuadritos de gelatinas de colores y al picarlas se ven como un mosaico de colores muy bonito y delicioso.
Probablemente muchos las deben conocer, son bastante tradicionales en fiestas y super deliciosas. Si las conocen seguro se han dado cuenta que en este tipo de gelatinas de mosaico tienden a verse los cuadritos de colores por los laterales.
En esta oportunidad les quiero enseñar a ocultar estos cuadritos y poder hacer deliciosas gelatinas con mucho contraste de sabores pero con un acabado limpió y prolijo por fuera que se presta para hacer infinitos estilos de decoraciones, las podemos pintar, decorar, combinar con el diseño de las tortas y al picar tener una deliciosa gelatina mosaico y no una simple gelatina de leche.

Lo primero que tenemos que hacer es preparar gelatinas cítricas con los colores y sabores que deseemos, poner a cuajar y al estar durita picarlas en cuadritos como pueden observar en la foto.
Por otro lado debemos tener gelatina de leche, si no saben cómo hacerla al final del post les voy a dejar una receta sencilla.
Nota: la gelatina de leche tiene que estar a temperatura ambiente, no puede estar tibia ni caliente para comenzar el proceso
 |  |  |  |
|---|
Para comenzar a armar nuestra gelatina de mosaico con los bordes ocultos lo primero que haremos es colocar una capa delgada de gelatina de leche en un envase, aproximadamente 1cm de grosor, está primera capa de gelatina de leche la llevamos a refrigerar unos pocos minutos hasta que esté semi cuajada. Acá yo usé para hacer la gelatina una tortera (molde de hacer tortas) de 12 cm, era una gelatina pequeña.
Luego que está primera capa está semi cuajada comenzamos a colocar los cuadritos de colores en la parte central dejando un espacio entre los cuadritos de colores y los bordes del envase.
Luego que hemos colocado la primera parte de los cuadritos de colores, agregamos gelatina de leche con mucho cuidado, una capa delgada que no cubra por completo los cuadritos, llevamos a refrigerar un par de minutos y cuando está capa está semi cuajada, cosa que ayuda a que se mantengan los cuadritos de de gelatina de colores en su lugar agregamos más gelatina de leche hasta cubrir por completo.
 |  |  |  |
|---|
Repetimos este proceso hasta terminar de armar la gelatina y para finalizar cubrimos los últimos cuadritos con gelatina de leche.
Luego esperamos que la gelatina esté bien durita antes de desmoldar. En lo personal me gusta desmoldar con agua tibia y no uso ningún tipo de aceite ni nada para ayudar a desmoldar, sólo agua tibia y cómo dato súper importante les cuento que si van a usar torteras de metal como la que use el agua debe estar tibia super bajito, una temperatura como para bañar a un bebé.

Y así quedó está gelatina, ustedes la veran así blanca y sencilla pero es justo lo que buscaba, porque la decoración va por fuera y quería que combinara con la torta que era una torta blanca.
Con esta técnica las gelatinas pueden quedar como una especie de lienzo en el que la imaginación es el límite 🥰 pero por dentro son una verdadera explosión de deliciosos sabores 🤤 en lo personal me gusta la mezcla de lo cremoso y lo cítrico en las gelatinas, siento que cuando la gelatina es sólo de leche o sólo cítrica el sabor es aburrido, en cambio cuando tiene de ambos es otro nivel.
 |  |  |
|---|
Y luego de una decoración con Toppers y figuras de gelatina así quedó, pasó de ser algo sencillo a algo muy lindo y colorido, el diseño fue pedido para una niña que le encanta jugar con figuras geométricas, armar torres y su mami me pidió que si le podía dejar figuras de gelatina para que la niña jugará y allí le dejé unas cuantas por fuera espero se haya divertido mucho con su gelatina ❤️.
Y para quienes han llegado hasta acá, les dejo una receta sencilla para hacer gelatina de leche.
Ingredientes:
- 1 Leche condensada.
- 750 ML de leche líquida.
- 1 taza de azúcar.
- 5 cucharadas de gelatina sin sabor.
- 3/4 taza de agua.
- 1 cucharada de esencia.
Preparación:
Primero ponemos a hidratar la gelatina en polvo con el agua. Dejamos varios minutos hasta que pase de estar húmeda y cremosa a seca y un poco durita.
Luego de esto en una olla tomamos la mitad de la leche, la taza de azúcar y calentamos hasta que se disuelva el azúcar y la leche esté humeante, en este punto apagamos el fuego.
Por otra parte derretimos la gelatina que teníamos hidratando, la podemos derretir en el microondas o baño de María. Cuando la gelatina esté en estado líquido la agregamos a la mezcla de leche caliente, mezclamos bien, agregamos luego el restante de la leche, la leche condensada y la esencia. Yo use sabor mantecado es uno de mis favoritos.

Y esto es todo por hoy amigos ❤️ espero que les haya gustado mi post de hoy 🥰 muchas gracias por leerme y darle amor a mi contenido ❤️ Dios les bendiga 🙏 reciban de mi parte dulces abrazos y hasta una próxima.
Las fotos usadas a lo largo del post fueron tomadas con mi teléfono Redmi 10S.
Banners y Firma Hechos en Corel Draw Photo-Paint
Traducción al Inglés con DeepL
Mis Redes Sociales


Hermosa gelatina que rica se ve, me gusta la forma como luego la decoración para darle color y vida.
Gracias amiga ❤️ si ese tipo de gelatina es delicioso y bueno el diseño fue para que hiciera juego con la torta que pidió el cliente toda la vida se la da la decoración externa 👌 he hecho unas así blancas y luego las pinto como la de mi cumpleaños
El lienzo en blanco se presta para infinitos detalles 👌
Join the foodie fun! We've given you a FOODIE boost. Come check it out at @foodiesunite for the latest community updates. Spread your gastronomic delights on and claim your tokens.
Thanks 🙏❤️
Más que un trabajo, esto es un arte. Increíble resultado, gracias por compartirlo en la comunidad.
Saludos @gelart
Muchas gracias amiga ❤️ por tu comentario y apreciar mi trabajo 🙏 muchas bendiciones 🙏❤️
Congratulations @gelart! You have completed the following achievement on the Hive blockchain And have been rewarded with New badge(s)
Your next target is to reach 400 comments.
You can view your badges on your board and compare yourself to others in the Ranking
If you no longer want to receive notifications, reply to this comment with the word
STOP🥳🥳🙏🙏 thanks
Keep up the fantastic work @gelart! Your dedication and hard work will pay off when you reach your target.
Thank you 🙏 We will continue here ❤️ The goal is to continue adding and growing on this platform. Many blessings, thank you for the support 🙏