Buenos días amigos de #hive, el día de hoy vengo a compartir con ustedes una deliciosa receta, es primera vez que la hago y realmente me gustó muchísimo, ésta es una torta muy saludable ya que la guanábana contiene fibra y propiedades anticancerosas y además ésta torta no tiene nada de grasas.
Quiero decirles que hace mucho estaba esperando hacer éste contenido, así que ya estamos aquí, comencemos.
Ingredientes
(Para el biscocho)
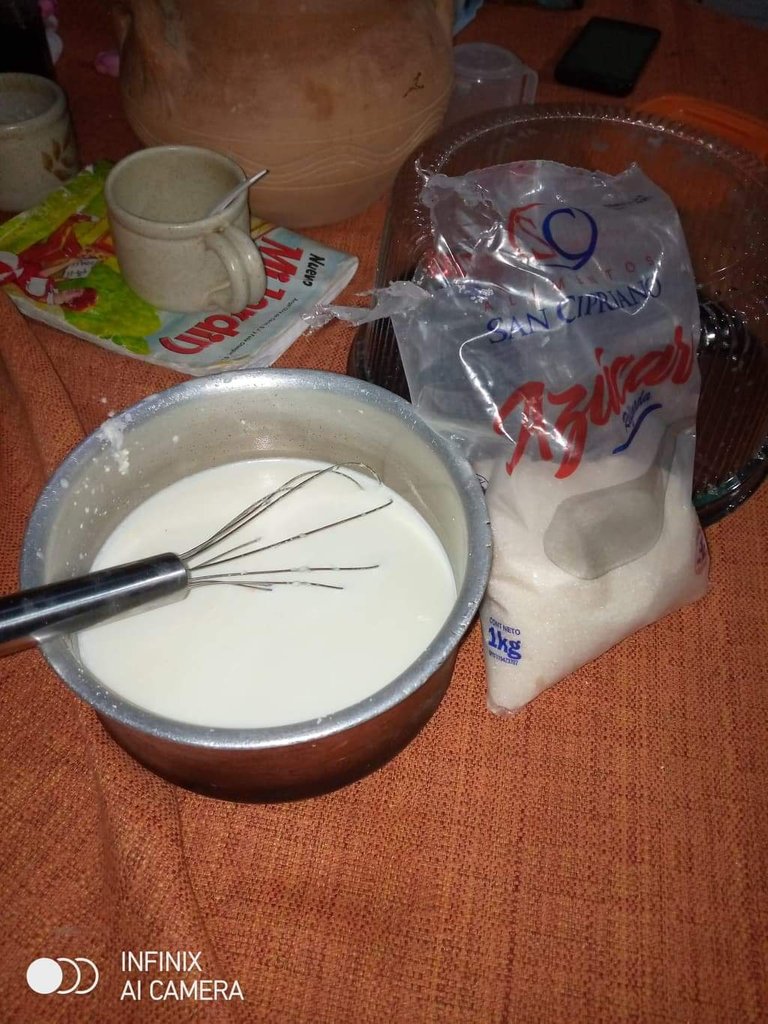
6 huevos
10 tazas de harina
4 tazas de azúcar
2 tazas y media de leche.
1 cucharada de vainilla.
polvo para hornear.
(Para el almíbar)500 gm de guanábana.
1 taza de azúcar
1 pizca de sal
(Para el merengue italiano)4 claras de huevo
1 taza de azúcar
1 cucharada sopera de vainilla
1 cucharadita de cremor tártaro.
6 cucharaditas de agua (sólo hasta cubrir el azúcar).
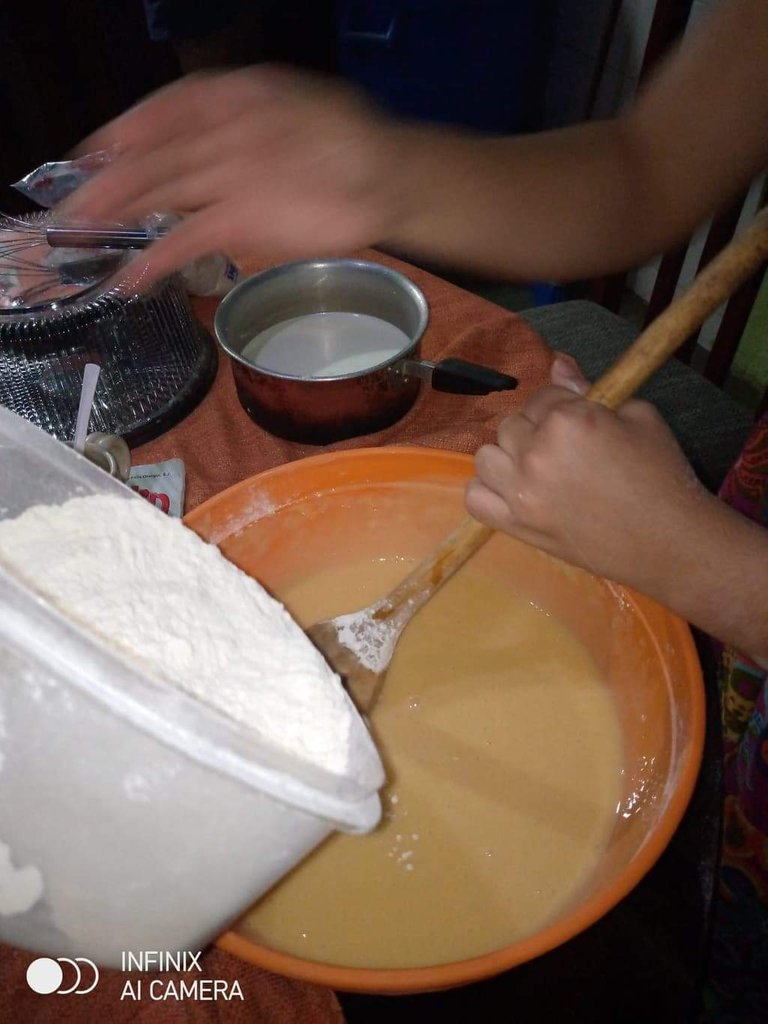
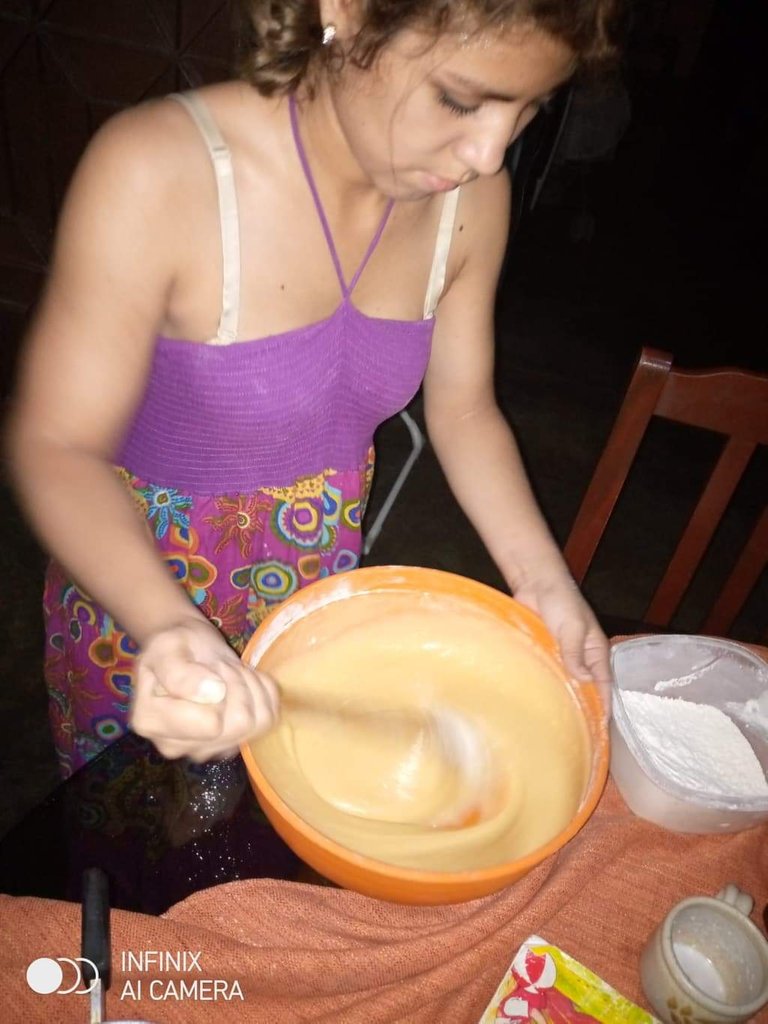
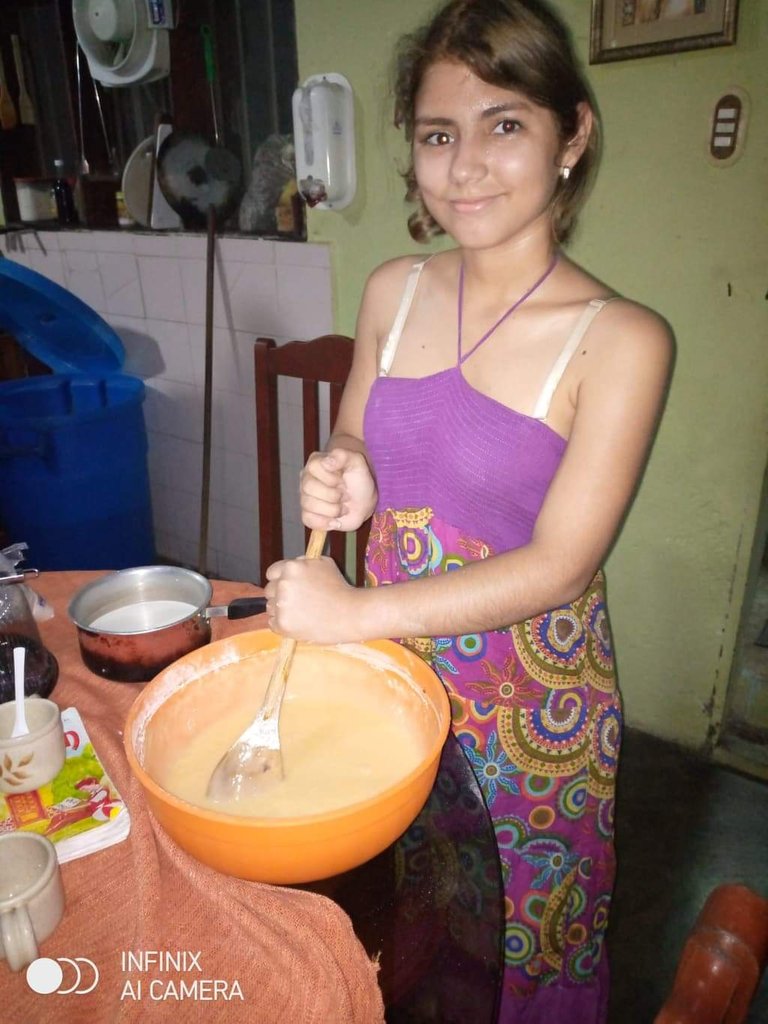
Lo primero que hice para la elaboración del biscocho fué tamizar la harina y mezclarla con el polvo de hornear. Luego de tamizar la harina de trigo y que haya quedado bien integrada con el polvo para hornear, batimos los seis huevos y vamos añadiendo la harina sin dejar de batir, ustedes lo pueden hacer más fácil con ayuda de una batidora. 🥺
(Todas las imágenes han sido tomadas desde mi teléfono y el de mi novio).
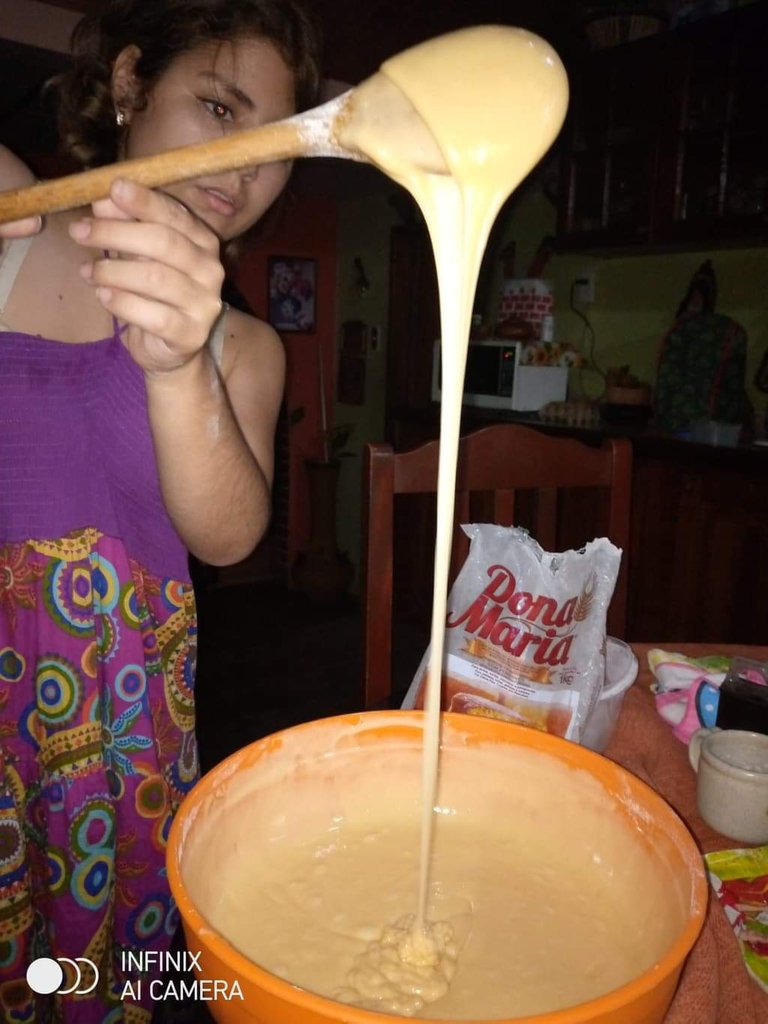
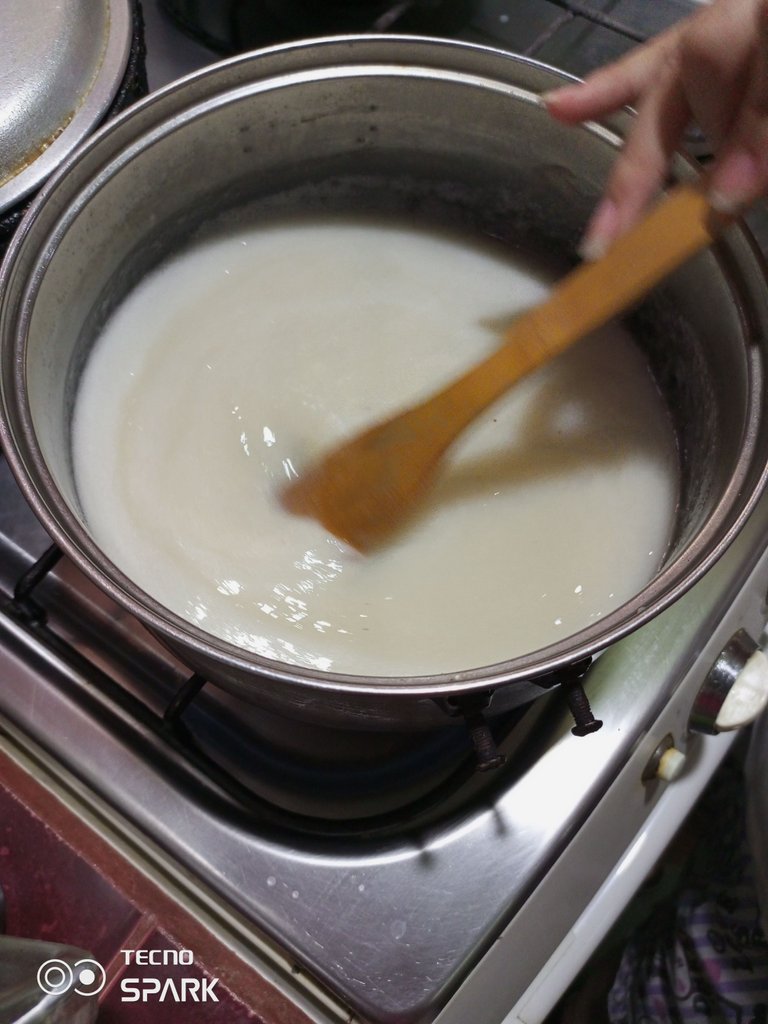
A medida que va espesando vamos a añadir la leche y el azúcar y la vainilla, hasta que nos quede una consistencia en un punto ni tan aguado pero tampoco tan espeso, así:
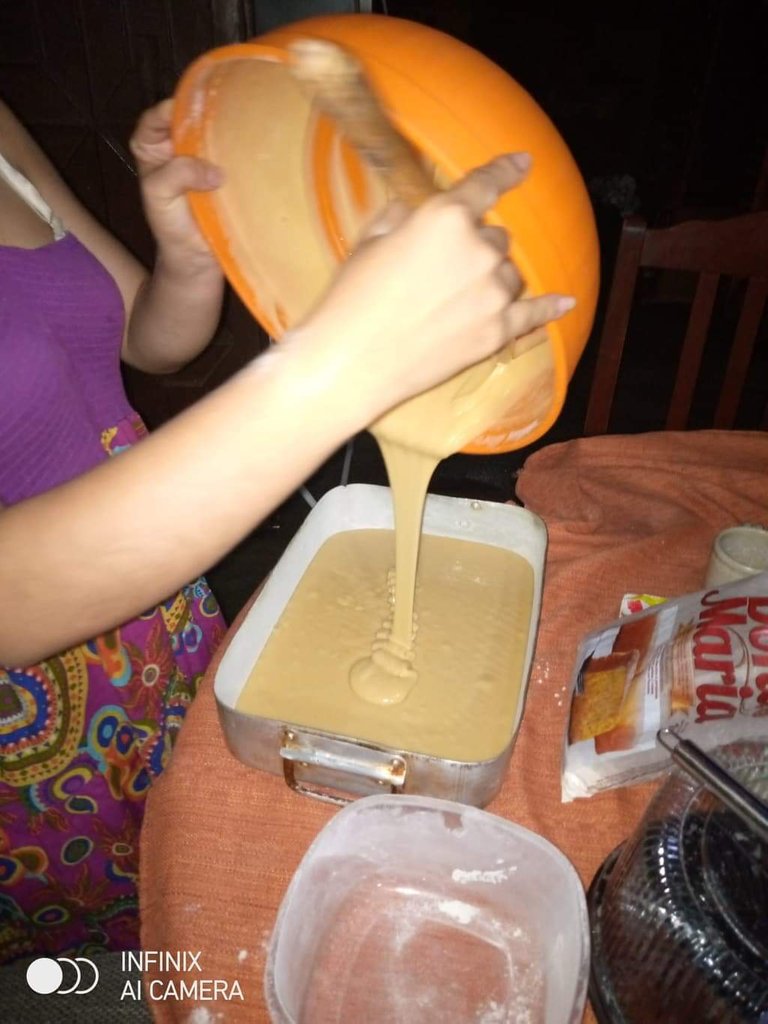
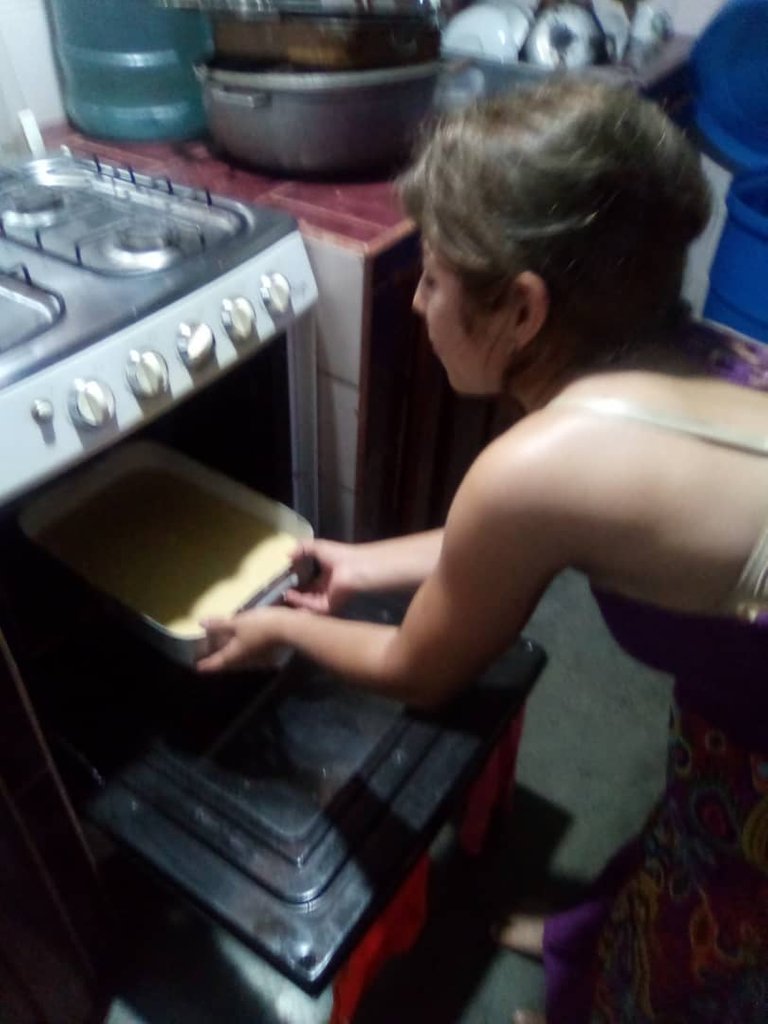
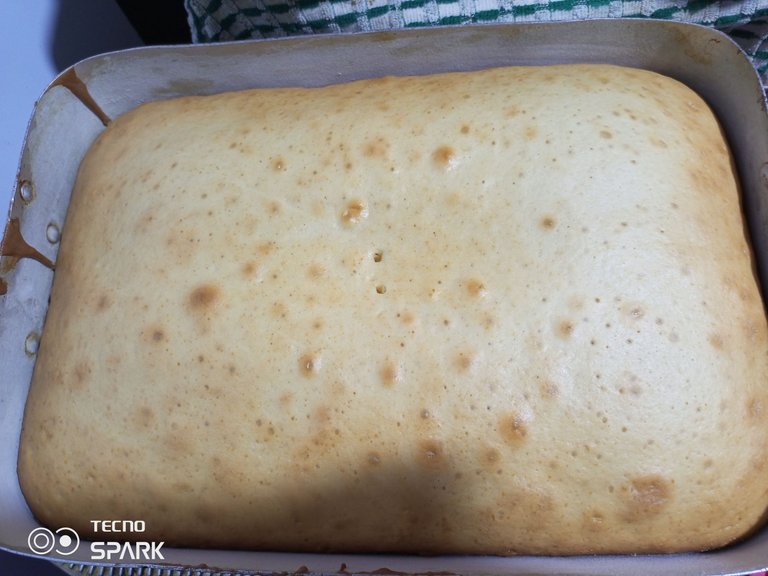
Ya con la mezcla del biscocho lista, procedemos a enharinar el molde untado previamente con mantequilla, colocamos la mezcla en el molde y llevamos al horno ya precalentado a 180°g por 30 minutos.
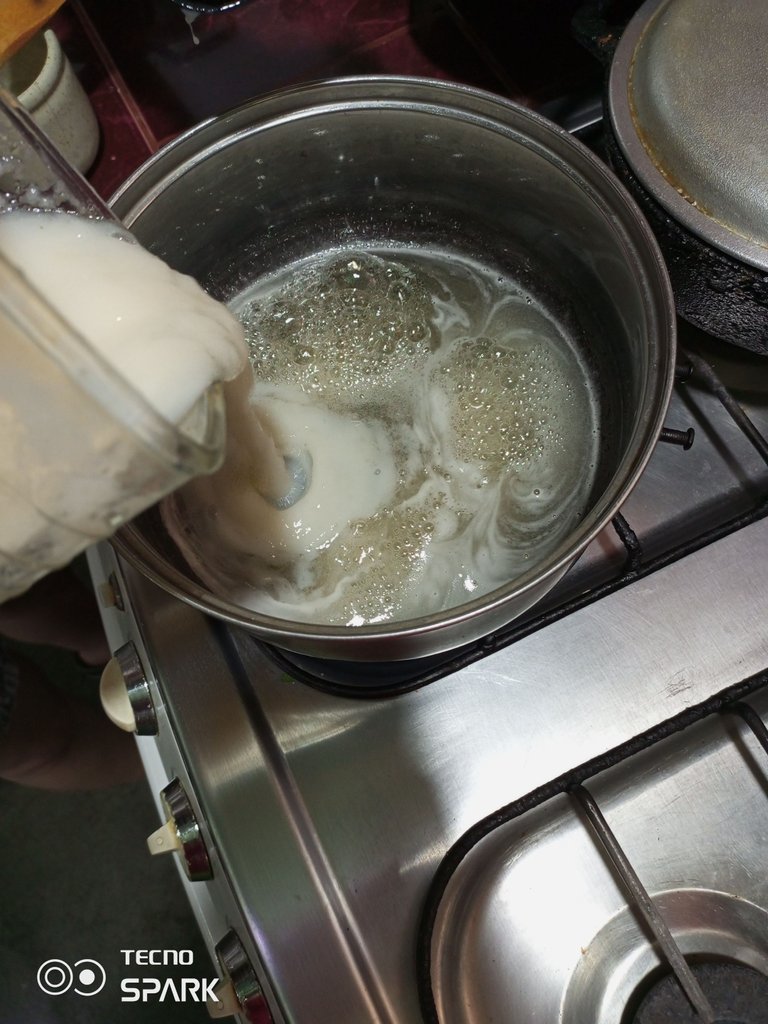
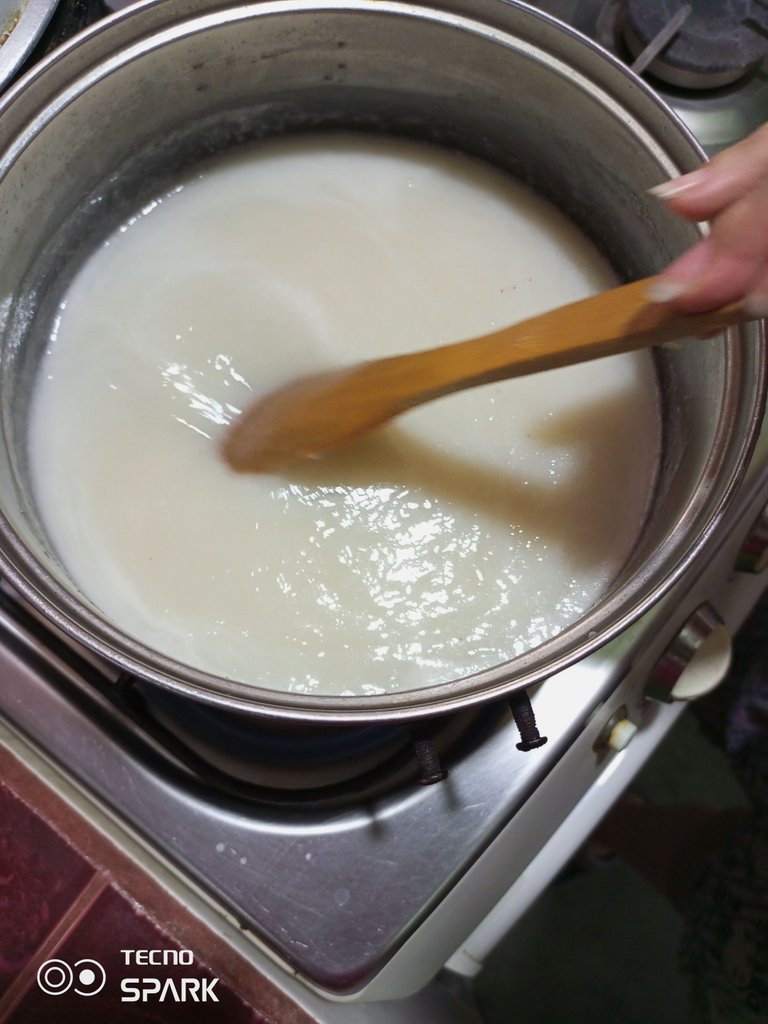
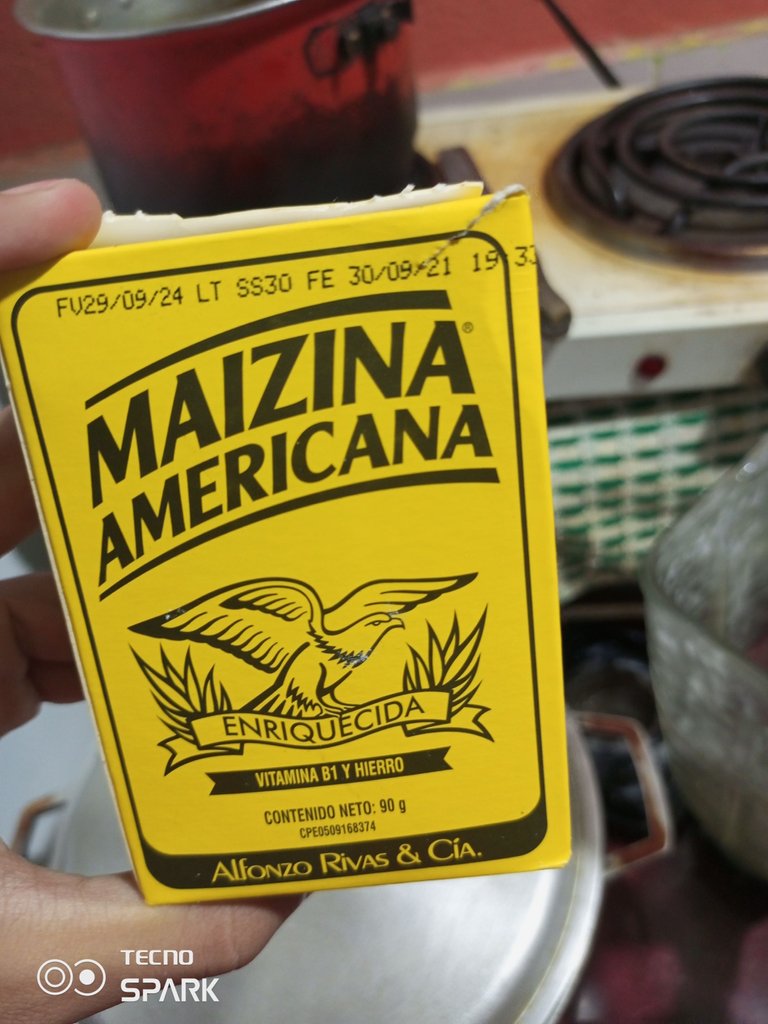
Para la elaboración del almíbar, tomé la pulpa de la guanábana, ya antes le saqué todas las semillas, y la aparté en un recipiente. Haremos lo siguiente, en una olla de tamaño medio, vamos a colocar una taza de azúcar y vamos a colocar las cucharadas de agua sólo hasta cubrir el azúcar, vamos a remover hasta que hierba y las burbujas tarden un poco en desaparecer, allí está el azúcar en punto de almíbar, no hay que dejarla caramelizar, vamos a agregar poco a poco la pulpa de la guanábana, yo la coloqué a licuar antes, porque no me gustan los grumitos que se le forman. La dejamos hervir hasta que agarre espesor, también podemos agregarle un poco de Maizena en caso de que no espese como queremos y no hay que dejar de batir.
Ya tenemos listo el biscocho y el almíbar, ahora haremos el merengue italiano, luego de dividir el biscocho a la mitad y rellenar con el almíbar, apartamos a un lado y haremos el merengue.
Primero, haremos el mismo procedimiento que hicimos con el azúcar del almíbar, agregamos el agua sólo hasta cubrir el azúcar y dejamos hervir al punto de almíbar.
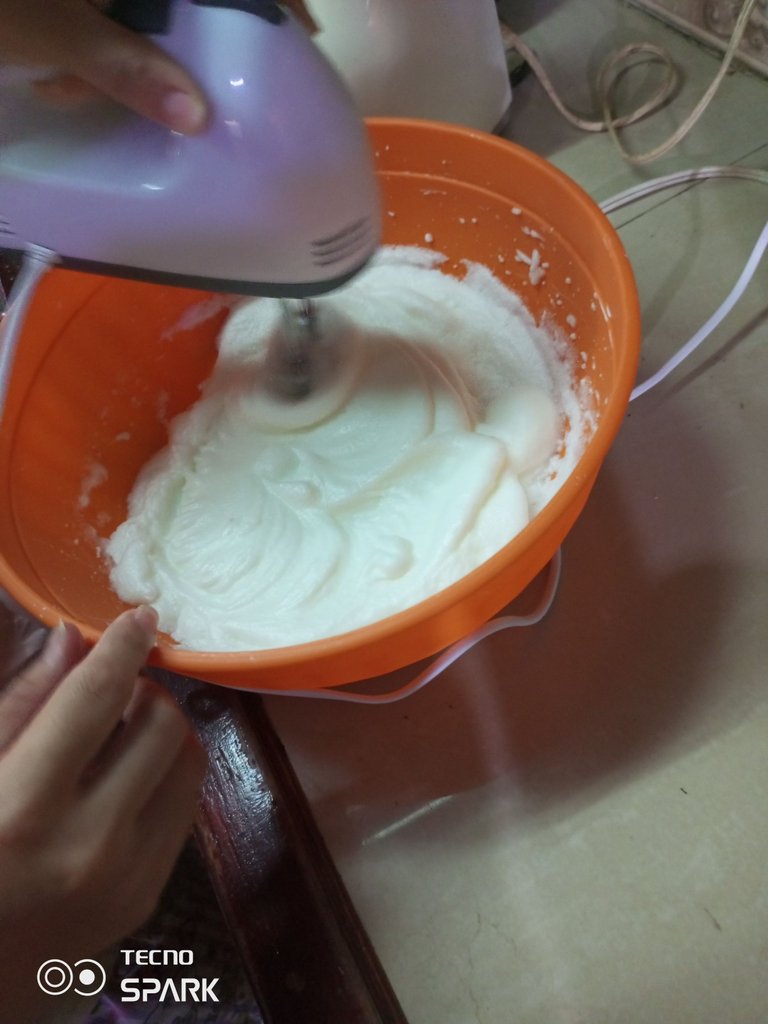
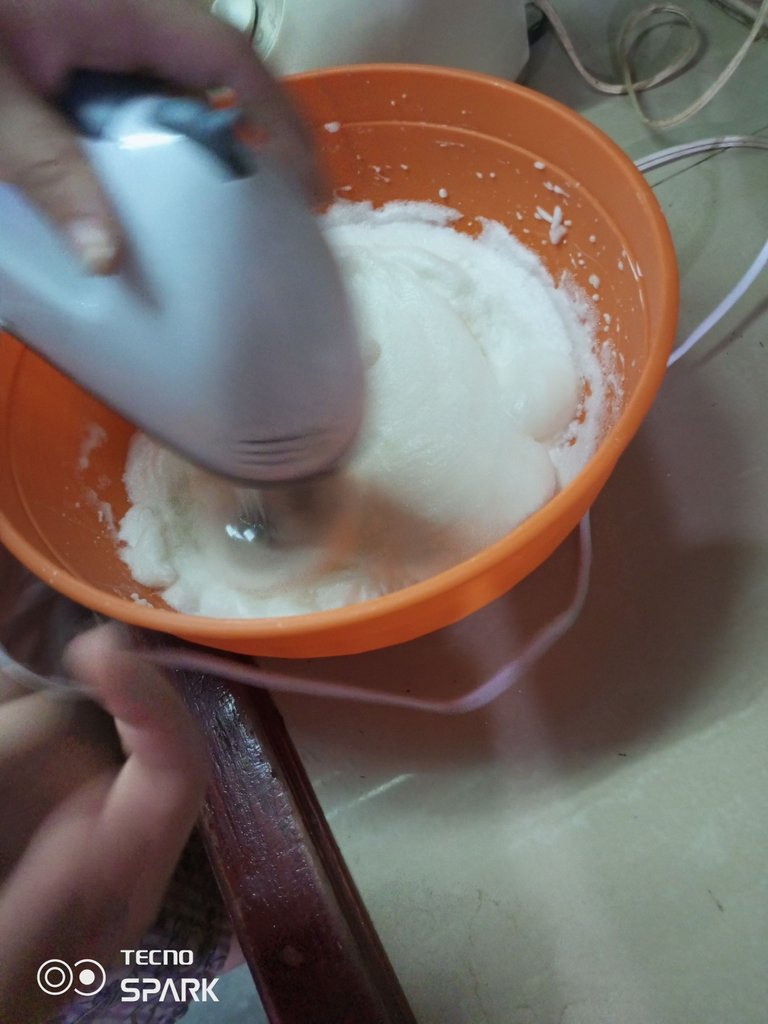
Con la batidora a velocidad máxima, batiremos las claras hasta aumentar su tamaño, ya en ése punto, comenzaremos a añadir el azúcar en forma de hilo, la vainilla y el cremor tártaro y seguimos batiendo por 5 minutos hasta que quede en su punto.

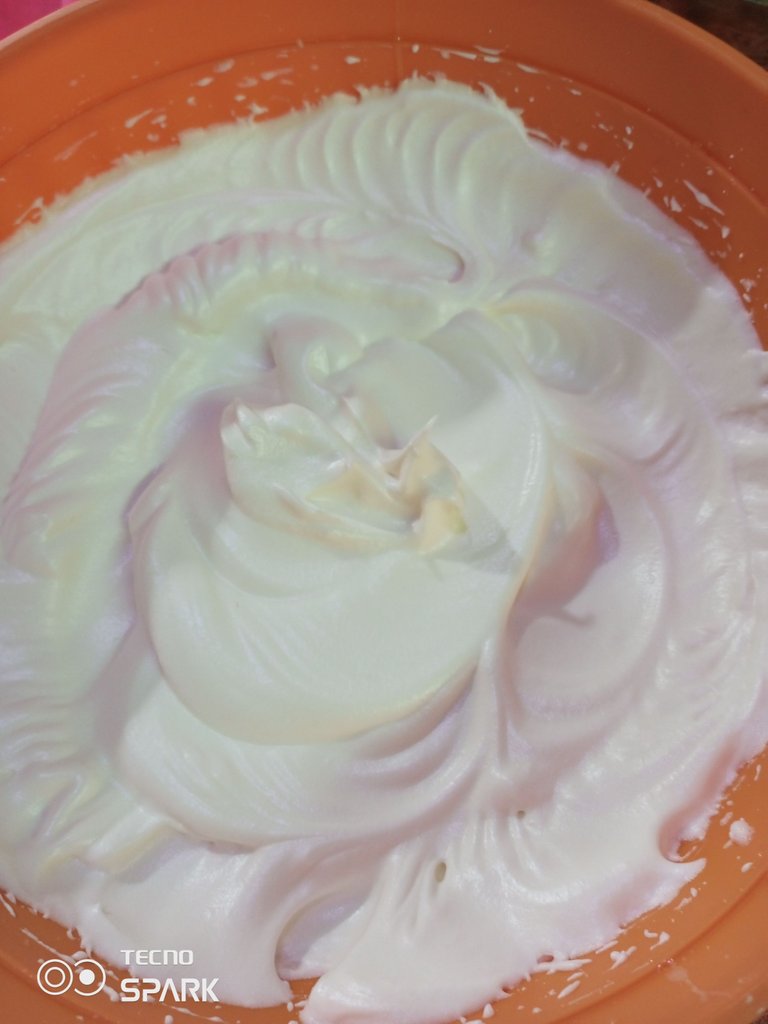
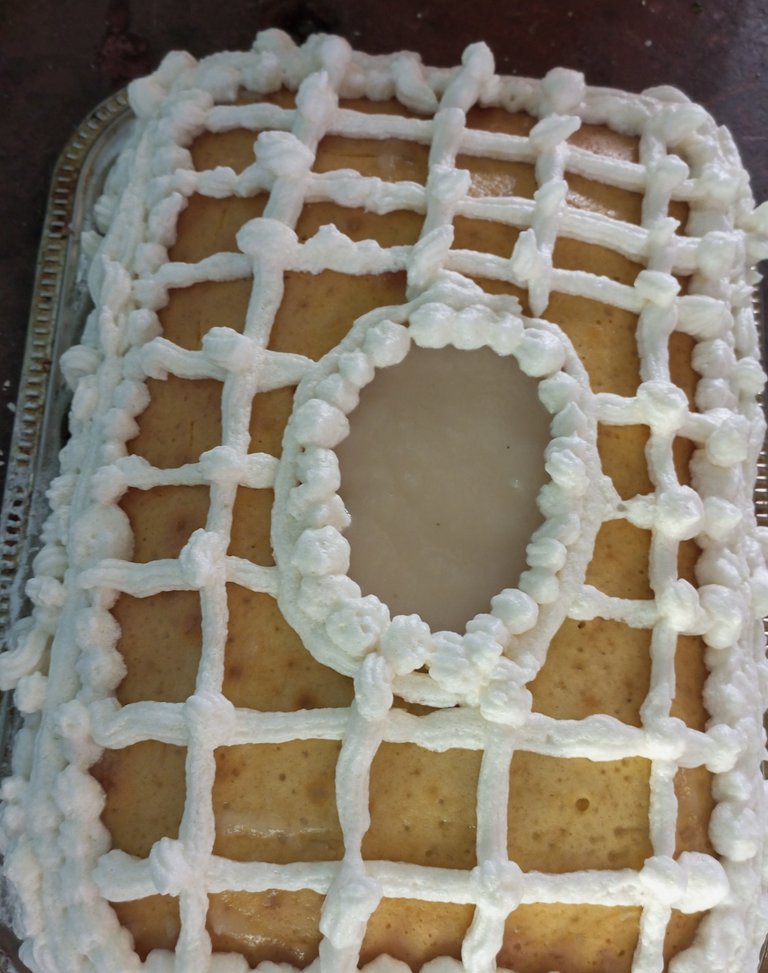
Ya con el merengue listo, con ayuda de una manga, vamos a decorar hasta cubrir todo el biscocho del modo que ustedes prefieran...
Así quedó éste biscocho, recuerden que las cantidades son las que ustedes deseen utilizar. ☺️
Recomendaciones
Eviten a las malas energías y no permitan que personas con malas energías se acerquen, me pasó durante la elaboración del biscocho, si pueden apreciar la imagen de cómo quedó y luego la imagen final de la forma en que se ve sin consistencia, porque nunca falta alguien que no quiere ver el éxito de los demás, así que ya saben, nos vemos en otro post 👋☺️

Eng
Good morning friends of #hive, today I come to share with you a delicious recipe, it is the first time that I make it and I really liked it a lot, this is a very healthy cake since soursop contains fiber and anti-cancer properties and also this one cake has no fat.
I want to tell you that I've been waiting to make this content for a long time, so here we are, let's start.
Ingredients
(For the biscuit).
6 eggs
10 cups of flour
4 cups of sugar
2 and a half cups of milk.
1 spoon of vanilla.
(For the syrup)500 gm of soursop.
1 cup of sugar
1 pinch of salt
(For the Italian meringue)4 egg whites
1 cup of sugar
1 tablespoon of vanilla
1 teaspoon of cream of tartar.
6 teaspoons of water (just to cover the sugar)
The first thing I did to make the biscuit was sift the flour and mix it with the baking powder. after sifting the wheat flour and that it has been well integrated with the baking powder, we beat the six eggs and add the flour without stopping beating, you can make it easier with the help of a mixer.🥺
(All images have been taken from my phone and my boyfriend's).
As it thickens we are going to add the milk and the sugar and the vanilla, until we have a consistency at a point that is not so watery but not so thick either, like this:
With the biscuit mixture ready, we proceed to flour the previously buttered mold, place the mixture in the mold and take it to the oven already preheated to 180°g for 30 minutes.
For the elaboration of the syrup, I took the pulp of the soursop, I already removed all the seeds, and I put it aside in a container. We will do the following, in a medium-sized pot, we are going to place a cup of sugar and we are going to place the tablespoons of water just until the sugar is covered, we are going to stir until grass and the bubbles take a while to disappear, there is the sugar in syrup point, we must not let it caramelize, we are going to add little by little the pulp of the soursop, I placed it to blend before, because I do not like the lumps that form. We let it boil until it thickens, we can also add a little Cornstarch if it does not thicken as we want and we must not stop beating.
We already have the biscuit and the syrup ready, now we will make the Italian meringue, after dividing the biscuit in half and filling with the syrup, we set aside and make the meringue.
First, we will do the same procedure that we did with the syrup sugar, add the water just to cover the sugar and let it boil to the point of syrup.
With the mixer at maximum speed, we will beat the whites until they increase in size, and at that point, we will begin to add the sugar in the form of thread, the vanilla and the cream of tartar and continue beating for 5 minutes until it is at its point.
With the meringue ready, with the help of a sleeve, we are going to decorate until the entire cake is covered in the way you prefer...
This is how this cake turned out, remember that the amounts are the ones you want to use. ☺️
Recommendations
Avoid bad energies and do not allow people with bad energies to get close, it happened to me during the preparation of the biscuit, if you can appreciate the image of how it turned out and then the final image of the way it looks without consistency, because it never fails someone who doesn't want to see the success of others, so you know, see you in another post 👋☺️
Una de mis tortas favoritas..!! Gracias por compartir la receta..!!
Encantada, estaré compartiendo más recetas por aquí, bendiciones ☺️🤍🫂
Me encantan las tortas de guanábana, son deliciosas. Voy a guardar tu receta porque tú torta de ve riquísima.
Gracias 😋
Que la disfrutes mucho, sí quedan muy buenas la verdad, otra recomendación es que la coman el mismo día
Una deliciosa torta con un procedimiento muy bien organizado y fácil de hacer. Me gustan muchísimo las guanábanas, se ve muy rica y esponjosa torta.
Así es, te la recomiendo, es muy buena y el almíbar de la guanábana queda espectacular ☺️💕
Wow de tan solo ver el paso a paso me provocó comer torta de guanábana, tengo siglos que no como una torta de esas, tienen su truco y proceso, apuesto que te quedo deliciosa a pesar de ese mínimo error energético pero tranquila sé que te quedo deliciosa, y tranquila para una próxima te quedará super genial y con las mejores vibras posible, muy buen post éxitos y bendiciones 😎🙏🏻🙌🏻
Muchas gracias por el apoyo, sí estoy planeando hacer una con mis amigas de la residencia donde vivo y compartir con ellas, te recomiendo hacerla, queda muy deliciosa ☺️🎂❤️