
- 2 tazas de harina leudante 280gr
- 3 huevos
- 1 taza de azúcar 220gr
- 2 dos cucharadas de cacao en polvo 40gr
- 1 cucharadita de polvo de hornear
- 1/4 de cucharadita de sal
- 1/2 taza de jugo de parchita
- 1/2 taza de aceite vegetal 125ml
- 1 molde de 20 cm de diámetro engrasado y enharinado
- 2 cups of self-rising flour 280gr
- 3 eggs
- 1 cup of sugar 220gr
- 2 two tablespoons of cocoa powder 40gr
- 1 teaspoon of baking powder
- 1/4 teaspoon of salt
- 1/2 cup of passion fruit juice
- 1/2 cup of vegetable oil 125ml
- 1 mold of 20 cm in diameter greased and floured
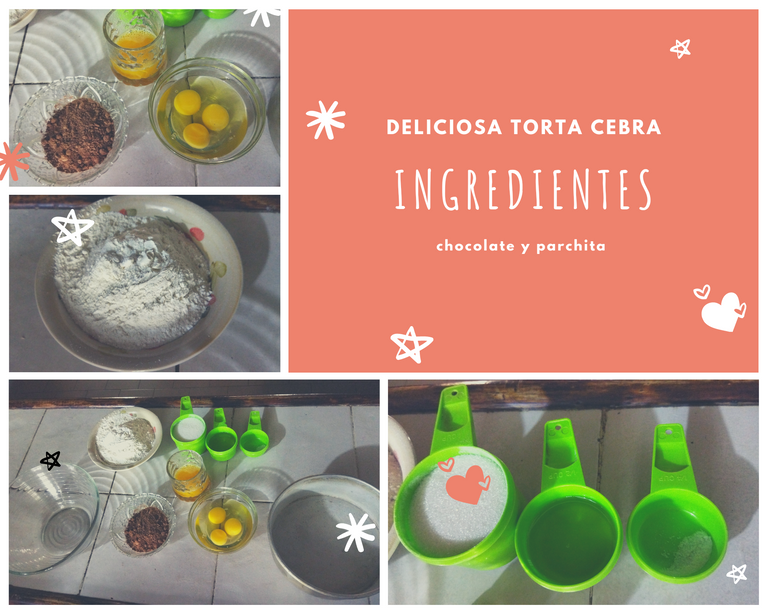

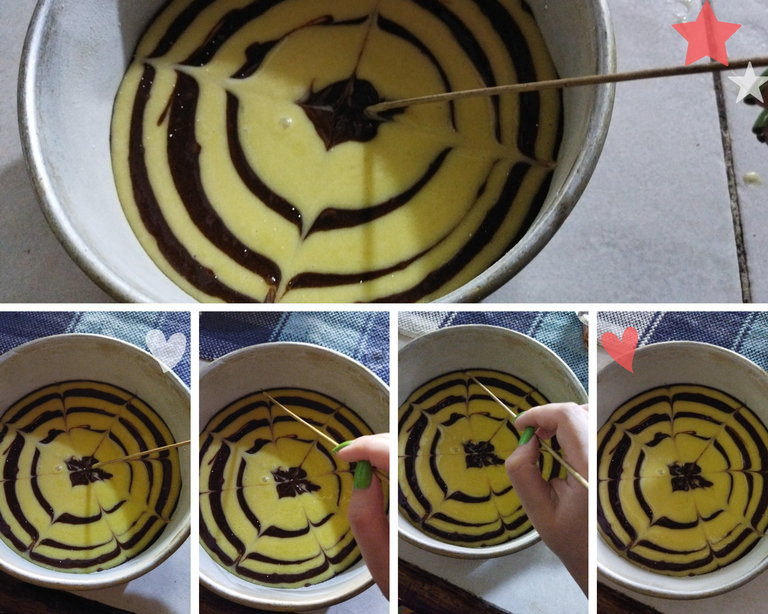
Primero tamizamos la harina junto con el polvo de hornear para no tener grumos en la mezcla. Luego colocamos en otro recipiente dos cucharadas de harina para dividir las dos mezclas al final, la de chocolate y la de parchita. Estas dos cucharadas de harina se le agregan a la mezcla de parchita para que quede con la misma consistencia que la de chocolate, ya que el cacao tiende a poner más espesas las mezclas.
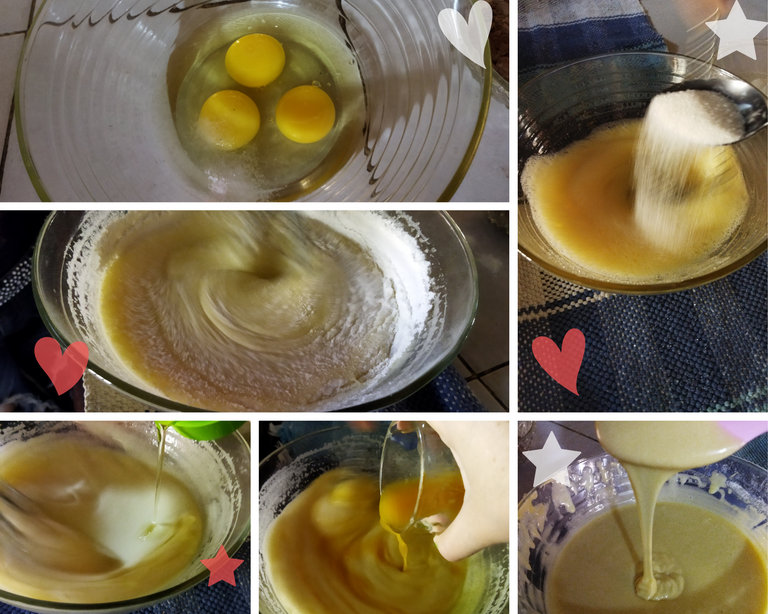
Comenzamos agregando los huevos en un recipiente junto con la sal, batimos o dejamos en la batidora hasta que empiecen a verse espumosos. A este paso le vamos agregando el azúcar en cucharadas, poco a poco, sin dejar de batir. Luego vamos vertiendo el aceite y el jugo de parchita. Sin apagar la batidora o dejar de batir. Ahora vamos agregando la harina por cucharadas. Después de haber añadido la harina revolvemos muy bien para integrar la que quedo en los bordes.
First we sift the flour together with the baking powder so as not to have lumps in the mixture. Then we place two tablespoons of flour in another container to divide the two mixtures at the end, the chocolate and the passion fruit. These two tablespoons of flour are added to the passion fruit mixture so that it has the same consistency as the chocolate mixture, since cocoa tends to thicken the mixtures.
We start by adding the eggs in a container along with the salt, beat or leave in the blender until they start to look foamy. At this step we are adding the sugar in tablespoons, little by little, without stopping beating. Then we pour the oil and passion fruit juice. Without turning off the blender or stopping blending. Now we are adding the flour by tablespoons. After adding the flour, stir very well to integrate what remains on the edges.

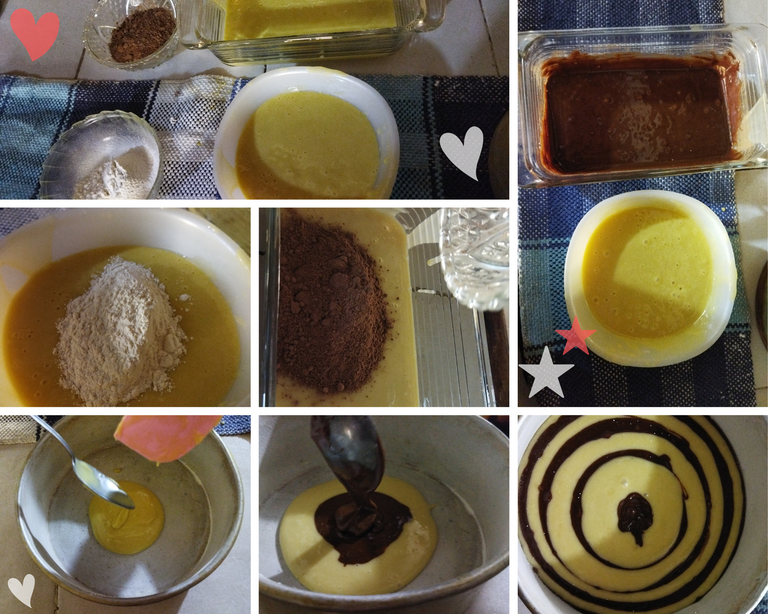



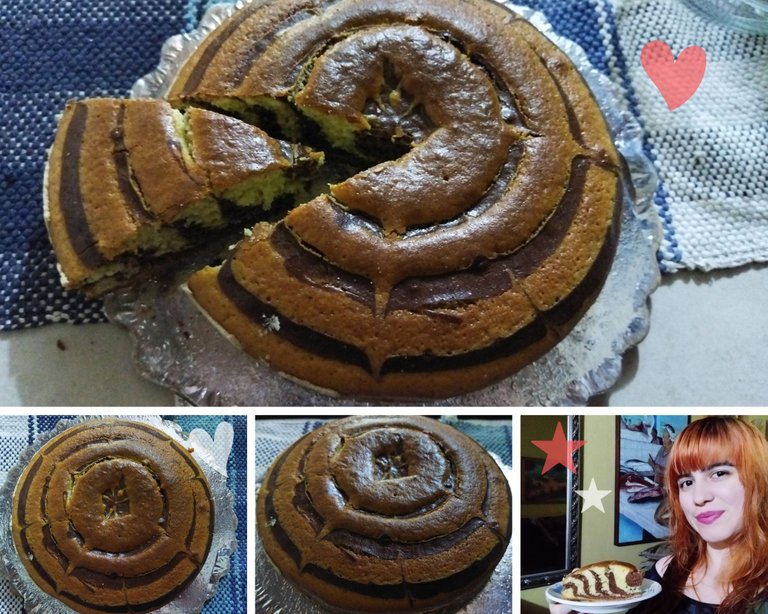
Servimos y a comer 😋🍰
We serve and eat 😋🍰

- Todas las fotografías son de mi autoridad.
- Cámara: Teléfono Xiaomi POCO M3
- Fotos editadas en Canva.
- Separadores hechos en Canva.
- All photographs are of my authority.
- Camera: Xiaomi POCO M3 Phone
- Photos edited in Canva.
- Dividers made in Canva.

Your content has been voted as a part of Encouragement program. Keep up the good work!
Use Ecency daily to boost your growth on platform!
Support Ecency
Vote for new Proposal
Delegate HP and earn more
Excelente post!! Se ve muy delicioso 😋
Muchas gracias amigo! Ojalá la hubieses probado, estaba deliciosa! Para la próxima te invito con un café 😋☕
Se ve muy rica y esponjosa,Siiiiii sería fabuloso jeje 🤗
Congratulations @charliefix! You have completed the following achievement on the Hive blockchain and have been rewarded with new badge(s):
Your next target is to reach 1250 upvotes.
You can view your badges on your board and compare yourself to others in the Ranking
If you no longer want to receive notifications, reply to this comment with the word
STOPCheck out the last post from @hivebuzz:
Support the HiveBuzz project. Vote for our proposal!
Que linda quedo su torta marmoleada @charliefix
Congratulations, your post has been upvoted by @dsc-r2cornell, which is the curating account for @R2cornell's Discord Community.
Thank u so much!
Un paso a paso bien explicado y como resultado una torta tipo cebra muy deliciosa, podemos asegurarlo. Felicidades, excelente post. Te animamos a seguir compartiendo en la comunidad #foodiesbeehive, tienes mucho talento.
Un abrazo.♥️
Muchas gracias mi amor! Estoy muy contenta y agradecida por poder compartir con ustedes 😘
Se ve muy rica!!!