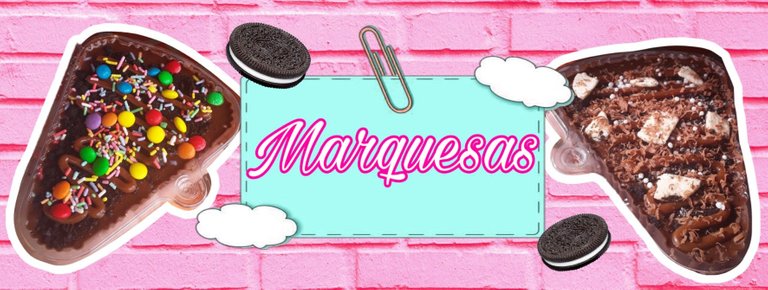
Tutorial de Marquesas| Marquise's Tutorial
Hello Hivers! I hope you are feeling well!
Today I bring you with all the love in the world, my marquise recipe.
First of all, what is marquise?
The marquise is one of the most consumed desserts in the Venezuelan culture despite not being considered a traditional sweet, but still, it is present in our table for its delicious flavor. The Marquise is of French origin, and was introduced to the country in the early twentieth century, being originally a chocolate cake with meringue on top, however the recipe got its Venezuelan touch by adding Maria cookies alternated with cream and being refrigerated, this is called only "Marquise", since it is not limited only to chocolate, it can also be white chocolate, lemon, coconut, oreo, among others. To this day, the recipe has remained the same, having the own touch of each family.
¡Hola Hivers! ¡Espero que os encontréis bien! Hoy os traigo con todo el cariño del mundo, mi receta de marquesa.Antes que nada, ¿qué es la marquesa?
La marquesa es uno de los postres más consumidos en la cultura venezolana a pesar de no ser considerado un dulce tradicional, pero aun así, está presente en nuestra mesa por su delicioso sabor. La marquesa es de origen francés, y fue introducida al país a principios del siglo XX, siendo originalmente una torta de chocolate con merengue por encima, sin embargo la receta obtuvo su toque venezolano al agregarle galletas María alternadas con crema y siendo refrigerada, esto se llama solamente "marquesa", ya que no se limita sólo al chocolate, también puede ser de chocolate blanco, limón, coco, oreo, entre otros. Hasta el día de hoy, la receta se ha mantenido igual, teniendo el toque propio de cada familia.
Without further ado, let's get started with the process! - ¡Sin mas preámbulos, empecemos con el proceso!
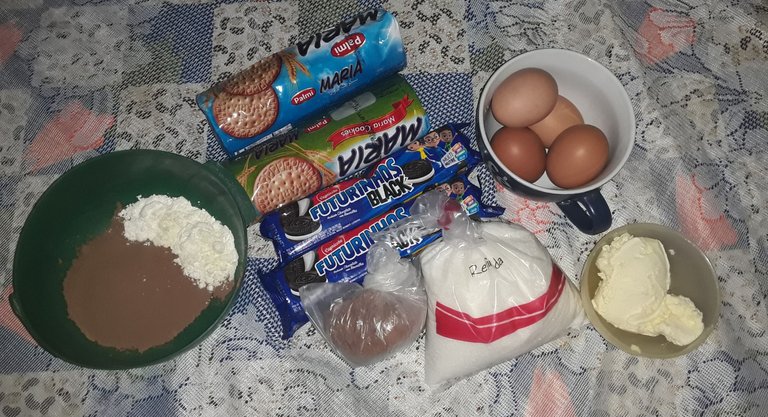

Ingredients:
For the chocolate cream:
- 450gr sugar
- 500ml water
- 4 whole eggs
- 2 tablespoons of powdered milk
- 60gr cocoa powder
- 60 gr unsalted margarine
Ingredientes:
Para la crema de chocolate:
- 450gr de azúcar
- 500ml de agua
- 4 huevos enteros
- 2 cucharadas de leche en polvo
- 60gr de cacao en polvo
- 60gr de margarina sin sal
Chocolate cream making process|Proceso de elaboración de la crema de chocolate
Let's start by making the syrup, for the syrup we will use 450gr of sugar in a pot and add 500ml of water. We will proceed to place it on the stove over low heat and with a thermometer we will be aware of the ideal temperature which will be 110°C.
Empecemos por hacer el almíbar, para el almíbar utilizaremos 450gr de azúcar en una olla y añadiremos 500ml de agua. Procederemos a colocarlo en el fuego a fuego lento y con un termómetro estaremos al tanto de la temperatura ideal que será de 110°C.
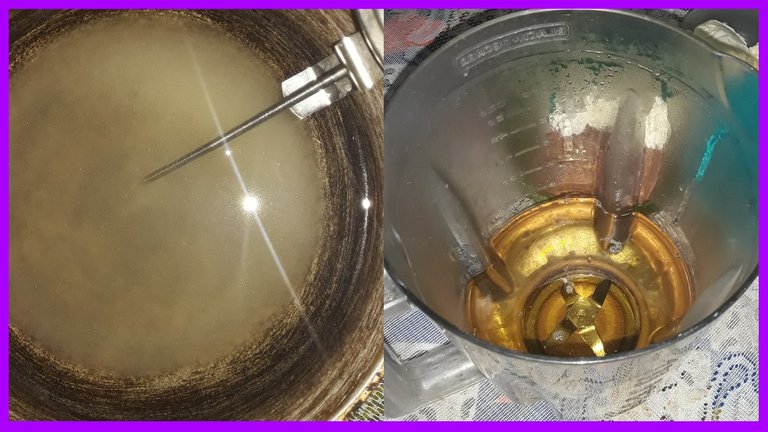
Once the syrup is ready at the aforementioned temperature, remove it from the heat and pour it into the blender.
Una vez que el almíbar esté listo a la temperatura mencionada, retírelo del fuego y viértalo en la batidora.
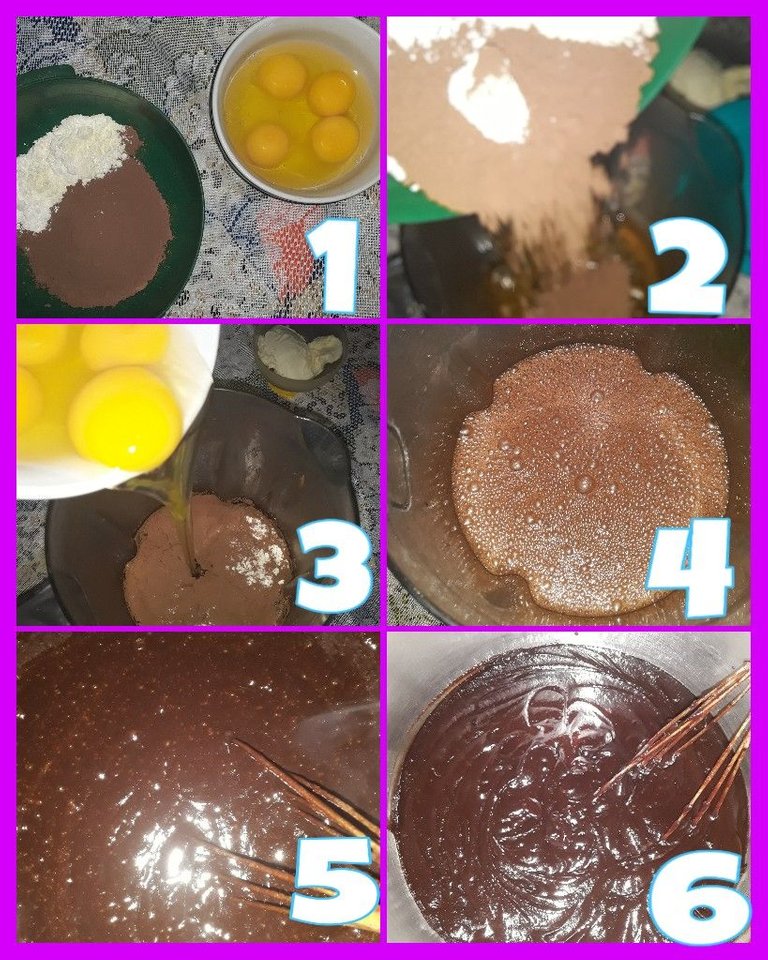
After pouring the syrup into the blender, we will proceed to begin to blend, and in the blending process we will gradually incorporate the cocoa and powdered milk. After having finished with the cocoa and powdered milk, add the 4 eggs one by one and you will notice that the mixture becomes a little thicker. When finished with this, we stop the blender and pour the mixture back into the pot, to proceed to place it over low heat on the stove and mix until it thickens and the eggs incorporated into the mixture are cooked.
Once this step is ready, we will look for a bowl where to place this mixture, and we will place our preparation in an inverted water bath (instead of hot water, we will use cold water) in order to cool our preparation to make the next step.
Tras verter el almíbar en la batidora, procederemos a empezar a batir, y en el proceso de batido iremos incorporando poco a poco el cacao y la leche en polvo. Tras haber terminado con el cacao y la leche en polvo, añadimos los 4 huevos uno a uno y notaremos que la mezcla se vuelve un poco más espesa. Al terminar con esto, detenemos la licuadora y vertemos la mezcla nuevamente en la olla, para proceder a colocarla a fuego lento en la estufa y mezclar hasta que espese y los huevos incorporados a la mezcla estén cocidos.
Una vez listo este paso, buscaremos un recipiente donde colocar esta mezcla, y colocaremos nuestra preparación en un baño de agua invertido (en lugar de agua caliente, utilizaremos agua fría) con el fin de enfriar nuestra preparación para realizar el siguiente paso.
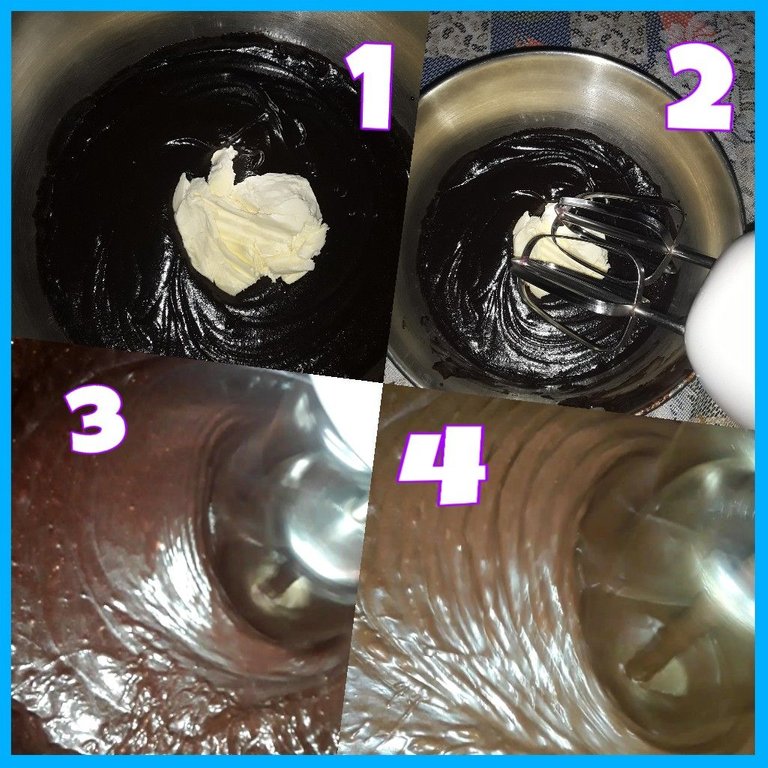
When our preparation has cooled, we remove it from the cold water bath, and we will add the 60gr of unsalted margarine, and we will begin to beat with our hand mixer at low speed to integrate the margarine and the preparation, and then we will proceed to beat at a higher speed. We will notice that the mixture is ready when it makes the "letter point", increases a little its volume, and becomes a lighter brown color, from these specifications, we will stop beating and proceed to assemble our Marquises! 😋
Cuando nuestra preparación se haya enfriado, la retiramos del baño de agua fría, y añadiremos los 60gr de margarina sin sal, y comenzaremos a batir con nuestra batidora de mano a baja velocidad para integrar la margarina y la preparación, y luego procederemos a batir a mayor velocidad. ¡Notaremos que la mezcla está lista cuando haga el "punto de letra", aumente un poco su volumen, y se torne de un color café más claro, a partir de estas especificaciones, dejaremos de batir y procederemos a armar nuestras Marquesas! 😋
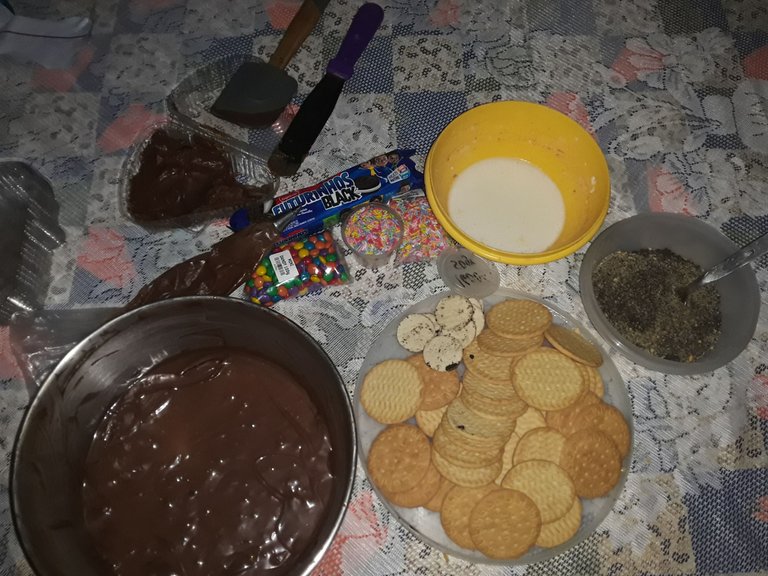
To begin the assembly, we must already have the decorations and cookies on hand!
Among these we will use:
-The necessary amount of Maria cookies to assemble and Oreo cookies or any other brand, to decorate.
-Liquid milk to lightly soak the Maria cookies, and place them on the tray.
-White chocolate sprinkles or resistant caramel sprinkles, since they are resistant to humidity and do not lose color.
-Dandies or M&M's
-And finally, arequipe or also called dulce de leche, cajeta, manjar and milk-based sauce; to use it as a topping.
Para comenzar el montaje, ¡debemos tener ya a mano los adornos y las galletas!
Entre estos utilizaremos:
-La cantidad necesaria de galletas María para montar y galletas Oreo o de cualquier otra marca, para decorar.
-Leche líquida para empapar ligeramente las galletas María, y colocarlas en la bandeja.
-Sprinkles de chocolate blanco o de caramelo resistente, ya que son resistentes a la humedad y no pierden el color.
-Dandies o M&M's
-Y por último, arequipe o también llamado dulce de leche, cajeta, manjar y salsa a base de leche; para usarlo como cobertura.
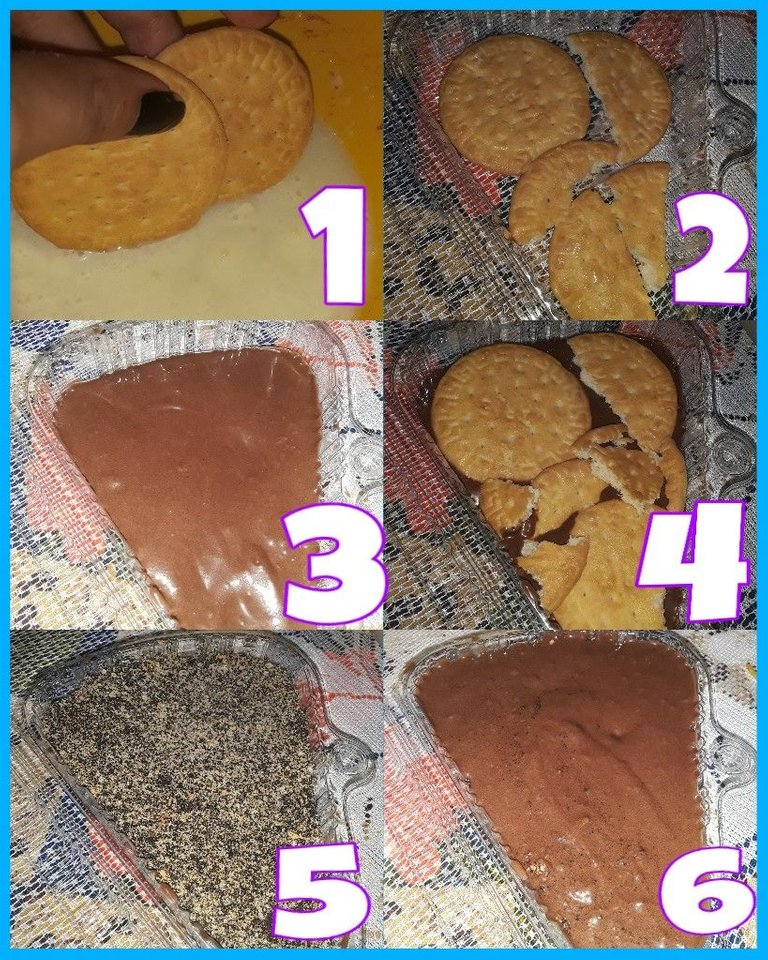
Start by soaking 3 Maria cookies and place them in the container, then place 2 tablespoons of the chocolate cream, soak again and place 3 Maria cookies, add on top of these 1 1/2 tablespoons of ground or other brand Oreo cookie and spread it out to create a layer, and finally, add 2 tablespoons of the chocolate cream again! 🍫
Comienza remojando 3 galletas María y colócalas en el recipiente, luego coloca 2 cucharadas de la crema de chocolate, vuelve a remojar y coloca 3 galletas María, agrega encima de estas 1 1/2 cucharadas de galleta Oreo molida o de otra marca y extiéndela para crear una capa, y por último, ¡agrega nuevamente 2 cucharadas de la crema de chocolate! 🍫

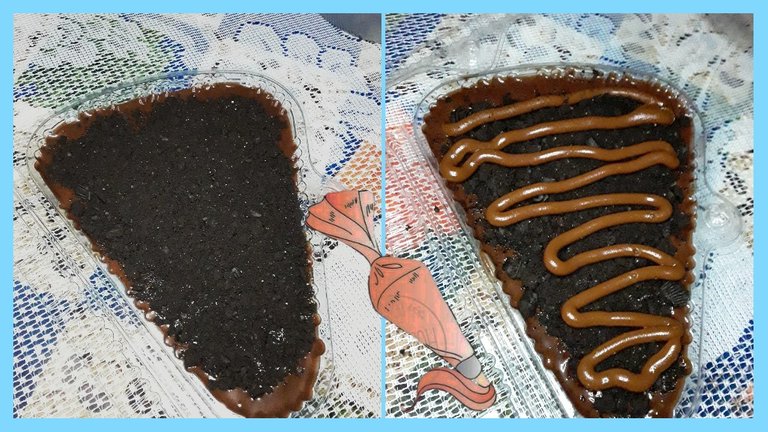
For the decoration, put some milk-based sauce in a piping bag and pour it as you like, in this case I put it like this, and added sprinkles, crushed cookies and Dandys!
¡Para la decoración, pon un poco de salsa a base de leche en una manga pastelera y viértela como más te guste, en este caso la puse así, y le añadí sprinkles, galletas trituradas y Dandys!
Y ahora, ¡el resultado final!
And now, the final result!

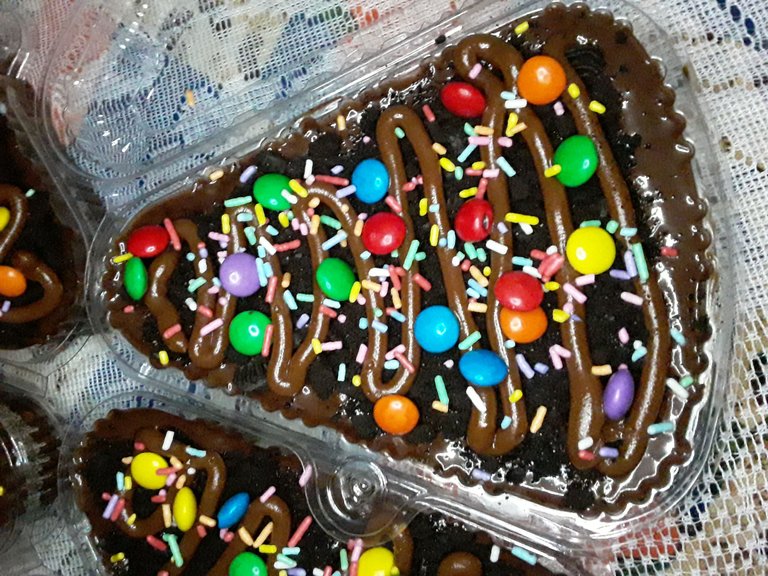
Thank you very much for watching my tutorial, I hope you liked it, any questions about the tutorial, you can ask me and I will gladly answer them, I hope you have a beautiful day, greetings 💜.
Muchas gracias por ver mi tutorial, espero que les haya gustado, cualquier duda sobre el tutorial, pueden preguntarme y con gusto les responderé, espero que tengan un hermoso día, saludos 💜.
My social media | Mis redes sociales
Instagram:
Personal fabivrm29
Art apple.black02
Pastry valeniocakes
Translated in Deelp
Fuentes:
Steemit
Collage and edited images made in Picsart
All the photos are to my property
Your content has been voted as a part of Encouragement program. Keep up the good work!
Use Ecency daily to boost your growth on platform!
Support Ecency
Vote for new Proposal
Delegate HP and earn more
Deliciosas.! Pronto las prepararé en casa JEJEJEJE :3 saludos mi pequeña apple.
SIII ya quiero ver cuando las hagas. Ya luego vengo con mas tutoriales💜👀
Congratulations @apple.black02! You have completed the following achievement on the Hive blockchain and have been rewarded with new badge(s):
Your next target is to reach 600 upvotes.
You can view your badges on your board and compare yourself to others in the Ranking
If you no longer want to receive notifications, reply to this comment with the word
STOPCheck out the last post from @hivebuzz:
Support the HiveBuzz project. Vote for our proposal!