In this post I will show you how to make classy paper ornaments.

Perhaps it’s because I live in the middle of nowhere and rarely leave home, that I am able to really enjoy making these simple homemade Christmas decorations. I’m so removed from all Christmas marketing.
Years ago when I lived in the city, I would feel sad this time of year because I would see all the beautiful Christmas decorations or holiday specials, and I couldn’t afford them. Isn’t that so sad on so many levels? I love shopping and pretty things. I LOVE it. But I’m disciplined and never allowed myself to dish out money on Christmas decor because…Christmas is one day.
I don’t know what’s trendy this year and I’m really ok with that. Christmas isn’t about what’s trendy.
This week on the blog I am sharing #classicchristmas ideas every day, to help spread some cheer. I’ll leave links to all of the traditional Christmas decor tutorials that are posted, so far. Check back daily, for more.
Alright, let’s make some beautiful, classy paper ornaments that are personal to us, and stir up that Christmas spirit. Woowee!
You Will Need:
- paper with an image (or images) of something you love
- thin cardboard, such as a cereal box
- mod podge glue (I used this matte finish one)
- antiquing wax (like this one)
- small paint brush
- rag or paper towel
- sharp scissors
- canning ring for tracing (or any circular shape)
- pencil
- hole punch
- string or ribbon
##How to Make Classy Paper Ornaments
This will make 8 paper ornaments.
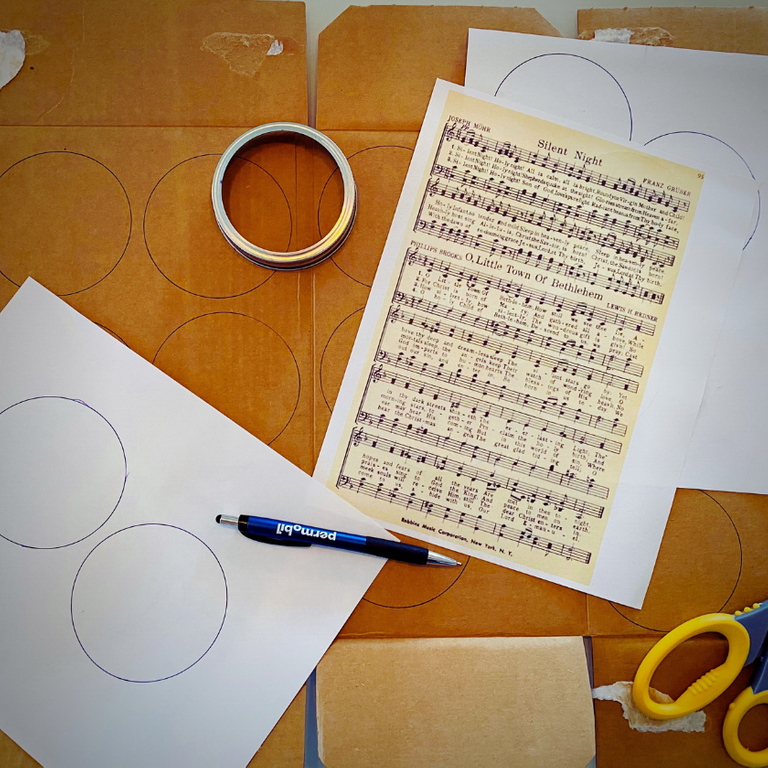
Print off two sheets of paper with images that you love on them. Florals, family photos, bank statements – whatever you’re into. I decided to go with some classic Christmas hymns.
Find enough cardboard in your recycle bin to make 8 ornaments. Keep in mind you’ll be cutting shapes out of this cardboard, so thinner is better. I used a box that had oatmeal in it. If you only want to put an image on one side, make sure your cardboard doesn’t have any print on at least one side, so you can use the plain side as the back of your ornament. Otherwise, plan on glueing images to both sides of the cardboard.
Trace 8 circles with your canning ring onto the cardboard, and 8 matching circles onto your papers. Carefully cut out all of the circles. Play that Christmas music and cut, cut, cut!
Use a paintbrush to thoroughly apply mod podge glue all over one side of your cardboard circles. If your cardboard has printing on it, glue that side first. Apply the paper circles with the image on it to the glued cardboard. Laminate the paper on by painting the front of the paper too. Allow it to fully dry.
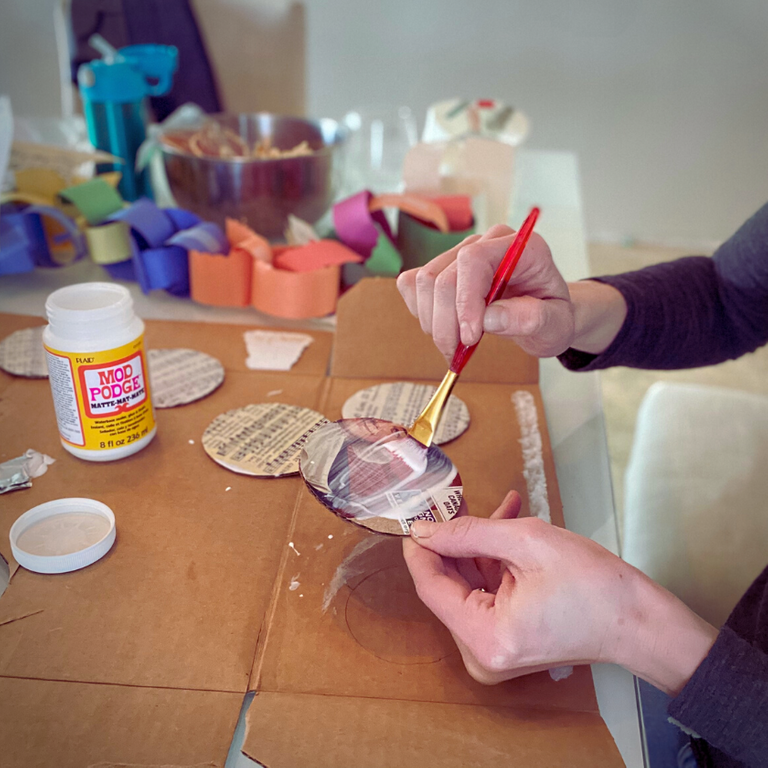
Once the front of the ornament is fully dry, flip it over and paint mod podge glue all over the back as well to completely seal the ornament. Allow the ornaments to dry and cure overnight.
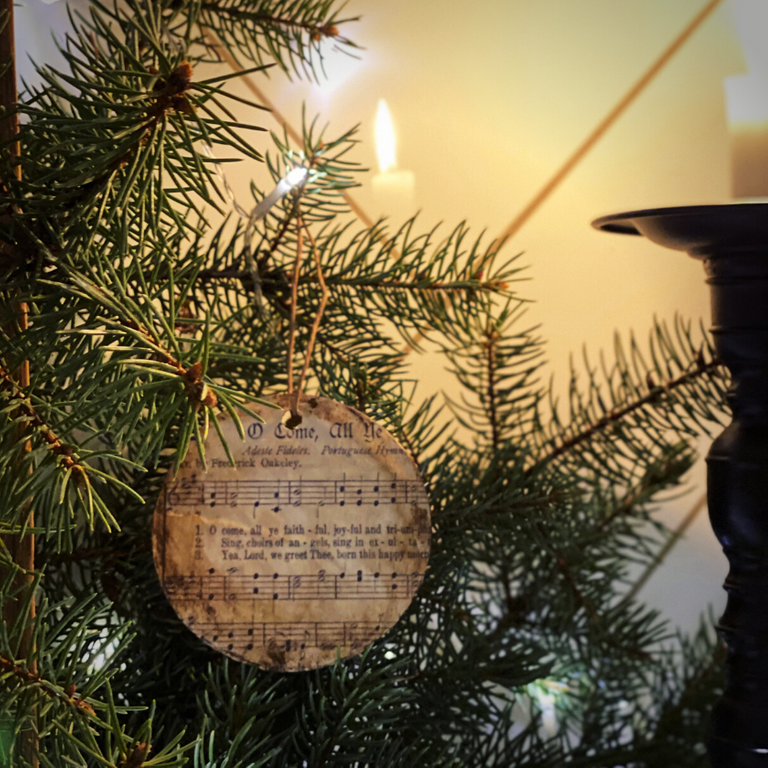
To give the paper an aged, classic, high-end look, we will apply antiquing wax. To do this, brush the product all over both sides of the ornament, wait a minute (and not a minute longer), then wipe away the excess product with a rag. It works well to do this in two batches. Quickly apply the antiquing wax to 4 of the ornaments, then go back and rub all of the excess product off. Then do the next 4 in the same fashion. If the antiquing wax dried too quickly, and is too dark, add a little water to your rag and gently rub some of it off, until you are satisfied. Allow the ornaments to fully dry.
Use a hole punch to make a hole for the string or ribbon. Feel free to use hot glue to apply beads, bows, or bells to jazz the ornaments up.
Bonus Paper Ideas!
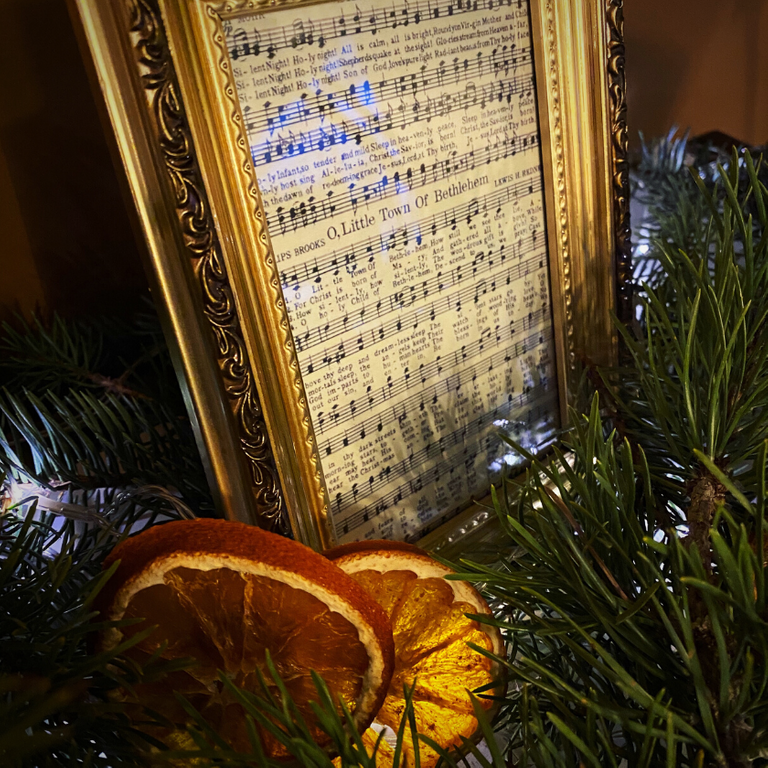
Frame the same image that you used for the ornaments and dipsplay it during the Christmas season. I framed some Christmas hymns and used them as decor on top of my piano.
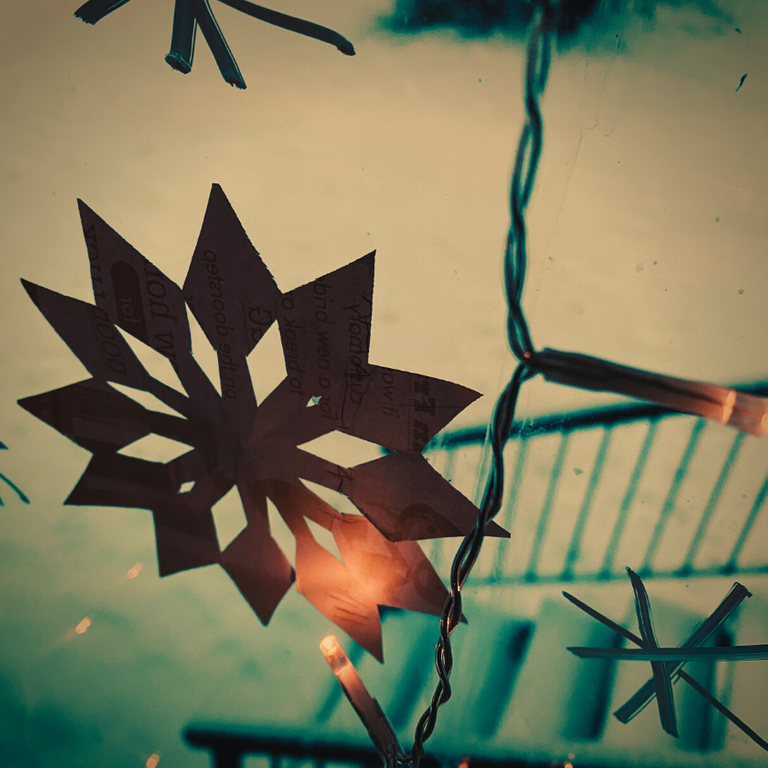
Paper snowflakes are another kindergarten classic, and they are so charming! To make paper snowflakes, start with a square piece of paper, then fold it diagonally, then in half, then in thirds. Use sharp scissors to cut shapes out of all sides. Behold, a masterpiece!
Happy Holidays Everyone!
Check back every day this week for another #classicchristmas idea.
If you enjoyed this post, you may also like these:
How to Make Classic Popcorn Garland
How to Make Orange and Clove Pomanders
How to Make (High-End) Salt Dough Ornaments
How to Make (Real) Vanilla Extract
How to Make Homemade Spiced Rum
Follow Us: @alexanderfarm on Hive and Odysee
Your content has been voted as a part of Encouragement program. Keep up the good work!
Use Ecency daily to boost your growth on platform!
Support Ecency
Vote for new Proposal
Delegate HP and earn more
These ideas are great! I really liked the one about making the ornaments for the tree. Excellent Christmas ideas that you are sharing, and without a doubt, they are highly recommended activities to do with our children. Best regards.
Thank you @sirenahippie!