Good evening/morning/afternoon/everytimeofyourday my friends.
My weekend is exactly is in the middle - one day of it I spent already for many different kinds of activity which I have no time to deal with them during the regular weekdays. The last thing I finished right now before started writing this post - I developed another black and white Ilford HP5 120 film that I expose today. The roll is in the "drying" room now and the negatives at the first glance look very contrasty and clean. But I will know and see better when will scan them.
This post is some kind of guide of how I use chemicals, darkroom tools, and photography storytelling how the entire process looks like. There are tons of very accurate explaining videos on Youtube, some of them are very interesting to see and to use as film developing process studies.

As I wrote already a few times in my different posts, I started my way in film photography when I already photographed with DSLR. Everything that I know I learned on the Internet - from numerous blogs and some explaining well videos on Youtube. My process timeline is already stable after some small changes I did during the developing process. I still learn the process.

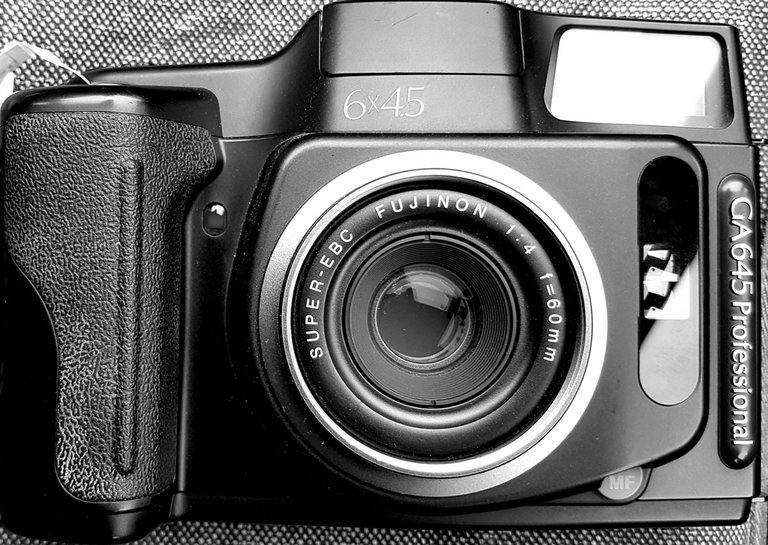
The film that I show in this post about my regular developing process was Ilford Delta pro 400. I exposed it as ISO200 with one of my favorite Medium Format cameras I have - Fujifilm GA645 and processed it as 400 ISO film in Kodak d-76 developer as you can see in the image below.

Ecofix is Fixer that I use already few years and it's working well for my needs also the price is also suitable.

I'm trying to stay as much as possible very close to 20C during all the parts of the process. These Patterson measuring tubes are very accurate and precision and accuracy are very basic pillars of chemistry.

The recipes for every film and the chemicals I use as usual I take from the The Massive Dev Chart that is perfect in terms of the information.

The formula for the developer and the film I used for this post is :
- Ilford Delta 400 D-76 1+1 400 14 14 14 20C
and it's saying the names of the current film and developer, dilution of the developer, ISO of the film, or Exposure Index - the ISO that we decided to use during exposing this specific roll, duration of the developing process (14 minutes), and finally the temperature.

Film washing is very important. And in the end, i can open the tank and look at the celluloid.

Now you see the exciting part of the developing process - the moment when I see the results for the first time and my heart beats anxiously every time I'm developing film and i happy that I don't get usual to such a magical process of creating something by hands.

The place of drying procedure should be clean and dust-free as soon as possible, otherwise, you will find some far-space debris of dust.

And finally the camera.

Let me know if you loved this kind of post, explaining the process and its simplicity.
Here we go. I just created this Analog (FILM) Photog. I'm still learning the community managing process, so please be patient. And we also need your help - so don't hesitate to join even if you don't use any analog camera. Sure you will find some special stuff photographed by amazing photographers with their Film cameras.
Stay safe
Stay alive
Stay free
Yours @victorbz

I want also use soon 120 mm film , I hope Hive soon more up and I can get some cool film camera too. ☺👌👌👌👌 and very good post .
let me know when you will have any decision about the camera you will find.
good luck
Soon.. or can I ask here help fo buy some camera , I do this first time that I use film and film camera then ☺👌👌👌
great great !!
Sorry what my weak English :))
you're is ok my friend i remember two years ego you even not didn't tried to talk :-)
is that true ? :))
Thanks for sharing. Your post bring me back when I used to shoot on a brownie and develop the film. Thanks for the post and the memories.
happy to hear about it.
you're very welcome to join the community and to contribute your analog images even taken a long time ago. there is no age for photographs we take.
I am slowly adding my work to the community ....years worth. Eventually I'll get to the photos. Thanks for the encouragement.
my pleasure !
Thanks for this easy explanation, I think I will have to get into developing BW myself :)
my pleasure !
actually, the process is a little bit more complex than I explained with the images I took. but finally, in whole, it's very simple and enjoyable for people with a developed sense of patience 😎
Yay! 🤗
Your post has been boosted with Ecency Points.
Continue earning Points just by using https://ecency.com, every action is rewarded (being online, posting, commenting, reblog, vote and more).
Support Ecency, check our proposal:
Ecency: https://ecency.com/proposals/141
Hivesigner: Vote for Proposal
thank you
Wow! Sound nice full of enjoyment ❤️❤️❤️🤗
Congratulations @hive-120035! You have completed the following achievement on the Hive blockchain and have been rewarded with new badge(s) :
Your next target is to reach 500 upvotes.
You can view your badges on your board and compare yourself to others in the Ranking
If you no longer want to receive notifications, reply to this comment with the word
STOPSupport the HiveBuzz project. Vote for our proposal!