Captura de Pantalla

Saludos y presentación:
Saludos #Linuxeros, miembros de la comunidad de #Linux&SoftwareLibre, y saludos a toda la comunidad de #Linux en #Hive y @linux-software, bienvenidos a un nuevo post de #ViernesDeEscritorio, hoy 24 de enero del 2025.
Como siempre, sigo usando mi apreciado Linux Mint solo que ahora lo actualicé a la versión 22,1 de nombre "Xia", y sigo usando el escritorio Cinnamon, que es el escritorio creado el equipo de Linux Mint.
TimeShift, herramienta para restaurar el sistema.
Cuando nosotros estamos en #Linux, a diferencia de de Windows y Mac, podemos hacer infinidad de cambios y personalizaciones diferentes, que van desde personalizar nuestro escritorio, hasta modificarlo o eliminarlo y colocar otro escritorio.
Ademas podemos colocar efectos visuales a las carpetas, colocar varias ventanas independientes de escritorio, colocar servidores como Apache, programar, eliminar archivos y dependencia, y finalmente, podemos meternos con el krenel o los archivos del sistema, entre muchas otras cosas.
Esa es una de las grandes libertades que nos da #Linux, al ser un código abierto. Pero, esto también indica la posibilidad de grandes riesgos, ya que al hacer algún cambio, si cometemos u error podemos dañar el sistema. Y también, puede suceder una ruptura del sistema, haciendo algo simple, como una actualización a una nueva versión, y al hacerla, podemos tener una caída del internet o un bajón de energía, y simplemente, nos quedamos con el sistema roto, de manera irrecuperable.
Eso, es una posibilidad que se puede presentar en cualquier momento. Y para evitar este tipo de situaciones, los desarrolladores de #Linux, crearon la herramienta TimeShift, que nos permite crear copias de seguridad de nuestro sistema operativo, y así poder recuperarlo, sin problemas.
Cómo usar TimeShift
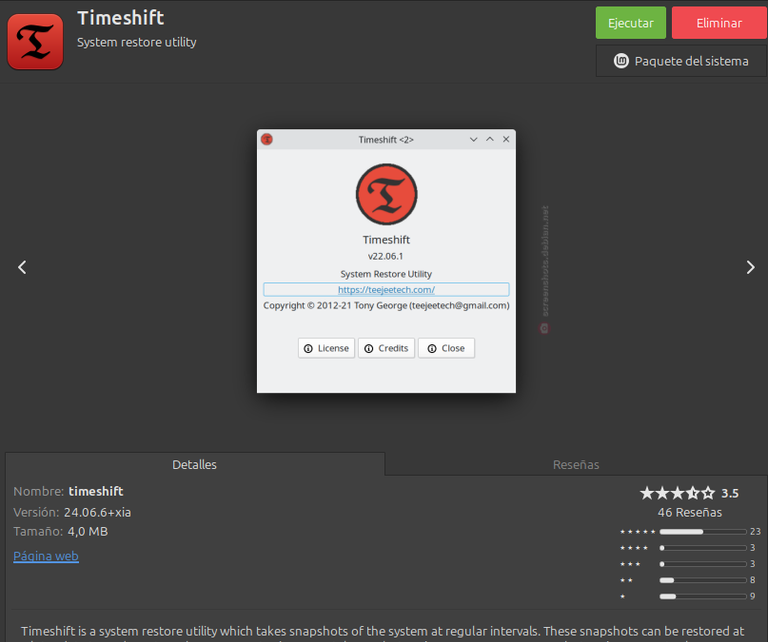
- Lo primero que debemos hacer es ver si la tenemos instalada en el sistema, en el caso de Linux Mint, ya viene instalada por defecto, y en muchos otros sistemas operativos #Linux, aunque no venga instalada por defecto, es un paquete del sistema, así que solo debemos instalarlo. En el caso de Debian y los sistemas derivados de ella y de Ubuntu, solo debemos abrir nuestra terminal y colocar: # sudo apt install timeshift y procedemos a instalarla.
Y si queremos instalarla desde el modo gráfico, lo podemos hacer a través de Flatpak.

Captura de Pantalla
- Después de tener el software instalado, lo vamos a abrir. Y debemos tomar en cuenta que al abrirlo, nos va a pedir, nuestra clave root.


Captura de Pantalla
Al abrir por primera vez nos va a salir esta ventana, y le vamos a dar a la pestaña que dice siguiente.
- Cuando le demos a la pantalla de siguiente, nos va abrir una nueva ventana la aplicación, y nos va a mostrar los discos duros que tenemos en el equipo.
En mi caso, yo tengo dos discos duros, uno de 150 GB, donde tengo el sistema operativo, y otro de 250 GB, donde tengo la carpeta /home.
Aquí en esta ventana, debemos escoger en que disco, queremos guardar, la copia de seguridad el punto de restauración.
Yo escogí, el disco de 150 GB, que es donde tengo el sistema operativo.
Después de escoger el disco, donde vamos a guardar la copia de seguridad, le damos a la pestaña que dice siguiente.

Captura de Pantalla
- En la nueva ventana, la aplicación nos pide que escojamos, cada cuanto tiempo se va a realizar la copia de seguridad y cuantas copias de seguridad se desean guardar.
Te da diferentes opciones desde la mensual,hasta la diaria, y te pregunta, cuantas copias de seguridad deseas guardar. Por ejemplo, puedes decir que quieres una copia diaria, y que te guarde 3 copias.
Esto significa, que te hará una copia diaria, y te va a guardar las últimas tres copias, y cuando llegue al límite de las 3 copias, borrara la última y la remplazara por la que le sigue.
Ahora bien, deben tomar en cuenta, que las copias de seguridad se guardan en tu disco duro, en una USB, o en un disco externo. Pero, normalmente, se guardan en el Disco duro del equipo, así que si guardas una copia de seguridad de 50 GB, esos gigas, se los debes descontar a la capacidad de tu disco duro. Es decir, si guardas tres copias de 50 GB, le debes descontar a tu disco duro, 150 GB de capacidad.
Tomando esto en cuenta, debes ver cuales son tus verdaderas necesidades. En mi caso, soy un usuario medio, no estoy programando y casi, no le realizo, cambios al sistema, ya que los que me interesaba, se los hice la primera vez que instalé el sistema operativo.
Así, que tomando eso en cuenta, decidí, hacer un respaldo semanal y guardar, 1 solo copia. Eso implica, que si tengo una ruptura del sistema, lo rescataré, con la configuración de la semana pasada, que es la que tengo guardada en TimeShift, y se renueva automáticamente todas las semanas.
Finalmente, después de escoger y configurar el tipo de guardado de datos, le damos a la pestaña, siguiente y avanzamos a una nueva ventana.

Captura de Pantalla
- En esta nueva ventana la aplicación, nos pedirá que escojamos, que datos deseamos guardar, y nos mostrara los dos discos duros que tiene le equipo. Y nos colocara tres opciones, en la primera dirá, excluir todos los archivos, en la segunda, incluir solo los archivos ocultos y la tercera que es incluir todos los archivos.
En mi caso, yo tengo dos discos duros, en uno esta el sistema operativo y en el otro está la carpeta /home, con todo mis contenidos. Ademas de eso, tengo un respaldo, que realizo todos los meses de la carpeta /home en un disco duro externo, y también tengo algunas copias de seguridad de archivos importantes, respaldados en DVD.
Finalmente, creo que cada usuario, debe respaldar y ser responsable de lo que haya en su /home. Así que tomando todo esto en cuenta, y lo que comenté arriba sobre el espacio que ocupa la copia de seguridad en el disco,en el disco, que tiene la carpeta /home, opté por la opción 1 de no resguardar los archivos.
Y por otro lado, decidí guardar todos los archivos, que están en el disco del sistema operativo, que son los que me permiten rescatar el sistema. Ver imagen.
Después de terminar este paso, le damos a la pestaña de siguiente, y la aplicación, nos abrirá, una nueva ventana.

Captura de Pantalla
- En la nueva ventana, la aplicación nos informa que la configuración esta completa. Y en ese momento le damos a la pestaña finalizar. Y ahí se nos abrirá una nueva ventana.

Captura de Pantalla
- En la nueva ventana, le vamos a dar a la pestaña donde dice crear, y se iniciara, la creación de nuestra copia de seguridad para restaurar el sistema.
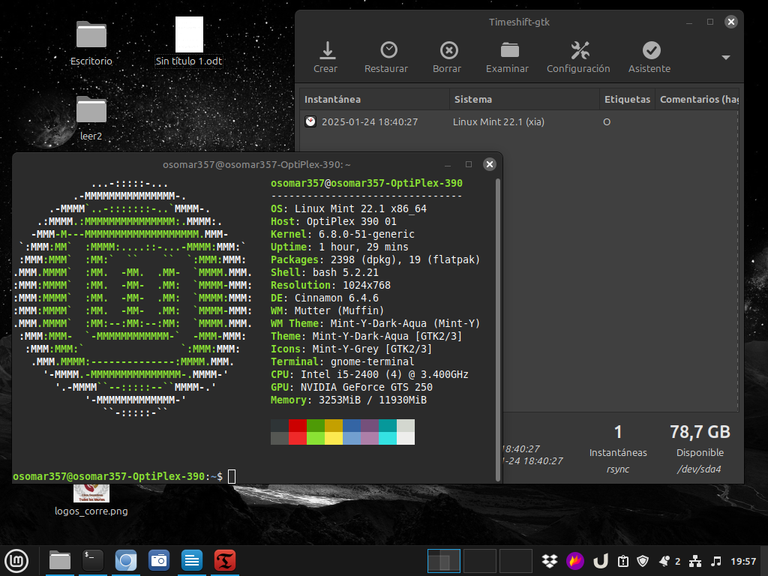
Es importante ver en esta ventana, la parte inferior derecha, ya que en ella, se verá el tamaño de nuestro disco, antes de iniciar la copia y después de que se termine la realización de la copia de seguridad. Ver primera imagen.
Por último, cuando iniciemos la creación de la primera de seguridad, la misma se puede tardar un poco, ya que es la primera y la aplicación está escribiendo todos los datos por primera vez. Pero después de la primera copia de seguridad, semanal mente, lo hará de manera automática, según la configuración que realice y solo colocara los cambios en el sistema, así que sera mucho mas rápido el proceso, y lo hará de manera automática.

Captura de Pantalla
- Cuando termina la aplicación de crear la copia de seguridad, nos informa que la misma ha sido creada, y en la parte inferior derecha, nos informa de que tamaño, quedó nuestro disco duro, después de crear la copia de seguridad.
Como se ve en la imagen anterior, mi disco tenía 120 GB, cuando inició la creación de la copia de seguridad, y ahora tiene un tamaño de: 78 GB, por eso es importante, respaldar lo que realmente se necesite, y en mi caso solo era el sistema operativo, de manera semanal, con una sola copia.

Captura de Pantalla
Puntos a tomar en cuenta en una restauración del sistema:
Es muy posible, que si nos toca restaurar el sistema, debido a algún error, o ala ruptura del sistema, por estar intentando hacer algún cambio o algo que estemos haciendo, la maquina no abra el sistema operativo y la pantalla se quede en negro.
Si esto ocurre, no te desesperes, ya que podrás rescatar tu sistema sin problemas. Lo que debes hacer, es tener una memoria booteable USB, con un sistema operativo Linux. No importa, que no sea el mismo sistema operativo que tenía tu maquina anteriormente.
Lo que debes hacer, es colocar la memoria USB y dejar que el sistema arranque en modo live, y después de que arranque, debes buscar la aplicación TimeShift. Si el sistema no lo tiene, simplemente la bajas de Flatpack y en dado caso de que tengas alguna complicación, lo bajas a tu distribución a través de la terminal, siguiendo las indicaciones de esta página.
Una vez que la tengas instalada, en el sistema live de la USB, abres la aplicación y ella automáticamente, reconocerá, la copia de seguridad o punto de restauración, y lo único que debes hacer, es darle a la pestaña que dice restaurar de la aplicación, y recuperaras tu sistema.
Una vez que termine el proceso de restauración la aplicación, te pedirá que reinicies, y al hacerlo, entraras de nuevo a tu sistema, tan funcional y con las mismas carteristas que le tenías.
Muchas gracias por leerme, y espero que esta información sea de ayuda para muchos de los lectores.


To read English
To read English

Screenshot

Greetings and introduction:
Greetings #Linuxeros, members of the #Linux&Softwarefree community, and greetings to the entire #Linux community in #Hive and @linux-software, welcome to a new post of #ViernesDeEscritorio, today January 24, 2025.
As always, I'm still using my beloved Linux Mint only now I upgraded it to version 22.1 named "Xia", and I'm still using the Cinnamon desktop, which is the desktop created by the Linux Mint team.
TimeShift, tool to restore the system.
When we are on #Linux, unlike Windows and Mac, we can make countless different changes and customizations, ranging from customizing our desktop, to modifying it or deleting it and placing another desktop.
We can also place visual effects to folders, place several independent desktop windows, place servers such as Apache, program, delete files and dependency, and finally, we can mess with the krenel or the system files, among many other things.
That's one of the great freedoms that #Linux gives us, being an open source. But, this also indicates the possibility of great risks, since by making any changes, if we make a mistake we can damage the system. And also, a system breakdown can happen, doing something simple, like an update to a new version, and when doing it, we can have an internet crash or a power outage, and simply, we are left with the broken system, irretrievably.
This is a possibility that can arise at any time. And to avoid this type of situation, the developers of #Linux, created the TimeShift tool, which allows us to create backups of our operating system, and thus be able to recover it, without problems.
How to use TimeShift
- The first thing we must do is see if we have it installed on the system, in the case of Linux Mint, it is already installed by default, and in many other operating systems #Linux, even if it is not installed by default, it is a system package, so we just have to install it. In the case of Debian and the systems derived from it and Ubuntu, we just need to open our terminal and place: # sudo apt install timeshift and proceed to install it.
And if we want to install it from the graphic mode, we can do it through Flatpak.

Screenshot
- After having the software installed, we are going to open it. And we must take into account that when opening it, it will ask us for our root key.


Screenshot
When you open it for the first time, this window will pop up, and we will click on the tab that says next.
- When we click on the next screen, the application will open a new window, and it will show us the hard drives that we have on the computer.
In my case, I have two hard drives, one of 150 GB, where I have the operating system, and another of 250 GB, where I have the /home folder.
Here in this window, we must choose on which disk, we want to save, the backup the restore point.
I chose, the 150 GB disk, which is where I have the operating system.
After choosing the disk, where we are going to save the backup, we give to the tab that says next.

Screenshot
- In the new window, the application asks us to choose, how often the backup is going to be made and how many backups we want to save.
It gives you different options from monthly to daily, and asks you how many backups you want to save. For example, you can say that you want a daily copy, and that I keep 3 copies for you.
This means that he will make you a daily copy, and he will keep the last three copies, and when he reaches the limit of 3 copies, he will delete the last one and replace it with the one that follows.
Now, you should take into account that the backups are saved on your hard drive, on a USB, or on an external drive. But, normally, they are saved on the computer's hard drive, so if you keep a 50 GB backup, those gigas, you should discount them to the capacity of your hard drive. That is, if you save three copies of 50 GB, you must discount your hard drive, 150 GB of capacity.
Taking this into account, you must see what your real needs are. In my case, I am an average user, I am not programming and I almost do not make changes to the system, since the ones I was interested in, I made them the first time I installed the operating system.
So, taking that into account, I decided, to make a weekly backup and save, 1 copy only. That implies, that if I have a system break, I will rescue it, with last week's configuration, which is the one I have saved in TimeShift, and it renews automatically every week.
Finally, after choosing and configuring the type of data saving, we give to the tab, next and advance to a new window.

Screenshot
- In this new window the application will ask us to choose which data we want to save, and it will show us the two hard drives that the computer has. And it will place three options, in the first it will say, exclude all the files, in the second, include only the hidden files and the third one is to include all the files.
In my case, I have two hard drives, on one is the operating system and on the other is the /home folder, with all my contents. In addition to that, I have a backup, which I perform every month of the /home folder on an external hard drive, and I also have some backups of important files, backed up to DVDs.
Finally, I think that every user, should support and be responsible for what is in his /her /home. So taking all this into account, and what I mentioned above about the space occupied by the backup on the disk, on the disk, which has the /home folder, I opted for option 1 of not saving the files.
And on the other hand, I decided to save all the files, which are on the operating system disk, which are the ones that allow me to rescue the system. See image.
After finishing this step, we click on the next tab, and the application will open a new window.

Screenshot
- In the new window, the application informs us that the configuration is complete. And at that moment we hit the finish tab. And there a new window will open for us.

Screenshot
- In the new window, we are going to give the tab where it says create, and it will start, the creation of our backup to restore the system.
It is important to see in this window, the lower right, because in it, you will see the size of our disk, before starting the copy and after the completion of the backup. See the first image.
Finally, when we start the creation of the first security one, it may take a little while, since it is the first one and the application is writing all the data for the first time. But after the first backup, weekly, it will do it automatically, according to the configuration you make and will only place the changes in the system, so the process will be much faster, and it will do it automatically.

Screenshot
- When the application finishes creating the backup, it informs us that it has been created, and at the bottom right, it informs us of the size, our hard drive remained, after creating the backup.
As you can see in the previous image, my disk had 120 GB, when the creation of the backup started, and now it has a size of: 78 GB, that's why it's important, to back up what is really needed, and in my case it was only the operating system, on a weekly basis, with a single copy.

Screenshot
Points to take into account in a system restore:
It is very possible, that if we have to restore the system, due to some error, or the break of the system, because we are trying to make some change or something we are doing, the machine does not open the operating system and the screen goes black.
If this happens, do not despair, as you will be able to rescue your system without problems. What you need to do is to have a bootable USB memory stick, with a Linux operating system. It does not matter, that it is not the same operating system that your machine had previously.
What you need to do, is to place the USB stick and let the system boot in live mode, and after it boots, you need to look for the TimeShift application. If the system does not have it, simply download it from Flatpack and in case you have any complications, download it to your distribution through the terminal, following the instructions on this page.
Once you have it installed, on the USB live system, open the application and it will automatically recognize the backup or restore point, and all you have to do is click on the tab that says restore the application, and you will recover your system.
Once the restoration process is finished, the application will ask you to restart, and by doing so, you will enter your system again, as functional and with the same pickpockets that you had him.
Thank you very much for reading me, and I hope this information will be of help to many of the readers.


Ya me vas a tener que enseñar un poquito de Linux, toda la vida de Windows yo jaja. Quizá estas más acostumbrado a poner comandos en la consola por sistemas operativos mas antiguos.
Sí, pero eso era antes, ahora Linux, es tan fácil y tan amigable como Windows o Mac, de hecho, puedes hacer todo, sin abrir una terminal.
Eso dependiendo del sistema operativo, pero lo mejor es meterse después de un tiempo, con las aplicaciones madres, una vez que las aprendes a usar, no hay servidor que no manejes, ni problemas que se te hagan difícil resolver, como administrador o como usuario.
Excelente herramienta de respaldo. Es lo bueno de Mint, que ta te traes instalado todo lo necesario.
Hola @albertoo6o7, realmente esa es una de la cosas buenas que trae Linux MInt, sin embargo, eso también trae un problema, que es el acostumbrarse a la facilidad, en el uso de las distros.
Y si es cierto, que Linux, esta avanzando mucho, en los procesos de utilidad y uso, para poder competir contra Windows y Mac y tener mayor aceptación.
También es cierto, que nosotros como usuarios de Linux, no debemos acostumbrarnos solo a la facilidad.
Un ejemplo es, que aquellos que dominan, distros como Debian, Archilinux, Fedora, o cualquiera de las distros madres, pueden fácilmente resolver cualquier problema y hasta administrar un servidor, sin mayor inconveniente.
Así, que siempre trato de no acostumbrarme a la comodidad que me da Linux Mint, y siempre estoy en la terminal, o inventando algo que me mantenga activo en Linux. Y cuando no lo hago, es por falta de tiempo, jajaja.
Feliz sabado.
!discovery 30
!PIZZA
Muchas gracias por el apoyo.
Agradecido.
This post was shared and voted inside the discord by the curators team of discovery-it
Join our Community and follow our Curation Trail
Discovery-it is also a Witness, vote for us here
Delegate to us for passive income. Check our 80% fee-back Program
$PIZZA slices delivered:
@jlinaresp(10/15) tipped @osomar357