Introduction, English Only
Greetings, friends!
Continuing the series of tutorials about the basics of Photography.
This time, I'm going to write about Aperture.
I have posted these examples and most of the theory before the new blockchain and within another project, but now I am reorganizing, editing, and translating those lessons into a new and more complete set.
I hope you find them useful and easy to understand!
Previous Lessons:
Предишни уроци:
Photography Basics — Exposure — En and Bg Translation
What is Aperture
The opening that those metal pieces inside your lens will create, the same as the pupil of the eye. So on that depends how wide a beam of light is getting in and touching our sensor or film (whatever light-sensitive material).
The wider the opening, the more light we let into the image.
Aperture is measured in F stops, shown to us as F numbers.
A lower F-number also means a wider opening. Higher F numbers mean tighter openings. And greater sharpness of the image, as a side effect of less dispersion of light. Wider openings reduce that sharpness — because of greater dispersion of light.
We call it Depth of Field (DoF).
In general, a wide-open Aperture, i.e. a small F-number means a shallow DoF. A larger F-number generally means a greater DoF.
Какво е Бленда
Отворът, който онези метални пластини, вградени в обектива, образуват подобно на зеницата на окото. От това зависи колко широк сноп светлина ще премине и достигне до сензора или филма (до какъвто светлочувствителен материал използваме).
Колкото по-широк е отворът, толкова повече светлина пускаме в изображението.
Блендата се измерва чрез F стопове, показвани ни като F числа. По-късно в тази статия ще обясня как се получават F числата.
По-малки F числа означават по-широк отвор. По-високи F числа означават по-тесен отвор. И по-голяма острота на изображението като страничен ефект от по-ниската дисперсия на светлината. И обратното.
Тази острота наричаме дълбочина на рязкост на изображението.
В общия случай, по-широка бленда, т.е. по-малко F число, означава по-плитка рязкост. По-голямо F число означава по-дълбока рязкост.
Beginners focus on this piece of information and mostly talk about open Aperture when striving to achieve those interesting-looking shallow DoF images.
But Aperture is only one of three major factors that influence the Depth of Field of sharpness within the frame. We shall talk about the other factors in another lesson.
And even in portrait photography, there are cases where we would use a wide-open Aperture for greater background blur, and cases, where we would use a relatively closed Aperture for more sharpness.
Начинаещите често се фокусират върху тази информация и основно говорят за отворена бленда, когато се стремят да получат интересно изглеждащи изображения с плитък DoF.
Но блендата е само един от три основни фактора, които влияят дълбочината на рязкост на изображението. За другите ще говорим в друг урок.
A дори в портретната фотография има случаи, в които бихме използвали широка бленда с цел по-неясен фон, както и случаi, в които ползваме сравнително по-затворена бленда за повече острота.
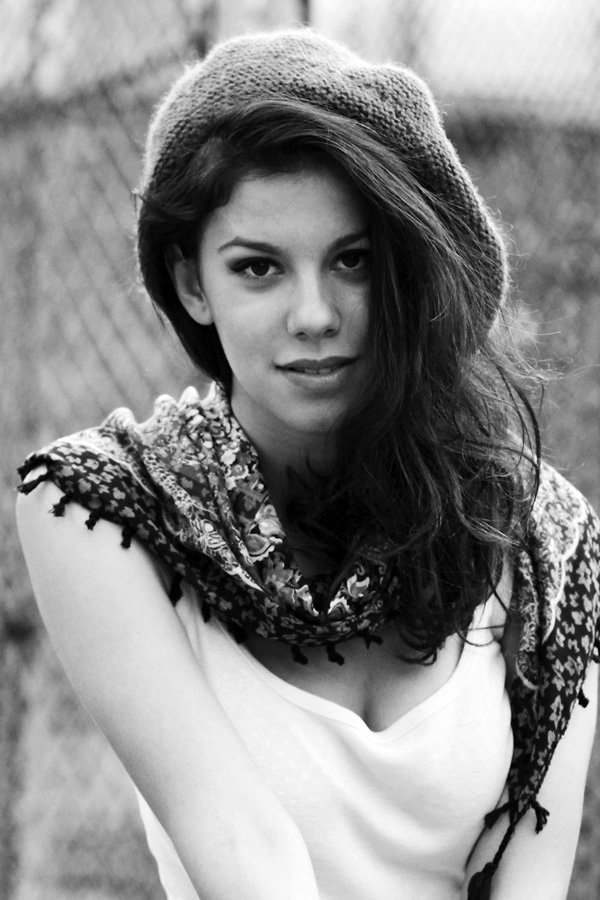
Aperture F 3.2; Focal Length 85 mm.
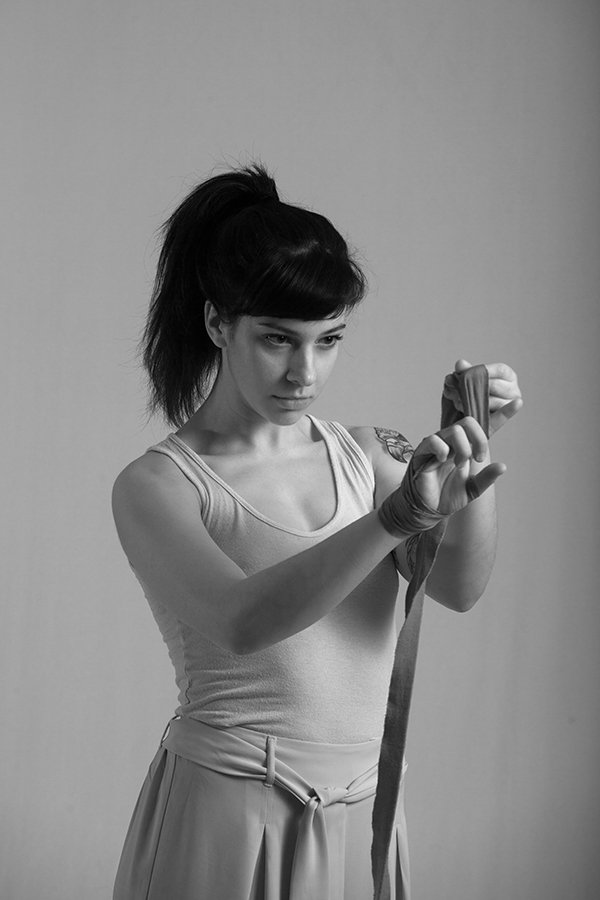
Aperture F 8; Focal Length 145 mm. Studio Lights.
Below — a practical demonstration of the change of Aperture.
Долу — практическа демонстрация на промяна в блендата.
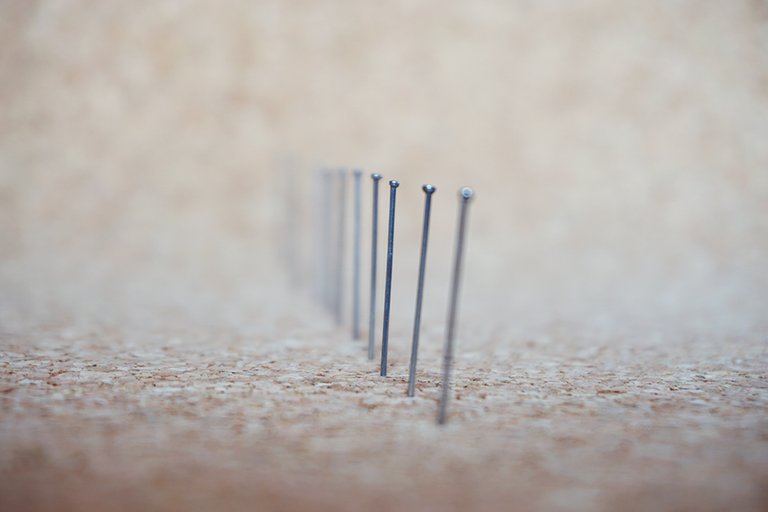
Aperture F 5.6
Focus is on the third pin and those in front and those in the back are out of focus. The Depth of Field in this frame is relatively shallow.
Фокусът е на третата карфица, а тези отпред и отзад са извън фокус. Дълбочината на рязкост в този кадър е сравнително малка.
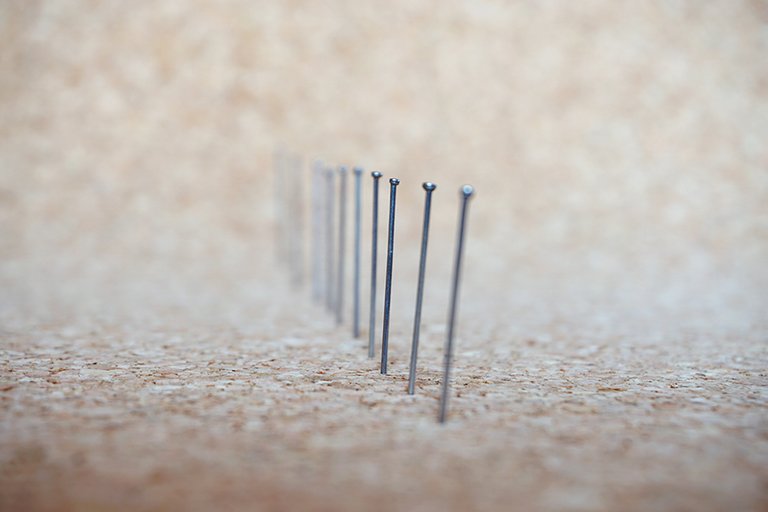
F 8
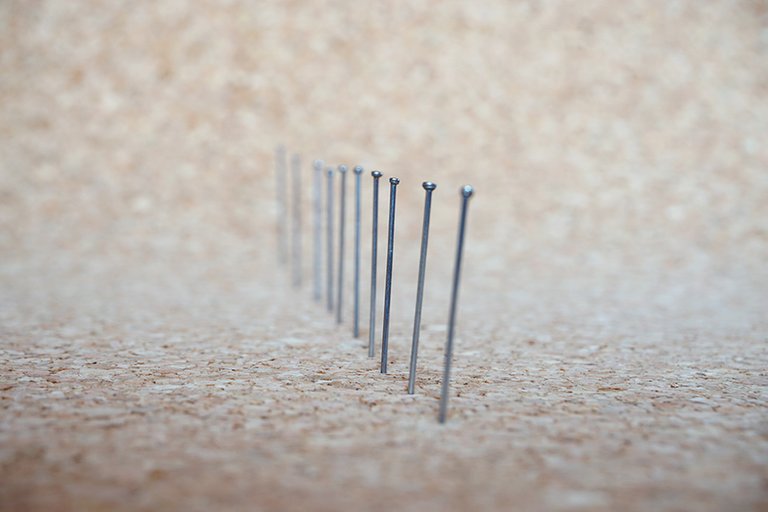
F 11
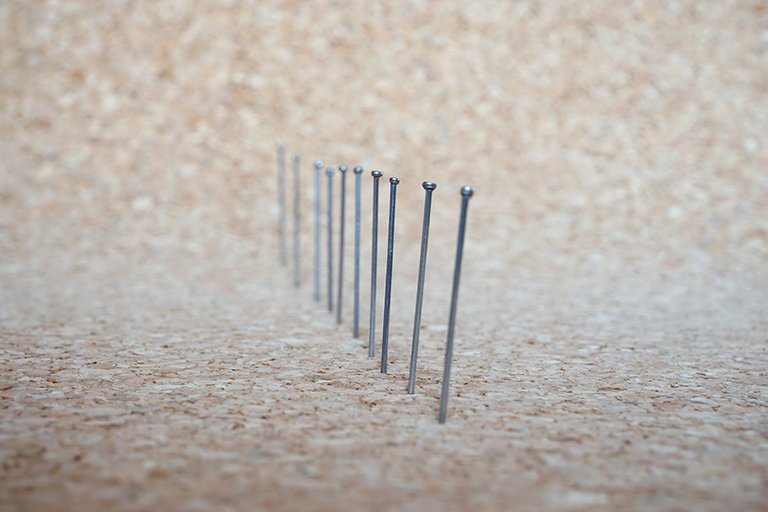
F 16
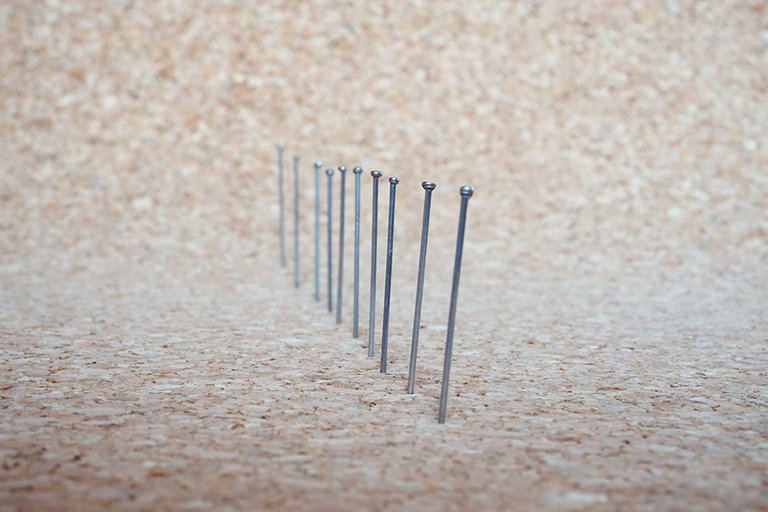
F 22
There is a connection here between this lesson, the previous one about Exposure (linked at the beginning of this article), and the lesson that follows.
Different Aperture values were used but the Exposure remained the same. How?
Learn more next time.
Тук има връзка между този урок, предишния за Експозиция (линк към него в началото на статията), и урокът, който следва.
Различни стойности на блендата са използвани, но експозицията остава една и съща. Как?
Научете повече следващия път.
Yours,
Manol


Hi Manol, I've upvoted and reblogged this, because you have knowledge I lack in regards the camera and its uses.
I've got a NIKON D5600, which I either leave on Auto, or use the two filter options
(don't have it in front of me, can't remember what they are called)
But they are presets. Useful, but I would like to know how to use the controls for the other functions as I want them to appear.
Thanks for this tutorial my friend @manoldonchev
Здравей Манол, аз подкрепих и реблогирах това, защото имате знания, които ми липсват по отношение на камерата и нейните приложения.
Имам NIKON D5600, който или оставям на Auto, или използвам двете опции за филтър
(не го имам пред мен, не мога да си спомня как се наричат)
Но те са предварително зададени. Полезно, но бих искал да знам как да използвам контролите за другите функции, тъй като искам те да се появяват.
Благодаря за този урок моят приятел
Thanks, mate :) We shall deal with your D5600 soon, I just need some more time to write down all the basic stuff. If I were right there I could have explained it in a few minutes, it's not rocket science.
Maybe I have to start making videos someday soon.
That would be helpful. I tried watching some tutorials when I got the camera, it always seems to me (and this is true of almost every tutorial I've tried to use for anything) that when I do a step, as far as I know exactly like the guy in the video did, I get a different result, and then what? I have no one to ask, and the rest of the tutorial is wasted, so I quit.
I must admit, I did NOT read your post, I reblogged it so I could go back to it.
And I will
Thanks Manol
@manoldonchev,
More great information.
As an aside, your mastery of English is flawless. Indeed, I often forget you're not a native anglophone. Even when I search for subtle mistakes in grammar and syntax, I rarely find any. Not only are you speaking in English, you're thinking in it as well.
Kudos, my friend ... that's a very big accomplishment.
Quill
Thanks, Quill!
Nobody's flawlessly flawless but I think reading does help quite a bit. What was written in English, I want to read in English. Translations suck.
That might be true even for my own translation of my own thoughts, you know :)
I do mostly audio recording, but people often ask for video and photography and as an entrepreneur (i.e. person without a guaranteed salary) I can't say no. After much research, I invested in a Sigma 30mm F/1.4 lens. It has probably paid itself 1000 times over. The lens itself was probably one of the best investments I've ever made.
The information you provide here is priceless :).
Aye, that one sounds really cool. At F 1.4 you have almost no loss of light at all. It's almost as the eye can see it. That would be F 1.
Fantastic tutorial with a great example using the pins. Larger doesn't always mean better. My pinhole lens has a really high aperture and about everything is in as much focus as it can be with a pinhole. Love the tutorial!