Hello everyone!
This video tutorial will guide you through the steps to participate in the SPK Network final Test Sprint. You will learn how to register your account, acquire SPK, power up SPK to get BROCA, create and manage contracts, or even encrypt your files. Follow these instructions to learn how to back up your files on the SPK Network.
Note: We will update this post with more information regarding the other steps of the SPK Network Sprint, so stay tuned on our Discord.
Below, you can find a table of contents that will be updated. We will constantly add more content, tutorials, and instructions. Stay in contact with us on the SPK Network Discord to be the first to see all the updates and new features.
In this guide:
- Register your account on the SPK Network - (0:16 - 1:00)
- Get some SPK - (2:22 - 3:13)
- Power up SPK to get BROCA - (3:14 - 3:50)
- Create a Paid Contract using BROCA - (3:55 - 5:22)
- Upload Files to Your New Contract - (5:23- 7:24)
- Create a Free Contract - (7:25 - 11:05)
- Extend a Contract Expiration Date - (11:06 - 12:28)
- Encrypt a File - (12:45 - 15:48)
In future guides:
SPK Drive (file-centric storage):
- Store a file
- Write a storage contract
- Share an encrypted file to the network
SPK DEX
- Execute a small SPK Token trade on the DEX, (Test out a Buy and a Sell and try placing and canceling orders)
Validators
- Run a validator
Governance
- Power up LARYNX tokens, delegate it & receive SPK, or get SPK off the DEX and power it up
- Delegate Larynx to service providers
- Use SPK to vote for validators
You can find the instructions for the Storage Nodes and Validators in the link below:
SPK Testnet Node Setup Guide
Create storage contracts on Dlux.io Frontend
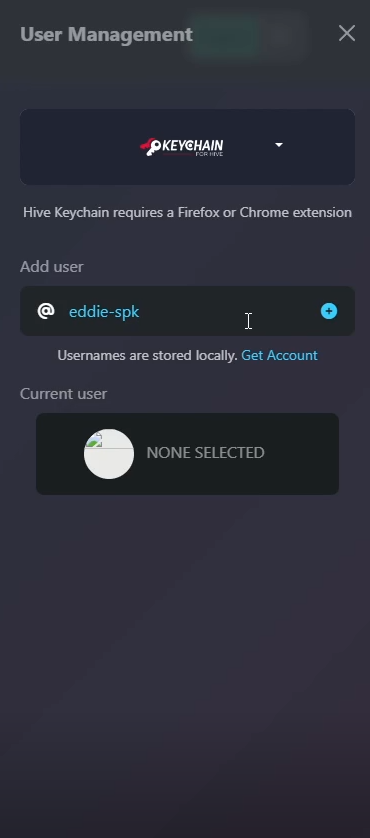
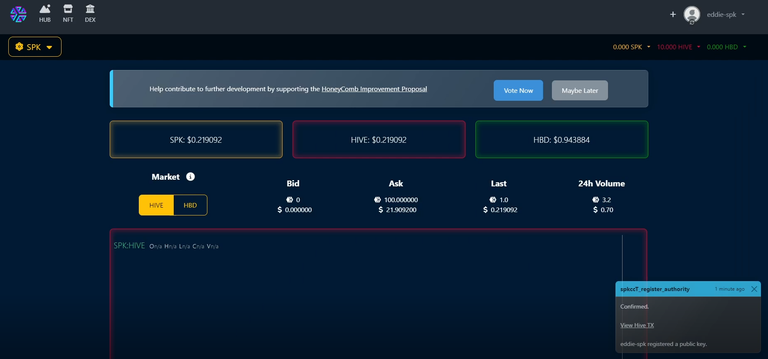
1. Register your account on the SPK Network - (0:16 - 1:00)
- Visit dlux.io and log in with Hive Keychain.
- Navigate to the files page here and register your account.
2. Get some SPK - (2:22 - 3:13)
Note: If you delegated LARYNX to an active SPK Claim Chain node, you should already have some SPK in your wallet.
You can confirm this on the Dlux Files Page. Look for the "SPK" wallet button next to "NEW" and "FREE".
Alternatively, check your balance on Ecency, but note this is the mainnet, and the balance might differ.
If you don't have any SPK, follow these steps:
- Visit the SPK DEX on dlux.io and buy some SPK.
- SPK is priced at 100 HIVE, but you could buy as low as 0.001 SPK and that will be enough to test.
- We will refund purchases at the end of the test period, as you are buying test tokens. Do not buy more than 1 HIVE worth of SPK. Also, this is the only link that you can access the SPK DEX with.
- If purchasing is not an option, join the SPK Network Discord and request some test SPK tokens in the #request-spk channel.
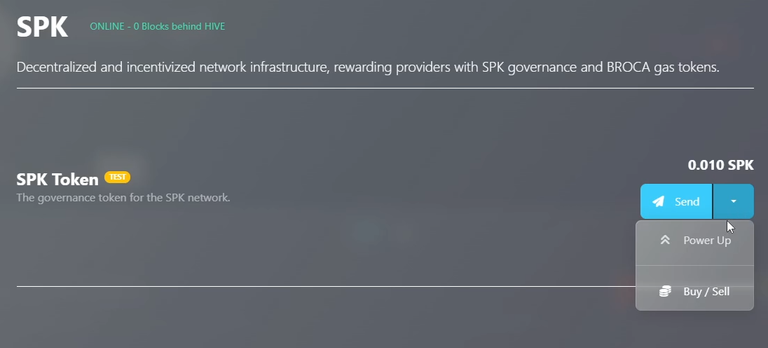
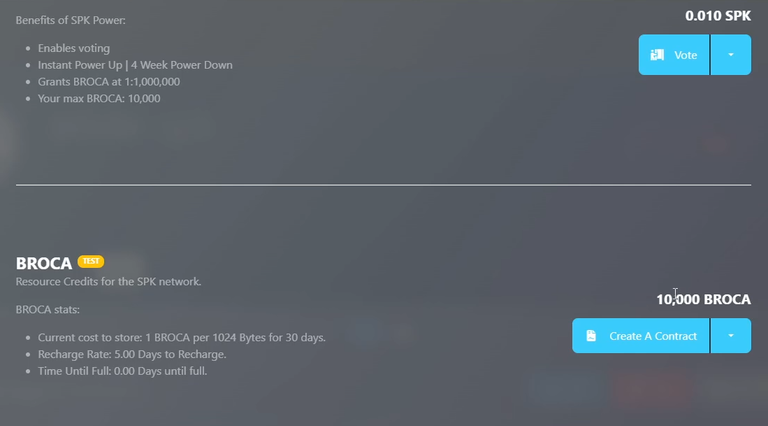
3. Power up SPK to get BROCA - (3:14 - 3:50)
- Click on the SPK wallet at Dlux Files Page.
- Powering up 0.1 SPK gives you 100K BROCA, equivalent to 95.37 MB.
- BROCA recharges at the same rate as Resource Credits on Hive (20% every 24 hours) allowing you to store up to 575 MB a month.
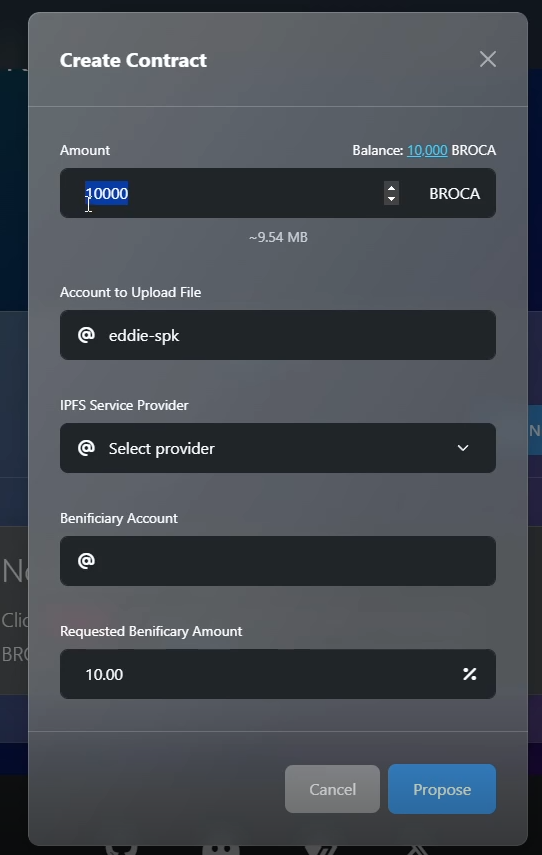
4. Create a Paid Contract using BROCA - (3:55 - 5:22)
- On Dlux Files Page, click on "NEW".
- Choose the amount of BROCA you want to use. 1,049 BROCA provides a 1 MB contract.
- Leave "Account to Upload File" as is unless you want a different account.
- Select @dlux-io as the "IPFS Service Provider".
- Leave "Beneficiary Account" and "Requested Beneficiary Amount" unchanged.
- Click "Propose" and confirm the transaction with Keychain.
- Wait for the transaction to process and the page to refresh automatically.
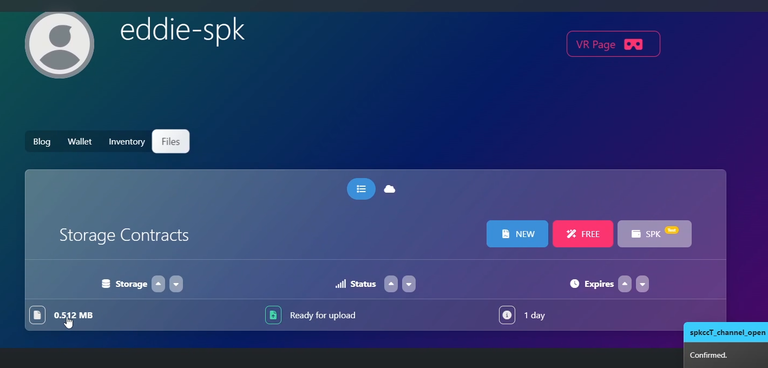
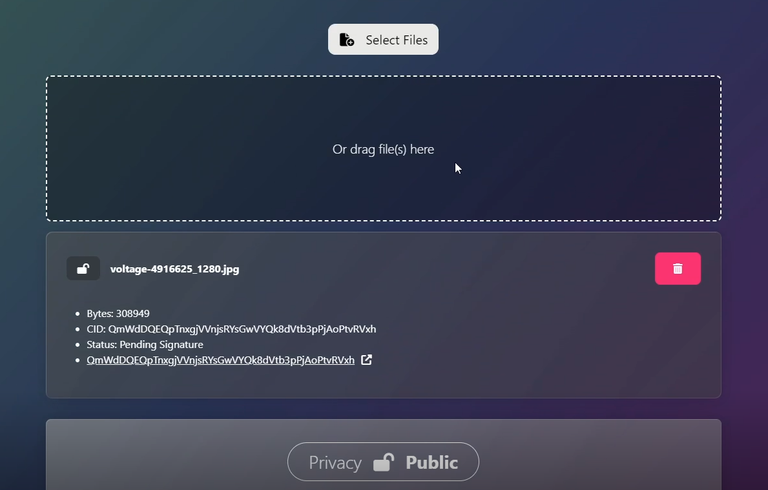
5. Upload Files to Your New Contract - (5:23- 7:24)
- Once your new contract is visible, you will see the storage, status, and expiration details.
- Click on the storage to upload your files. Start the contract within one day.
- Ensure your files do not exceed the storage capacity.
- Choose to make them Public or Encrypted. For this example, select Public.
- Click "Sign and Upload", confirm the transaction, and wait for the page to reload.
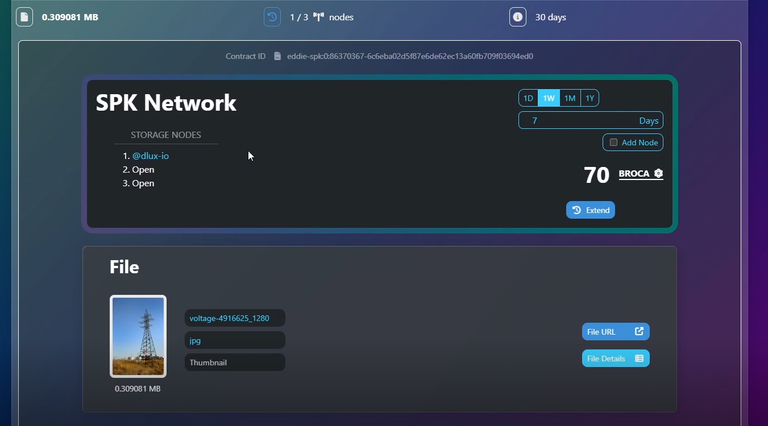
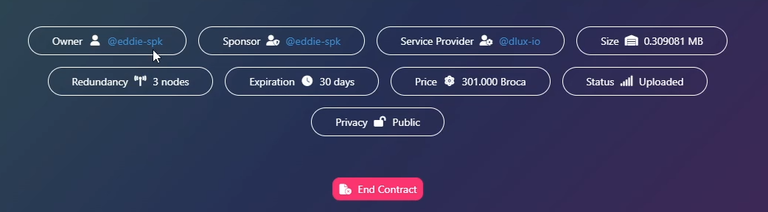
- Your contract will now be active for 30 days. You can view details such as price, expiration time, size, and more in the info section.
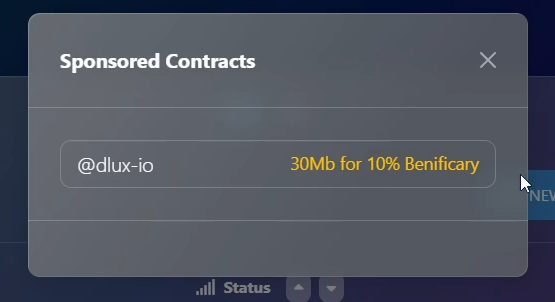
6. Create a Free Contract - (7:25 - 11:05)
- Go to the Dlux Files Page and click on the "FREE" icon.
- This allows you to upload up to 30 MB by setting a 10% beneficiary to @dlux-io. The beneficiary applies to one post, which you must publish to create the FREE storage contract.
- We recommend using a dummy or test account for this purpose.
- Click "Ready to Upload" and upload your files, following the same steps as the paid contract.
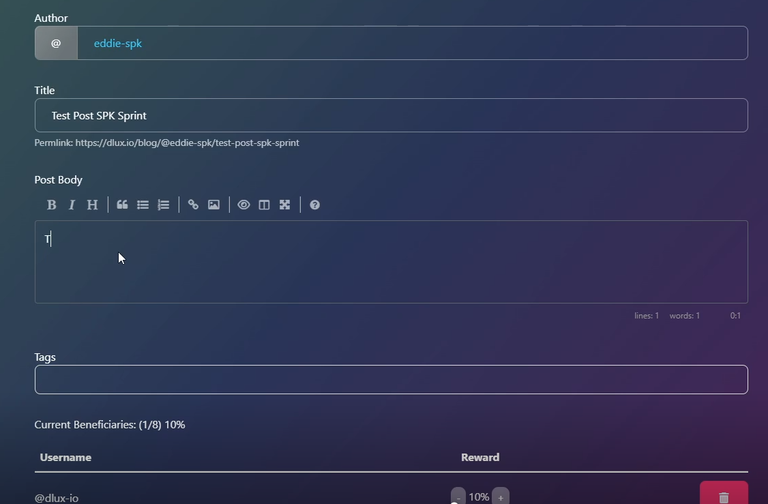
- Once uploaded, click on the storage contract again to create a post.
- Enter the Title, body, and tags. You can add the images you just uploaded to the post.
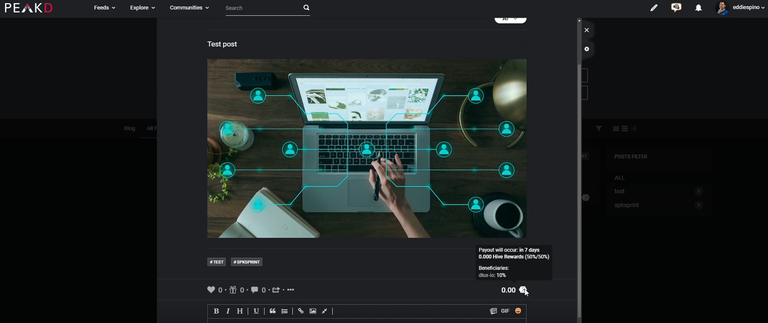
- Click "Publish".
- Note: This will create a post on Hive social media networks. Use a dummy account if just testing.
- If nothing happens, reload the page to see your contract for 30 days. Do not post again to avoid duplications.
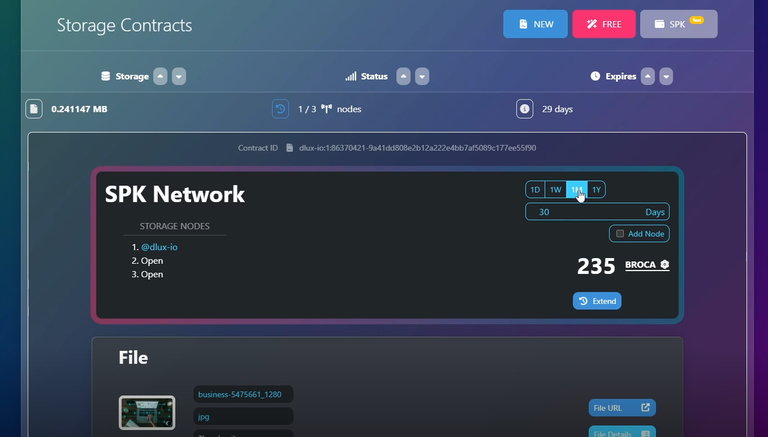
7. Extend a Contract Expiration Date - (11:06 - 12:28)
- Click on any contract and look for the "Extend" button.
- Choose the number of days to extend (day, week, month, or year).
- Check the amount of BROCA required based on file weight and duration.
- Click "Extend" and confirm the transaction.
- Reload the page to see the updated expiration date.
8. Encrypt a File - (12:45 - 15:48)
- Create a new contract and upload files as before (paid or free). At DLUX this currently only works with text files, other files types are planned.
- Ensure you have your private MEMO key in your Hive Keychain Wallet. If not, import it.
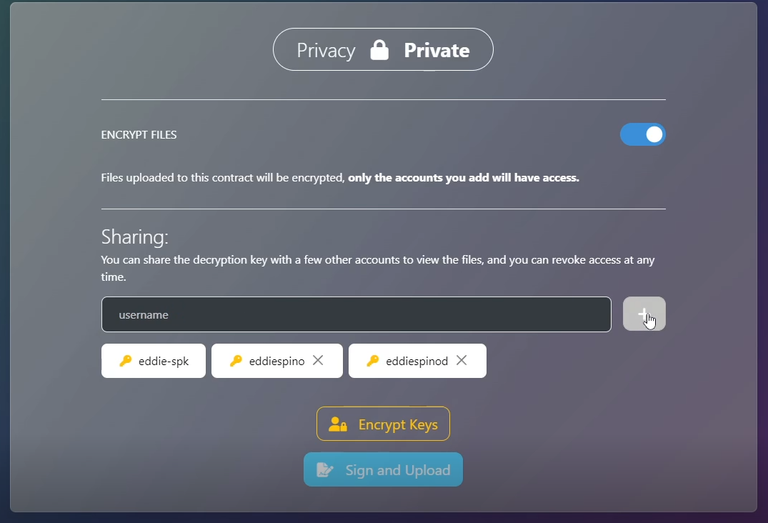
- In the "Privacy" section, choose "ENCRYPT FILES".
- By default, files are encrypted for yourself, but you can add more users.
- Under "Sharing", type the desired username(s) (without @) and click the plus sign.
- Add as many usernames as needed.
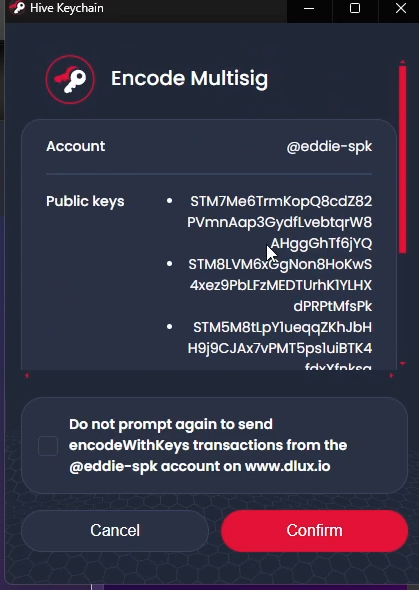
- Click "Encrypt Keys" and confirm the transactions. This encrypts the files for all specified users, including yourself.
- Finally, click "Sign and Upload".
These are all the steps to create contracts and store files using the Dlux.io frontend by @disregardfiat and @markegiles. Additionally, as mentioned in the video, there is another frontend by @nathansenn that is currently under development. Once it's ready, we will create a video tutorial and add it to this post. Future updates will also include instructions for advanced features such as creating a storage node, setting up a validator, voting for governance, and storing files on your own node. Stay tuned!
Here's a video by @disregardfiat with more instructions and details of how Dlux Contract system works.
SPK Network - Final Test Sprint
Call to Action!
- Join the Community: Head over to the SPK Network Discord and join the #testnet-sprint channel for all the instructions.
- Get Involved: Request the "Testnet Sprinter" role and enable notifications on Discord. This will ensure you receive updates and important notifications.
- Get Support: If needed, request a test account and SPK tokens in the #request-spk channel. @eddiespino or @disregardfiat will assist you.
- Stay Updated: Keep an eye on this blog post for constant updates.
- Create and Share Content: Post your experiences on Hive social media networks (peakd.com, ecency.com, 3speak.tv, inleo.io, etc.) using the #spktestnet tag. You can also create content on web2 platforms like X, Facebook, Reddit, and YouTube and share the links in the comments of this post.
- Engage and Feedback: Provide feedback, engage with the community, comment, and test the platform rigorously. Higher participation and engagement can lead to greater rewards!
Vote for our Witness:
About the SPK Network:
The SPK Network is a decentralized Web 3.0 protocol that rewards value creators and infrastructure providers appropriately and autonomously by distributing reward tokens so that every user, creator, and platform can earn rewards on a level playing field.
Check out the SPK Network Light Paper: https://peakd.com/hive/@spknetwork/spk-network-light-paper
Visit our website: https://spk.network/
Telegram Group: https://t.me/spknetwork
Discord Server: https://discord.gg/JbhQ7dREsP
▶️ 3Speak
Please let us know your feedback in the comments or directly on Discord. I'm going to give the role to some of the users that have participated in previous tesnets.
Keep up the great work guys 👍