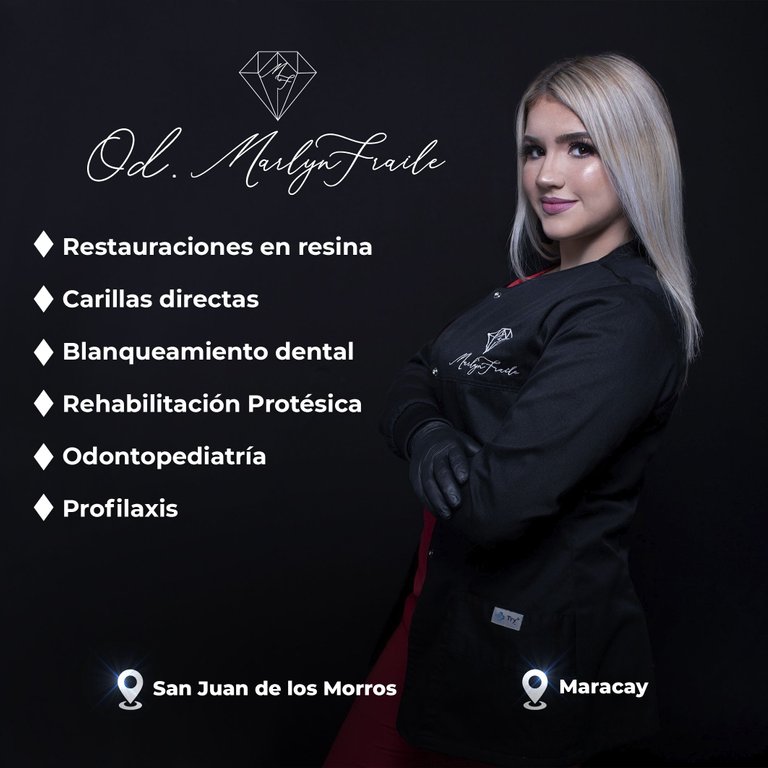
Hola comunidad de Hive, espero estén muy buen, el día de hoy les comparto un poco de mi trabajo y conocimiento en el área del diseño gráfico, específicamente en el diseño de redes sociales.
Este diseño lo hice hace unos meses atrás y fue realizado para una amiga la cual desempeña labores como Odontóloga, ella me pidió un “diseño” que llevara la información de los tratamientos que ella realiza ya como profesional, asi que me envió dicha información y la petición de como quería que fuese el diseño, junto con la foto que quería. Trabajaré en Adobe Photoshop.
Hello Hive community, I hope you are very well, today I share with you a little of my work and knowledge in the area of graphic design, specifically in the design of social networks.
I did this design a few months ago and it was made for a friend who works as a dentist, she asked me for a "design" that would carry the information of the treatments that she already performs as a professional, she sent me said information and the request of how I wanted the design to be, along with the photo I wanted. I will work in Adobe Photoshop
Cabe destacar que mi estilo es un bastante minimalista, creo fielmente que menos es más y que todo diseño bien organizado, jerarquizado y con los colores adecuados puede ser el mejor (conceptos básicos de diseño gráfico).
A continuación les explico paso a paso como lo realice:
It should be noted that my style is quite minimalist, I faithfully believe that less is more and that any well-organized, hierarchical design with the right colors can be the best (basic concepts of graphic design).
Here I explain step by step how to do it:

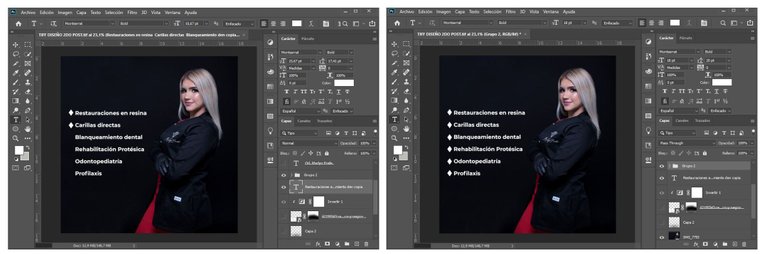
Paso 1. Inicié con un proyecto de un tamaño de 18x18CM y 300 de resolución, hay quienes trabajan en 1080x1080PX, lo que muchos conocen como 1*1, yo lo trabajo más en centímetros para que la resolución sea mejor. Seguidamente agregue la foto que ella quería para dicho diseño y comencé a hacer modificaciones para adaptarlo a la medida que hice.
Step 1. Start with a project with a size of 18x18CM and 300 resolution, there are those who work in 1080x1080PX, which many know as 1*1, I work more in centimeters so that the resolution is better. Then I added the photo that she wanted for said design and I began to make modifications to adapt it to the size I made.
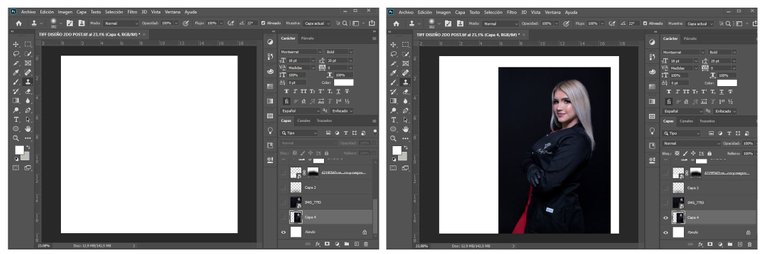
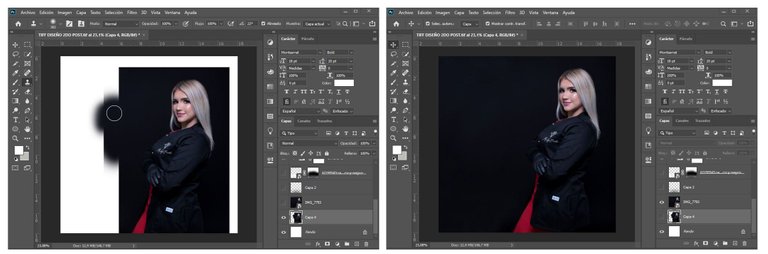
Paso 2. Con la herramienta de clonar, fui ampliando el fondo de la misma foto y hasta cubrir las zonas que se ven en blanco.
Step 2. With the clone tool, I was enlarging the background of the same photo and even covering the areas that are seen in white.
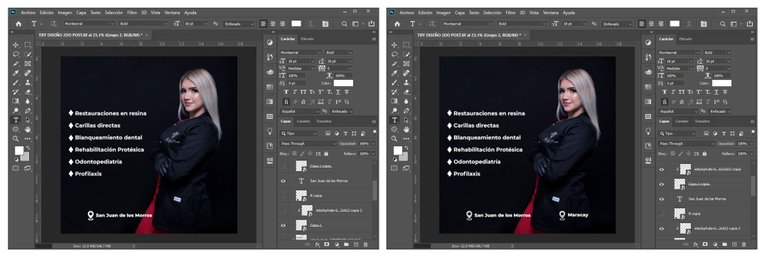
Paso 3. Luego fui organizando el texto y colocándolo donde yo creí que quedaría mejor de acuerdo a la imagen, le coloque un tamaño de 15 puntos y un interlineado de 17 puntos, con una separación de un espacio.
step 3. Then I organized the text and placed it where I thought it would look better according to the image, I gave it a size of 15 points and a spacing of 17 points, with a separation of a space.
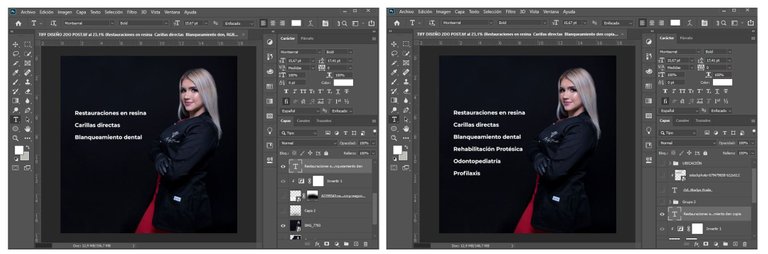
Paso 4. Le coloque un icono de diamante en cada uno de los servicios ofrecidos para que fuese un poco más llamativo a la vista del público.
step 4. I placed a diamond icon on each of the services offered to make it a little more striking in the eyes of the public.
Paso 5. Finalizado el texto de los servicios pase a añadir la ubicación donde pasa sus consulta odontológica, igualmente agregue un icono, claramente de ubicación, al icono le di una textura en relieve la cual da la ilusión de que fuese de cuero y un pequeño brillo en uno de sus bordes superiores.
step 5. Once the text of the services is finished, add the location where you spend your dental consultation, also add an icon, clearly of location, I gave the icon a raised texture which gives the illusion that it was from leather and a small shine on one of its upper edges.
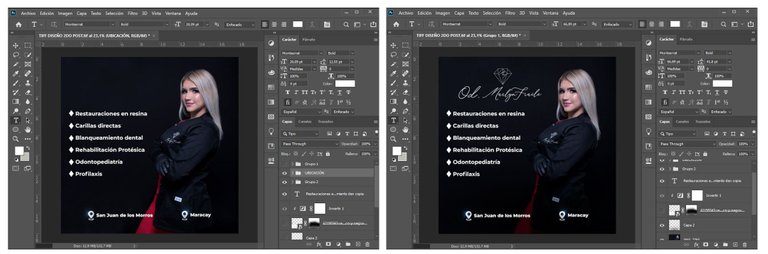
Paso 6. Ya para terminar agregue una sombra negra entre la foto y las ubicaciones en la parte inferior, esto hizo que resaltaran un poco más, y colocar el logo y diseño listo.
step 6. To finish, add a black shadow between the photo and the locations in the lower part, this made them stand out a little more, and place the logo and design ready.
Este ha sido todo el proceso para realizar este diseño, cuéntame qué opinas y si te gusto o tienes una duda déjame saberlo, gracias por llegar hasta aquí, saludos.
This has been the whole process to make this design, tell me what you think and if you like it or have any questions let me know, thanks for getting here, regards.
Éste diseño ya se encuentra en las redes de mi amiga y cliente Aquí
-Diseño realizado por mi en la programa de edición Adobe photoshop 2020-
This design is already in the networks of my friend and client Aquí
-Design made by me in the Adobe photoshop 2020 editing program-
Congratulations @jrluisgomez! You have completed the following achievement on the Hive blockchain and have been rewarded with new badge(s):
Your next target is to reach 100 upvotes.
You can view your badges on your board and compare yourself to others in the Ranking
If you no longer want to receive notifications, reply to this comment with the word
STOPCheck out the last post from @hivebuzz:
Support the HiveBuzz project. Vote for our proposal!