Greetings, new Hiver! Welcome to the @encouragement project!
We're excited to have you join this innovative community. Thank you for taking the leap into this new paradigm. Welcome to Web3!
We know that starting out can be overwhelming, but today, we'll simplify things and provide you with the essential information you need to make your journey epic.
In this guide, you will find the first steps you need to take when starting on the Hive Blockchain.
 First Suggestions
Ask as many questions as you can. There are no dumb questions!
Create a Discord account and join the Discord of the Aliento Project. We'll be waiting for you over there!

Within our Discord, you can search for the #general-chat-english channel and the #dudas-y-preguntas (#doubts-and-questions) channel to interact with the community.
Based on the information gathered over the years, thanks to experienced Hivers, we have prepared a small guide summarizing the first steps you should take when making life on Hive.
Step 1.- How do I get started on Hive? - My account
Let's take it easy, dear Hiver, first let's ask the most important question: do you already have a Hive account? If the answer is yes, you can skip this first step.
On the other hand, if the answer is no, we invite you to look at the following video created by @soy-laloreto, where you will only need a few minutes; follow a few small steps, and that's it.
We can also help you create a free Hive account if you don't have one. Contact us on our Discord or Telegram to request one.
Creating Accounts on Hive using PeakD
Creating Accounts on Hive using PeakD Important Safety Tips
Here is an infographic created by @thepeakstudio that you can see in this post to show you what each of the keys you receive when you create your accounts does.
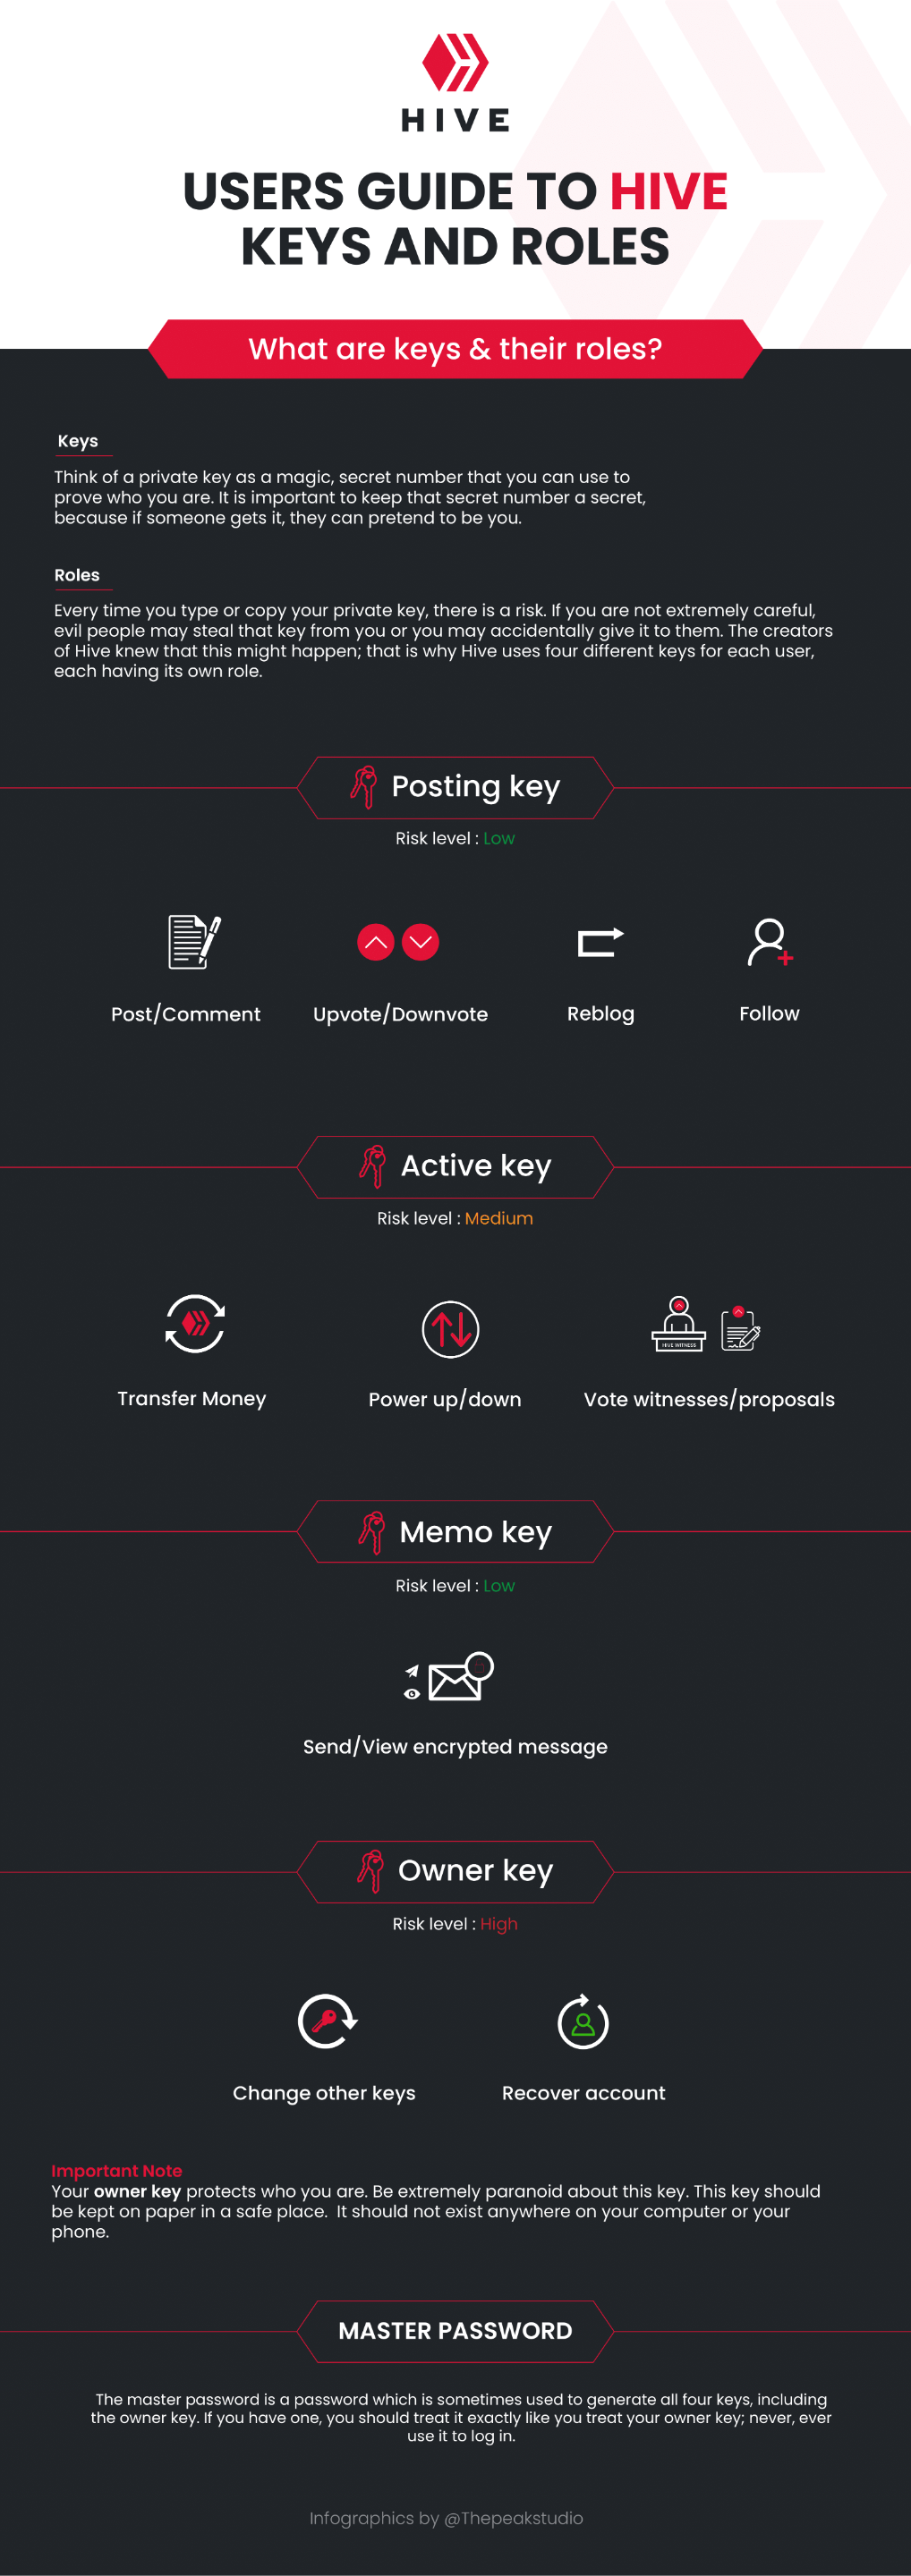
It is important not to lose any of them to avoid problems such as losing money, spam in your accounts, etc.
We must also be careful about one of the easiest ways to lose our account: phishing. And for this, we have a post created by the @rutablockchain project that you can read below:
HIVE Account Security Guide by @rutablockchain
Step 2.- Log into your Hive account
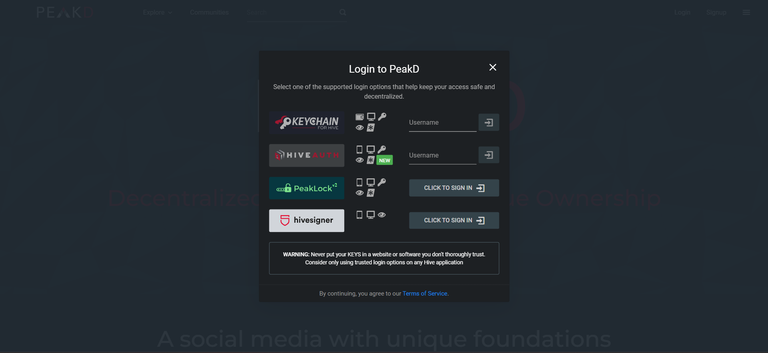
When logging into our Hive account to use the various applications of the ecosystem, we will have several options that we can use, but we will focus on those that we have available to login to the app or frontend known as PeakD.com:
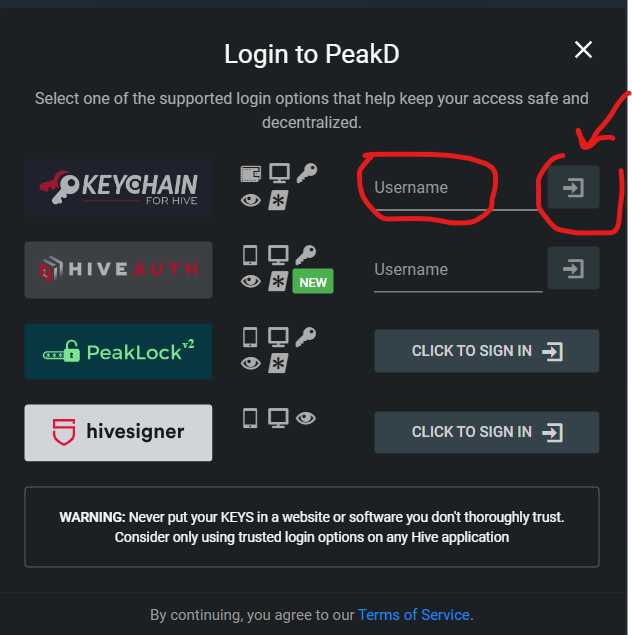
Hive Keychain
As a first option, we have the Hive Keychain, which we can use to login only using our username that we previously configured in the app; to know how to configure our keychain, let's see the following tutorial created by @dimeilaz for it:
Hive Keychain Installation on PC (Browser) / Mobile - Tutorial | Hive Basics with Encouragement! by @dimeilaz
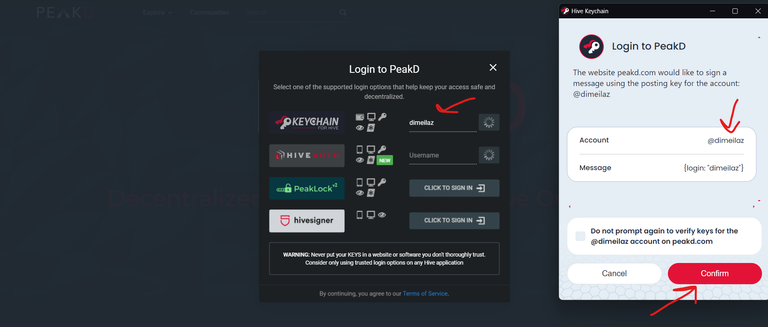
To access the account, enter your username in the text box that asks for it and click the door button on the right. It will show you a permission box from the Hive Keychain. Click on the "confirm" button, and that's it. You are in your Hive account.
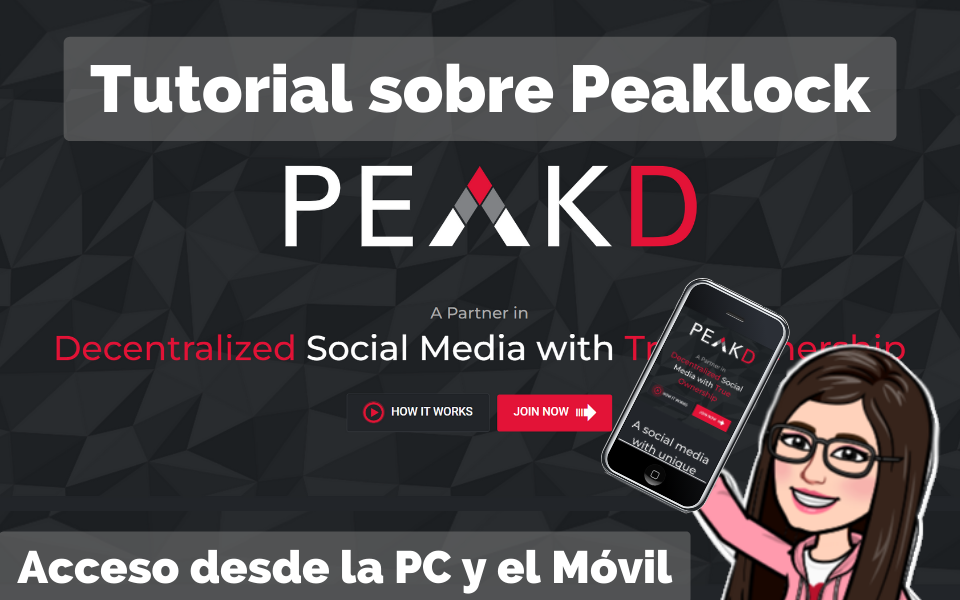
PeakLock
To access your account with the keys you just received after the last tutorial, we will learn to use a tool known as "PeakLock" that will allow us to create a 5-digit numeric password (PIN) to use our encrypted keys and thus be able to access our account in an easier and completely secure way.
To do this, we will use a tutorial created by @elizabeths14 about it:
Tutorial | Accessing Peaklock from PC and Mobile by @elizabeths14
HiveSigner
HiveSigner is a method very similar to the "PeakLock" method. Still, the difference is that the password we link to our private keys is an alphanumeric password we can create ourselves.
For more information on this, let's use a tutorial created by @ylich, a Hispanic leader and active witness (@la-colmena):
Understanding Hivesigner - Security guide || Entendiendo Hivesigner - Guía de seguridad @ylich
Step 3.- Create your Introduction Post
To start making life inside the Hive blockchain, it is recommended that you write an introductory post. For this, we will click on the button with a pencil icon to access the PeakD editor.
Important Note: When creating an introduction post, be sure to tag the person who invited you to Hive or share how you discovered Hive. To tag someone, write "@" followed by their username.
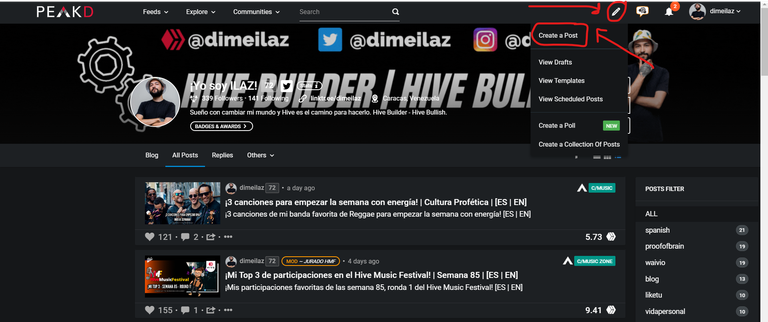
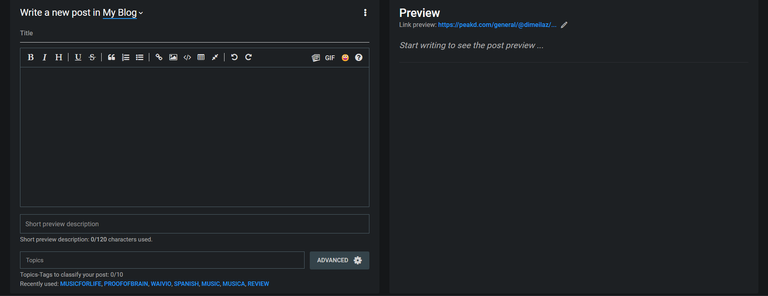
The text editor in PeakD.com will be where we will start writing our posts. On the left side, we will place the whole structure of our publication, while on the right side, we will see a preview of what we are creating.
Now, for this step, you will need to have a little bit of knowledge about HTML or Markdown, and for this, we have a guide that can help you understand all this topic before you venture to create your first post:
🌟ULTIMATE Markdown Tutorial🌟 by @carrieallen
Now, after you have become a pro in HTML and Markdown, it's time to start developing your post, but be careful. Hive is a blockchain where we look for the human side of people, so let's go with a few tips to make your post very attractive and pleasing to the community:
1.- Upload photos about yourself and your life
At Hive we love to know the human side of people, what do you like to do? Do you have a partner, family, or pets? Do you have an epic job? Are you a cool artist? Show us all that in lots of pictures!
2.- Publish the post in a community
In Hive, there is something called "communities," which help people find specific niches to upload their posts to ensure that they will be read by people interested in that topic.
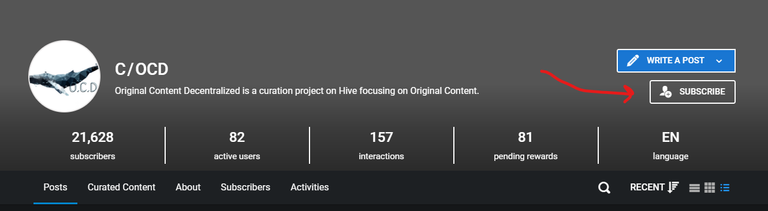
In the case of introductory posts in English or bilingual (English and another language), we suggest you post in the OCD Community because they are very supportive of new user content.
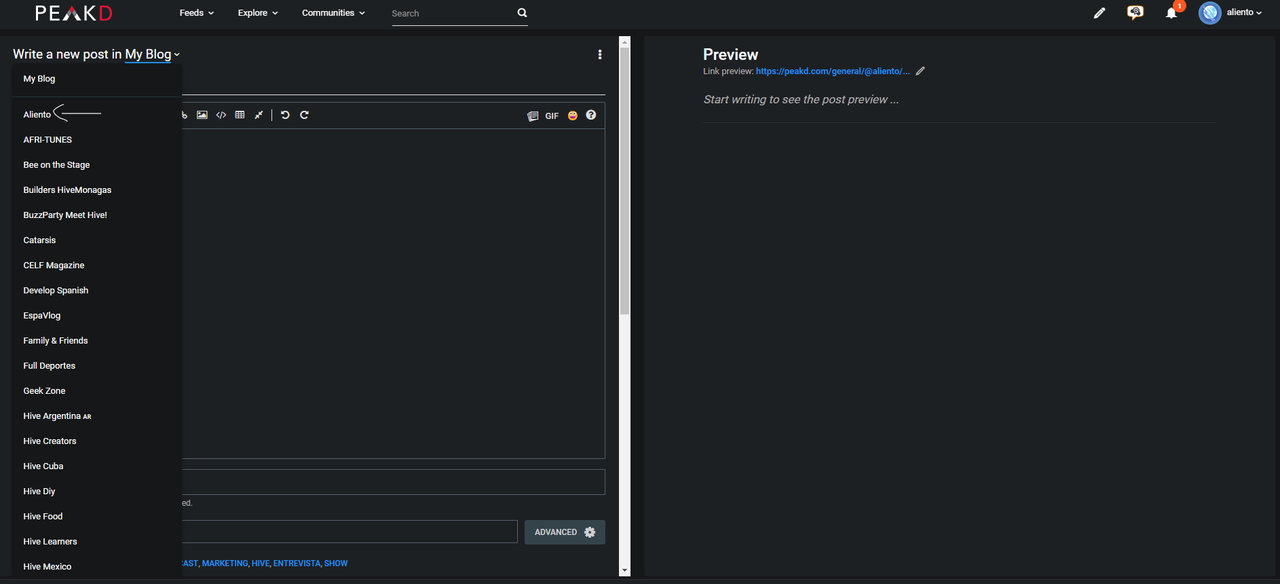
The idea is that you subscribe to the community and then, using the PeakD editor, click on the button that says "My Blog" and select the community you just subscribed to.
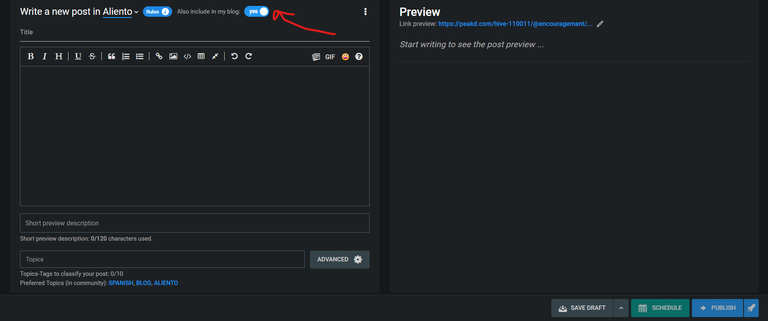
You will also be able to click on this button that says "publish also on my blog" so that it appears both in the community and directly on your blog.
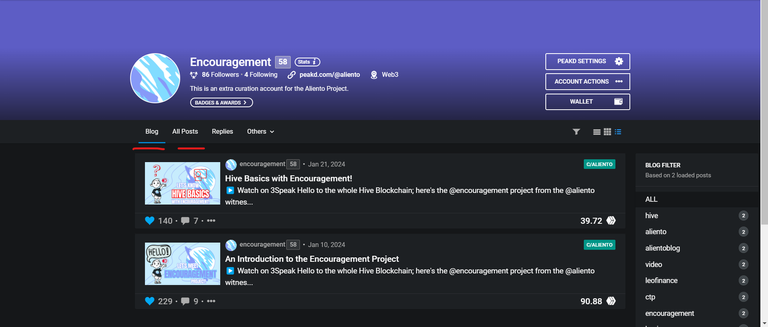
In our profile, there are two particular sections: "Blog," which shows only the posts we have shared in our blog (including reblogs of other people), and "All Posts," which shows all our posts, whether they are in our blog or only in particular communities.
Step 4.- Select tags for your post

In the Internet world, we use the "hashtag" (#) to be able to spread our posts towards the particular topics that it has internally; in Hive, it works in the same way as in Web2; we can use tags in our post to be able to segment our content.
For our first post, we can use the following tags or topics as a suggestion:
#introduceyourself - this is the main tag for every introduction post created on Hive
(be careful with this tag because if it is not used in an introductory post it may be frowned upon in the community due to abuse issues.)
#life - this is the tag for those posts that talk about our personal life; in this case, since this is our first post introducing ourselves to the community, we should talk about our life, so this tag is perfect.
#myhiveintro - this is optional and could be a second tag for the introductions on Hive.
Now, after you have used the particular tags of the Hive introductions, you can use tags that go with the topics of your post.
For example, if you are a singer, you can use the tag #music, if you are a chef, you can use the tag #food or #foodie, if you are a dancer you can use the tag #dance or #dancer, and so on.
For more information, here is a compilation of posts from the @ilaz.aliento account that can help you a lot on how to use tags both inside and outside Hive:
Let's talk about Tags! by @ilaz.aliento

Let's talk about Tags! | Part Two | by @ilaz.aliento

After my first post - Tip
After you have uploaded your introductory post, you can start looking for your particular niche. For this, we invite you to take a look at this post made from the account @ilaz.aliento, where they give you some suggestions about communities where you can direct your next posts depending on the niche:
Let's talk about Communities! by @ilaz.aliento
Let's talk about Communities! by @ilaz.aliento 
Step 5.- Choose a simple and eye-catching title
This part is tips based on the experience of many hivers. We are in the age of the internet, and something known as SEO can help us position our content in search engines.
The simpler the title is, and the more we put keywords about what people will see in the post, the easier it will be to capture the attention of all readers.
An example: If I want to title the post "This is my particular life, I am the Hiver musician, actor and nature lover" referring to everything I do in my life, we could write something like this: "Art, Nature and Bohemia, I am the Hiver!"
Notice that we summarized what we wanted to write in the first title, which reads quite striking.
Step 6.- Double check the post before clicking on “Publish”
Although it may seem silly to remember this, it is important to check if we have no spelling mistakes, if the information we put about us is the one we want to show, and if we chose the right photos.
Remember that once we upload a post to the blockchain, it can never be deleted; it can only be edited or "deleted" from the front end, but the information is immutable in the blockchain, so take your time. There is no hurry to start.
Additional Info
It is important to emphasize some things that you may not be aware of but may even be implicit within Hive:
Votes on posts are not guaranteed, no matter how good the post is.
A good way to make yourself known is by interacting with other people. Don't be afraid to leave nice comments on people's posts; believe us when we tell you that this will get you a lot of interactions with your posts.
Plagiarism, spam, reposting, and content recycling are frowned upon on Hive and therefore penalized.
Just as there are upvotes, there are downvotes (negative votes). If you get one, it doesn't always mean you've done something wrong. However, it is the method used to criminalize abuse on the platform. A negative vote doesn't rob you of rewards.
The reward obtained from the posts will be yours after seven days of publishing the post. Before that, you can accumulate votes, perhaps receive one against, lower, or increase the reward amount, depending on the cost of the coin.
Using Hive on a mobile device
If you've already read all this information but don't know how to do it because you will use Hive from a mobile phone, then we have this tutorial created by @elizabeths14 to explain everything you need to know about Hive through a phone.
Hive from the phone by @elizabeths14
Final Words
We hope this information will be very useful to all of you, those who are starting on Hive; if you have any doubts, you can leave us a comment on this post, or as we told you at the beginning of it, you can log into our Discord server and write to us there.
We welcome you to Hive and want your stay here to be enjoyable, so we have also developed all these guides and many more to help you on this path.

Really easy way to explain, gracias equipo aliento.
Congratulations @encouragement! You have completed the following achievement on the Hive blockchain And have been rewarded with New badge(s)
Your next target is to reach 900 upvotes.
You can view your badges on your board and compare yourself to others in the Ranking
If you no longer want to receive notifications, reply to this comment with the word
STOPCheck out our last posts:
Valuable tools for the entire Hive ecosystem.
Thank you for this.
Regards.
spanish
Herramientas de mucho valor, para todo el ecosistema de Hive.
Gracias por ello.
Saludos.
Great tutorial, especialy part about mobile Phone makes me glad couse im using it more often now. Thank you.
Muy buena información 👍 gracias
Gracias por está actualización.
@robert.grace
This will come in useful for you
Muy util, el post, gracias.
Thank you so much for tip, i’m starting up immediately