En casa siempre ocurren imprevistos y debemos buscarle una solución rápida y oportuna. Tal fue el caso con la cerradura de pomo de la habitación principal, que empezó a dar problemas. De inmediato, adquirimos otra, buscando la mejor alternativa precio-calidad. Lo bueno es que pudimos realizar esta compra en una ferretería que acepta HBD.
Unforeseen events always happen at home and we must find a quick and timely solution. Such was the case with the doorknob lock in the master bedroom, which started to give problems. We immediately purchased another one, looking for the best price-quality alternative. The good thing is that we were able to make this purchase at a hardware store that accepts HBD.
Instalar una cerradura puede parecer sencillo, pero a veces el trabajo puede complicarse si no se cuenta con la pericia necesaria. Recuerdo que hace un año, mi primo intentó hacerlo y el asunto no terminó bien porque desarmó toda la cerradura, hasta los resortes, y luego no pudo volver a ensamblarla. Todavía están todas las piezas en una bolsa plástica.
Installing a lock may seem simple, but sometimes the job can get complicated if you don't have the necessary expertise. I remember a year ago, my cousin tried to do it and it didn't end well because he took the whole lock apart, right down to the springs, and then couldn't put it back together. All the parts are still in a plastic bag.
Espero que este post sirva de ayuda. Lo primero que se debe hacer es identificar la cerradura de pomo, hay de varios tipos, siendo las principales las que son para habitación y otras que son para baño, una requiere de llave exterior y la otra no. Hay con seguro de botón y de pasador. Por supuesto que la calidad de los materiales es importante porque el uso, el tiempo y la corrosión afecta primero a las de peor manufactura.
I hope this post will be helpful. The first thing to do is to identify the doorknob lock, there are several types, the main ones being those that are for bedroom and others that are for bathroom, one requires an external key and the other does not. There are push button and pin locks. Of course the quality of the materials is important because the use, the time and the corrosion affects first to those of worse manufacture.
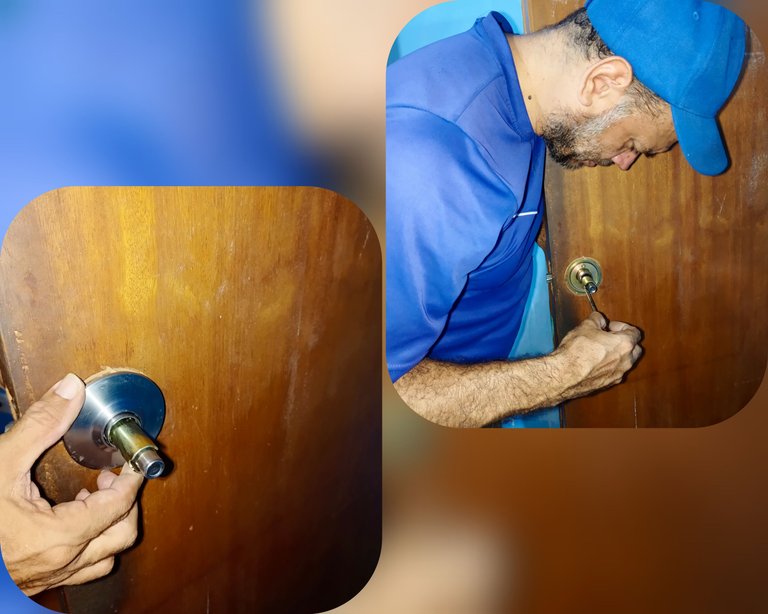
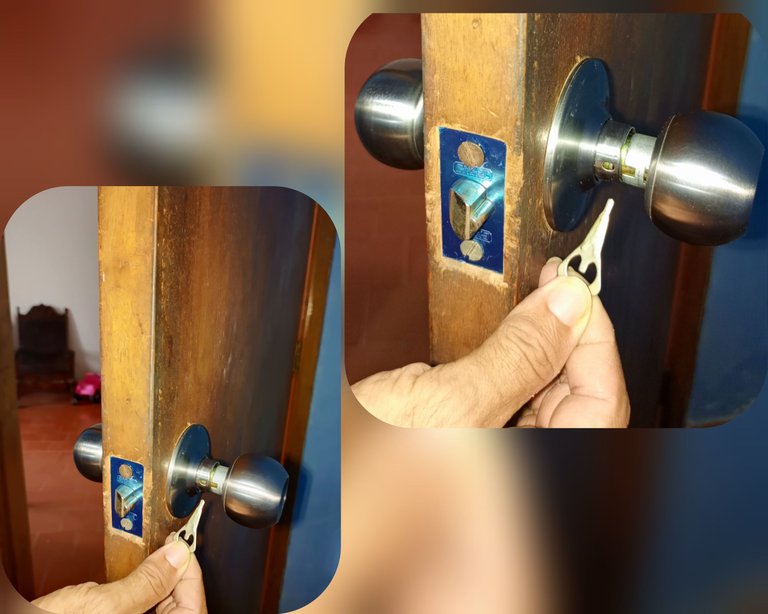
Una vez que se adquiere la cerradura debemos quitar la anterior. En el cuello del pomo interno se advierte una pequeña ranura, por allí se debe introducir una llave y empujar mientras se jala el pomo hacia el exterior. Una vez realizado este paso, se desliza un sombrero, en algunos casos se gira hasta destornillar, que hace contacto con la puerta. Van a quedar al descubierto dos tornillos incrustados en un aro metálico.
Once the lock is acquired we must remove the previous one. In the neck of the internal knob there is a small groove, through there you must insert a key and push while pulling the knob outwards. Once this step is done, a hat slides, in some cases it is turned until unscrewing, which makes contact with the door. Two screws embedded in a metal ring will be exposed.
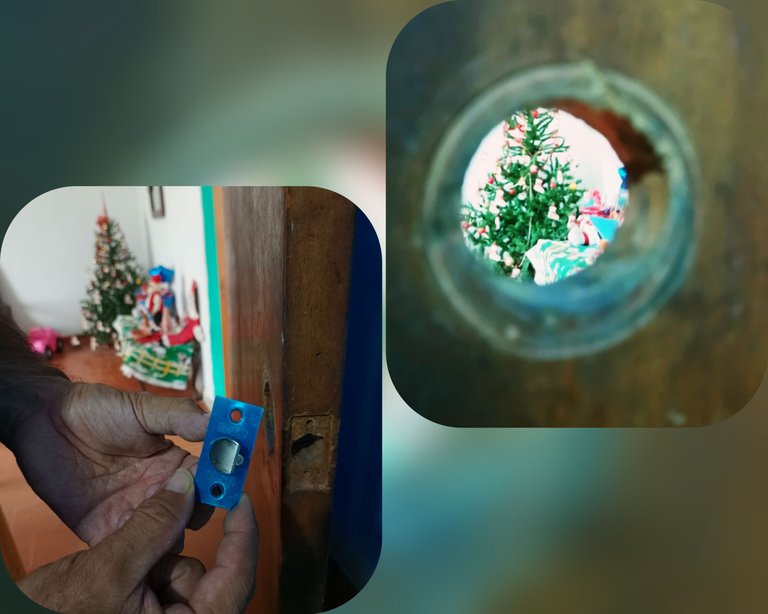
Al remover estos tornillos saldrá la cerradura. También quitaremos el pasador que está ubicado en el perfil de la puerta removiendo otros dos tornillos. Una vez que todo esté fuera, procedemos a instalar la nueva cerradura. Empezamos ahora donde quedamos. Primero se atornilla el pasador en el lateral, sin llegar a hundir los tornillos al máximo, ese sería el paso final.
Removing these screws will remove the lock. We will also remove the pin that is located in the door profile by removing two other screws. Once everything is out, we proceed to install the new lock. We now start where we left off. First we screw the pin into the side, without sinking the screws in as far as possible, that would be the final step.
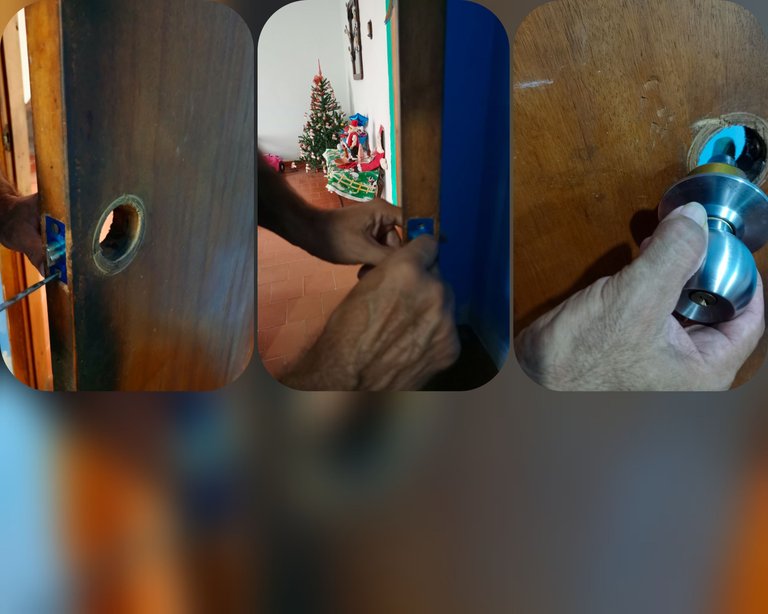
Una vez fijado el pasador, se procede a acoplarlo con la parte de la cerradura de pomo que va hacia el exterior. En este paso se debe girar el pomo para verificar que hace juego y mueve el pasador. Luego se procede a colocar los tornillos para fijar esta parte hasta un punto en el que tenga firmeza sin impedir el movimiento. Si se atornilla demasiado, el pomo no va a girar con libertad. Una vez que encontramos el punto exacto de fijación se procede a atornillar completamente el pasador ubicado en el perfil de la puerta.
Once the pin has been fixed, proceed to mate it with the outward facing part of the knob lock. In this step the knob should be turned to verify that it matches and moves the pin. Then proceed to place the screws to fix this part to a point where it has firmness without impeding the movement. If it is screwed too tightly, the knob will not turn freely. Once we find the exact point of fixation, we proceed to screw completely the pin located in the profile of the door.
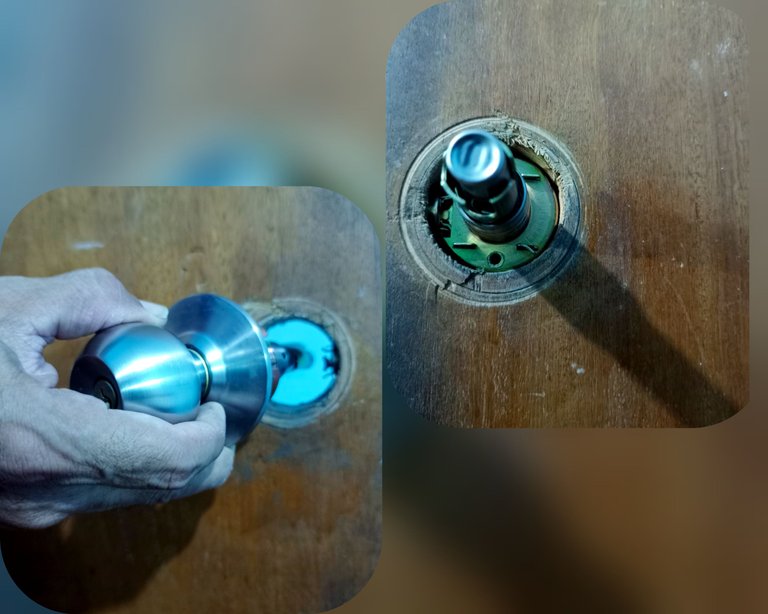
Posteriormente, se coloca el sombrero interno hasta quedar firme y, por último, se introduce el pomo interno, respetando la ranura de desarme, la cual indica dónde debe quedar exactamente el pomo. Confirmamos que todo está en orden, movemos ambos pomos, pasamos el seguro, lo destrabamos, probamos las llaves, cerramos y abrimos la puerta. De todo ser normal, entonces realizamos un trabajo correcto.
Afterwards, the inner hat is placed until it is firm and, finally, the inner knob is inserted, respecting the disassembly groove, which indicates exactly where the knob should be. We confirm that everything is in order, move both knobs, pass the lock, unlock it, try the keys, close and open the door. If everything is normal, then we have done a correct job.
✓Las fotos son de mi propiedad.
✓Texto traducido con DeepL.
✓>The photos are my property.
✓>Text translated with DeepL.
Una vez intente instalar una y me sobraron piezas. Así quedo porque vivía sola, lo bueno no era una puerta tan importante. Gracias por compartir.
Suele ocurrir más frecuente de lo pensamos, tiene su truco colocar una cerradura. Por eso les compartí este post, espero les sea útil. Saludos.
Amigo tal como dices, uno cree que es sencillo pero que va, hay que ser cuidadoso y para mi incluso tener cierta habilidad para ese tipo de trabajos.
Mi esposo si la desarma completa no lo.arma más nunca jajaja
Jaja, así le pasó a mi primo. La cerradura quedó totalmente desarmada y tuvieron que comprar otra. Para armarla desde cero tendríamos que ver un tutorial de You tube.
En eso sí estoy raspada, Jejeje, menos mal que mi esposo hace un poquito de muchas cosas y resuelve esos detalles, una vez hace varios años, me pasó un problemita con la cerradura del baño, y gracias a Dios tenía una amiga que su esposo sabía de eso y ella aprendió, y me resolvió el problema, porque no hubiese podido resolver yo. Afortunadamente eres detallista y pudiste resolver sin complicaciones ese asunto 🤗🤗🤗
Colocar una cerradura requiere de pericia y conocimiento, estar atento y saber dónde va cada pieza para no cometer errores. Siempre se aprende algo nuevo. Saludos.
Muy buena información amigo, como tú dices, parace facil, pero luego pueden aparecer cosas que nos pueden complicar la situación, hac poco cambiamos una, pero era un poco diferente.