La vida de un desarrollador se basa en adaptarse a cada cosa que va a aprendiendo a lo largo de su carrera.
Por ejemplo, los que empiezan con web primero ven HTML, luego CSS y luego JavaScript, bien. Los desarrolladores de aplicaciones móviles primero deben aprender a programar, luego la cuestión de optimización específica para cada dispositivo, redes, etc. Nosotros los GameDev primero aprendemos a programar, luego a usar el motor o librería que preferíamos (ya luego otras habilidades, pero progresivamente).
Hay dos habilidades que nos vuelven "hermanos" a todos los programadores, independiente a la rama en que esté: Inglés y Git.
¿Qué es Git?
Git es un sistema de control de versiones que nos ayuda a organizar nuestro proyecto. Es decir que en vez de tener que las versiones en una carpeta padre en nuestro disco, lo que hacemos es ir subiendo nuestros cambios por versiones y tener la facilidad de volver a cualquiera por si hicimos algo mal. Es una maravilla ¿No?.
Más si nos hemos topado con ese problema de que guardamos las versiones en carpetas pertenecientes a otras, se nos daña el disco de nuestra PC y...

Inserte desesperación
Ahí es donde necesitaremos Git.
A continuación les explicaré los conceptos y comandos básicos para usarlo, incluyendo lo que es su "red social"(GitHub) y la línea de comandos en sí. Empecemos:
Flujo de trabajo
El flujo de trabajo consiste en una rama principal, una intermediaria, y la que usaremos nosotros. En este caso solo usaremos dos, la principal y la intermedio porque es un proyecto de ejemplo.
Pero antes...
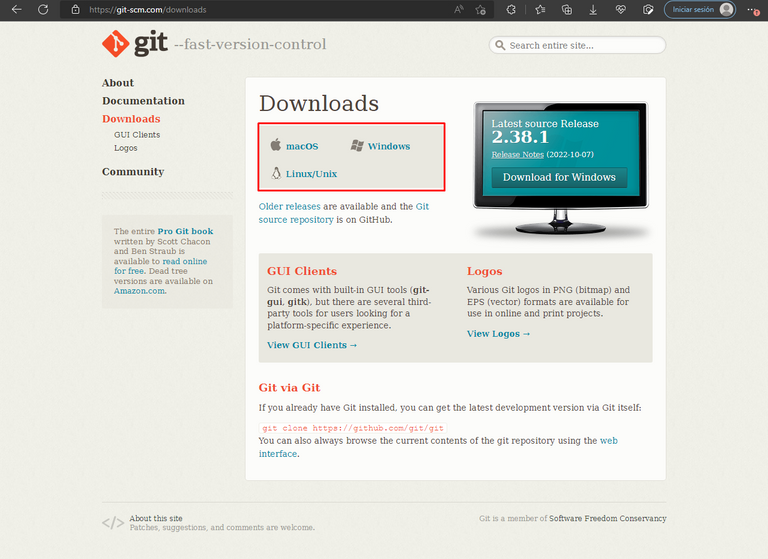
Descargar git
Vamos a su página oficial y elegimos la versión para nuestro OS
Ya saben el resto(si usan Windows como yo): aceptar, aceptar, continuar, instalar.
Crear un repositorio
Ya después toca ir a github.com a crearse una cuenta, paso que saltaré porque es el típico sistema de registro de cualquier plataforma. Lo que haremos al tener la cuenta será crear el repositorio, o lugar en donde almacenaremos nuestras en un repositorio desde GitHub en la cruz de la esquina superior derecha de nuestro feed.
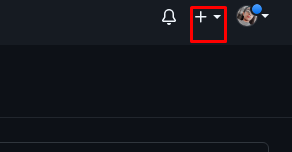
Luego hacemos click en "New repository" y empezamos la aventura
el de nosotros se llamará "GallinaCorre"

Hay algunas cosas a destacar acá, como lo es el README, el gitignore y la licencia que tendrá nuestro proyecto.

El README se usa para documentar temas importantes del proyecto, para añadir instrucciones que prevengan cualquier mal funcionamiento del programa.
El gitignore se agrega en el repositorio para ignorar cualquier archivo que esté de forma local en nuestro proyecto y no queramos que se suba a GitHub, a nuestro repositorio remoto.
La licencia está encargada de darle al proyecto unos permisos especiales para su utilización en manos de otros. Por ejemplo, si alguien clona nuestro proyecto(lo descarga para modificarlo) solo puede modificarlo como le plazca, si este tiene una licencia MIT o GNU(que también tiene sus peculiaridades). De igual forma deberá adaptarse a cualquiera que esté disponible y acatar las normas que esta tenga por establecido.
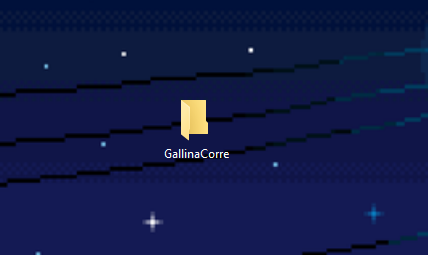
Ya que lo creamos, vamos ahora a crear nuestro proyecto de forma local. Nos dirigimos a cualquier directorio de nuestro pc y creamos una carpeta, yo lo hice en el escritorio.
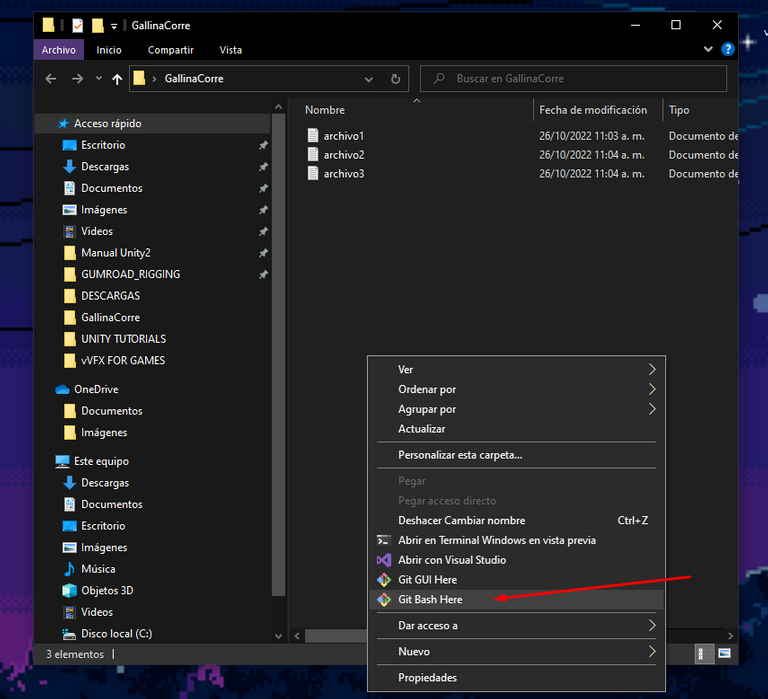
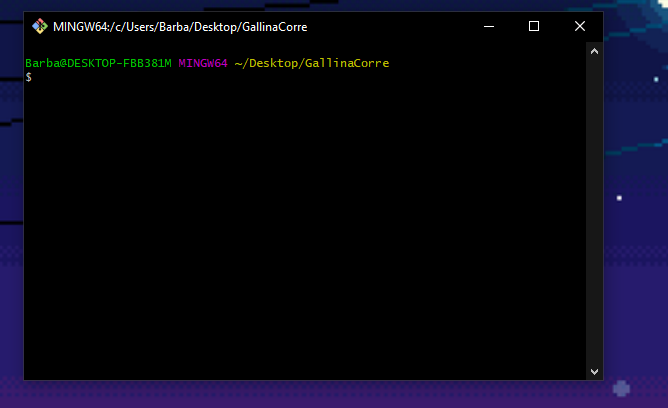
En mi caso solo pondré un par de carpetas y abriremos el bash de git para empezar a usarlo(de forma local, por ahora).
Comandos básicos de GIT
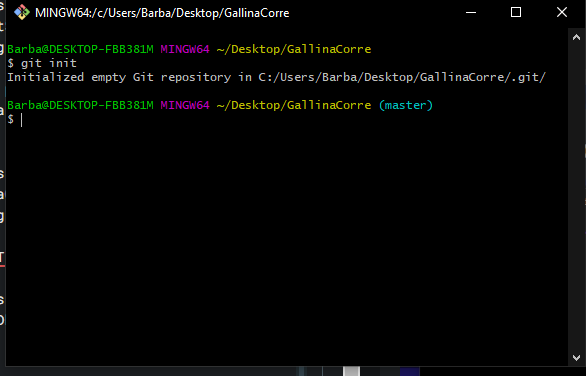
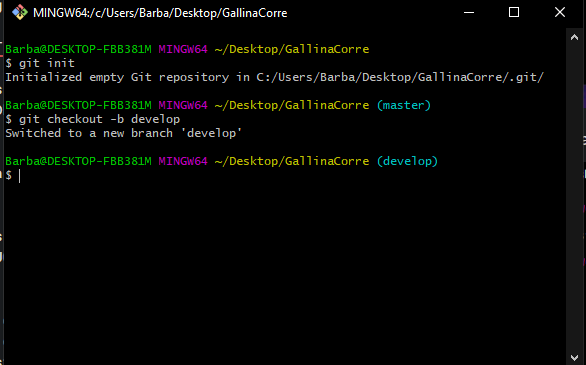
- Git init: este se usa para inicializar el repositorio:
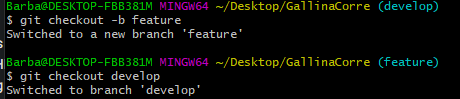
- git checkout -b "nombre de la rama nueva a la que nos movemos": esta sirve para crear una rama que será la intermediaria entre la master(que representa la versión final de nuestro proyecto) y así no trabajar directamente sobre ella y dañar algo:
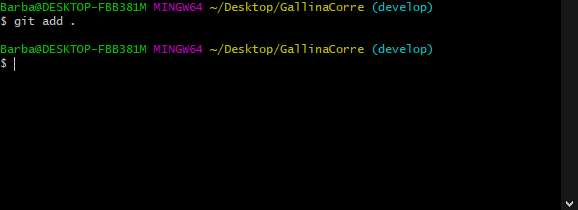
-git add . : este se usa para agregar todos los archivos de nuestra carpeta en la que iniciamos el git al control de versiones.
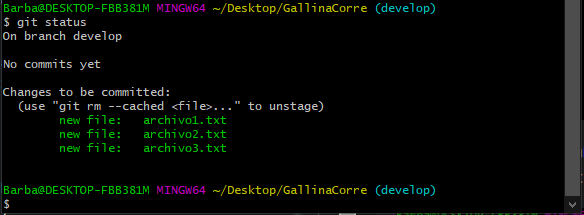
- git status : consultamos el estado de nuestro proyecto, lo que hemos agregado.
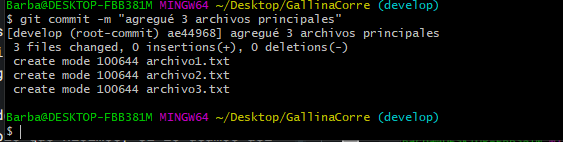
- git commit : este comando nos funciona para escribir un pequeño resumen del cambio que hicimos, si lo usamos asi solo se nos abre vim para editar, pero si escribimos git commit -m "commit" se edita en esa linea.
Luego de esto lo unico que faltaria sería subir a nuestro repo, pero antes debemos darle nuestros datos a git, para que no haya conflicto.
git config --global user.name "barbiechm" : registra tu username.
git config --global user.email barbiechm08@gmail.com : registra el email.
Registramos con git remote nuestro repositorio remoto:

Ahora sí hacemos "push" como dice la chaviza:
- git push origin "rama que quieras enviar": esto es lo que envía nuestros cambios locales a nuestro repositorio, lo primero que hacemos es copiar el url del repositorio.

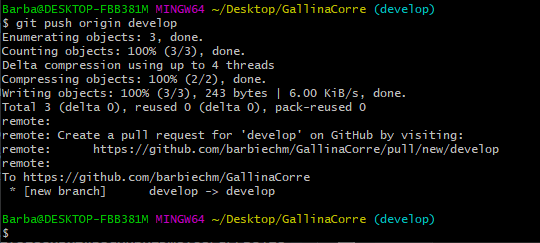
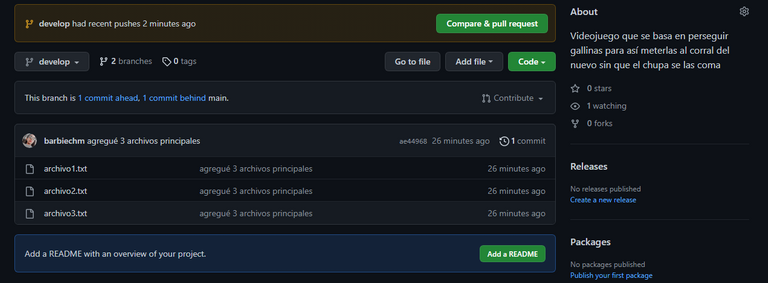
Nos dirigimos a nuestro Github, nos cambiamos a la rama develop y efectivamente ahí están nuestros cambios
Y listo, tendriamos eso funcionando.
Crear nuestra rama de trabajo(lo conveniente)
Para crear y mover a nuestra rama de trabajo, de esta forma, igual si queremos volver a la intermedia:
Conclusión: El arte del merge
Ahora, si queremos trabajar junto a personas, que es para lo que git se usa frecuentemente, cada uno tendrá su copia local clonando el repositorio con:
- git clone /path/to/repository
También se crea su respectiva rama de trabajo, el jefe de proyecto se encarga de fusionarlas todas para crear un solo producto. El comando para fusionar es:
- git merge "la rama que se va a fusionar"
Ya hasta ahora pueden usar git de una forma básica e indagar en el montón de funcionalidades y comandos que posee. Incluso usar su interfaz gráfica que pueden descargarla desde su web oficial.
Espero haya sido de ayuda. Comenten para profundizar más en lo del merge c:
The life of a developer is based on adapting to each thing he is going to learn throughout his career.
For example, those who start with web first see HTML, then CSS, then JavaScript, fine. Mobile app developers must first learn how to program, then the issue of device-specific optimization, networks, and so on. We GameDev first learn to program, then to use the engine or library we preferred (and then other skills, but progressively).
There are two skills that make us "brothers" to all programmers, independent of the branch in which it is: English and Git.
What is Git?
Git is a version control system that helps us to organize our project. That is to say that instead of having the versions in a parent folder on our disk, what we do is to upload our changes by versions and have the facility to go back to any of them in case we did something wrong. It's a wonder isn't it?
Insert image of happiness
More if we have run into that problem that we save the versions in folders belonging to others, the disk of our PC is damaged and...
Image of despair
That's where we will need Git.
Below I'll explain the basic concepts and commands for using it, including what its "social network"(GitHub) is and the command line itself. Let's get started:
Workflow.
The workflow consists of a main branch, an intermediate branch, and the one we will use. In this case we will only use two, the main and the intermediate because it is an example project.
But first...
Download git
We go to its official page and choose the version for our OS
You know the rest (if you use Windows like me): accept, accept, continue, install.
Create a repository
Then it's time to go to github.com to create an account, step that I will skip because it is the typical registration system of any platform. What we will do when we have the account will be to create the repository, or place where we will store our files in a repository from GitHub in the cross in the upper right corner of our feed.
Then we click on "New repository" and we start the adventure
Our repository will be called "GallinaCorre".
There are some things to highlight here, such as the README, the gitignore and the license that our project will have.
The README is used to document important issues of the project, to add instructions to prevent any malfunction of the program.
The gitignore is added in the repository to ignore any file that is locally in our project and we don't want it to be uploaded to GitHub, to our remote repository.
The license is in charge of giving the project special permissions for use by others. For example, if someone clones our project (downloads it to modify it) he can only modify it as he pleases, if it has an MIT or GNU license (which also has its peculiarities). In the same way it will have to adapt to anyone that is available and to abide by the norms that this one has by established.
Now that we have created it, we are going to create our project locally. We go to any directory of our pc and we create a folder, I did it in the desktop.
In my case I will only put a couple of folders and we will open the git bash to start using it (locally, for now).
Basic GIT commands
- Git init: this is used to initialize the repository:
- git checkout -b "name of the new branch we are moving to": this is used to create a branch that will be the intermediary between the master (which represents the final version of our project) so we don't work directly on it and damage something:
-git add . : this is used to add all the files in our git startup folder to version control.
- git status : we check the status of our project, what we have added.
- git commit : this command works to write a small summary of the change we made, if we use it like this only opens vim to edit, but if we write git commit -m "commit" we edit in that line.
After this the only thing left to do would be to upload to our repo, but first we must give our data to git, so that there is no conflict.
git config --global user.name "barbiechm" : register your username.
git config --global user.email barbiechm08@gmail.com : register your email.
We register with git remote our remote repository:
Now we do "push" as the chaviza says:
- git push origin "branch you want to push": this is what pushes our local changes to our repository, the first thing we do is copy the url of the repository.
We go to our Github, we change to the develop branch and indeed there are our changes there
And that's it, we should have that working.
Create our working branch (the convenient thing to do)
To create and move to our working branch, this way, the same if we want to return to the intermediate one:
Conclusion: The Art of Merge
Now, if we want to work together with people, which is what git is often used for, each one will have his local copy by cloning the repository with:
- git clone /path/to/repository
We also create their respective working branch, the project manager is in charge of merging them all to create a single product. The command to merge is:
- git merge "the branch to be merged".
So far you can use git in a basic way and dig into the many features and commands it has. You can even use its graphical interface that you can download from its official website.
I hope it has been helpful. Comment to deepen more in the merge c:
Translated with www.DeepL.com/Translator
Gracias, yo hice un curso, había cosas que se me había olvidado, aunque la instalación sé que hay cosas que no son siguiente todo xD 🤣 aunque mientras funciona, pues bien.
Gran tutorial, un fuerte abrazo, me salvaste ver como 2 horas de curso otra vez jajajaja 😁
te recomiendo "cmder", te guarda los comandos, solo de darle flecha para arriba y listo, más fácil
PD: Sé que eres nueva tanto en Hive como en esta comunidad, quiero darte la bienvenida, te dejo por aquí el post de las reglas, tengo que aclarar que el post está muy bien, solo que para que sea un miembro más de la familia, debes leerlas y comentarlas (que las aceptas, claro), para esperar a que te den la verificación, así ya serás parte de esta bonita familia Geek (Diría el traductor de Google, familia friki xD).
Un abrazo y nuevamente bienvenida. 💪
Gracias por la info Eliud! Ya me pasó por el post y comento a ver. Me alegra haberte ayudado, se vienen más turbo tutoriales pronto jajajajaja<3
Congratulations @lemon3d! You have completed the following achievement on the Hive blockchain and have been rewarded with new badge(s):
Your next target is to reach 50 comments.
You can view your badges on your board and compare yourself to others in the Ranking
If you no longer want to receive notifications, reply to this comment with the word
STOPTo support your work, I also upvoted your post!
Support the HiveBuzz project. Vote for our proposal!