English
Greetings my loves, I hope everyone has a happy start to the week, and that it is full of the best positive energies.
Today I am pleased to be with you again and this time bring you a makeup practice that I had not recreated for a long time, but since I want to learn more about this beautiful art, I have to continue practicing and in this way show it. to all of you.
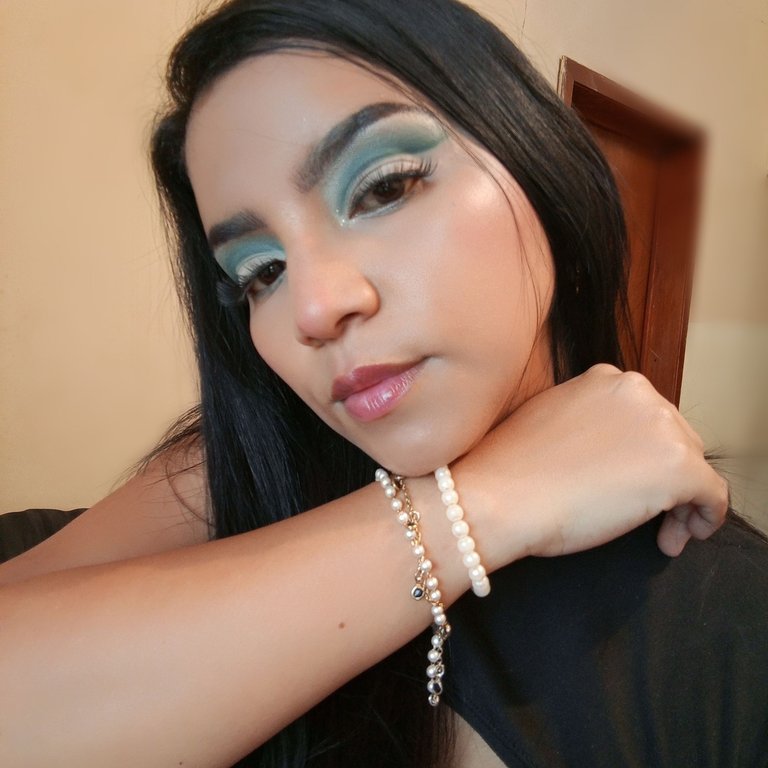
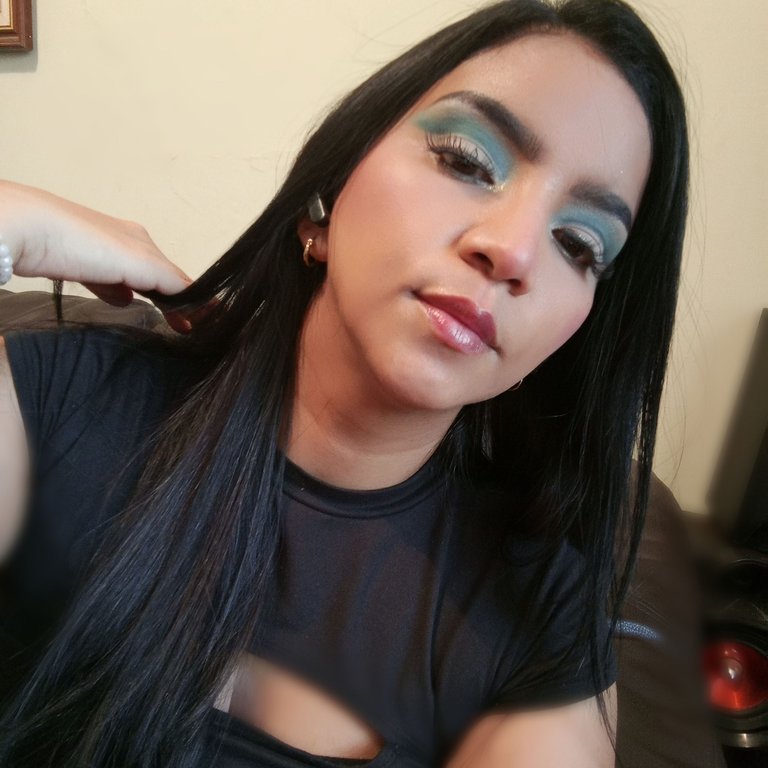
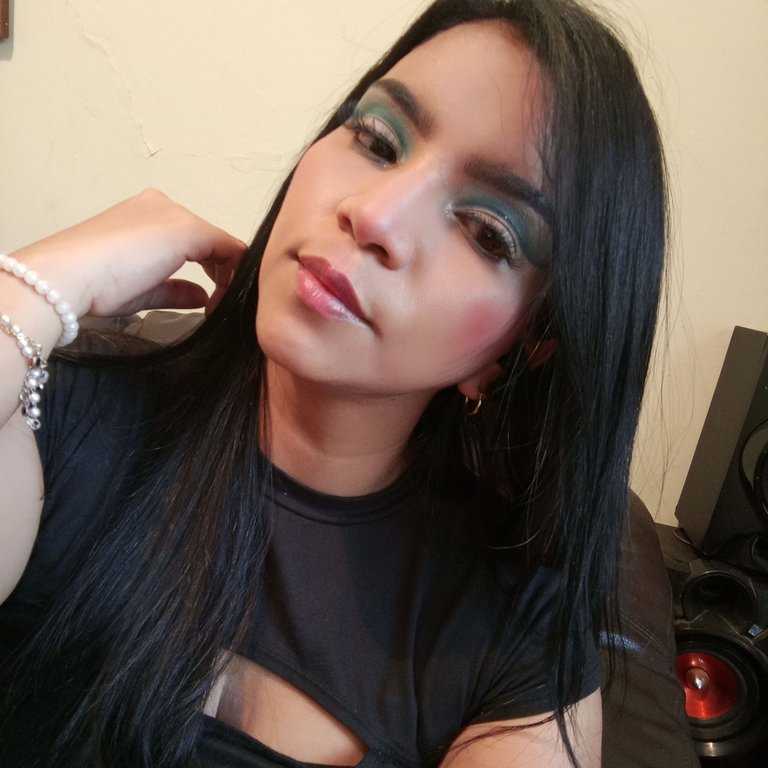
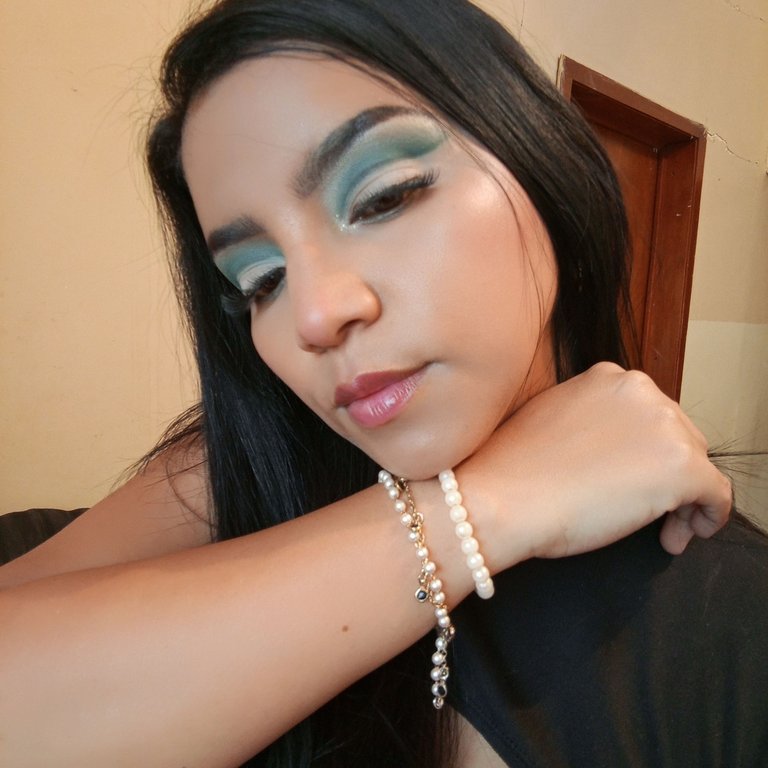
For this makeup I chose blue tones, and for the design I decided to opt for an open cut that gives a lot of sophisticated enhancement to the look.
Without further ado, I'll tell you the materials I used and the step by step.
- MATERIALS:
Serum, moisturizer, Primer, Makeup base, Face concealer, Pressed powder, Eyebrow shadow, Shadow palette, Eyeliner, Blush, highlighter, Lipstick.
- STEPS:
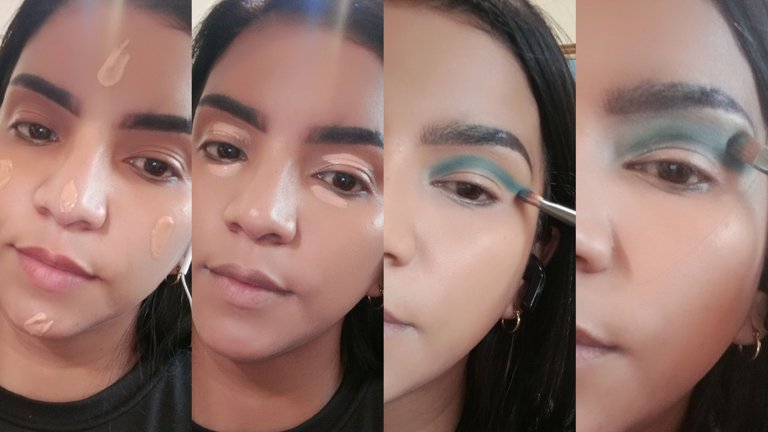
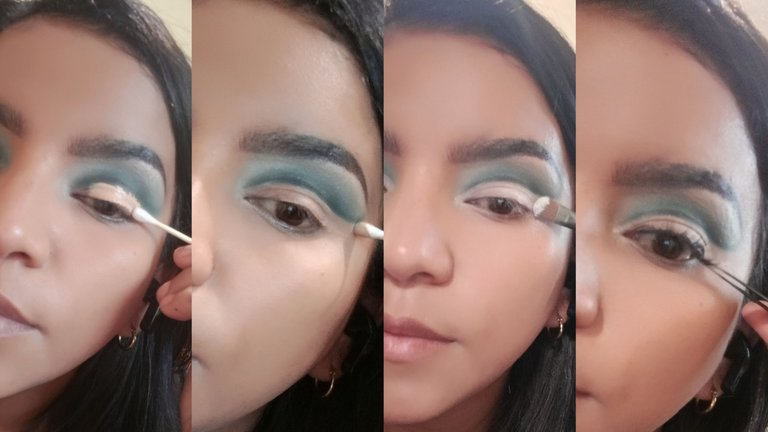
Well, dears, I tell you that to start with my makeup, I first did Skin Care, which we already know is very important for the care of our skin. and then I proceed to do the eyebrows, I do it with a small brush applying the pomade and shadow, then I perfect them with concealer in the surroundings, I continue applying the makeup base in five key points such as forehead, cheeks, nose and chin. Then with the help of a damp sponge I will spread it until it covers the entire face, covering it very well and sealing it with compact powder. Once my base is sealed, I proceed to continue applying makeup on my eyes on the upper eyelid, I apply concealer, then I make a dark blue line and blend it with a light blue, then I make the cut in the eye socket with the concealer, then I clean the area and I apply shadow. white, then I did black eyeliner and finally I applied blush, highlighter, lipstick and glued on false eyelashes.
As you can see, it was quick and practical to recreate this makeup.
Español
Saludos mis amores, espero que todos tengan un feliz inicio de semana, y que esté llena de las mejores energías positivas.
Hoy tengo el agrado de estar nuevamente con ustedes y esta vez traerles una práctica de maquillaje que hacía mucho tiempo que no recreaba, pero como quiero aprender más sobre este hermoso arte, tengo que seguir practicando y de esta manera mostrarlo. a todos ustedes.
Para este maquillaje elegí tonos azules, y para el diseño decidí optar por un corte abierto que le da mucho realce sofisticado al look.
Sin más, os cuento los materiales que utilicé y el paso a paso.
Suero, crema hidratante, prebase, base de maquillaje, corrector facial, polvo, sombra de cejas, paleta de sombras, delineador de ojos, rubor, iluminador, lápiz labial.
Bueno queridas les cuento que para empezar con mi maquillaje primero hice Skin Care, que ya sabemos que es muy importante para el cuidado de nuestra piel. y luego procedo a hacer las cejas, lo hago con un pincel pequeño aplicando la pomada y sombra, luego los perfecciono con corrector en los alrededores, sigo aplicando la base de maquillaje en cinco puntos claves como frente, mejillas, nariz y mentón. Luego con ayuda de una esponja húmeda lo extenderé hasta cubrir todo el rostro cubriéndolo muy bien y sellándolo con polvo compacto. Una vez sellada mi base procedo a seguir maquillándome los ojos en el párpado superior, aplico corrector, luego hago una línea azul oscuro y la difumino con un azul claro, luego hago el corte en la cuenca del ojo con el corrector, luego limpio la zona y aplico sombra. blanco, luego me hice un delineado negro y finalmente apliqué rubor, iluminador, labial y pegué pestañas postizas.
Como puedes ver, fue rápido y práctico recrear este maquillaje.

Thank you for visiting me, I hope you liked it, I send you a big virtual hug.
Gracias por visitarme, espero que les haya gustado, les mando un fuerte abrazo virtual.