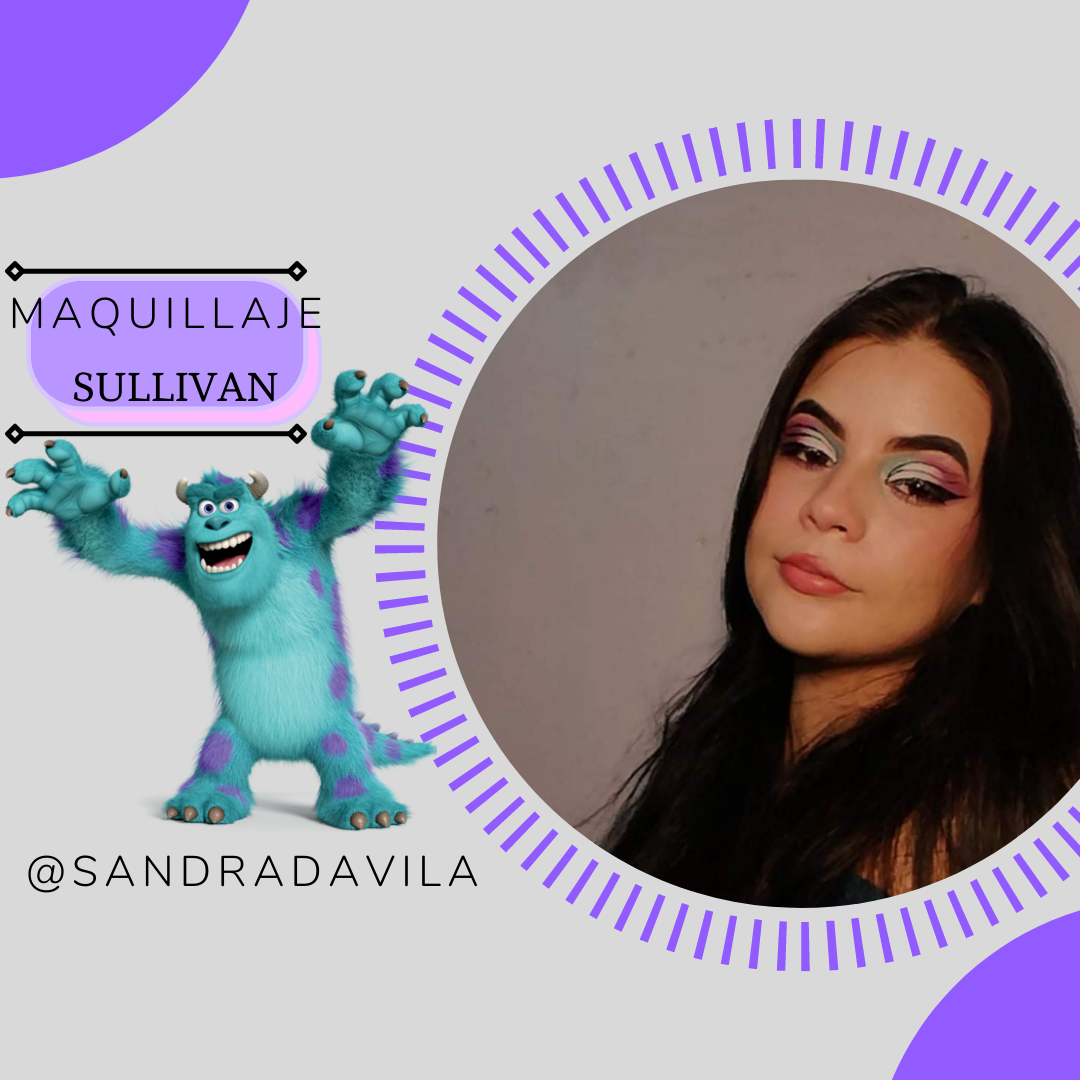
 Hola hermosas personas de Hive y MakeUp Power. Espero se encuentren igual de bien que yo. Aquí con mucho amor les traigo un tutorial de maquillaje de uno de los personajes de mi infancia, James P. Sullivan de Monsters Inc. Una película que marcó no solo mi infancia sino la de muchos, así que decidí hacer un maquillaje basado en los colores de este pintoresco personaje♥
Hello beautiful people at Hive and MakeUp Power. I hope you are as well as I am. Here with much love I bring you a makeup tutorial of one of my childhood characters, James P. Sullivan from Monsters Inc. A movie that marked not only my childhood but that of many, so I decided to make a makeup based on colors of this colorful character ♥
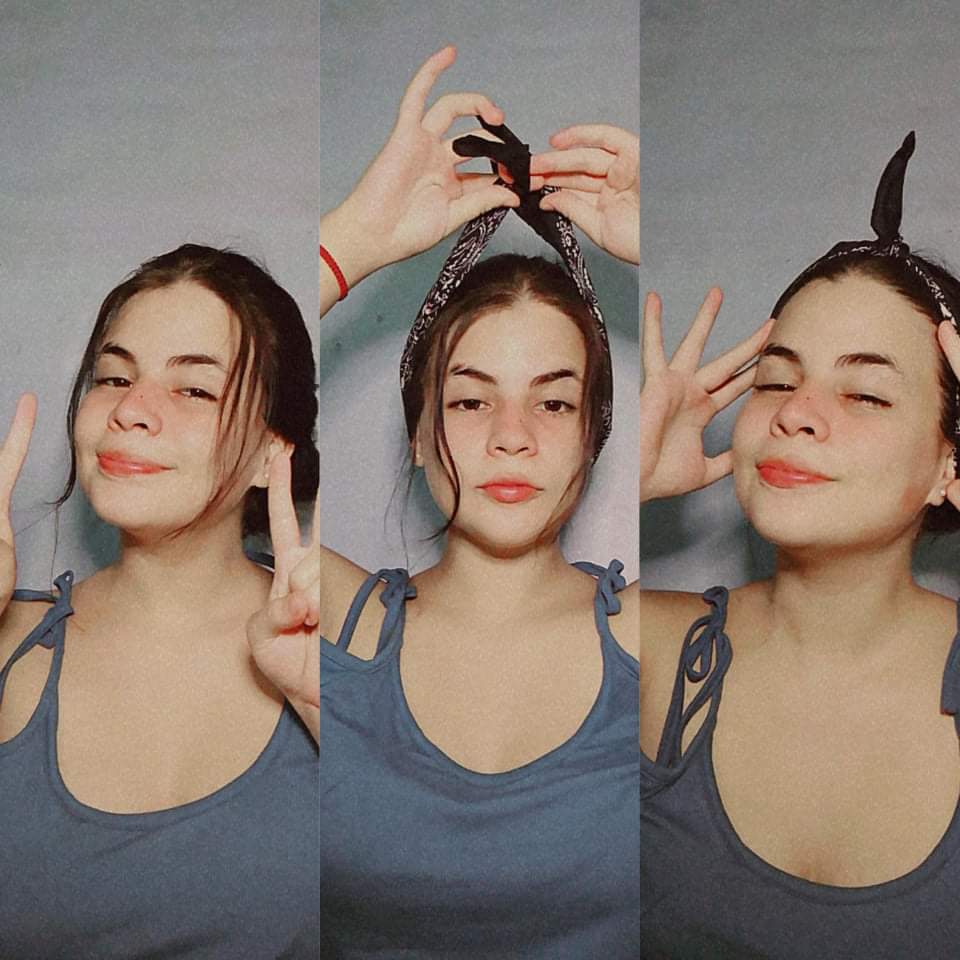
- Paso 1:
Comenzamos primero quitando todo el cabello de nuestro rostro para no entorpecer nuestro trabajo, con ayuda de una diadema o cintillo.
- Step 1:
We first start by removing all the hair from our face so as not to hinder our work, with the help of a headband or headband.
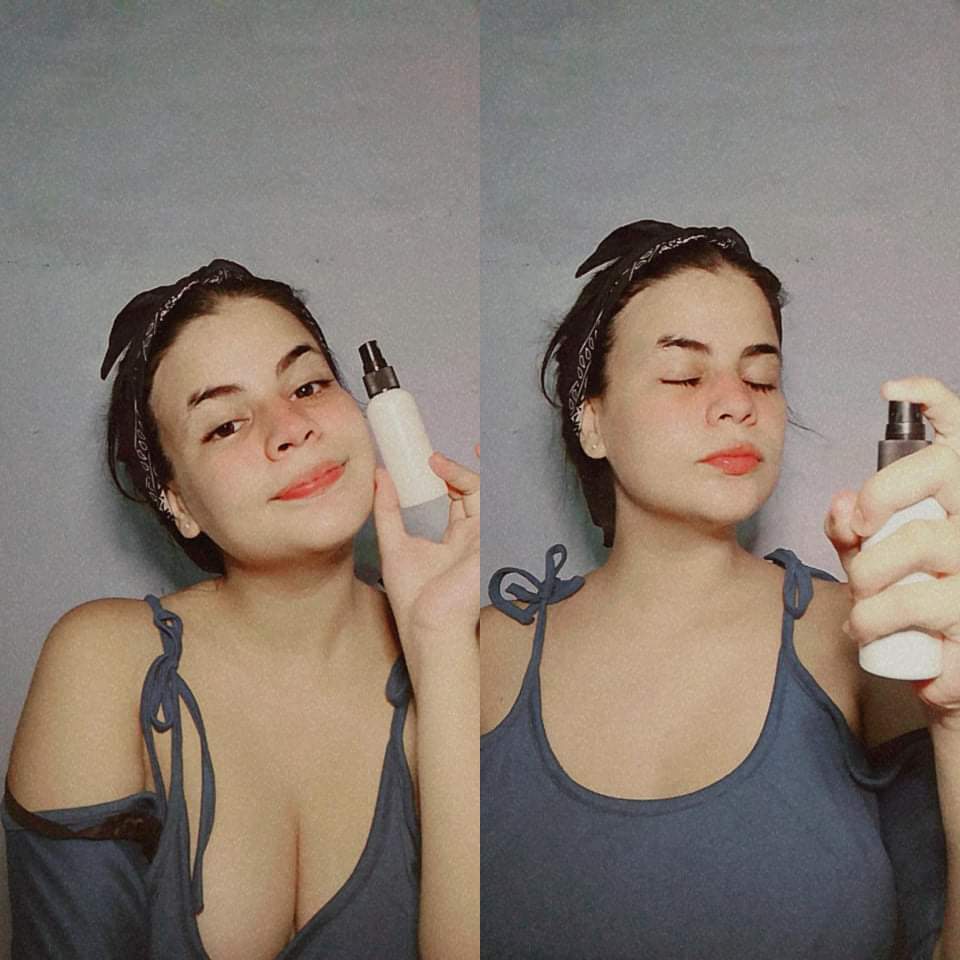
- Paso 2:
Hidratamos nuestro cutis y lo preparamos para la base con un primer o hidratante
- Step 2:
We hydrate our skin and prepare it for the base with a primer or moisturizer
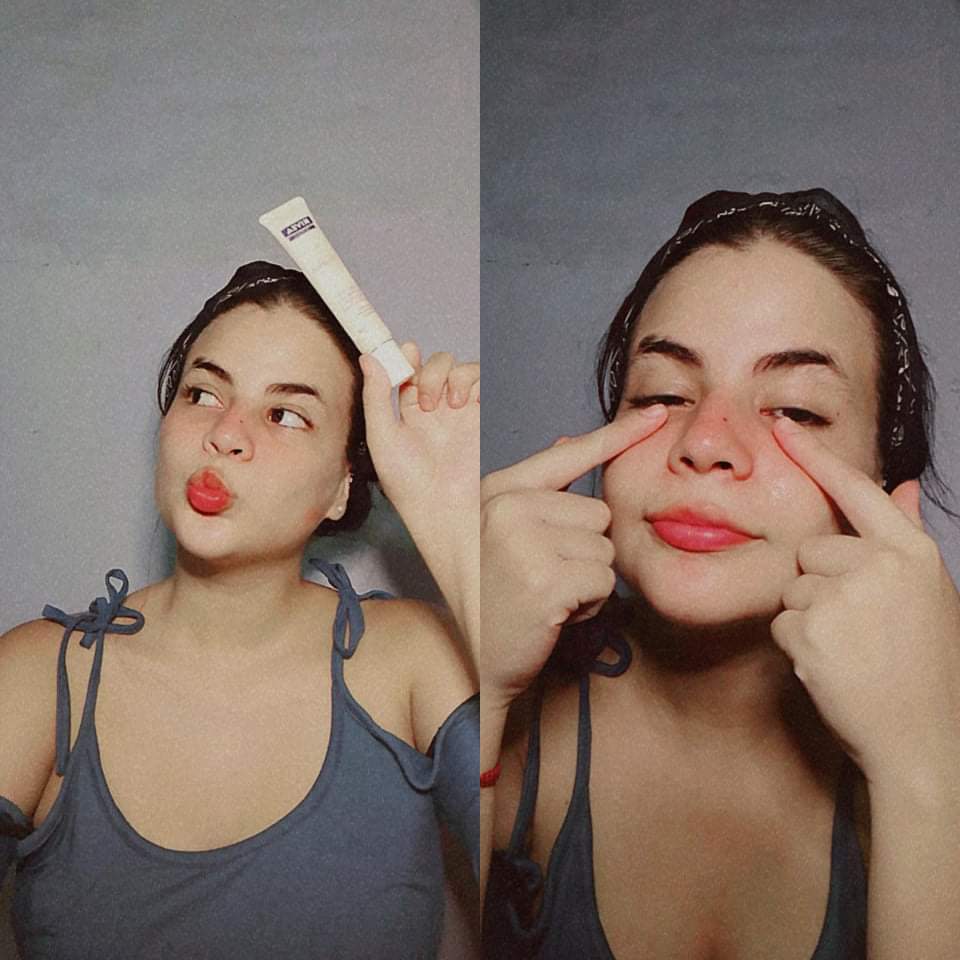
- Paso 3:
Protegemos el área de nuestras ojeras con aclarador de manchas y ojeras
- Step 3:
We protect the area of our dark circles with blemish and dark circle lightener
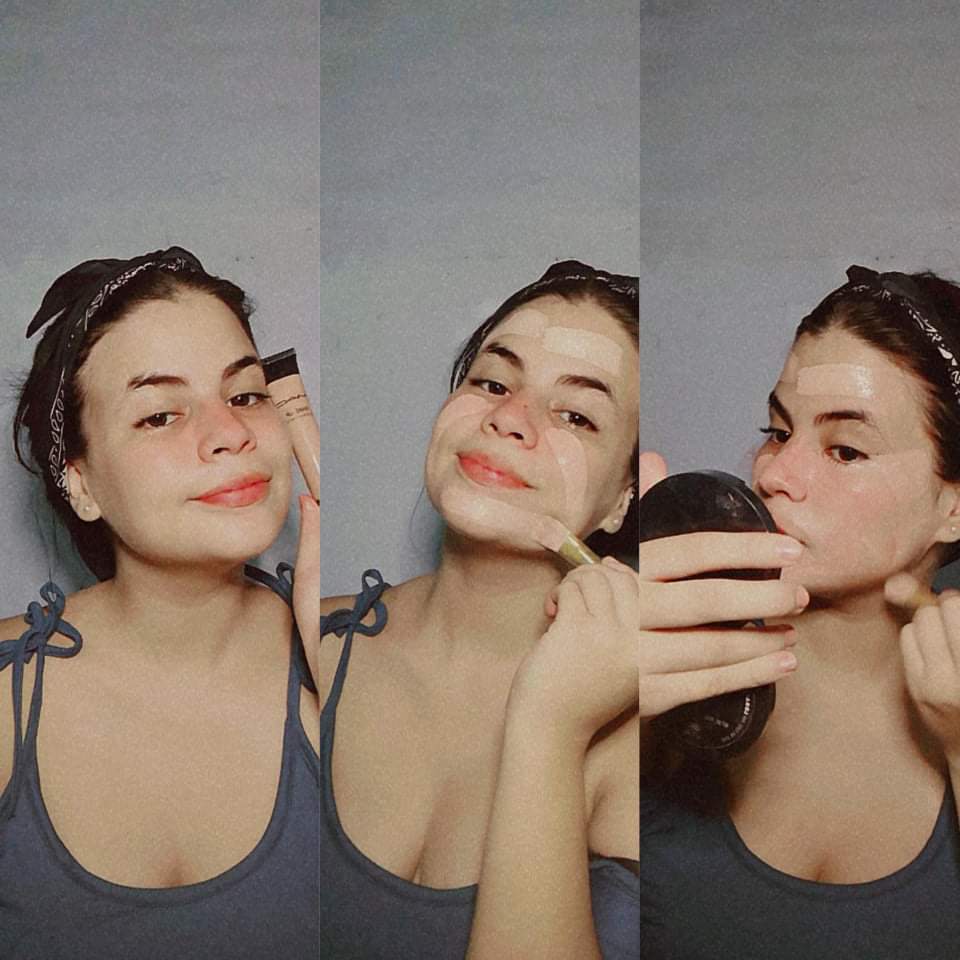
- Paso 4:
Aplicamos una base en toda la superficie de nuestro rostro, importante que sea del tono adecuado
- Step 4:
We apply a foundation on the entire surface of our face, it is important that it is the right tone
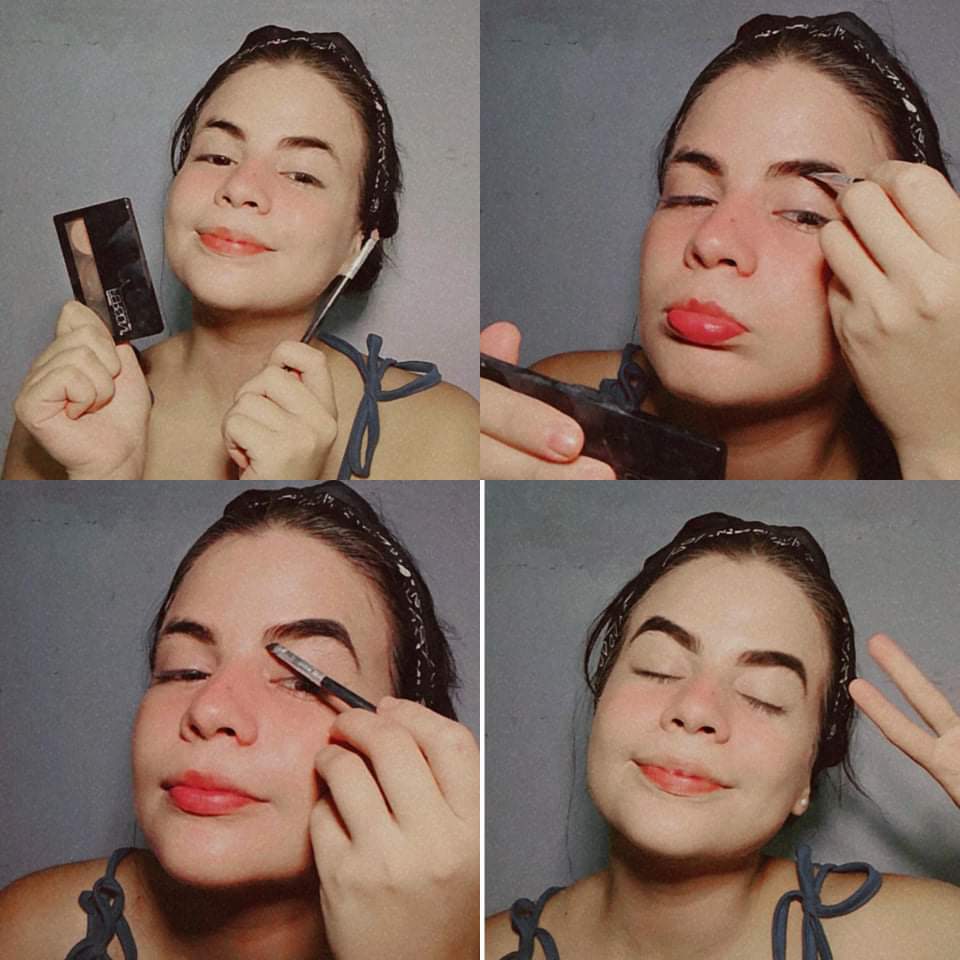
- Paso 5:
Haremos nuestras cejas con ayuda de nuestro pincel angular y producto para cejas, ya sea sombra o pomada. Empezamos desde la mitad inferior hasta el exterior, igual procedimiento en la zona superior, y sin tomar más producto difuminamos al principio de nuestras cejas
- Step 5:
We will make our eyebrows with the help of our angular brush and eyebrow product, either shadow or pomade. We start from the lower half to the outside, the same procedure in the upper area, and without taking more product we blur at the beginning of our eyebrows
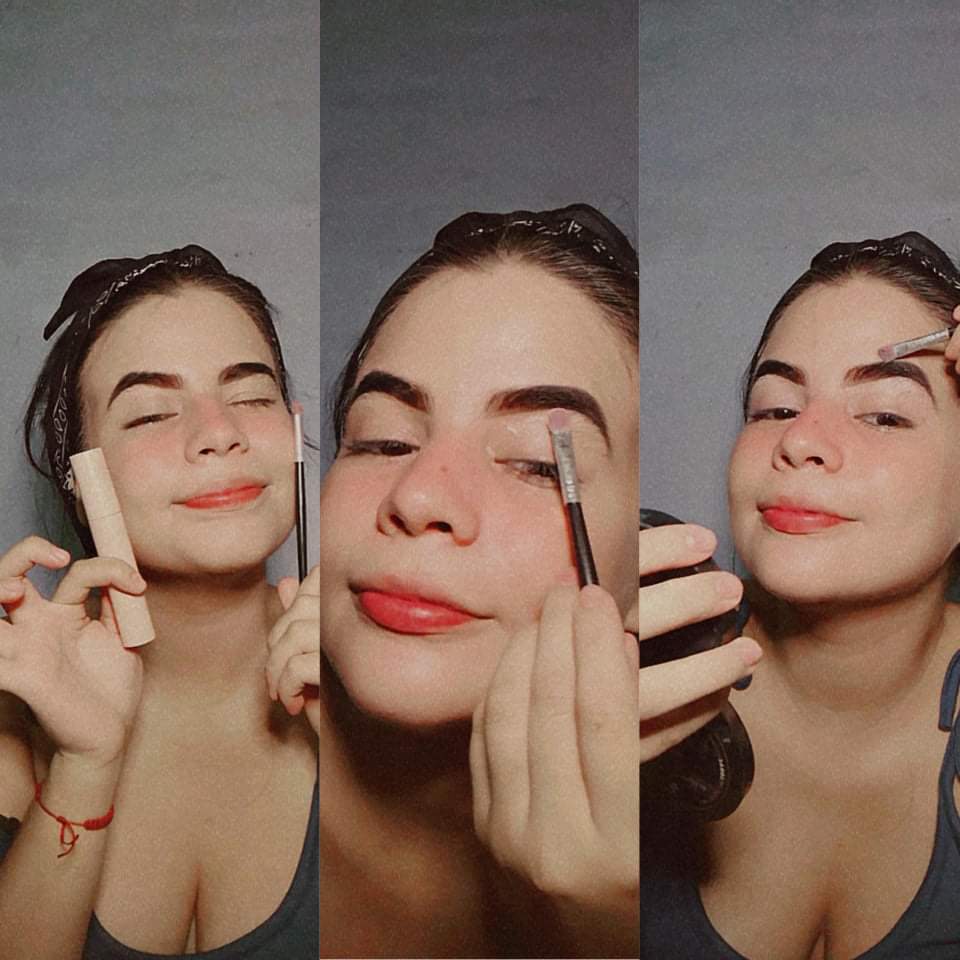
- Paso 6:
Corregimos con ayuda de un pincel plano y un corrector en crema o líquido. Definiremos la forma de nuestra ceja para que se vea más limpia
- Paso 6:
We correct with the help of a flat brush and a cream or liquid concealer. We will define the shape of our eyebrow to make it look cleaner
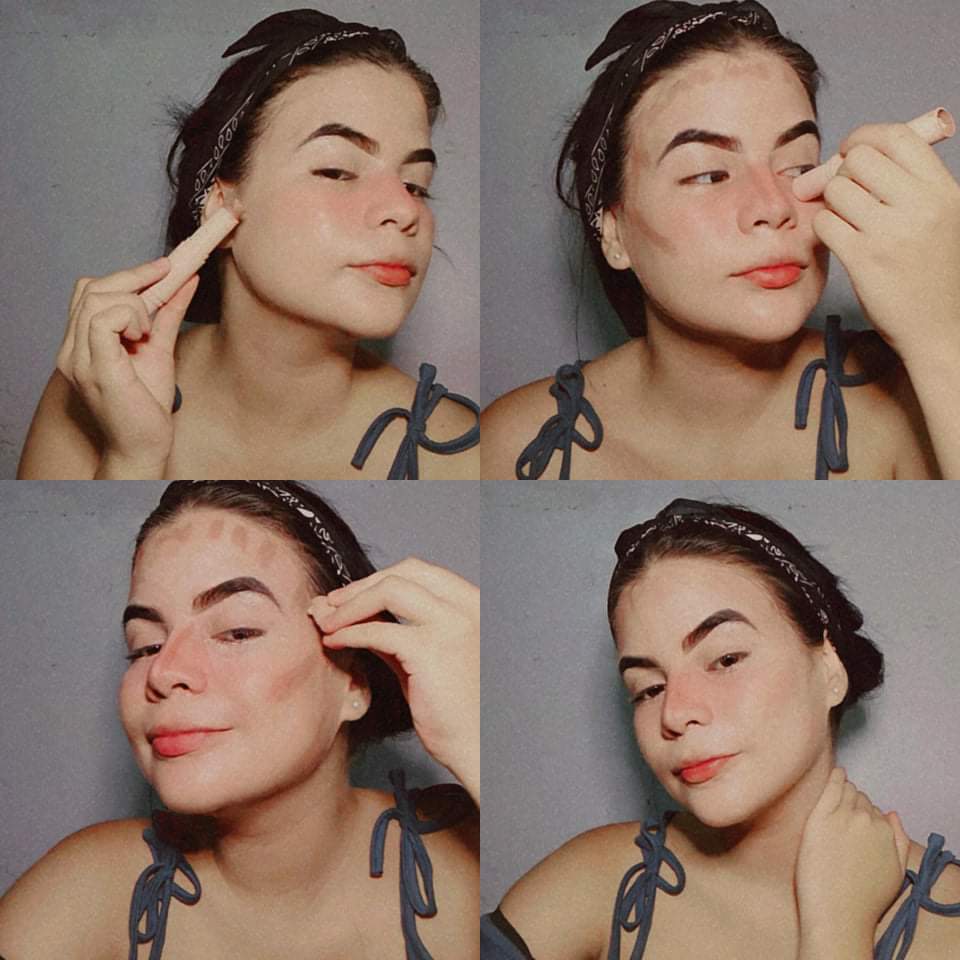
- Paso 7:
Utilizaremos contorno y corrector para definir nuestras facciones y corregir imperfecciones en nuestro rostro. Con contorno haremos la nariz, pómulos, sienes, y contorno de nuestro rostro, con corrector principalmente trataremos el area de las ojeras, el centro de nuestra nariz y alguna que otra imperfección. With a damp sponge we blur
- Step 7:
We will use contour and concealer to define our features and correct imperfections on our face. With contour we will make the nose, cheekbones, temples, and contour of our face, with concealer mainly we will treat the area of dark circles, the center of our nose and some other imperfections. Con una esponja húmeda difuminamos
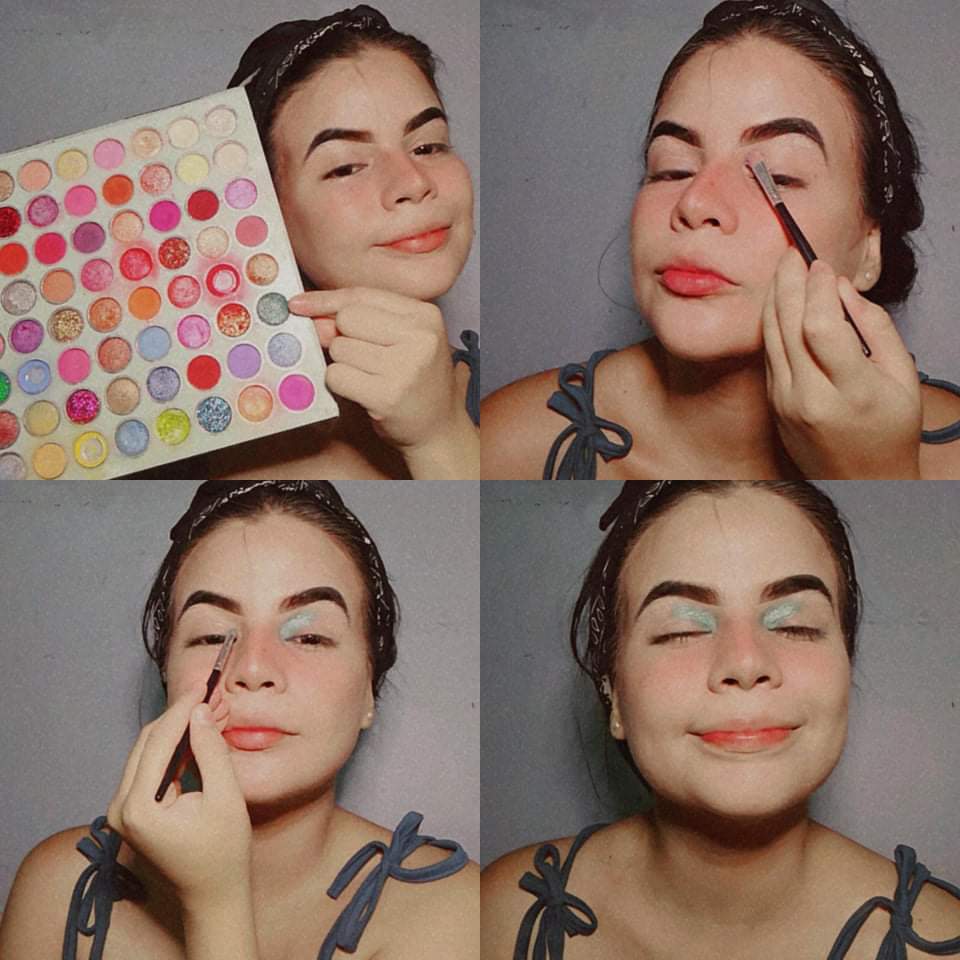
- Paso 8:
Usaremos el color turquesa de nuestra paleta de sombras, y una brocha para aplicarlo en todo el contorno del corte natural de nuestro párpado móvil hacia arriba. Solo hasta la mitad llegaremos con el color turquesa
- Step 8:
We will use the turquoise color of our eyeshadow palette, and a brush to apply it around the natural cut of our moving eyelid upwards. Only halfway through we will arrive with the turquoise color
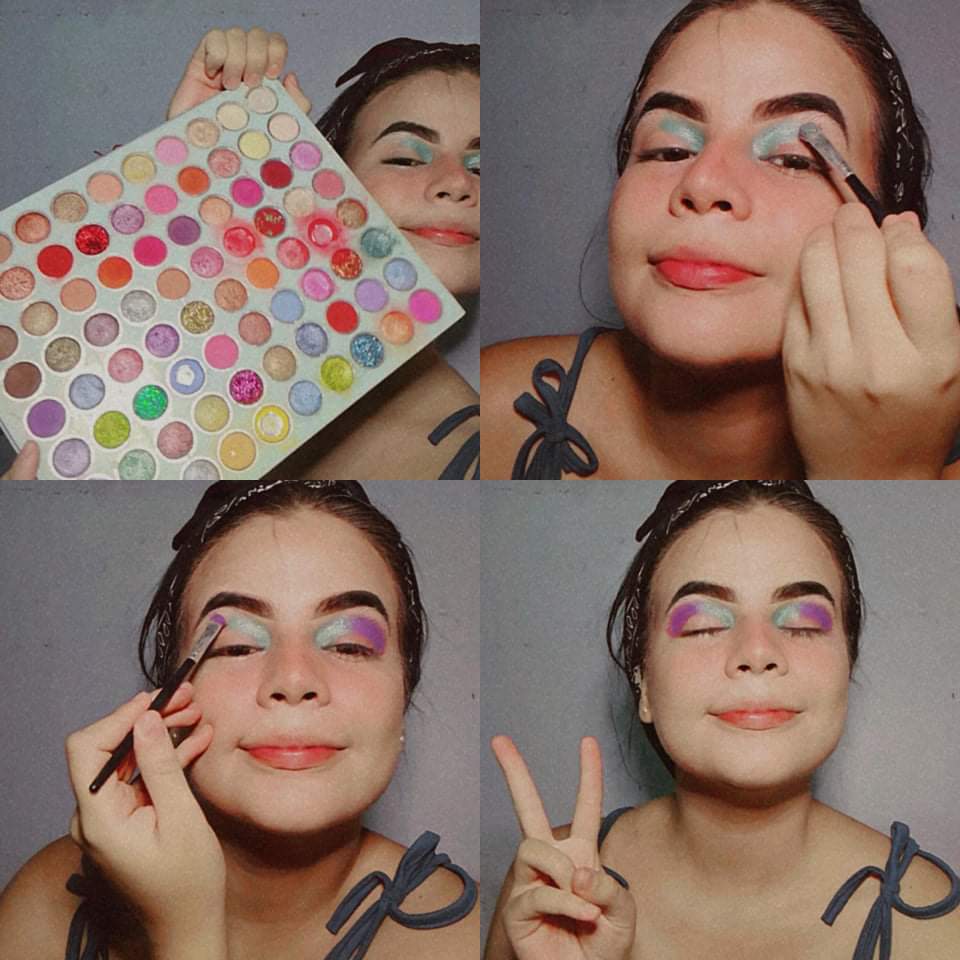
- Paso 9:
Ahora ocupamos el color púrpura y de igual forma lo aplicamos en todo el contorno del corte natural de nuestro párpado móvil hacia arriba, esta vez de la mitad hacia afuera
- Step 9:
Now we occupy the purple color and in the same way we apply it around the contour of the natural cut of our mobile eyelid upwards, this time from the middle outwards
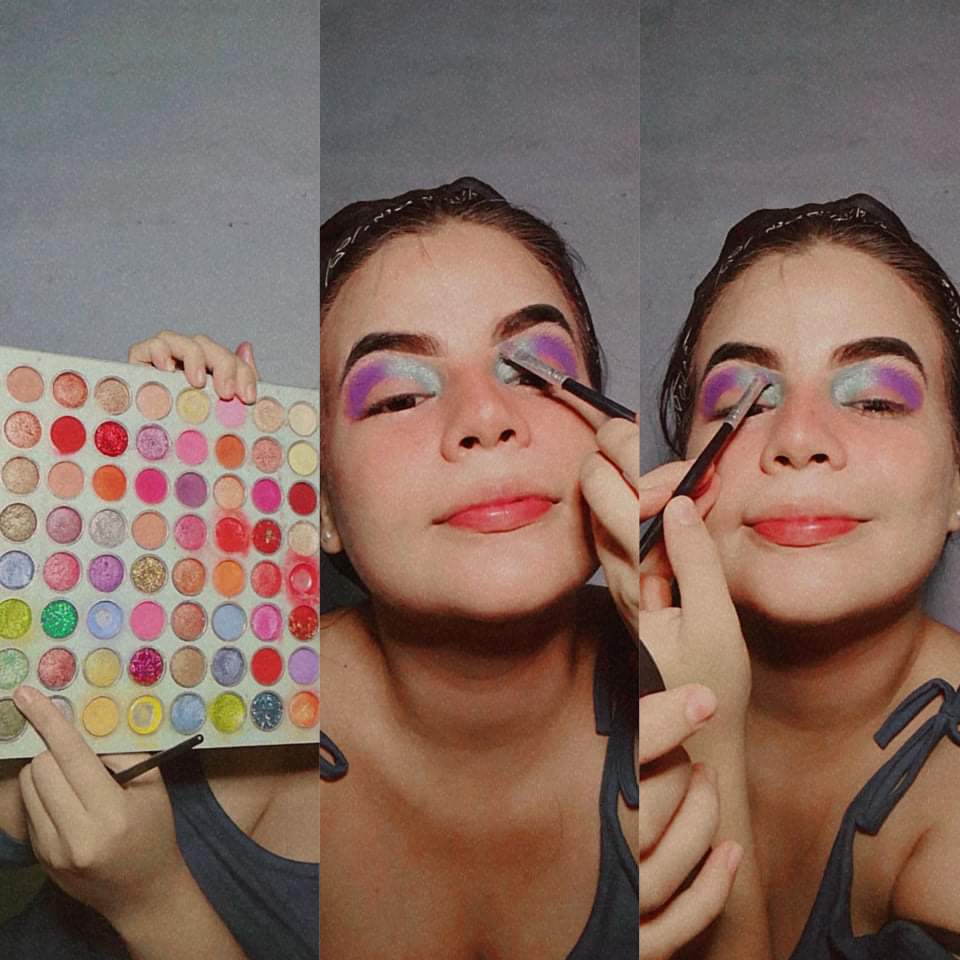
- Paso 10:
Con el color esmeralda empezaremos a difuminar la parte de arriba de la zona turquesa para dar un efecto natural.
- Step 10:
With the emerald color we will begin to blur the upper part of the turquoise area to give a natural effect.
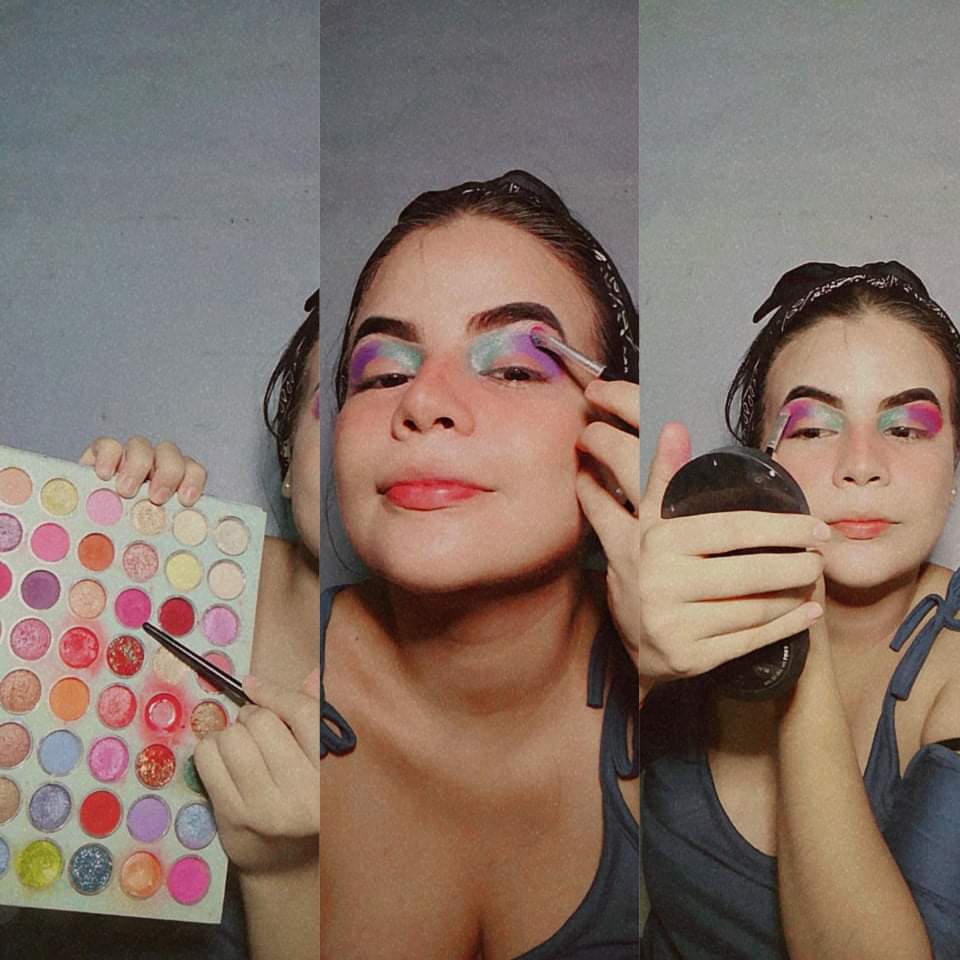
- Paso 11:
Con color fucsia difuminamos la zona púrpura en la parte superior, para dar un efecto más natural
- Step 11:
With fuchsia we blur the purple area in the upper part, to give a more natural effect
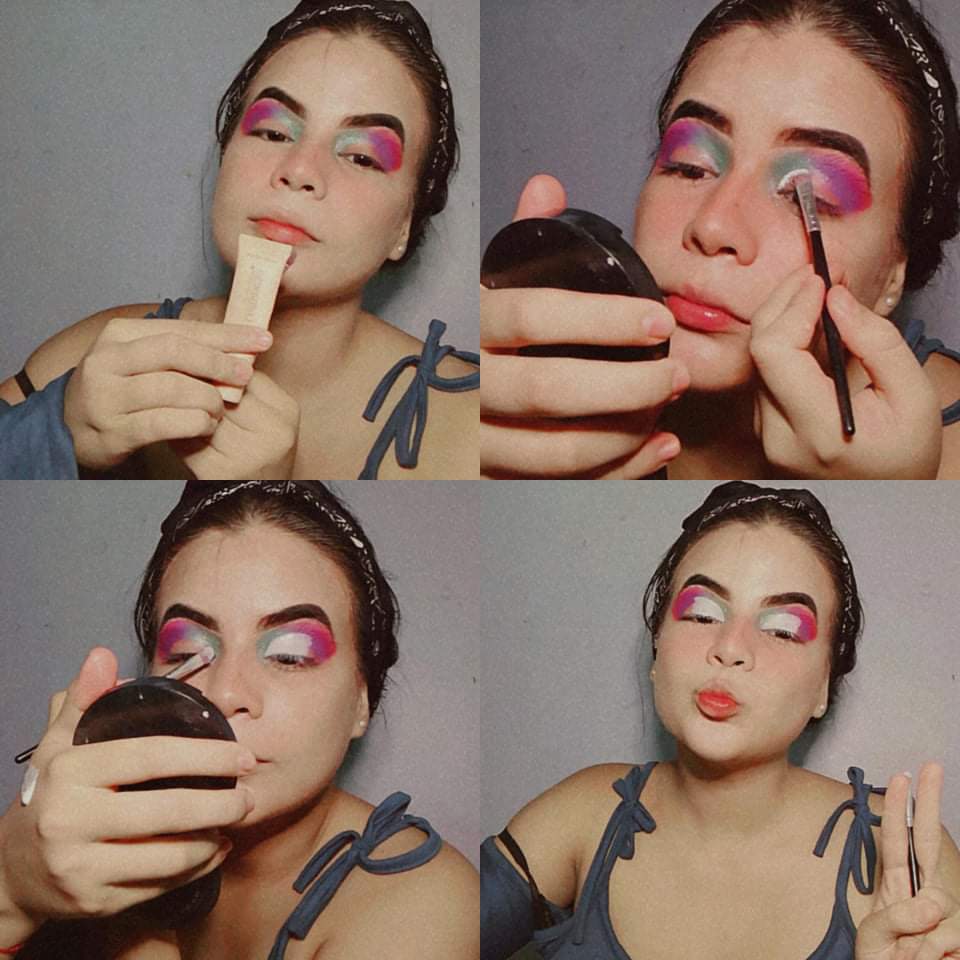
- Paso 12:
Con corrector líquido y una brocha plana marcaremos toda la línea del corte natural de nuestro párpado móvil partiendo desde nuestro lagrimal interno y la rellenaremos, el corrector debe llegar hasta un poco más de la mitad del ojo
- Step 12:
With liquid concealer and an plane brush we will mark the entire line of the natural cut of our mobile eyelid starting from our internal tear duct and fill it in, the concealer should reach a little more than half of the eye
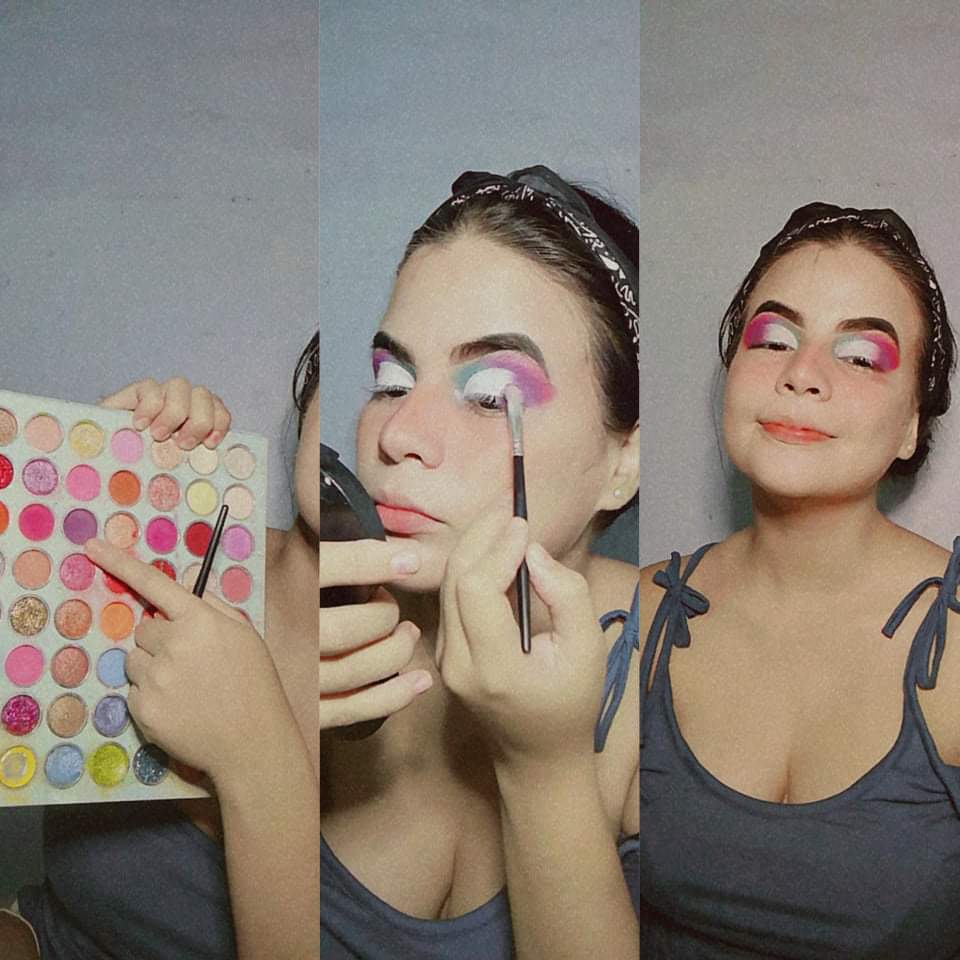
- Paso 13:
Con un morado muy oscuro, casi marrón difuminamos el límite entre el color blanco y el púrpura
- Step 13:
With a very dark purple, almost brown, we blur the boundary between white and purple
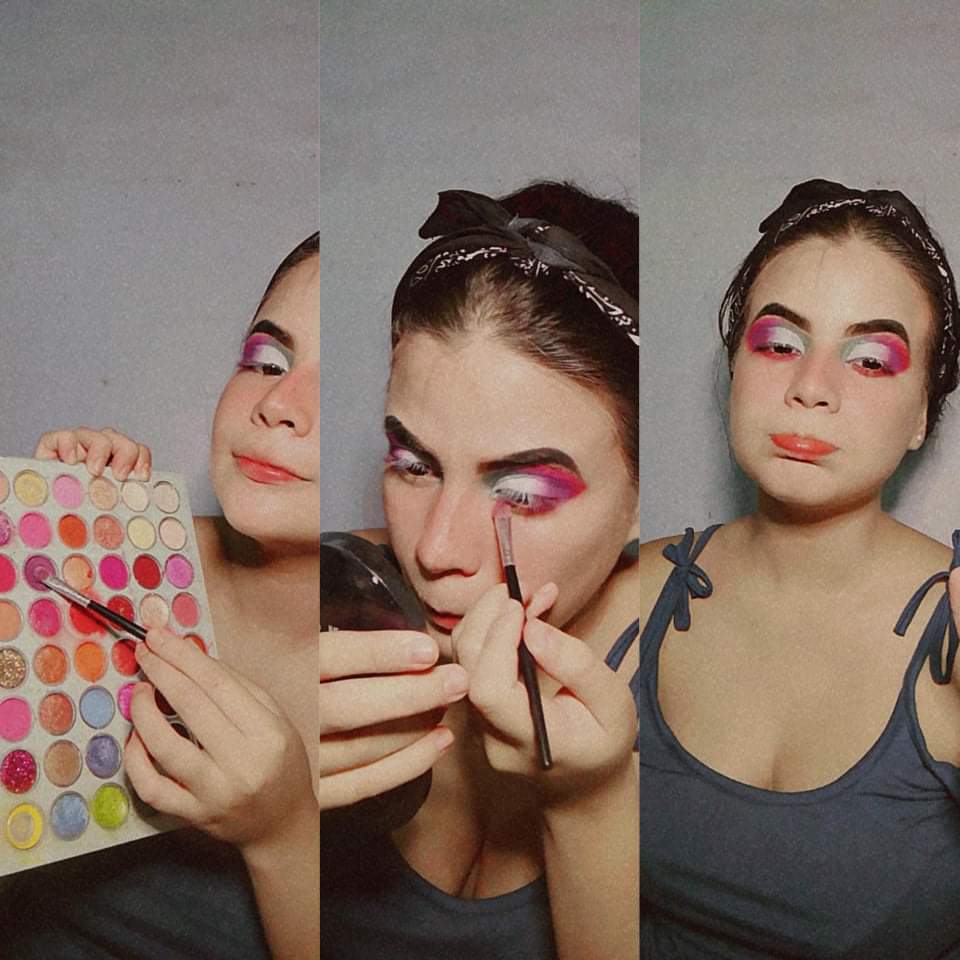
- Paso 14:
Con ese mismo morado aplicaremos en toda la zona de abajo de nuestro ojo, muy pegado a las pestañas inferiores
- Step 14:
With that same purple we will apply all over the area below our eye, very close to the lower lashes
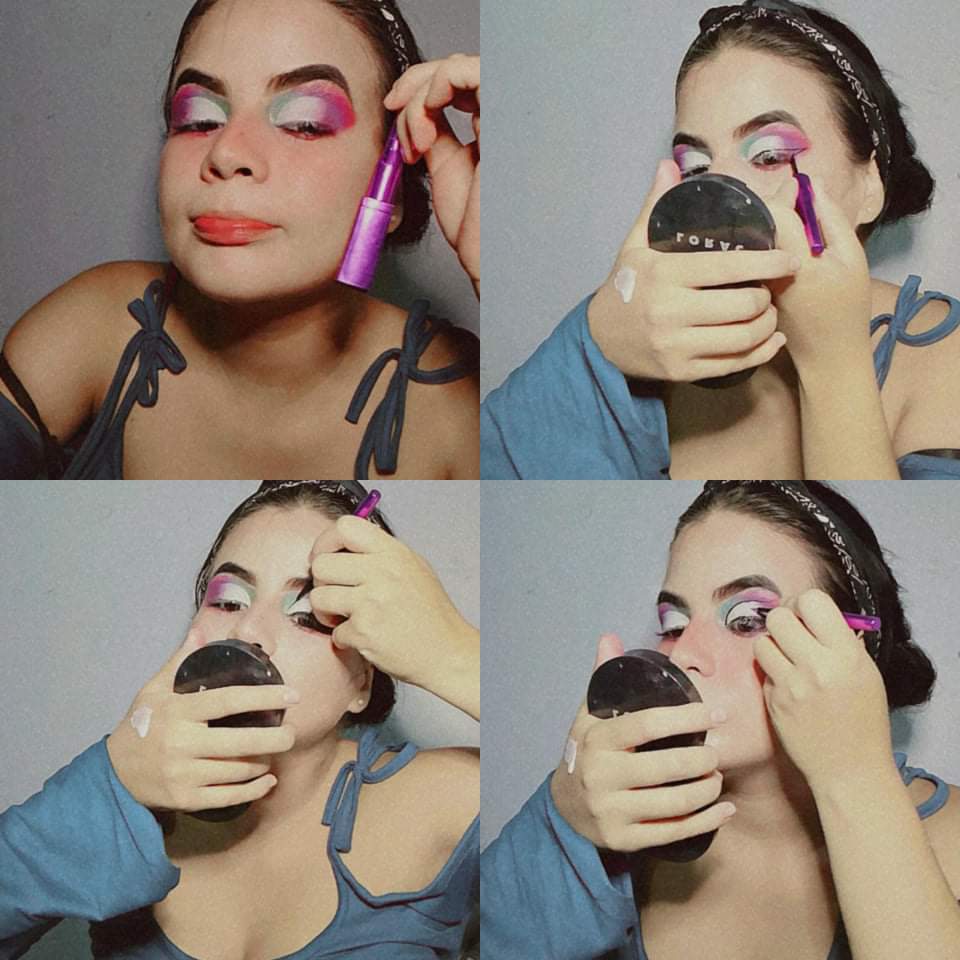
- Paso 15:
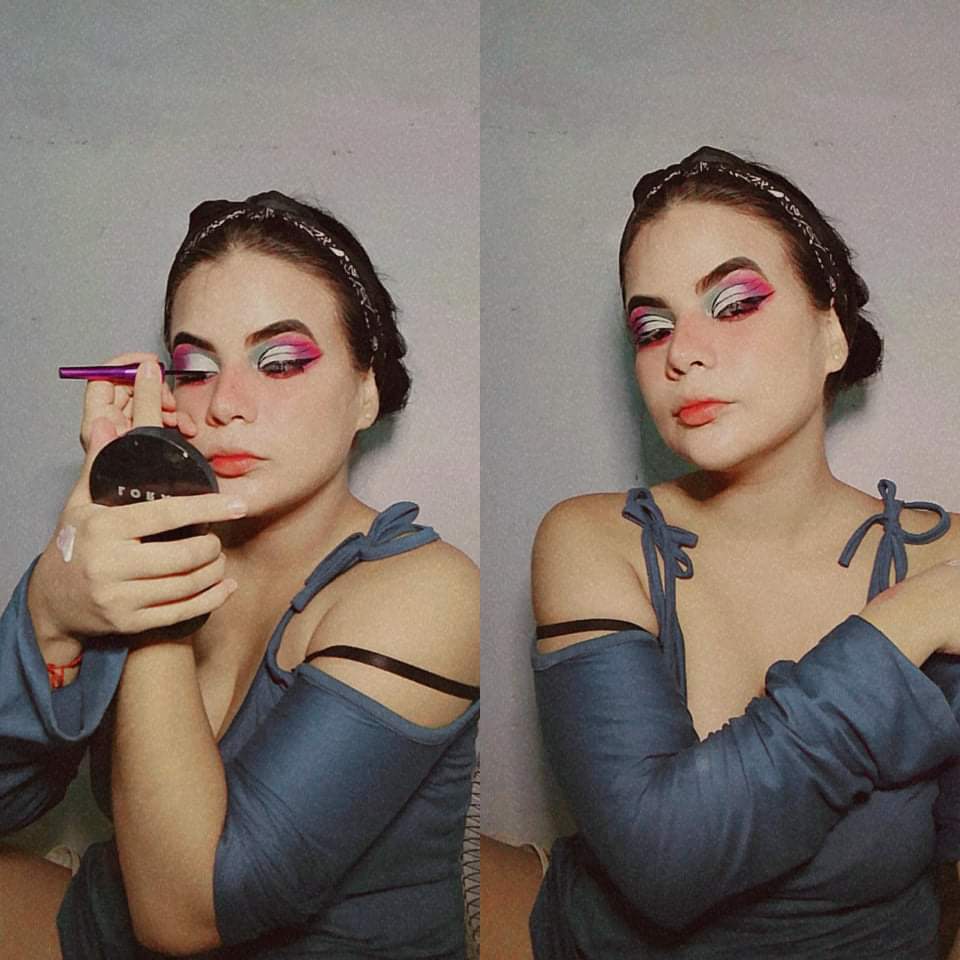
Con delineador líquido haremos un delineado normal, siempre y cuando sea el adecuado para nuestro tono de ojo. Luego con él, trazaremos toda la forma del corrector que habiamos hecho antes. En medio de la línea del delineado y la del contorno del corrector, haremos justo a la mitad otra línea sobresaliente hacia afuera
- Step 15:
With liquid eyeliner we will make a normal eyeliner, as long as it is suitable for our eye tone. Then with it, we will trace the entire shape of the concealer that we had made before. In the middle of the line of the eyeliner and the one of the contour of the concealer, we will make right in the middle another protruding line outwards
- Paso 16:
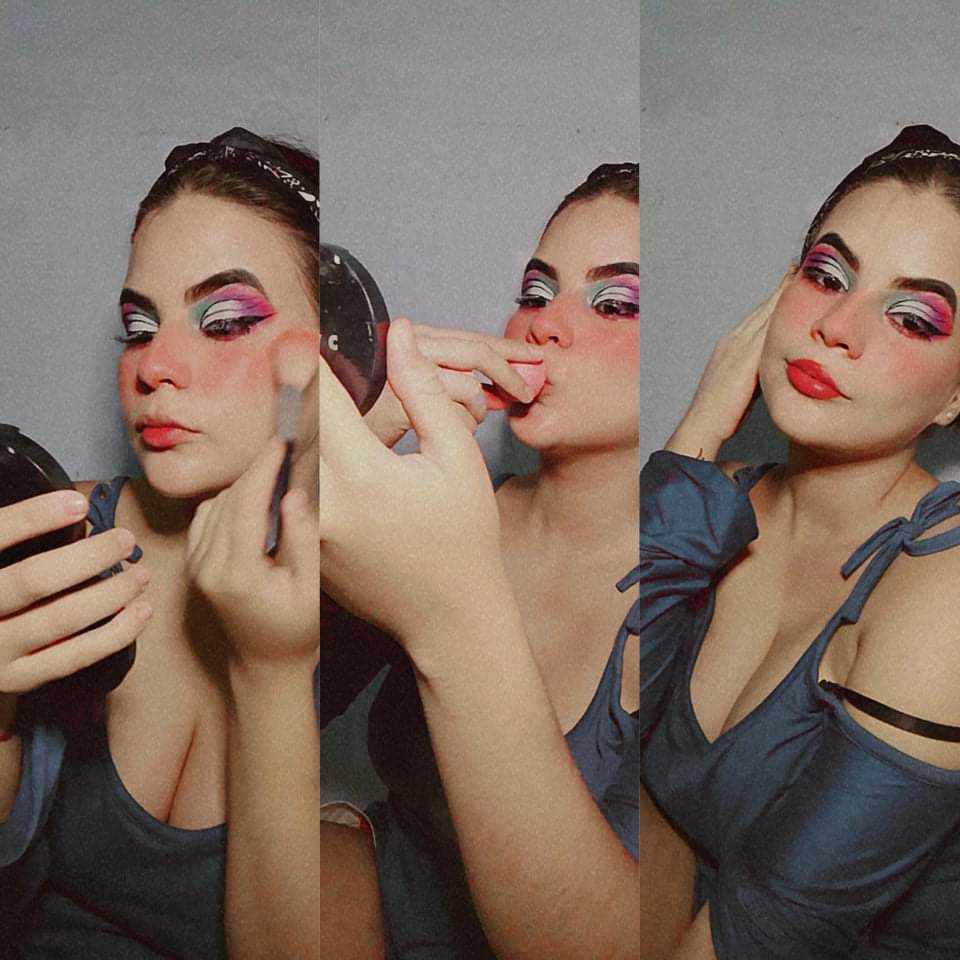
Nos aplicamos rubor y labial
- Paso 16:
We apply blush and lipstick
- Paso 17:
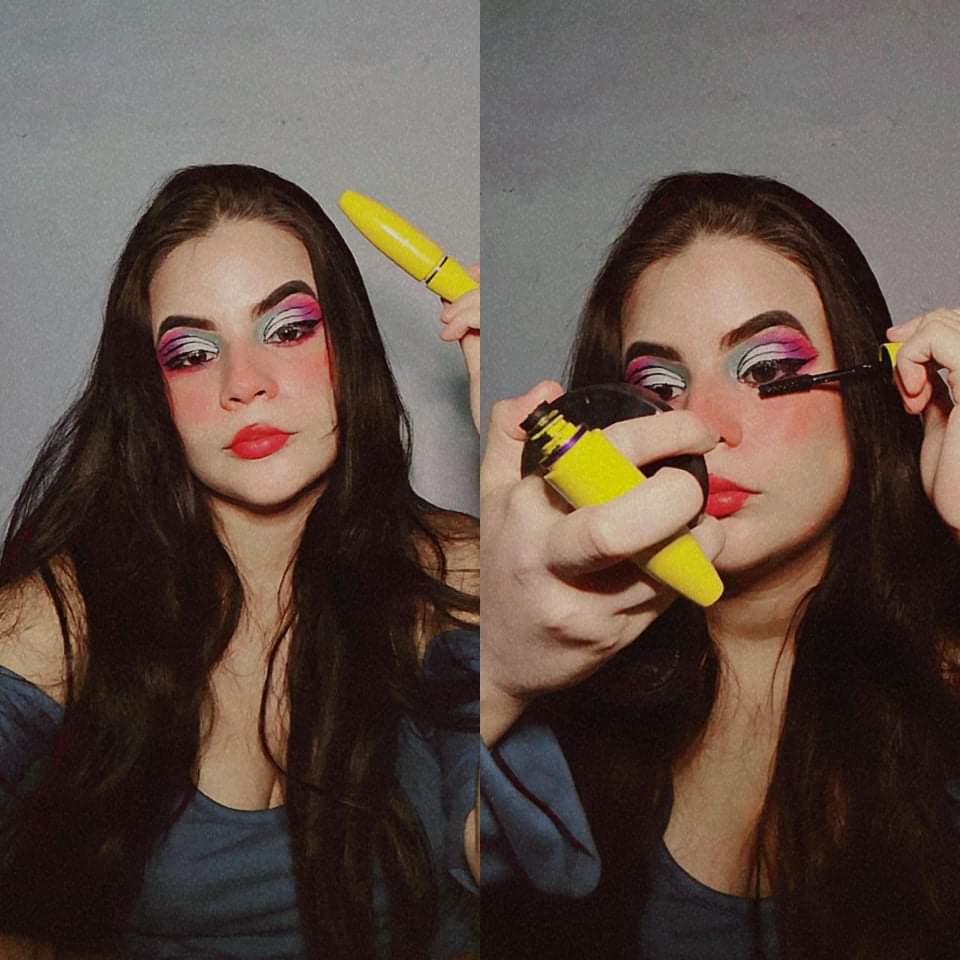
Por último, un poco de máscara de pestañas para realzar nuestra mirada. Listo, nuestro maquillaje está hecho
- Step 17:
Finally, a bit of mascara to enhance our look. Done, our makeup is done
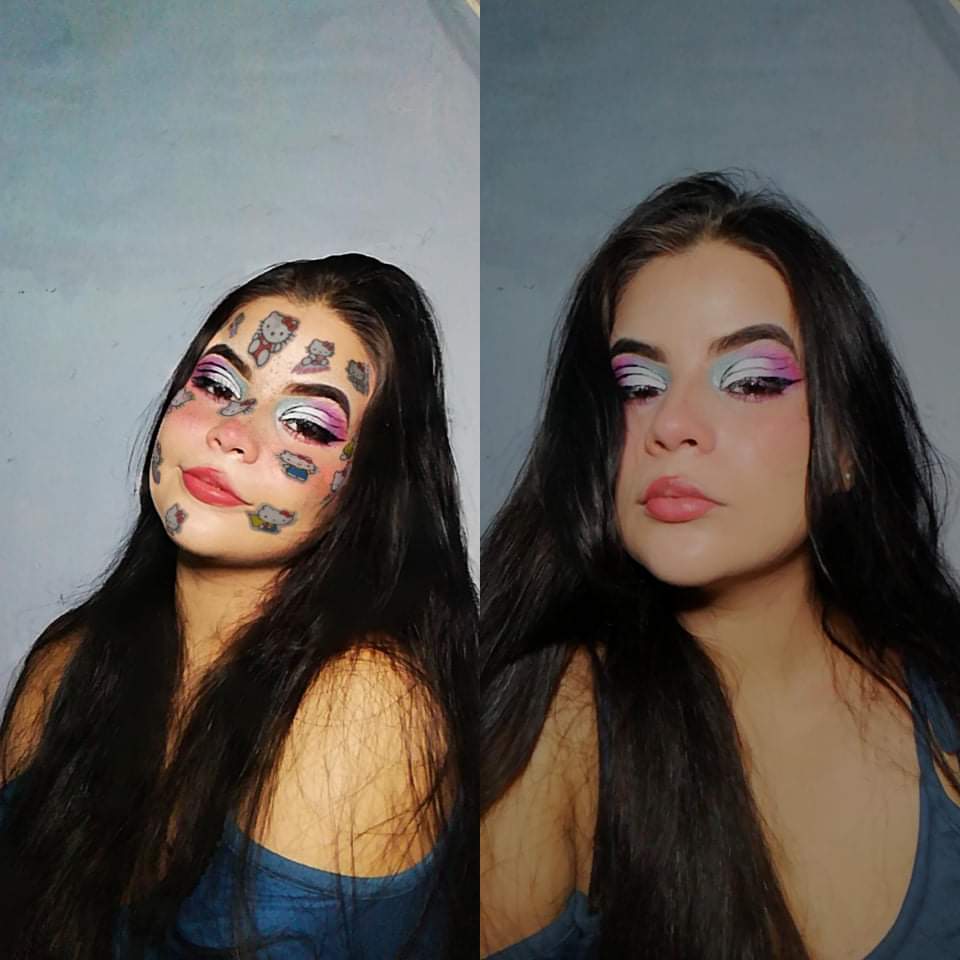
Resultados
Results
.jpg) Muchas gracias por llegar hasta acá, espero les haya gustado y puedan ponerlo en práctica. Muchas buenas vibras y buenos deseos para todos♥
Muchas gracias por llegar hasta acá, espero les haya gustado y puedan ponerlo en práctica. Muchas buenas vibras y buenos deseos para todos♥
Thank you very much for getting here, I hope you liked it and can put it into practice. Many good vibes and good wishes to all ♥


.jpg)
Quedó precioso tu maquillaje 💕
A mí lo que más me cuesta es maquillarme las cejas y veo que todas lo hacen con aquella facilidad y pulso jejeje seguiré intentando, apenas estoy aprendiendo 🥰
Muchas gracias por tus lindas palabras amiga!
Esta atenta a mi perfil, ya que pronto estaré publicando tutoriales de cómo maquillar tus cejas y hacer delineados según la forma de tu ojo. Muchos besitos y buenas vibras! ❤️
Muy precioso ese maquillaje!
Congratulations @sandradavila! You have completed the following achievement on the Hive blockchain and have been rewarded with new badge(s) :
Your next target is to reach 200 upvotes.
You can view your badges on your board and compare yourself to others in the Ranking
If you no longer want to receive notifications, reply to this comment with the word
STOP