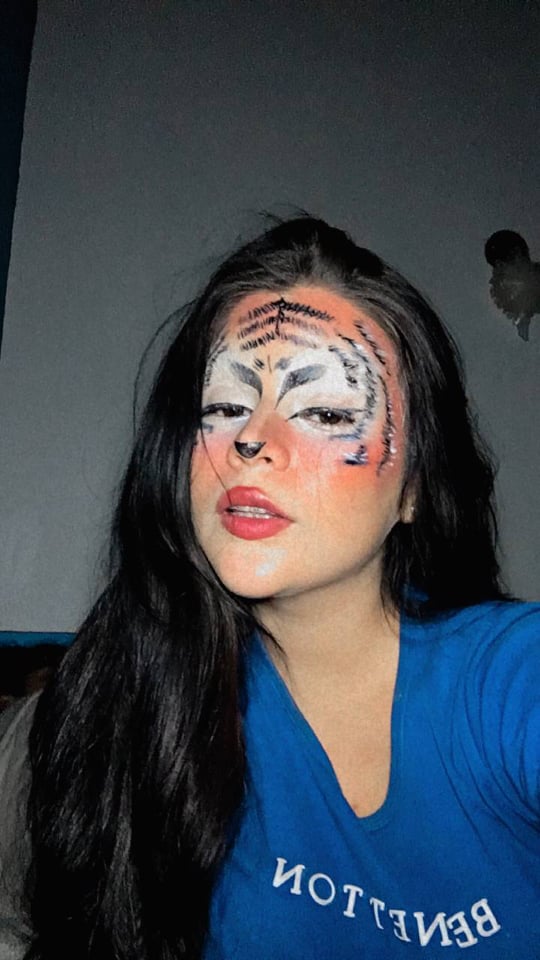
Good morning MakeUp Power people, I hope you are doing well. Every day I explore my skills and try to improve constantly to bring quality content and this time will be no exception, it is very rewarding to see the result of your efforts the way I have seen them, that's why this time I bring you an artistic, easy and very beautiful makeup, inspired by Tigers; large animals with beautiful and detailed features. I hope you can enjoy this tutorial as much as I do.
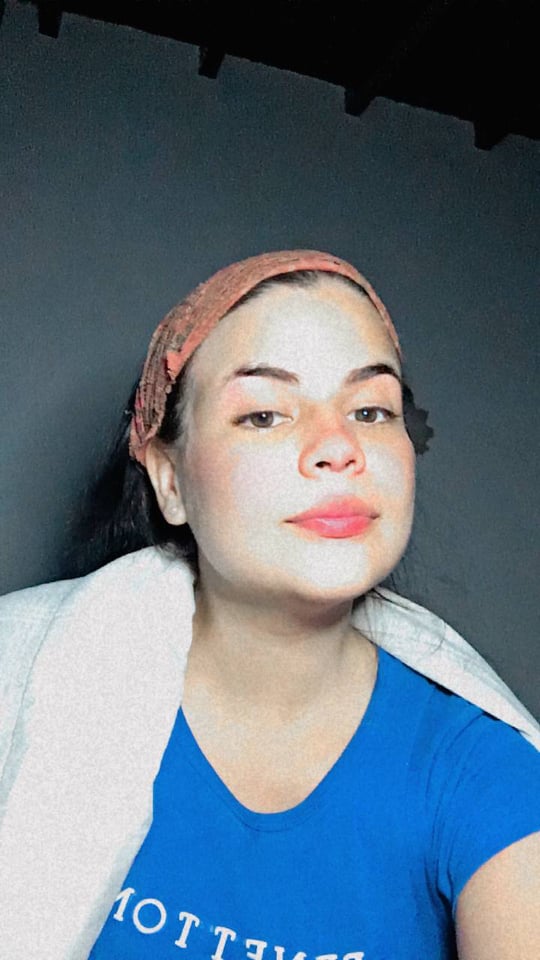
- Paso 1:
Debemos tener la cara completamente limpia, poniendo en práctica nuestra rutina skincare.
- Step 1:
We must have a thoroughly cleansed face, putting our skincare routine into practice.
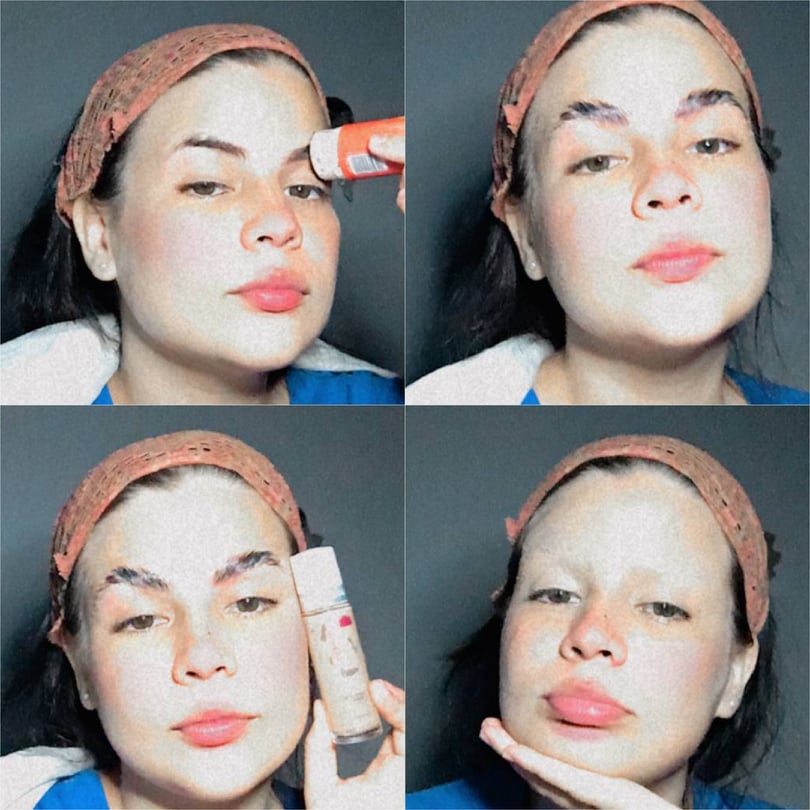
- Paso 2:
Con pegamento escolar en barra (NO TÓXICO) Lo aplicaremos en nuestras cejas de manera ascendente con cierta presión y esperamos que seque. Repetimos esto unas 3 veces hasta tener nuestras cejas completamente templadas. Posteriormente, con corrector líquido o base mate de secado rápido (Es muy importante que sean secas o de secado rápido para no humedecer nuestro trabajo con el pegamento y arruinar todo), aplicamos en toda la superficie de nuestras cejas y las difuminamos con una esponja de toques suaves, si es necesaria otra capa de corrector porque nuestras cejas son muy oscuras, la podemos aplicar.
- Step 2:
With school glue stick (NON TOXIC) we will apply it on our eyebrows in an ascending way with some pressure and wait for it to dry. We repeat this about 3 times until we have our eyebrows completely tempered. Afterwards, with liquid concealer or quick drying matte foundation (It is very important that they are dry or quick drying so as not to wet our work with the glue and ruin everything), we apply over the entire surface of our eyebrows and blend them with a sponge with soft touches, if another layer of concealer is necessary because our eyebrows are very dark, we can apply it.
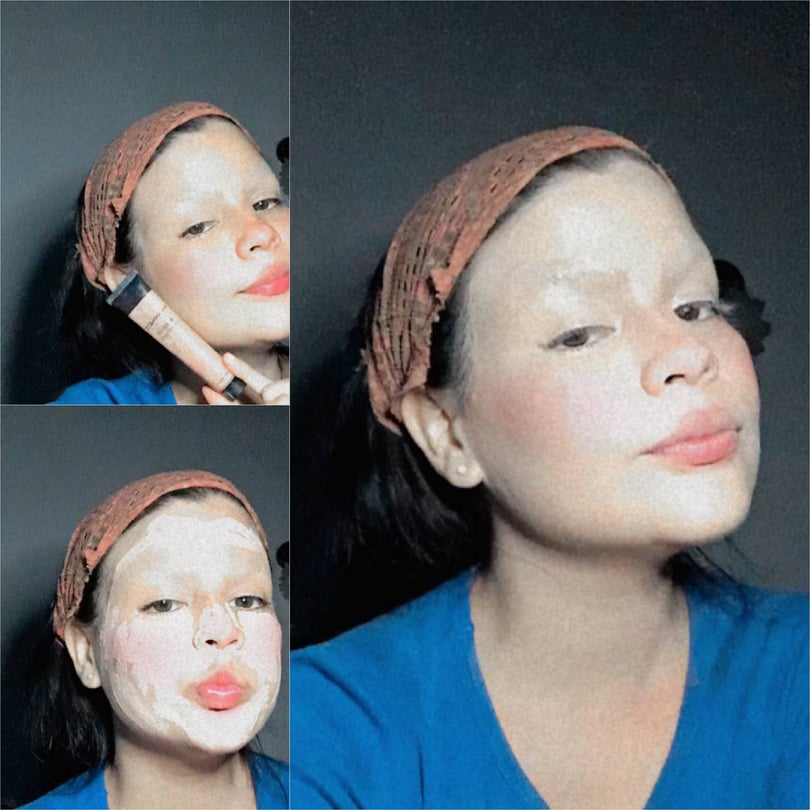
- Paso 3:
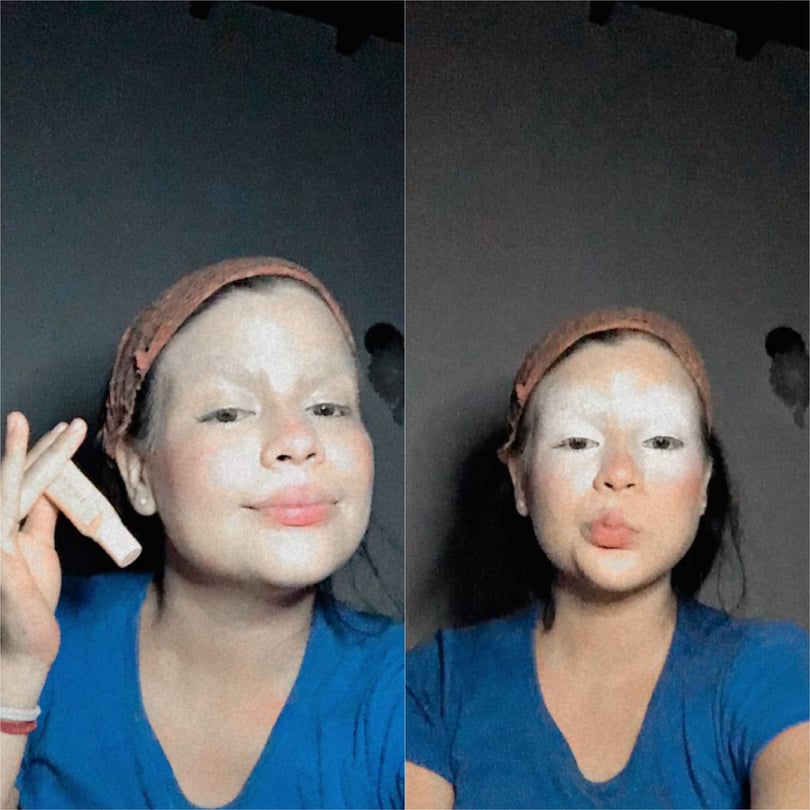
Usamos una base adecuada para nuestro tono de piel, la aplicamos en todo nuestro rostro y lo difuminamos igualmente con la esponja.
- Step 3:
We use a foundation suitable for our skin tone, apply it all over our face and blend it with the sponge.
- Paso 4:
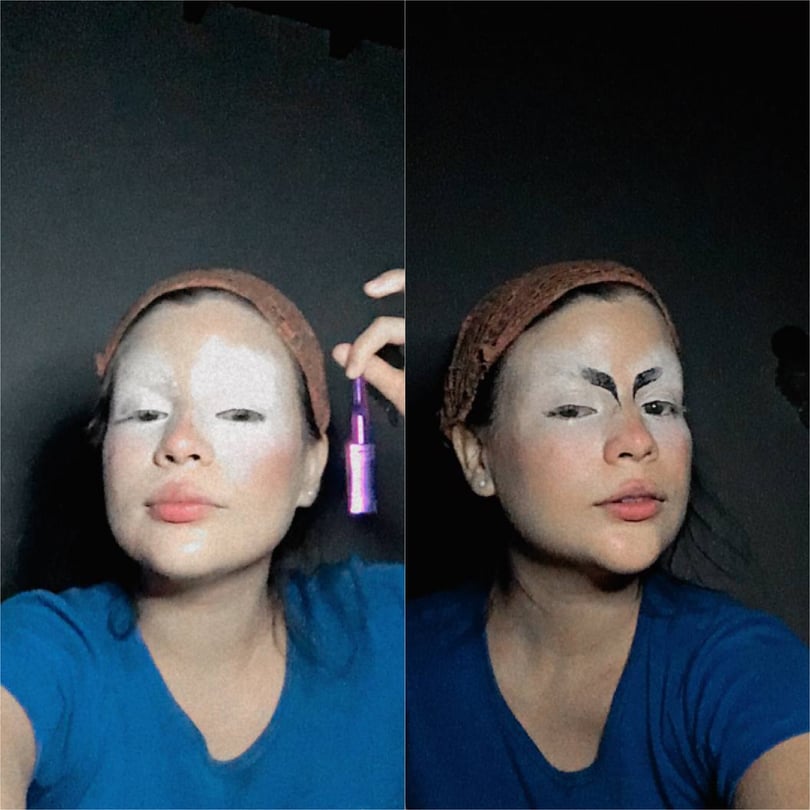
Utilizamos corrector blanco y lo aplicamos en toda la zona de nuestro ojo, abarcando las cejas, el pàrpado y las ojeras, haciendo una especie de circulo alrededor de nuestros ojos
- Step 4:
We use white concealer and apply it to the entire eye area, including the eyebrows, eyelids and dark circles, making a kind of circle around our eyes.
- Paso 5:
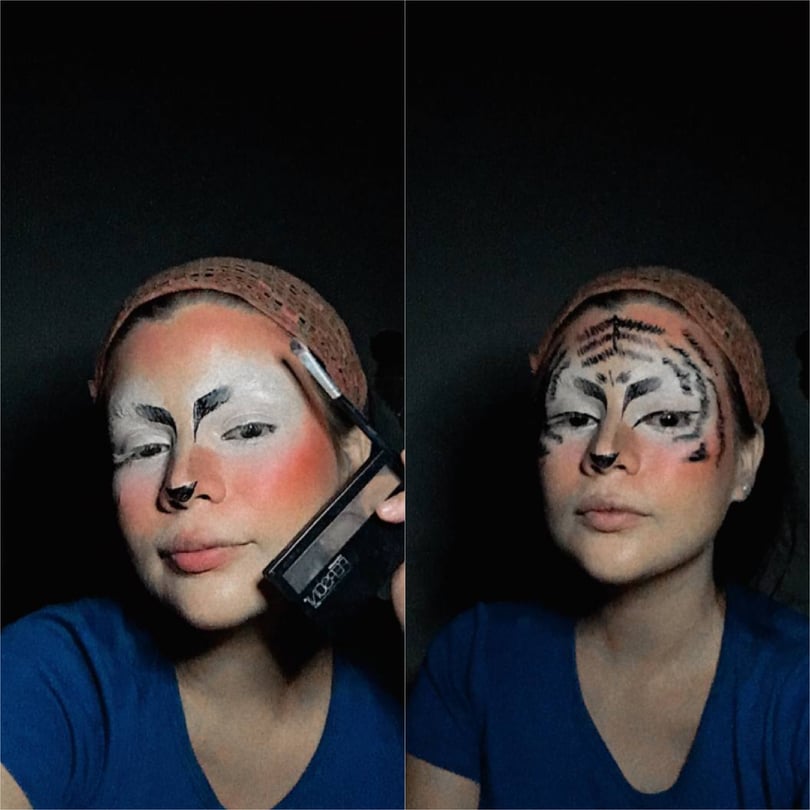
Dibujamos una especie de ceja, a partir de nuestra nariz solo hasta la mitad de nuestra ceja, difuminando el final, tal y como se aprecia en la foto
- Step 5:
We draw a kind of eyebrow, starting from our nose only up to the middle of our eyebrow, blurring the end, as shown in the picture.
- Paso 6:
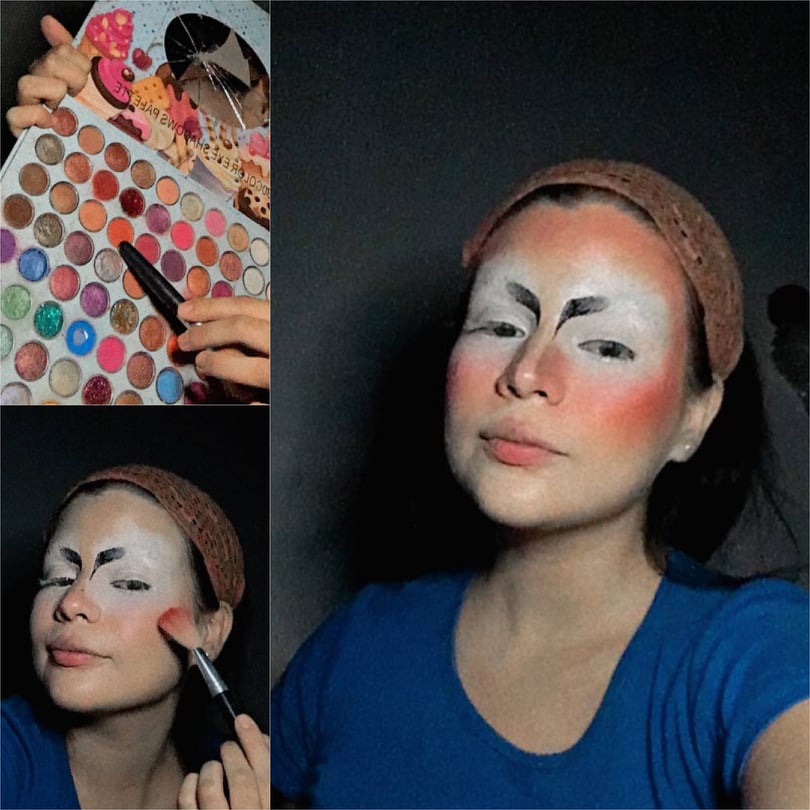
Con nuestra brocha para rubor y un tono anaranjado de nuestra paleta, lo aplicaremos en zonas como la frente, las sienes y los pómulos. Luego con un tono marrón nos contornearemos la nariz, difuminando solo un poco ya que nuestro objetivo es que quede marcado.
- Step 6:
Using our blush brush and an orange shade from our palette, we will apply it to areas such as the forehead, temples and cheekbones. Then with a brown tone we will contour our nose, blurring just a little bit since our goal is to make it stand out.
- Paso 7:
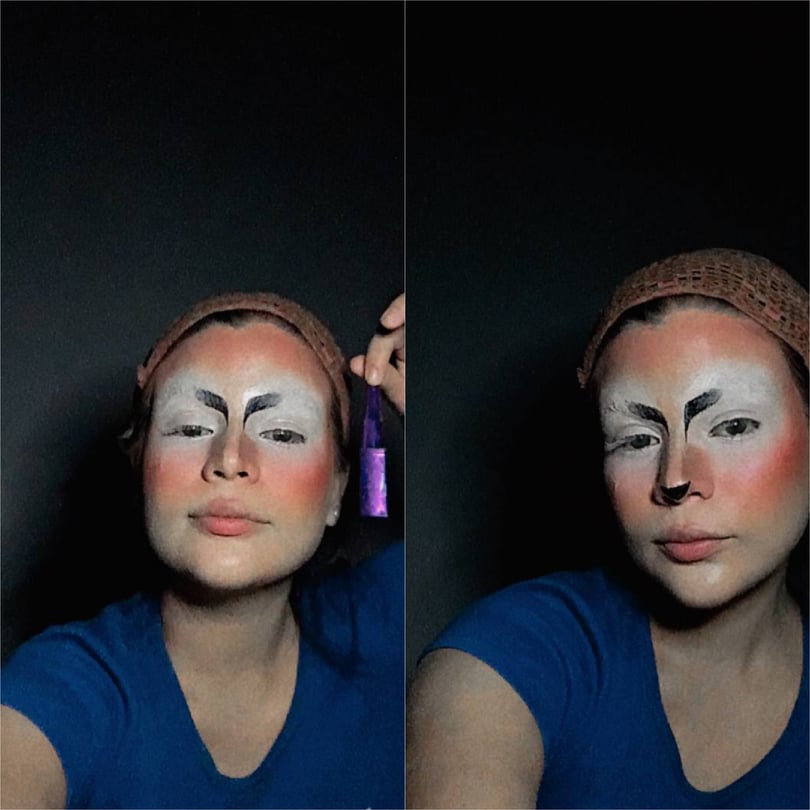
Con delineador nos haremos una especie de nariz, solo en la punta en forma de media luna hacia arriba.
- Step 7:
With eyeliner we will make a kind of nose, only at the tip in a half-moon shape upwards.
- Paso 8:
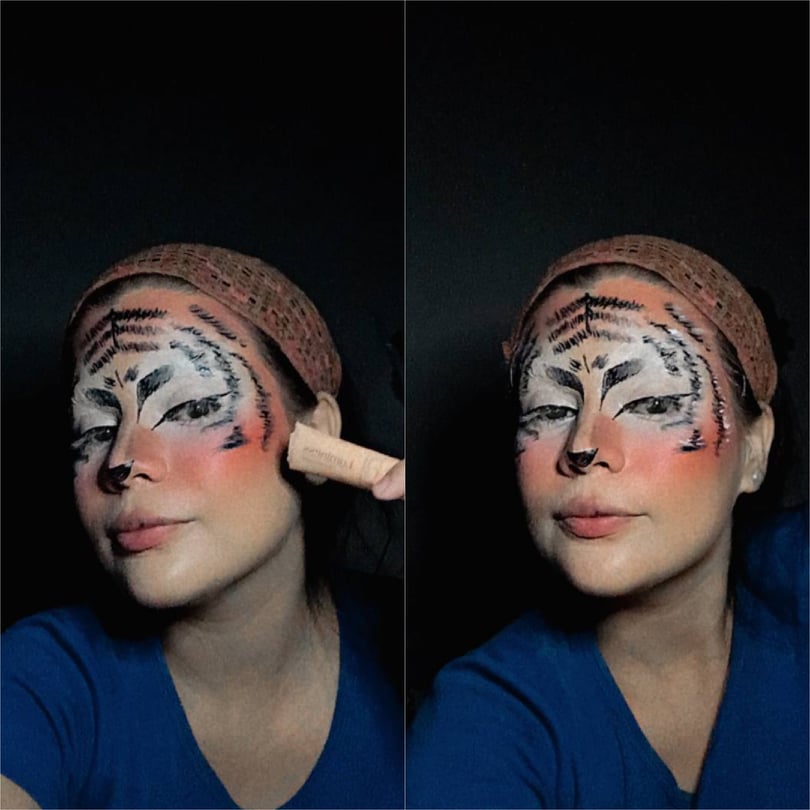
Con una brocha fina y sombra negra, haremos especie de textura de pelaje en nuestro rostro, enfatizando alrededor de la zona superior de nuestra cara de la misma manera que en la foto. Opcional, podemos resaltar algunos pelos con delineador
- Step 8:
With a fine brush and black shadow, we will make a kind of fur texture on our face, emphasizing around the upper area of our face in the same way as in the photo. Optional, we can highlight some hairs with eyeliner.
- Paso 9:
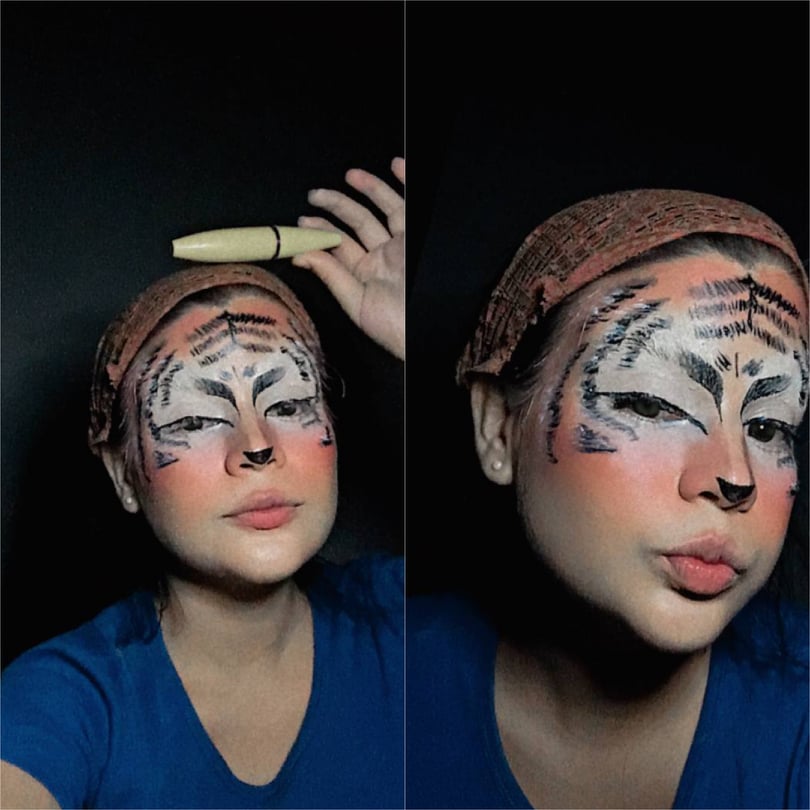
Con la misma brocha fina y corrector blanco esparciremos algunos pelos en los bordes de los que hicimos anteriormente con color negro.
- Step 9:
With the same fine brush and white concealer we will spread some hairs on the edges of the ones we did before with black color.
- Paso 10:
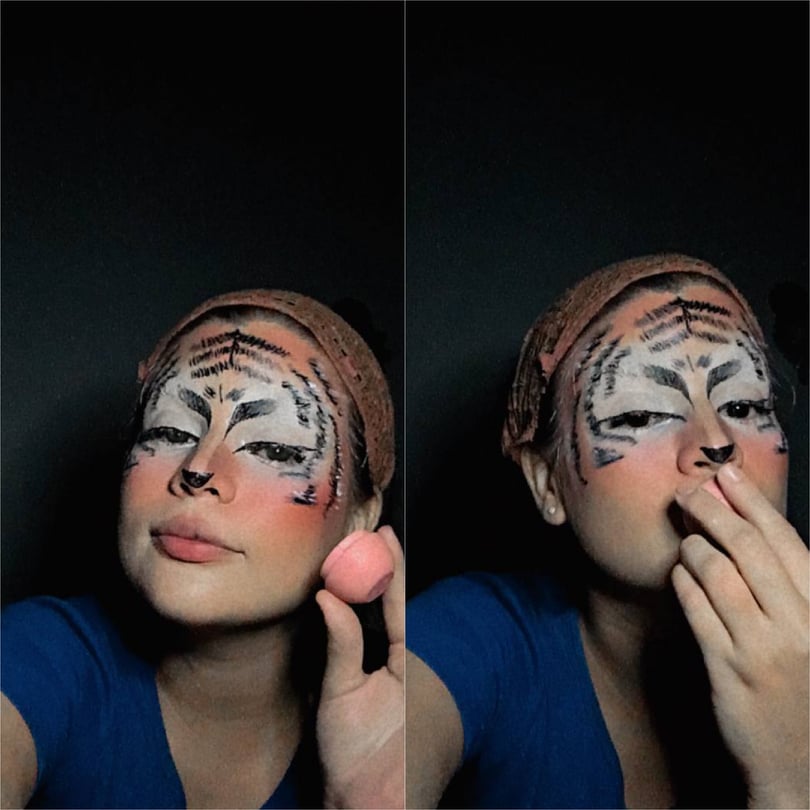
Nos aplicamos máscara de pestañas
- Step 10:
We apply mascara
- Paso 11:
Por último, utilizamos el labial de nuestra preferencia. Estos son los resultados
- Step 11:
Finally, we use the lipstick of our preference. These are the results
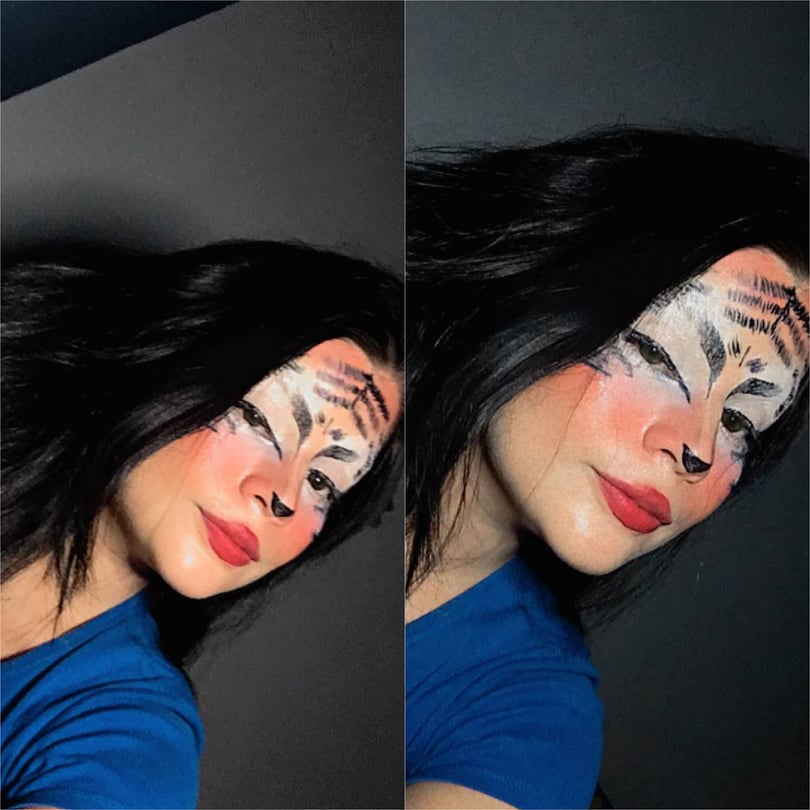
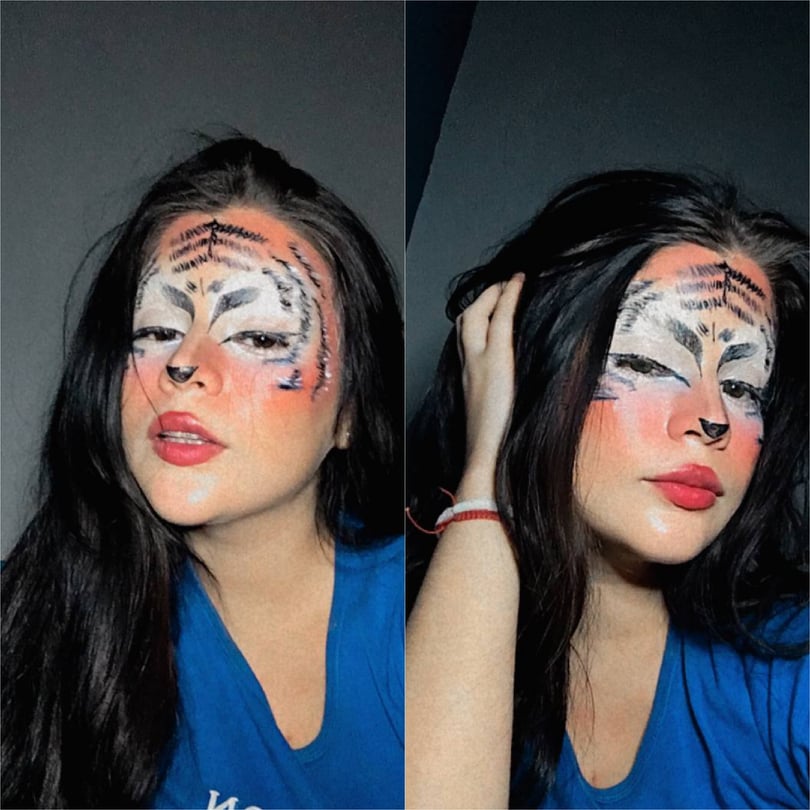
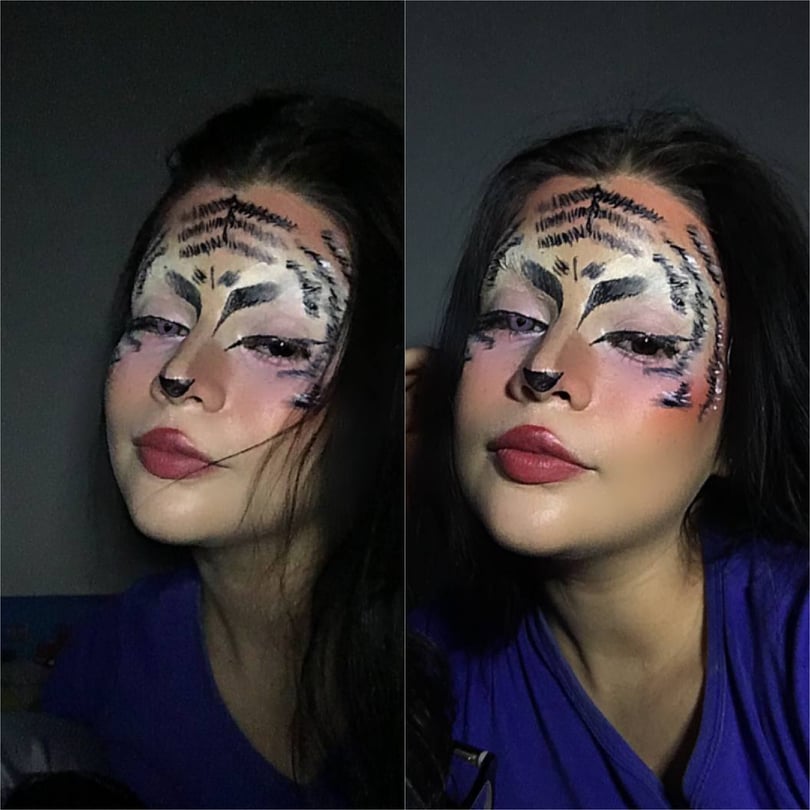
Muchas gracias por llegar hasta acá, espero les haya gustado y lo pongan en práctica, las mejores vibras para todos ustedes y muy buenos deseos. Recuerden, nunca tengan miedo de experimentar y explorar sus habilidades, sean creativos y ustedes mismos!
Thank you very much for coming here, I hope you liked it and put it into practice, the best vibes for all of you and very good wishes. Remember, never be afraid to experiment and explore your skills, be creative and be yourselves.
Congratulations @sandradavila! You have completed the following achievement on the Hive blockchain and have been rewarded with new badge(s) :
Your next target is to reach 800 upvotes.
You can view your badges on your board and compare yourself to others in the Ranking
If you no longer want to receive notifications, reply to this comment with the word
STOPCheck out the last post from @hivebuzz: