
Hola amigos de Hive
A principios de este año comencé un curso de peluquería y tenía ya un par de semanas con ganas de cortarle el cabello a mi hija por tres razones
- ya le hacia falta un corte.
- necesitaba practicar.
- para hacer un tutorial y enseñar algo que estoy segura le será de utilidad a muchos.
Me hubiese gustado tener mejores fotos para presentarles este paso a paso, pero me hacía falta un tercer brazo 😥
De cualquier manera, tengan en cuenta que es mi primera práctica y a pesar que fue un poco de ensayo y error, aquí les voy a contar cuál fue el procedimiento de manera teórica y cuáles fueron las improvisaciones y errores que tuve que hacer para que lo tomen en cuenta si se animan a intentarlo.
Comencemos 💇♀️💈
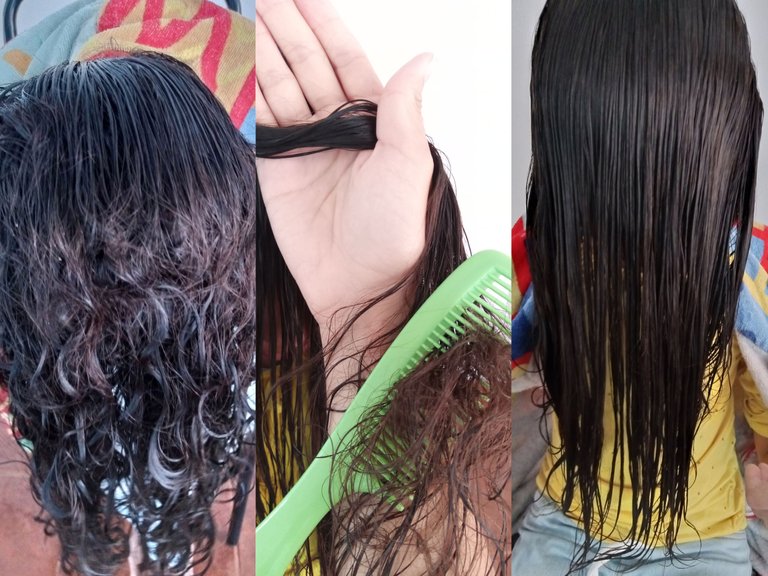
Lo primero es lavar bien el cabello y quitar el exceso de agua hasta que quede húmedo.
Se peina todo el cabello hacia adelante; cómo es natural el cabello se va a enredar, así que para desenredarlo, peinamos desde la raíz y poco a poco vamos arrastrando los nudos hasta las puntas.
Para no maltratar a la otra persona, agarramos con bastante presión el cabello un poco más atrás de los nudos y con mucha paciencia seguimos peinando.
Hello Hive friends

At the beginning of this year I started a hairdressing course and I had been wanting to cut my daughter's hair for a couple of weeks now for three reasons

1) she needed a haircut.
2) she needed to practice.
3) to make a tutorial and teach something that I'm sure will be useful to many.

I would have liked to have better pictures to show you this step by step, but I needed a third arm 😥.

Anyway, keep in mind that this is my first practice and although it was a bit of trial and error, here I will tell you what was the procedure in a theoretical way and what were the improvisations and mistakes I had to make so that you can take it into account if you dare to try it.

Let's get started 💇♀️💈.

The first thing is to wash your hair well and remove excess water until it is damp.

Comb all the hair forward; how is natural the hair is going to tangle, so to untangle it, we comb from the root and little by little we drag the knots to the ends.

In order not to mistreat the other person, we grab the hair with enough pressure a little further back from the knots and with a lot of patience we continue combing.
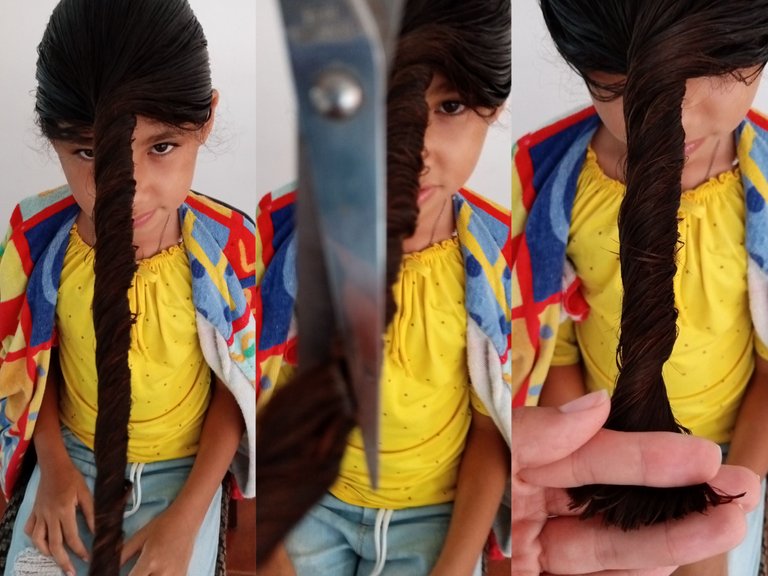
Una vez que esté bien peinado el cabello, lo vamos a enrollar y convertiremos a nuestro cliente en un Unicornio y con la tijera de forma vertical cortamos en linea recta.
Con esto, el efecto que vamos a lograr es una caída muy sutil en capas en todo el cabello así como la forma en V y nos ayudará a mantener el largo.
Once the hair is well styled, we are going to roll it up and turn our client into a Unicorn and with the scissors vertically cut in a straight line.

With this, the effect we are going to achieve is a very subtle layered fall throughout the hair as well as the V-shape and it will help us to maintain the length.
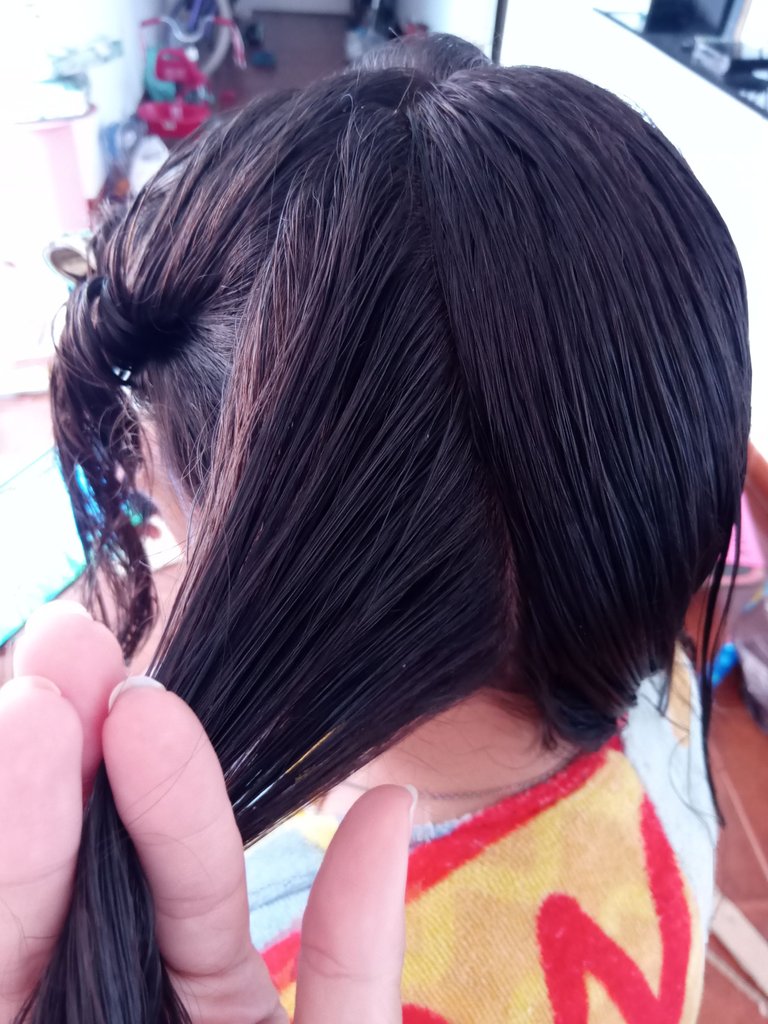
Peinamos nuevamente todo el cabello hacia atrás, y dividimos en tres partes, dos delanteras y una trasera.
Primero trabajaremos en la parte trasera
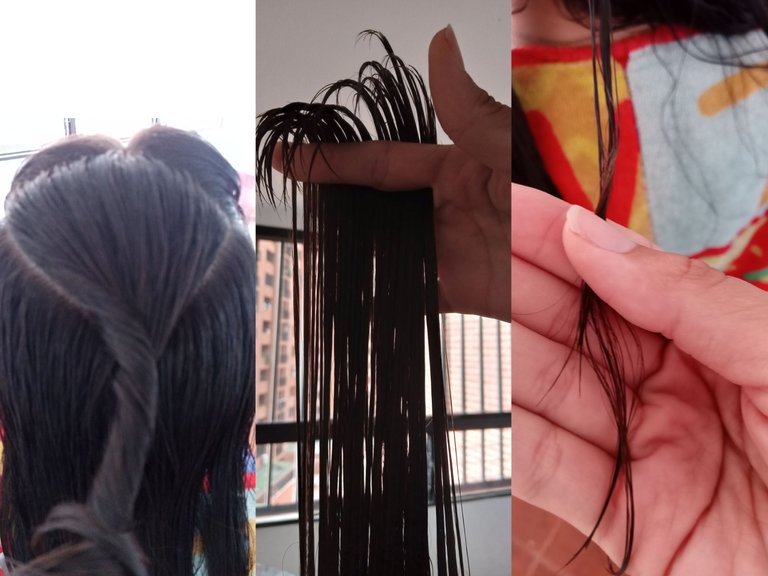
Vamos a seleccionar un mechón en forma de V que será nuestra guía para cortar el resto del cabello.
Elevamos en 90° y cortamos a la altura del mechón más corto que nos quedó de cortar el cuerno de unicornio.
We comb all the hair back again, and divide it into three parts, two at the front and one at the back.

First we will work on the back part

We will select a V-shaped strand that will be our guide to cut the rest of the hair.

We elevate at 90° and cut at the height of the shortest strand left from cutting the unicorn horn.
A partir de aquí viene lo bueno.
Vamos a peinar la división trasera y vamos a ir dividiéndo el cabello, de izquierda a derecha por mechones.
From here comes the good stuff.

We are going to comb the back part and divide the hair from left to right by strands.
Cada mechón de cabello lo vamos a estirar hacía adelante, agarrándolo bien estirado y bien peinado hasta conseguir nuestro mechón guía (el más corto)
We are going to stretch each lock of hair forward, holding it well stretched and well combed until we get our guide lock (the shortest).
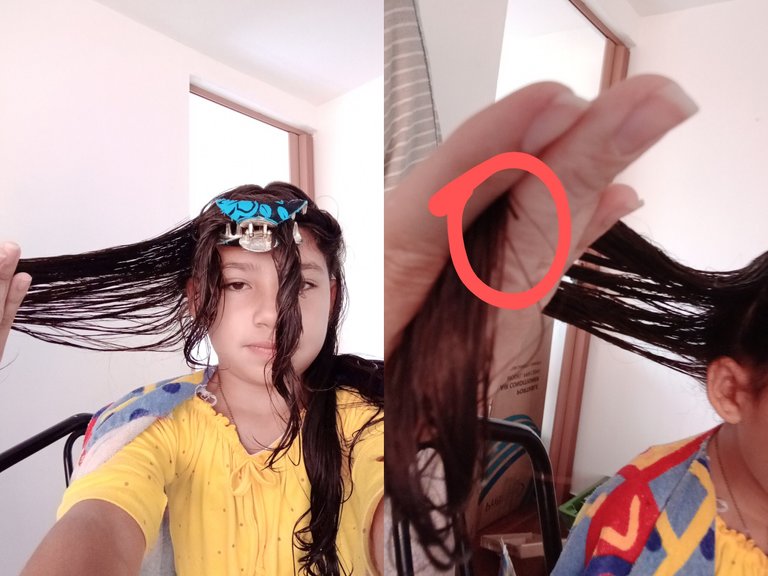
En la foto lo estaba agarrando muy mal pero quería que se viera lo mejor posible lo que intento explicarles.
Así vamos a ir cortando todo nuestro cabello, seleccionando mechones verticales, estirando hacía adelante hasta conseguir la guía y cortar de forma recta.
In the photo I was holding it very badly but I wanted it to look as good as possible what I'm trying to explain.

So we are going to cut all our hair, selecting vertical strands, stretching forward until we get the guide and cut straight.
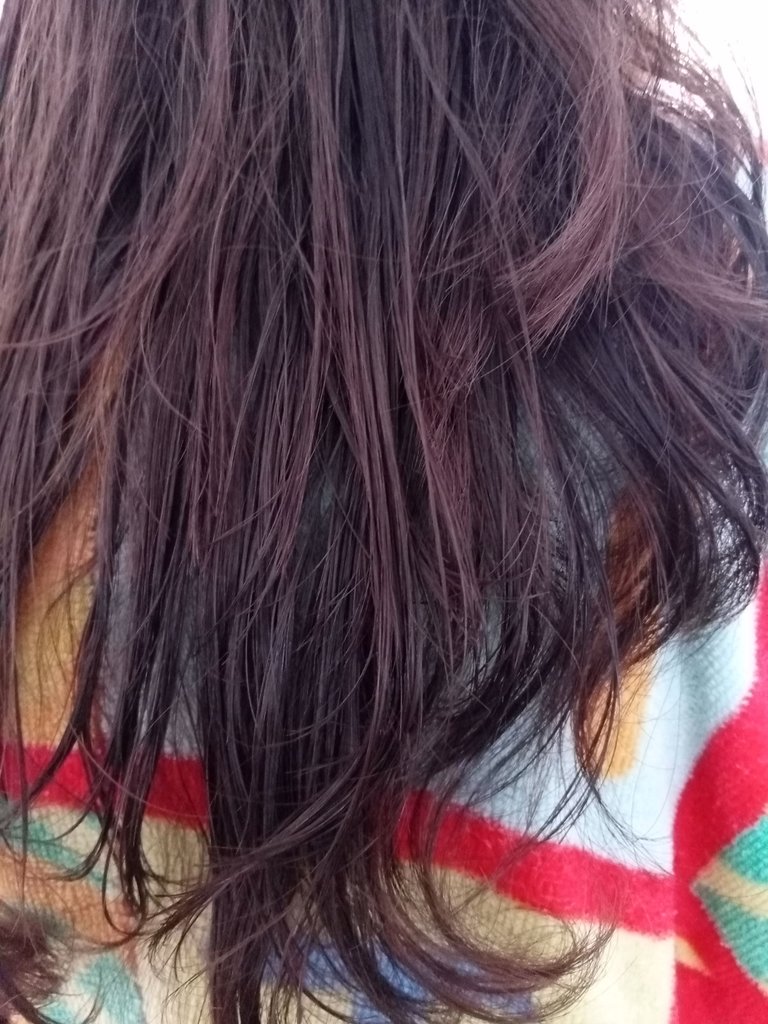
Hasta aquí todo chévere, la forma quedó muy bella, pero mi niña me pidió que lo quería más corto, cómo por lo hombros. Y menos mal, porque luego lo corte muchísimo más de lo que planeaba y por suerte le encantó.
Ahora viene mi paréntesis, desde muy niña yo misma he cortado mi cabello, me llegue a hacer unos cuantos desastres, y a mi niña, obviamente también he sido siempre yo su peluquera, y mi error recurrente, es creer que no estoy cortando mucho cuando el cabello está mojado y no termino de entender que el cabello se seca y se reduce bastante su tamaño sobretodo cuando no es liso.
Pero bueno, eso me volvió a pasar esta vez, igualmente como ven en la foto, se veía aún muy largo y ella me lo pidió por los hombros así que comencé a repetir el procedimiento, esta vez quitando un poquito más de centímetros, que terminaron siendo muchos más centímetros de lo que parecía.
So far so cool, the shape was very beautiful, but my little girl asked me to make it shorter, like around the shoulders. And thank goodness, because then I cut it much shorter than I had planned and luckily she loved it.

Now comes my parenthesis, since I was a little girl I have cut my hair myself, I have made a few disasters, and my girl, obviously I have always been her hairdresser, and my recurring mistake is to believe that I am not cutting much when the hair is wet and I do not quite understand that the hair dries and reduces its size a lot especially when it is not straight.

But well, that happened to me again this time, but as you can see in the picture, it still looked very long and she asked me to cut it to the shoulders so I started to repeat the procedure, this time taking off a little more centimeters, which ended up being many more centimeters than it seemed.
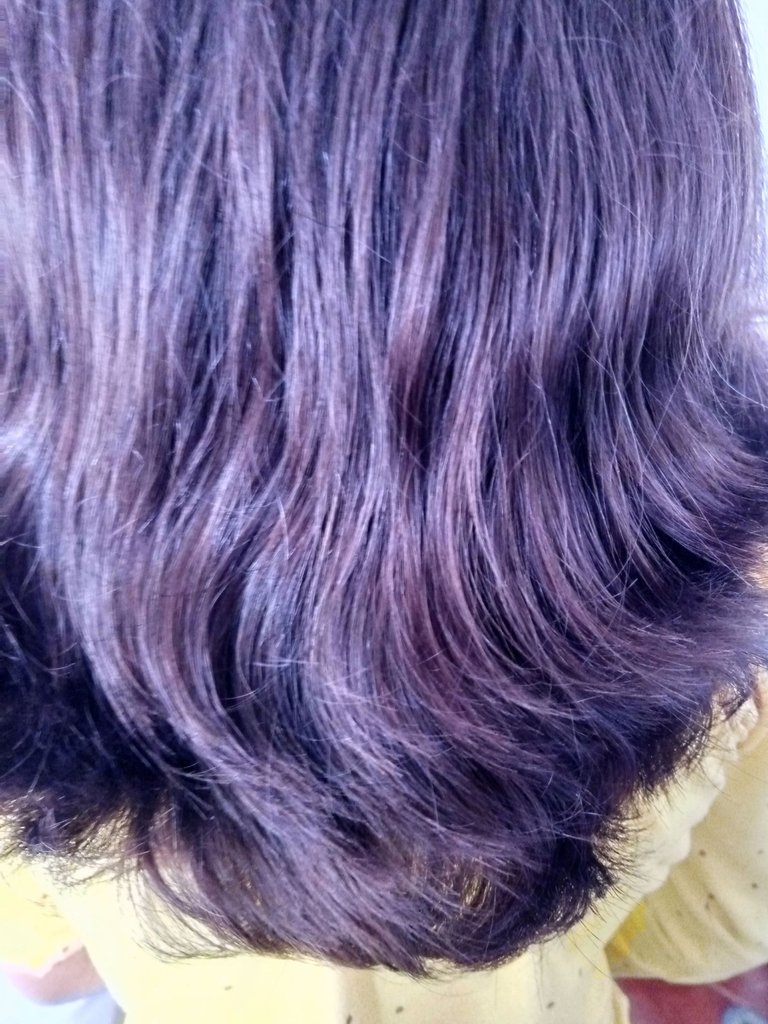
Ahora era el turno de la parte frontal.
Peinamos todo hacia adelante y decidimos a qué altura queremos que comience la caída del cabello (se repite el error).
Marque el cabello al final del mentón para que quedara de ese largo y corte en línea recta, y cuando peine, sorpresa, no quedó de ese largo, el cabello se encoge y le quedó más corto jajajaja pero igual le encantó, el corte quedó muy cuchi, a pesar que no era el plan original.
Now it was the turn of the front part.

We combed everything forward and decided at what height we wanted the hair to start falling out (mistake repeated).

I marked the hair at the end of the chin so it would be that length and cut in a straight line, and when I combed, surprise, it was not that length, the hair shrinks and it was shorter hahahaha but she still loved it, the cut was very cute, even though it was not the original plan.
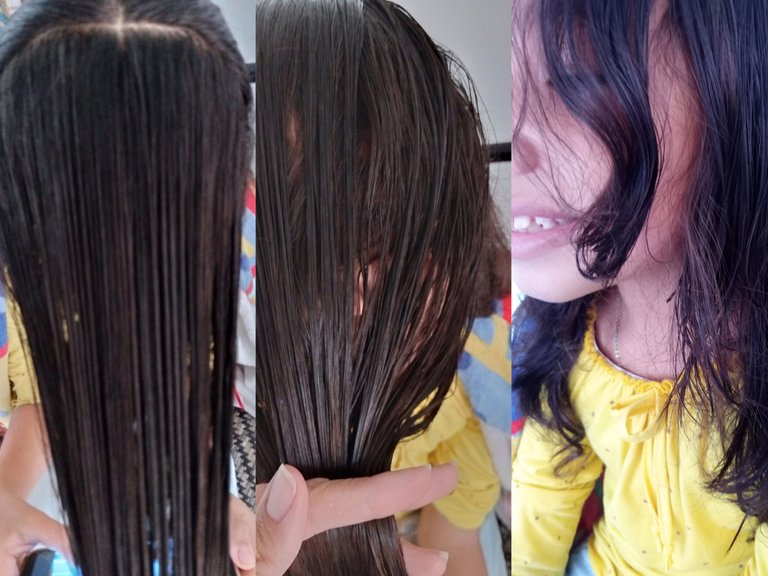
A pesar de los contratiempos, pude cortarle su cabello con éxito y por DIOS, acuérdense que el cabello se encoge.
De verdad espero que esté tutorial les sea de muchísima utilidad. Espero seguir aprendiendo y mejorando cada día estás técnicas y seguir compartiendo con ustedes mis más recientes conocimientos.
Despite the setbacks, I was able to successfully cut her hair and for GOD's sake, remember that hair shrinks.

I really hope you find this tutorial very useful. I hope to keep learning and improving every day these techniques and keep sharing with you my latest knowledge.

Molto brava, è da un po' che voglio tagliarmi i capelli da sola... ma ho paura di sbagliare....
The rewards earned on this comment will go directly to the person sharing the post on Twitter as long as they are registered with @poshtoken. Sign up at https://hiveposh.com.
Congratulations @mxryp07! You have completed the following achievement on the Hive blockchain and have been rewarded with new badge(s):
Your next target is to reach 400 upvotes.
You can view your badges on your board and compare yourself to others in the Ranking
If you no longer want to receive notifications, reply to this comment with the word
STOPCheck out the last post from @hivebuzz:
Support the HiveBuzz project. Vote for our proposal!