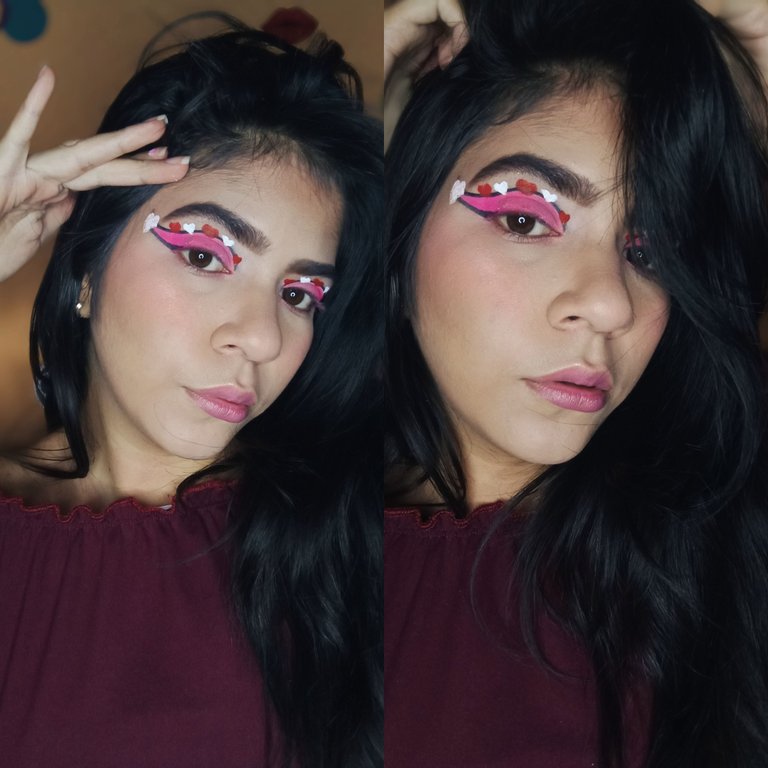
¡Hola amores de hive! Feliz inicio de semana (aunque fue ayer, ese día lo pase en compañía de mis amigos así que tome un descanso) pero ahora ya estoy acá con otro maquillaje para comenzar esta semana ¡Empecemos!
Hello hive loves! Happy start of the week (although it was yesterday, I spent that day with my friends so I took a break) but now I'm here with another makeup to start this week. Let's get started!
Materiales / Materials:
- Tónico facial / Facial tonic.
- Jabón facial neutro / Neutral facial soap.
- Primer / Primer.
- Crema hidratante / Moisturizing cream.
- Paleta de sombras / Shadow palette.
- Corrector / concealer.
- Pintura roja / Red paint.
- Pintura Blanca / White Paint.
- Pigmento Fucsia / Fuchsia Pigment.
- Delineador / Eyeliner.
- Iluminador / highlighter.
- Pomada de cejas / Eyebrow pomade.
- Base / Foundation.
- Beauty blender / Beauty blender.
- Polvo suelto / Loose powder.
- Contorno / Contour
- Pinceles / Brushes
- Brillo labial / Lip Gloss.
Procedimiento / Procedure:
Primer paso / First step:
Comenzamos preparando nuestro rostro para poder aplicar el maquillaje, así que comenzamos limpiandolo con tónico facial para eliminar cualquier impureza, luego la lavamos con jabón facial neutro, aplique crema hidratante y primer.
We start by preparing our face to be able to apply makeup, so we start by cleansing it with facial toner to remove any impurities, then we wash it with neutral facial soap, apply moisturizer and primer.
Segundo paso / Second step:
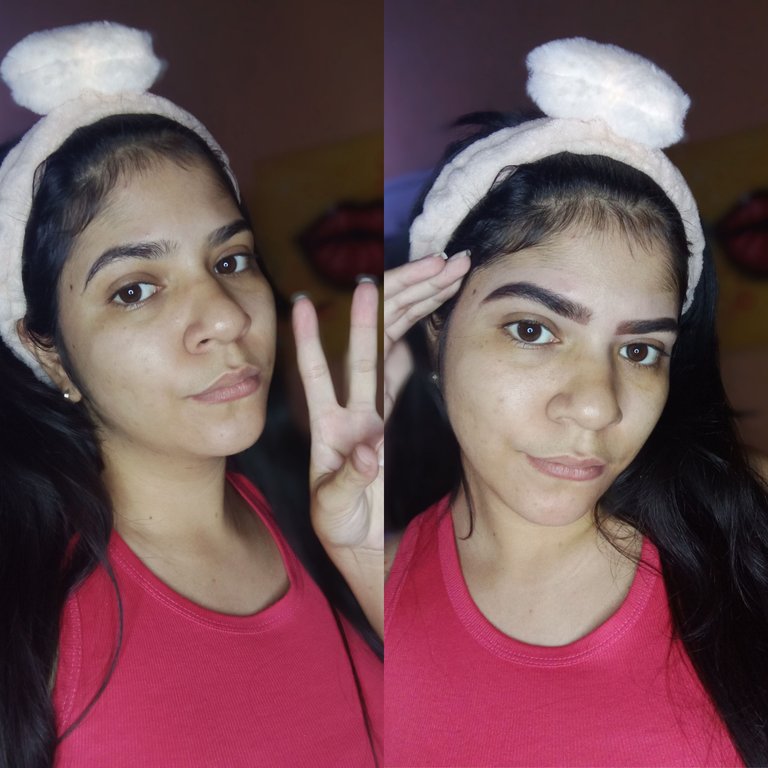
Peine mis cejas y con la pomada y un pincel delgado trace una línea debajo de mis cejas y comencé a rellenar los espacios poco a poco con movimientos hacia arriba, luego de esto lo difumine con un cepillo para eliminar el exceso de pomada y equilibrar el tono, limpie los bordes con un hisopo y agua micelar y por último aplique corrector y lo difumine para así definir la forma de las cejas y corregirlas.
I combed my eyebrows and with the pomade and a thin brush I drew a line under my eyebrows and started to fill in the spaces little by little with upward movements, then I blended it with a brush to remove the excess pomade and balance the tone, I cleaned the edges with a swab and micellar water and finally I applied concealer and blended it to define the shape of the eyebrows and correct them.
Tercer paso / Third step:
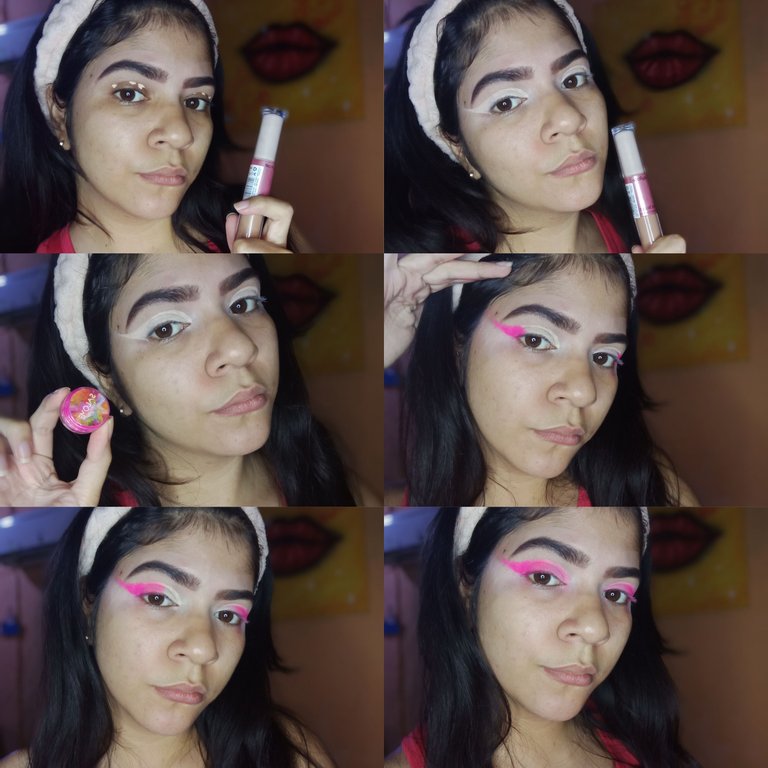
Aplique pequeños puntos de corrector en mis párpados y lo difumine, luego tome una brocha plana y corrector y cree una forma de cat eye completa y lo rellene con el corrector.
I applied small dots of concealer on my eyelids and smudged it out, then took a flat brush and concealer and created a full cat eye shape and filled it in with the concealer.
Luego tome pigmento fucsia y con un pincel lo aplique al final de la forma del cat eye hasta el final de la cuenca de mi ojo, luego tome un tono de fucsia más claro y lo aplique en el medio de ojo, y al principio del ojo aplique una sombra rosa muy suave y clara, creando una transición de colores.
Then I took fuchsia pigment and with a brush I applied it at the end of the cat eye shape to the end of my eye socket, then I took a lighter shade of fuchsia and applied it in the middle of the eye, and at the beginning of the eye I applied a very soft and light pink shadow, creating a transition of colors.
Cuarto paso / Fourth step:
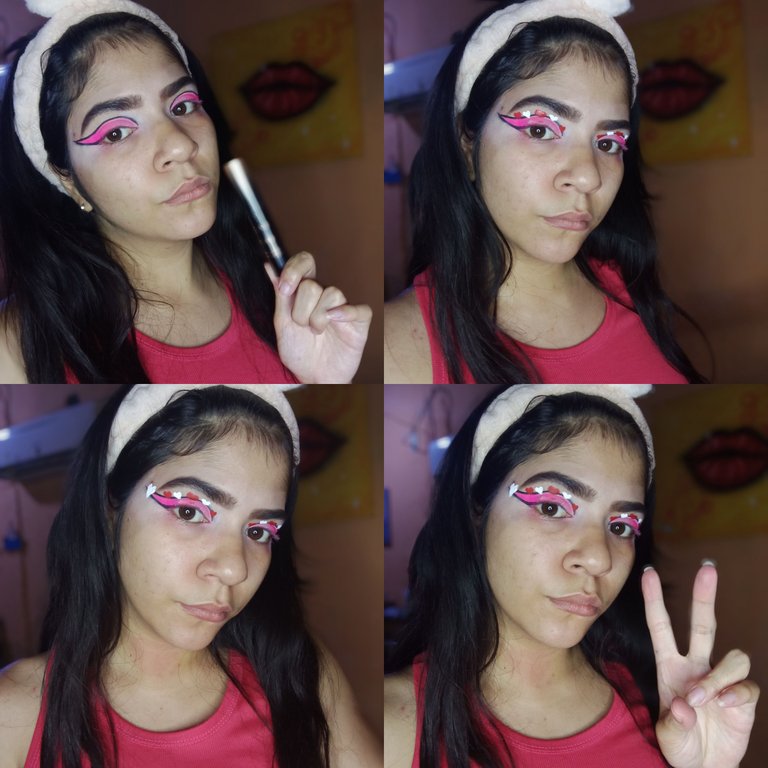
Luego de terminar con las sombras tome el delineador liquido y remarque la forma del cat eye completo con un delineado delgado, luego de esto tome pintura roja y blanca y poco a poco comencé a dibujar con un pincel los corazones justo encima del delineado de la parte superior, intercambiando los colores: rojo y blanco, los rellene y los remarque para que se notarán más, al final del delineado dibuje un corazón más grande en color blanco y lo rellene.
After finishing with the shadows I took the liquid eyeliner and outlined the shape of the whole cat eye with a thin outline, after this I took red and white paint and little by little I started to draw with a brush the hearts just above the outline of the upper part, exchanging the colors: red and white, I filled them and outlined them so they would be more noticeable, at the end of the outline I drew a bigger heart in white color and filled it.
Quinto paso / Fifth step:
Aplique pequeños puntos de base en mi rostro y lo esparcí con mi beauty blender, luego aplique corrector debajo de mis ojos y lo difumine, luego de esto aplique contorno justo debajo de mis pomulos siguiendo la línea de mis orejas y lo difumine agregando más bronzer para destacarlo más.
I applied small dots of foundation on my face and spread it with my beauty blender, then I applied concealer under my eyes and blended it, after that I applied contour just under my cheeks following the line of my ears and blended it adding more bronzer to highlight it more.
Luego de esto sellé todo con polvo compacto, agregue brillo labial y luego aplique rubor e iluminador en mis pomulos ¡Y listo! Maquillaje terminado.
After that I sealed everything with pressed powder, added lip gloss and then applied blush and highlighter on my cheeks and that was it! Makeup finished.
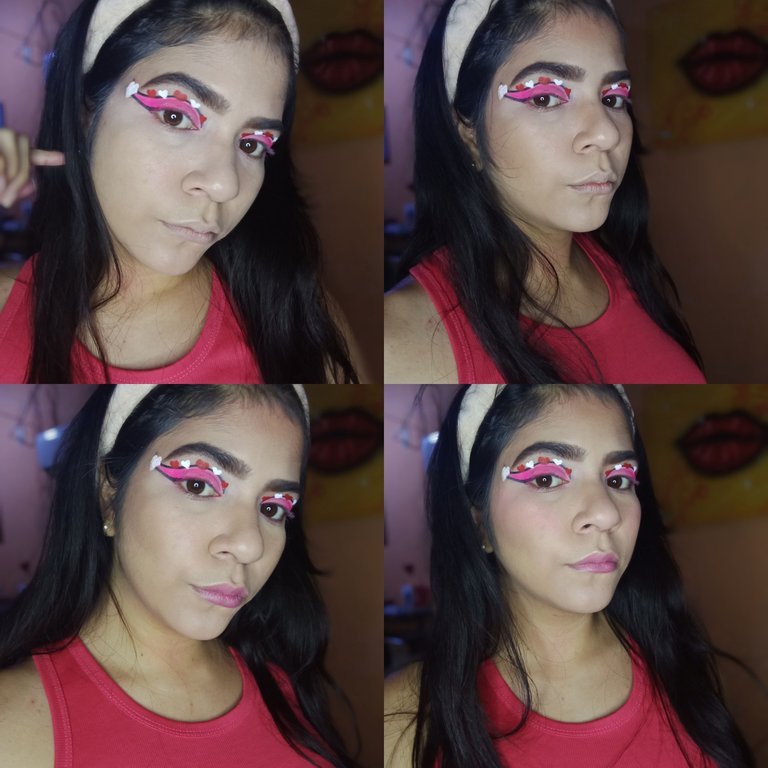
El resultado / The result:
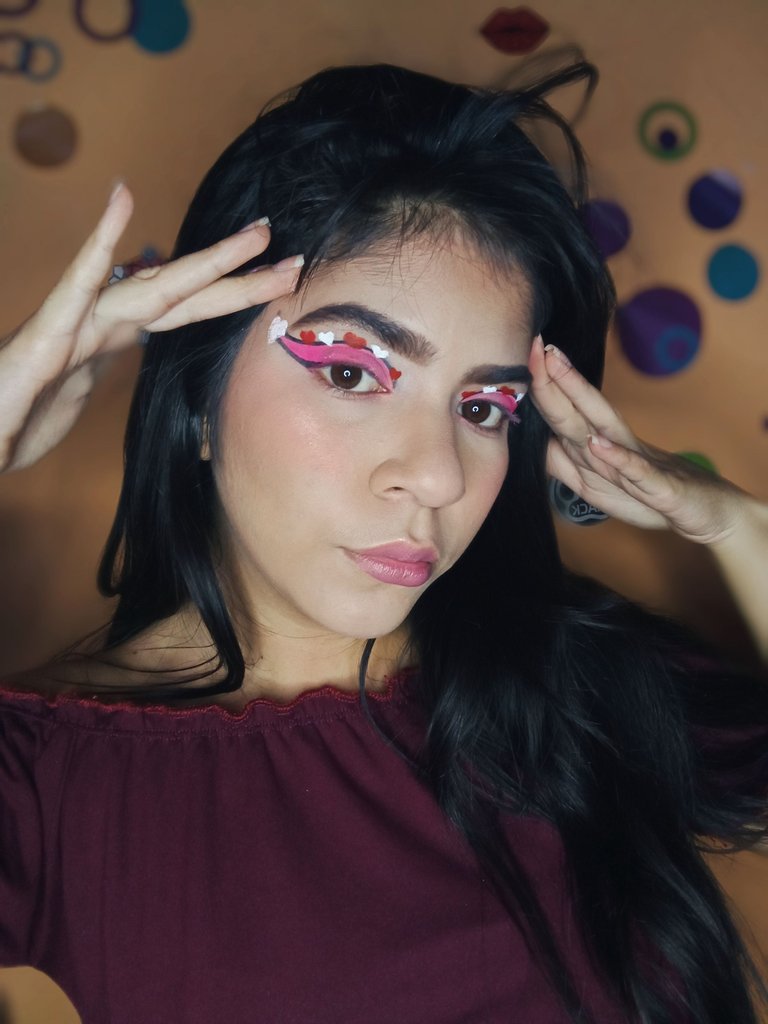
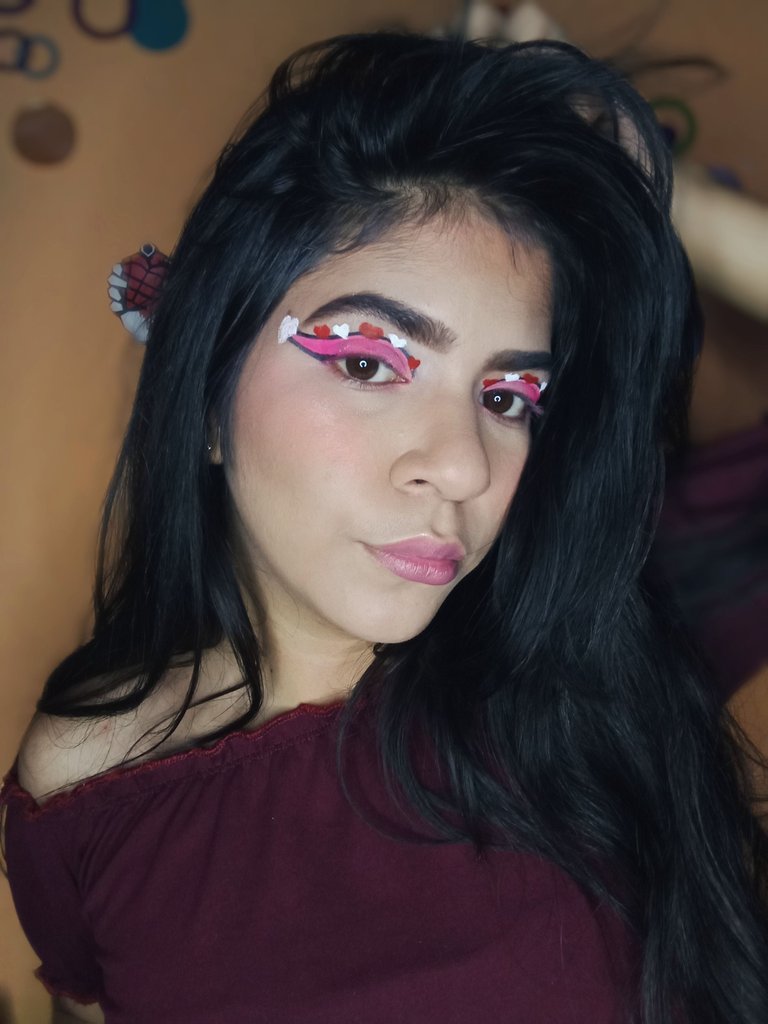
¡Espero que les haya gustado mi post! La verdad amo este tipo de maquillajes en tonos rosas y con muchos corazones o detalles bonitos, últimamente me he concentrado a hacerlos de este tipo porque me encantan ¡Nos leemos pronto! XOXO.
I hope you liked my post! The truth is I love this kind of makeup in pink tones and with lots of hearts or pretty details, lately I've been concentrating on doing this kind of makeup because I love it. See you soon! XOXO.
Text translated with: DeepL.
All photos of the procedure and results belong to me.