💙 Hola bellezas 💙
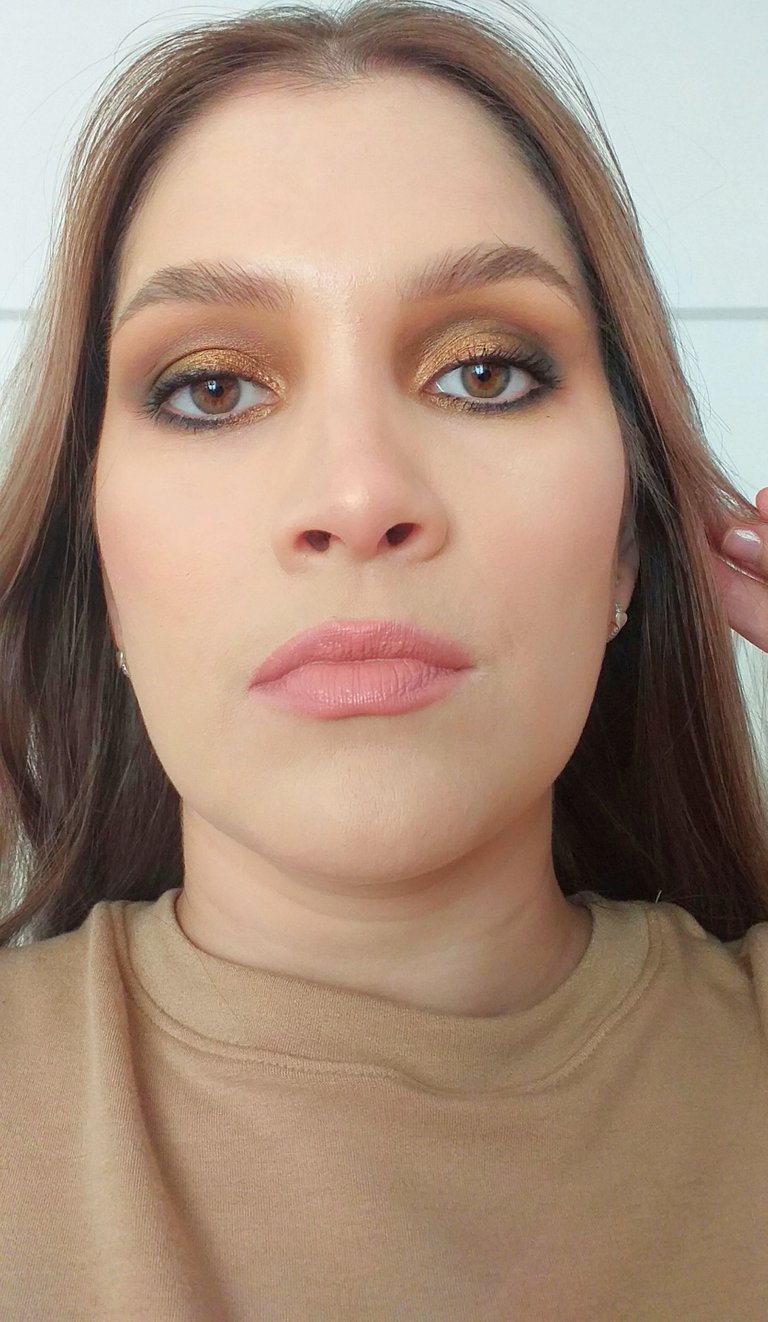
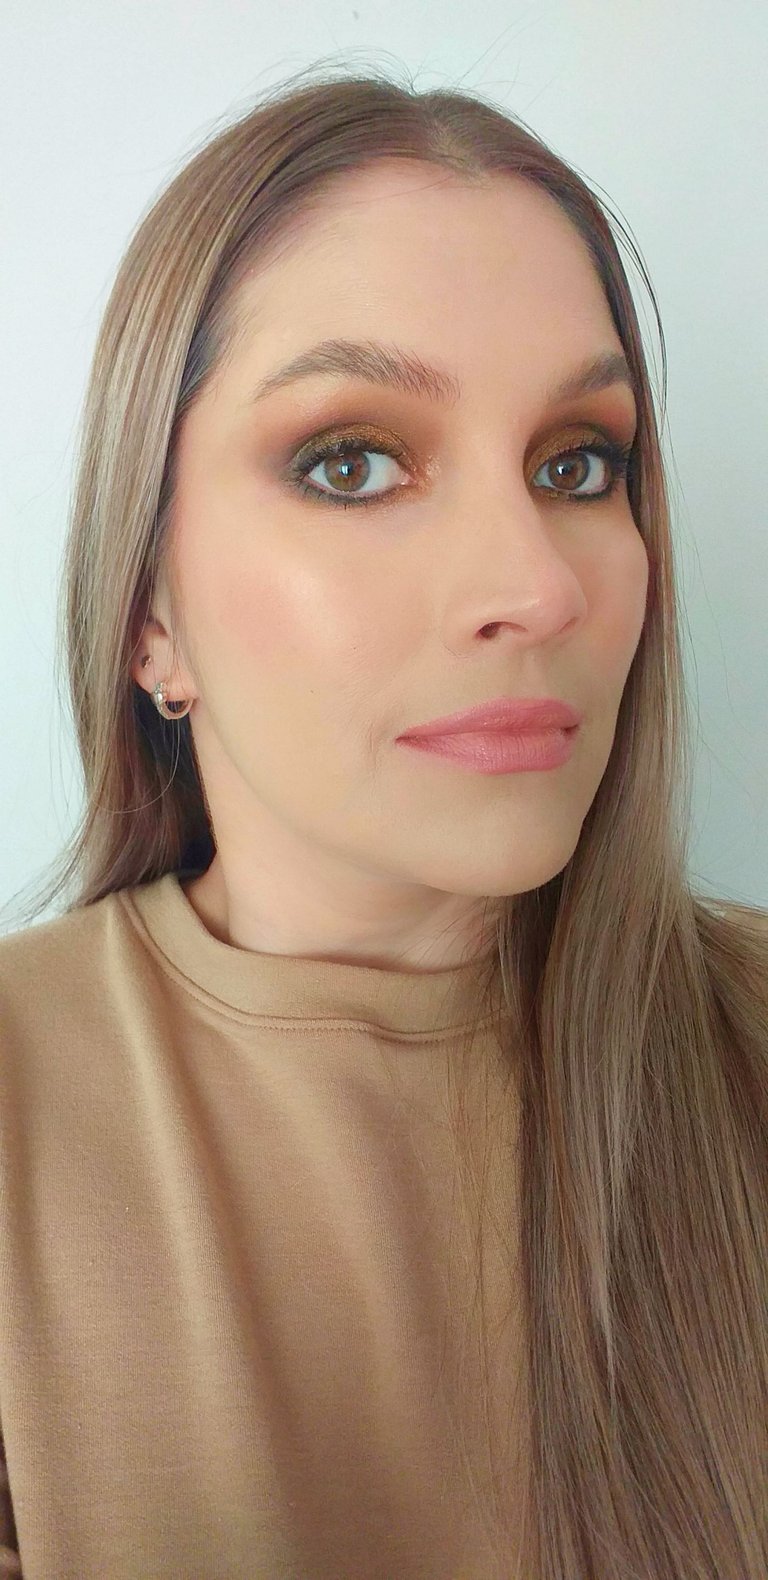
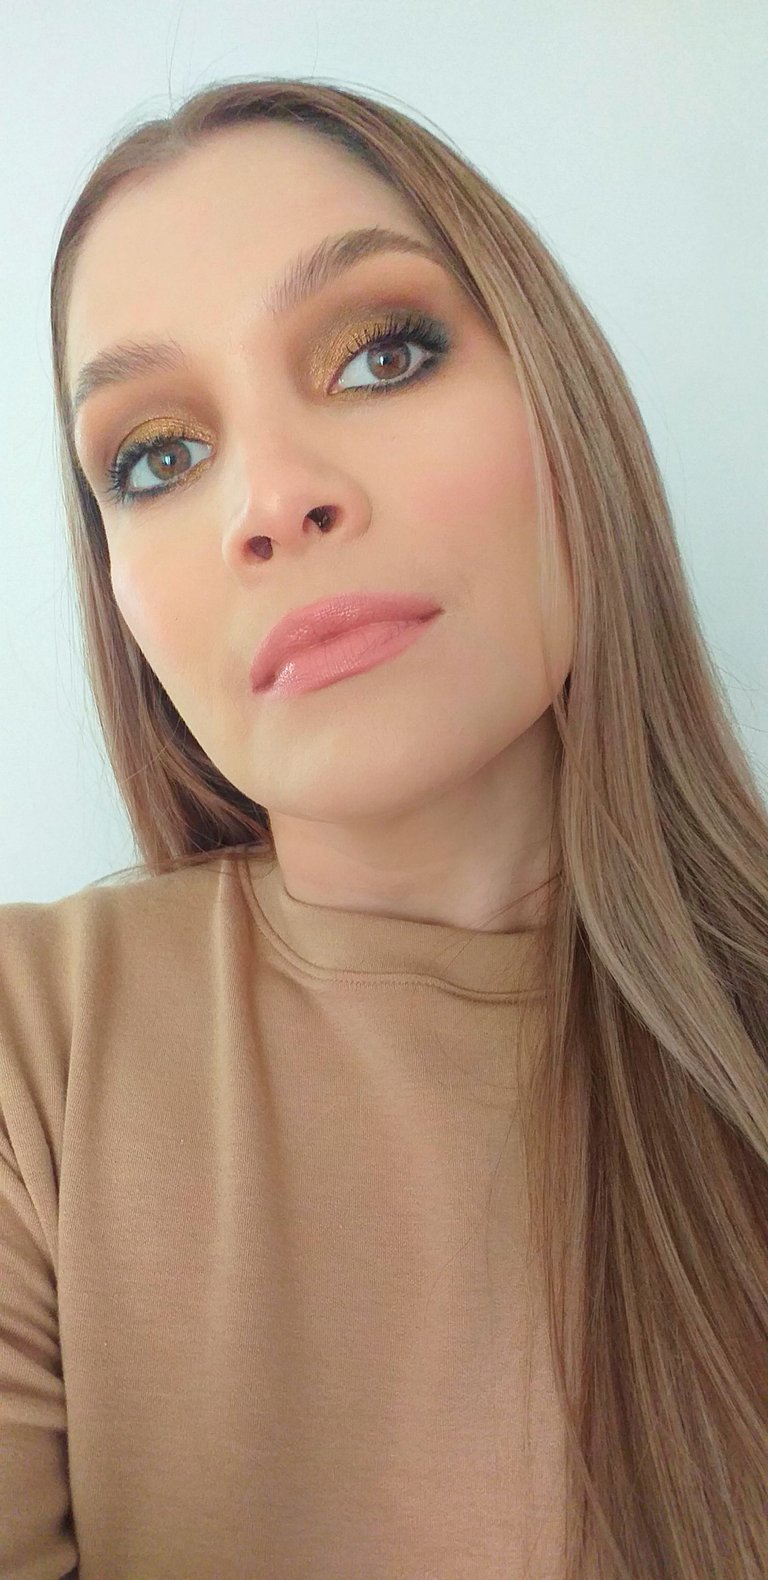
Hermosuras de la comunidad de belleza, hoy quiero compartirles el paso a paso para la elaboración de este smokey eyes un hermoso look para lucir en una ocasión espacial, cena romántica o evento, es un look que nunca pasa de moda porque para se considera atemporal porque además le quede muy bien a todo el mundo, además existen miles de formas de hacerlo y además puedes jugar con las distintas combinaciones de colores.
Beautiful of the beauty community, today I want to share with you the step by step for the elaboration of this smokey eyes a beautiful look to wear in a special occasion, romantic dinner or event, it is a look that never goes out of fashion because it is considered timeless because it also looks great on everyone, there are thousands of ways to do it and you can play with different color combinations.
Una vez limpia y preparada mi carita, defino mis cejas con pomada para rellenar los espacios donde me faltan pelitos, preparo mi parpado con correcto para luego pasar de lleno al parpado, en esta oportunidad voy a comenzar a construir desde el color mas oscuro hasta el mas claro, así que tomamos delineador en gel y posicionamos en el parpado móvil sin ir muy arriba porque vamos a romper los bordes para difuminar e integrar los próximos colores.
Once my face is clean and prepared, I define my eyebrows with pomade to fill in the spaces where I am missing hairs, I prepare my eyelid with the correct one to then move on to the eyelid, this time I will start building from the darkest to the lightest color, so we take gel eyeliner and position it on the mobile eyelid without going too high because we will break the edges to blur and integrate the next colors.
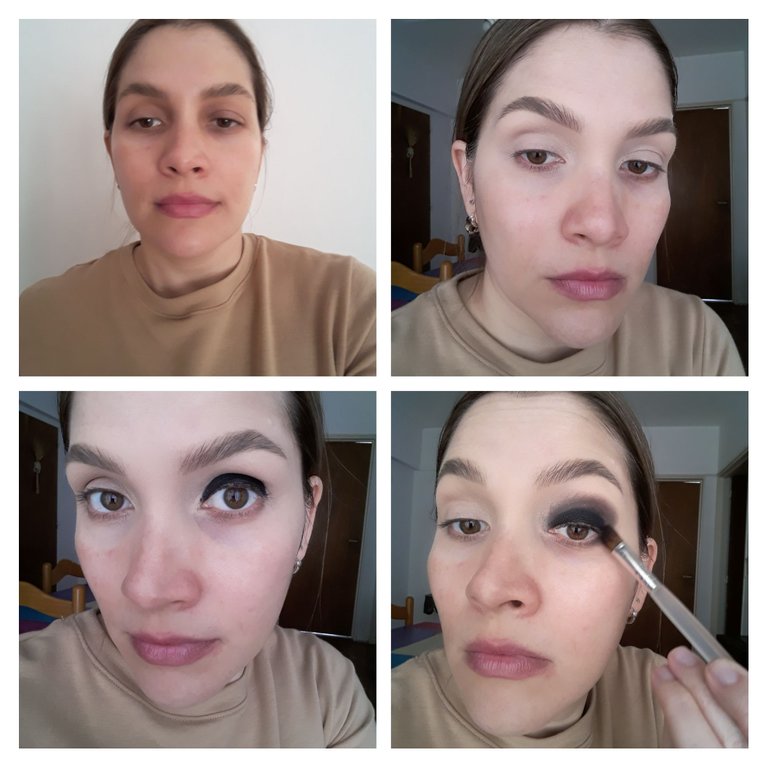
Vamos a construir nuestro smokey eyes con tres colores porque no tenemos un parpado amplio así que tomamos un color café para incorporar entre la cuenca y el parpado móvil, luego tomamos un color un poco mas claro en la misma gama para difuminar el borde de nuestro esfumado.
We are going to build our smokey eyes with three colors because we don't have a wide eyelid so we take a brown color to incorporate between the socket and the mobile eyelid, then we take a slightly lighter color in the same range to blend the edge of our smokey eyes.
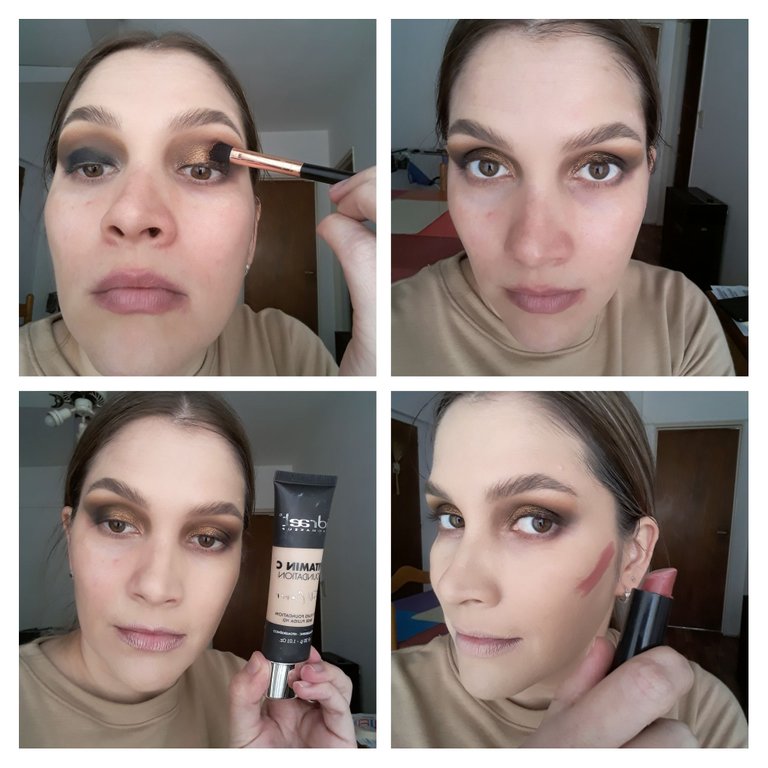
Para abrir la mirada coloco un poco de zona satinada desde el inicio de lagrimal hasta la mitad del parpado y difuminamos para que no se vea una línea marcada, luego pasamos al rostro con mi base favorita del momento, además estoy amando descubrir la versatilidad de los productos y estoy encantada con el resultado de los labiales cremosos para hacer contornos y también funcionan como rubor.
To open the look I place a little bit of satin area from the beginning of the eyelid to the middle of the eyelid and blend so that it does not look a marked line, then we move to the face with my favorite foundation of the moment, I am also loving to discover the versatility of the products and I am delighted with the result of the creamy lipsticks to make contours and also work as a blush.
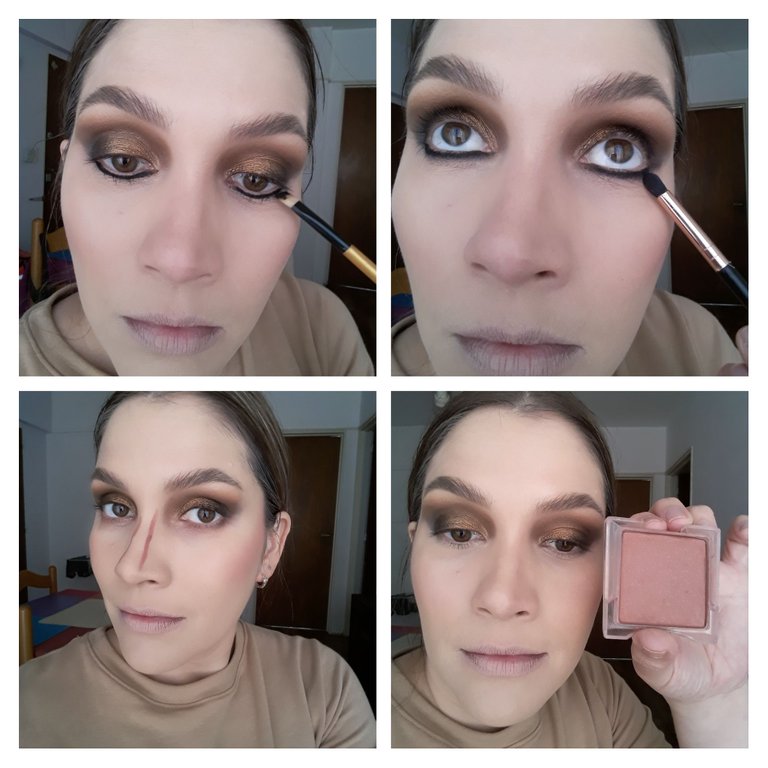
Vamos a replicar lo que hicimos en el parpado en la línea inferior de pestañas, tomamos el delineador y trazamos una línea muy fina, difuminamos e incorporamos el tono café en los bordes y en la parte mas externa el tono mas claro, contorneo mi nariz y me gusta sellar el blush con un poco de producto en polvo para mayor durabilidad.
We are going to replicate what we did on the eyelid on the lower lash line, we take the eyeliner and draw a very thin line, smudge and incorporate the brown tone on the edges and on the outermost part the lighter tone, I outline my nose and I like to seal the blush with a little powder product for durability.
Me emocione y no tome mas fotos del paso a paso pero finalice con una bruma hidratante que deja mi piel linda y jugosa, además que seca el efecto cartón y te hace lucir mas natural, agregamos mascara de pestañas y labial nude para la sesión de fotos bien potra y divina.
I got excited and didn't take more pictures of the step by step but I finished with a moisturizing mist that leaves my skin nice and juicy, it also dries the cardboard effect and makes you look more natural, we added mascara and nude lipstick for the photo shoot very pretty and divine.
Congratulations @jonhanna91! You have completed the following achievement on the Hive blockchain and have been rewarded with new badge(s):
Your next target is to reach 50 posts.
You can view your badges on your board and compare yourself to others in the Ranking
If you no longer want to receive notifications, reply to this comment with the word
STOPTo support your work, I also upvoted your post!
Check out the last post from @hivebuzz:
Support the HiveBuzz project. Vote for our proposal!