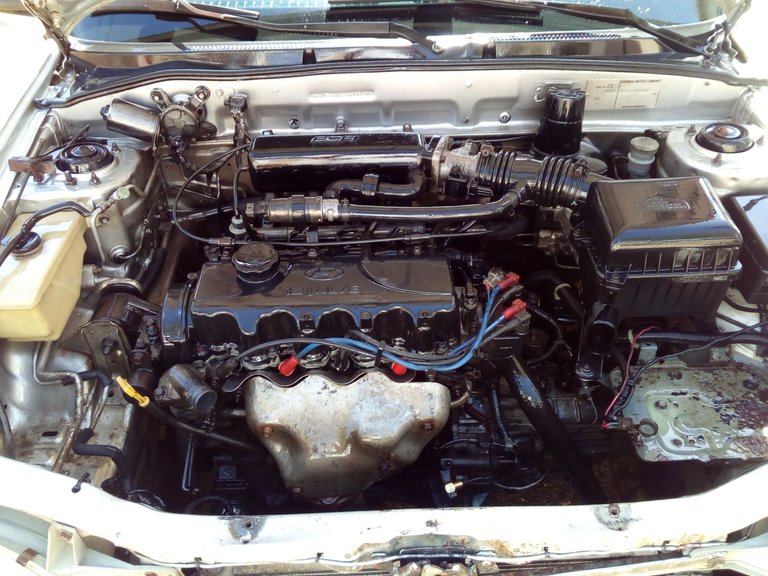
-> Abiertamente expreso el contento que tengo ahora en mi edad adulta al haber tomado la iniciativa de reconstruir un vehículo que ha formado parte de la familia durante muchos años, en ese entonces me lleno de emociones, jamás me dejo mal, siempre llego a casa sin general dificultades pero por diferentes situaciones precarias se dejo disfuncional en el jardín de mi casa, tanto trote y trabajo duro dejaron sin vida su motor. Generando un terrible consumo de lubricante tras 745.500Km de recorrido, siendo en su totalidad un motor con cilindrada original.
A su debido tiempo y con todo el entusiasmo del mundo reuní todo el capital posible para llevar acabo mi meta de reconstruir un carro que desde niño he deseado. Personalmente tome la noción de empezar desarmando cada componente para tener una idea de los daños a mi proyecto.
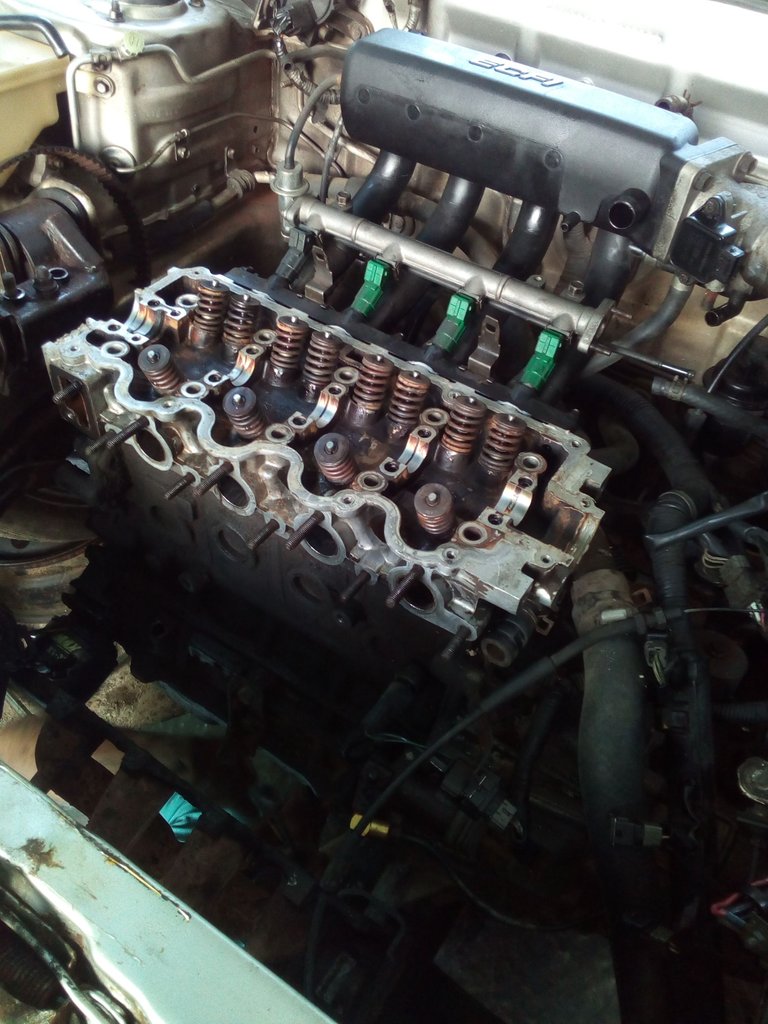
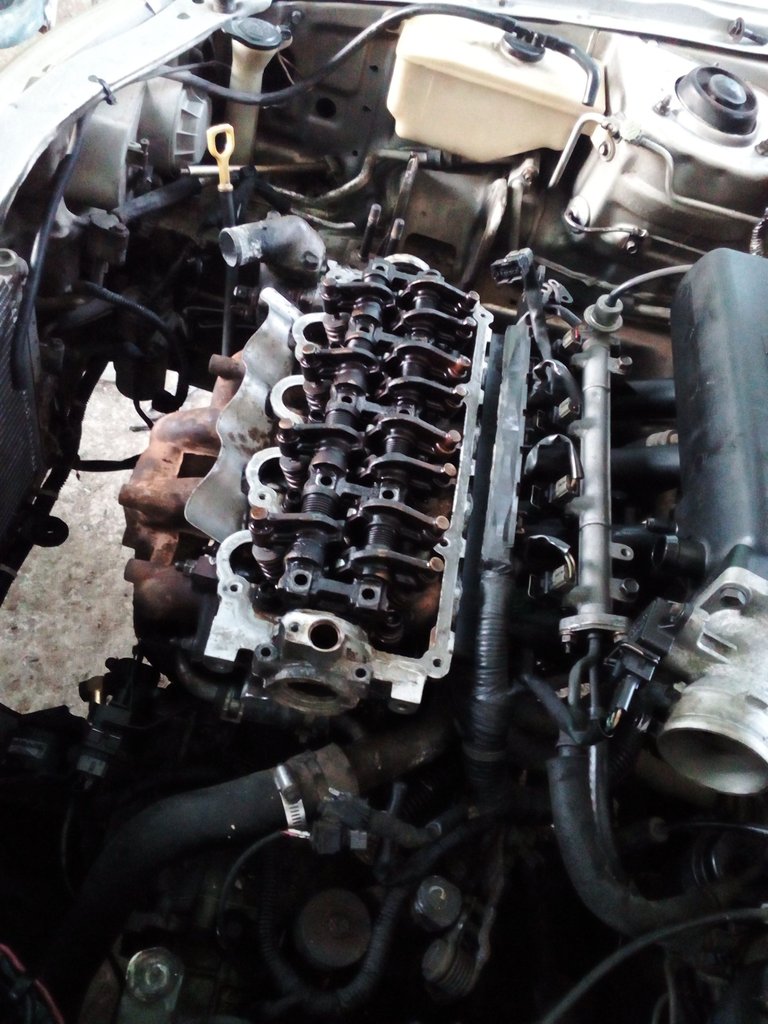
Inicialmente retire el tapa válvulas, para encontrarme en una terrible condición con respecto a su cámara de combustión, dándome a lucir que disponía de válvulas desgastadas y con anterioridad enderezadas, ya que en algún momento este vehículo rompió el tensor de correa generando así que doblara al menos 6 válvulas entre admisión y escape. Ya en este punto sabia a los que me enfrentaba, me dispuse a comprar válvulas, gomas y obviamente sus respectivas empacaduras
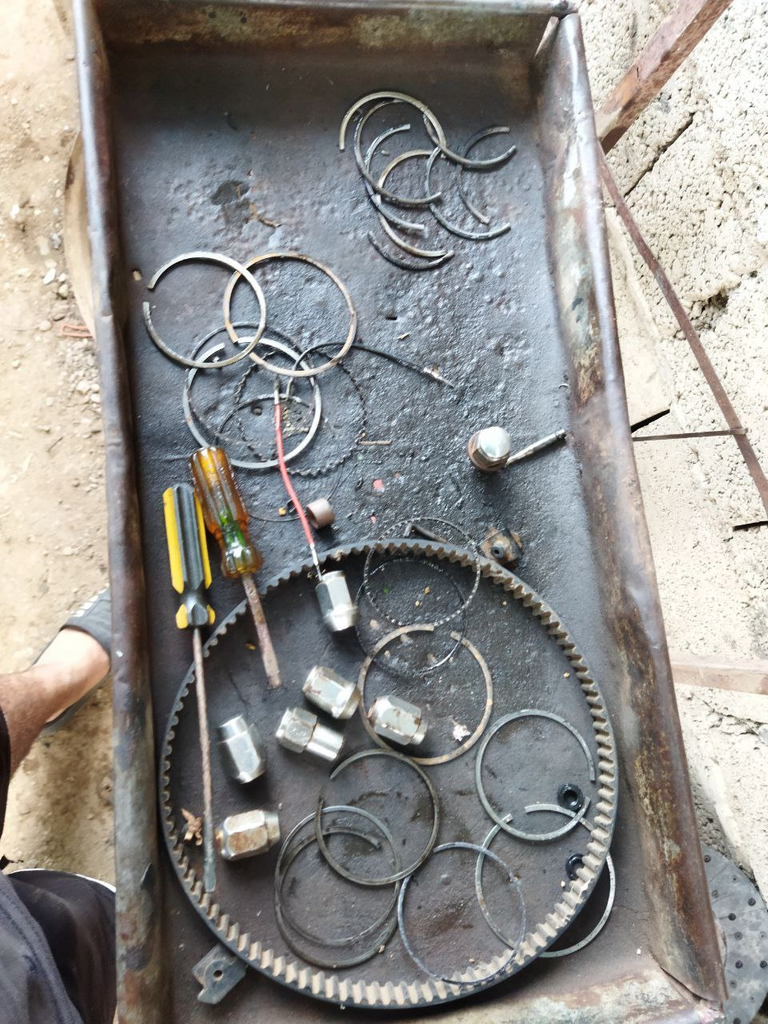
Luego pasamos a sus cilindros, obviamente desgastados a gravedad con anillos de compresión rotos, razón obvia por la cual le costaba encender. Entonces me vi en la necesidad de ir a una rectificadora para medir la condición de mi bloque y mi cigüeñal. Como era de esperarse la cilindrada paso a otra medida de pistón y anillo, una medida muy por debajo de la esperada quedando a 0.20. Es increíble lo tardado y costoso que puede ser reparar un motor tan pequeño de 1.3L pero valía la pena, ese pequeño motor me empujo a velocidades que otras personas considerarían imposible por la poca cilindrada del motor pero a su vez contaba con una caja manual de 5 velocidades diseñada especialmente para el motor 1.5L de Hyundai, definitivamente el mejor carrito que se pudiese tener.
Tras tener los pistones, anillos y conchas de bielas. Me puse a armar el motor con ayuda de un amigo de mecánica, que me guio en cada momento a la hora de poner todo en su lugar, inicialmente ubicamos cada pistón en su biela con su respectivas conchas, para luego meterlos directamente por el bloque para posicionarlos en el cigüeñal estando en su tiempo de sincronización.
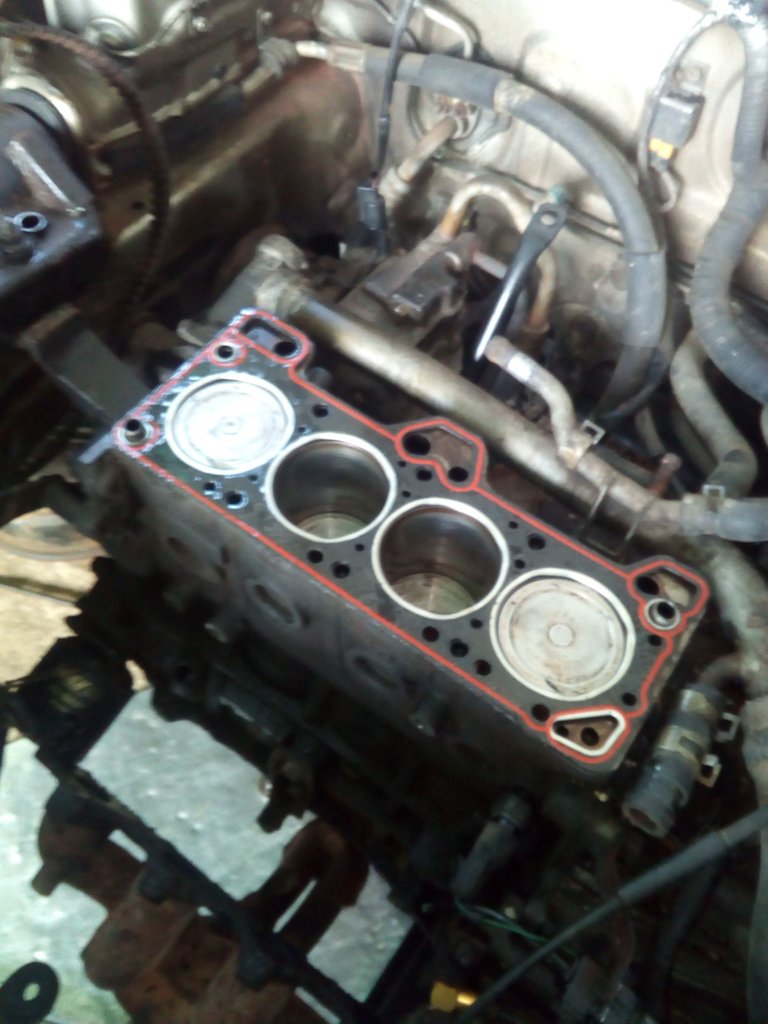
Ahora luego de haber colocado sus pistones a medida, seguimos armando la cámara, posicionando válvulas en sus guías, en total eran 12 válvulas ubicadas cada una con gomas, todo totalmente original. Como siguiente coordinamos los taquetes, ya que un mal posicionamiento de ellos pueden tener como consecuencia el doblar alguna válvula. Para luego hacer el terqueo correcto de los tornillos entre cámara y bloque para asentar la empacadura.
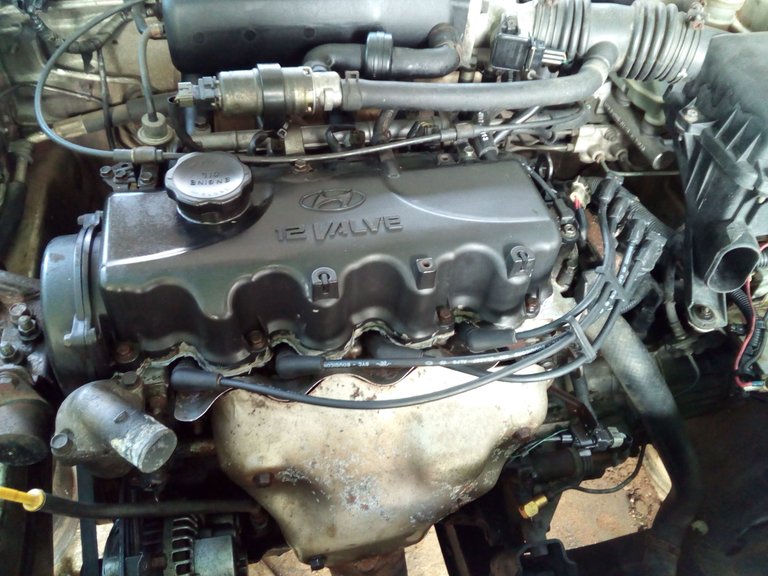
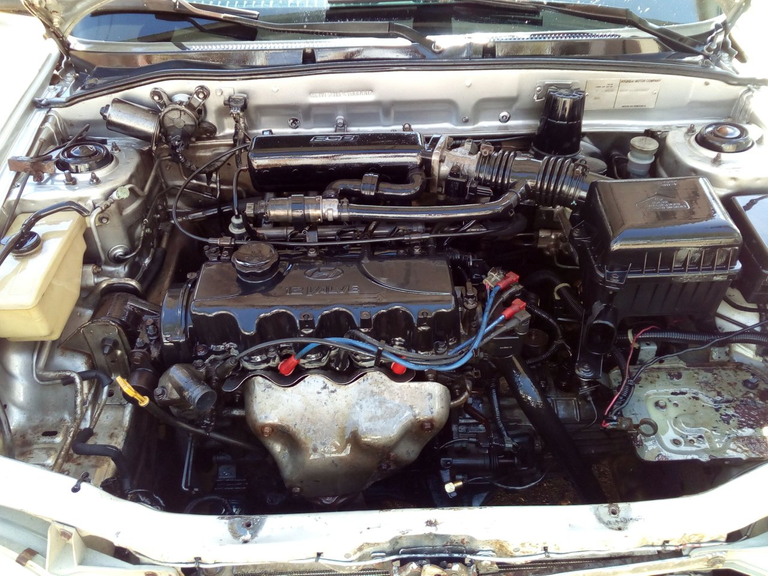
Ya finalizando instalamos el tapa válvulas, para luego colocar bujías nuevas NGK punta de platino y cables nuevos previendo cualquier posible problema, igualmente haciendo limpieza de sus inyectores, cambiando micro filtros e instalando una bomba de gasolina nueva de 120Psi.
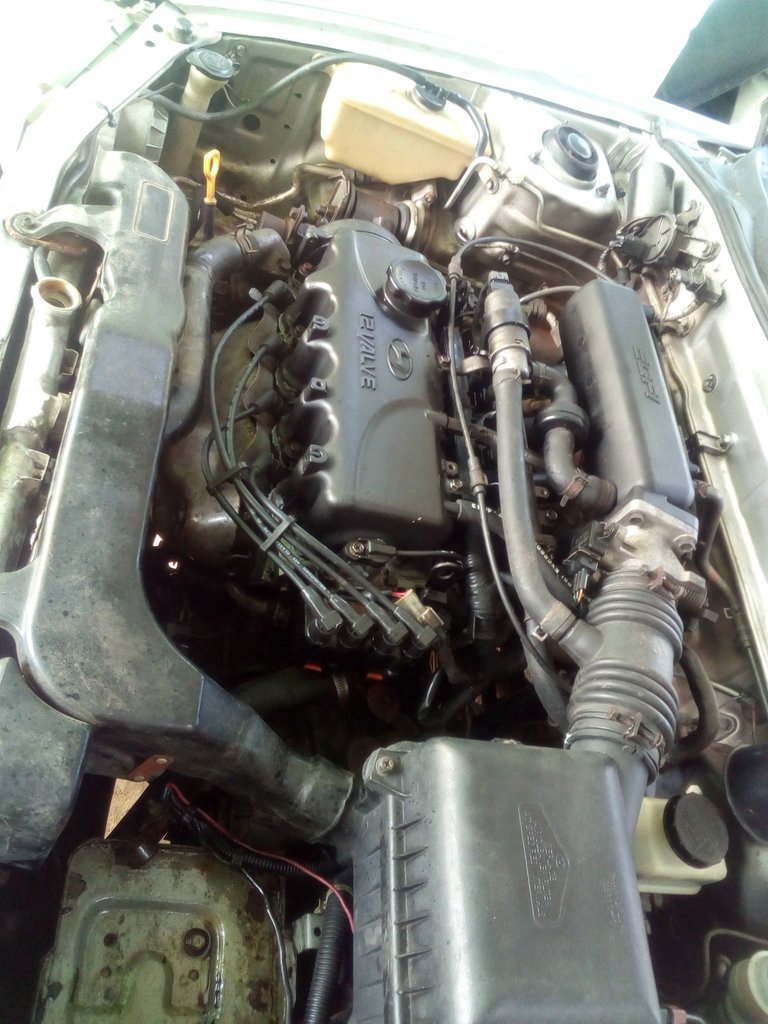
Posteriormente instalamos los componentes necesarios para llegar al encendido del motor, instalando radiador, electro ventiladores, purgando su bomba de agua y bueno ya al final esperando que secara por completo el silicón. Entonces ya para concluir le echamos el aceite necesario, 4 litros de lubricante Castrol 15/40 Semi sintético.
Ya era hora de encender el vehículo, basto solo dar arranque por unos cuantos segundos para escuchar el hermoso ronroneo de mi proyecto encendido ¡era una bestia! Me dispuse a darle el calentamiento previo, para que los anillos se asentaran y el lubricante hiciera el recorrido necesario.
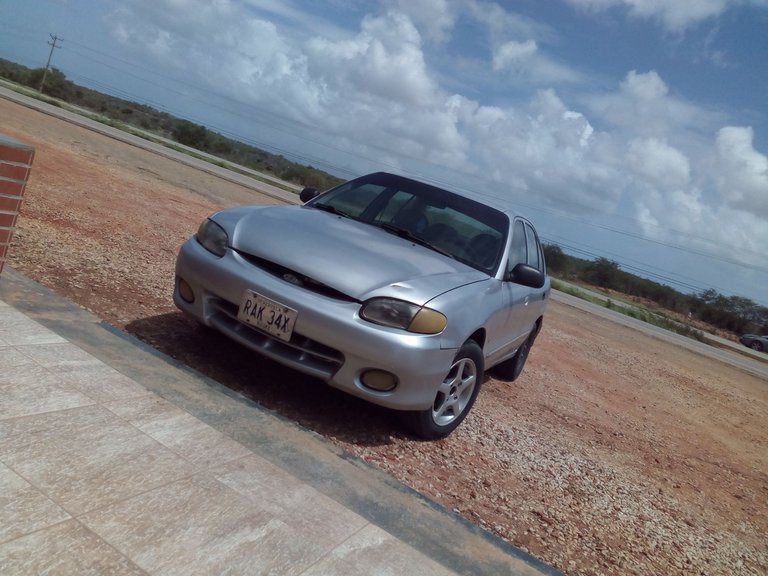
Imaginen mi felicidad en el momento que me monte para darle una vuelta, la fuerza que tenia ese motorcito, un desplazamiento increíblemente suave, me me trajo recuerdo de mi adolescencia de la primera vez que lo maneje, ¡simplemente increíble!
Actualmente esta listo para cualquier recorrido, se que no me va a dejar mal parado!
Con esto me despido, Quemamos neumáticos en la próxima publicación, gracias por haber leído.
Versión en Ingles
-> I openly express how happy I am now in my adulthood to have taken the initiative to rebuild a vehicle that has been part of the family for many years, back then it filled me with emotions, it never left me bad, it always arrived home without general difficulties but for different precarious situations it was left dysfunctional in the garden of my house, so much jogging and hard work left its engine lifeless. Generating a terrible consumption of lubricant after 745.500Km of travel, being in its totality an engine with original displacement.
In due time and with all the enthusiasm in the world I gathered all the capital possible to carry out my goal of rebuilding a car that I have wanted since I was a child. I personally took the notion of starting by disassembling each component to get an idea of the damage to my project.
Initially I removed the valve cover, to find myself in a terrible condition with respect to its combustion chamber, giving me to see that it had worn valves and previously straightened, since at some point this vehicle broke the belt tensioner thus generating that it bent at least 6 valves between intake and exhaust. Already at this point I knew what I was facing, I set out to buy valves, rubber and obviously their respective gaskets.
Then we moved on to her cylinders, obviously worn to gravity with broken compression rings, obvious reason why she was having trouble starting. I then found it necessary to go to a grinding machine to measure the condition of my block and crankshaft. As expected, the displacement went to another piston and ring measurement, a measurement far below the expected 0.20. It is incredible how time consuming and expensive it can be to repair such a small 1.3L engine but it was worth it, that little engine pushed me to speeds that other people would consider impossible due to the small displacement of the engine but at the same time I had a 5 speed manual gearbox specially designed for the 1.5L Hyundai engine, definitely the best car you could have.
After I had the pistons, rings and crank shells. I started to assemble the engine with the help of a friend of mechanics, who guided me in every moment to put everything in place, initially we placed each piston in its connecting rod with their respective shells, and then put them directly through the block to position them on the crankshaft being in its synchronization time.
Now after having placed the pistons, we continued assembling the chamber, positioning the valves in their guides, in total there were 12 valves, each one with rubber bands, all totally original. Next we coordinated the plugs, since a bad positioning of them can have as a consequence the bending of any valve. Then we made the correct locking of the screws between chamber and block to seat the gasket.
We installed the valve cover, and then put new spark plugs NGK platinum tip and new wires to prevent any possible problem, also cleaning the injectors, changing micro filters and installing a new fuel pump 120Psi.
Later we installed the necessary components to get to the engine ignition, installing radiator, electro fans, purging the water pump and well and at the end waiting for the silicone to dry completely. Then to conclude we poured the necessary oil, 4 liters of Castrol 15/40 Semi synthetic lubricant.
It was time to start the vehicle, it was enough to start it for a few seconds to hear the beautiful purr of my project ignited, it was a beast! I got ready to give it the previous warm up, so that the rings would settle and the lubricant would do the necessary route.
Imagine my happiness at the moment I got on it to give it a ride, the strength of that little engine, an incredibly smooth ride, it brought back memories of my adolescence of the first time I drove it, simply incredible!
It is now ready for any ride, I know it won't let me down!
With this I say goodbye, we will burn tires in the next publication, thank you for reading.
Congratulations @cjhamana! You have completed the following achievement on the Hive blockchain and have been rewarded with new badge(s):
Your next target is to reach 50 upvotes.
You can view your badges on your board and compare yourself to others in the Ranking
If you no longer want to receive notifications, reply to this comment with the word
STOPCheck out the last post from @hivebuzz:
Support the HiveBuzz project. Vote for our proposal!