--> Buenas buenas, entusiastas del mundo automotor, les voy a presentar como logré prevenir que un Hyundai Accent rompiera la correa de tiempo. Cuya consecuencia es grande, ya que mayormente estos vehículos 4 cilindros vienen con mucha compresión y pistones planos, lo cual genera impacto entre pistón y válvula a la hora de perder la sincronización entre cigüeñal y árbol de levas.
Hay algo que debemos tener muy claro a la hora de tener un vehículo a correa, y es el recorrido de la misma. Normalmente las correas de tiempo originales de las diferentes marcas soportan hasta 40 mil kilómetros máximos de recorrido, como hay otras de marcas alternativas que soportan hasta 60 mil kilómetros. Pero variando entre calidad y precio es que uno escoge, pero a la hora de entender que es lo mejor para ti, es mejor ir por lo de mejor calidad sin importar lo caro que sea, te puede evitar un gran dolor de cabeza.
Una cosa mas a tomar en cuenta es la calidad del tensor, ya que esta pieza es fundamental, ¿Por qué? Porque si la rotación del tensor es rígida, se puede trancar, la rolinera del tensor debe girar fluidamente sin ruidos, ni tropiezos. Si esta se tranca, se puede partir el tensor y como dije anteriormente, se pierde la sincronización, generando el mismo daño a tu motor.
No estar atento al recorrido y pasar del uso limite de la correa o el tensor tiene una posibilidad, simplemente se parten. Al menos en el caso de este Hyundai Accent, en otros vehículos como el Aveo tienden a aflojarse y salirse.
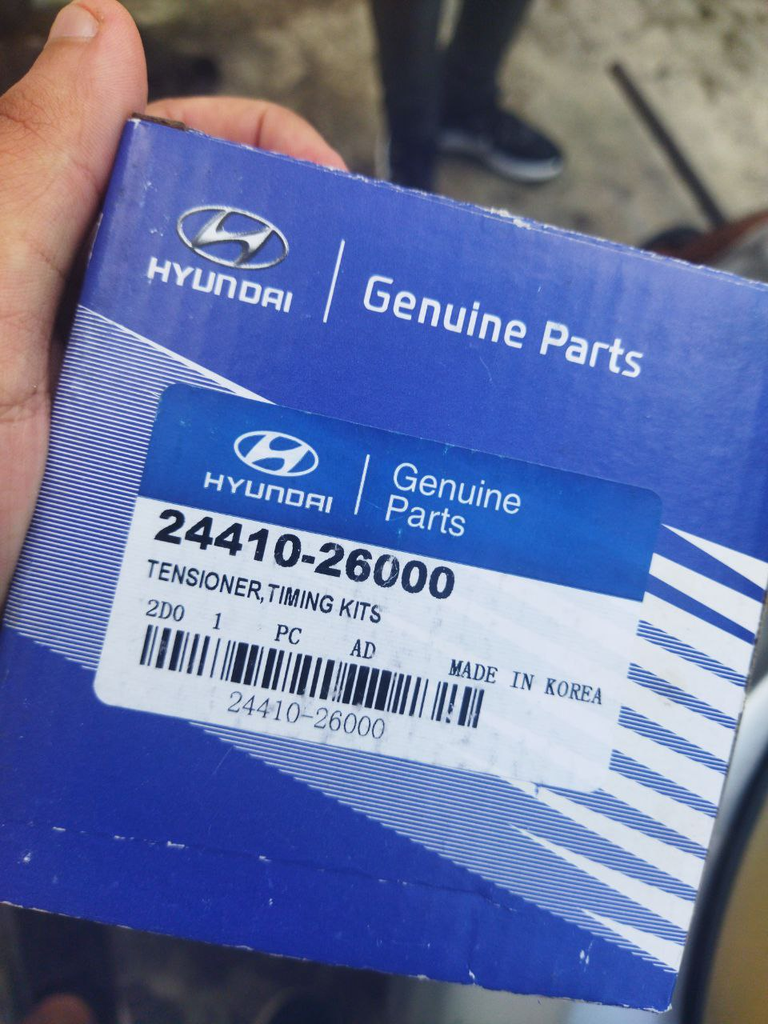
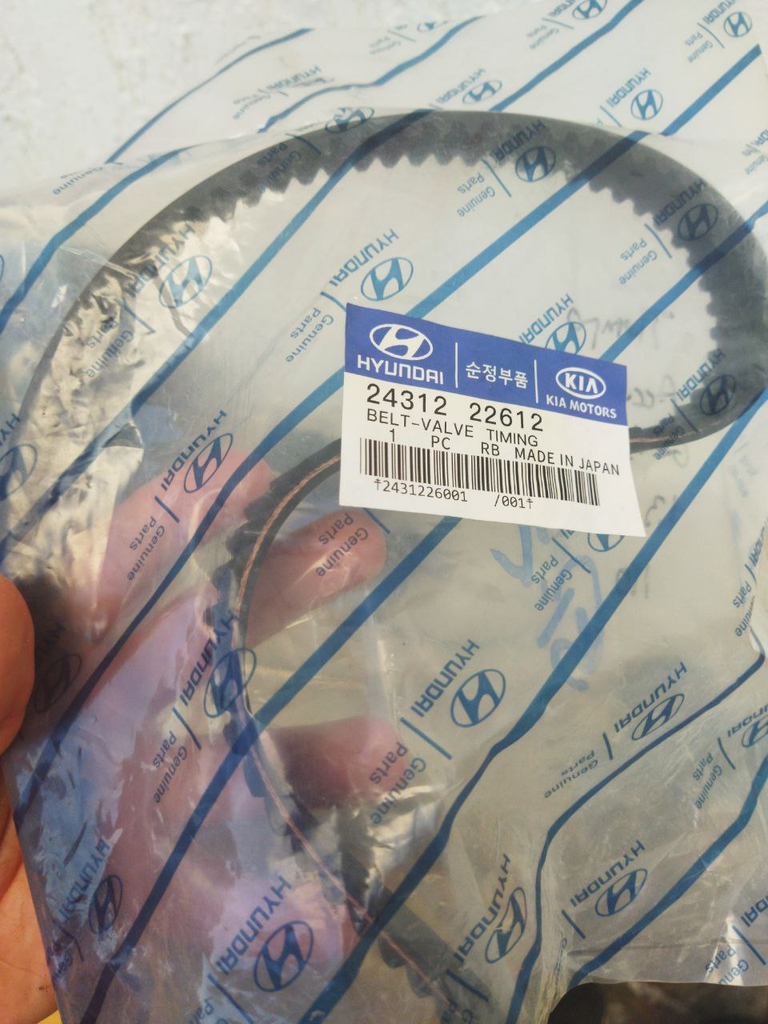
En mi caso disponía de un kit de tiempo original Hyundai, tanto correa como tensor directamente de la carca "MOBIS" que es la marca mayorista de repuestos de la marca. Cuya presentación me participaba hasta 45 mil kilómetros de recorrido garantizado. No fue así, apenas con 20 mil kilómetros de recorrido me empecé a percatar de un ruido de golpeteo en el área de la correa, como si saltara, pero el carro no presentaba falla alguna, se movía perfectamente, pero el ruido era muy estático, al acelerar se perdía pero en mínimo era bastante preocupante. Pues tome la iniciativa de desarmar todo, evitando cualquier daño, simplemente por cautela y verán el desastre con el que me encontré.
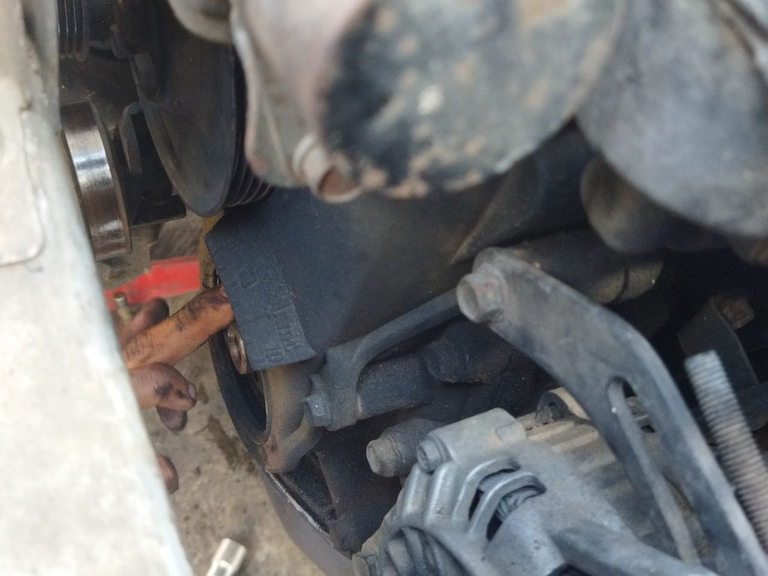
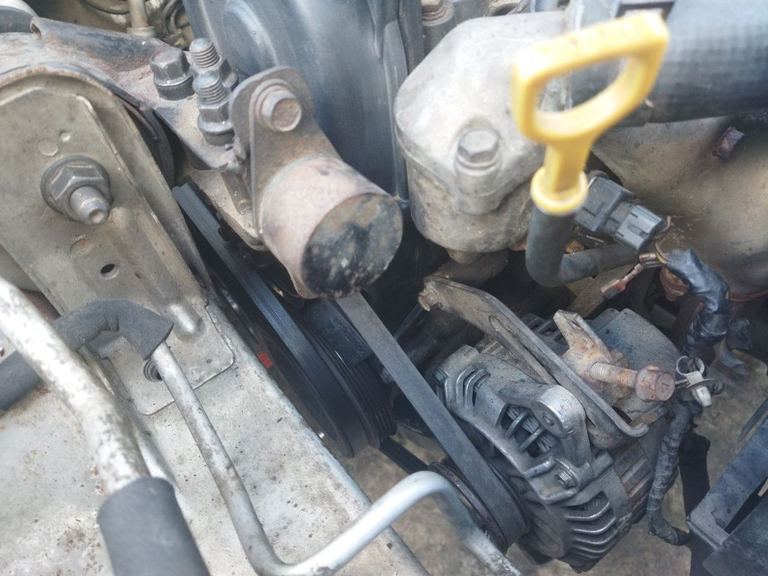
El primer paso es abrirse un camino cómodo para empezar a retirar las piezas. Principalmente levantar el carro del lado de las correas con un gato hidráulico.
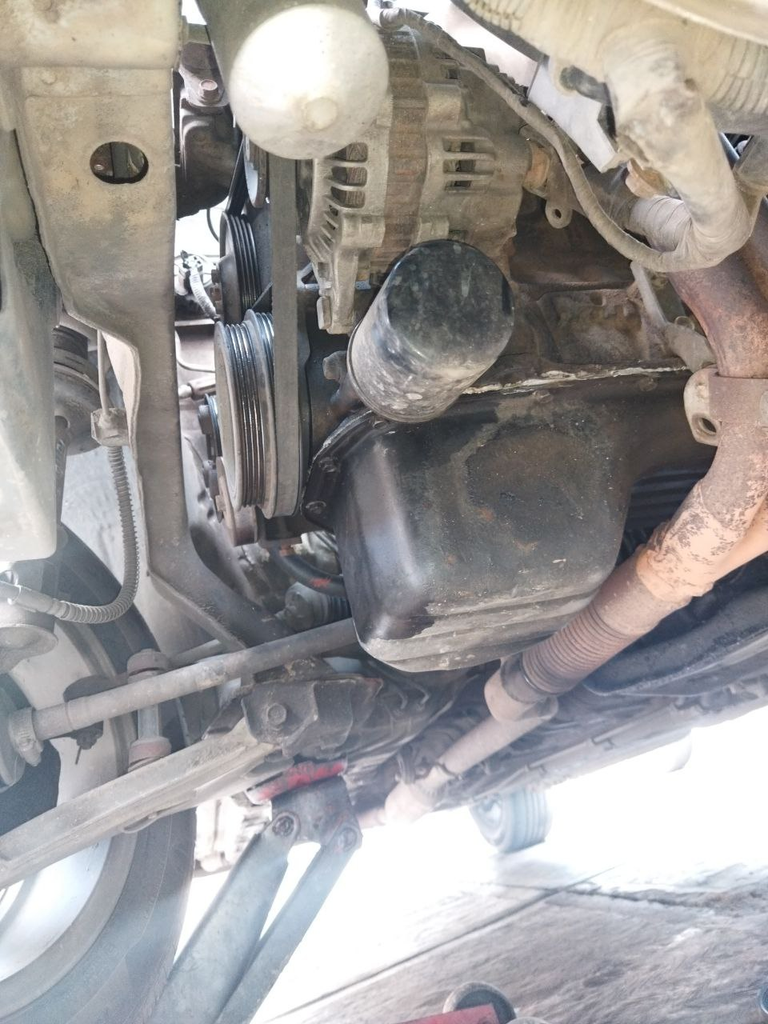
El siguiente paso a realizar fue retirar las correas de accesorios, la del compresor, bomba de agua y la del alternador, primeramente retiramos los soportes del alternador para quitar la tensión de la correa y así poder sacarla. Ya la del compresor, fácilmente retirando la polea ajustada sobre el eje del cigüeñal puede salir.
Ya tenemos el camino libre, podemos empezar a quitar los tapa polvos de la parte superior e inferior. Simplemente soportados por varios tornillos numero 10
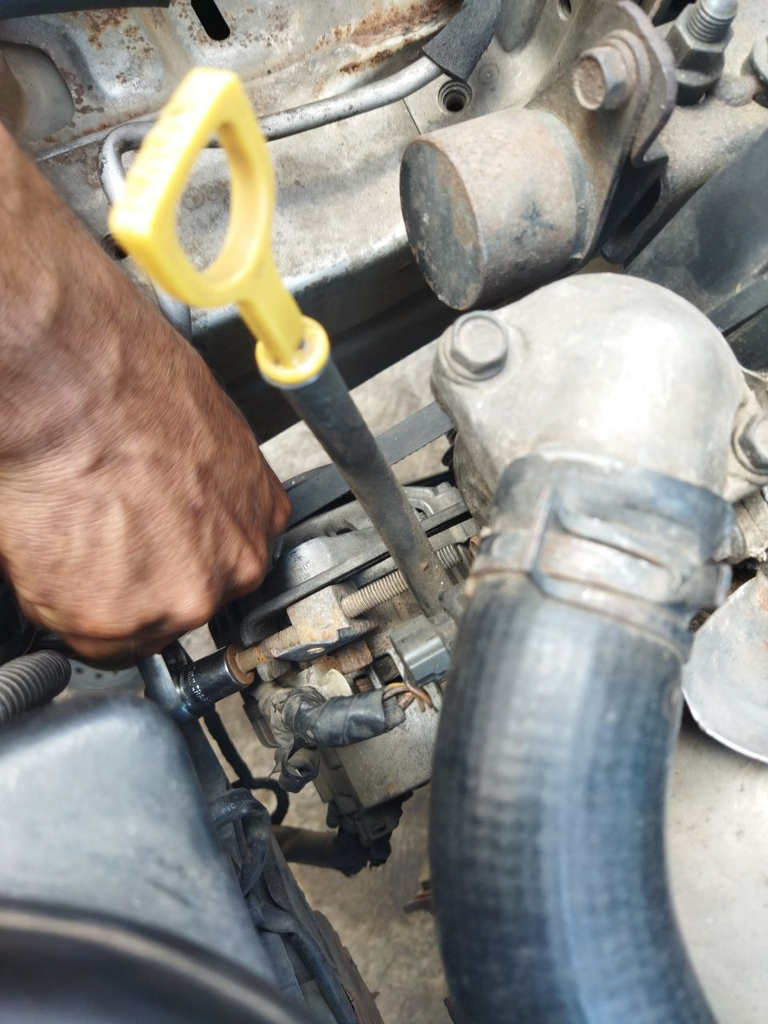
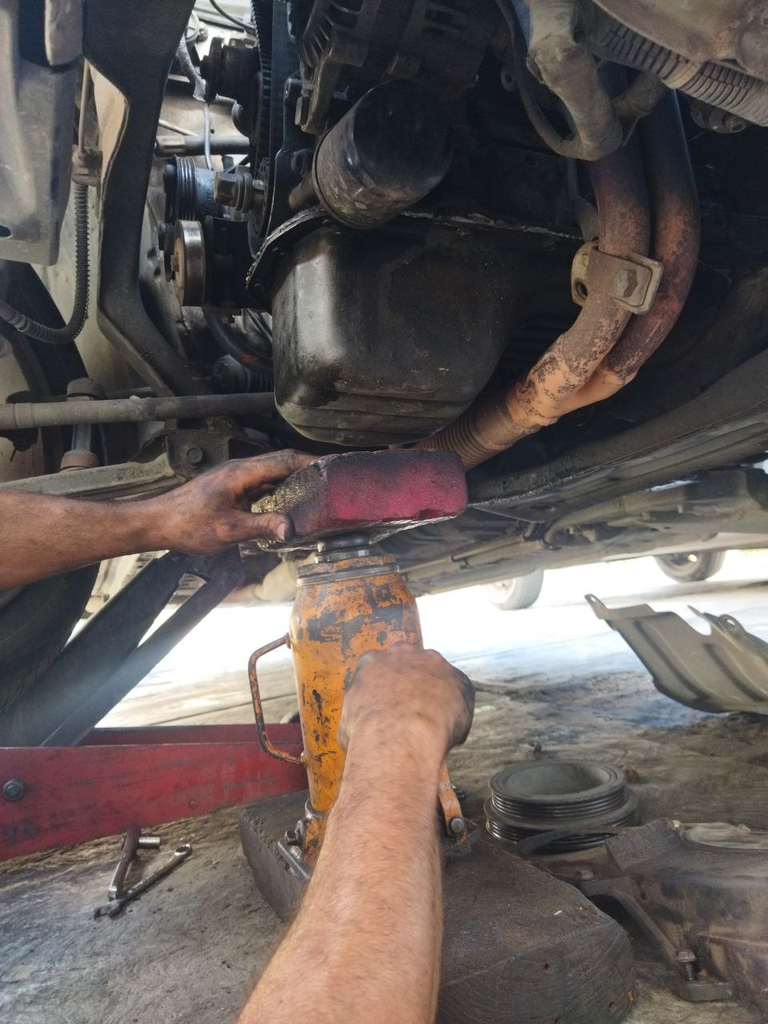
Ahora retiraremos el soporte del motor para poder sacar la correa. Pero debemos ubicar otro gato hidráulico debajo del motor para hacer soporte.
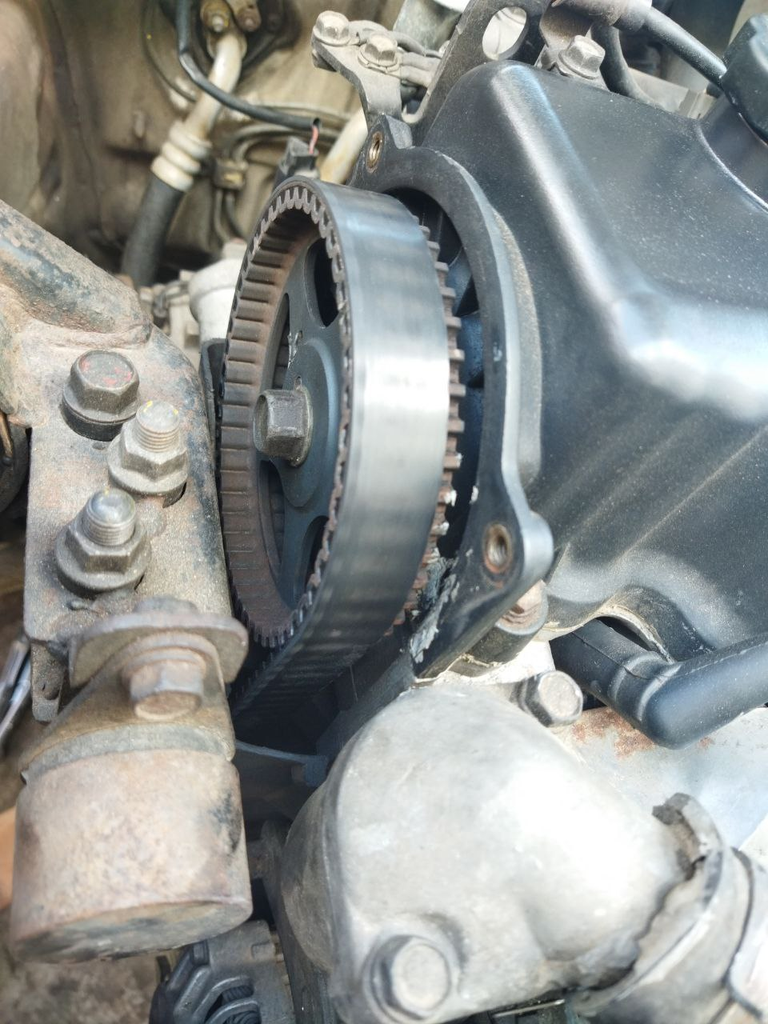
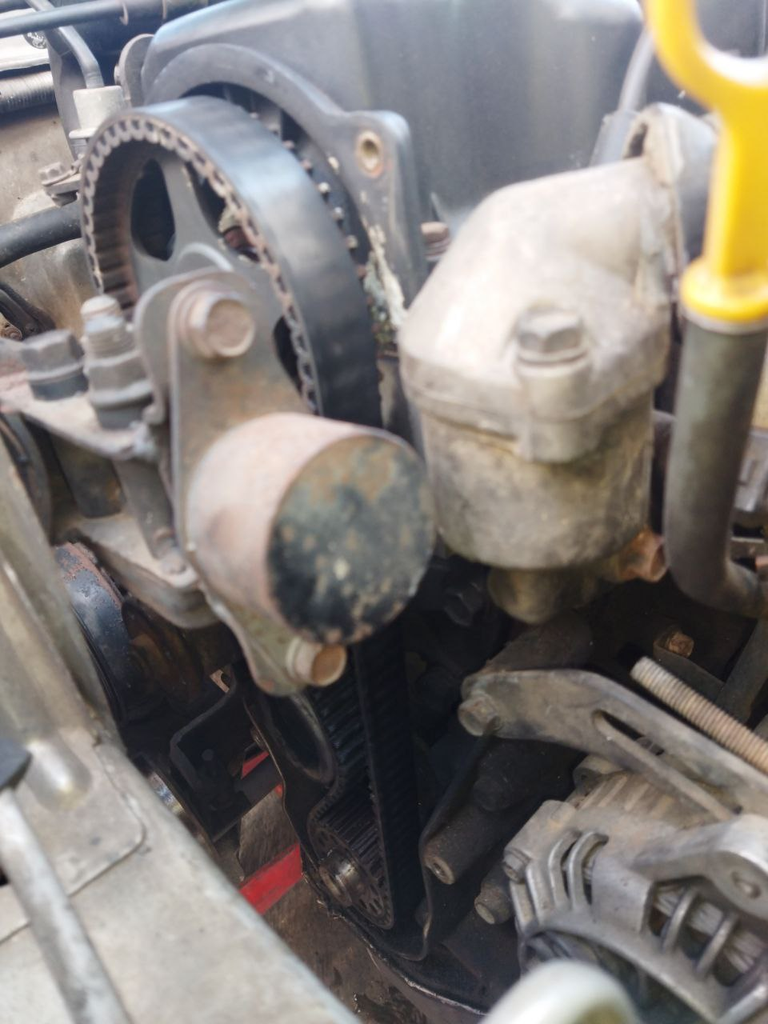
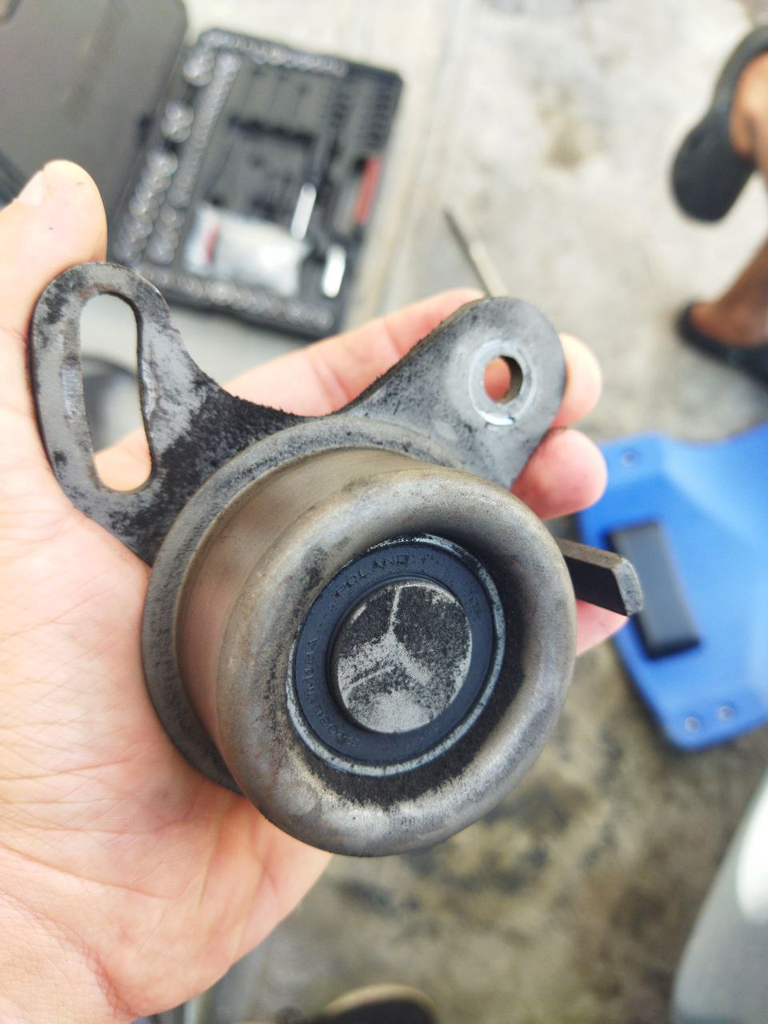
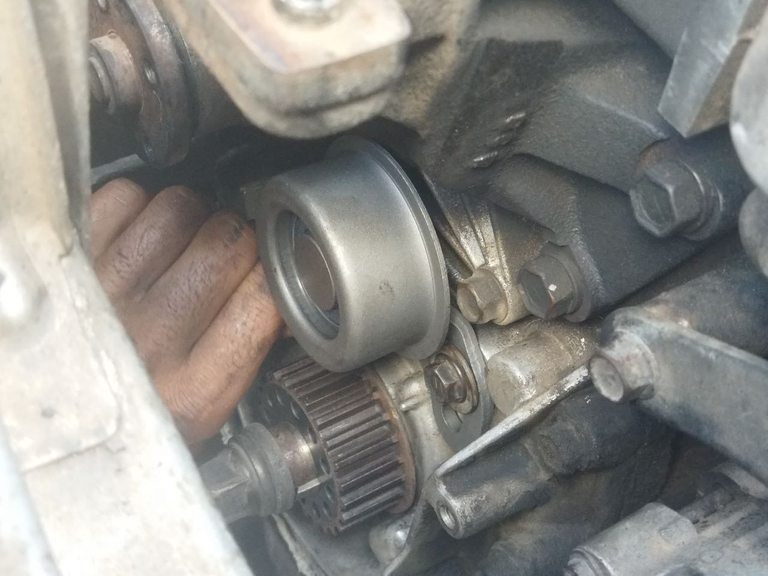
Empezamos retirando el tensor de correa, el cual ya se percibió herido... simplemente aflojando las dos tuercas que lo sostienen sobre el bloque, y en efecto, estaba muy cercano a dañarse, ya giraba con golpe y sonaba, una de las razones por la cual sonaba terrible la sincronización.
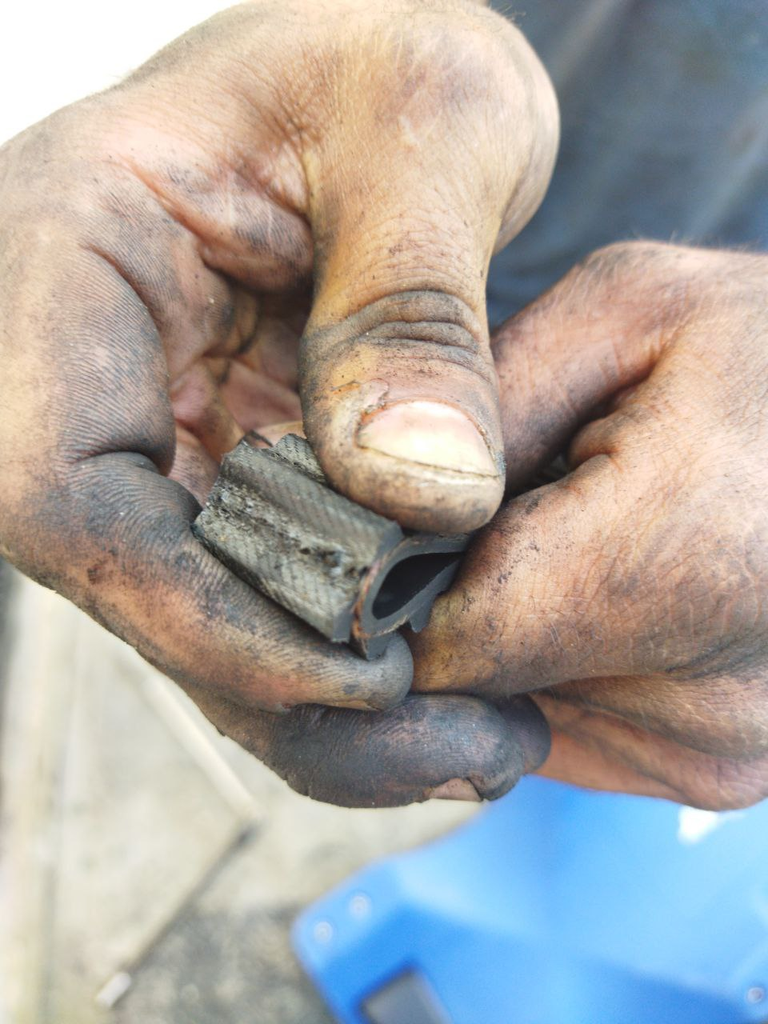
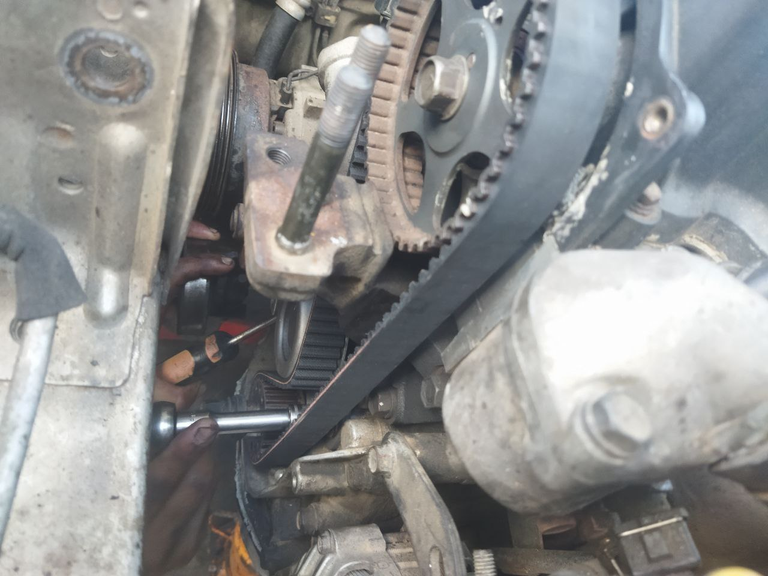
Retiramos la correa y nos encontramos con este desastre... Varias zonas de la correa fragmentadas de la misma manera, incluso en unas zonas llegando a la misma costura. Casi llegando al punto de ruptura.
Bueno, gracias a ser precavido logre salvarme de una terrible situación en la que hubiese tenido que rehacer el motor nuevamente. Pero aquí es donde viene lo bueno, meter repuestos nuevos y de la mejor calidad.
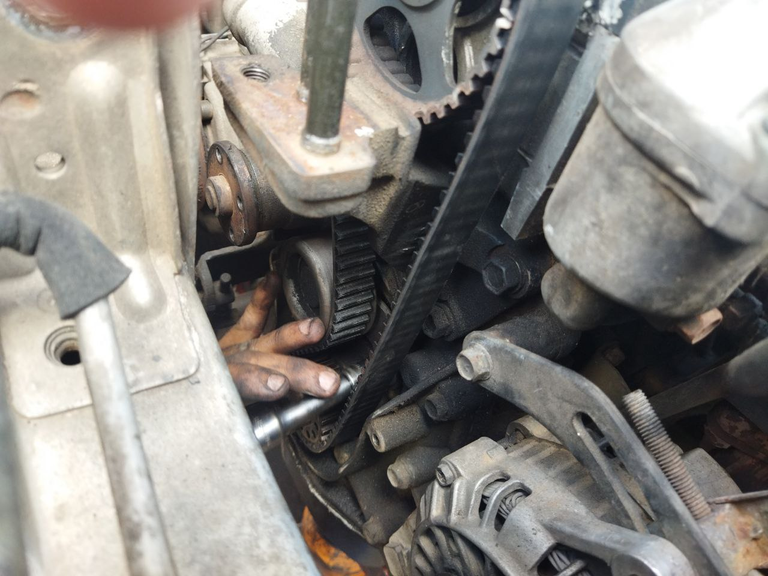
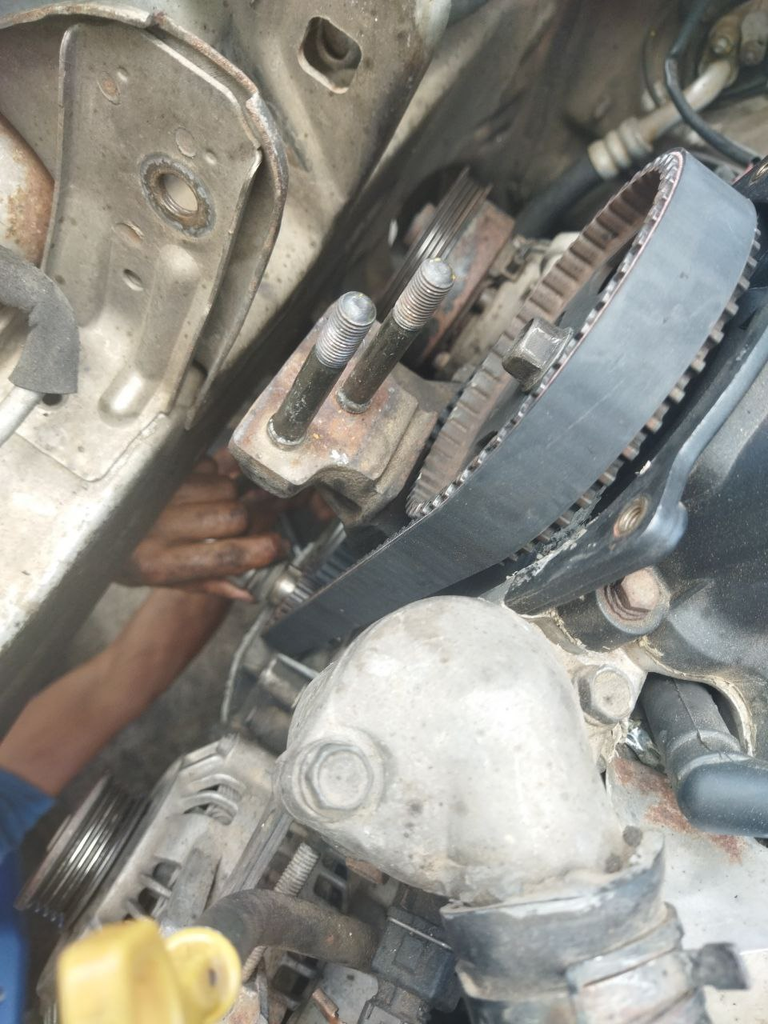
Podemos proceder primeramente ubicando el eje de cigüeñal y el árbol de levas en su punto de sincronización según la guía que tienen para luego ajustar el tensor y ubicar la correa de tiempo. También ocupamos darle una buena limpieza a la zona con gasolina, de modo que la suciedad no entre en el tensor y tranque el tensor. En este caso no fue necesario cambiar los sellos de aceite ya que previamente los había cambiado.
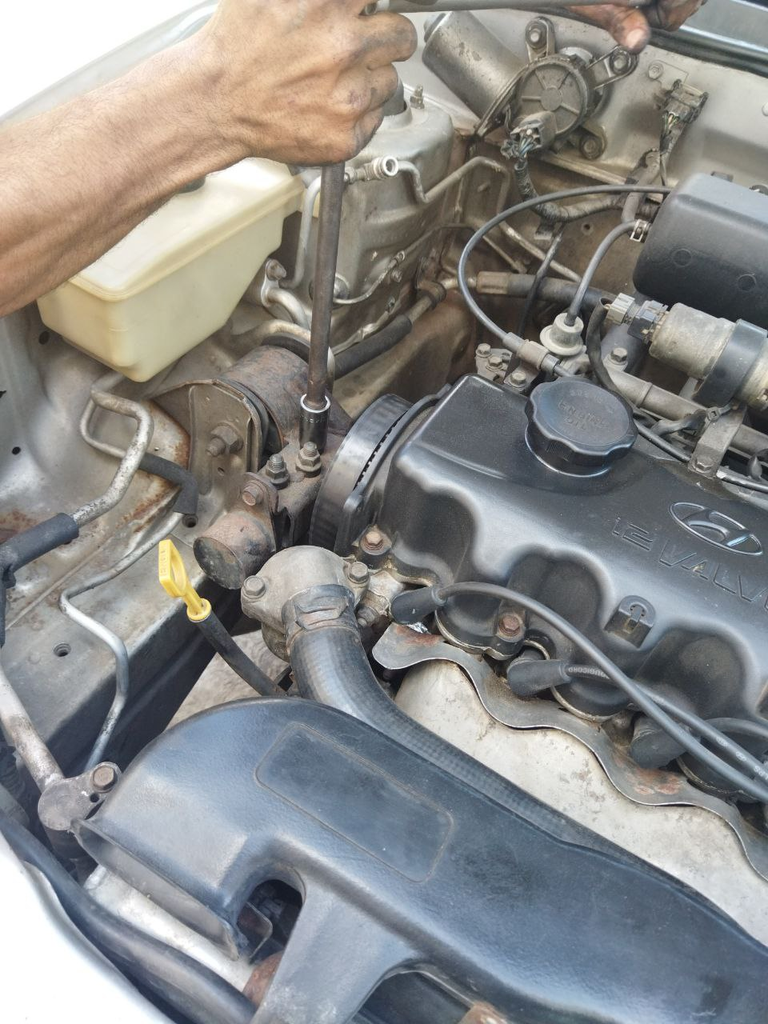
Ya para terminar, procedemos a darle vueltas al motor con un dado en el sentido de sincronización para percatarnos de que todo este bien, y si, todo perfectamente, en el punto exacto.
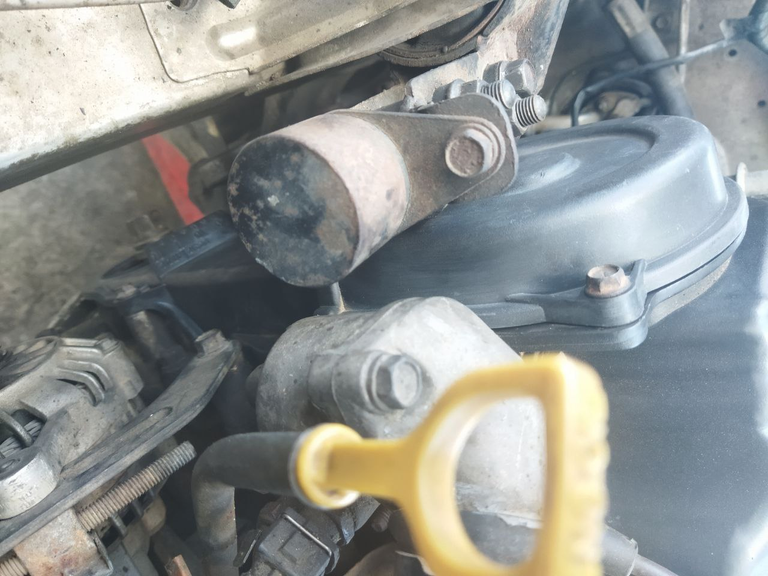
Con toda tranquilidad empezaremos a armar pieza por pieza. Ubicamos tapa polvos, poleas y sus correspondientes correas, asegurando el alternador y posicionando el soporte de nuestro motor para seguidamente encender el vehículo.
Tenemos nuestro kit de tiempo perfectamente armado.
Con esto me despido.
Quemamos neumáticos en la próxima publicación, gracias por haber leído!
ENGLISH VERSION
--> Good morning, automotive enthusiasts, I am going to present how I managed to prevent a Hyundai Accent to break the timing belt. Whose consequence is great, since mostly these 4-cylinder vehicles come with high compression and flat pistons, which generates impact between piston and valve at the time of losing the synchronization between crankshaft and camshaft.
There is something that we must be very clear about when we have a vehicle with a belt, and that is the belt travel. Normally the original timing belts of the different brands support up to 40 thousand kilometers maximum travel, as there are others of alternative brands that support up to 60 thousand kilometers. But varying between quality and price is that one chooses, but when it comes to understand what is best for you, it is better to go for the best quality no matter how expensive it is, you can avoid a big headache.
One more thing to take into account is the quality of the tensioner, since this piece is fundamental, why? Because if the tensioner rotation is rigid, it can jam, the tensioner roll must rotate smoothly without noises or stumbling. If it locks, the tensioner can break and as I said before, the synchronization is lost, generating the same damage to your engine.
Not being attentive to the travel and going beyond the belt or tensioner's limit of use has a chance of simply snapping. At least in the case of this Hyundai Accent, in other vehicles like the Aveo they tend to loosen and come off.
In my case I had an original Hyundai timing kit, both belt and tensioner directly from "MOBIS" which is the wholesale brand of spare parts of the brand. The presentation of which told me up to 45 thousand kilometers of guaranteed mileage. Not so, just with 20 thousand kilometers of travel I began to notice a knocking noise in the area of the belt, as if it jumped, but the car did not present any fault, it moved perfectly, but the noise was very static, when accelerating it was lost but at minimum it was quite worrying. Well, I took the initiative to disassemble everything, avoiding any damage, simply out of caution and you will see the disaster I found.
The first step is to open a comfortable way to start removing the parts. Mainly lift the carriage on the side of the belts with a hydraulic jack.
The next step was to remove the accessory belts, the compressor, water pump and alternator, first remove the alternator brackets to remove the belt tension and thus be able to remove it. Now the compressor, easily removing the pulley fitted on the crankshaft shaft can come out.
Now that we have the way clear, we can start removing the dust covers from the top and bottom. Simply supported by several number 10 screws
Now we will remove the motor support to be able to remove the belt. But we must place another hydraulic jack under the motor to make support.
We started by removing the belt tensioner, which was already hurt... simply by loosening the two nuts that hold it on the block, and indeed, it was very close to being damaged, it was already spinning with a bang and sounding, one of the reasons why the timing sounded terrible.
We removed the strap and we found this disaster... Several areas of the strap fragmented in the same way, even in some areas reaching the same seam. Almost reaching the breaking point.
Well, thanks to being cautious I managed to save myself from a terrible situation in which I would have had to redo the engine again. But this is where the good part comes in, getting new and top quality parts.
We can proceed first locating the crankshaft shaft and the camshaft in its synchronization point according to the guide they have to then adjust the tensioner and locate the timing belt. We also had to give a good cleaning to the area with gasoline, so that the dirt does not enter the tensioner and lock the tensioner. In this case it was not necessary to change the oil seals since I had previously changed them.
Finally, we proceed to turn the engine with a die in the sense of synchronization to make sure that everything is well, and yes, everything perfectly, at the exact point.
With all tranquility we will begin to assemble piece by piece. We place the dust cover, pulleys and their corresponding belts, securing the alternator and positioning the support of our engine to then start the vehicle.
We have our time kit perfectly assembled.
With this I say goodbye.
We will burn tires in the next publication, thanks for reading!
Es bastante elaborado, de hecho me sorprende que estuviera tan cerca de romperse en tan poco kilometraje si en teoría debía aguantar 40k, sin embargo así es la vida a veces y lo importante es que lo has atajado a tiempo y sin accidentes, cuando una de estas se rompen hacen un daño terrible al resto, en el caso de un amigo una rompió y daño hasta un pistón del golpe que dio. Saludos y te quedo buenísima la publicación :)
Gracias, compa