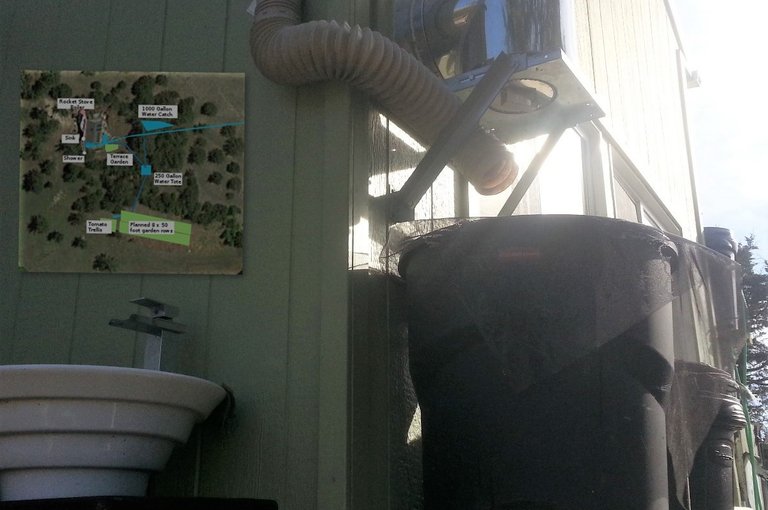
We've setup a gravity fed rain water collection & distribution system on the off-grid property for our drinking, cooking, cleaning, and garden irrigation. Anyone that has had to carry water for an extended period of time has no doubt considered that there has to be an easier way. Solar panel powered pumps could move water, but instead I've setup this gravity fed system to move water - without the need for electricity.
Gravity Fed Water System
The gravity fed water system includes cabin roof-top rainwater collection, hot and cold water lines, a sink, outdoor shower, rocket stove boiler with gravity re-fill, an overflow to a 250 gallon water tote for garden irrigation, a 1000 gallon cistern, a 300 foot siphon, solar heated water, and a work-in-progress 1000 gallon water catchment.
Downspout Rainwater Collection & Storage
We use rain water irrigation and for cleaning - boiled for dishes, hot for showers, baths, and laundry. In the first picture below you can see the front roof eves trough running down to fill the front rainwater barrels, they also fill with the overflow rainwater from the back barrels. They are plumbed together to fill as one, they receive overflow water from the back roof barrels, and they overflow to the 250 gallon irrigation water tote down the hill.

|
|
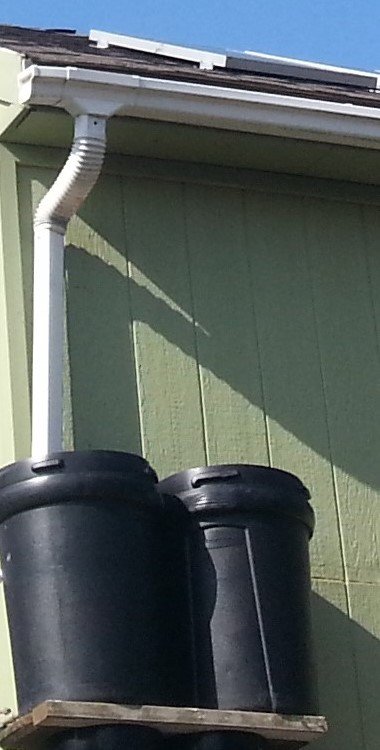
In the second picture above you can see the back roof eves trough run off to the back rainwater barrels. They have been risen high on top of an old refrigerator and a couple sturdy buckets to provide gravity fed water pressure. They are also plumbed together to fill and empty as if they were one.
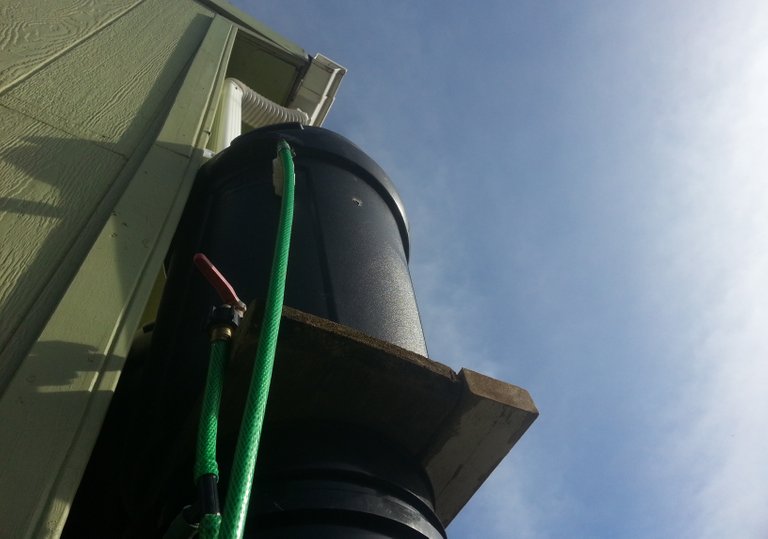
In the picture above you can see how the back barrels are plumbed together - each of their drain hoses are connected with a 'T' adapter (bottom of the picture) to provide the gravity pressurized cold water line for the system. You can also see the overflow hose attached near the top of the barrel - when it's raining and the barrels fill to that overflow hose outlet, the excess rainwater drains down the overflow hose to the front rain barrels.
Water Distribution with Gravity & Garden Hoses
In the picture below you can see where all the outdoor garden hose gravity fed plumbing magic happens. All standard 1/2" garden hose with 1/2" garden hose push-on 'T" and elbow connectors. Note that although standard garden hose is usually 1/2", the standard garden hose threaded connectors are usually 3/4".
Cold Water Line
On the right side of the picture below you can see the cold line hose coming from the lifted high back barrels. It 'T's to the sink faucet cold line and to the usually turned off valve that goes to the hot water line.
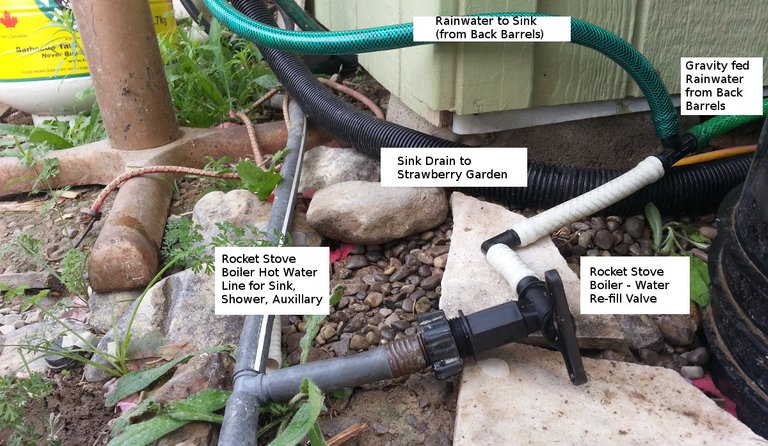
The hot water line starts at the lifted rocket stove boiler, feeds to and auxilary hot water hose that is used to fill the clothes washing machine, the sink faucet hot water line feed, and the shower. The rocket stove boiler is positioned high enough to provide enough gravity fed water pressure, but is lower than the back barrels, so when the boiler is low on water, the Re-fill valve can be opened until the boiler has been gravity re-filled with rainwater from the back barrels.
The Rocket Stove Boiler
Gravity fed rocket stove boiled rainwater for outdoor showers, baths, laundry, dishes, and hand washing. If you would like to more details about building the rocket stove boiler and outdoor plumbing setup, this previous post goes into more detail: Rebuilding the Rocket Stove Boiler and Connecting Outdoor Plumbing for Spring Showers.
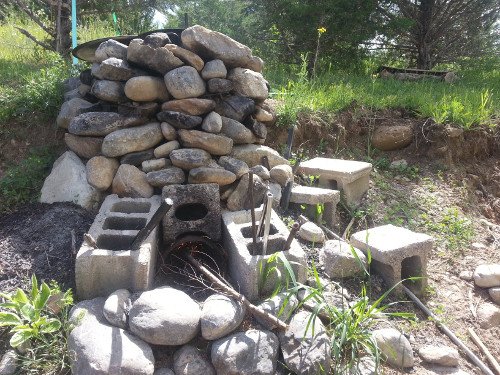
|

|
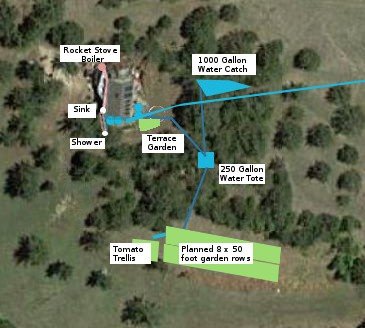
In the screen capture below you can see where the hot and cold water lines run around the corner of the cabin and overflow down the hill to the 250 gallon irrigation water tote.
Hot Water Sink & Shower
You can see the outdoor garden hose plumbed sink in picture below. The drain from the sink goes down a large drain hose to the wild strawberry gardens that are just down the hill from the cabin. This previous post goes into detail about how the hot and cold gravity fed faucet and drain was plumbed: Off-Grid: Patio Sink Install with Gravity fed Garden Hose Adapters.
|

|
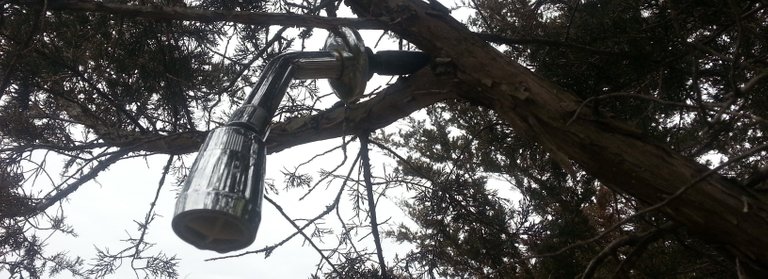
In the picture below you can see the out door shower that is hung from a tree branch. The shower taps are gently attached to the tree trunk. The standing pad for the shower is made with flat field stones that drain to a patch of orange mint herbs.
1000 Gallon Cistern, 300 foot Siphon
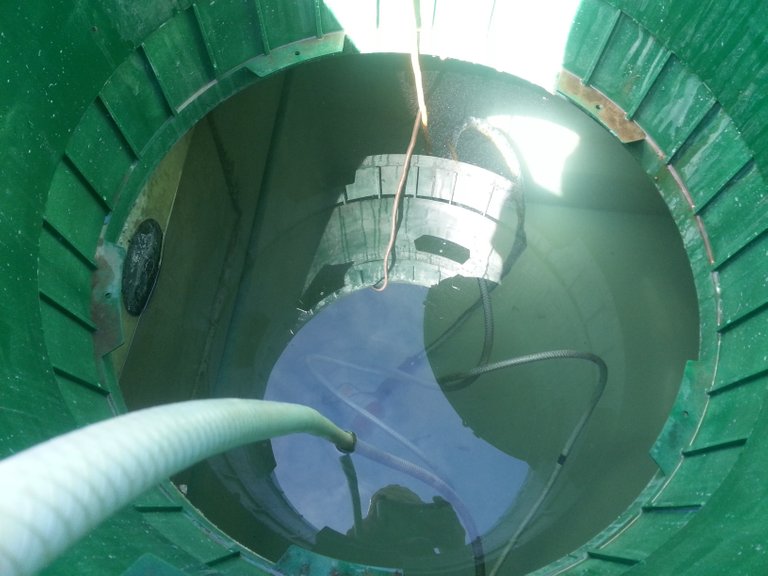
We have a 1000 gallon cistern at the top of the valley. A truck fills the cistern twice a year ($120 per delivery) with fresh drinking water. We primarily use this water for drinking and cooking, but sometimes for baths and showers. It would be easy to fill the cistern with rain water, but for now my wife prefers the delivered water. I ran a 300 foot garden hose siphon to effortlessly bring the cistern water down the hill to the cabin. It took about 30 seconds of running a bilge pump to start the siphon, then the bilge pump was removed - with a tap at the bottom of the siphon to pause the water flow, the siphon has only had to be restarted that one time I ran over the siphon hose with the lawnmower. This previous post goes into more detail about the 300 foot siphon: Back Acres: Starting a 300 foot Siphon from the Cistern to fill the Hot Tub.
Bulk Water Storage Treatment
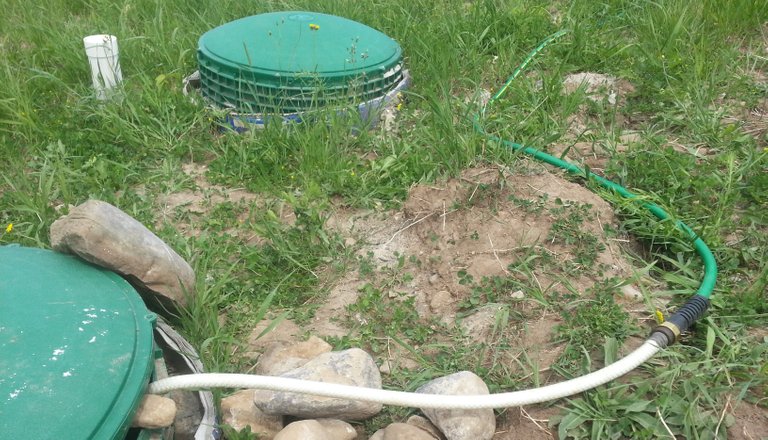
When holding water for drinking and cooking, it is important that the water stays safe to consume and does not go bad. If light can get to the water there may be a green algae growth. A red growth from bacteria does not require light. Adding a small amount of chlorine or iodine to the contained water will prevent the water from becoming unsafe to drink. There are other methods to keep stored drinking water safe. I use a small amount of chlorine for the cistern, the water has no noticeable chlorine smell or taste.
Previous Post: Water Containment for Emergency, Conservation, and Off-Grid Living
|
|
Sun-heated Siphon Hose Water
My motivation for setting up the siphon was to avoid carrying water. I wasn't even thinking about how hot garden hose water gets sitting in the sun on a summer's day. By noon each day the full length of 300 foot siphon hose would be full of hot water. It didn't take long for us to start using this hot water for baths and showers. I rarely had to use the rocket stove boiler this past summer. Building a permanent solar heated water system for the homestead is at the top of the list for next summer.
Drinking and Cooking Water Filtering
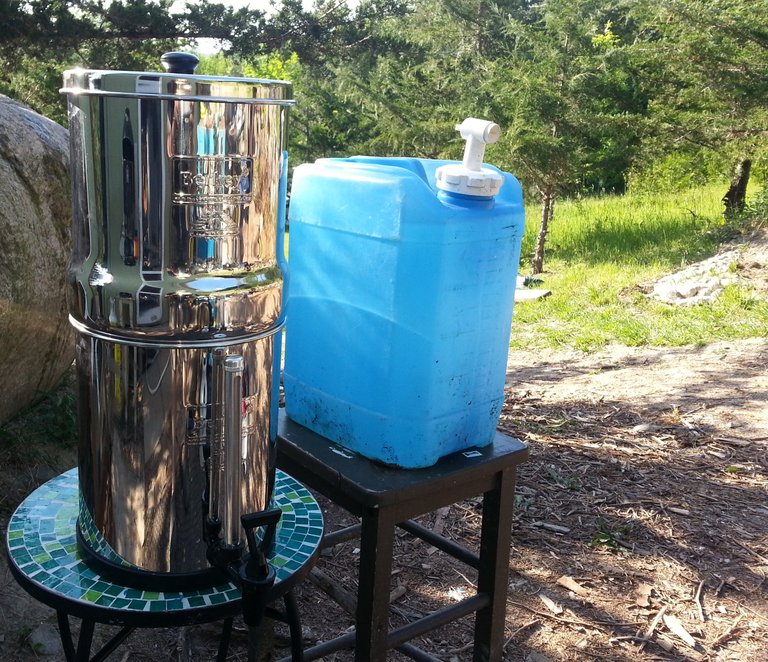
Despite the drinkable water being delivered to our properly treated cistern, we like to be extra safe. Our cistern water is put through the gravity fed Berkey water filter before we use it for drinking or cooking.
|

|
The Off-Grid: Berkey Water Filter and a Full 1000 Gallon Cistern of Drinking Water post provides more details about the cistern and Berkey water filter.
Water for Garden Irrigation
We would like to grow most of our own food one day. Gardens with access to plenty of water will have a more abundant harvest, so it is helpful to provide irrigation. Passive irrigation choices like ditches, water catches, and swells are excellent additions that become part of the landscape. Gravity fed garden or irrigation hoses, water barrels, totes, and water catches can also be useful for garden irrigation.

|

|
In the first picture above you can see one of the pair of the cabin's front water barrels that use for irrigating the cabin terrace garden. In the second picture above you can see the cabin terrace garden - this past spring - with drip irrigation hose in place. A small hole was drilled at the location of each garden plant for efficient and effective garden irrigation. This previous post goes into more detail about how this was setup: Off-Grid: Garden Hose Irrigation with Gravity and a .79mm Drill Bit.
Overflow to 250 Gallon Water Tote
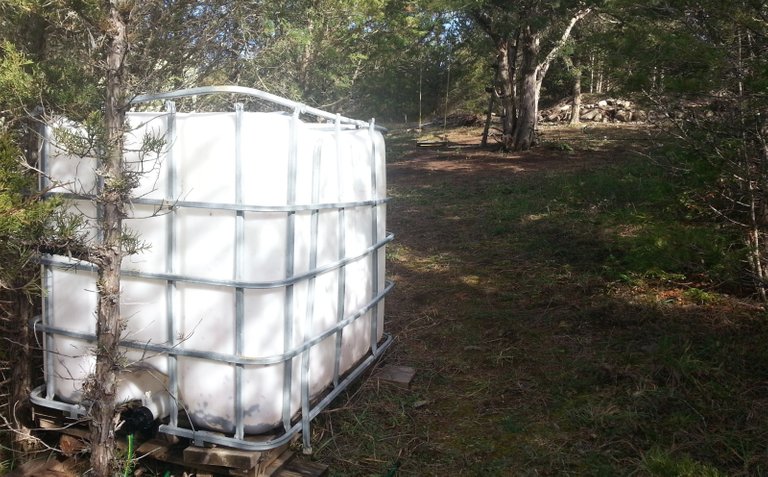
After the cabin rain barrels have filled to capacity, the overflow runs in garden hoses down the hill to a 250 gallon water tote. The second picture below shows the hose from the cabin barrels winding up the tree to enter the top of the water tote to fill.
|

|
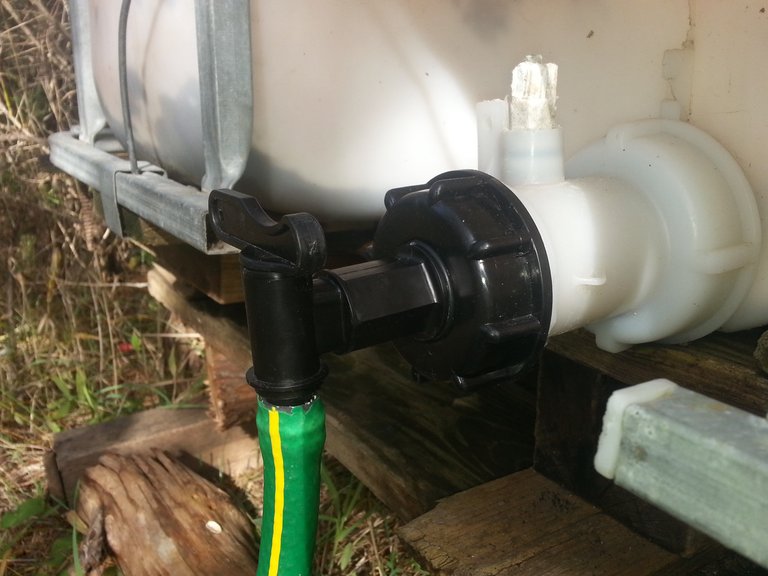
In the first picture above you can see the spigot/tap that was added to easily push on a 1/2" garden hose. In the first picture below you can see the tomato trellis garden that the water tote irrigated this past summer. In the second picture below you can see up the hill in the distance the large water catch being constructed to provide water to the addition garden rows that will be added.

|
|
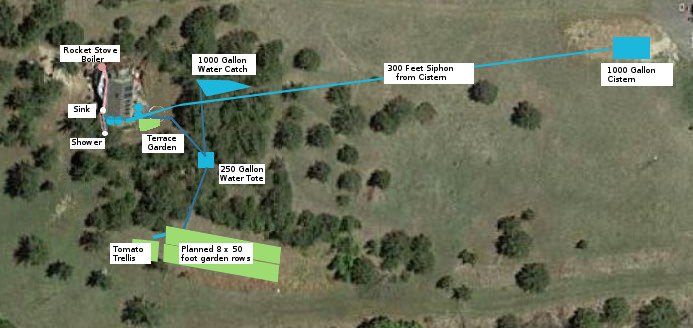
In the screen capture below you can see the property water system layout with the 250 gallon water tote, the under construction 1000 gallon water catch up the hill, and the 8 x 50 foot garden rows I'll start adding next summer - beside the tomato trellis garden at the bottom of the hill.
1000 Gallon Water Catch - Under Construction
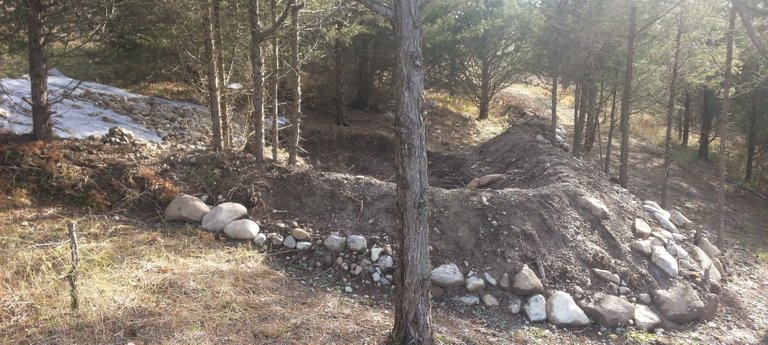
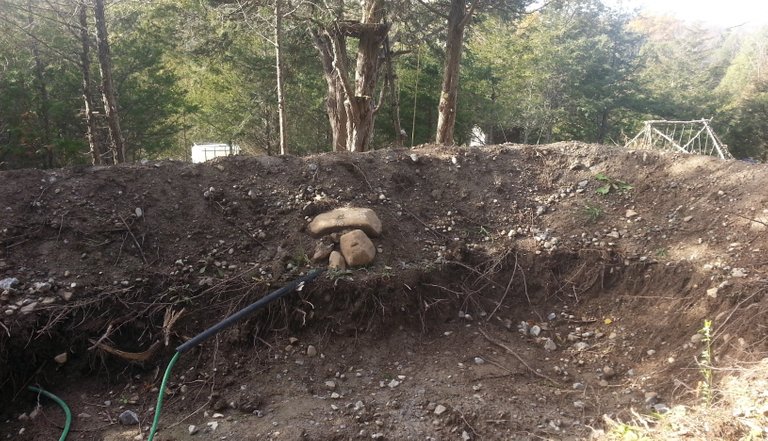
The picture below is a sneak peak of the under construction water catch. I created the catch wall by first piling heaps of juniper branch brush to form the wall, then dug out the up-hill side of the brush wall, piling the dug out clay and rocks on top of the brush branches.

In the picture above and below on the right you can see the thick black hose used as a casing for the drain hose to slide through. I will line the water catch with plastic for the first couple seasons, then use a more permanent compacted clay solution. In the first picture below you can see some of the up-hill side plastic sheeting that was added for maximizing water collection, eventually it will be completely covered with the small stones. This large water catch will easily get the gardens through a couple weeks of drought - a capacitor for the irrigation system to smooth out the flow.
|
|
Beaver Dam Inspiration
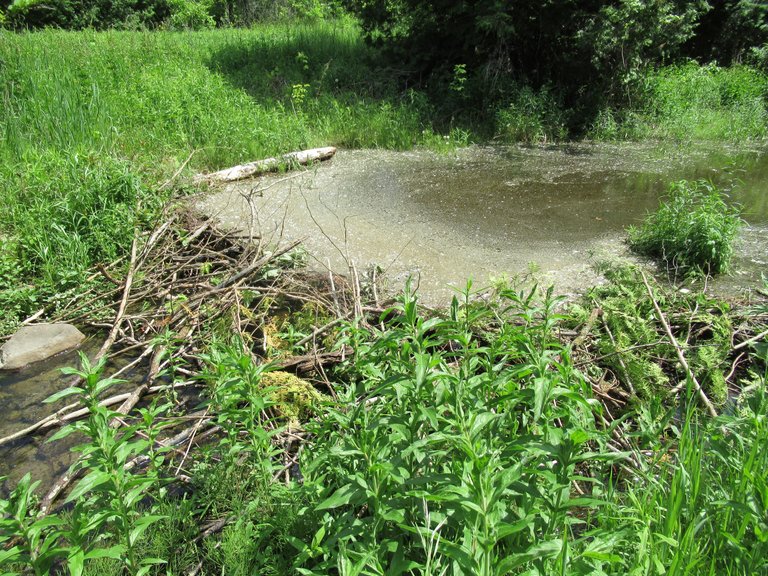
There is a creek that runs down the valley, just across the property line. Beavers have built multiple dams up the creek, I admit they were inspirational. Below are a couple pictures of their handy work, I'll be sure to add fish, water flow, and eventually plants to my water catch to be sure it doesn't turn into a swamp. This previous post goes into more detail if you are curious about the beavers: Back Acres: Beaver Dams Up the Creek - Not for Long.
|

|
Winter Shutdown
Winter is here, we've had snow, and freezing days and nights for weeks. Before the below freezing temperatures arrived, I was sure to open all the water collection and irrigation taps so the water could flow out. If water is left in the barrels and totes with freezing water, the taps or containers can break. For cleaning water we add buckets of snow to the cabin's wood stove top boiler and collect water from the roof's eve-troughs while the temperature still gets above freezing.

Ten buckets of snow are needed to melt down to One bucket of water, so we welcome the odd thaw. This previous post shows how our stove top boiler was made: Wood Stove Top Boiler and Standard Garden Hose Connectors.
To my surprise the cistern 300 foot siphon keeps, even with freezing, we are able to easily turn the siphon tap at cabin to draw water whenever the temperature goes above freezing.
This is exciting stuff! I love how your system includes everything, from rainwater harvesting to heating and filtering, all the way to graywater use. I particularly like your rocket-stove water heater. Solar is great, but sometimes it just ain't enough.
This post was shared in the Curation Collective Discord community for curators, and upvoted and resteemed by the @c-squared community account after manual review.
@c-squared runs a community witness. Please consider using one of your witness votes on us here
Just goes to show how much knowledge, technology and hard work goes into creating a safe and viable environment for a small family to survive without the luxuries of 'civilisation'.
Well done and I hope you live to enjoy it without have to need it.
Thanks - it's satisfying to have the system in place, especially looking back at the full mornings of work it replaces :)
I just love this. Will put it aside for bedtime, when I do my "slow" reading--that is, reading that takes focus. So much to learn here. I admire your industry and skill. I will share this on Twitter. Very useful
Thanks, it was a lot of fun putting the system together :)
Your setup is looking great. You've come a long way since last year man.
I was going to ask about freezing pipes and how you get around them in the Winter, but you've already answered my question.
Thanks, I have been meaning to get a hand pump for the cistern, but for now i'll sink the bilge pump or a bucket into the cistern in an emergency. I'll be trenching a 4 foot under ground water line from the cistern to the house that i'm building near by for further winter comfort :)
Awesome post jack dub! Cool to see your set up :)
Hi @mountainjewel! Nice share in the contest. I am ready to order nourish whenever it works for you guys. Can you even ship to Canada or should i give you an american address? I'd prefer here, i don't know when i will see mom (she lives in ND) next.
Oh cool! Glad to hear it :) we’ll be gone for the next 11 days at the silent meditation retreat so it will be after that. I’ll check in with you then to see where you want it shipped. Whenever works for us ☺️💗
Posted using Partiko iOS
Enjoy the retreat! There's a good chance i will be taking a few weeks off tech over christmas and ny so we will get this order through as soon as we can! If you can ship to me then let's do it! 💜🎶💜😊
Thanks, I thought of you guys every time I typed 'carrying water' :)
This is an awesome set up! And, a great post. Nice work @jackdub! Hopefully winter is not too harsh this year.
Thanks - winter's off to an early start to be a long one here in southern ontario, hopefully there's not too many extreme cold stretches, although I do enjoy the time inside :)
Southern Ontario hey! I am out in Alberta east of the Rockies by two hours along hwy 1. It got pretty wintery here the last little while. I don't know why, but i assumed you're from USA. I am looking forward to cozying up. All winter long! Good for you for being off grid! That's really awesome.
Great post. Love the system map and labelled diagram plus .gif of stove :) wonderful content! I like the systematic and well thought out approach. And permanence of homesteading upgrades. I tend to put stuff together then take it apart when I need the parts to do something else :(
Thanks - it's nice to see it all laid out on the map. With how much time the setup saves, I wouldn't dare take it apart without an adequate replacement. I'm that way with my electronics projects though, i've built many of them multiple times :)
Congratulations! Your post has been selected as a daily Steemit truffle! It is listed on rank 16 of all contributions awarded today. You can find the TOP DAILY TRUFFLE PICKS HERE.
I upvoted your contribution because to my mind your post is at least 5 SBD worth and should receive 216 votes. It's now up to the lovely Steemit community to make this come true.
I am
TrufflePig, an Artificial Intelligence Bot that helps minnows and content curators using Machine Learning. If you are curious how I select content, you can find an explanation here!Have a nice day and sincerely yours,

TrufflePigThis is a really thoroughly written post, there's lots of good information in here for someone who might be thinking about doing something like this.
Congratulations! This post has been chosen as one of the daily Whistle Stops for The STEEM Engine!
You can see your post's place along the track here: The Daily Whistle Stops, Issue 334 (12/08/18)
Congratulations @jackdub! You have completed the following achievement on the Steem blockchain and have been rewarded with new badge(s) :
Click here to view your Board of Honor
If you no longer want to receive notifications, reply to this comment with the word
STOPthis is really cool to see ! rainwater catchment is where its at.