Here is a quick overview of the Kratky method of gardening and a 3-step guide on how to easily grow your own nutrient dense food at home.
Kratky planters are a simple hydroponic garden module that require far less water than conventional soil gardens. They are also portable so they can be taken inside when needed.
Unlike typical NFT hydroponic systems, they require minimal labour or parts to put together and almost no maintenance. Growth speeds are not as fast as with powered systems but they use no electricity and are far more resilient.
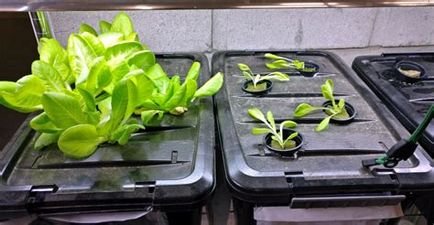
I recently have put together some Kratky x6 pot systems using New Zealand Made lightproof reservoirs. It took me less than 15 minutes each and they should provide plenty of the heirloom perpetual spinach for years to come.
Parts list per system:
1x 50L black reservoir
6x 50mmx80mm white wicks
6x rockwool cubes
12x seeds of your choice (better to have 2 in case one doesn't germinate)
hydroponic fertiliser
seedling dome
heating mat
I got everything at growshop.co.nz except the seeds which I harvested from last seasons plants. I recommend getting some heirloom seeds from a trusted supplier so you can get your own perpetual seed supply.
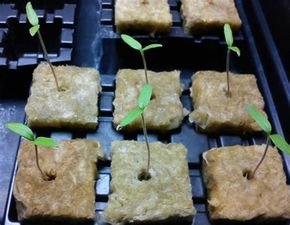
Step 1. Germinate seeds
You can use a seed sprouter or soak the seeds over night then put them in the rockwool. Other things like jiffy pellets work too but rockwool is considered best for hydroponic applications. The pots I used are 50mmx80mm white wicks which are small enough to hold the rockwool without clay balls, but you may choose a bigger size in which case clayballs or other medium may be necessary.
You can also use cuttings cuttings from existing plants and apply plant hormone gel like clonex to stimulate root growth. There is lots of information about how to do this online.
To get the best outcome, put the rockwool with seeds planted in a humidity dome on top of a heating pad until the seeds/cuttings are fully rooted and healthy enough to be put into the Kratky. This is not totally necessary but some kind of protection for the seedlings until they are strong will improve their success rate especially outside. Regularly checking that the rockwool is not dry is important as this will cause the seedlings to wilt and die or never germinate at all, too wet and not enough oxygen gets in so its a balance that is stabilised by a dome. Putting a heating mat under the seedling dome can be helpful or sometimes necessary especially in winter or in cooler regions.
Step 2. Make the Kratky
Take the reservoir with lid attached and arrange the net cups face down on the lid so they are evenly spaced apart from each other.
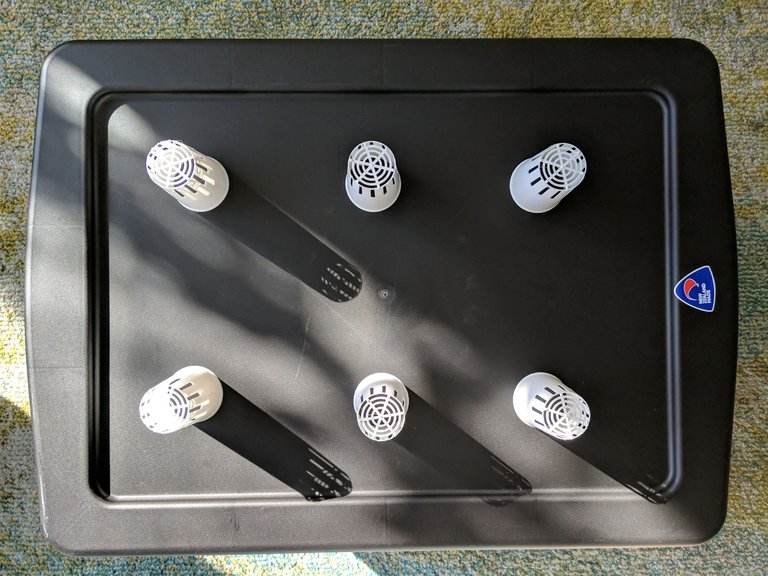
Use a pen, marker or knife to outline the outside of the cup. Then take the cups off and draw a second circle outline a few millimetres within the initial outline. Use this as a guide when cutting the holes and make sure not to exceed the initial outline or the cup will fall through the hole or not be held in position sturdily. If you mistakenly make the hole too big you can adjust the size with paper and insulation tape.
I used a standard blade to cut the holes as the plastic is soft, if you have the right sized hole saw then that will be easier and more precise. You can run the saw in reverse to prevent plastic dust and rough edges.
After making the holes place each cup in the Kratky, then when then seedlings are ready put them carefully in the cups. Avoid squishing the rockwool especially when wet as this affects its performance and may injure the seedlings roots.
Step 3. Fill the Kratky with water
After everything is ready to go you can now fill the Kratky with water. To start with it's better to top water the rockwool to make sure it doesn't dry out. Do not to introduce fertiliser yet this as this can burn the seedlings. Once the plants start to dangle roots and get some significant foliage growth you can safely begin introducing fertiliser. Root supplements can be used earlier on.

The idea with the Kratky is that as the plants begin to take up water, the roots will get more oxygenated at the top of the root mass. It's important NOT to refill the Kratky to cover the roots, refilling the Kratky to the top will cause the plant to drown. It is ok to change the water in the Kratky during the growth period if needed, but if the water has the correct nutrient and additive regimen, then this shouldn't be required often. Although if the water level is very low and there is still growth to come then adding water could be necessary.
If algae formation begins, check for light leaks and cover where necessary but don't worry to much as this won't hurt the plants. Algae may compete for nutrients so if plant growth slows add a bit extra.
Another consideration is pH. If you follow direction of the nutrient package (or 1/4-1/2 them like I do) this should not need too much attention. You can get pH drops and pH meters to test pH and ensure the pH level is between 5.5-6.5ish pH. If you use reverse osmosis water then this should be standard and may require an upward buffer, especially if too much fertiliser is used. If using hard water (tap water) standard dosing of nutrient should yield a suitable final pH. There are also pH adjustment products you can buy, or you can use lemon juice/baking soda, just be careful about the concentrations and give adequate time for it to dissolve and spread in the water before testing levels again.

Closing thoughts
Kratky is a good alternative to a raised bed and suitable for individual small scale home vege gardening in urban areas with limited soil space or where water availability is a concern. The water can get gungy if over-fed with nutrients. You can use things like dilute hydrogen peroxide but in general a 'homeopathic' approach to nutrient dosing will help prevent this and other problems. It also saves valuable fertiliser. In any case it's important to thoroughly clean reservoirs between harvests.
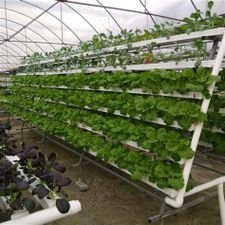
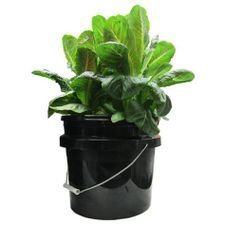
The x6 plant system in the blog is just one configuration of Kratky. The most common is a 15L bucket style which is more portable when full, creates isolation between water, and can support larger individual plants, but can be more expensive per litre.
The principle is the same. You can also make larger systems and/or add other parts and features to make them more effective such as air stones, supplementary lighting, domed protection and automated environmental and water chemistry management devices. These will not work without electricity and will require more maintenance so they're more of a hobby when used at a small scale, but are still very water efficient and grow plants with much more vigour than Kratky alone. I may cover these in a future blog.

There is lot more specific information online about how to best make Kratky systems so I encourage people to give it a go!
Awesome post, really great information when I am thinking or in the setup of a small system like this till I build a vermiponics system
Thank you for sharing this great content, You have been manually Upvoted by @skylinebuds
Did you know you can now delegate WEED, SPT, ONEUP or THGaming token to @skuration and receive Curation Rewards and Plus Tribe Tokens for helping build this curation project?
If you are inclined, Come Hang In Discord, This is still very much a work in progress discord with many changes comes
Congratulations @freedomnz! You have completed the following achievement on the Hive blockchain and have been rewarded with new badge(s):
Your next target is to reach 50 upvotes.
You can view your badges on your board and compare yourself to others in the Ranking
If you no longer want to receive notifications, reply to this comment with the word
STOPCheck out the last post from @hivebuzz:
Support the HiveBuzz project. Vote for our proposal!