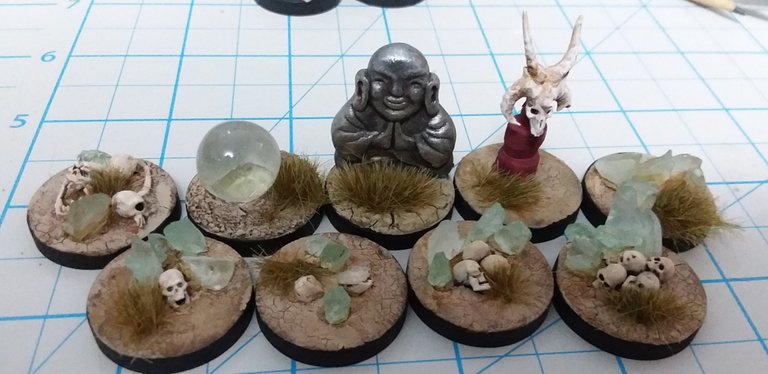
Since this quarantine has left me with a lot of time on my hands, I have had a chance to work on a project I have been planning for quite a while. This is a set of objective markers for tabletop role-playing games and war games. I wanted something fairly universal that could straddle genres, so my overarching theme was a cracked earth desert with crystals and skulls.
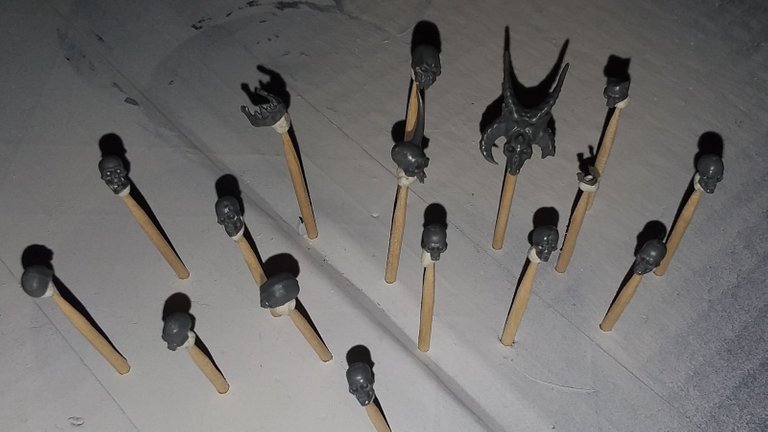
I set up selected Citadel skulls on toothpicks using poster putty, and stuck the toothpicks into a cardboard box for priming.
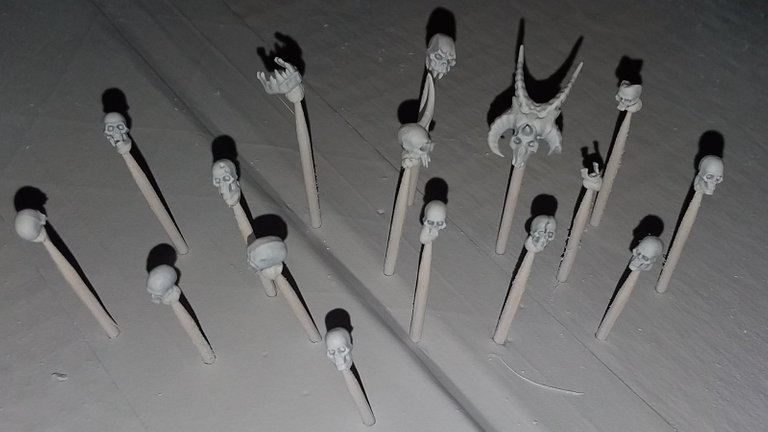
After priming, they're far too white, but at least they aren't grey anymore. I glued them into position on my bases. The human skulls are laid out with skull count to mark objectives 1-4. They'll get better color later on.
I used Reaper 1" bases for this project because they have a much more cylindrical profile. Most bases I have seen are truncated cones that taper from the nominal diameter at the bottom to a slightly smaller surface area. This option gave me more space to make it look interesting.
On to the crackle paste! First, apply a layer of Mod Podge or white PVA glue and let it dry. Then, on to the paste! My tub was an old purchase from Michael's, and it had dried out. Not one to be deterred, I added water from the tap and used a crafts stick to mash it into something I hoped would be usable. Then I used an old, dead paintbrush to smear the resulting mess onto the base. Let's hope this works.
spoiler: it does!
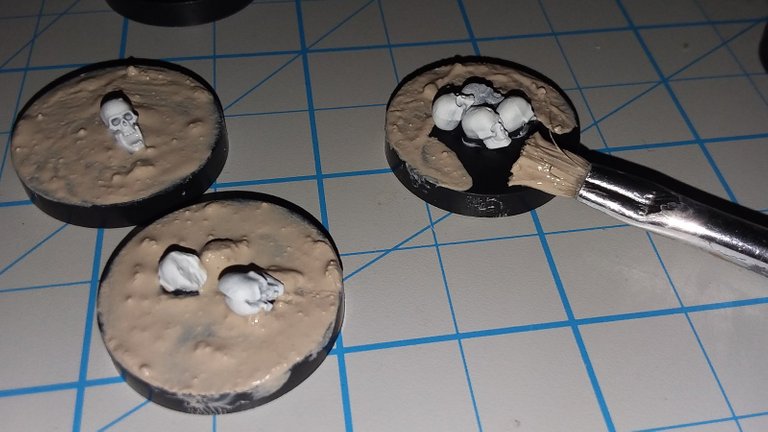
At this point, I added some pieces of crushed glass while the paste mix was still wet. I used super glue and hoped it would work out. I hadn't wanted to work the paste in after adding the glass. Note to self: next time, glue the glass first and deal with the paste issues anyway.
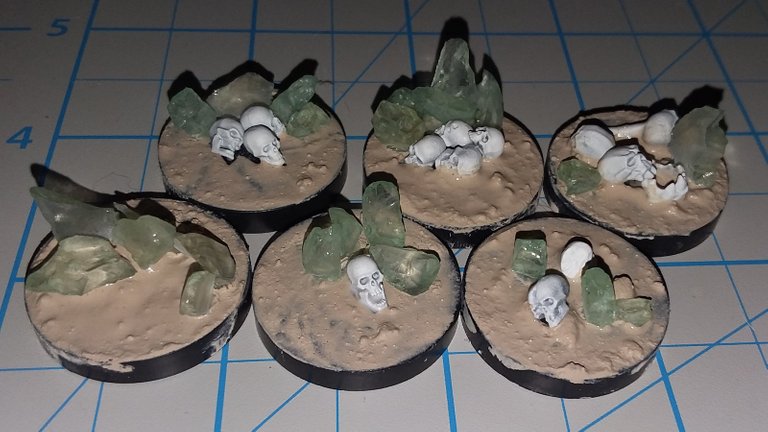
Once the paste dried, it actually looked pretty good. It's a bit thin in spots, but on the other hand, the texture is quite fine and fits the scale of the terrain pretty well.
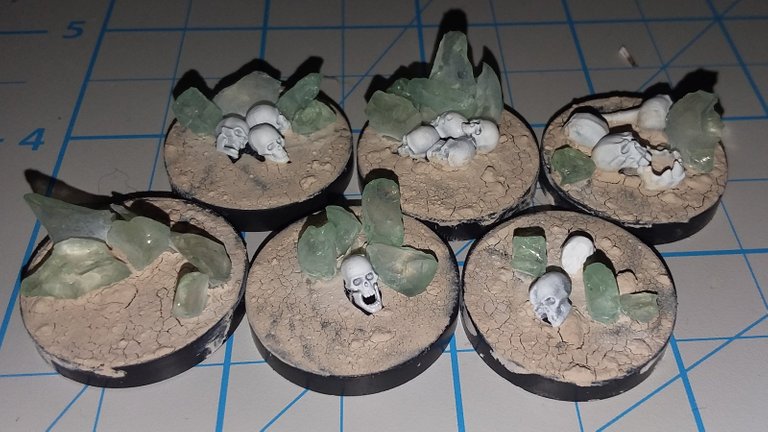
Time for paint! Actually, I started with a sepia ink wash (Vallejo Game Ink) to shade the skulls and sand. After that, I used cheap Craftsmart acrylic paint to drybrush the skulls and sand. I also used cheap dollar store paintbrushes. The Craftsmart paint works well enough once you get rid of the clumps and thin it with enough water to make it flow well. The downside to this is thinning paint with water tends to make drybrushing more difficult. Guess why. Still, I managed to get results that satisfied me.
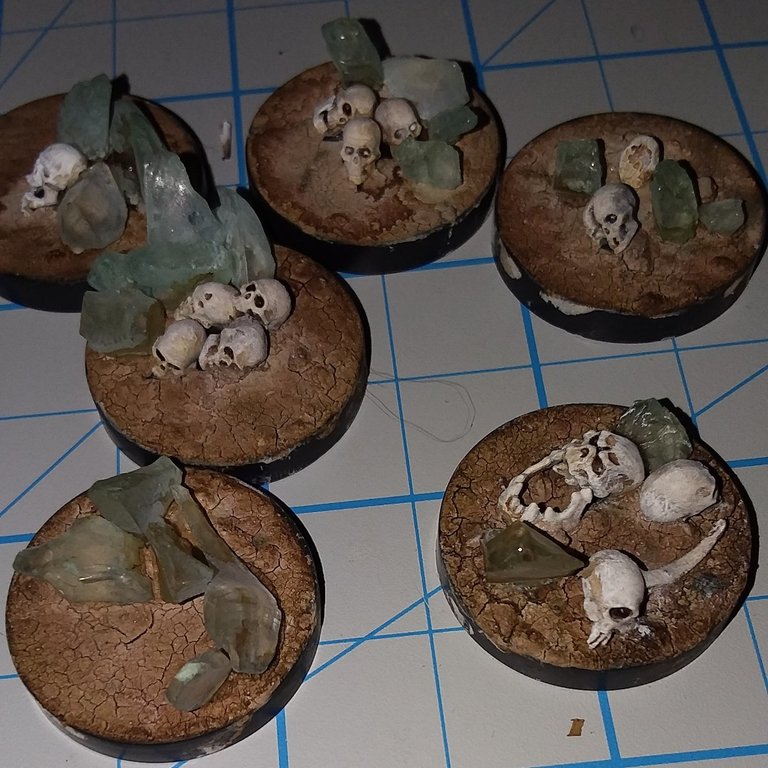
After that point, some more touch up and dry brushing and some Army Painter Grass Tufts brought me to the picture that opened this post.

As for the rest of those markers in the back row, some more explanation is in order. One is white glue and sand layered up to form an organic terrain shape, which I then painted and added a 'crystal ball' marble from a Dollar Tree decorative accents bag. It isn't very spherical. I used a Buddha pendant I found in the Michael's clearance bin to make a statue/idol mini diorama objective marker. I clipped off the bail and filed everything smooth, and then layered pain, ink, metallic paint, and more ink to get the look I wanted. The demon skull is on a bit of dowel I shaped by using a drill as a makeshift lathe and some cheap Harbor Freight files to shape it. I wouldn't really recommend that, but it worked.
Everything here can be used to create custom bases for your miniatures, neat model dioramas, or who knows what else. The sky is the limit!


@tipu curate
Upvoted 👌 (Mana: 14/28)
The objective markers look great :) I especially like the glass shards as crystals.