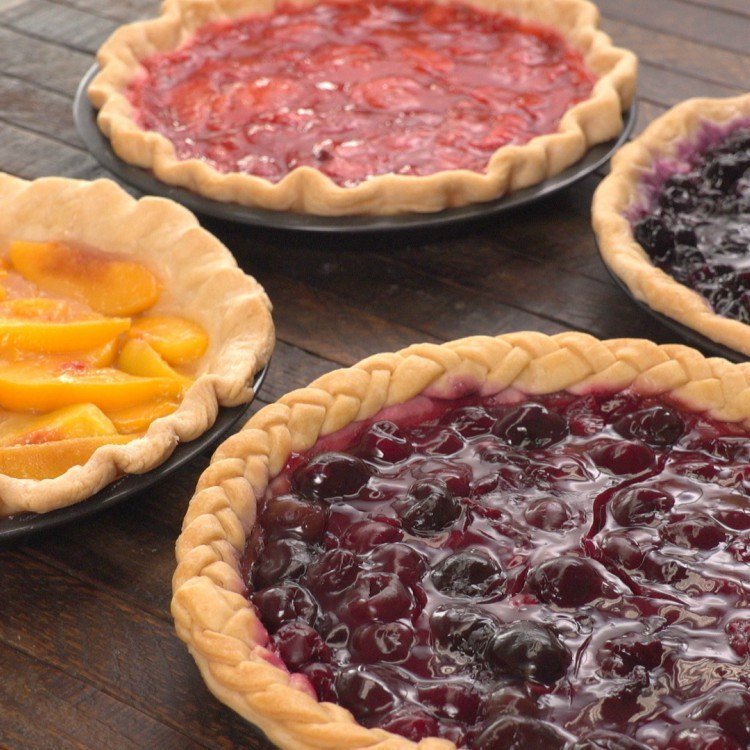
Believe it or not, fall is on its way, and when it comes desserts, that means one thing: PIES! Whether your preferred kind is apple, pumpkin, pecan or chocolate, it’s the perfect edible autumnal treat. One of the best ways to make a pie a treat for the stomach AND the eyes? Decorative crusts! After all, why should cake get to have all the eye-catching fun?

Feel like you don’t have the skills to do crazy creative things with pie dough? Don’t worry! Not only do we have FOUR fun options for you to check out, they’re all totally simple to learn and to do. Let us demonstrate for you, then read on for the step-by-step directions.
DECORATIVE PIE CRUSTS – 4 WAYS
INGREDIENTS
- Your favorite pie crust
DIRECTIONS
SCALLOPED EDGE
- If you’re making a single crust pie, roll out the pie dough so it’s ½ inch larger than the pie dish. For a double crust pie, roll it out so it’s 1 inch larger than the dish. Fold the overhang under to form the edge.
- Hold the spoon so it is facing in and press the rounded edge of the spoon into the crust about ½-inch deep along the edge of the dough. Move the spoon out slightly and press again, forming 2 indention marks. Repeat around the edge.

FLUTED EDGE
- If you’re making a single crust pie, roll out the pie dough so it’s ½ inch larger than the pie dish. For a double crust pie, roll it out so it’s 1 inch larger than the dish. Fold the overhang under to form the edge.
- Place your index finger and thumb on the crust facing in. With the thumb on your other hand, press into the crust from the inside, forming a v shape between your other two fingers. Repeat around the edge.
ROPED EDGE
- If you’re making a single crust pie, roll out the pie dough so it’s ½ inch larger than the pie dish. For a double crust pie, roll it out so it’s 1 inch larger than the dish. Fold the overhang under to form the edge.
- Form a fist with one hand and press your thumb into the crust at an angle. Pinch the dough between your thumb and index finger. Continue and repeat every ½ inch for a single crust or 1-inch for a double crust.
BRAIDED EDGE
- The braided edge should be used for a single crust pie, but you will start by making enough dough for a double crust. Line a pie dish with one of the rolled out crusts, trimmed flush with the edge of the pie dish.
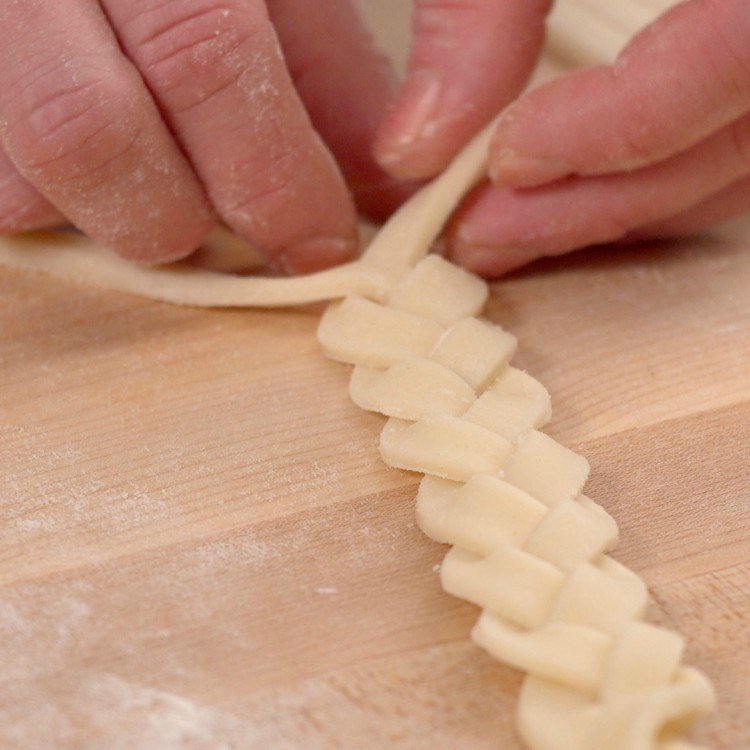
- Roll the remaining dough into a rectangle. Cut out at least 12 thin (¼-inch thick) strips. Carefully braid the strips so that you have 3 to 4 braids with which to work.

- Brush the edge of the crust with water and gently press the braid onto the edge. Carefully place and press the second braid next to the end of the first, and gently braid the ends into each other. Trim off any excess dough and repeat until the braid is complete all the way around the edge of the pie.

Fun AND possible! Which one do you think you’ll try the next time you make pie? Are there any other simple, easy-to-learn decorative pie crusts you’d like to see us demonstrate next?
