Hey everybody! A few days ago I was telling you that I'm doing some spring cleaning through my images. My hard drives are almost full so I need to get rid of the images I no longer use. While looking through them I spotted a few who had some potential.
When I first looked at them back then I discarded them in an instant. The lighting was flat, the composition was off, they weren't sharp enough, etc. Now, when I looked at them I saw them as moody, dreamlike images, so I started playing around in Photoshop to see what I can get out of them. With the previous image from this series I forgot to record the entire process. Now I recorded it but being too long I opted for a speed edit video. It took me almost an hour to get to the final result most of it because I don't have a fixed workflow. I edit depending on the mood that I want to achieve, depending on the image in question and depending on how I feel in that particular day.
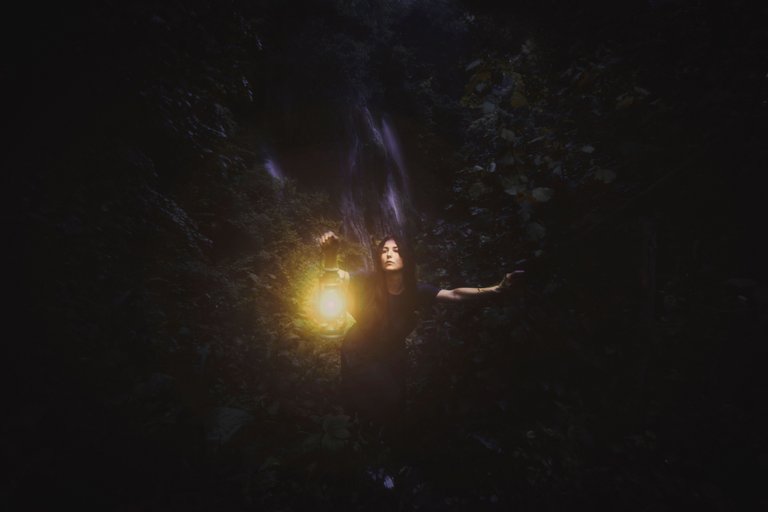
So, let's start with the final result.

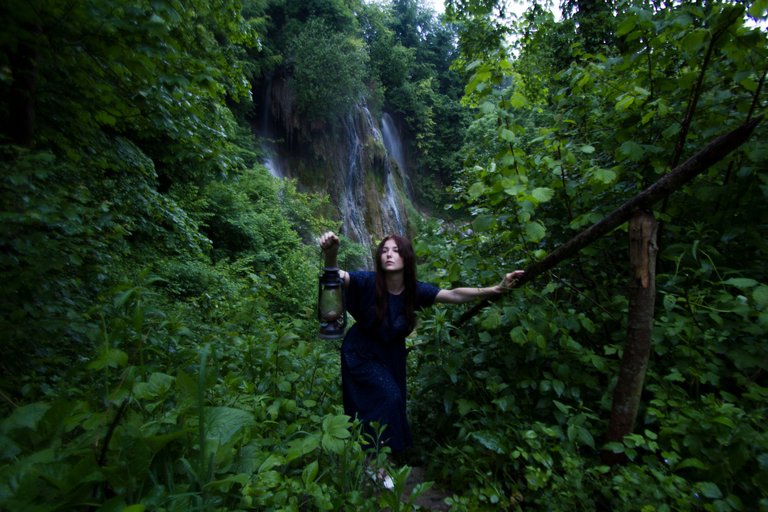
And this is the before version.

The process isn't that complicated if you have the final image in mind.
At first I used a curves adjustment layer to decrease the exposure of the image, then I painted on the mask over the areas where I didn't want the effect to take place.
Converted the duplicated layer into a smart filter, opened it in Camera Raw, cooled the image, added some contrast, some blacks and played with the tonality using Camera Raw's curves option.
After all these processes the image was still bright so I created a new blank layer and using a soft brush I painted with black on the areas that I wanted to be darker. Because the effect was too strong, I decreased the opacity of the layer.
The next step was to add the light to the lantern. I created a new blank layer, filled it with black and then went to filter-render-lens flare to simulate the light. I used a hue saturation adjustment to give the light a warmer feeling.
After that, everything that I did was to add small corrections here and there until I reached the final result.
You can see the entire process in the video bellow.
▶️ DTube
▶️ IPFS
Umm wow, you have some serious photoshop skills, I am so used to making things look clean and simple for weddings that this kind of editing is just amazing to me!
Haha thanks a lot! I'm used to hiding things that I don't want others to see :) If you give me a wedding image I wouldn't know what to do with it, most likely I'd manipulate it beyond recognition:))
Well its a real talent, I would love to give it a go but I don't think it would turn out that well! And I am sure you could easily edit a wedding image!
Hi @raoul.poenar
You have received a 100 % Upvote! I am @gentasteem One of the steemit employees. Here I will always give upvote and comentar and help For steemit loyal users in Indonesia In order to get faster progress. If you want to join, Follow me @gentasteem at Steemian.com
New solution for Steemian Indonesia, Join in this one facebook group. A most smooth group performs each other Steem. Group Conditions: Follow> Upvote> Leave (Group Name) Commented.
https://m.facebook.com/story.php?story_fbid=391437977950217&id=100012520534996&ref=bookmarks&_rdr#!/groups/148679145824251?refid=52&ref=bookmarks&tn=HH-R

Was waiting for this :D Such a good photo man. So glad you made the speededit also :D
Thanks Victor! And changed the music too :))
Haha, i was so afraid, that i watched it again on mute :)))))
Hahaha...good one :)
You got a 2.59% upvote from @buildawhale courtesy of @raoul.poenar!
If you believe this post is spam or abuse, please report it to our Discord #abuse channel.
If you want to support our Curation Digest or our Spam & Abuse prevention efforts, please vote @themarkymark as witness.