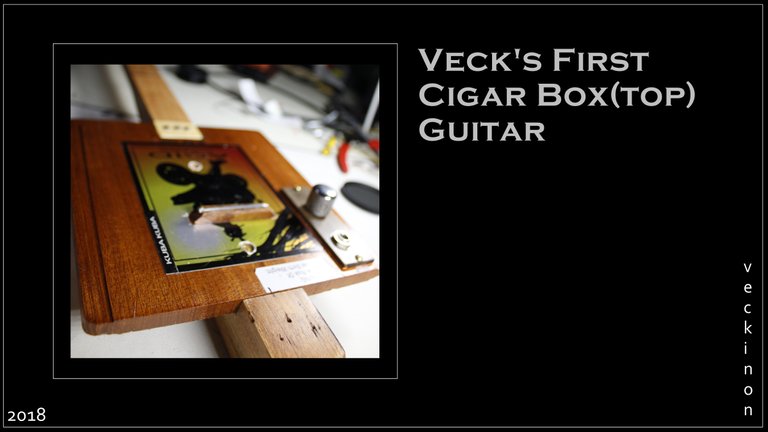
'Ey there, folks. I wanted to share a project I just completed. A while back, my cousin, Troy, gave me a few of these Acid Cigar boxes he snagged when he was working as a regional manager for Smoker Friendly. He thought maybe I would want to try and make a cigar box guitar out of them sometime.
I immediately noticed that the boxes, while made of mahogany--a great wood for both acoustic and electric guitars--the wood was quite a bit thicker than what you would usually use for a typical cigar box guitar. So, instead of making a run-of-the-mill acoustic cigar box guitar, I decided to just use the top of the box and make a solid body electric guitar.
Although the end product is kind of rough, this project was actually a long time in the making. At the time I started it, I had next to none of the tools necessary to really be successful at this sort of thing. Also, with my frequent health problems and limited income, it took a while to get what I needed and I ended up redoing multiple parts of the project as I would acquire more appropriate tools or materials or simply better ideas. The way things are presented in this article is not necessarily the chronological order the project actually happened in.
I was determined to wind the pickup with myself. I had wound some coils before back when I worked for the UM physics dept. But that was with access to their machine shop; a luxury I no longer had. So my first task was to come up with an affordable way to wind the pickup. I eventually came across a very inexpensive NZ-1 style hand driven coil winder w/counter on amazon link:
The documentation for the winder mentioned that it could be motor driven, but did not mention specifics. After doing a google search, I found other users who mentioned that it could be used with an old belt-driven sewing machine motor. These types of replacement motors are all over eBay for pretty cheap. So I picked one up, mounted the winder and the motor to a chunk of 2x4 and came up with this:
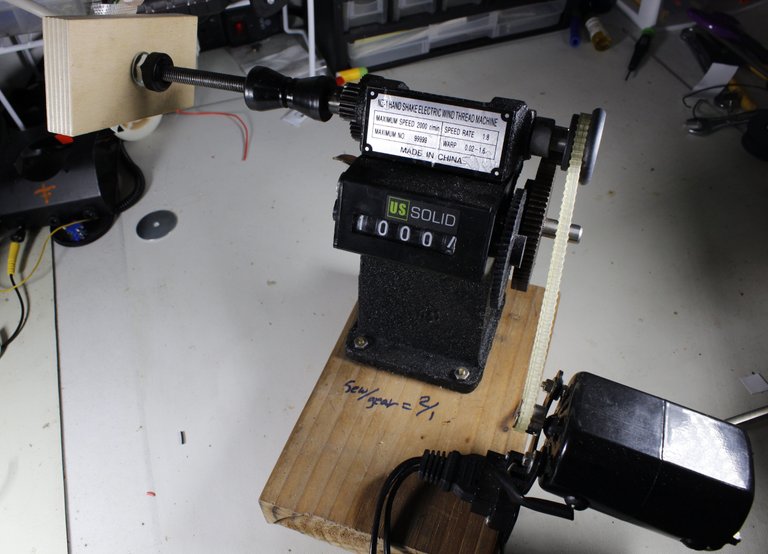
My homemade pickup winder
I ordered some pole pieces and flatwork from https://www.Mojotone.com. I made three pickups total before I had one I was happy with for my guitar. The pickup I ended up using actually used pieces of a cut-up paint-stir stick as the flatwork. I ended up doing 10,000 turns of 42 gauge wire around Alnico 5 pole pieces. I potted the pickup in paraffin and I wired it to a 500k pot that came out of my Carvin to use as a volume control.
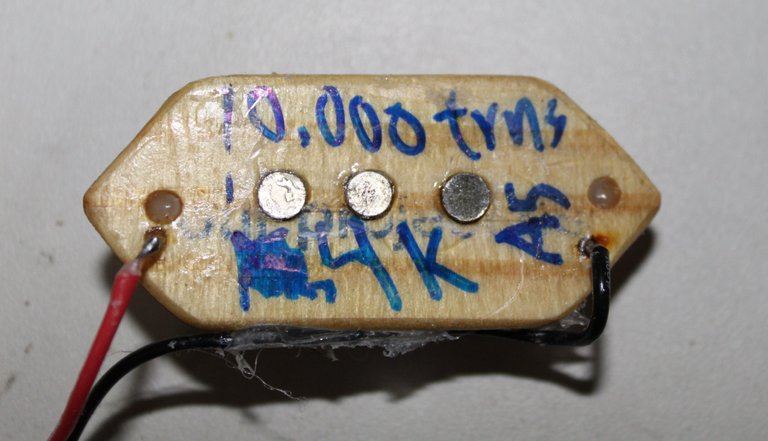
a little note on the back of my pickup so I remember what the hell I did
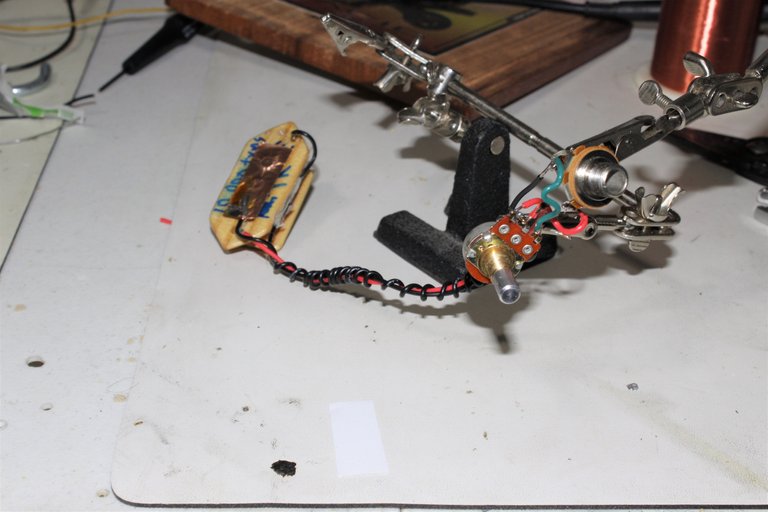
The foil tape on the back and the coiled black wire are to ground the pickup pole-pieces and shield the signal wire. Both are done to prevent electromagnetic interference (noise).
Obviously, you can't have a guitar with just a pickup, so I had to whip up a couple of other things as well. The neck was made from a 1x2 piece of poplar that I bought at the hardware store. Given that the box-top was so thick, I chopped an end of the board and glued it to the back in the place where the notch would be cut out for the top. That way I wouldn't have to worry about the whole thing snapping when it was tuned up.
I decided to go fretless with a high action--strictly for slide--and a baritone, 30-inch scale. I started the neck by shaving it into a rough u-shape. I then chiseled out portions for the headstock and the top recess and sanded a whole lot to try and make it look halfway decent. Once it was done, the fret-lines were measured out. I decided to stain the frets that would typically be marked on a guitar a darker color and paint fret-lines. I had a little trouble with the stain running. I found a couple of videos online of people who used gel stain for more detailed staining, and if I were to repeat the process, I would try that instead.
Once it was stained. I put on a few coats of a semi-gloss polyurethane, installed the nut and tuners, and it was ready to go!
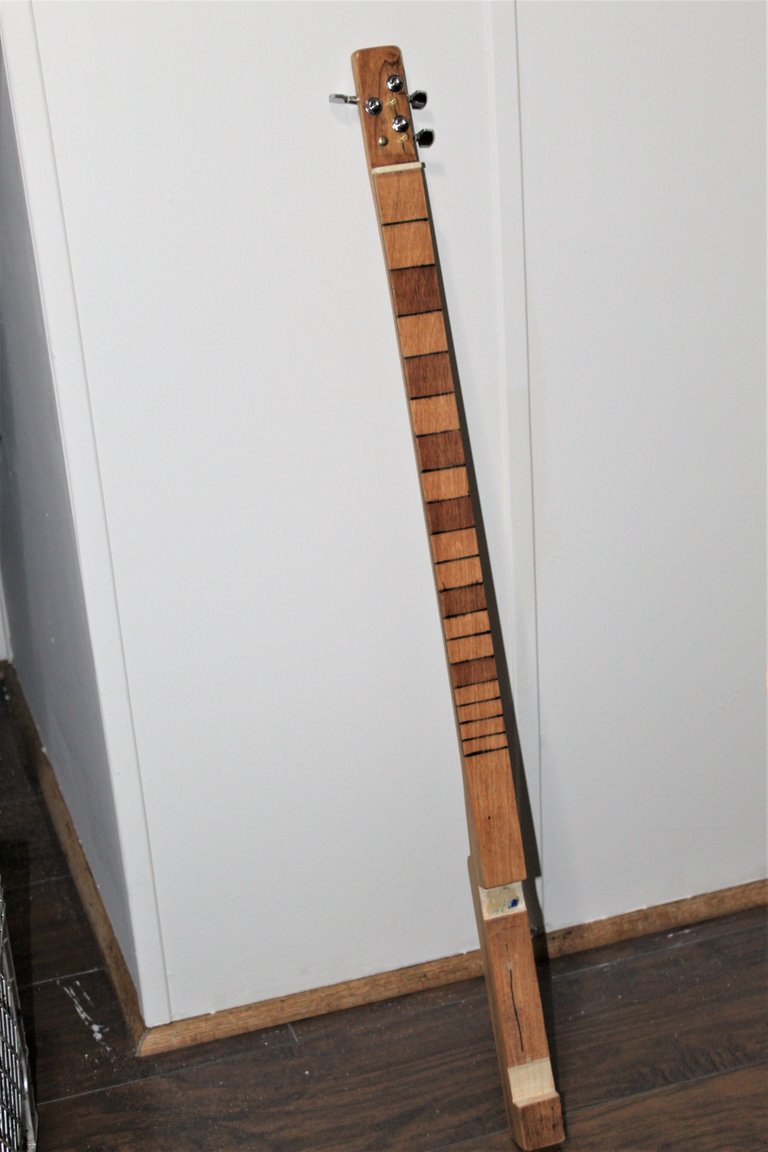
The finished neck.
The top was pretty easy to pull off. I simply cut a notch for the pickup, a hole for the electronics, and added a bridge. I came up with the idea of using a finishing nail for the bridge. I glued it to a small piece of mahogany cut from another box-top that I had slaughtered in an earlier attempt. I then, not-so-carefully, cut a rectangle out of the label on the box-top and glued the bridge to the exposed wood.

The bridge.
Afterward, I just had to put the whole dang thing together. I used another piece of paint-stir stick to make a plate to mount the electronics and screwed top to the neck.
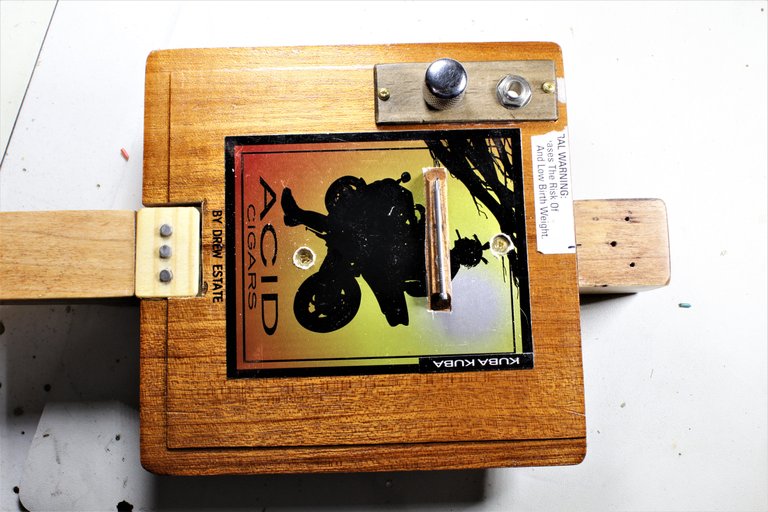
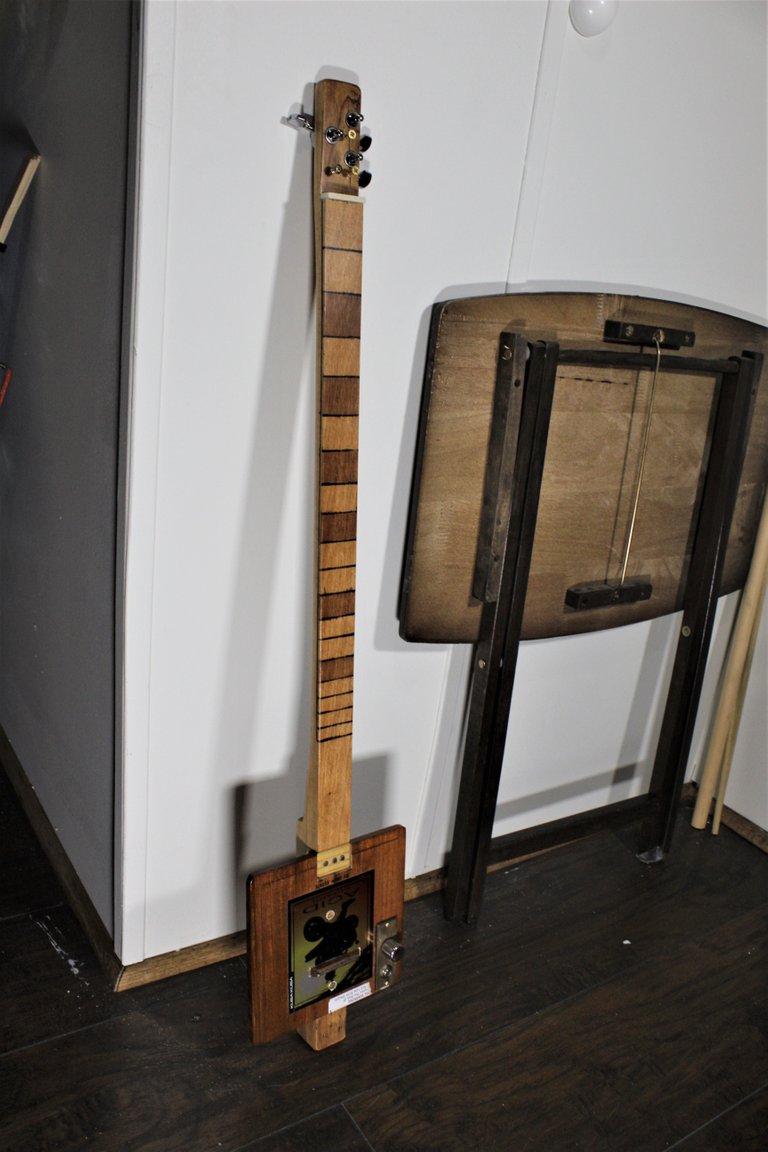
I still need to pick up some strings for it. I also may need to buy a new slide. I can't seem to find mine since moving this summer. Anyway, I can't wait to hear how it sounds! I'll try and remember to update everyone when I get it strung up and let you guys hear how it turned out as well. In the meantime, thanks for looking!
Best wishes,
@veckinon
Congratulations @veckinon! You have completed the following achievement on the Steem blockchain and have been rewarded with new badge(s) :
Click here to view your Board of Honor
If you no longer want to receive notifications, reply to this comment with the word
STOPTo support your work, I also upvoted your post!
Do not miss the last post from @steemitboard: